CHAPTER 7
Carl's office: the sliding photo
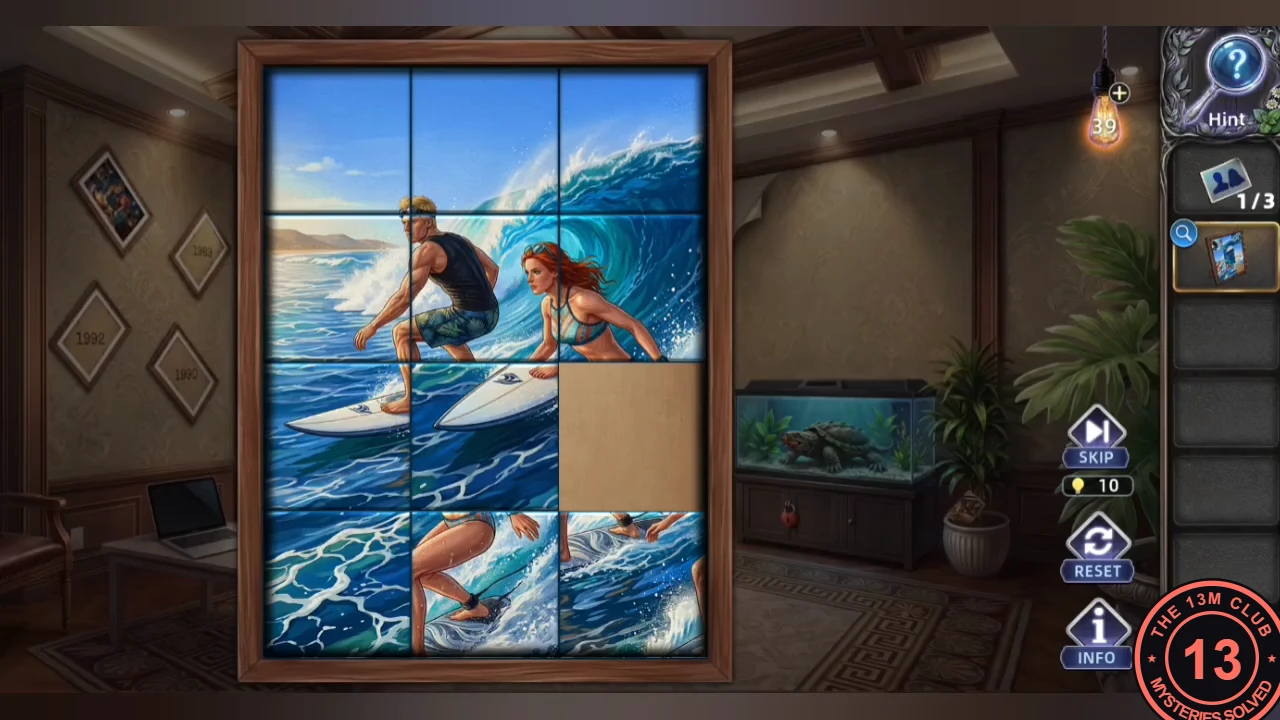
In Carl's office, feed the turtle and complete the sliding photo.
- Take the Sausage from the table and the framed Photo Puzzle lying on the lid of the aquarium. Open the aquarium and give the Sausage to the snapping turtle; while it eats, take the first Photo from the bottom of the tank. Select the Photo Puzzle in your inventory to open it: it is a sliding picture of jet-ski surfers, 3 columns by 4 rows with one empty space. Slide the tiles until the picture is complete for the second Photo. The third Photo is half-buried in the soil of the potted palm on the right, beside the aquarium; tap the pot and take it.
CHAPTER 7
The photo frames and symbol tiles
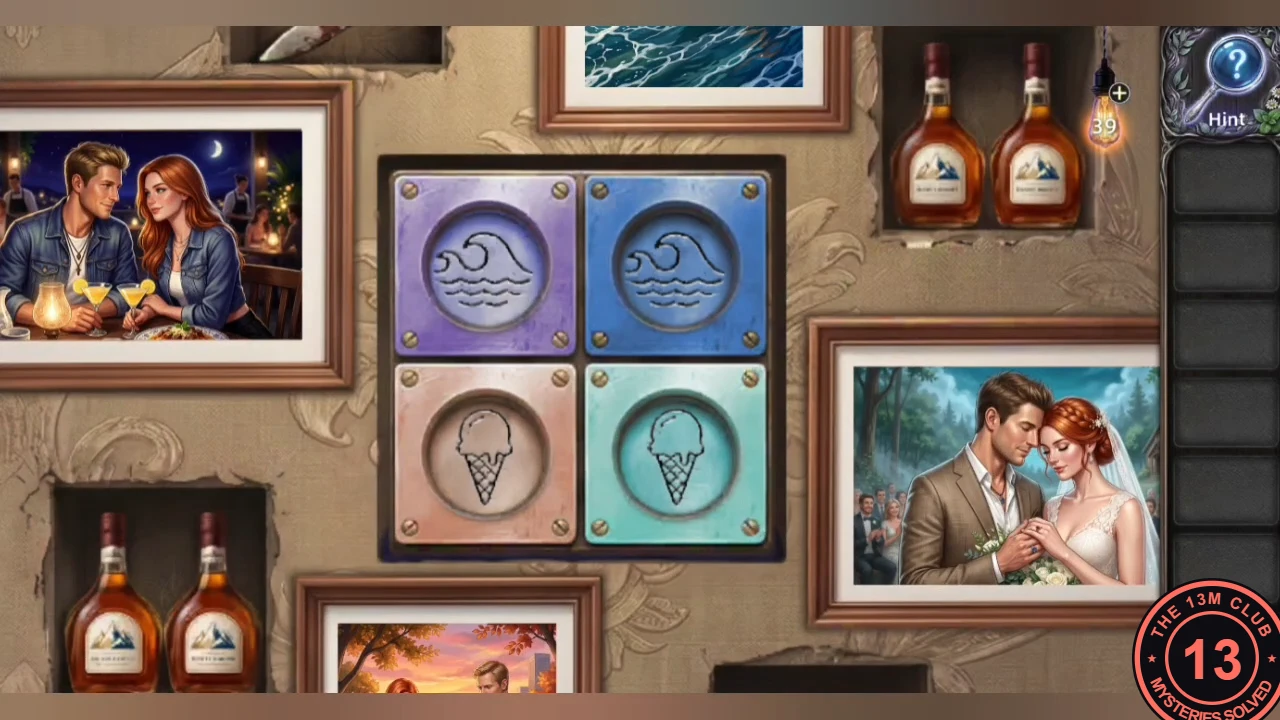
The photos go in the crooked frames, and the symbol tiles open a niche in the photo wall.
- Place the photos in the crooked frames. Set the 2x2 symbol tiles to match them: moon top left, waves top right, pacifier bottom left, ring bottom right. The middle niche in the photo wall opens: take the Sapphire Ring. The anchor wine bottle lying in the niche is a symbol clue to inspect, not an item to take.CODEMoon, Waves / Pacifier, Ring
CHAPTER 7
The toy box
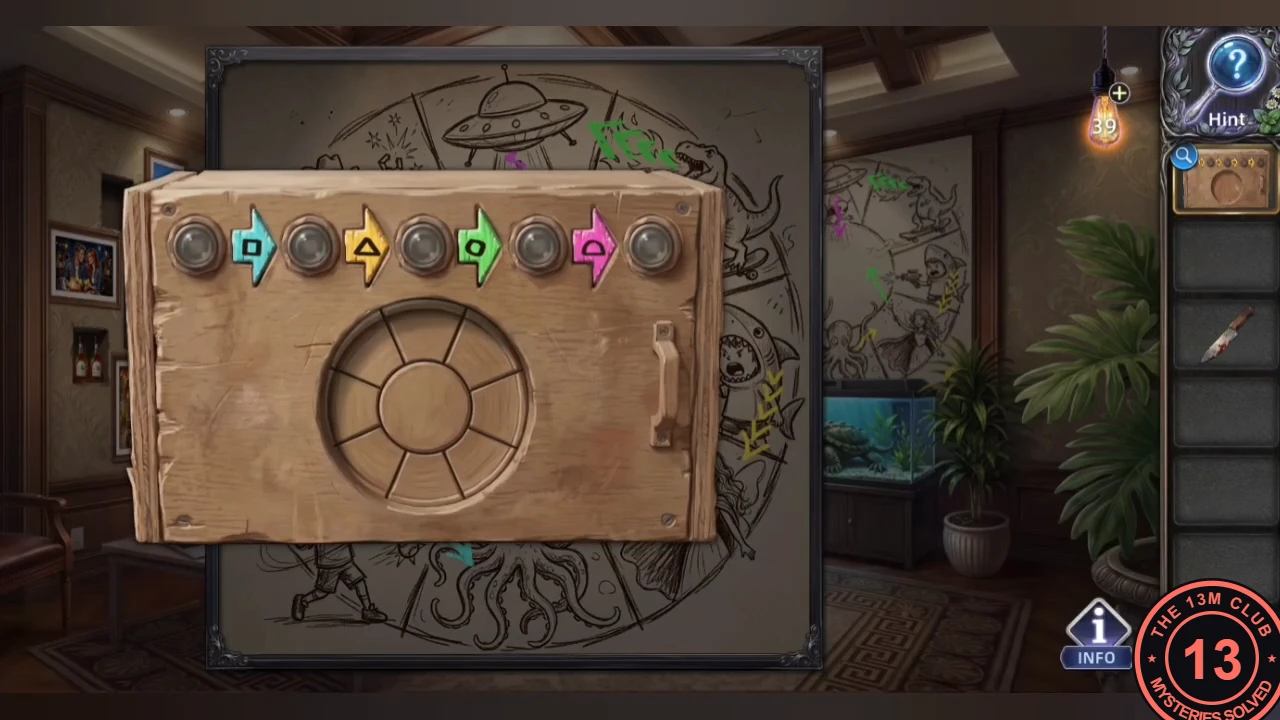
The toy box follows the AEGIS logo colours and the comic wheel on the wall.
- Put the Sapphire Ring on the left marble hand on its pedestal: the pedestal cabinet opens. Take the Toy Box and the Risk Report from it. Take the Table Knife from the separate upper-left wall niche among the photos and use it to cut the wallpaper above the aquarium, which uncovers the comic wheel. Tap the arrows on the box until their colours match the AEGIS logo on the Risk Assessment: cyan square, yellow triangle, green circle, pink semicircle. The carving then becomes an eight-segment wheel laid out like the comic wheel on the wall. Start at the baseball boy and follow the comic arrows in the box's colour order: tap the baseball boy, the octopus (cyan), the fairy (yellow), the UFO (green), then the octopus again (pink). Each tap lights a lamp; with all five lit, the box opens: take the Child Doll and the Charger (power cord).CODEBaseball boy, octopus, fairy, UFO, octopus
CHAPTER 7
The laptop and the wall safe
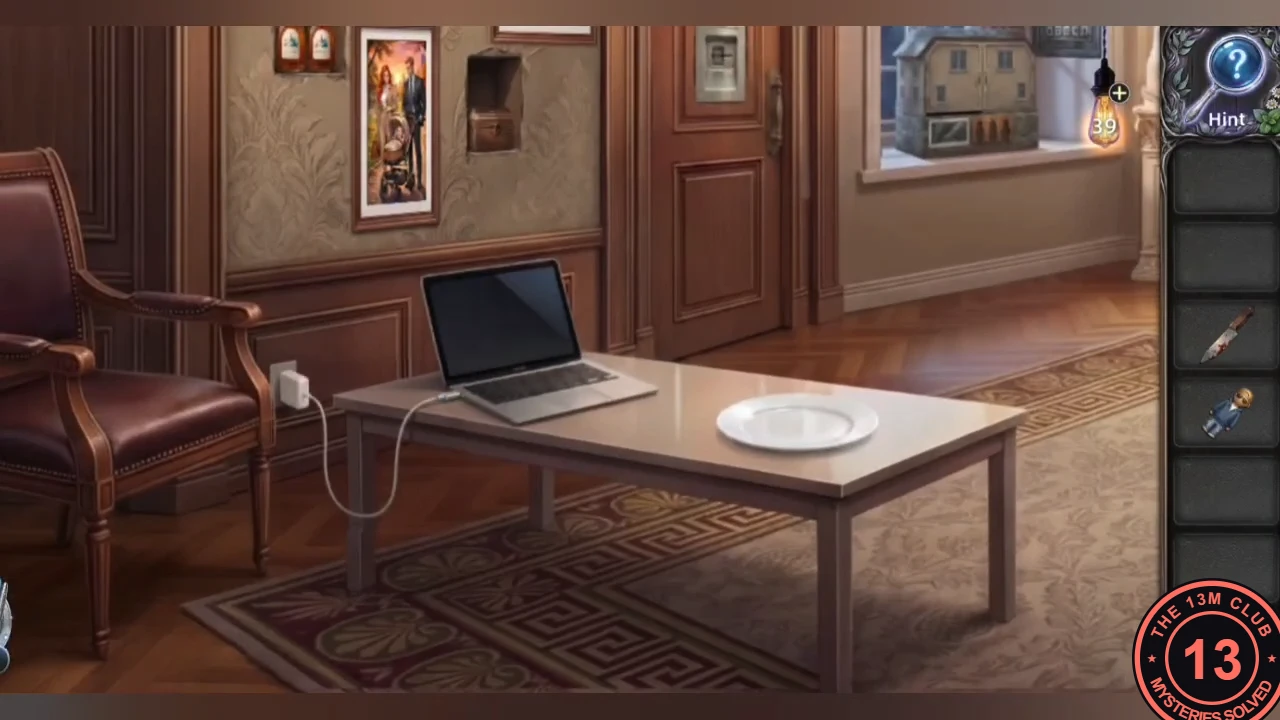
Charge the laptop, read Carl's memo and invoices, and open the wall safe.
- Charge the laptop. Its hint is "I just want to drink until I forget": enter anchor, lemon, fire, mountain, then read Carl's memo and the two invoices ($1,500,000 and $1,260,000).CODEAnchor, Lemon, Fire, Mountain
- Open the wall safe with the difference, 240000, take the Black Card and use it on the office door reader.CODE240000
CHAPTER 7
The night garden: phone booth
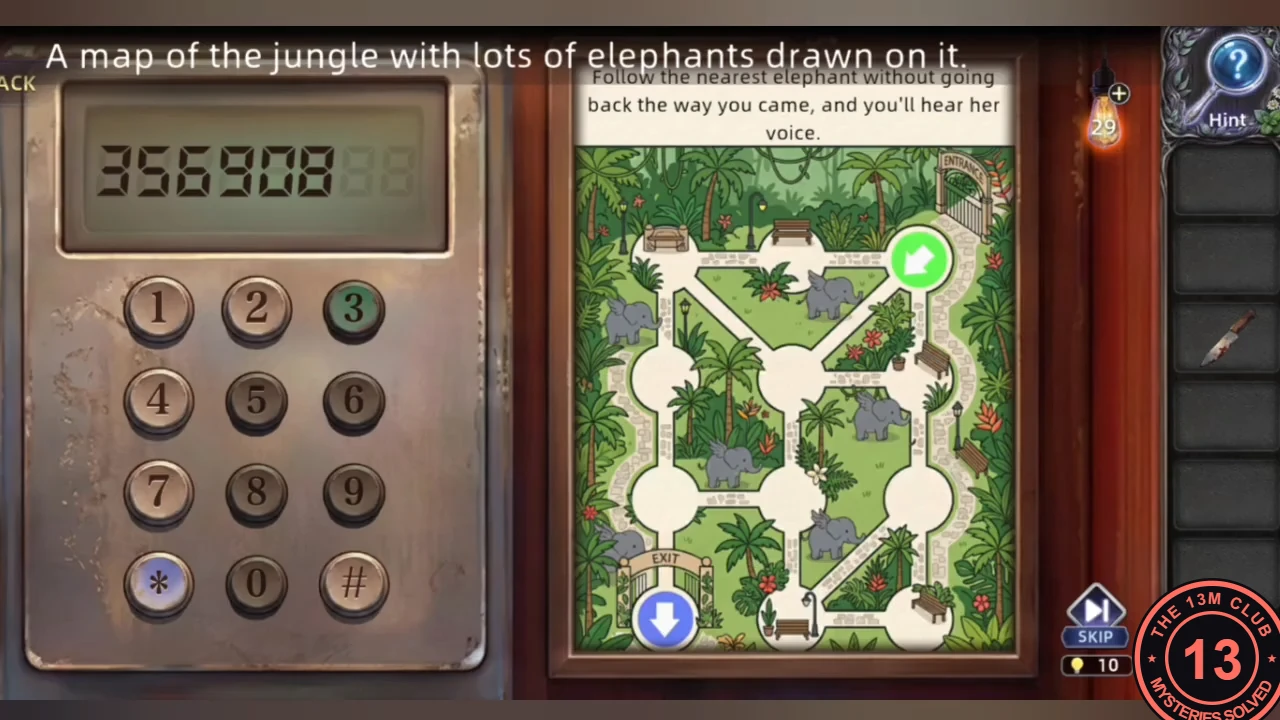
In the night garden, the red phone booth leads to a hidden ring.
- At the red phone booth, follow the map hint: start at the green entrance at the top right (key 3) and always go to the nearest elephant without going back, ending at the blue exit at the bottom left (key *). Dial the junction numbers 3569087*.CODE3569087*
- Take the Ruby Ring from under the office carpet and place it on the marble hand to enter the bathroom.
CHAPTER 7
The bathroom lock and the skeleton
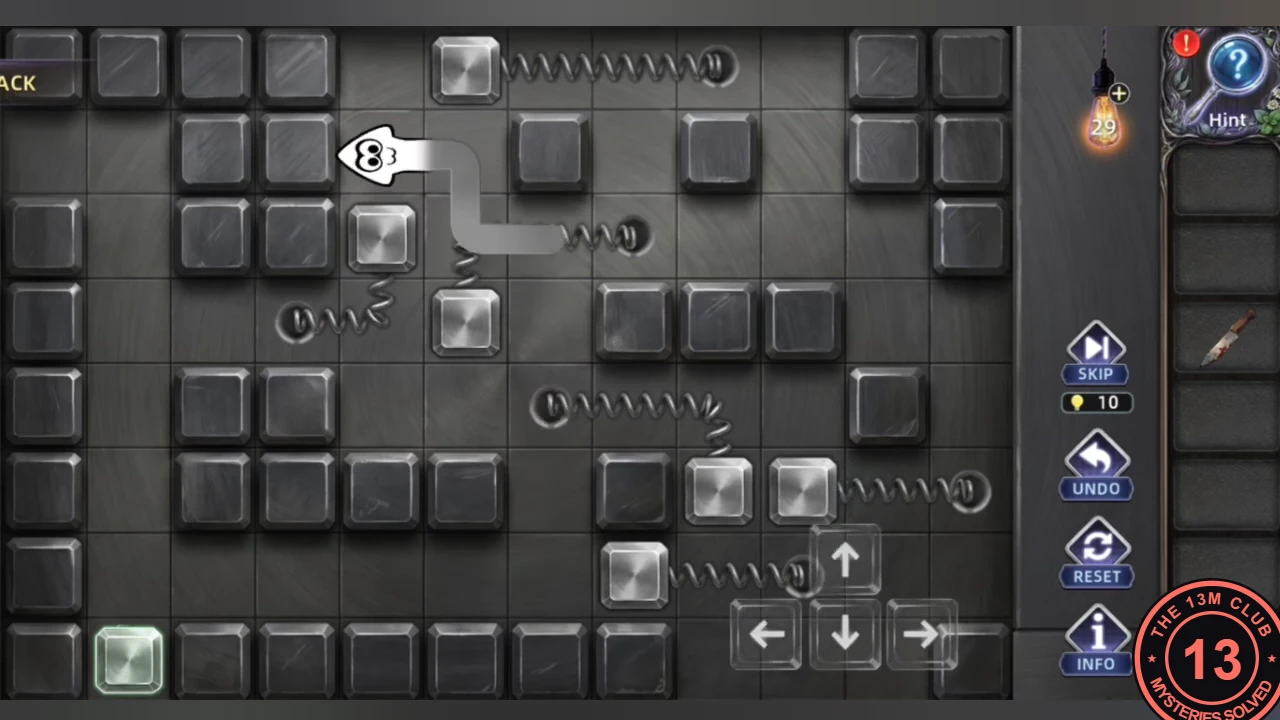
Locked in the bathroom, pick the lock, then search the bathtub.
- Pick the lock. The white piece is a magic snake: move it with the arrow pad at the lower right (or by dragging). Plain grey blocks are walls. Seven blocks are attached to springs that end in a ball; push such a block with the snake's head and it slides along its spring, one square per push. A block that reaches its ball turns green and stays put. Turn all seven green. UNDO reverses a move and RESET restarts. The order that worked: 1) Take the snake down the left side and push the spring block there down into the bottom-left corner. 2) Go round to the top row and push the top spring block right until it reaches its ball. 3) Left of centre are two spring blocks, one diagonally below and to the right of the other. The upper block's spring runs down one square and then left to its ball; the lower block's spring runs up one square and then right. Push the upper block down from above (it ends beside the lower one), then push the lower block up from below. Then push the first block left from its right side, and finally push the second block right along its spring from its left side. 4) Push the spring block on the second row from the bottom right, three squares to its ball. 5) Two spring blocks sit side by side in the row above it. The left one's spring runs up one square and then left. Push it up from below. Then push the right one right to the ball at the right edge. Finally, push the first block left from its right side until it reaches its ball. The lock opens. Other orders may work; this is the one used in the recorded playthrough.
- Open the drawer under the sink and take both the Blue Key and the Red Key. Pull back the shower curtain: a skeleton lies in the rose-filled bathtub. Take the Man Doll standing on the top-left rim of the bathtub. Tap the five coloured pin heads among the roses (Nail 5/5). A cassette tape is clamped in the skeleton's jaws ("I'll have to pry its jaws open"): pry them with the Table Knife and take the Tangled Cassette Tape. Unlock the blue handcuffs on the skeleton's wrist with the Blue Key and take the Blue Handcuffs, then unlock the red handcuffs with the Red Key and take the Red Handcuffs.
- Snap the Red Handcuffs and Blue Handcuffs onto the two marble hands on the pedestals by the bathroom door; the door opens. Take the Toothbrush from the sink vanity on the right, beside the basin, and use it to wind the tape back into the Tangled Cassette Tape.
CHAPTER 7
The dollhouse
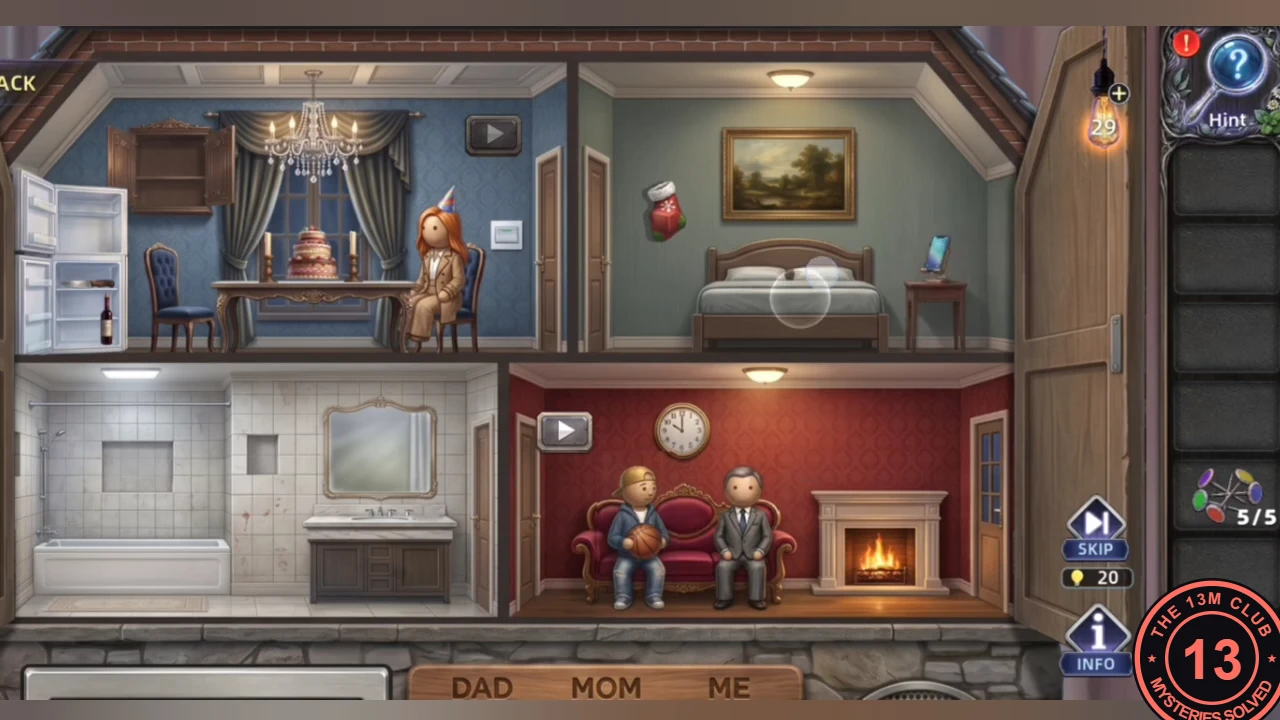
At the dollhouse, act out Carl's family scenes with the dolls.
- In the living room, tap the dollhouse in the window alcove; its base has DAD, MOM and ME slots. Put the Child Doll from the Toy Box in the ME slot. Take the small Key from the jewellery box in the lower-right niche of the photo wall, use it on the locked cabinet beneath the aquarium and take the Woman Doll, then put her in the MOM slot. After the bathroom, put the Man Doll in the last empty slot ("The dolls are in place"). Then put the repaired Cassette Tape into the tape player at the left end of the base. The tangled tape does not fit until it has been rewound.
- Act out Carl's family scenes with the DAD, MOM and ME dolls from the base. The rooms are the dining room (top left, with the fridge), the bedroom (top right), the bathroom (bottom left) and the living room (bottom right). 1) Press the play button: Mom reminds Dad of their anniversary and asks him to fetch the cake from the fridge and add two candles. 2) Tap the fridge to open it and drag the cake onto the dining table. Tap the wall cabinet above the fridge, then drag both candles onto the table. Put Dad and Mom at the table; the birthday wishes play. 3) Press play again: Jace asks Dad why he is home so late. Put Me in the living room and drag Dad onto the sofa beside him. Then drag the red Christmas stocking from the bedroom wall to Dad; the phone on the bedside table is not accepted at this point. "Love you, Dad" plays. 4) Press play once more: Mom confronts Carl about the bills. Drag Dad into the bedroom, then Mom; their argument plays. 5) Drag Mom into the bathroom, where she lies on the floor, then drag Dad in beside her. Finally drag the phone from the bedroom bedside table to Dad. The phone call and the radio news about the mall fire play, and the puzzle is solved. A drawer opens in the dollhouse base: take the purple Dream Tapir Doll (a baku plush) and the Transparent Card.
CHAPTER 7
Pinning the giant baku
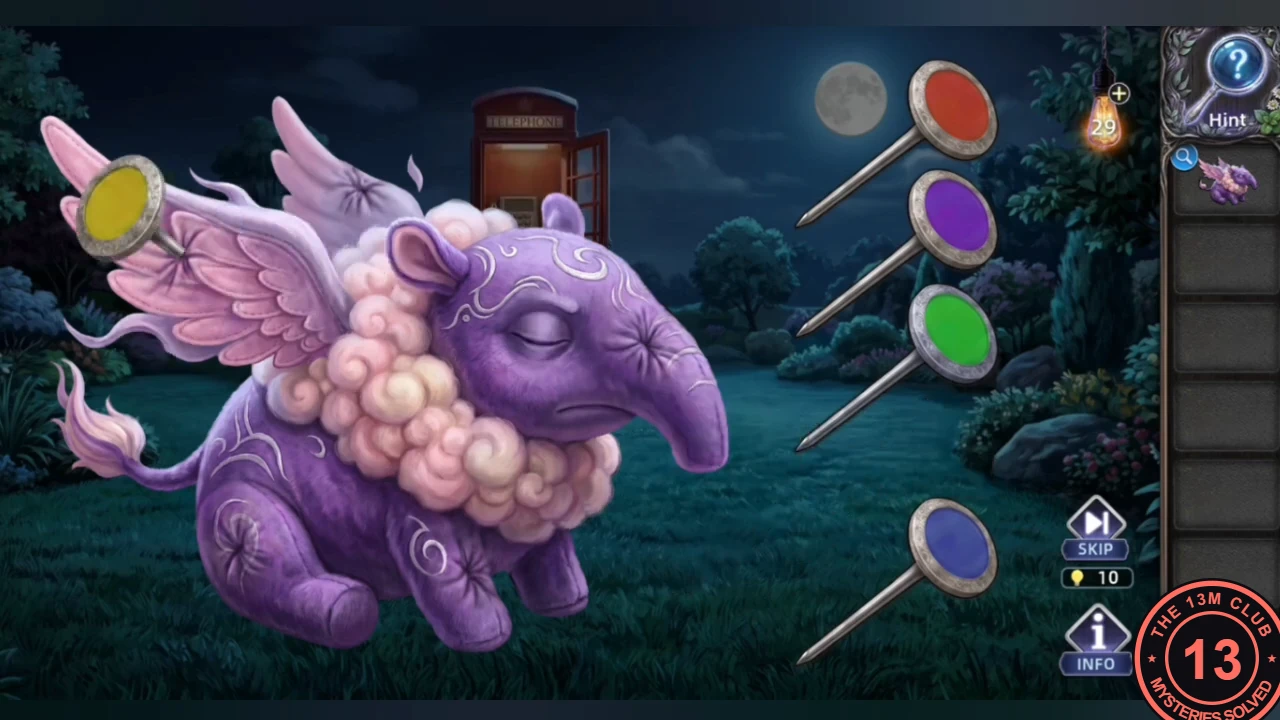
Pin the giant baku with the five coloured pins.
- Go to the night garden and tap the Dream Tapir Doll in your inventory ("But how do I trigger it?"). The Transparent Card is the colour clue: laid over the elephant map in the red phone booth, it shows five coloured pin marks. The finished positions are given below. Use the Nail (the five coloured pins) on the doll: the giant baku appears with stitched star marks. Drive the pins in: yellow on the left wing tip, purple on the top wing, blue on the head, red on the lower belly, green on the front leg.
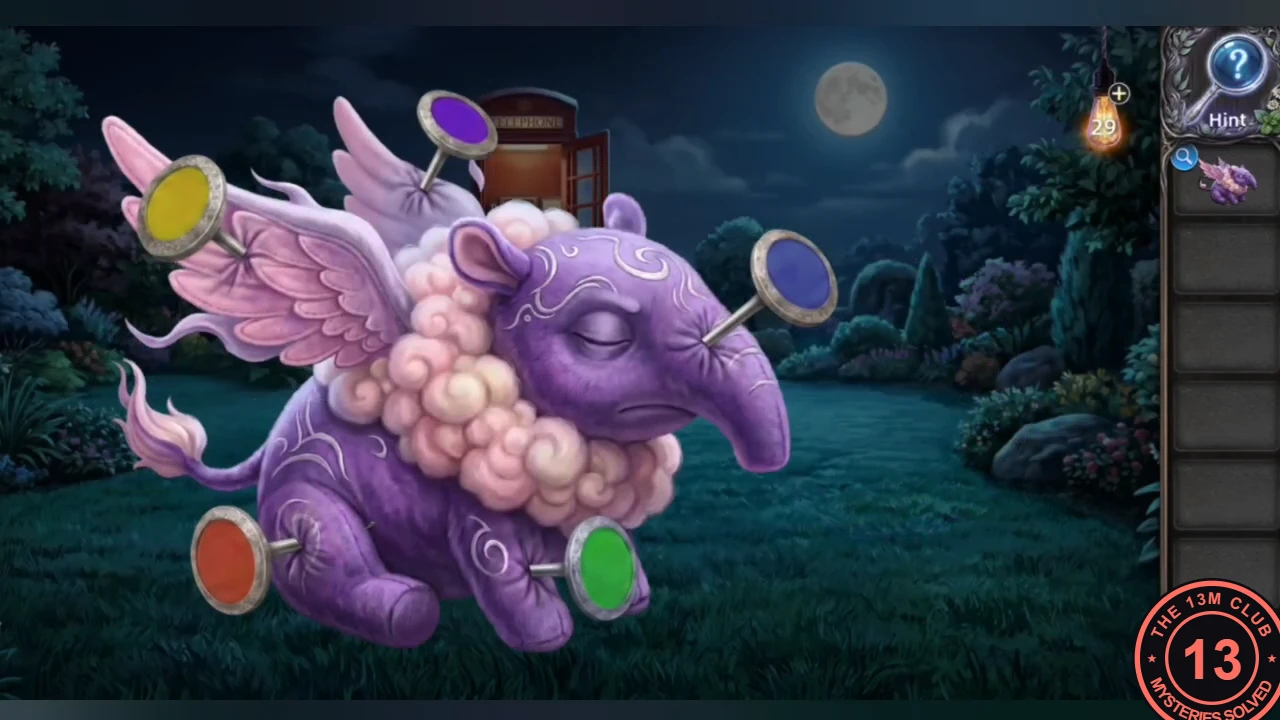
Completed pin positions (accepted): yellow on the left wing tip, purple on the top wing, blue on the head, red on the lower belly and green on the front leg.
CHAPTER 7
The third cracked wall
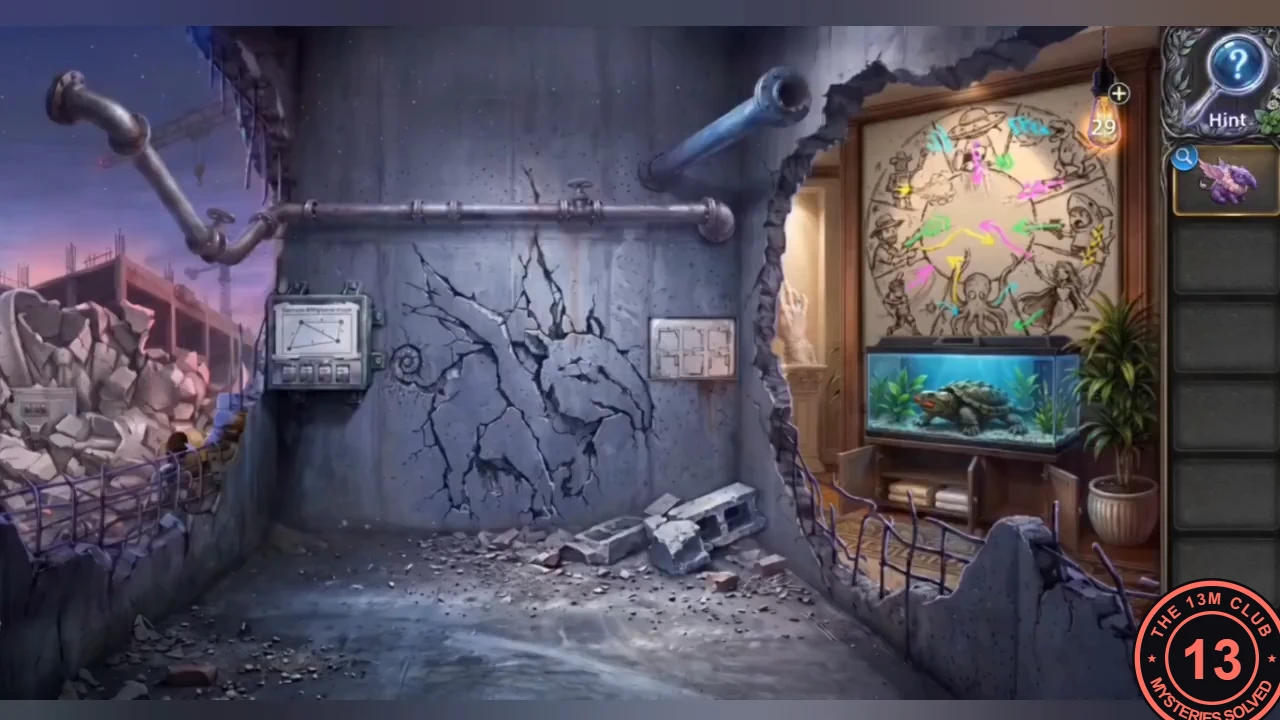
Knock the last cracked wall at the pin spots and confront Carl.
- The Dream Tapir Doll keeps the pins in place. Knock the third cracked wall, which shows the same baku outline, at the pin spots: the head, the left wing tip, the top wing, then the two lower spots on the left. Go through to Bailey Plaza Mall and confront Carl. The mall catches fire and Chapter 8 follows.