ECHOES · CHAPTER 4
The study lamp panel
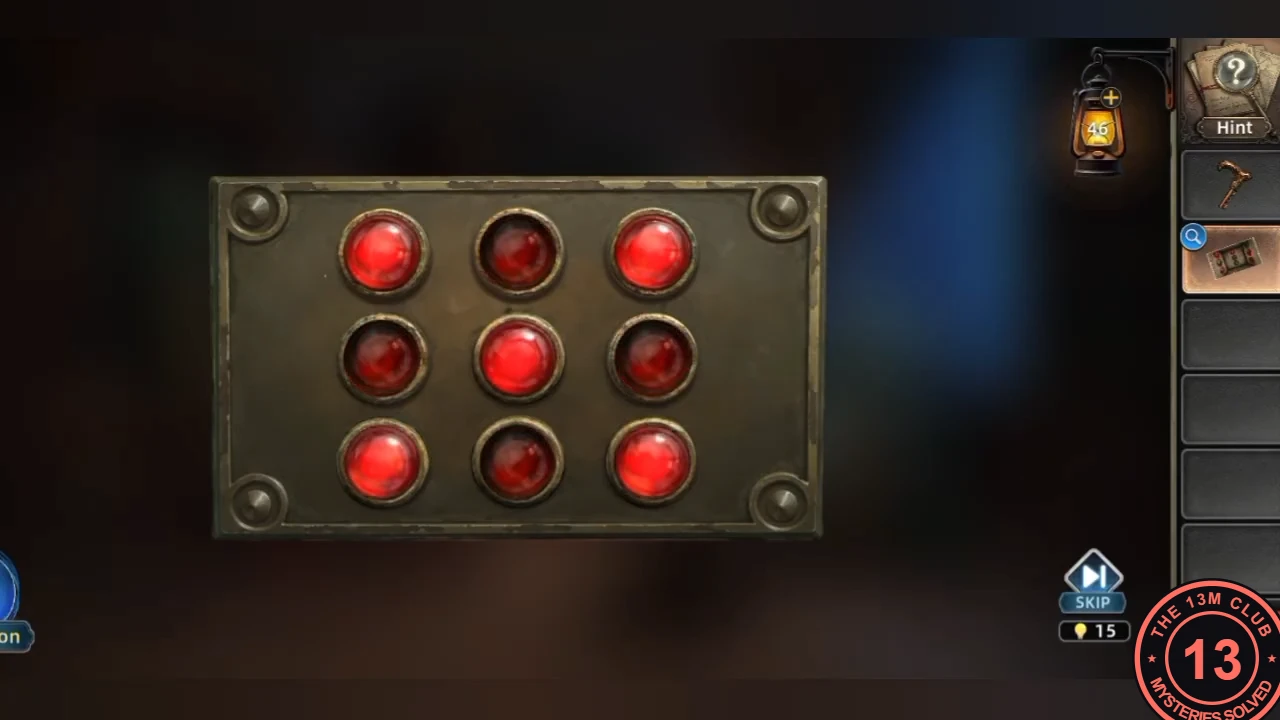
In the study, the Photograph shows the lamp pattern for the chest.
- In the study, take the walking cane leaning by the skeleton's chair (it becomes a Special Key) and the sealed letter in the skeleton's hand; the Photograph lies under the letter. The Photograph shows the inside of a box with red-lit and dark circles. Tap the chest on the round table to open its 3×3 lamp panel. Pressing a lamp changes several lamps, so adjust until the panel matches the photograph: top row lit, lit, dark; middle row dark, dark, lit; bottom row lit, dark, lit. Take the Sword Hilt from the chest.CODETop: lit lit dark · Middle: dark dark lit · Bottom: lit dark lit
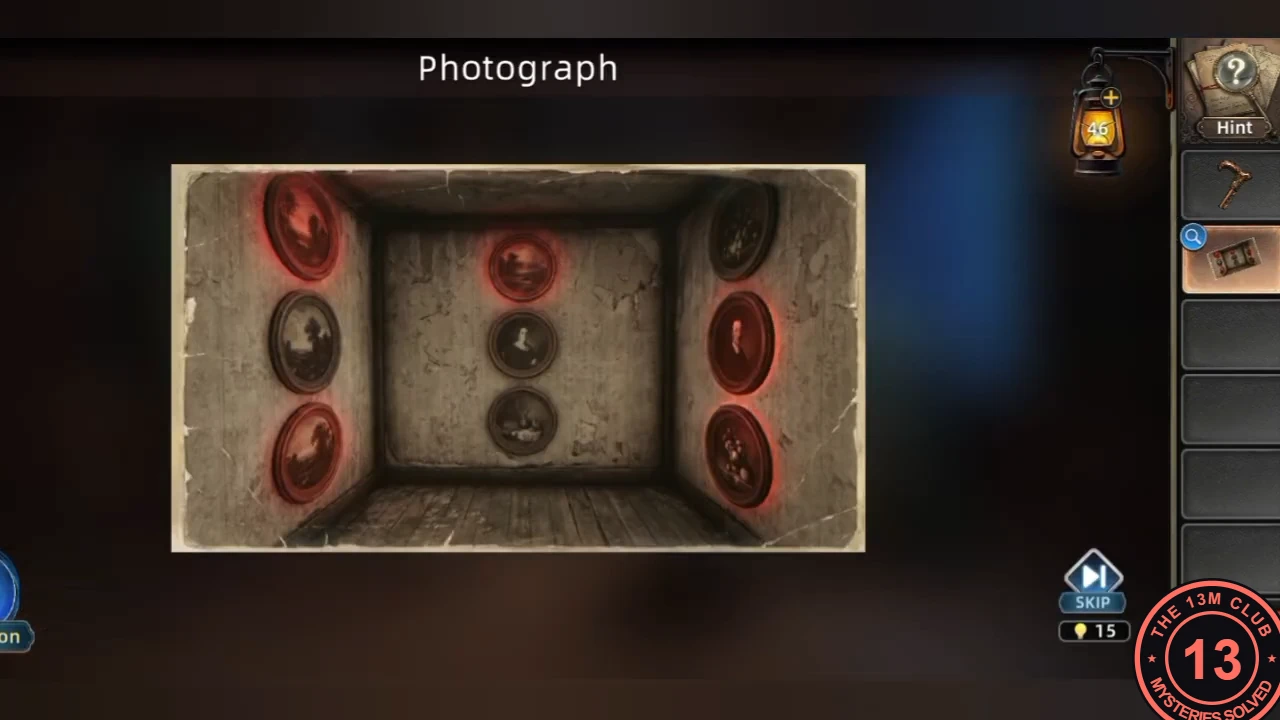
The Photograph is the target pattern for the lamp panel. 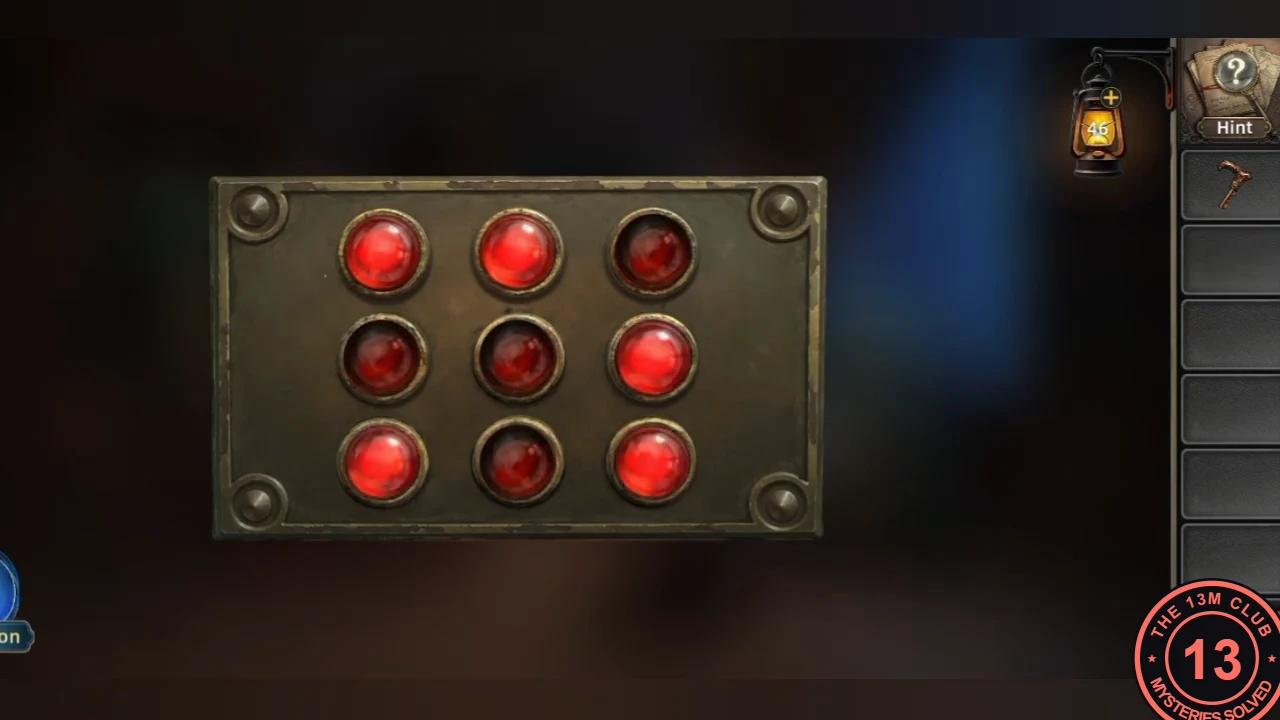
The lamp panel matching the photograph: top row lit, lit, dark; middle dark, dark, lit; bottom lit, dark, lit.
ECHOES · CHAPTER 4
The laser reflectors
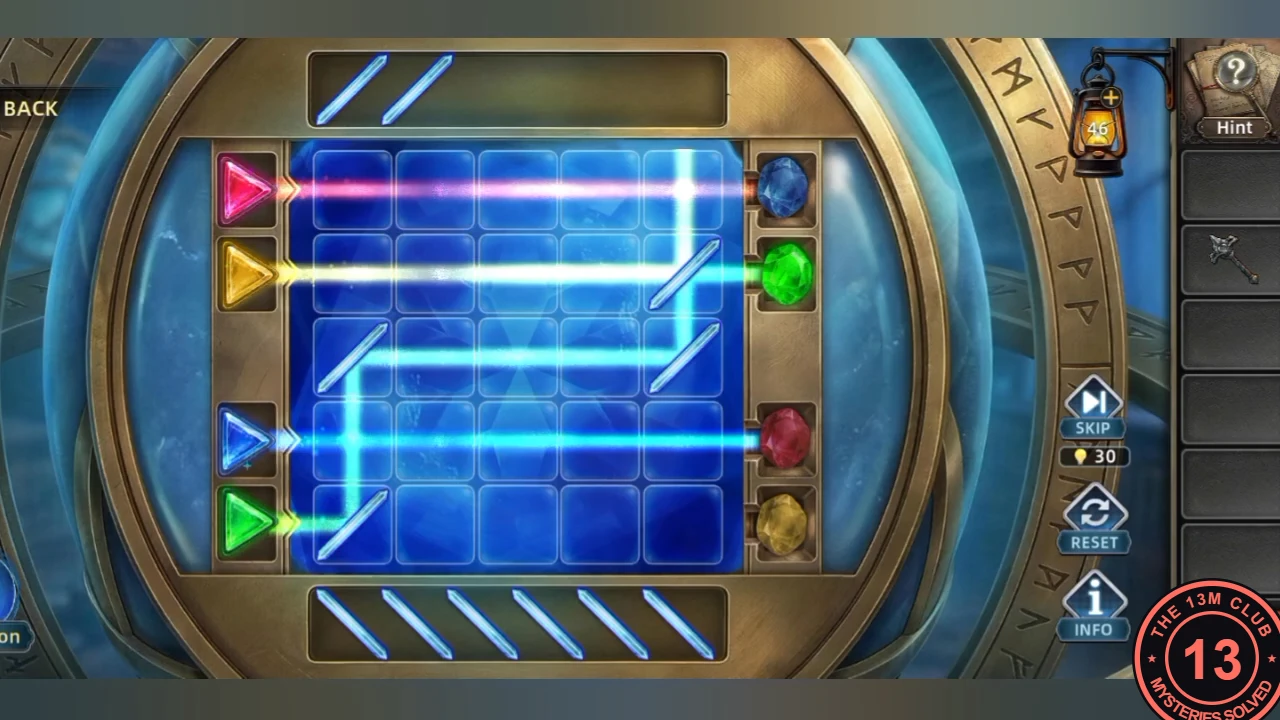
Steer every laser beam to a gem of its own colour.
- Select the Special Key and use it on the cabinet on the right wall above the skeleton; it opens and you can take the Multifaceted Gem. Insert the Gem in the globe on the left to open the laser board. "Drag and place the reflectors so that every beam hits a gem." The board is 5 x 5. Four emitters sit on the left: pink in row 1, yellow in row 2, blue in row 4 and green in row 5. Each beam must reach the gem of its own colour on the right: blue in row 1, green in row 2, red in row 4 (for the pink beam) and yellow in row 5. Reflectors come from the trays above and below the board and turn a beam by 90 degrees. Count rows from the top and columns from the left. In the layout below, "/" means a reflector rising to the right and "\" one falling to the right. The layout that solved it uses 11 reflectors. Row 1: column 2 \, column 3 /. Row 2: column 2 \, column 4 \, column 5 /. Row 3: column 1 /, column 5 /. Row 4: column 3 /, column 4 \. Row 5: column 1 /, column 2 \. Paths: pink goes right, down column 2 to row 2, right to column 4, down to row 4 and out to red. Yellow goes down column 2 to row 5 and out to yellow. Blue goes up column 3 to row 1 and out to blue. Green goes up column 1 to row 3, right to column 5 and up into row 2 to green. One reflector is left over.
ECHOES · CHAPTER 4
The crow rune lock
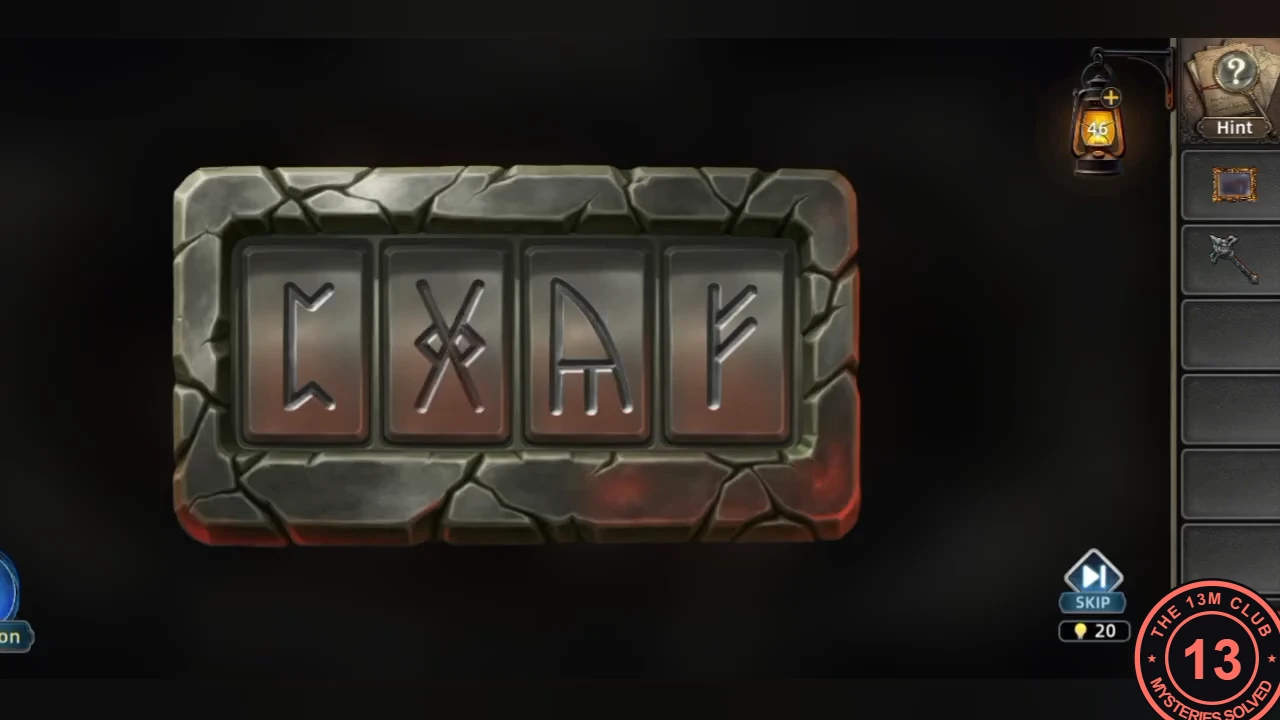
The numbered crows in the picture point to the runes for the stone lock.
- Take the Glass Frame from the study wall. Its glass shows four numbered crow outlines with lines running from them. Hold the frame over the cocoon figure and the stones around it, then over the study, and move it until each crow's line ends on a rune in the scene. Enter those runes in crow order 1–4 on the stone lock: the bracket rune, the X through a diamond, the X with a diamond, and the stroke with a chevron at the top.
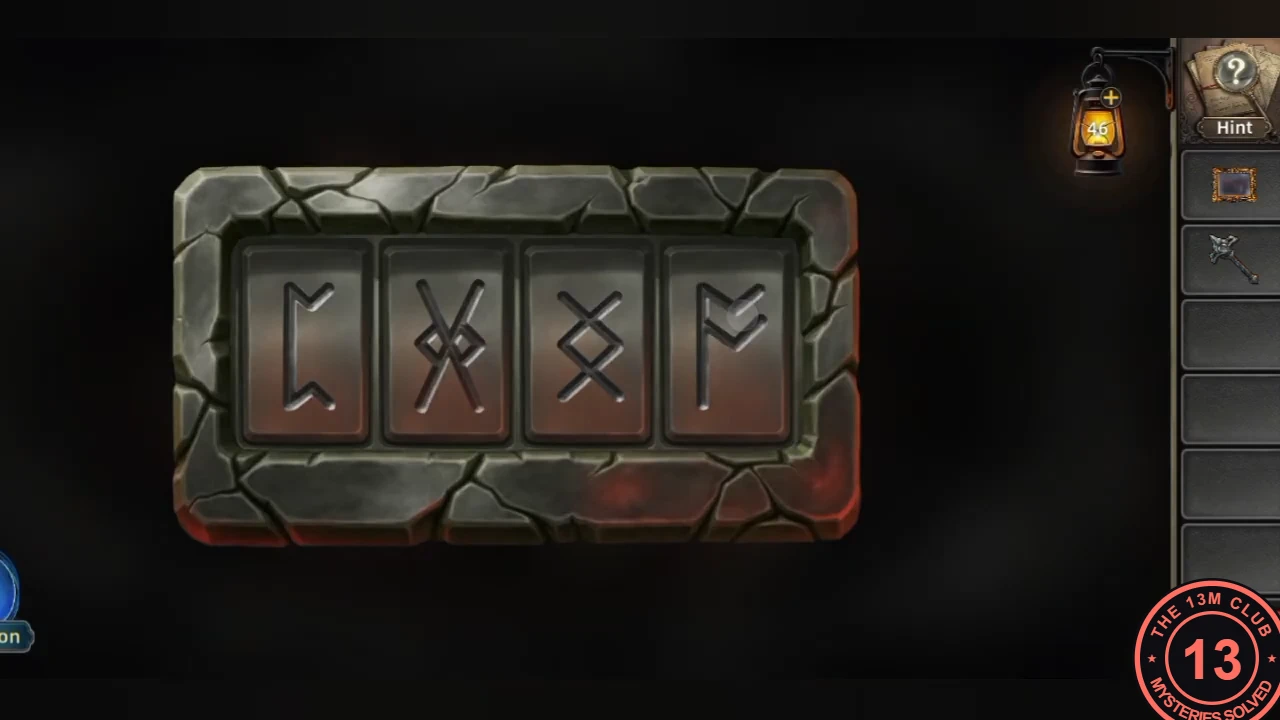
The four runes entered in crow order 1 to 4.
ECHOES · CHAPTER 4
The broken sword and the hidden clock
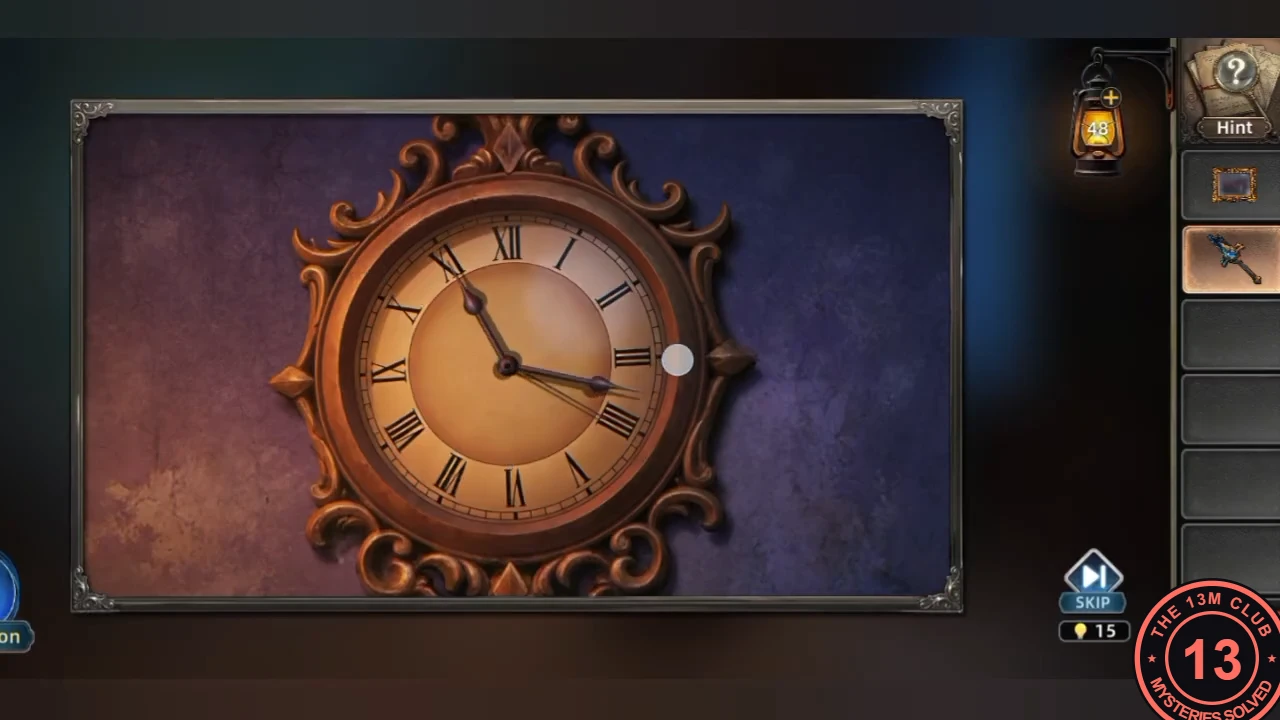
The Sword Hilt, the cocoon figure and the black lines over the fireplace lead to the clock.
- In the cocoon space, a stone fragment floats in the air (Riggs notes it is the same kind of stone as his bracelet). Use the Sword Hilt on it to make the Broken Sword, and read the note about the curse beside it. On the deduction radio, False Resurrection now has all three clue photos (3/3): tap Start Deduction and then Check Result. Look at the figure in the cocoon: its two raised arms point up-left and up-right like the hands of a clock. Back in the study, the black lines above the fireplace are wrapped around something: cut them with the Broken Sword to uncover a clock. Set it to match the arms: hour hand on XI, minute hand on II (11:10).CODE11:10
ECHOES · CHAPTER 5
Reflection of the Abyss: the tunnel
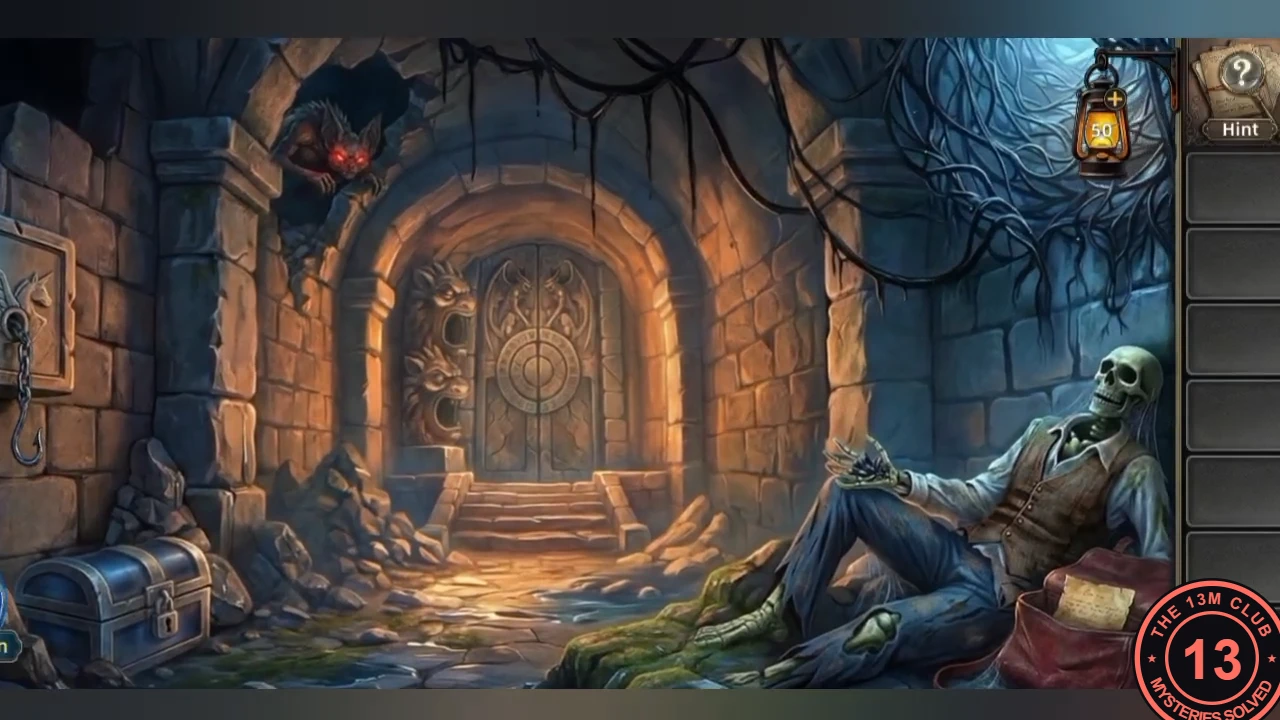
Chapter 5: get past the monster in the wall and the bat in the ruins tunnel.
- In the tunnel, move only while the monster in the wall is not watching. Moving too early shows a Death screen and restarts the attempt. Take the Small Key lying on the floor just in front of the chest (the wall plaque above holds only a hook) and open the chest for the Meat. Hang the Meat on the hook of the wall plaque; when the bat comes for it (Riggs hides first), the door at the end of the tunnel opens.
ECHOES · CHAPTER 5
The water cave and the dive
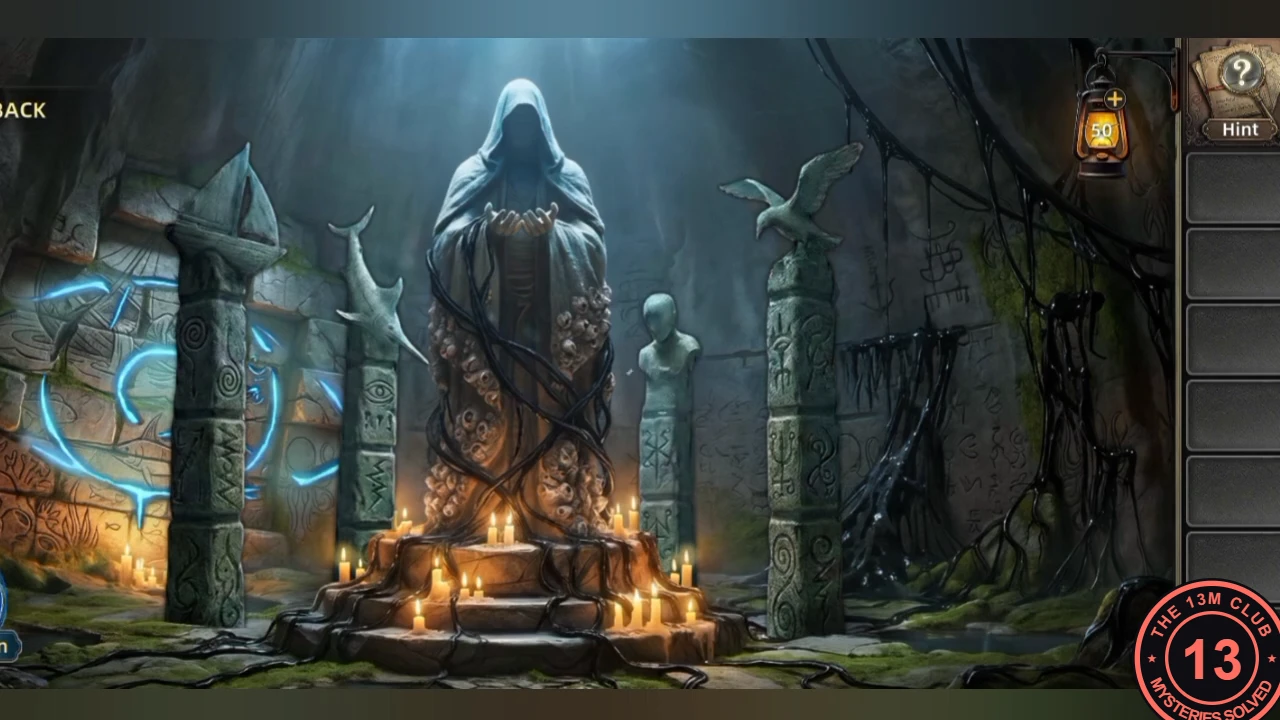
Light the cave relief, cast a harpoon and dive to the sunken temple.
- In the water cave, take the Sponge from the floor. At the hooded statue, take the Brick from the statue's base and fit it into the gap in the carved wall relief to the left, then clean the relief with the Sponge. The relief lights up in a glowing ring showing a swordfish, smaller fish and a ship; no input is needed. Tap the hooded statue: its face glows and it produces a Metal Block in its hands. Put the Metal Block in the furnace on the left of the cave; it melts and casts a Harpoon. Use the Harpoon on the shape moving in the pool to haul the creature out, and take the diving Helmet that comes up with it; it completes the diving suit lying by the pool. Riggs dives. Underwater, tap where the diver should swim (a circle marks the target) and steer around the fish and anglerfish until he reaches the seabed. The puzzle can be skipped.
ECHOES · CHAPTER 5
The sunken temple and the rune battle
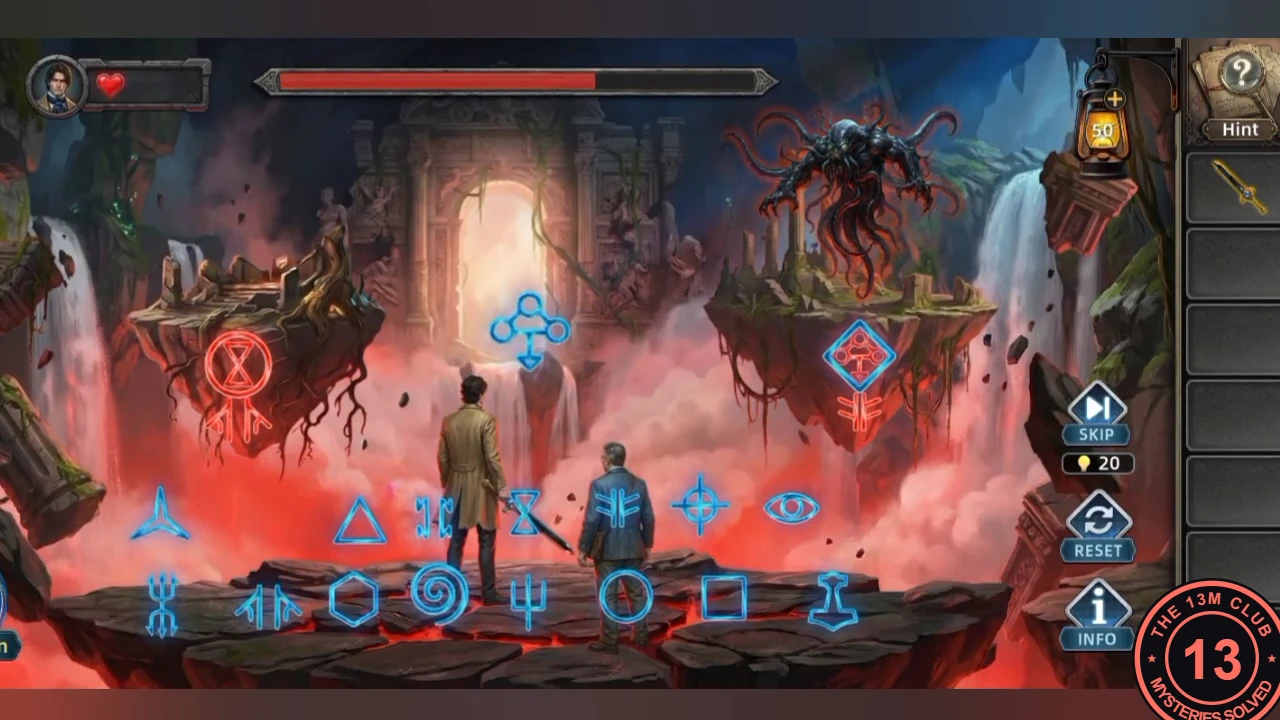
Collect the three orbs for the temple door, then win the rune battle.
- In the sunken temple, take the Sacred Relic fragment from the statue's hands; it joins the Broken Sword into the Complete Sacred Relic, and a compartment in the statue's base opens: take the Blue Orb. Cut the black tentacles on the floor in the middle with the Complete Sacred Relic and take the Green Orb from the debris, then cut the tangle on the wreck at the right and open the chest beneath it for the Red Orb. Put the three orbs in the round door (blue, red, then green in the playthrough this guide follows); it opens. In the battle, tap runes on the field to build the combination shown on the monster's tile until it is trapped.CODEBlue, red, green orbs
ECHOES · CHAPTER 6
Illusory Echoes: the pentagram door
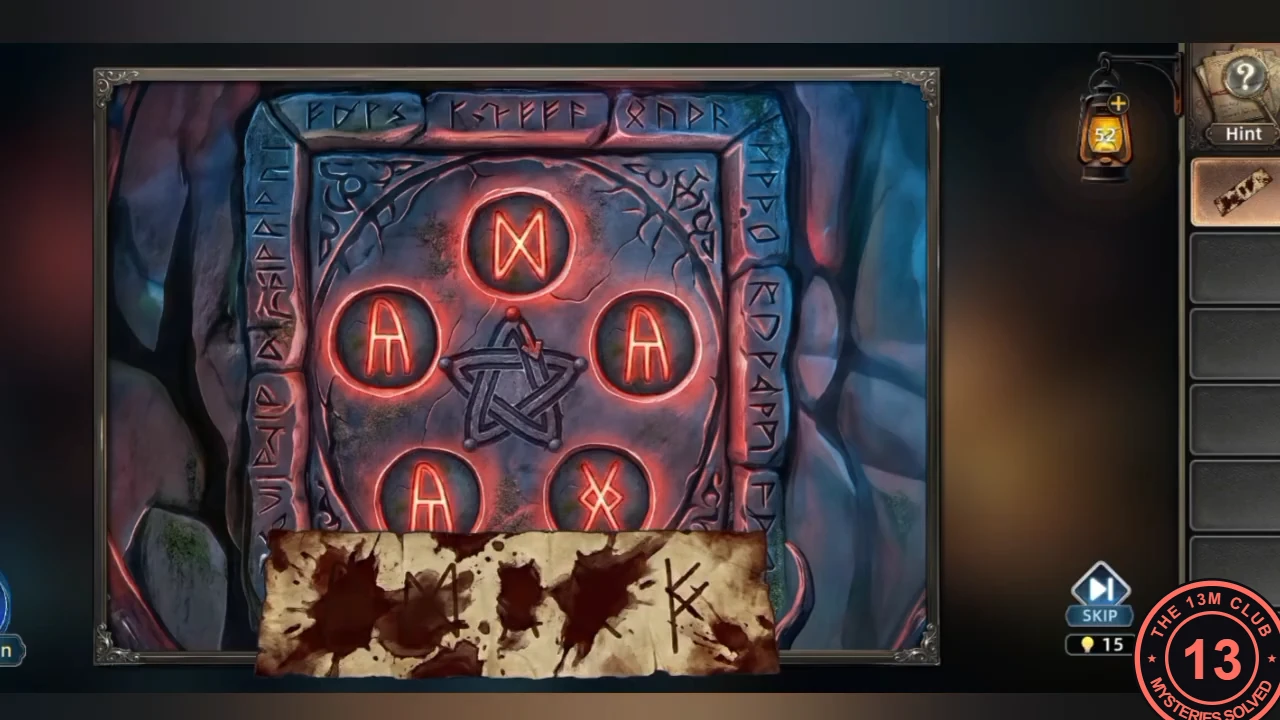
Set the pentagram door runes from the blood-stained paper.
- The blood-stained paper on the pentagram door shows five runes; read it clean in the book by the lamp on the desk: (1) an A-shape without a crossbar, with a short bar and tick between its legs; (2) a bow-tie: two upright strokes joined by an X; (3) an X with a diamond on top; (4) a diamond standing on two crossed legs; (5) an F-shape with two arms angled upwards. Tap the circles to change their runes and set them in that order along the star line, starting at the bottom-left circle: bottom left (1), top (2), bottom right (3), left (4), right (5).CODEBottom left A-shape · Top bow-tie · Bottom right X with diamond · Left diamond on crossed legs · Right F-shape
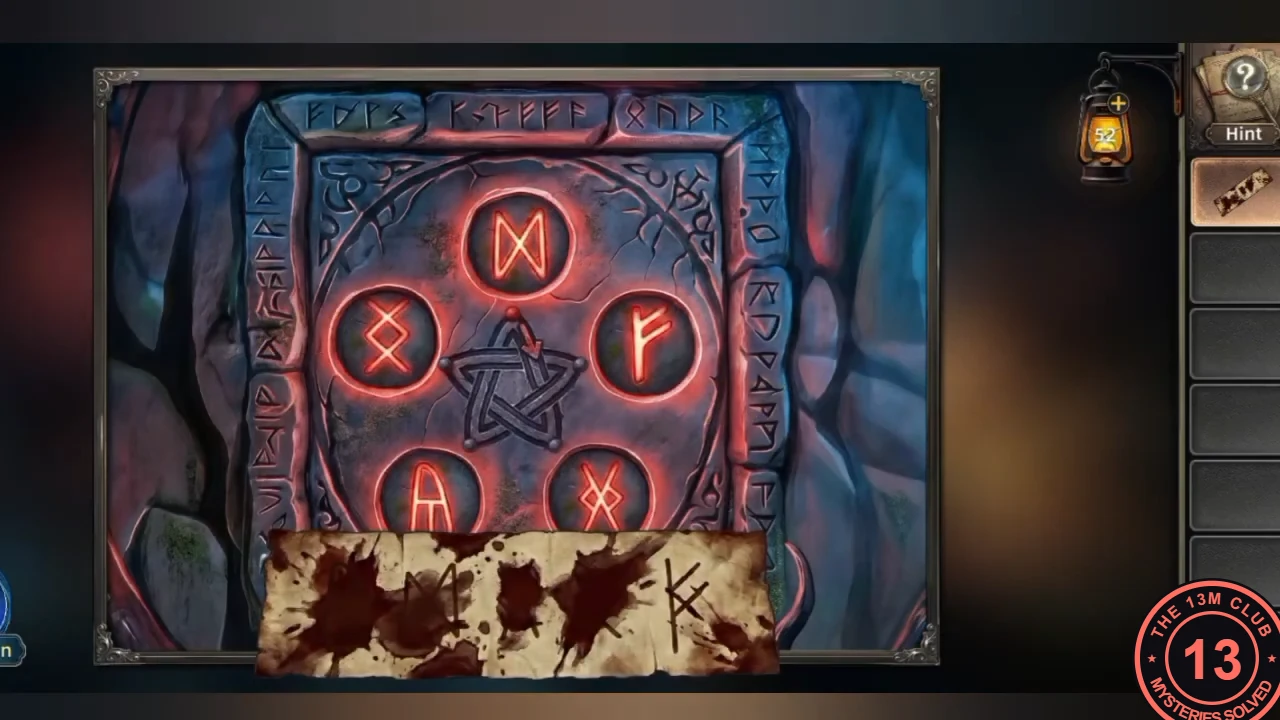
The pentagram door with all five runes set.
ECHOES · CHAPTER 6
The gear trap and the race to the switch
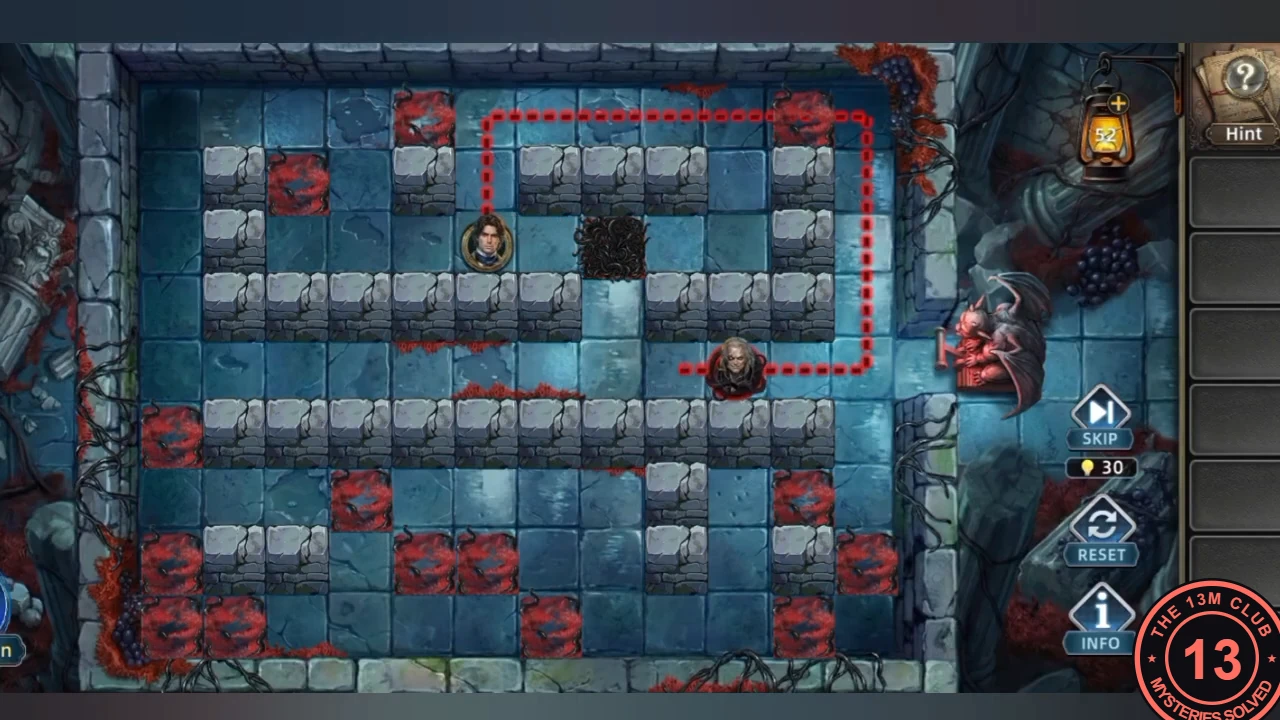
Jam the gear trap, then lead Riggs to the switch while Will chases him.
- Behind the pentagram door is a set of turning gears that powers a trap in the red archway. Take the Arrow from the corpse at the back of the room (a victim of the trap) and wedge it between the gears; they jam solid and the archway's red glow goes out, so the way is safe. After the scene with Will under the Cocoon's control, Riggs must reach the switch, the red device on the right edge of the board's middle row. Move Riggs one square at a time with the blue arrows beside him; Will chases him along the red dotted line. Riggs can step onto the red growths, and each one he leaves turns into a black barrier that Will cannot cross; his dotted route then has to go around. Use this to wall Will off behind black squares, then walk Riggs to the switch. Reset restarts the board, and the puzzle can be skipped.
ECHOES · CHAPTER 6
The core, the neuron maze and the ending
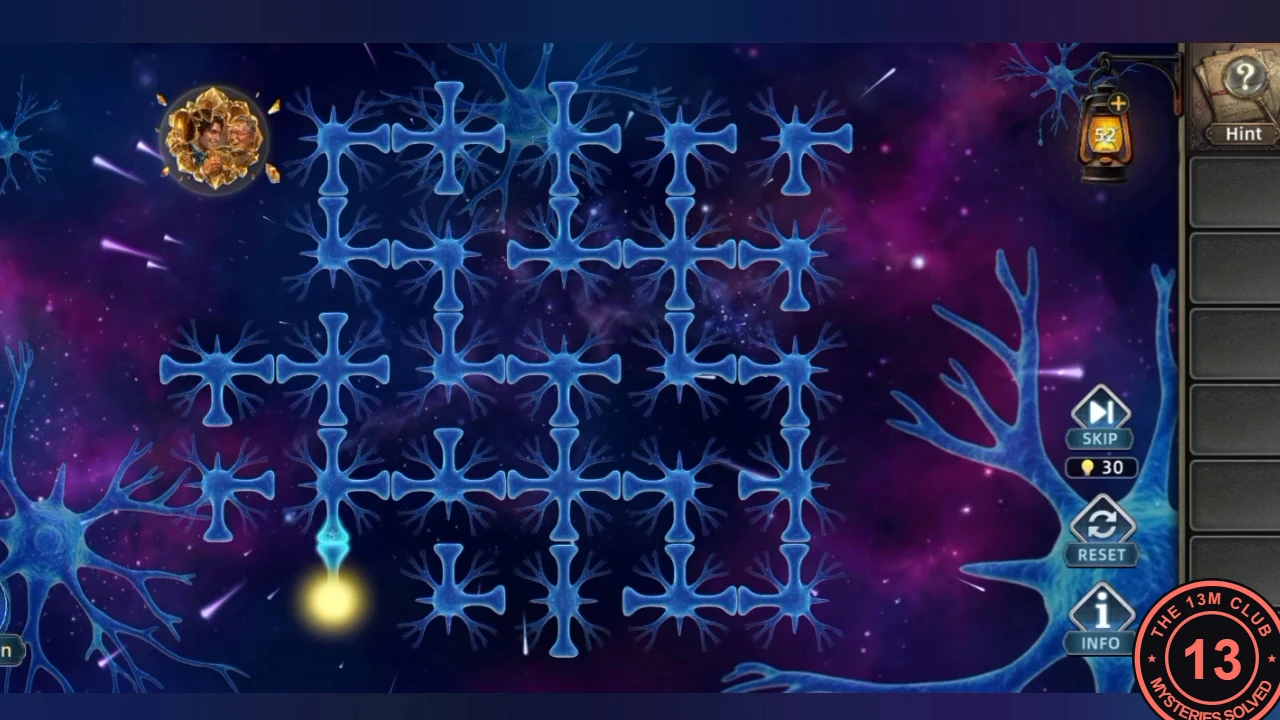
Strike the core, guide the light orb through the neuron maze and watch the ending.
- Strike the core's glowing weak points with the sword before they close. In the neuron maze, the glowing orb sits on a network of neuron lines and a golden medallion waits elsewhere on the board. Small cyan arrows next to the orb show the directions it can move: tap one to move the orb to the next junction. Plan a route along connected lines and check the arrows again after each move, because a dead end means backtracking. Reaching the medallion completes a round; there are three (the medallion sits at the bottom left, then the top left, then the bottom right). Reset restarts the board, and the puzzle can be skipped.
- Watch the ending. Will leaves Riggs a farewell letter; there is one ending.