Respite: the gate and the monkey toy
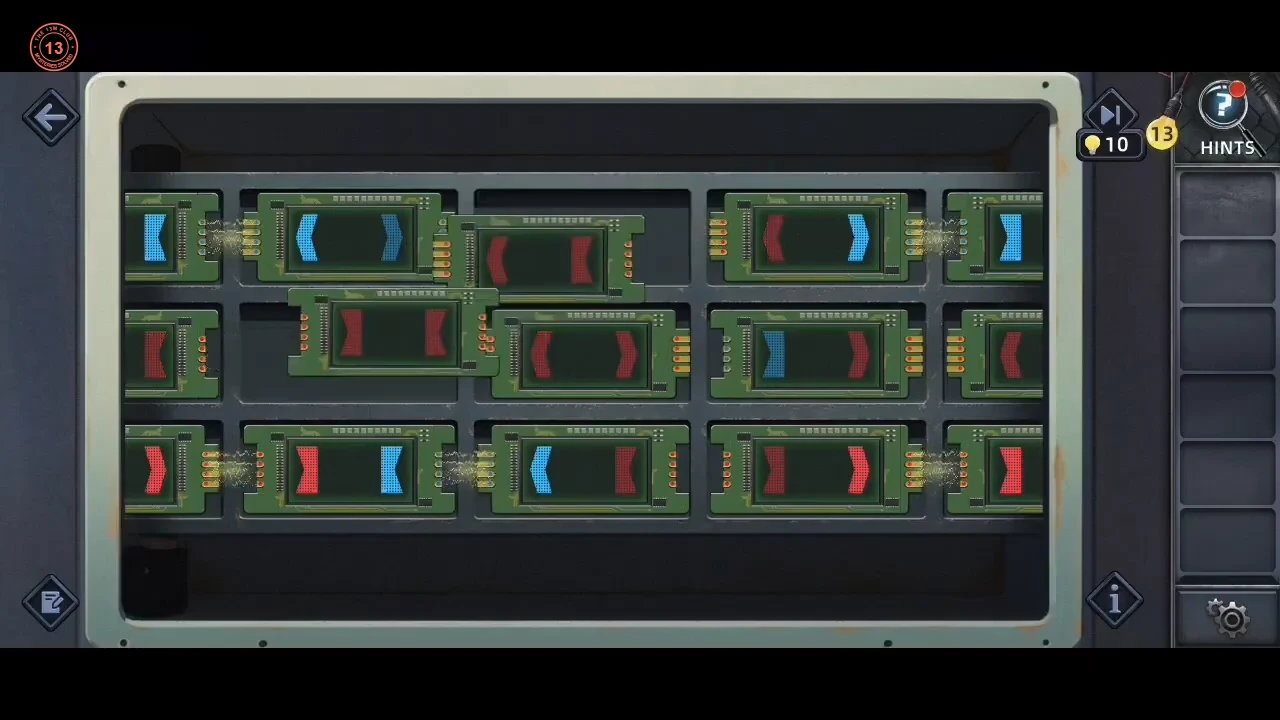
Chapter 3 (Respite): reinforce the school fence and repair the monkey toy for the gate.
- At the school gate, take the Long stick and the Gong. Take the Cotton gloves from the trash bin, then handle the Barbed wire and fix it to the fence.
- Knock down the Broken monkey toy with the Long stick and add the Gong. Fix its speaker: swap the circuit boards so the arrow ends of neighbouring boards match in colour across all three rows. Place the toy at the gate.
Sophia's Puzzle Tower
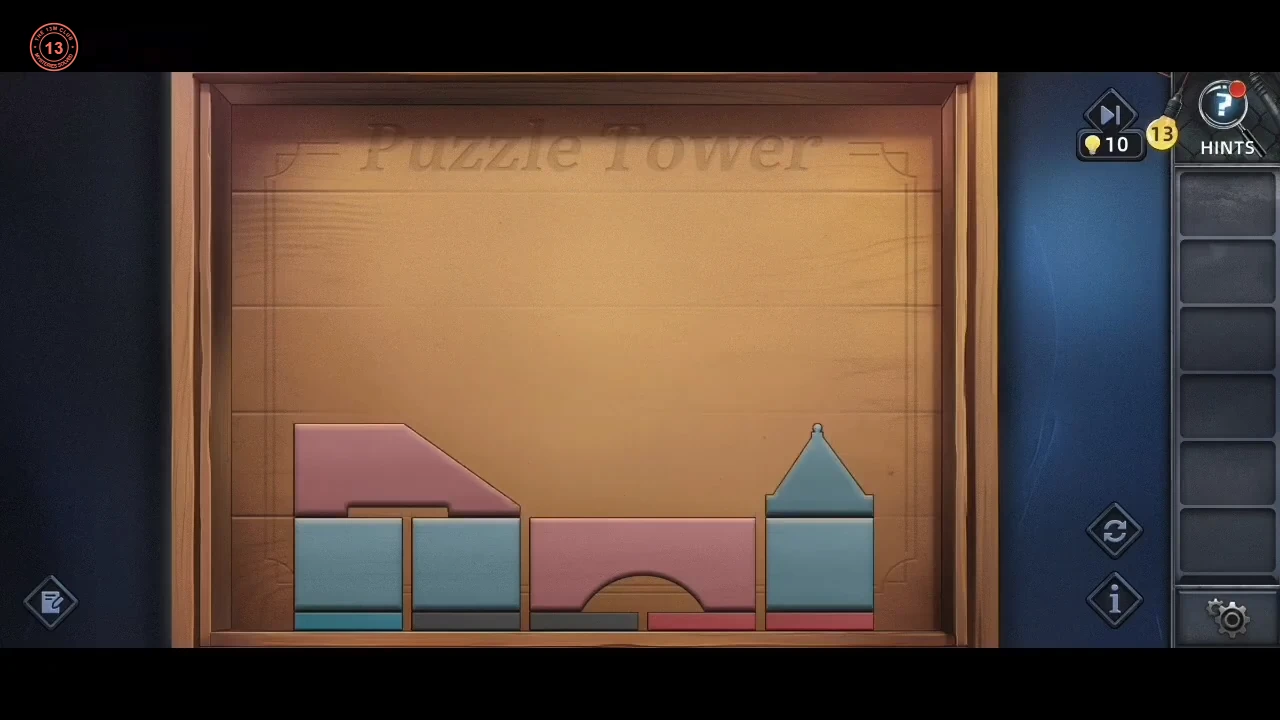
Sophia's Puzzle Tower has three boards and rewards you with her map.
- In the dorm, Sophia has a fever and Nora needs the radio. The next morning, play Sophia's Puzzle Tower. Nora's rule: "You need to move all the blocks over the same color foundation." The coloured strips along the bottom are the foundations; grey strips must end up empty. A block needs a flat surface under it, and stacks can be up to four levels. Clear lower blocks by first moving the blocks above them, parking blocks on a grey strip for the moment if needed. Count foundations from the left. Board 1 (blue, blue, grey, red): put the blue arch across 1–2 with the blue square on its right half, and the red square on 4 with the red triangle on top. Board 2 (blue, grey, grey, red, red): stack the three blue squares on 1 and top them with the blue triangle. Put the red arch across 4–5 with the red ramp on top. Board 3 (red, grey, blue, blue, grey, grey): stack all four red squares on 1. On 3–4, stack the two blue arches, then the blue ramp, then the blue triangle on the ramp's flat left end. Solving all three boards gets you Sophia's map.
The music room and the classroom lock
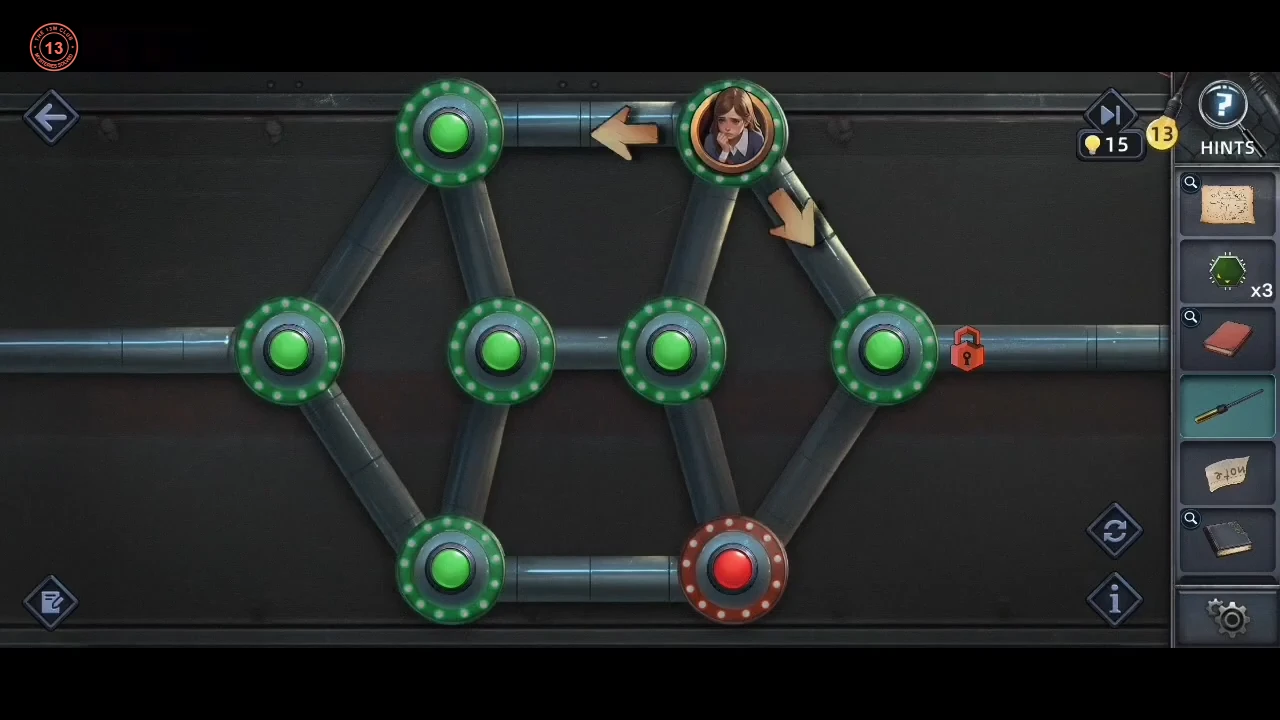
The radio needs six chips; the first three are in the music room. The classroom door lock is broken, so Sophia crawls through the ventilation duct: guide her through a valve-and-pipes puzzle.
- The radio is missing six chips. In the music room, pick up the Chip on the floor by the piano's left leg and the Chip on the floor beside the white bin to the right of the piano, and take the Textbook from the low wall shelf above the piano. Under the desk, take the Screwdriver and a third Chip. Open the Textbook in your inventory: its Homework page is signed Ethan Parker. Take the Slip tucked in it (the homework note, written "note" in mirror writing). Use Sophia's map to visit the rooftop and take the Plant manual by the telescope, then use the map to go to the classroom. Its lock is broken, so use the Screwdriver on the ventilation grille to the left of the classroom door. Sophia crawls in. Guide her through the pipes by tapping a neighbouring valve to move there. Each valve she enters switches between red and green. She cannot turn straight back along the pipe she just used. At the start, the top-left, top-right, middle-right and bottom-right valves are red. Name the eight valves Left (the first one), Top-left, Top-right, Middle-left, Middle-right, Right (next to the lock), Bottom-left and Bottom-right. One working route is Left, Bottom-left, Middle-left, Middle-right, Bottom-right, Bottom-left, Left, Top-left, Middle-left, Middle-right, Bottom-right, Right, Top-right, Middle-right, Bottom-right and Right. Every valve is then green and the lock opens. Passing through Right earlier does not end the puzzle. Sophia opens the classroom door from inside.
The red toolbox code
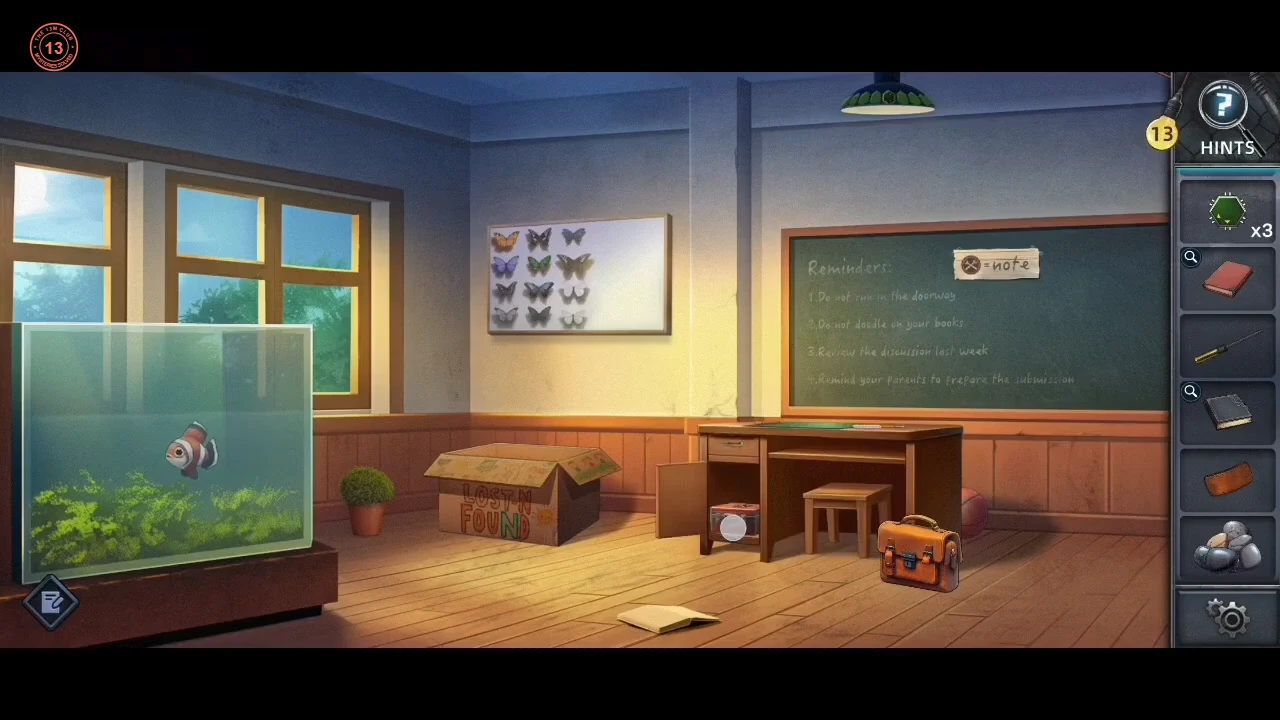
In the classroom, the Reminders board gives the code for the red toolbox.
- In the classroom, clear the toy box for the Scissors. Use the Scissors on the strap of the satchel to cut off the Leather piece (the Plant manual already came from the rooftop). Take the Net from the butterfly board on the wall and use it in the fish tank for the Pebbles. Open the red toolbox with the crossed-tools sticker using 3825, then take the Blackboard eraser and the Handsaw. The chalkboard sticker says the crossed-tools symbol = note. Count the letters of NOTE line by line on the Reminders board: the letter n in line 1 (3), o in line 2 (8), t in line 3 (2) and e in line 4 (5).CODE3825
The chalkboard notes and the piano
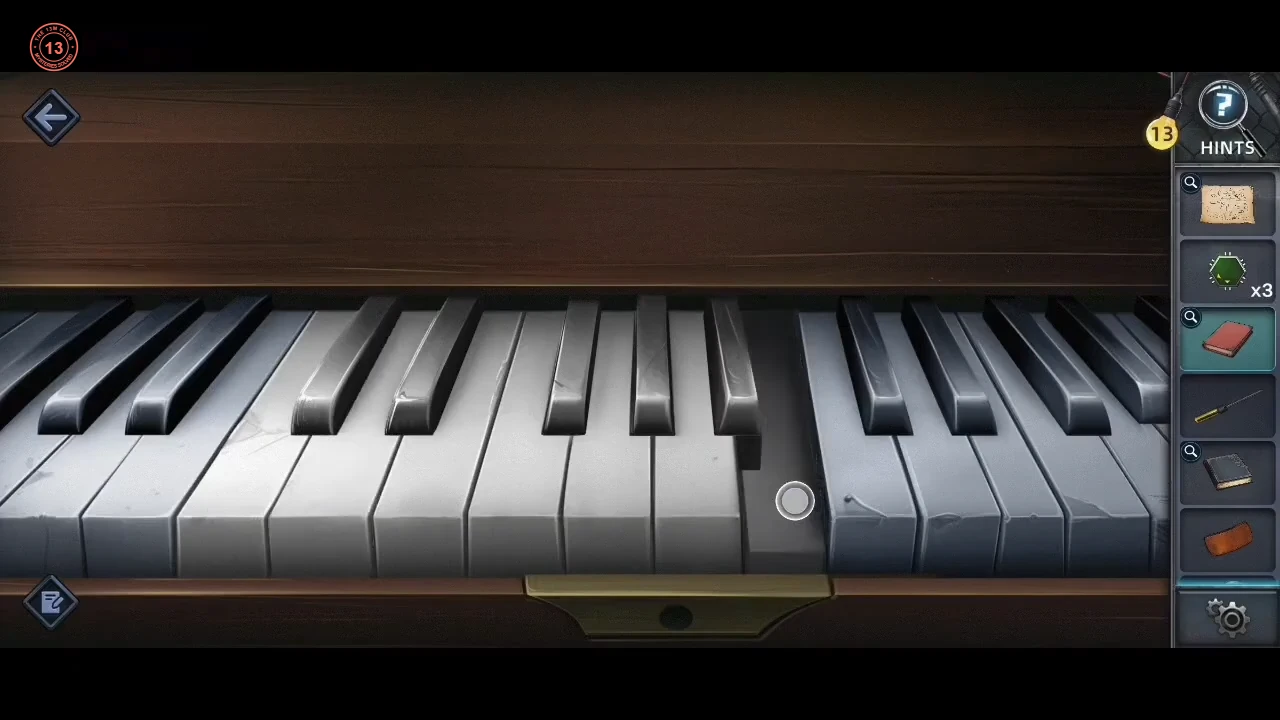
The chalkboard notes and the music textbook tell you which piano keys to play.
- Wipe the chalkboard with the eraser so only the note syllables remain: do do re si la mi re mi. The Music Lesson textbook labels the seven white keys of one octave do, re, mi, fa, sol, la, si from left to right. On the piano, that octave is the brightly lit group of seven white keys in the middle. Play the white keys 1, 1, 2, 7, 6, 3, 2, 3 of that group for the Lens. The Rubber band is screwed to the chair beside the desk, so use the Screwdriver on that chair to take it.CODEdo do re si la mi re mi
The name cabinet
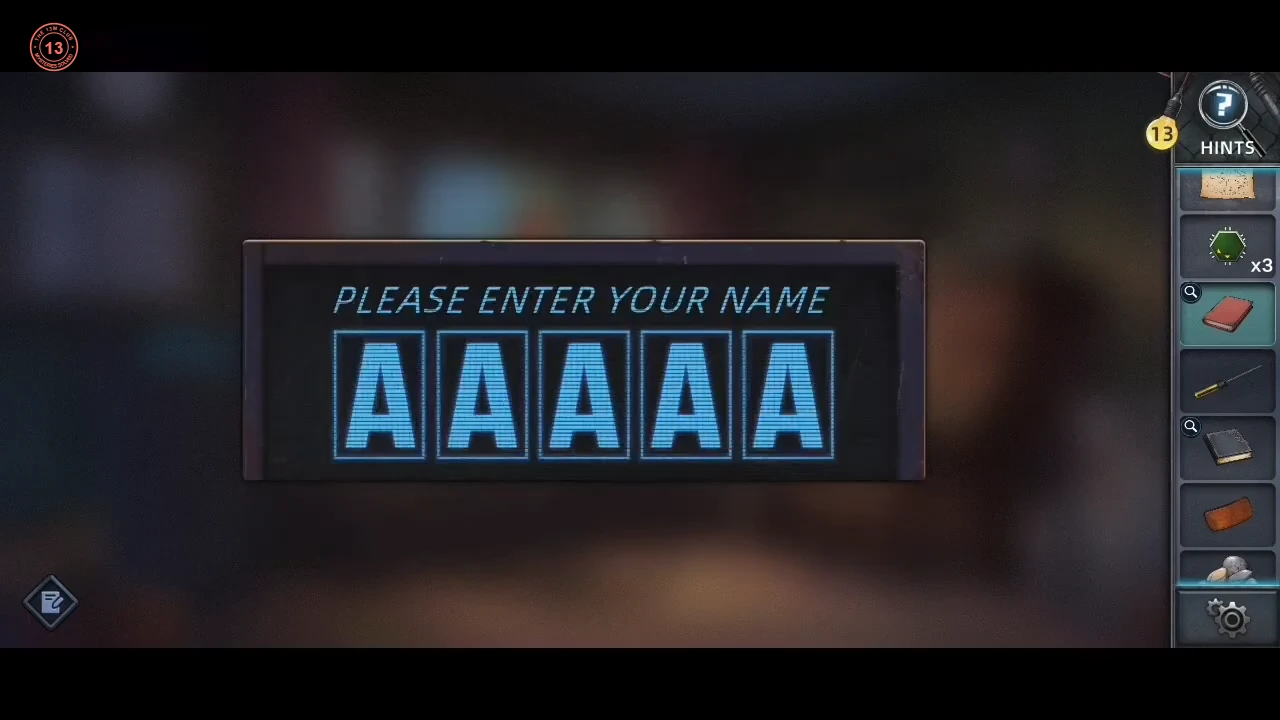
The music-room cabinet asks for a name.
- The cabinet asks PLEASE ENTER YOUR NAME. Enter ETHAN (from the homework signature) and take the Chip.CODEETHAN
The rooftop telescope and the HOPE lock
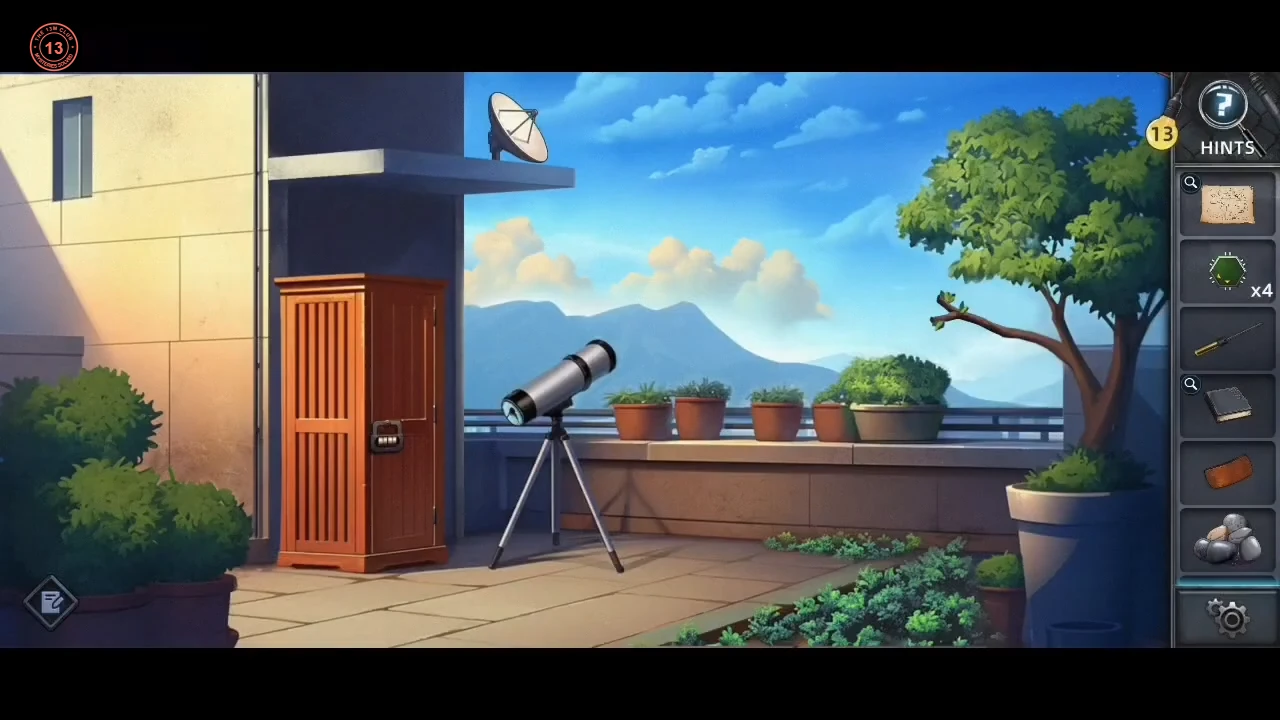
The rooftop telescope reveals the word for the door lock.
- On the rooftop, cut the Branch with the Handsaw. Fit the Lens on the telescope and pan across the town. Four signs can be read: EJOY HOTEL (dark blue), LOVE TIME (a purple heart), SUPER MOM (orange-red) and a vertical NICE ROOM sign (dark). No sign spells the answer directly. The door lock's four letter reels are coloured blue, purple, orange and grey, and the accepted word takes one letter from the sign of matching colour: H from HOTEL, O from LOVE, P from SUPER and E from NICE. This colour reading is this guide's interpretation; the recording shows only the signs and the accepted entry. Enter HOPE on the door lock for the Shovel.CODEHOPE
The seedling bed
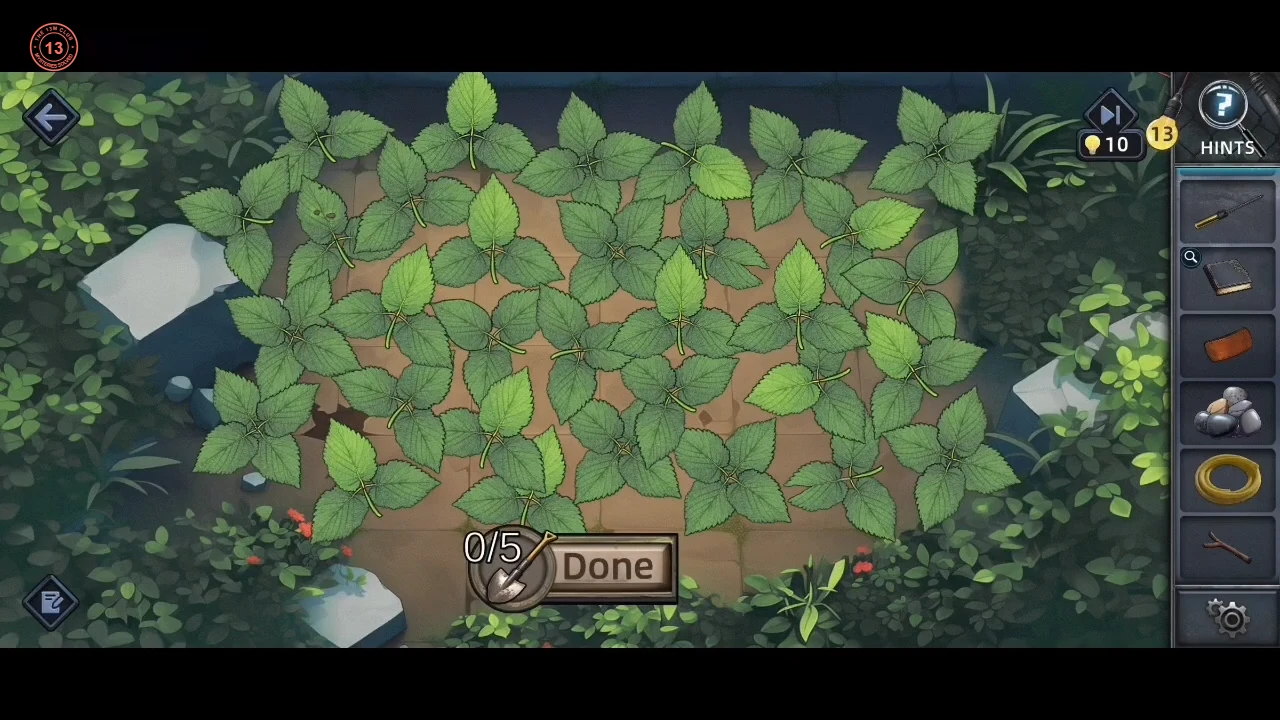
Find the wrong plants in the seedling bed.
- Use the Shovel on the rooftop seedling bed. Open the Plant manual: a healthy strawberry plant has three serrated leaflets, and the Unhealthy examples have ragged edges, smooth edges or holes. Tap the five wrong plants and press Done. With the Done button at the bottom centre, they are in these positions: upper left, just right of the top-left corner (its leaflets have small holes); left of centre at middle height; upper middle, right of centre; far right in the upper half; and lower right, just above the red flowers on the right. If Sophia says some leaves were wrongly identified, tap a plant again to remove its outline and check again. When the plants are accepted, Sophia gives you a Strawberry.
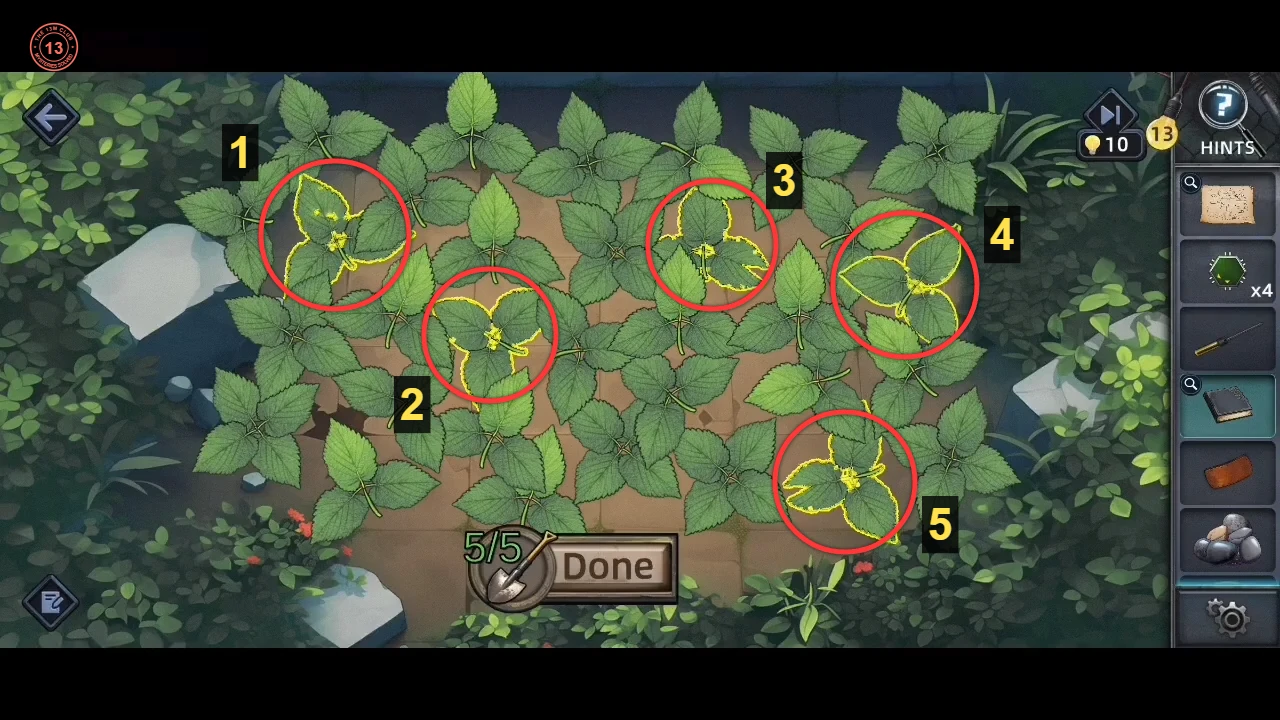
The five plants to tap, numbered as in the step: 1 upper left, 2 left of centre, 3 upper middle, 4 far right, 5 lower right.
The slingshot shots
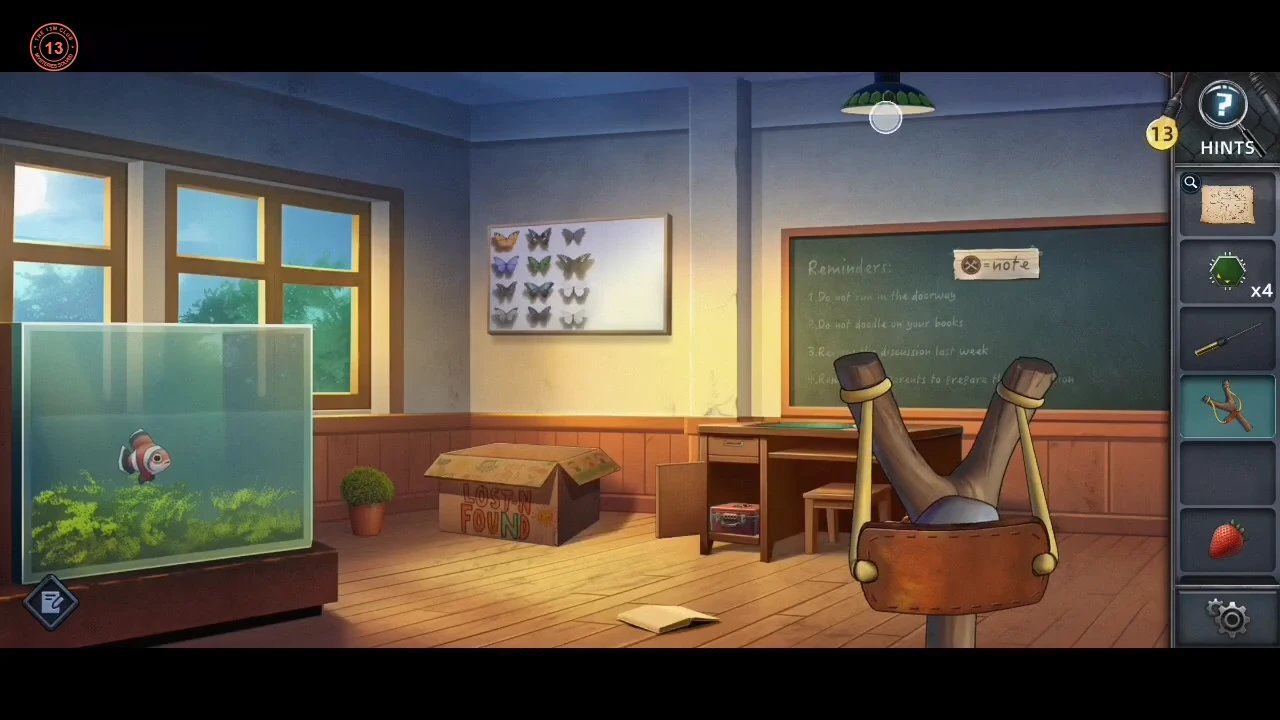
Build the slingshot and use it on the classroom lamp and the rooftop dish.
- At the classroom craft table, build the Slingshot from the Branch, Rubber band, Leather piece and Pebbles. A Chip is lodged on top of the classroom ceiling lamp: use the Slingshot in the classroom and aim at the lamp to knock it down (fifth Chip). Then go to the rooftop and shoot down the Dish antenna hanging from the building ledge above the wooden cabinet.
The parrot and the fruit lock
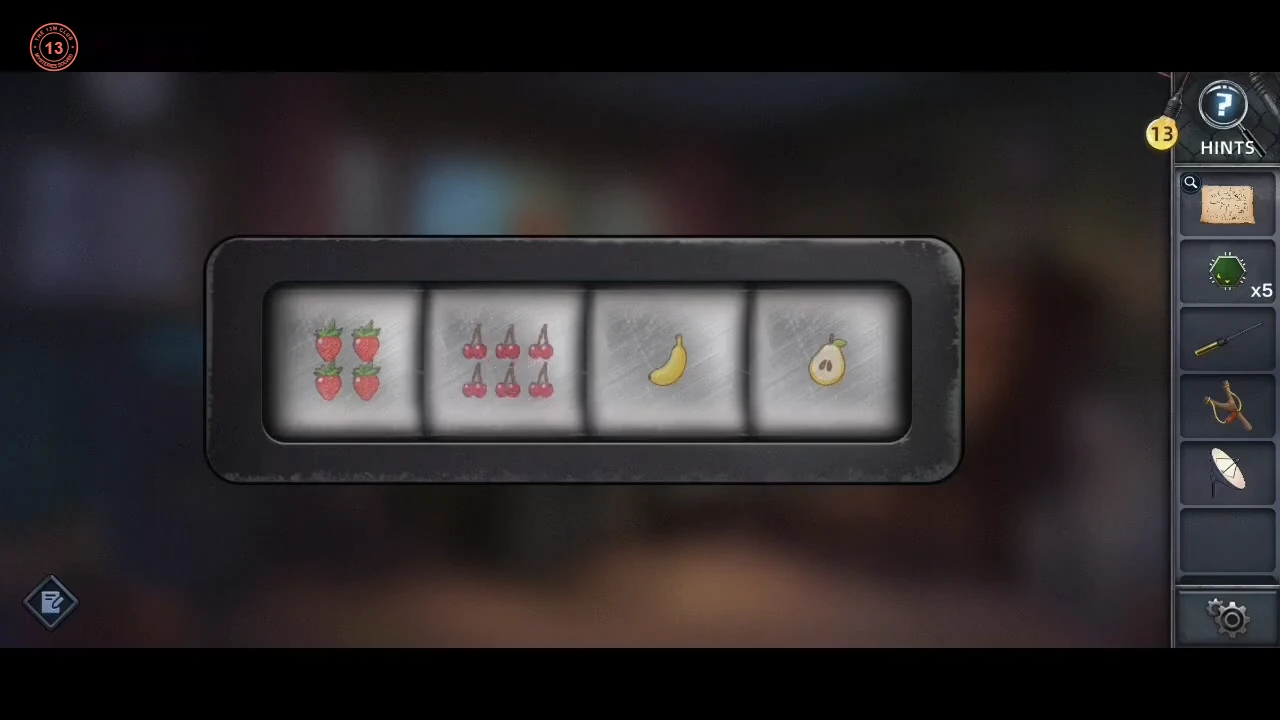
The parrot's fruit wishes give the setting for the fruit lock.
- Feed the Strawberry to the parrot. It says it still has to eat 3 strawberries, 6 cherries, 1 banana and 2 pears. Open the suitcase's fruit lock in the music room. Counting the strawberry it has already eaten, set the reels to 4 strawberries, 6 cherries, 1 banana and 2 pears (two stacked pear halves on the last reel; the single pear the reel starts on is not accepted). Take the Chip from the suitcase.CODE4 6 1 2
The radio chips
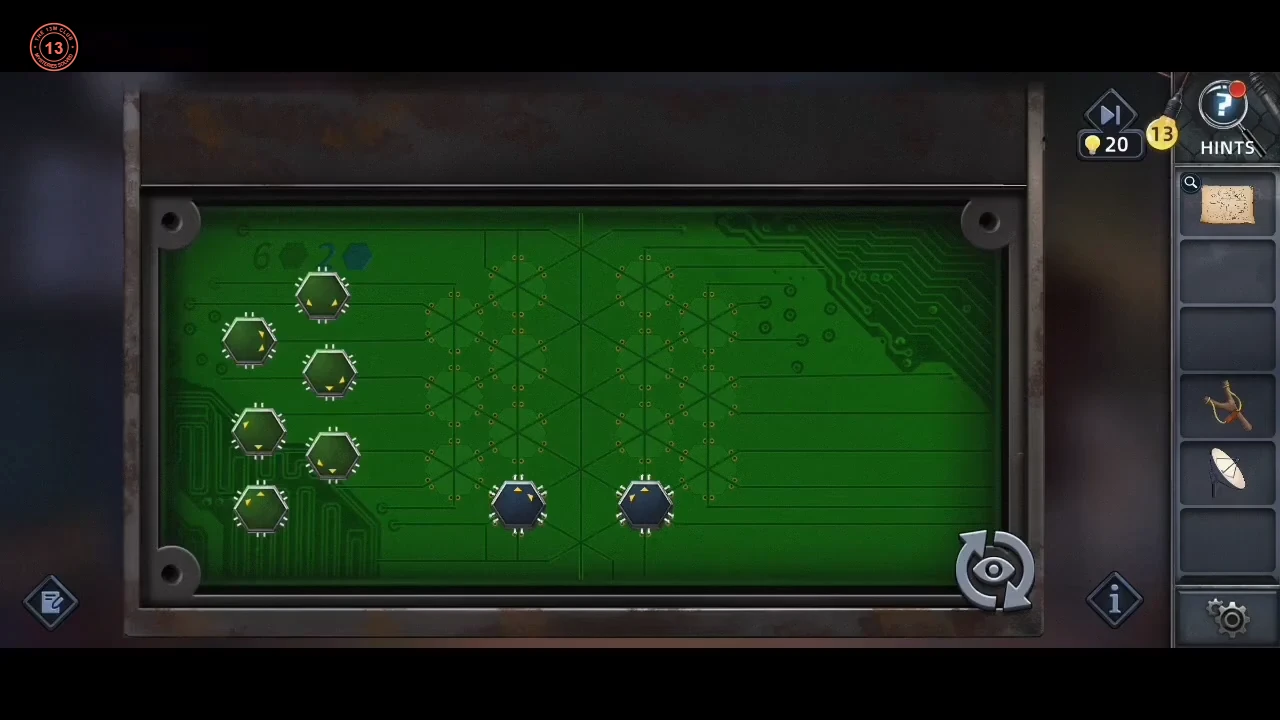
Fit all six chips and the dish antenna, then tune the radio.
- Use the Screwdriver on the radio's back panel. Alex says six new chips are needed. Drag the six green chips onto the dashed hex sockets. A green beam lights between two chips when their arrow marks point at each other along a grid line. Every green chip must join the chain that starts at the two fixed blue chips at the bottom. The working layout uses these sockets: directly above the left blue chip (linked to it and diagonally down to the right blue chip); two rows above the right blue chip (linked straight down to it); at the top, up and to the left of that chip (linked diagonally to it); just left of the top chip; and two stacked chips in the column just right of the right blue chip, the lower one slightly above it. A long beam runs from the chip left of the top down to the lower of those two chips. The chips have different arrow marks. If a chip does not light a beam where you put it, swap it with another chip. The puzzle is solved when every chip is linked. Fit the Dish antenna on the radio on the desk. Then tune it: the left knob changes how many waves the red line has, and the right knob slides it sideways. Match the grey wave until the line turns green.
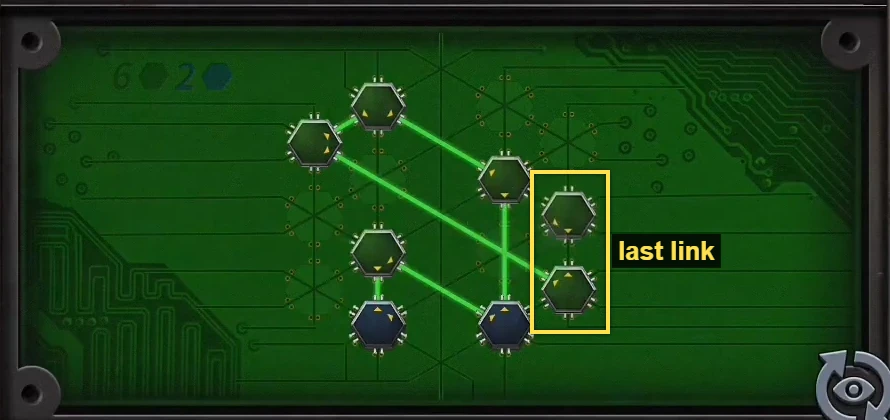
The working layout, a moment before PROBLEM SOLVED. The last link, between the two boxed chips, lights as the banner appears. 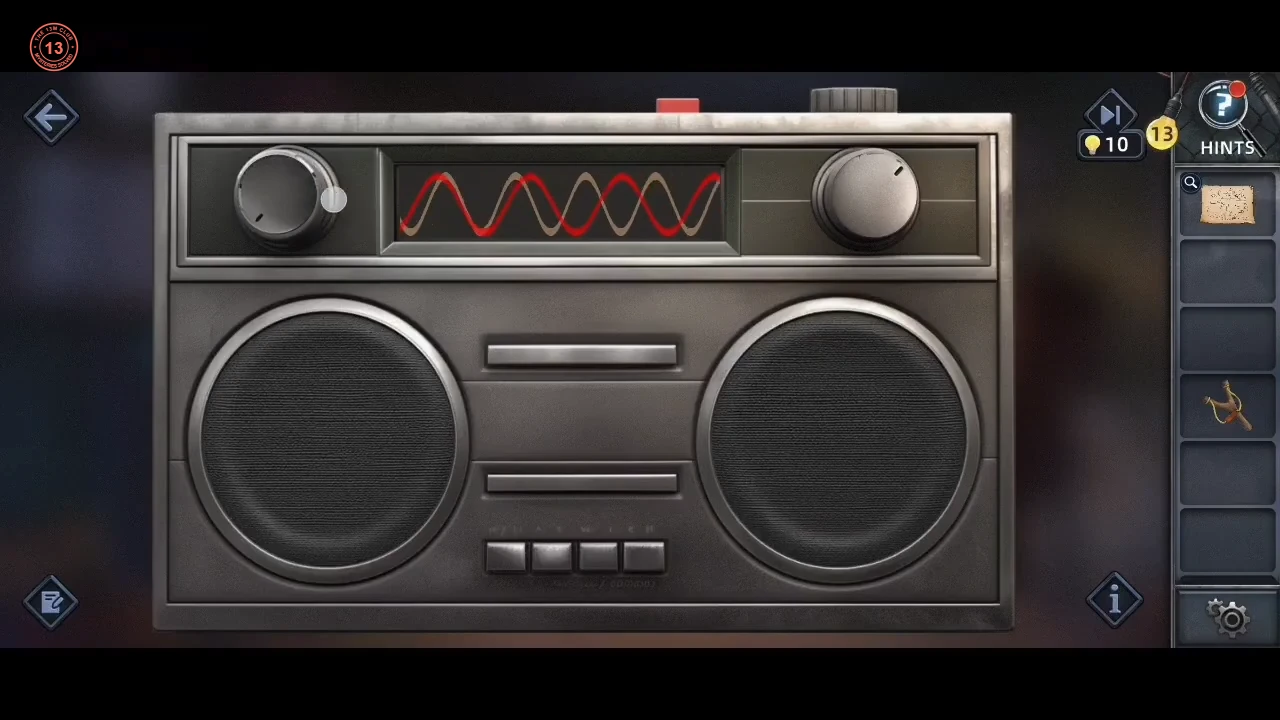
Tuning: the left knob changes how many waves the red line has, the right knob slides it sideways.