End Or Start: the eye statue ring
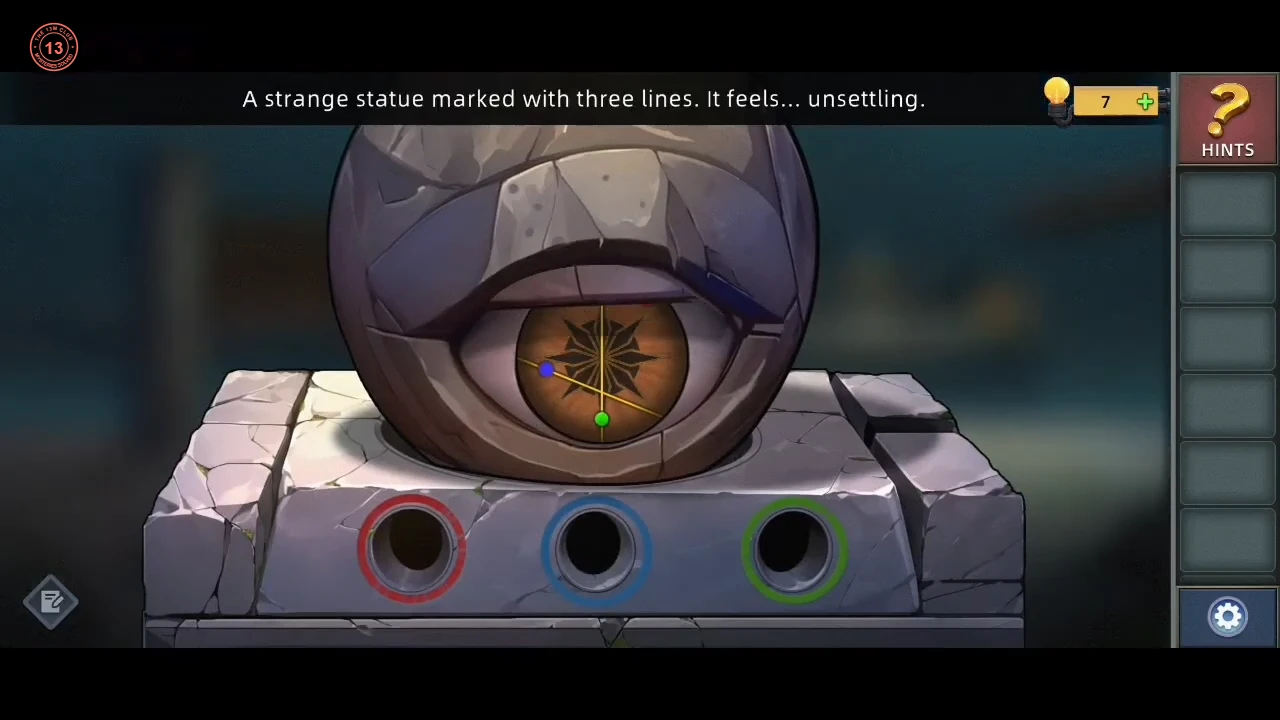
Chapter 5: a 3-hour countdown starts on the rooftop and Michael races ahead. The eye statue's ring comes first.
- On the rooftop, a 3-hour countdown starts and Michael races ahead; the platform behind you collapses, so keep going. Examine the eye statue: its iris is marked with three lines. Its ring holds three coloured beams (orange, green and blue), each stretched between two of the ring's anchor points. Drag a beam's end from one anchor to another; a beam turns yellow when it lies on a line of the mark. Accepted layout, using clock positions: one beam straight across the top, from about 10 o'clock to 2 o'clock; one straight down from 12 to 6; and one from 9 o'clock down to about 4 o'clock. When all three are yellow the ring is solved.
The slat board and the 3-digit lock
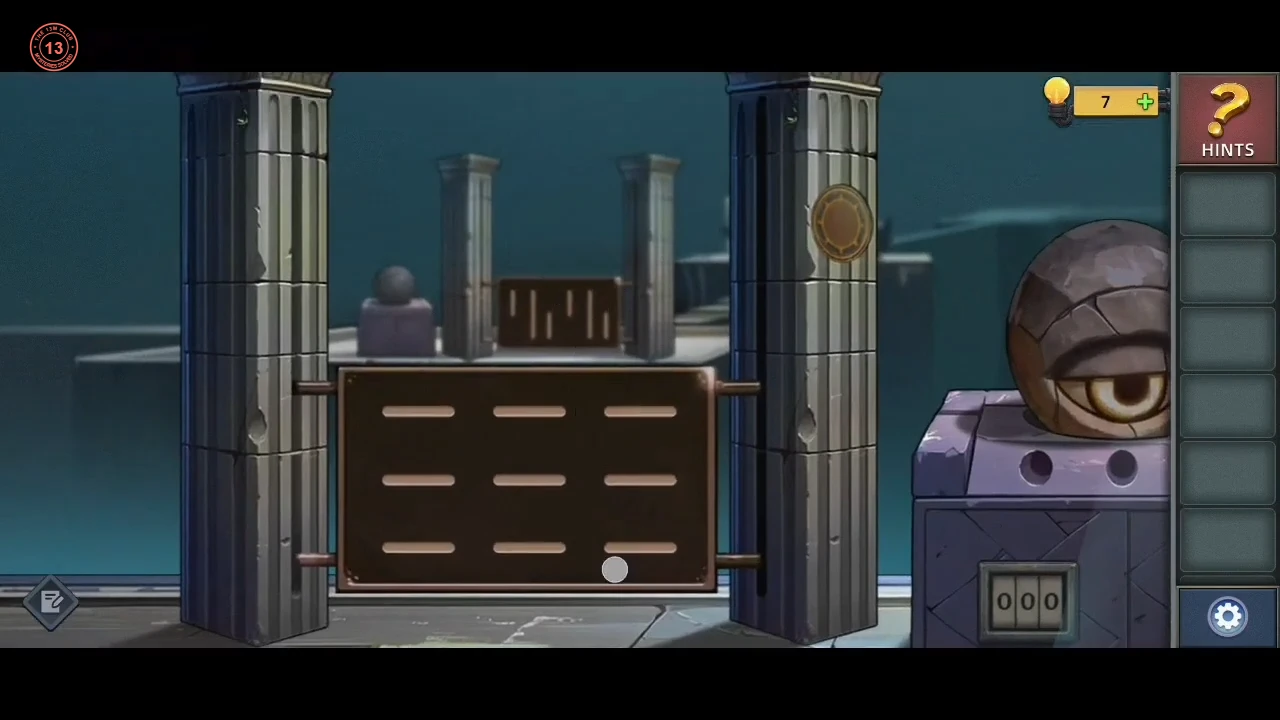
The slat board beside the lock gives the code for the Red Stone Pillar.
- Enter 9 2 6 on the 3-digit lock beside the slat board and take the Red Stone Pillar and the Magnifying Glass from the box it opens in front of the eye statue. The clue is the slat board, and the game notes that the opponent's side has a similar-looking board. This guide could not work out how the board is read, but two separate playthroughs opened the lock with 9 2 6, so the code appears to be fixed.CODE926
The block transfer
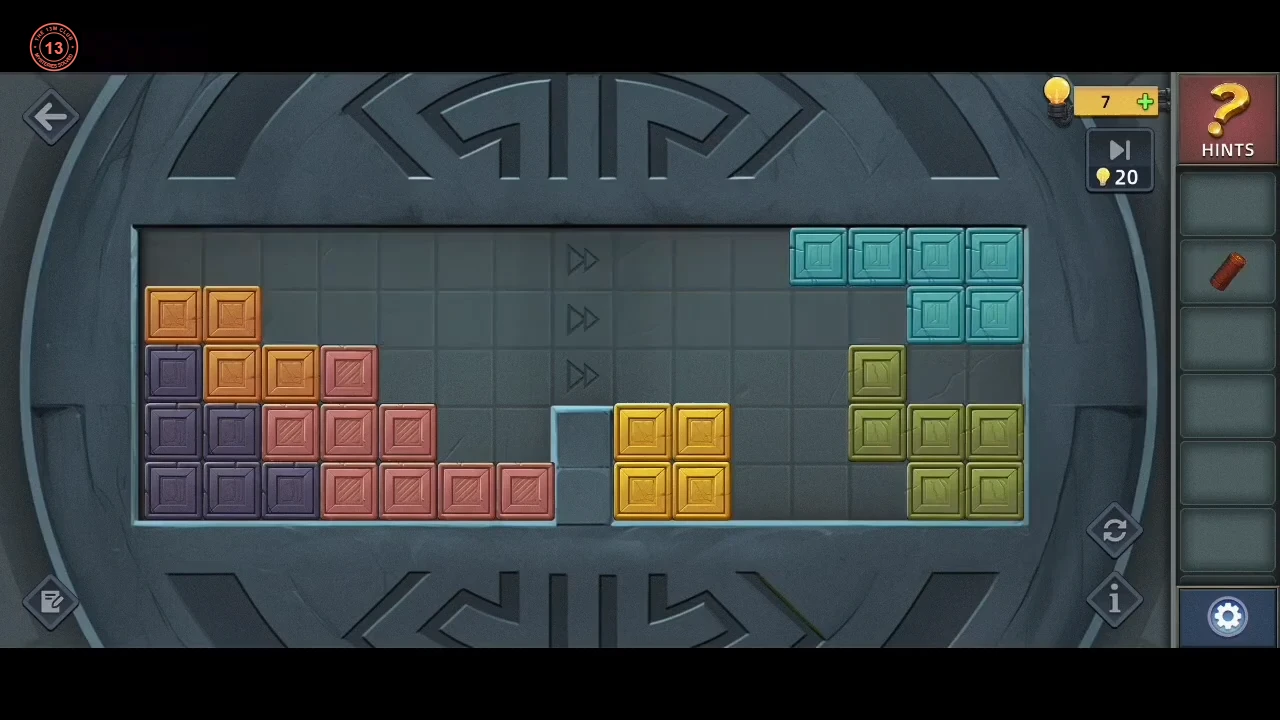
Pack every block from the left area into the right area for the Sundial Pointer and the Blue Stone Pillar.
- Select the Magnifying Glass from the 926 box and use it on the eye statue: the lens focuses the statue's light into a beam on the floor plate in front of it, which opens a block mechanism. Ethan: "It looks like you need to move all the blocks from the left area to the right." The left area is packed with coloured blocks (purple, orange, cyan, yellow, olive and pink). A stone post fills the bottom two rows of the divider, and arrows mark the top three rows as the way across. Drag a block to move it. Blocks stay wherever you drop them; they do not fall. The right area is only just big enough, so treat it as a packing puzzle. Blocks keep their orientation, so plan where each shape fits before you move it. In the finish this guide follows, the right area read row by row from the divider: top row purple, orange, orange, then cyan to the wall. Second row purple, purple, orange, orange, olive, cyan, cyan. Middle row purple, purple, purple, pink, then olive to the wall. Fourth row yellow, yellow, pink, pink, pink, olive, olive. Bottom row yellow, yellow, one empty cell, then pink to the wall. The puzzle gives the Sundial Pointer and the Blue Stone Pillar.
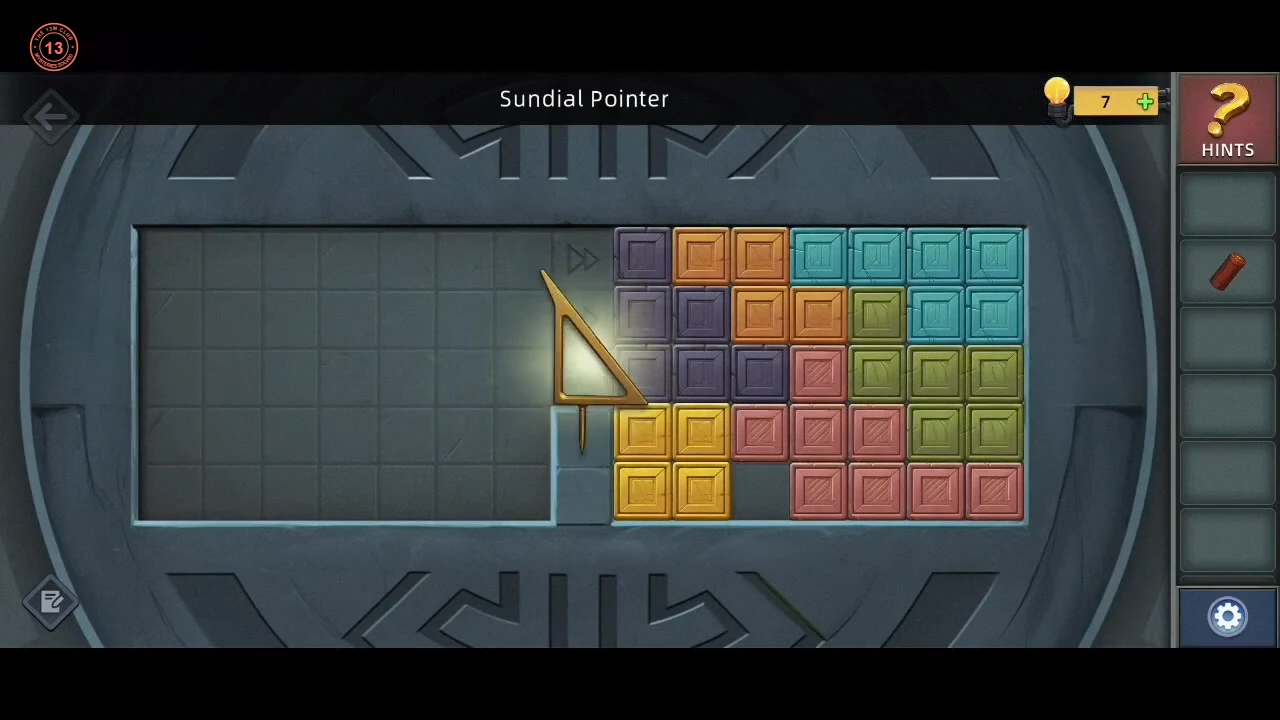
One finished packing, as listed row by row in the step.
The sundial
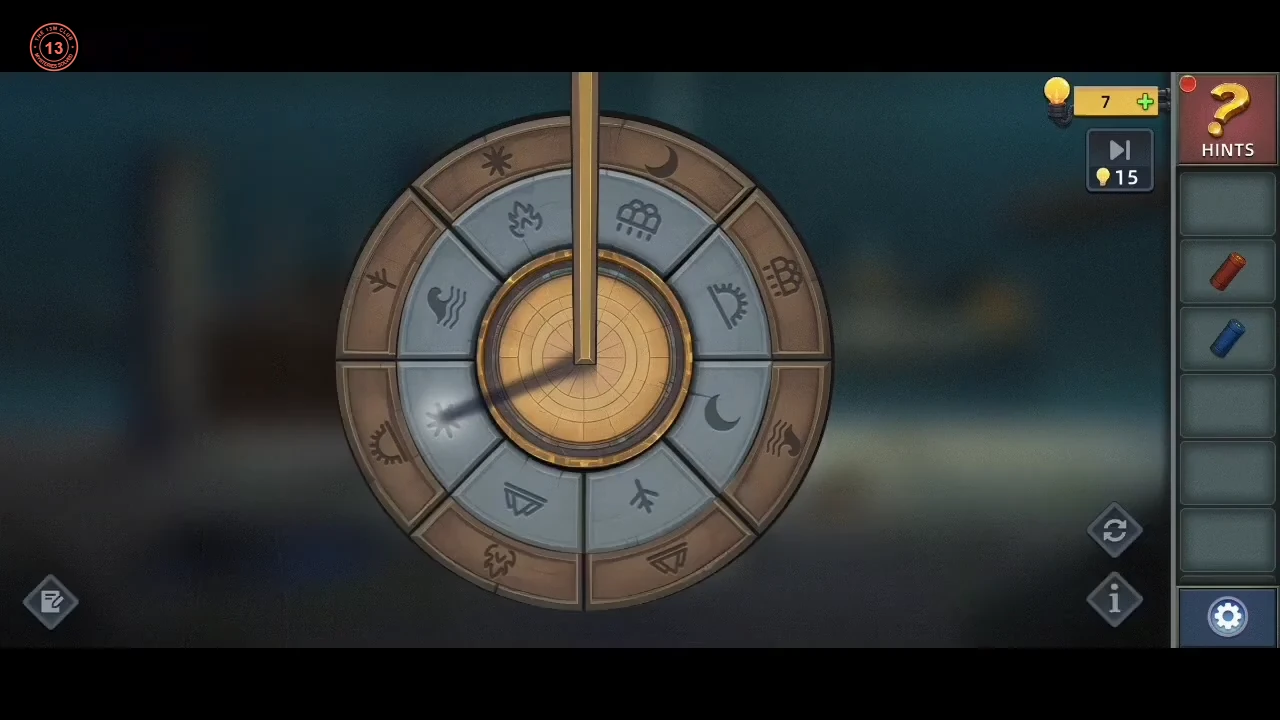
Set the sundial ring, then place the three stone pillars in the eye statue.
- Tap the sundial plate on the floor and fit the Sundial Pointer, then turn the tiles of the inner ring. Starting with the tile just left of the pointer and reading clockwise, set them to branch, mountain, star, waves, leaf, rain cloud, sunrise, moon. Two playthroughs finished with this same layout. Water then fills the well and gives the Green Stone Pillar.
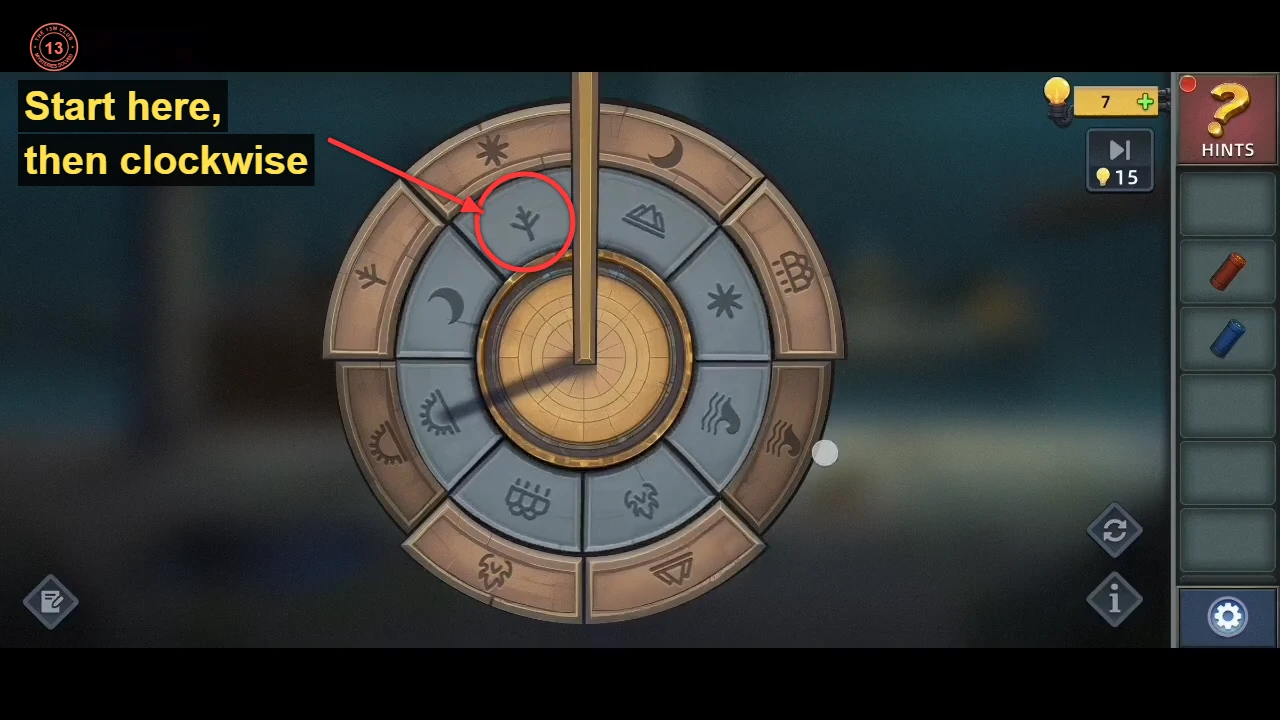
The sundial layout that opens it. Start with the branch tile just left of the pointer and read clockwise. - Insert the red, blue and green pillars into the eye statue's sockets.
The armoury gears
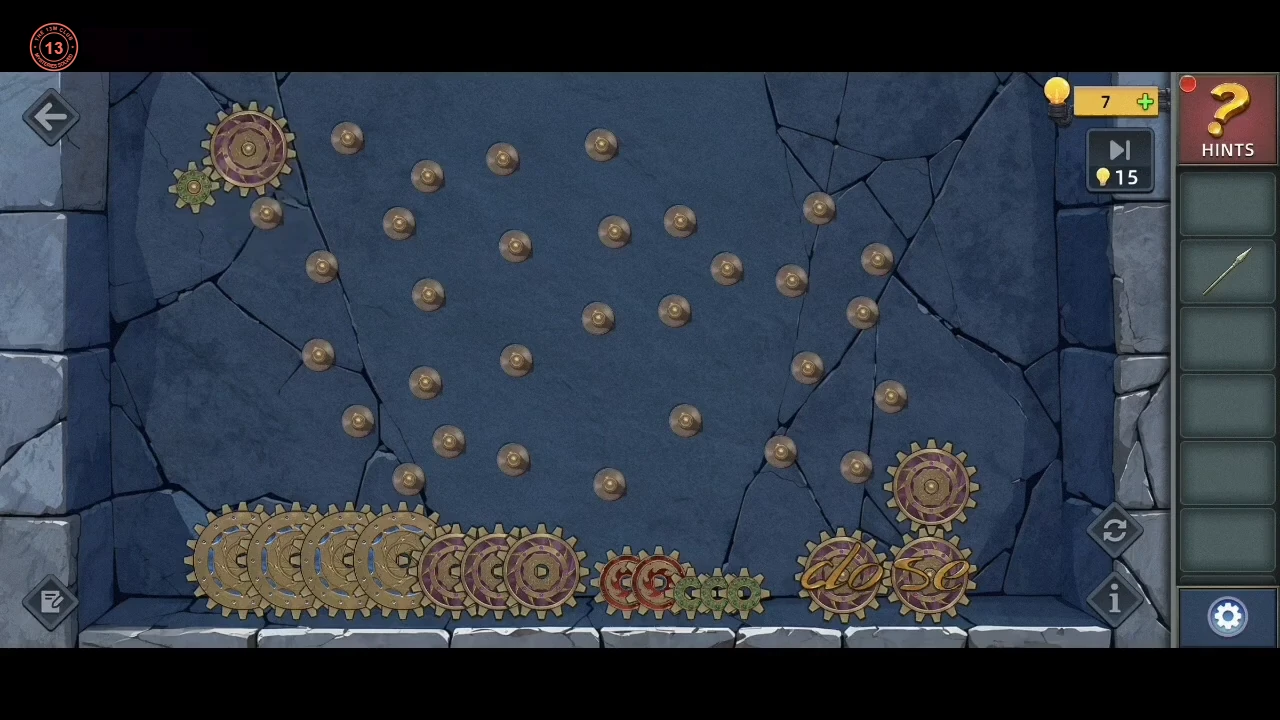
In the armoury, connect the gears to stop the flame jets.
- In the armoury there are three Gears to collect. Take the first from the dark lump at the foot of the statue holding the lance, Tap the intact blue vase at the lower left: it shatters and the second Gear lies in the pieces; take it. Take the Lance from that statue, then use the Lance on the tangle of vines at the lower right to free the third Gear. Tap the gear mechanism on the wall (the board of pegs) and place your Gears with the others along its bottom. Build an unbroken chain of touching gears on the pegs. Start from the small fixed gear at the top-left corner and run down the left side to the lower-left middle. Then go right across the lower middle of the board and finish at the fixed gear just above the two lettered gears at the bottom right, so your chain meshes with it. Alternate sizes: large gold gears span the wider gaps between pegs, and the small green gears fill the tight spots between red ones. When the lower-right gear turns, the flame jets stop and the stairs are clear. The recording shows the finished chain rather than every placement, so use these landmarks and test each link as you go.
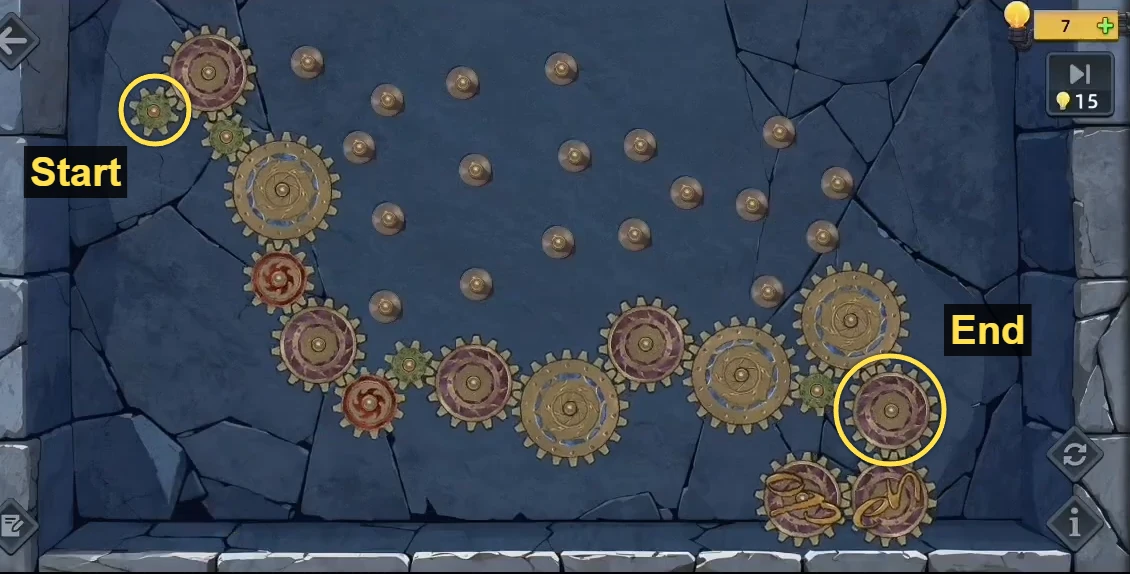
The finished chain, from the fixed start gear (top left) to the fixed end gear above the lettered gears.
The banner room weapon reels
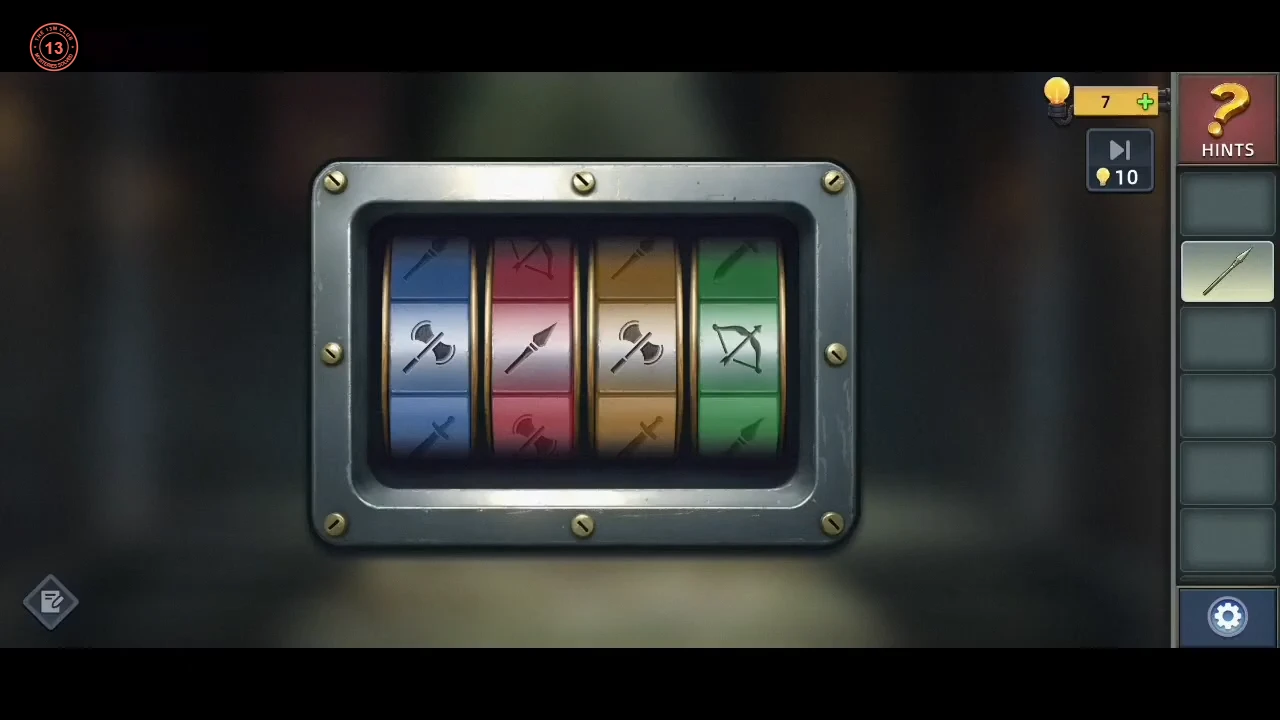
The banner outlines set the weapon reels on the chest.
- In the banner room, select the Lance you are carrying and use it to lift the hanging banners one by one: weapon outlines are revealed behind them. Set the chest reels blue sword, red spear, gold double axe, green bow, then take the Bow and the Axe.CODESword, Spear, Double axe, Bow
The gate eye panel
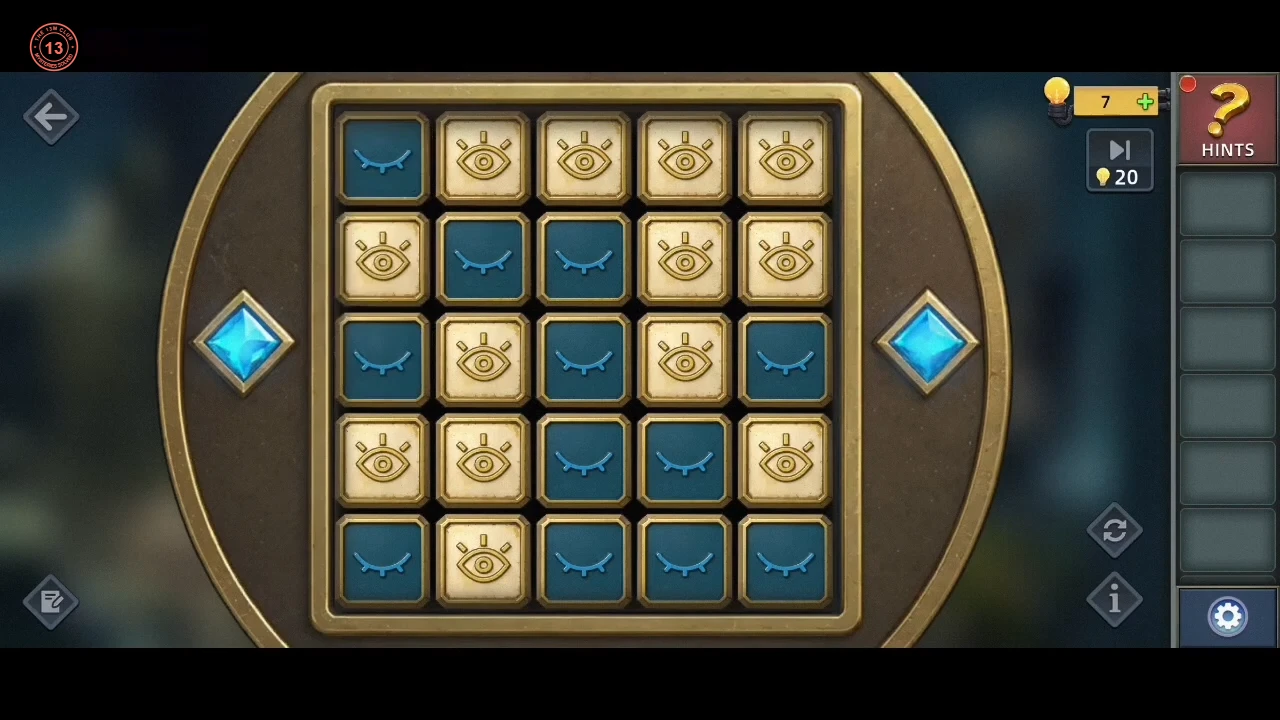
Arm the knight statues, then close every eye on the gate panel.
- Give each knight statue its weapon. Ethan notes that all four lights on the gate are on; tap the gate for a 5x5 panel of eye tiles. The game explains: "Tap a square to flip itself and its four adjacent neighbors. Turn all squares blue with closed eyes to complete the mechanism." Each tap flips the tapped tile and the tiles directly above, below, left and right of it (not the diagonals), between a gold open eye and a blue closed eye. Use row chasing. Starting with the top row, for every open eye, tap the tile directly below it. Then do the same for row 2 using row 3, and so on down to row 4. Now only the bottom row can still have open eyes. Read them left to right (O = open, - = closed) and tap these tiles in the TOP row: O - - - O tap 1 and 2; - O - O - tap 1 and 4; O O O - - tap 2; - - O O O tap 4; O - O O - tap 5; - O O - O tap 1; O O - O O tap 3. Then chase down from the top row again, and the panel finishes with every eye closed. The method works from any starting pattern.
Lin and the monkey-mask panel
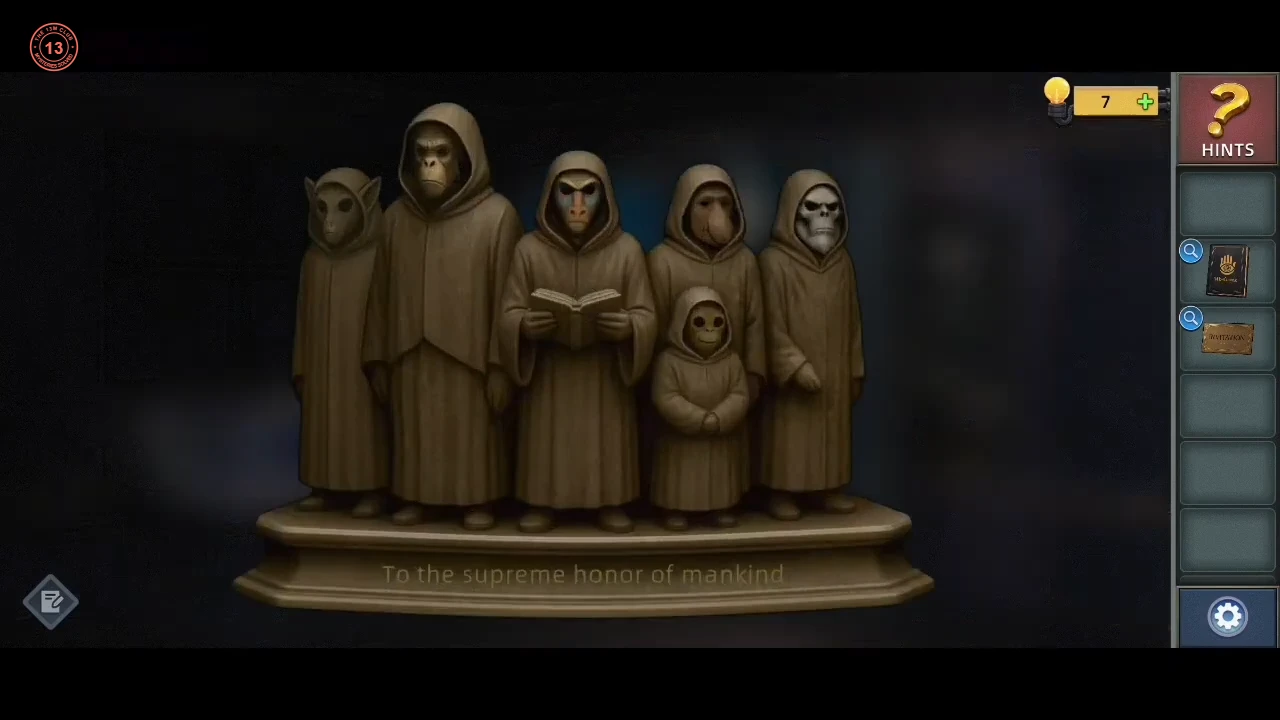
Lin searches the control room. The "TO 06" letters and the Book set the monkey-mask panel.
- As Lin, in the control room, take the roll of Tape from the left end of the console desk and the Book (an "Mk-Game" volume with a hand and eye on the cover) from the console. Open the glass display cabinet on the right. Tap the incense burner on its second shelf to take the Incense ash. Zoom in on the red joystick on the console and sprinkle the Incense ash over it, which shows a fingerprint. Press the Tape on the joystick to get the Tape with fingerprint. The scanner is hidden behind the vase on the third shelf of the glass cabinet: tap the vase so it slides left and the fingerprint scanner appears to its right. Then put the Tape with fingerprint on the scanner. The side cabinet opens. Read the "TO 06" letters, the Invitation on the cabinet's bottom shelf and the hooded-statue group.
- Each "TO 06" letter is signed with a number and carries a photo of a masked member. The 04 letter on the clipboard shows the orange mask, the 03 letter the green mask and the burnt 02 letter the chimp mask. The Book page is signed 01 beside a mandrill mask stamp. The Invitation is signed 05 but has no photo. You are 06. Under the six monkey masks (orange, chimp, mandrill, white, green, gold) this gives 4, 2, 1, ?, 3, ?. The accepted entry puts 6 under the white mask and 5 under the gold one: enter 4 2 1 6 3 5. If you try the panel before reading the Book, the mandrill slot is still unknown (420635 is not accepted).CODE421635
The bridge path
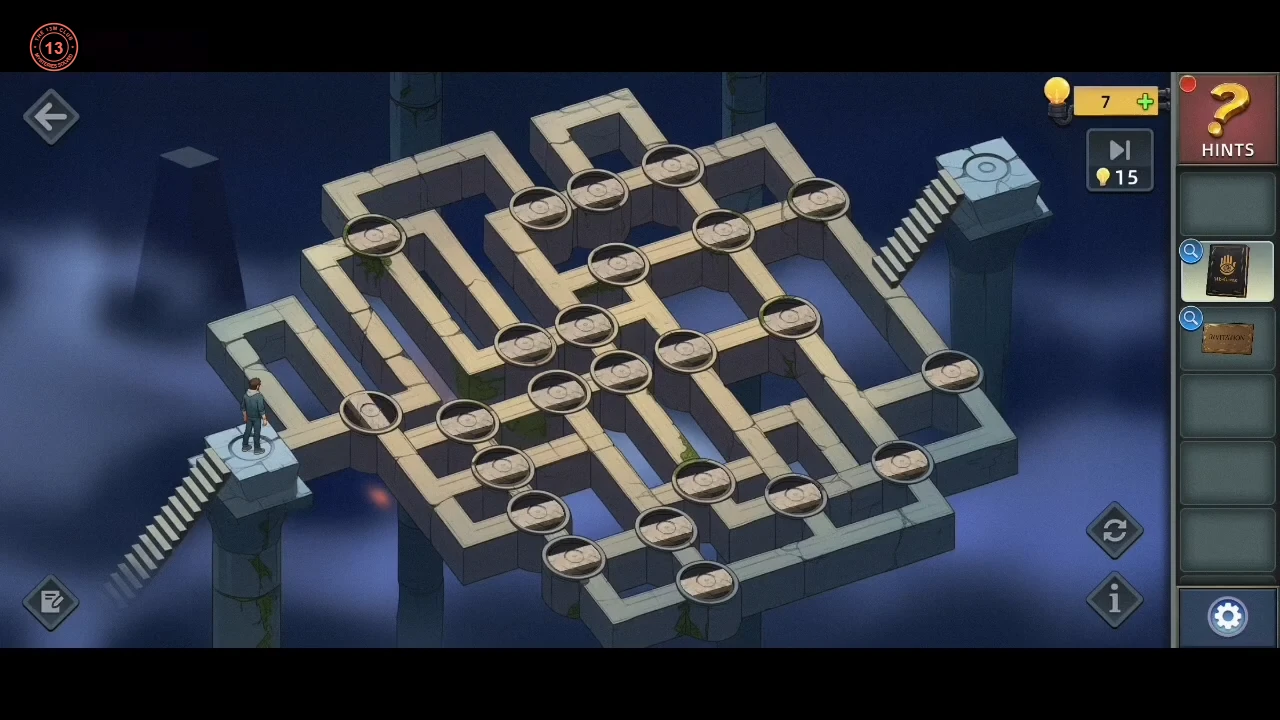
As Lin, connect the bridge path from the stairs to the switch.
- Tap the path map on the control console to open the board. The round turntables set into the bridge each carry a short plank; tap a turntable to turn its plank and change which paths it joins. Ethan waits on the platform at the left stairs and must reach the switch platform at the top of the right stairs. When a continuous path exists he walks it on his own and it lights green. In the observed solve, the completed path makes a small loop up and left from Ethan's platform, then returns down through the turntable just right of that platform. It runs along the front (lower) part of the board through the turntables there, zigzags up and back down twice in the lower middle, and follows the front-right edge to the turntable below the right stairs, then climbs to the switch. The turntables in the upper part of the board are not on this route.
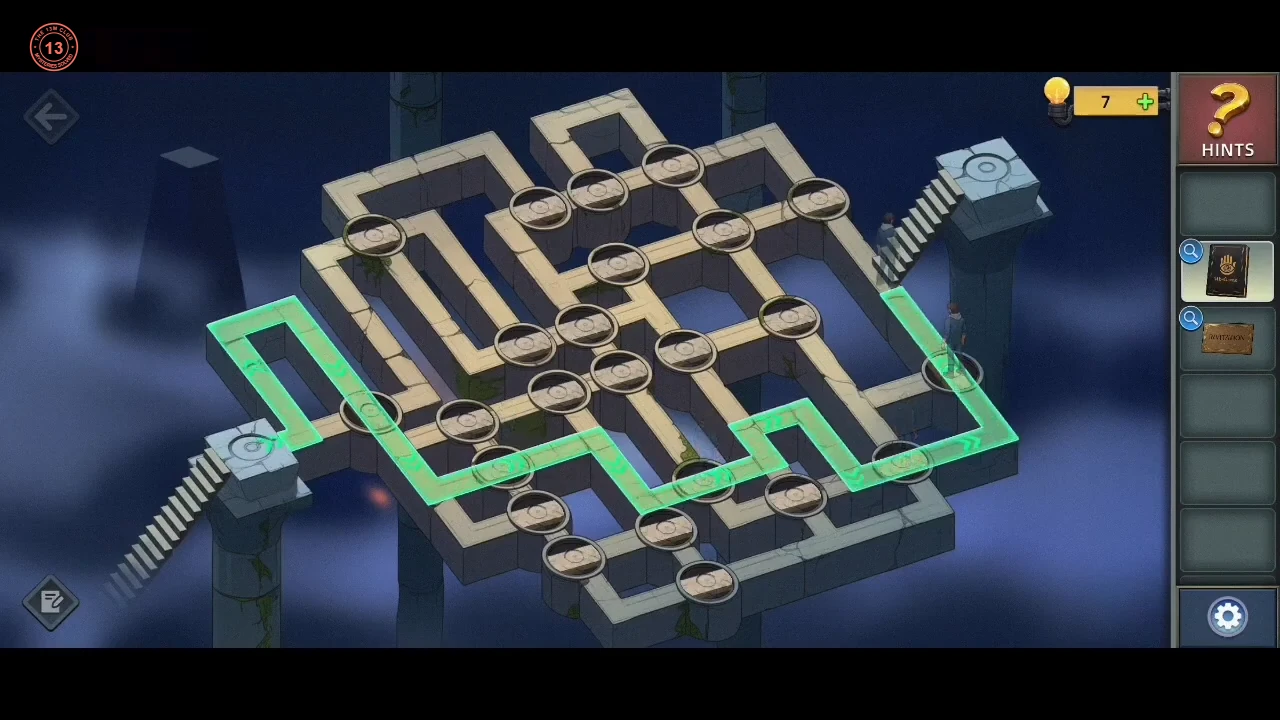
The completed path, lit green as Ethan walks it.
Sheep and wolves, and the ending
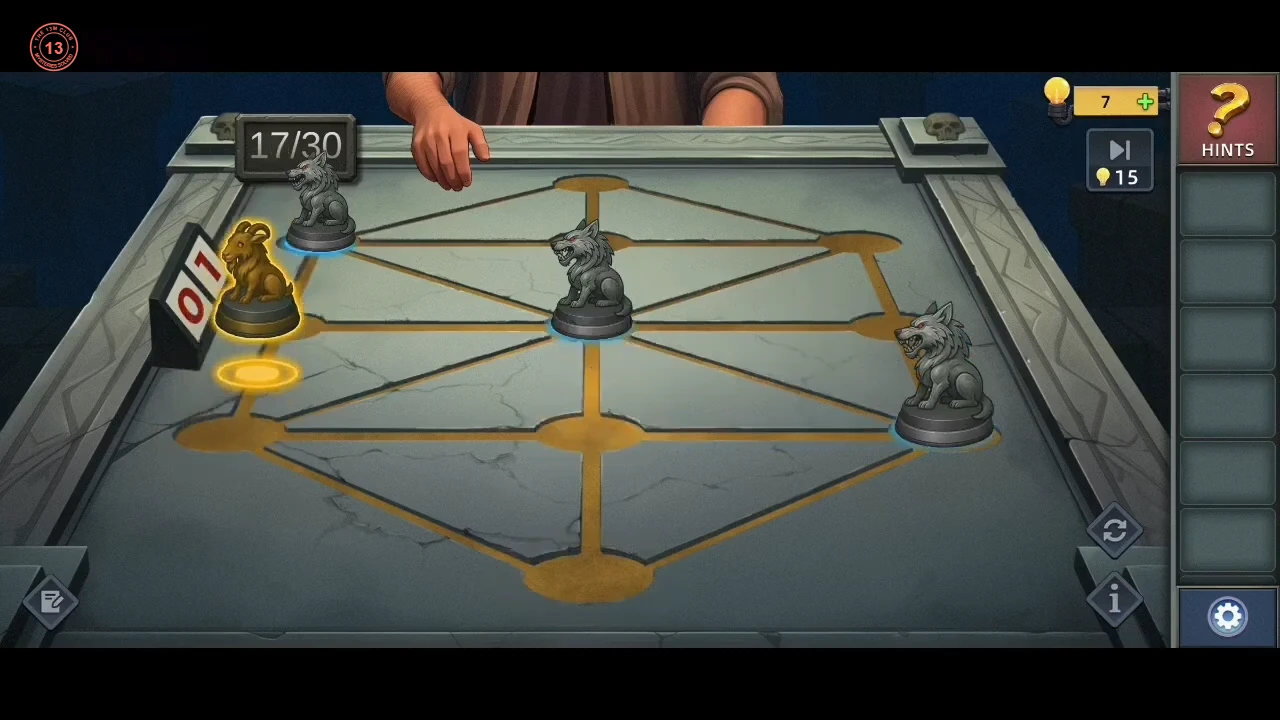
The sheep-and-wolves game against Michael, followed by the ending.
- Ethan faces Michael at a sheep-and-wolves board. The broadcast gives the rules: "The sheep and the wolf take turns. Each can move one square along the lines per turn. If the sheep gets trapped and can't move, the wolf wins. But if the sheep survives 30 turns, it wins." The winner plays as the wolves in the next round. The board has 11 points: a tip at each end, and three rows of three points between them (left side, middle, right side). The middle point of the centre row connects to all eight points around it. Each tip connects to the three points of the row beside it. Pieces only step to an empty connected point. Nothing jumps or captures, so a wolf standing in the way simply blocks that line. The counter at the top left counts every move by either side. Round 1: you are the gold sheep, starting on the near tip, with Michael's three wolves on the far tip and the two far corners. Tap the sheep to see its legal moves highlighted. Only four points have just three connections: the two tips and the middle point of each side. Those are the only places three wolves can surround you. Every other point has at least four exits, so you cannot be trapped there. Stay on the corners and centre points. Step onto a tip or side-middle point only when at most one of its three neighbours holds a wolf, because one wolf move then cannot close all three exits. Keep this up until the counter passes 30. Michael says "Count yourself lucky..." and the sides swap.
- Round 2: you move the three wolves, starting on the near tip and the two near corners. Michael's sheep starts on the far tip. Trap it before the counter reaches 30. The sheep can only be trapped on a tip (wolves on all three points of the row beside it) or on a side-middle point (wolves on the corner above it, the corner below it and the centre point). A practical plan, which won this round in 16 moves: move one wolf onto the centre point early and keep it there. From the centre it guards eight points, and the sheep cannot slip past it. Advance the other two wolves up the left and right sides, keeping them level, so the sheep is pushed into the far row. When the sheep steps onto the far tip, fill the last of the three far-row points. If it steps onto a side-middle point while your centre wolf is in place, fill the corner above and the corner below it.
- Watch the ending. The host offers "Join us or Embrace death" and Lin is brought in. Ethan reaches for the skull mask on the table; the scene then cuts to a closing montage and the credits, without showing him put it on. There is no on-screen choice; this is the only ending shown.