The Red X in the Mirror: the phone photo
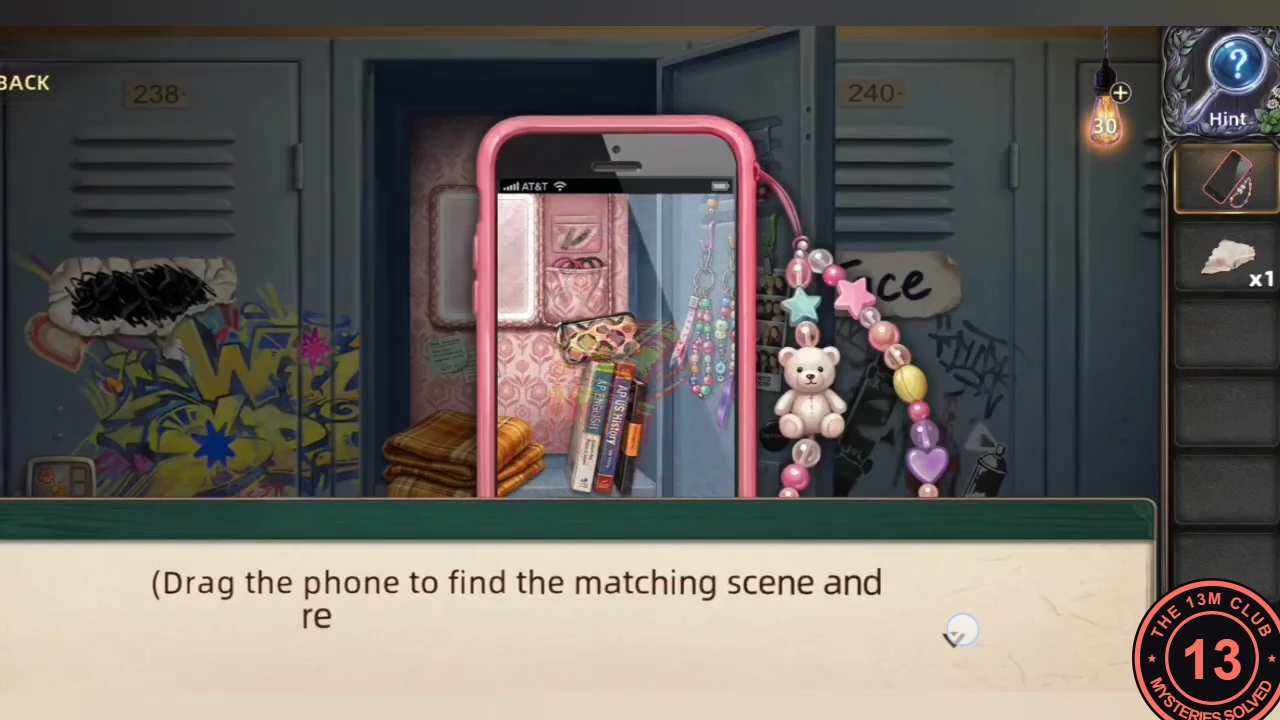
Chapter 5 opens in a rainy school corridor. Nina's phone lines up an old photo with her locker.
- Pick up Nina's Phone and the Scrap of Paper in the rainy corridor. Tap locker 239 so Nina opens it.
- Use the phone on the open locker and line up the faint photo with the scene. From Jace's backpack take Jace's Camera, the Hair Dryer and the Graffiti Sketch.
Drying the sketchbook
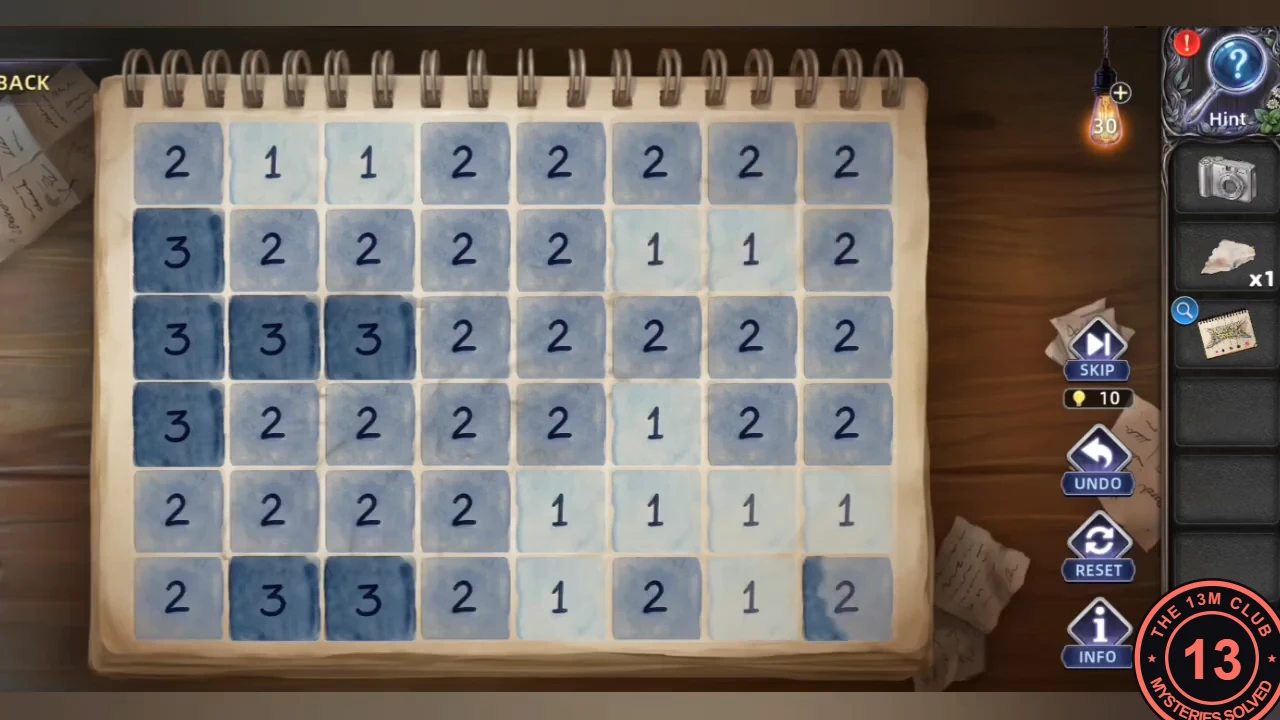
Jace's sketchbook is soaked. Dry it with the Hair Dryer without drying any tile too much.
- Use the Hair Dryer on the soaked sketchbook. The page is a grid of 6 rows and 8 columns of moisture numbers (1 to 3), and every tile must end at 0 or -1; the game warns against drying any tile further than that. Each tap blows on one tile and lowers that tile and the eight tiles around it by 1 (fewer at the edges). The starting page was the same in two playthroughs, and this set of 16 single taps (the order does not matter) dries it exactly. Counting rows from the top and columns from the left, tap: row 1 column 7; row 2 columns 1, 2, 4, 5, 7 and 8; row 3 column 2; nothing in row 4; row 5 columns 1, 2, 4, 5, 7 and 8; row 6 columns 3 and 8. The dried page shows a flower vine.
The art-supplies locker flower lock
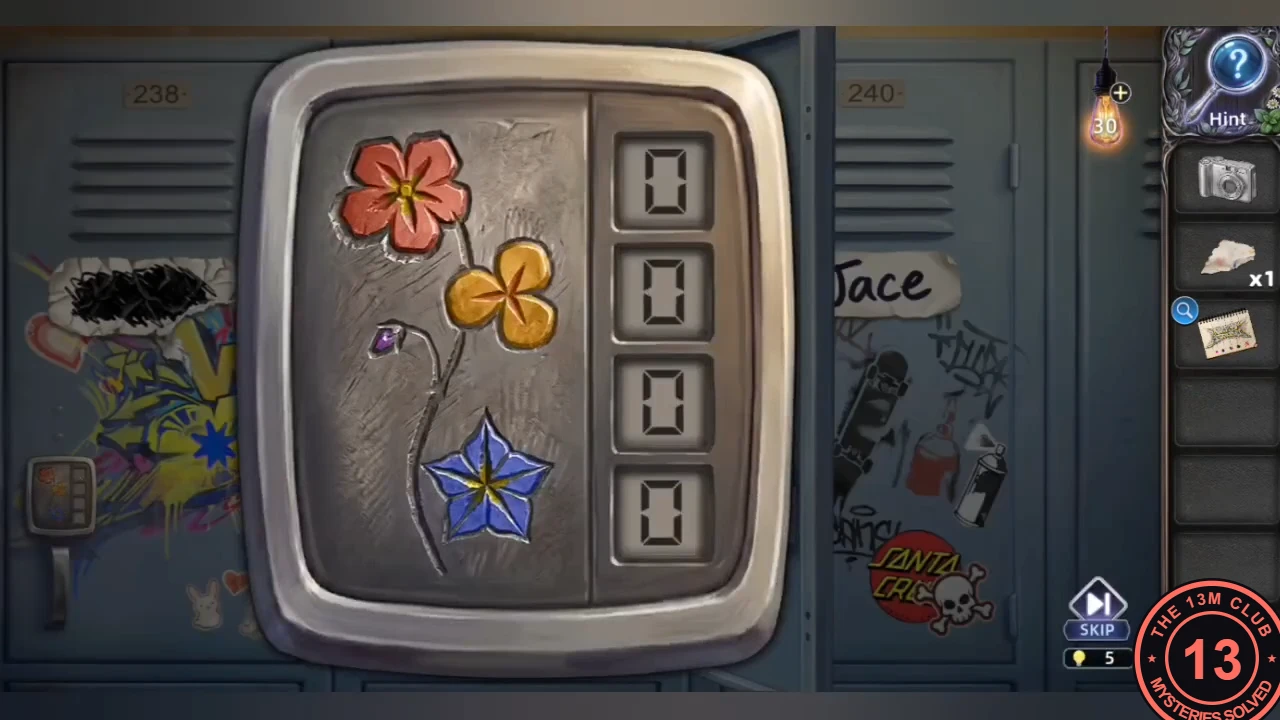
The dried picture gives the flower counts for the art-supplies locker lock.
- Enter 4 3 2 4 on the flower lock of the left locker, the one full of art supplies (red, orange, purple, blue flowers).CODE4324
The camera memory and the hidden drawer
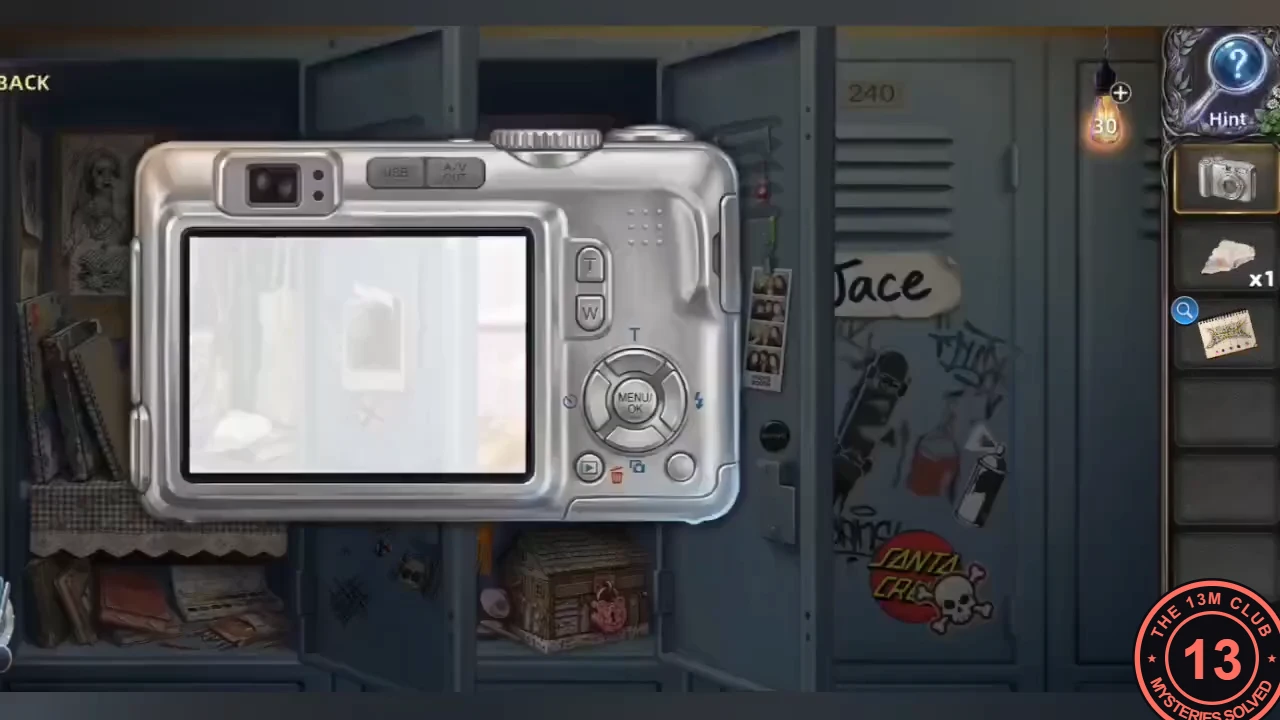
Jace's Camera reveals a memory at the art-supplies locker, and its hidden drawer holds the torn drawing.
- Use Jace's Camera on the open art-supplies locker and move it until the faint old photo lines up with the locker. A memory plays: Nina and Jace talk by the lockers and a hooded figure in a yellow raincoat appears. Then open the drawer in the locker, a hidden compartment: take the Instant Camera with Dead Battery and the Coin, and place the Scrap of Paper from the corridor on the torn drawing in the drawer ("Some pieces are missing").
Jace's graffiti keypad
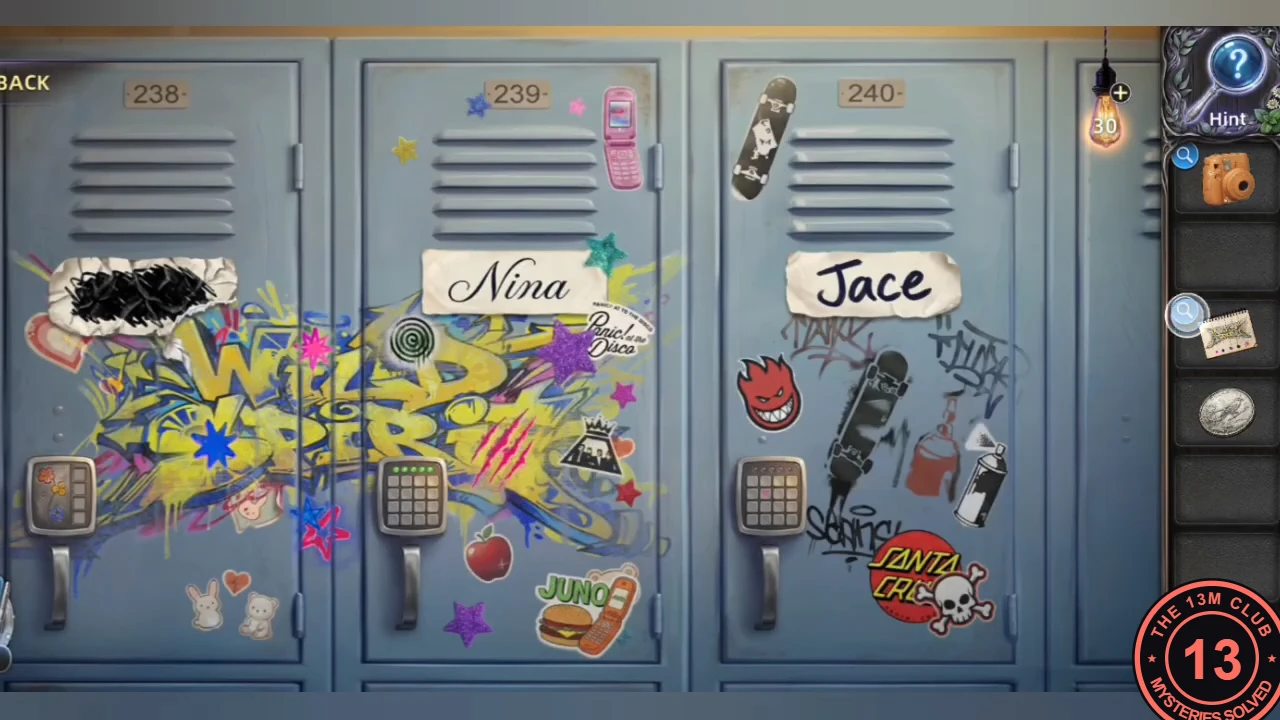
Jace's Graffiti Sketch shows which cells of his locker keypad to press.
- Press Jace's keypad in the order shown on the Graffiti Sketch. Counting rows from the top and columns from the left, press 2-2, 3-1, 4-2, 2-3, then 3-4 (row-column). When Jace's locker opens, take Jace's Game Console from its shelf and the Scrap of Paper that appears.
The torn drawing and the instant camera
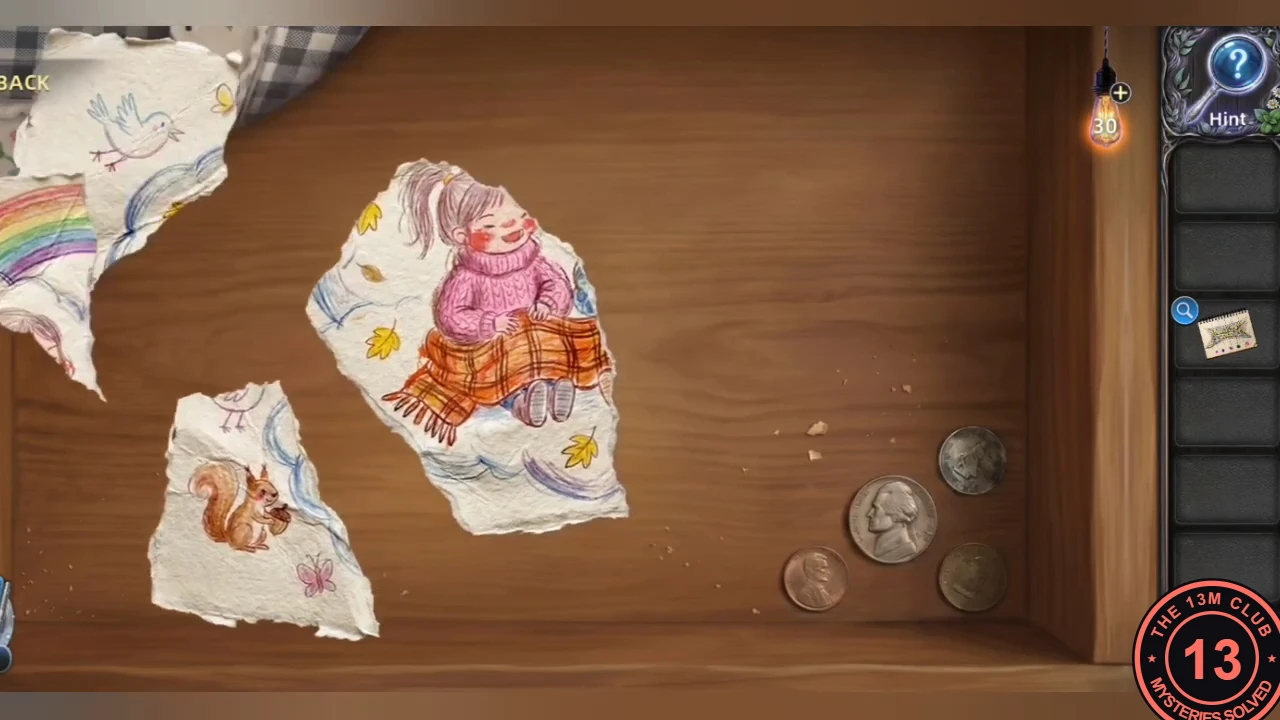
Rebuild the torn drawing and photograph it with the Instant Camera to end the dream.
- Go back to the drawer in the art-supplies locker and add the new Scrap of Paper to the torn drawing. Use the Coin on the screw of Jace's Game Console to open its back and take the Battery, then put the Battery into the Instant Camera with Dead Battery to get Ruth's Instant Camera. Finally take the crumpled Scrap of Paper lying on the books on the middle shelf of the art-supplies locker and add it to the drawing: "It's complete..."
- Photograph the drawing and line it up. Take the Key from the hidden drawer in the art-supplies locker on the left and use it on the pink box in Nina's locker: it holds a Half-Finished Painting. Go back to the art-supplies drawer and take the Instant Photo lying there.
- Join the Instant Photo with the torn drawing, then tap through the memories. Nina wakes in the office.
After the Tide Recedes: the night beach
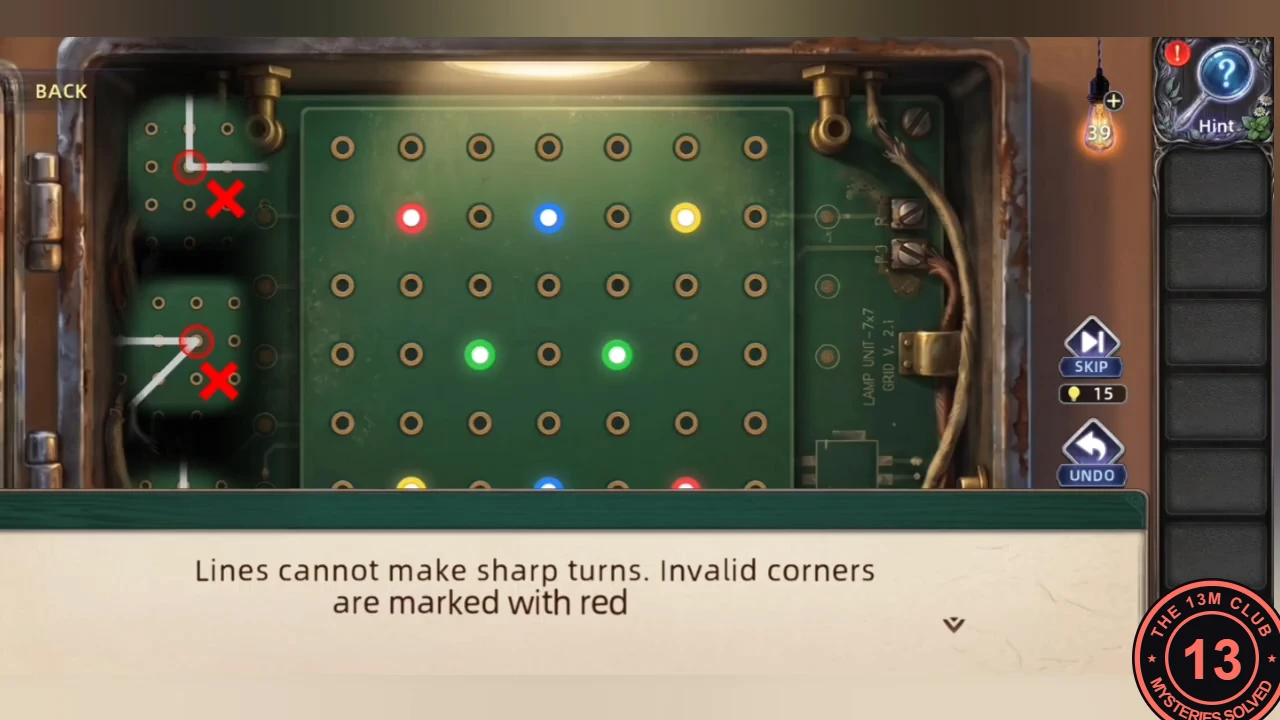
The chapter card may first download content; stay connected.
- Open the lamp-post circuit box. Drag to join each pair of dots of the same colour, and tap a wire to remove it. Wires can run straight or diagonally, but each bend can only be 45 degrees; a right-angle or sharper bend is invalid and is marked in red, as the guide panel at the left shows. The board is 7 x 7 holes; count rows from the top and columns from the left. Red dots are at row 2 column 2 and row 6 column 6, blue at row 2 column 4 and row 6 column 4, yellow at row 2 column 6 and row 6 column 2, and green at row 4 columns 3 and 5. The wiring the game accepted: Yellow: from row 6 column 2, go diagonally down to row 7 column 3, along row 7 to column 6, diagonally up to row 6 column 7, up column 7 to row 3, then diagonally to row 2 column 6. Red: from row 2 column 2, go diagonally to row 3 column 3, along row 3 to column 5, diagonally to row 4 column 6, then down column 6 to row 6. Green: straight along row 4. Blue: from row 2 column 4, go diagonally up to row 1 column 3, left to column 2, diagonally down to row 2 column 1, down column 1 to row 4, diagonally down through row 5 column 2 to row 6 column 3, then right to row 6 column 4. The lamp lights and Paul sits down on the bench.
- Put the Glass Shard into the cracked mirror, then take the Umbrella from the vanity and give it to Paul.
Ruth's home: the fridge door colour lock
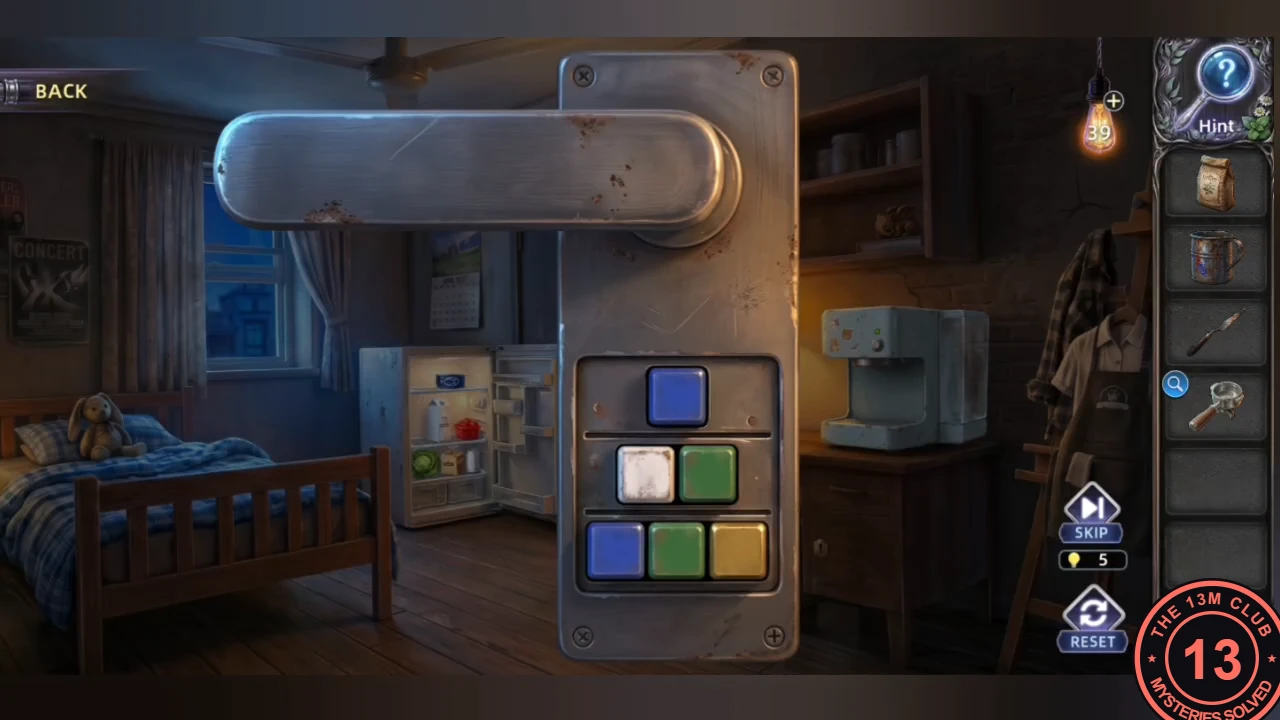
At Ruth's home, find the coffee ingredients. The fridge door handle has a colour lock.
- At Ruth's home take the Broom standing beside the fridge. Use it under the bed to pull out the Brush-Rinsing Bucket and the Scraper, and take both. Take the empty Filter Basket out of the coffee machine on the desk. Then knock the Coffee Beans off the high shelf with the Broom.
- Copy the fridge layout onto the door-handle colour lock: blue / white, red / green, yellow, white.
The second circuit box
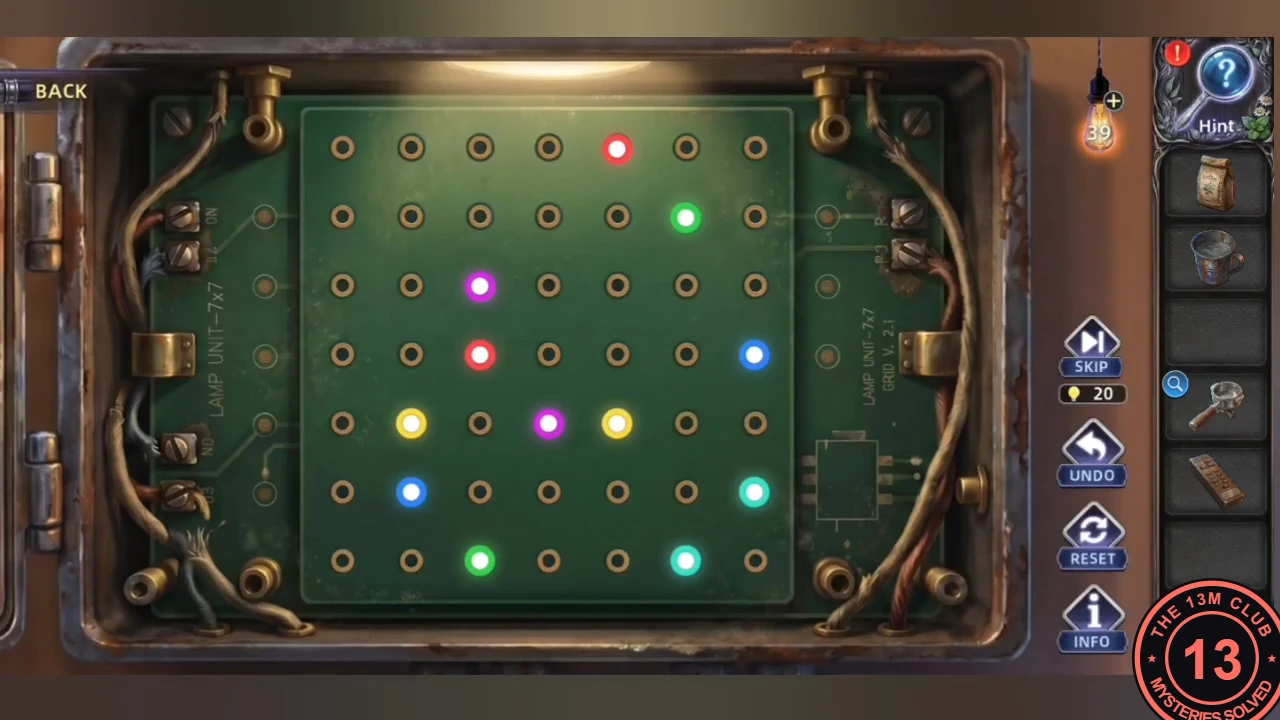
The back room cabinet holds a Key and the Remote Control, and the Key opens a second circuit box that powers the TV.
- Fill the bucket at the sink. Pry open the lower cabinet with the Scraper and take the Key and the Remote Control. Use the Key on the grey box on the wall by the window to open the second circuit box. The rules are the same as at the lamp post (join same-coloured pairs; straight, diagonal and 45-degree bends only) on another 7 x 7 board. Count rows from the top and columns from the left. Accepted wiring: Green: from row 2 column 6, go left to column 5, diagonally up to row 1 column 4, along row 1 to column 2, diagonally down to row 2 column 1, down column 1 to row 6, diagonally down to row 7 column 2, then right to the green dot at row 7 column 3. Red: from row 1 column 5, go right to column 6, diagonally down to row 2 column 7, down to row 3, diagonally down to row 4 column 6, down to row 5, diagonally down to row 6 column 5, left to column 4, diagonally up to row 5 column 3, then up to the red dot at row 4 column 3. Purple: from row 3 column 3, go diagonally to row 4 column 4, then down to row 5 column 4. Yellow: from row 5 column 2, go up column 2 to row 3, diagonally up to row 2 column 3, right to column 4, diagonally down to row 3 column 5, then down to row 5 column 5. Blue: from row 6 column 2, go right to column 3, diagonally down to row 7 column 4, right to column 5, diagonally up through row 6 column 6 to row 5 column 7, then up to row 4 column 7. Light blue: diagonally from row 7 column 6 to row 6 column 7. The TV switches on.
The book shelf
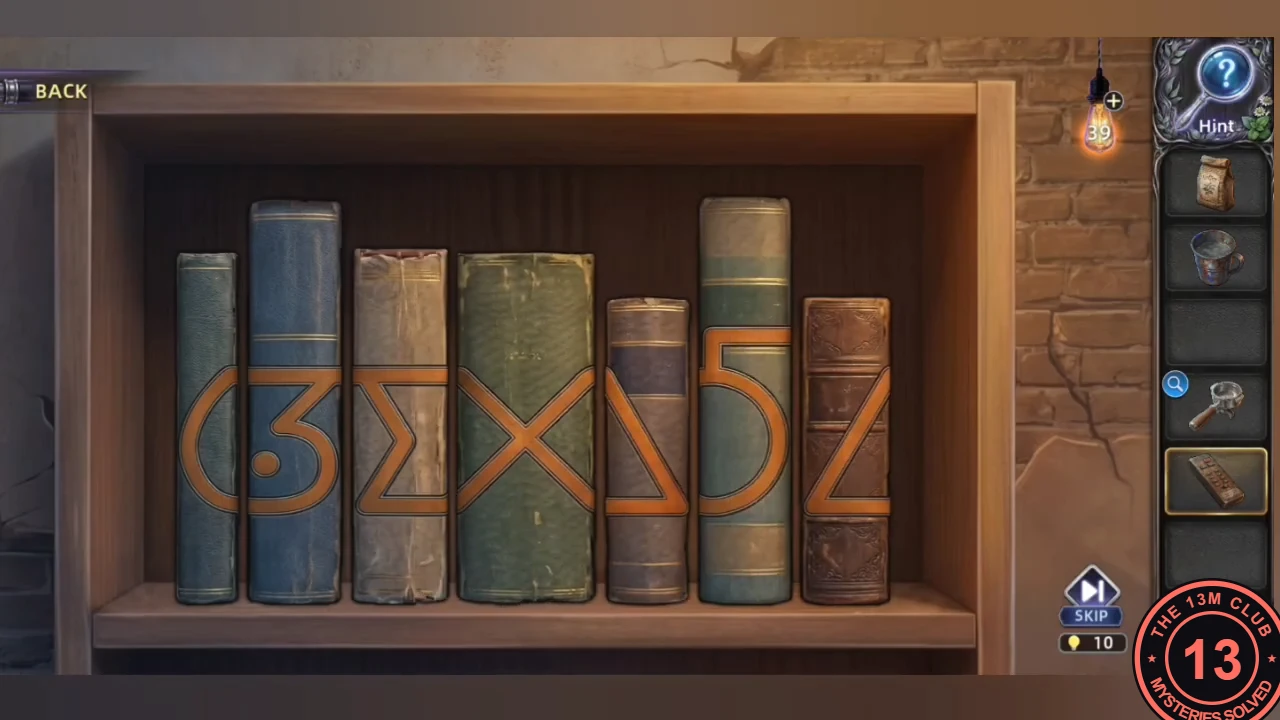
Join the orange halves on the book spines to open the shelf.
- Drag the books so the orange halves join: C, 3, Σ, X, 5, Δ. Take the Key and coffee recipe card.
A ridiculously good cup of coffee: the grinder
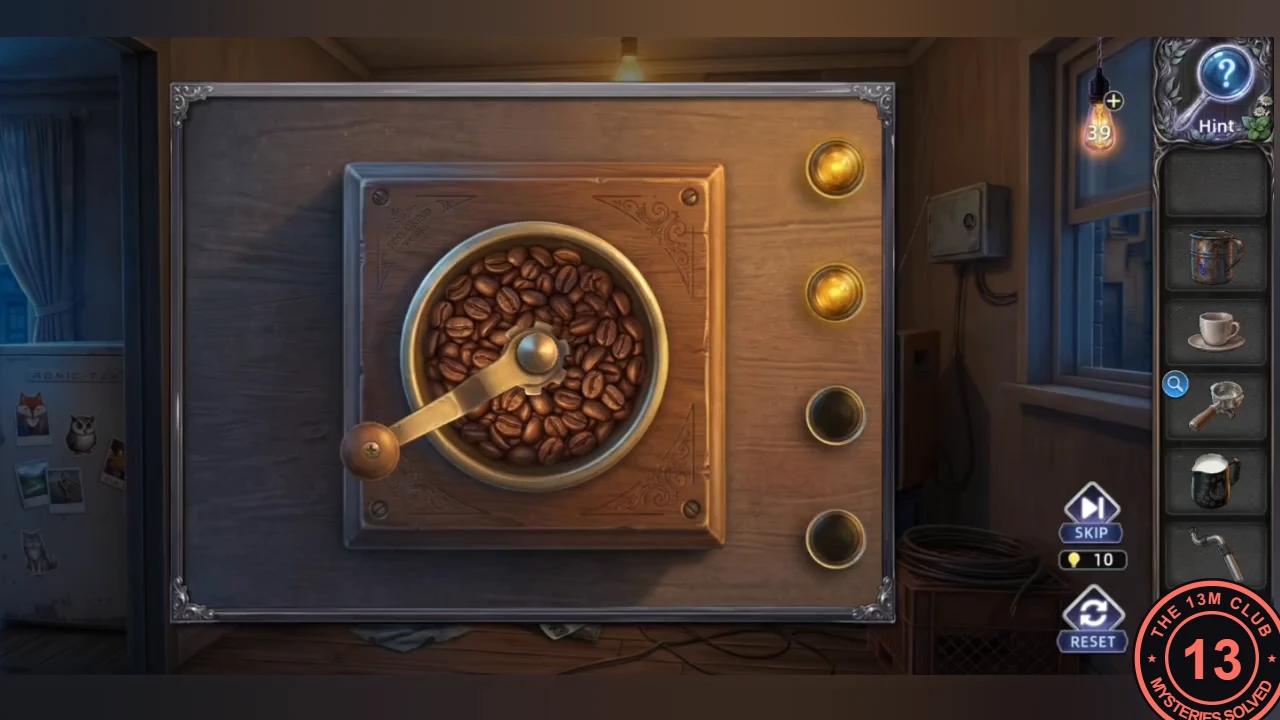
Make the ridiculously good cup of coffee: prepare the machine, the milk and the ground coffee.
- Take the Empty Milk Pitcher. Water the window plant with the bucket to reveal a dirty metal part and wash it at the sink: Clean Steam Nozzle.
- Fill the pitcher at the sink and pour it into the machine's water tank. Fill it with fridge milk. Open the desk cabinet with the Key for the Coffee Cup.
- Load the beans into the grinder and turn the crank to the recipe numbers 1–4 in order. The Ground Coffee drops into the grinder's wooden drawer: take it and combine it with the empty Filter Basket from the coffee machine to get a Filter Basket Filled with Ground Coffee, then fit it with the cup.
Latte art
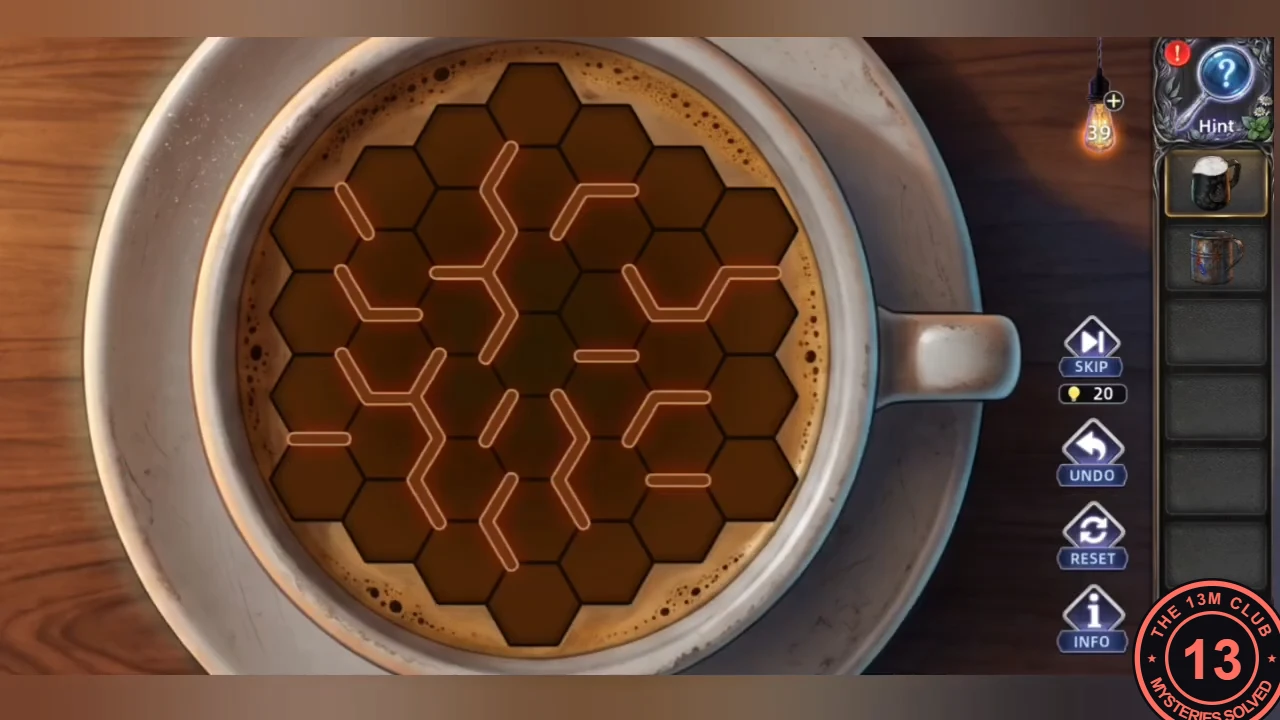
Froth the milk and draw the latte art in one stroke.
- Fit the steam nozzle and froth the milk, then draw the latte art in one stroke along the grooves through every hex. Ruth drinks the coffee.