Letter From Hell: the burning container
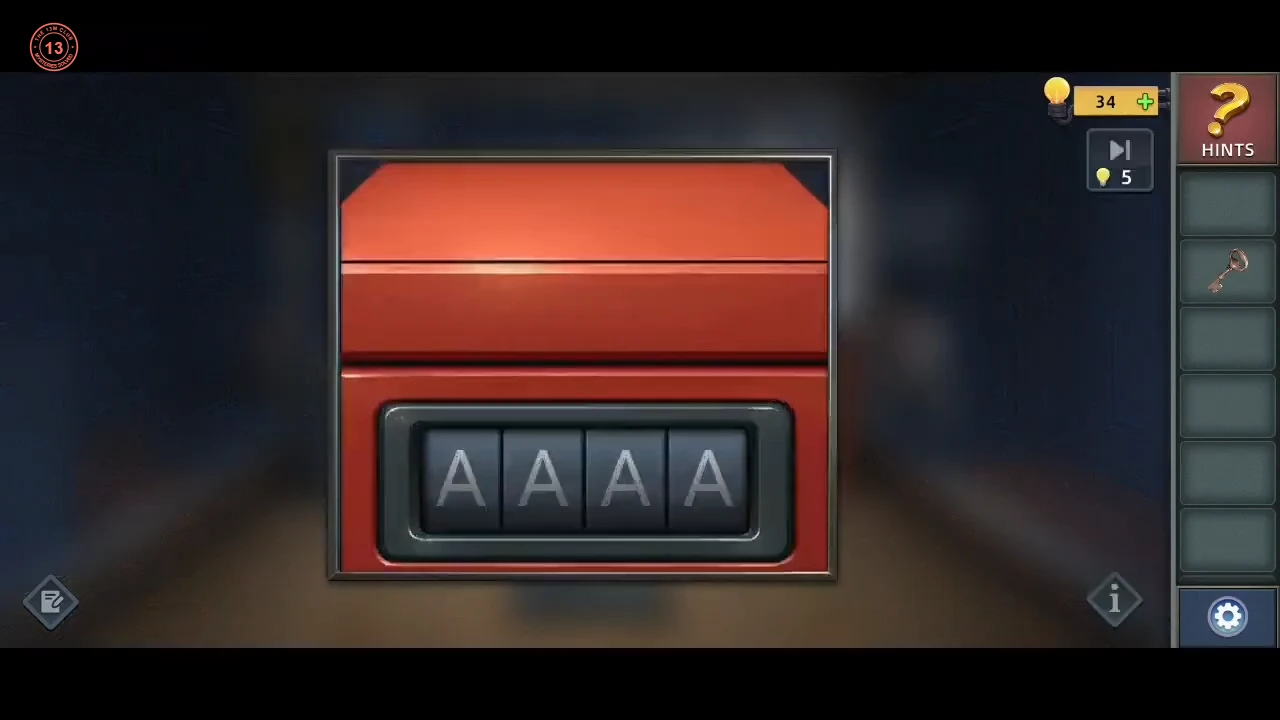
Last Chance is the death-game story in the collection menu. Ethan Carter, buried in debt, accepts an invitation to a game on an island. Its five chapters unlock in order. Picked-up items are named at the top of the screen.
- In Ethan's flat, turn on the lamp and pick up the letters under the door. Open the desk drawer and take the Letter Opener (the tutorial asks you to get it). At the desk, use the Letter Opener on the black envelope to get the invitation and a photo of the container yard.
- In the dark container, accept the bracelet from the pedestal box. In the burning room, take the Fire Extinguisher. Inspect it in the inventory and pull the pin to get the Strange Key and a usable extinguisher, then spray the burning barrel.
- Enter EUTA on the red box's letter lock and take the Button.CODEEUTA
The lake-picture sliding puzzle
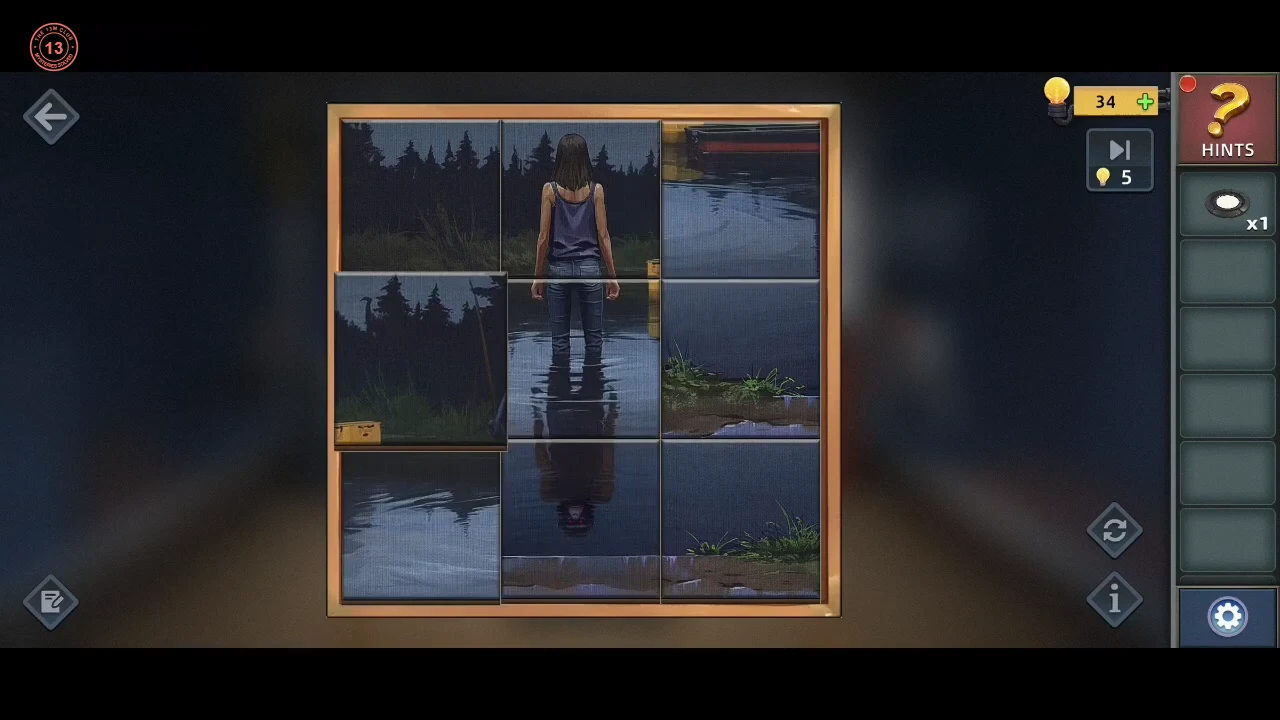
The safe handle is a trick, but it opens the small cabinet with the missing tile of a sliding picture.
- Put the Strange Key in the safe handle. The handle comes off ("Playing a trick on me!"). Use the Handle on the small left cabinet to get the Puzzle Piece.
- Insert the piece into the 3x3 sliding picture of a girl at a lake and slide the tiles until the picture is complete. Take the Card.
The card shapes and the safe dial
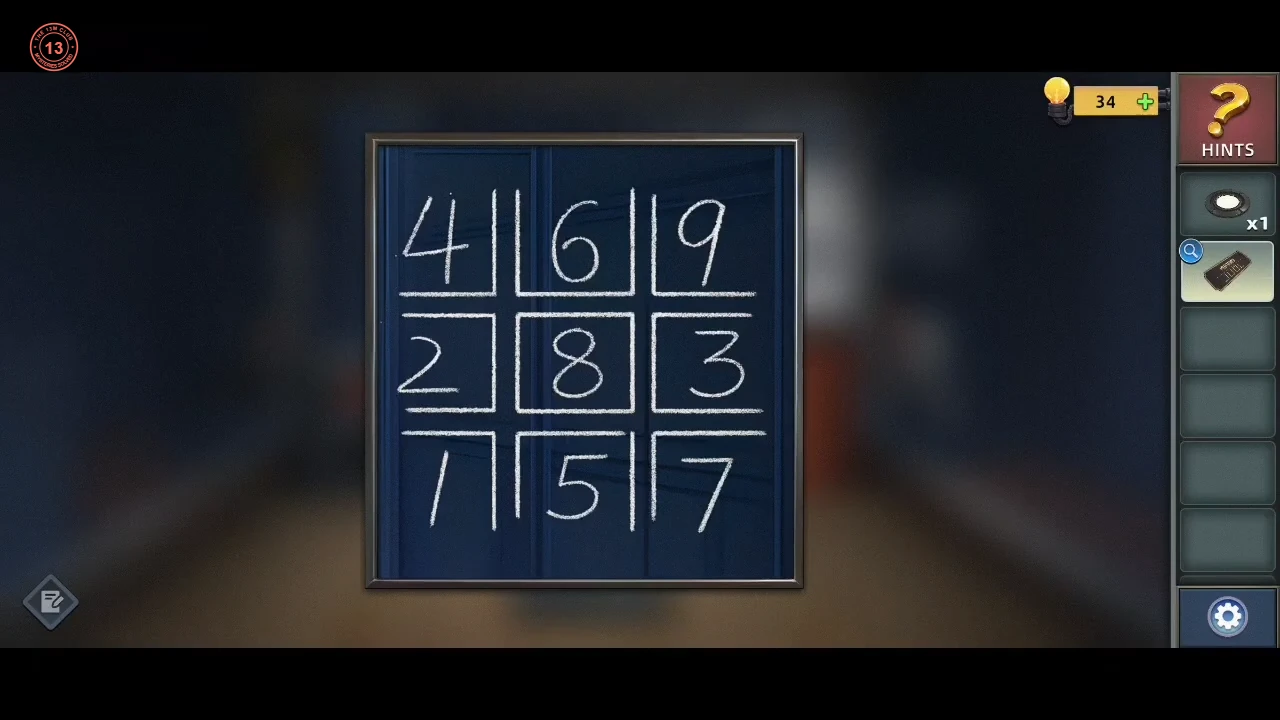
The Card from the sliding picture and the number grid on the container wall give the safe combination.
- The Card shows four grid-corner shapes. Match each shape to a cell of the tic-tac-toe number grid on the wall (4 6 9 / 2 8 3 / 1 5 7): they give 4, 6, 8 and 9. Turn the safe dial to 4, 6, 8, 9 and take the second Button.CODE4 6 8 9
The 12-button ring
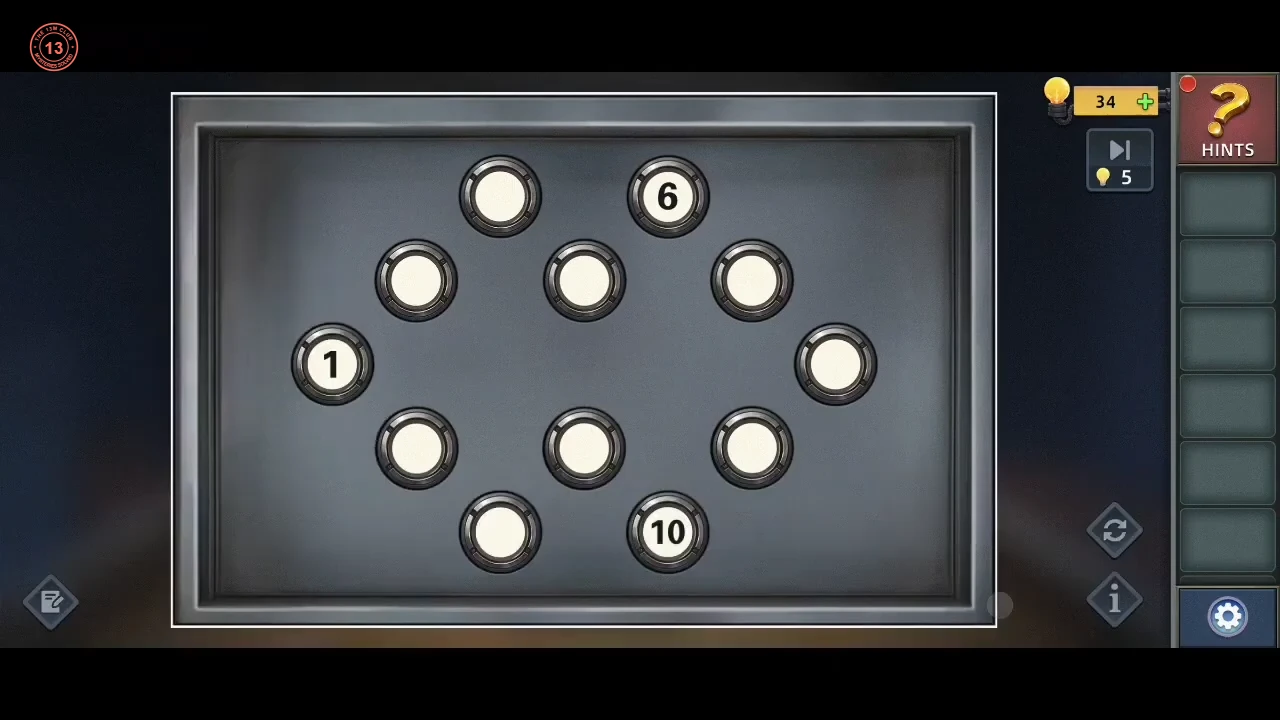
Both Buttons go into the pedestal ring to finish the first round.
- Put both Buttons in the two dark sockets of the pedestal's 12-button ring. Buttons 1, 6 and 10 already carry their numbers, but they must be tapped in their turn too. Each tap lights a button green; a blank button takes the next number (2, then 3, and so on). Ethan says he has to light them all up. The accepted arrangement, row by row from the top: 5 6 / 3 4 7 / 1 … 12 / 2 8 11 / 9 10. Full tap order: 1 (far left, numbered), 2 lower left, 3 upper left, 4 inner top, 5 top left, 6 (top right, numbered), 7 upper right, 8 inner bottom, 9 bottom left, 10 (bottom right, numbered), 11 lower right, 12 far right.CODE1, 2, 3, 4, 5, 6, 7, 8, 9, 10, 11, 12
Chips For Life: the shooting gallery
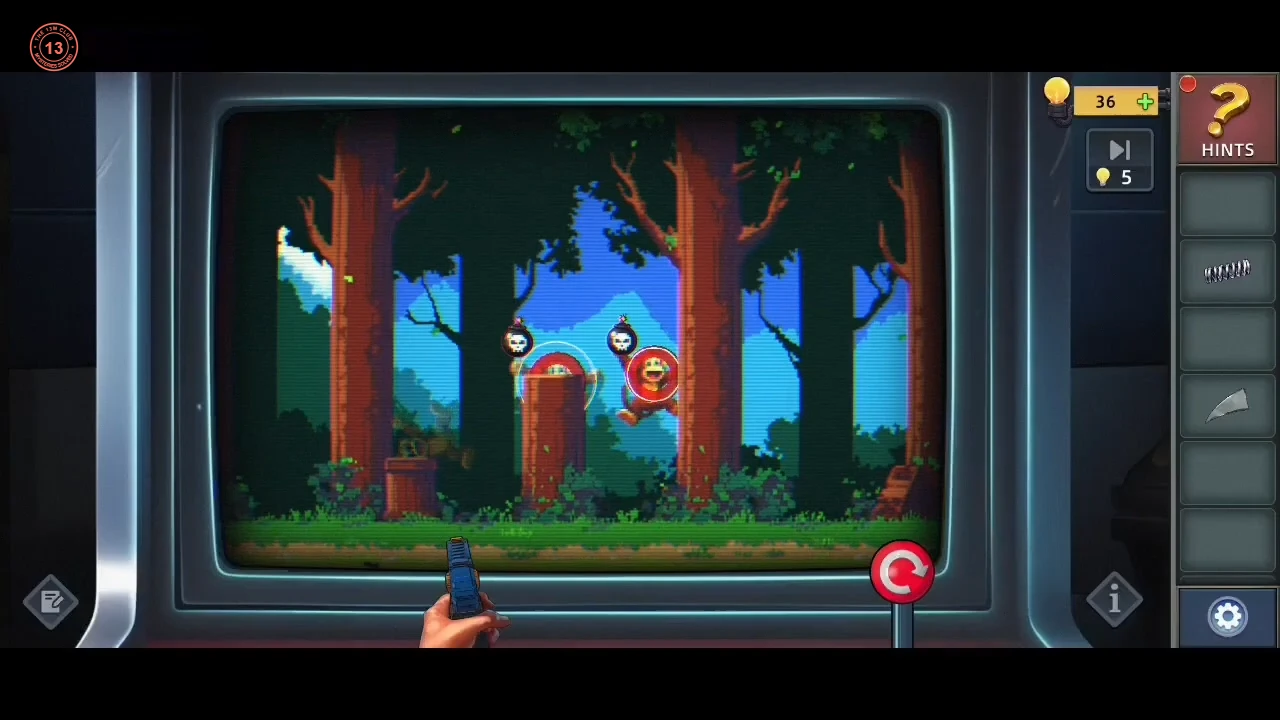
Chapter 2 opens in the Death Game hall, where every player starts with 2 coins. Collect tools around the hall, then win coins at the shooting gallery.
- The Masked Man's opening broadcast gives every player 2 starting coins, so you now hold 2 Coins. The other arcades are full except the Battle cabinet on the right: tap it and Ethan spends a coin on a skeleton game he cannot win (story event, 1 coin left). A brute, the Vicious Man, then smashes the BOXER machine. Take the Spring and the Gloves that fall onto the floor in front of it. Use the Gloves on the cracked glass display case at the far left to break it. Take the Toy gun from inside, then pick up the Piece of glass from the floor below the case.
- Put the Toy gun on the Monkey Killer cabinet (between the BOXER and Battle machines) and insert your last Coin. Ethan reminds himself that this is his only coin. Tap each monkey when the white circle is inside the red area; hit every monkey to clear the level.
The racing leaderboard and the ADMIN keypad
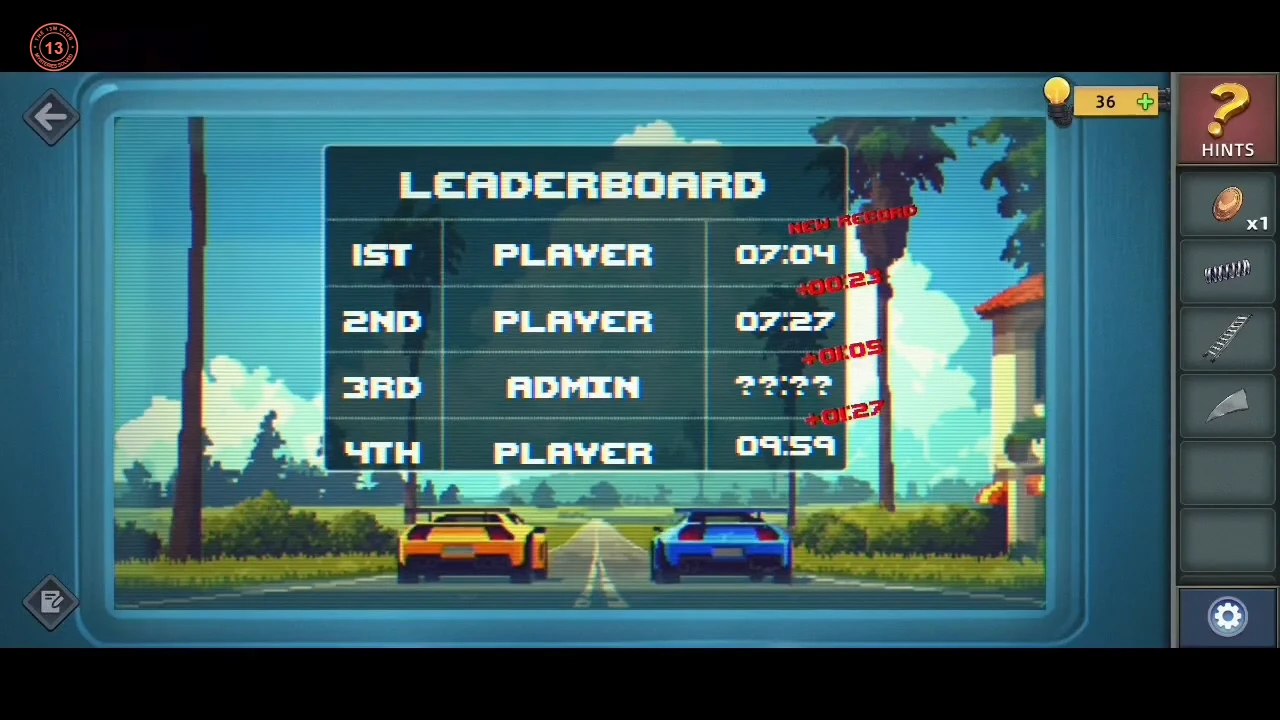
Lin joins you. The racing leaderboard gives the ADMIN code for the tool room.
- Lin, the young girl, offers to work with you. In the game room, pick up the Ladder lying on the floor at the lower left, beside the ENJOY cabinet. At the racing cabinet, read the leaderboard: 4th place 09:59 and ADMIN is "+01:27" ahead of it, so ADMIN's time is 08:32. The red "+01:05" below 2nd place (07:27) gives the same result. Enter 0832 on the ADMIN keypad to open the tool room.CODE0832
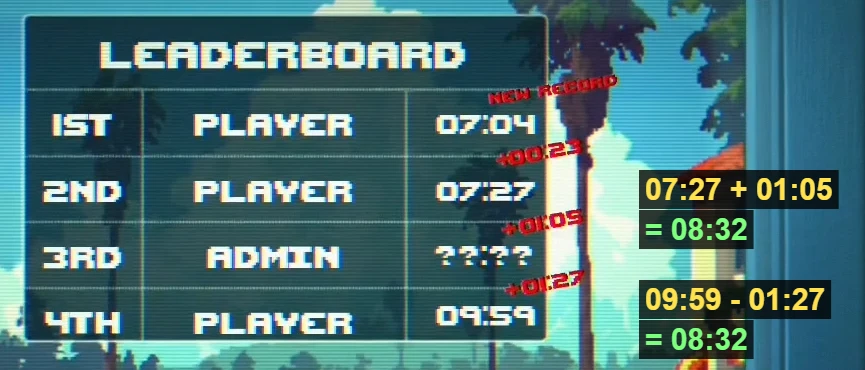
Both red gaps around ADMIN give the same time: 08:32.
The tool-room colour wall box
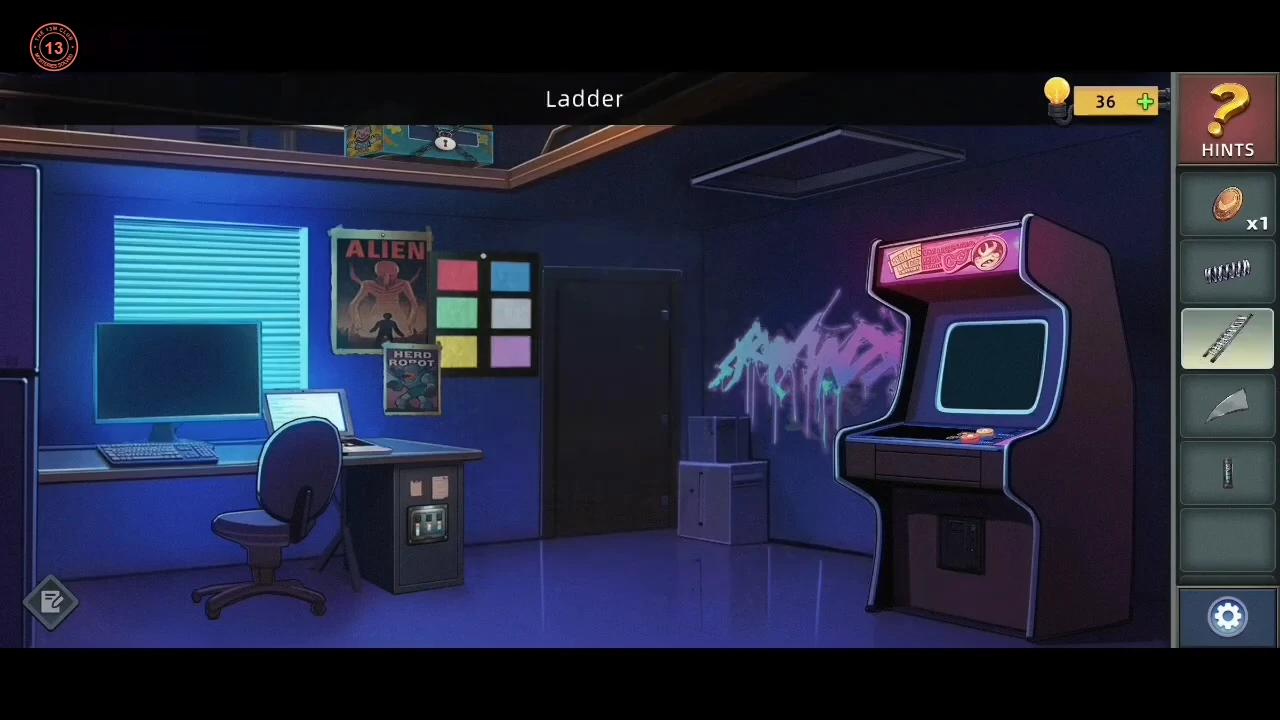
In the tool room, get the Battery and the Allen bit, then crack the three-letter lock on the small cabinet under the computer desk. Its clue is the six-colour grid on the wall beside the ALIEN poster.
- Tap the robot vacuum several times until it gives the Battery (it is sturdy and needs a few hits). Stand the Ladder you found in the game room under the overhead shelf, between the graffiti and the arcade cabinet. Examine the Spring in your inventory and straighten it out to get a Wire. Use the Wire on the lock of the toy box on the overhead shelf: a jack-in-the-box springs out and you get the Allen bit.
- The lock is the small cabinet under the computer desk. Each of its three letter displays has a column of colour stripes beneath it. That is the input. The clue is the 2x3 colour grid on the wall beside the ALIEN poster: trace each column's colours in order, top to bottom, across that grid, and the path draws a letter. Set the displays to R, U, N. The desk cabinet opens: take the Power drill.CODERUN
The Bomber Duo machine
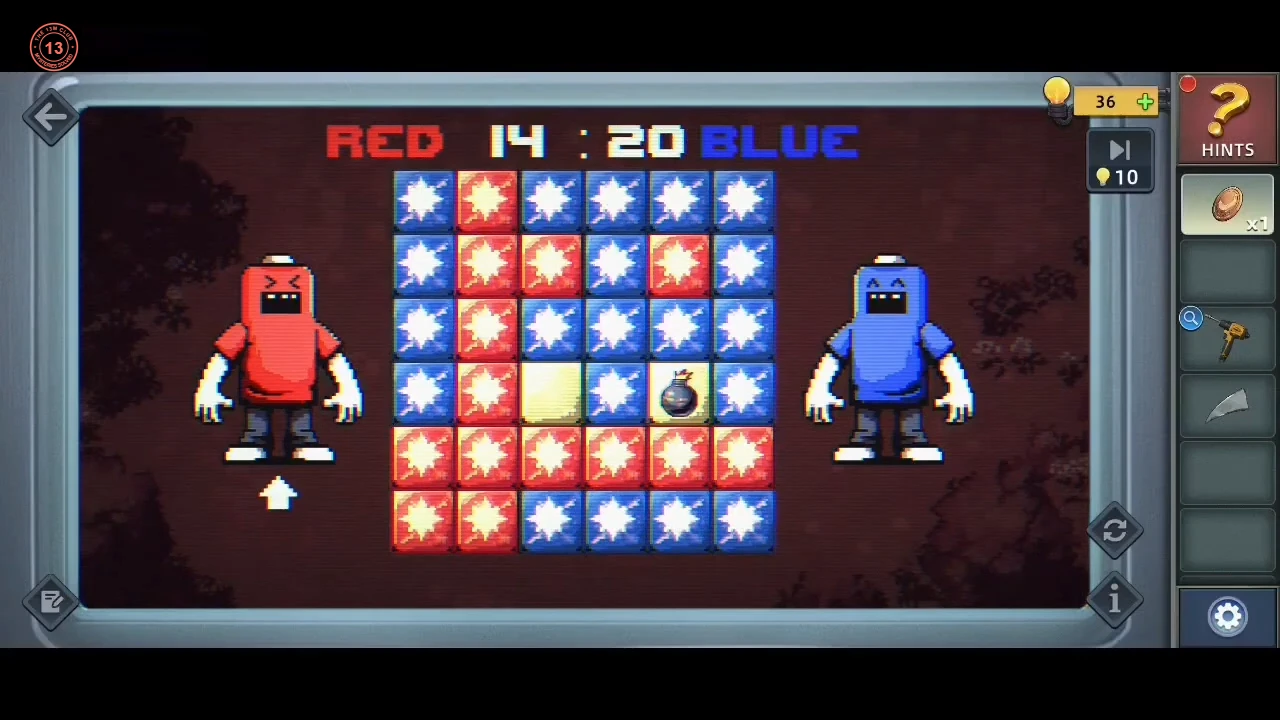
Repair the Bomber Duo machine with the drill and wire, then play both sides to a draw.
- You still hold the Wire you made from the Spring in the tool room. Inspect the Power drill, insert the Battery into its handle and fit the Allen bit. At the Bomber Duo co-op machine, unscrew the four screws of the vent panel with the drill. Inside, one cable is broken; use the Wire on the break to join it. Insert a Coin and play. Lin explains: "Red and Blue take turns planting bombs. Whoever scores higher gets the coins. If it's a tie, both of us still get a winner's reward." So the aim is a tie, not a win. You plant for both sides: an arrow shows whose turn it is, and you tap a tile to drop that side's bomb. Each bomb colours its whole row and column in that side's colour, and the score counts tiles of each colour. Choose each bomb's tile so that neither colour pulls ahead, and check the score after every bomb. The board has 36 tiles, so the target is 18 : 18. A round that ends with one side ahead is lost, and you simply play again. The tie gives the Coin.CODE18 : 18 tie
The claw machine and the monster cabinet
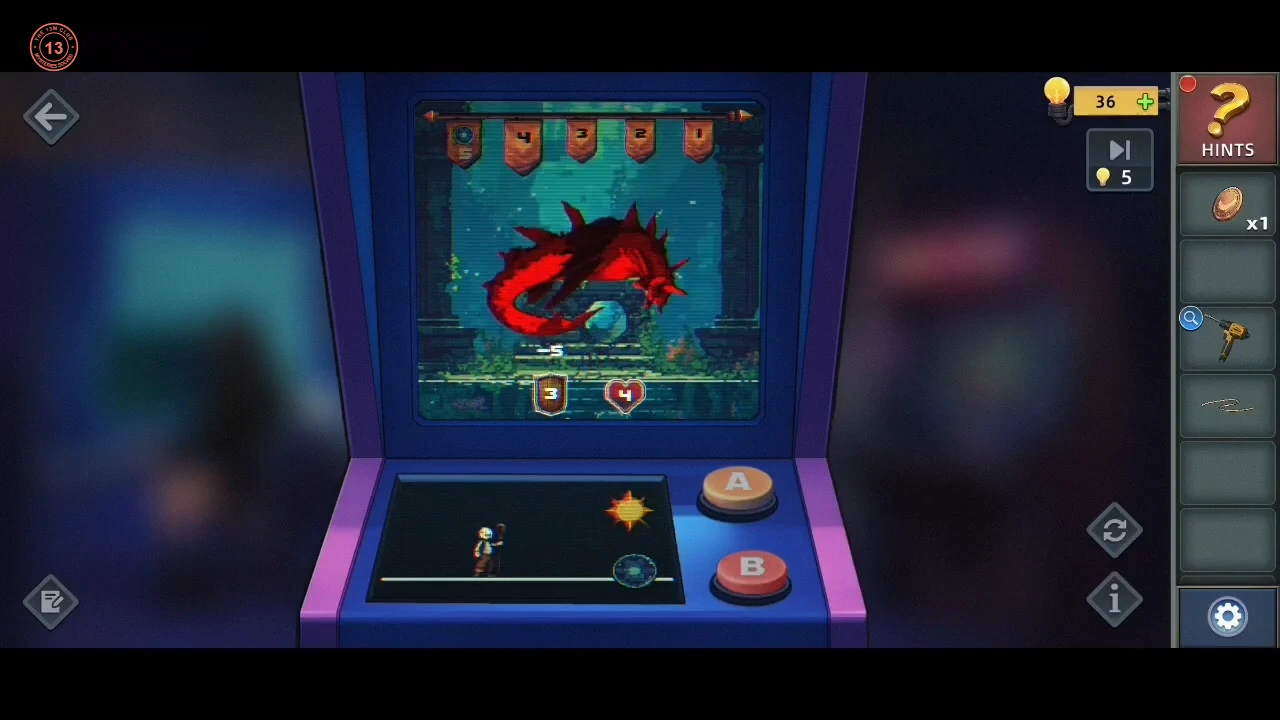
Win the Bear doll from the claw machine, then beat the rigged monster cabinet that Lin loads.
- Spend a coin on the claw machine for the Bear doll. Inspect the Bear doll in the inventory, cut it open with the Piece of glass and take the String from inside. Lin hacks the tool-room computer and loads the monster cabinet ("Choose the right attack to kill the dragon"). The five banners at the top show the damage of your next five attacks, used from left to right. Under the monster, the left badge is its shield and the right badge its heart. Button A and button B each fire the weapon pictured beside it, and one weapon wears down the shield while the other strikes the heart. The monster, its numbers and the two weapons were different in the two playthroughs checked, so read your own cabinet. In both winning games checked, the shield was brought down to exactly 0 first and the last hit then took the heart to exactly 0. Runs that ended with the shield above 0, or with a badge pushed below 0, failed and offered "Continue?", which simply restarts the fight. Before each press, add up the remaining banners and decide which badge each one should go to. Example 1 (purple dragon, shield 4, heart 5, banners 2 2 2 1 2; A = sword, B = bow): A, A takes the shield 4 to 2 to 0, then B, B, B takes the heart 5 to 3 to 2 to 0. Example 2 (sea serpent, shield 8, heart 4, banners 5 4 3 2 1; A = sun, B = blue disc): B takes the shield to 3, A only takes the heart from 4 to 3 because the remaining shield soaks up the rest, B takes the shield to 0, then A, A takes the heart to 1 and 0. When the monster dies, take the Auger bit.
The rigged bullet-hell cabinet
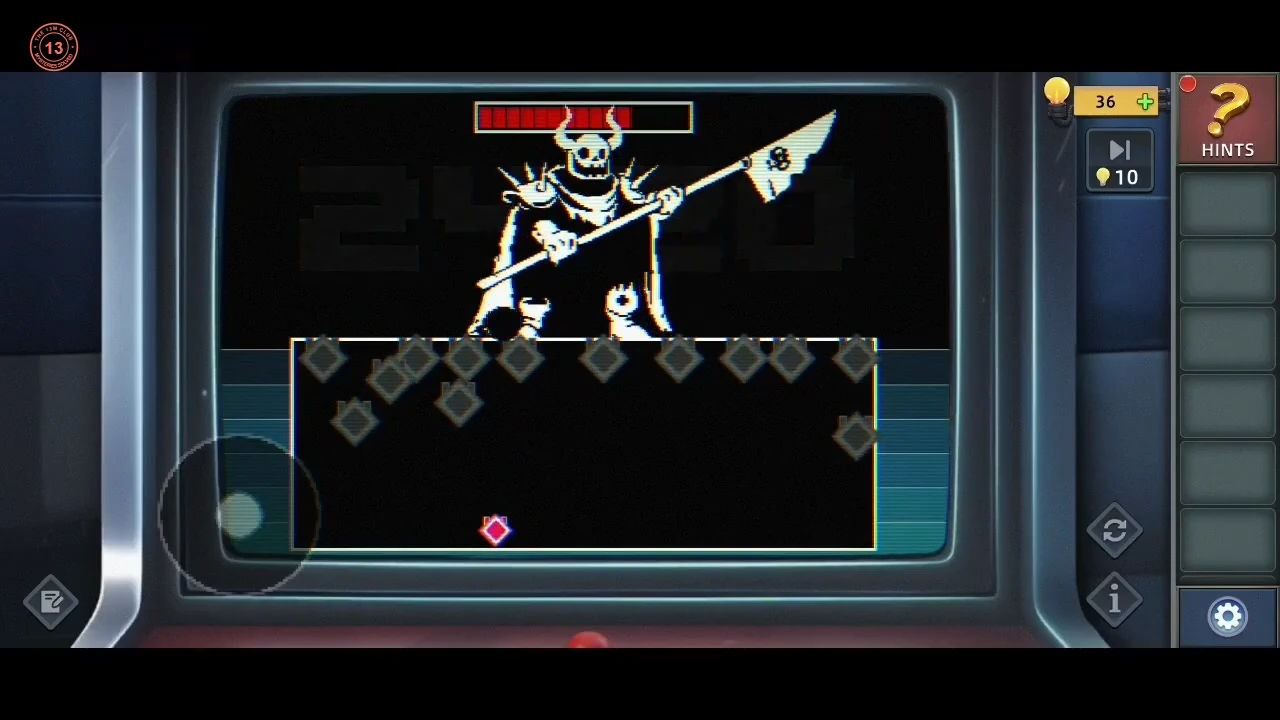
Make a coin on a wire so the bullet-hell cabinet gives unlimited retries.
- Inspect the Power drill and swap its Allen bit for the Auger bit, then show the drill to Lin. Her plan needs a Coin, the drill with the bit loaded and the String: hand all three over and she drills the coin and ties the string to it, giving you the Wire hanging coin, which can be pulled back out of a machine.
- Feed the wire coin into the bullet-hell cabinet. It returns after every GAME OVER, so you can retry for free. Drag the joystick to move the heart and survive until the skeleton's bar empties. The fight is rigged, but each time the heart dies it leaves a grey diamond mark in the arena that stays there in later attempts, and the marks block the skeleton's spears and skulls (Ethan: "Look! The mark left behind after my death can…"). Use your deaths to build a row of marks across the arena between the skeleton and the heart (in the recording the marks ended up in a row near the top of the box), then keep the heart below that wall while the bar drains. A treasure chest of coins follows the win.