CHAPTER 7
The Man Behind the Wall: dream entry
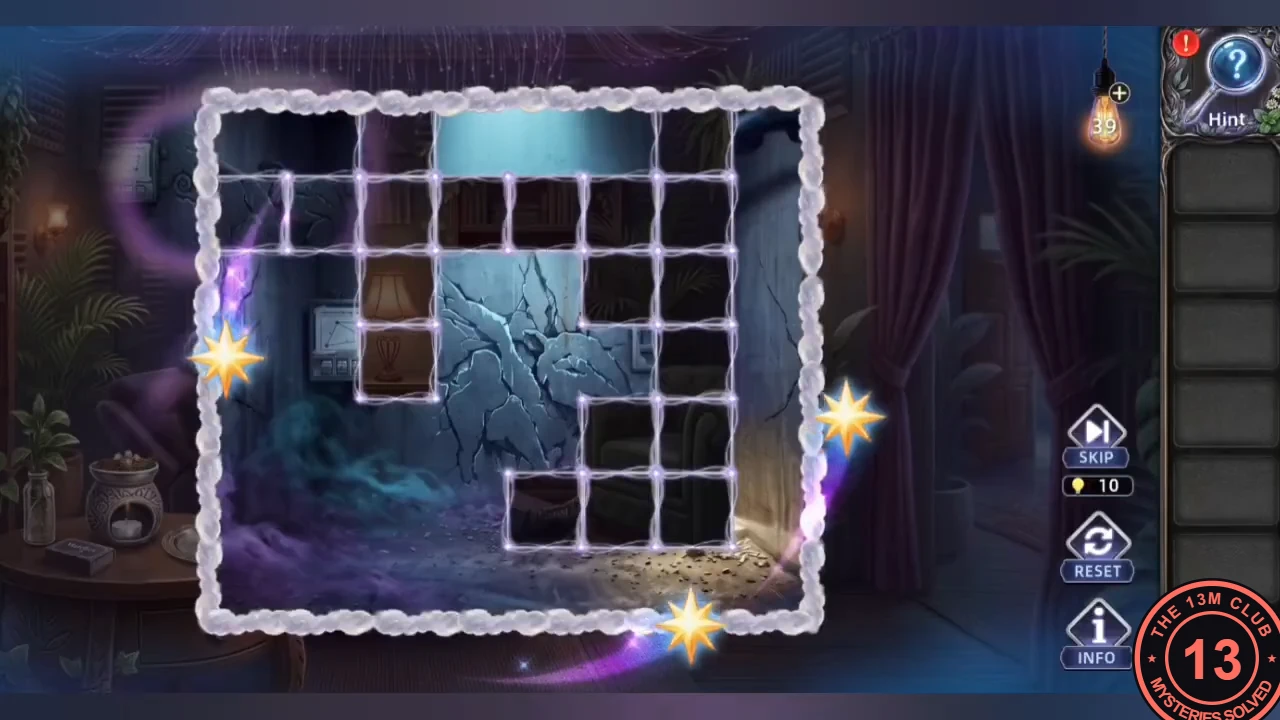
Carl Byrne, a property developer, is the overly cooperative patient. Open his dream with an 8 x 7 light grid.
- Start Chapter 7. Carl Byrne, a property developer, is the overly cooperative patient. Open his dream from the treatment room.
- Solve the dream-entry light grid. Tapping a dark tile lights it, and the light runs along its row and column in all four directions until it reaches a tile that is already lit or the edge of the board. Light every tile before the move counter runs out; if you go wrong, press RESET. Count rows from the top and columns from the left. This board has 8 columns and 7 rows. Tap these six tiles in this order: row 5 column 1, row 7 column 4, row 7 column 8, row 3 column 7, row 2 column 3, then row 6 column 6. The two top-left tiles of row 1 are already lit at the start, even though that corner of the picture is very dark.
CHAPTER 7
The drill panel dials
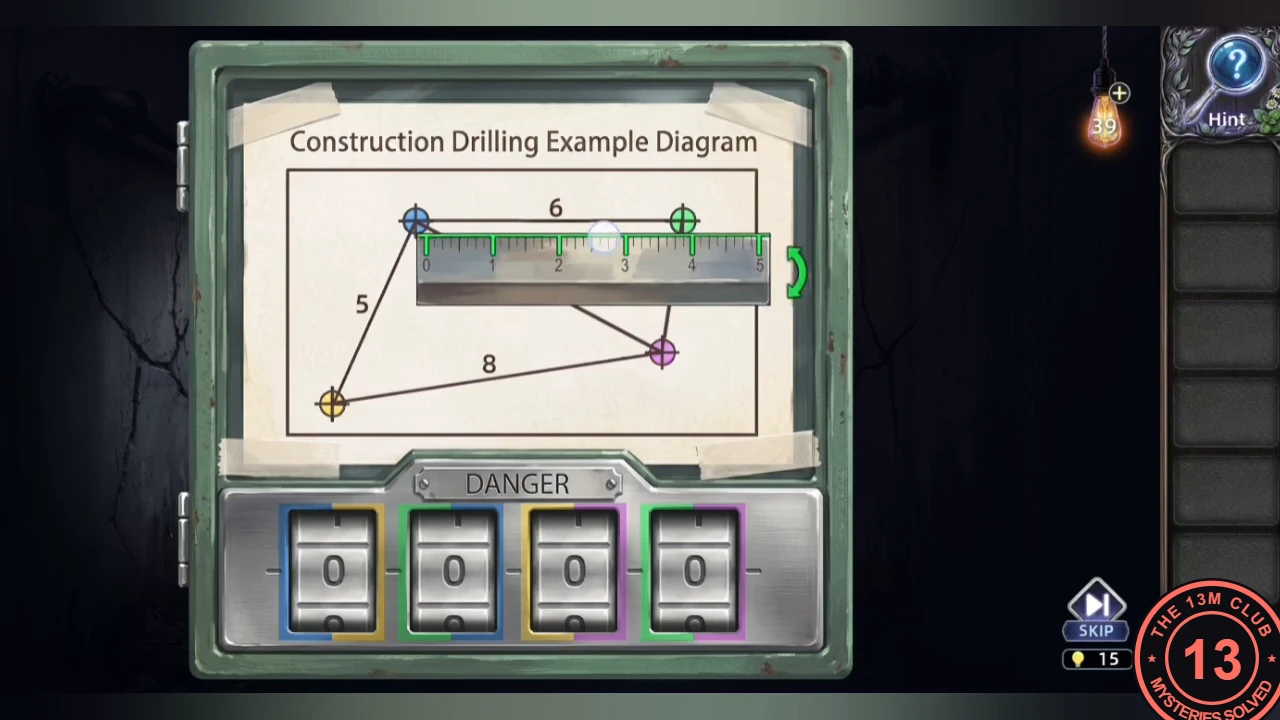
In the dark tunnel, the drill panel opens with measurements from its diagram.
- In the dark tunnel take the Flashlight and the Ruler. On the drill panel, measure each coloured segment of the Construction Drilling Example Diagram with the Ruler and set the four colour-framed dials to 3 4 5 2. The panel opens: take the Rubber Mallet from inside.CODE3 4 5 2
CHAPTER 7
The first cracked wall
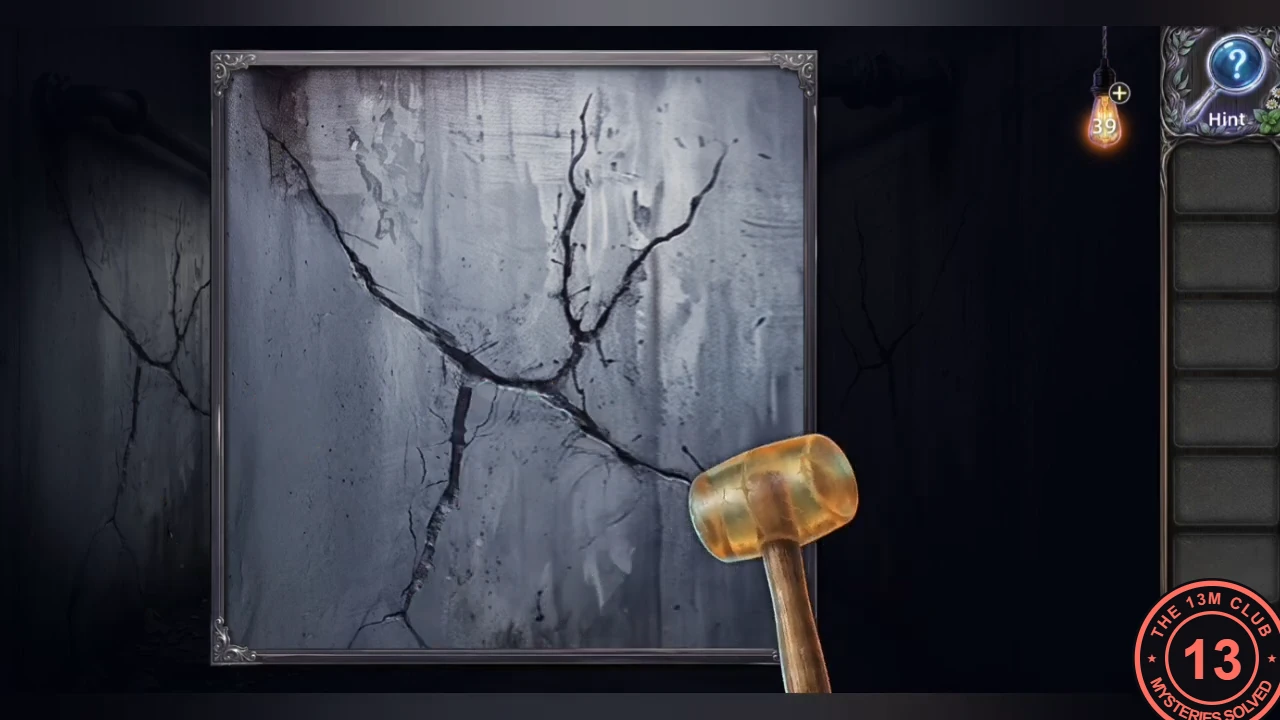
The cracked tunnel wall echoes when knocked. A torn sheet gives the knock order.
- Take the Torn Sheet of Paper and lay it over the Piping Construction Top View: the column beside the sound-wave icons reads 5, 1, 4, 4, 3 from top to bottom.
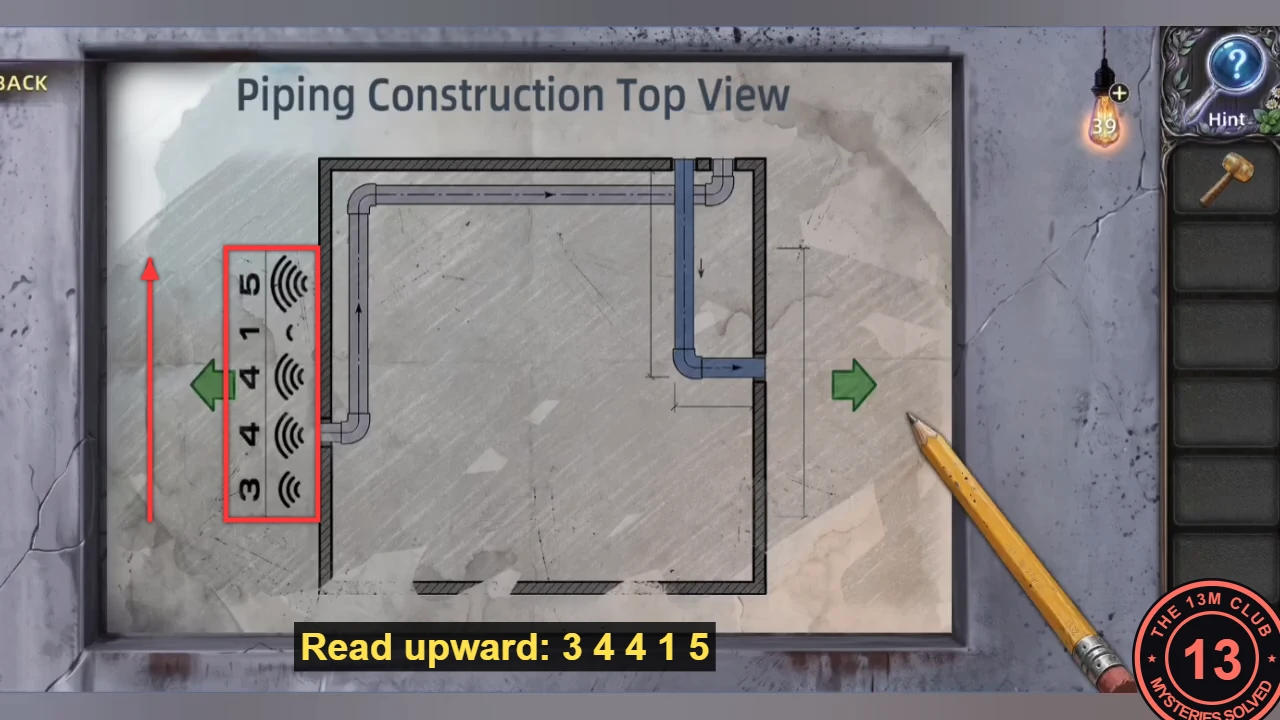
The echo counts beside the sound-wave icons. Read them from bottom to top for the knock order: 3, 4, 4, 1, 5. - Knock on the cracked wall with the mallet. A long crack runs from the top-left corner down to the right edge, another crack runs down from its middle, and two cracks branch upward. Each section between the cracks echoes with a fixed number of rings. The Piping Construction Top View sheet lists the echoes 3, 4, 4, 1, 5 (read the column from bottom to top). Knock the left section (below the long crack, left of the downward crack; 3 rings), then the bottom section (below the long crack, right of the downward crack; 4 rings) twice, then the top section (above the long crack, between the upward branches; 1 ring), then the right section (the right edge beside the end of the long crack; 5 rings).CODE3, 4, 4, 1, 5
CHAPTER 7
The construction site: target pillar
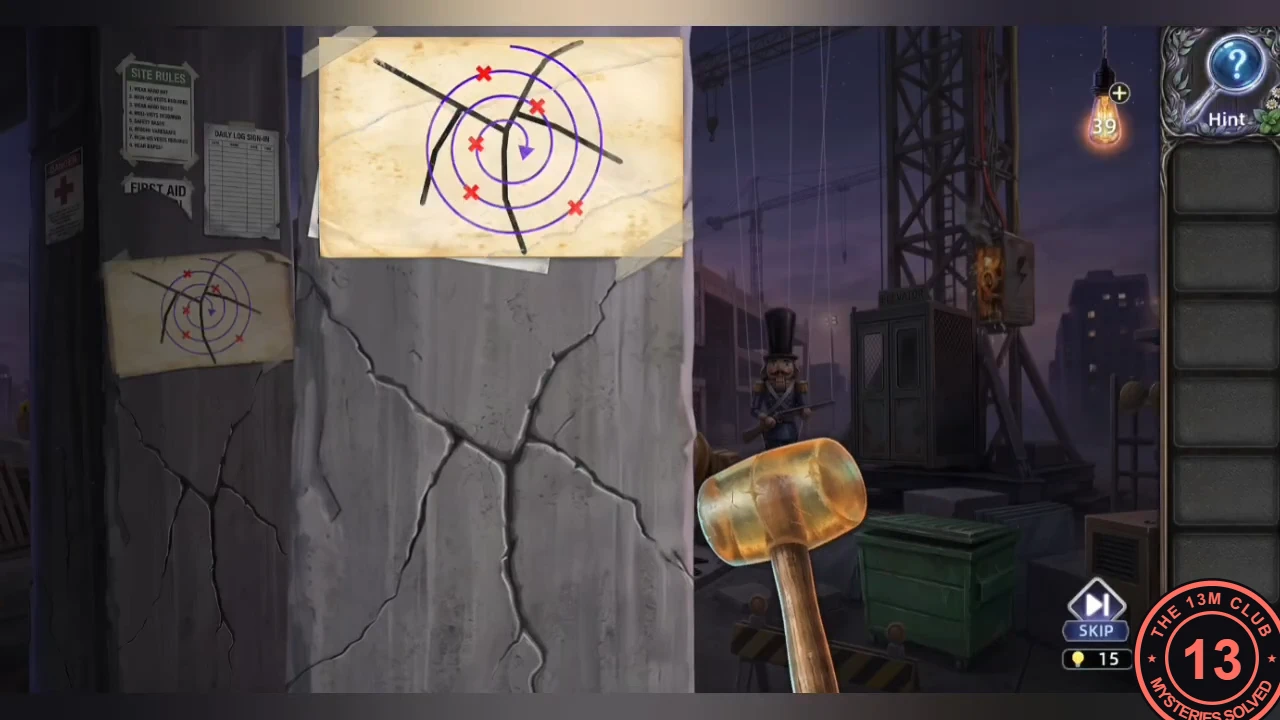
At the construction site of Bailey Plaza Mall, knock the target pillar in the order of the Paper Fragment.
- The giant statue of Carl welcomes you to Bailey Plaza Mall. Take the Paper Fragment: it shows the pillar's cracks, a spiral and five red X marks. Follow the spiral from its outer end inward and knock the pillar section under each X in that order: bottom right, top, bottom left, upper right, then the inner X left of centre.
CHAPTER 7
The bulldozer crank
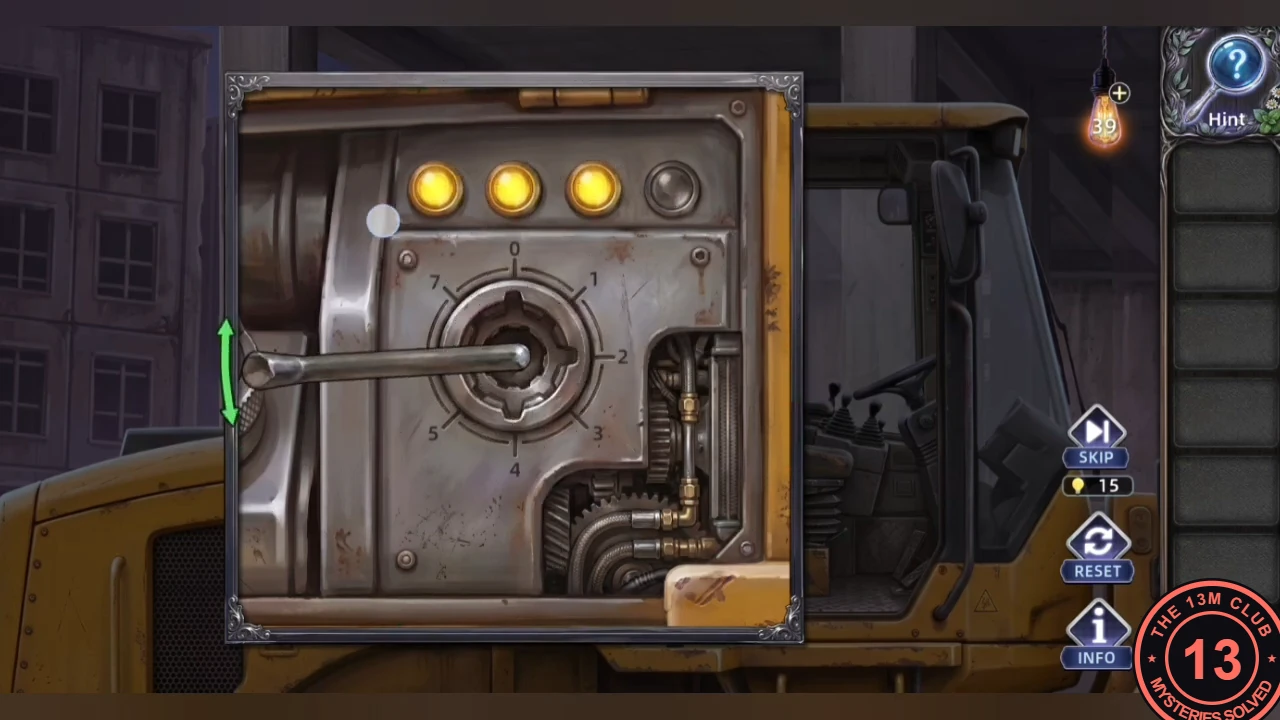
Refuel the bulldozer and crank its engine in the order from the operating procedures.
- Take the Steel Bar from the rubble in front of the statue and the Empty Fuel Drum beside it. Set the drum under the black fuel leak next to the cement mixer to get a full Fuel Drum. The bulldozer cab door is jammed: pry it open with the Steel Bar, which becomes the Bent Iron Bar. In the cab, take the Maintenance Hatch Key and read the Heavy Machinery Operating Procedures: manual valve sequence 2, 4, 8, 16.
- Open the engine hatch with the key, pour in the fuel and use the Bent Iron Bar as a crank. Turn it 2, then 4, then 8, then 16 notches to light all four lamps.CODE2, 4, 8, 16
CHAPTER 7
Driving the excavator
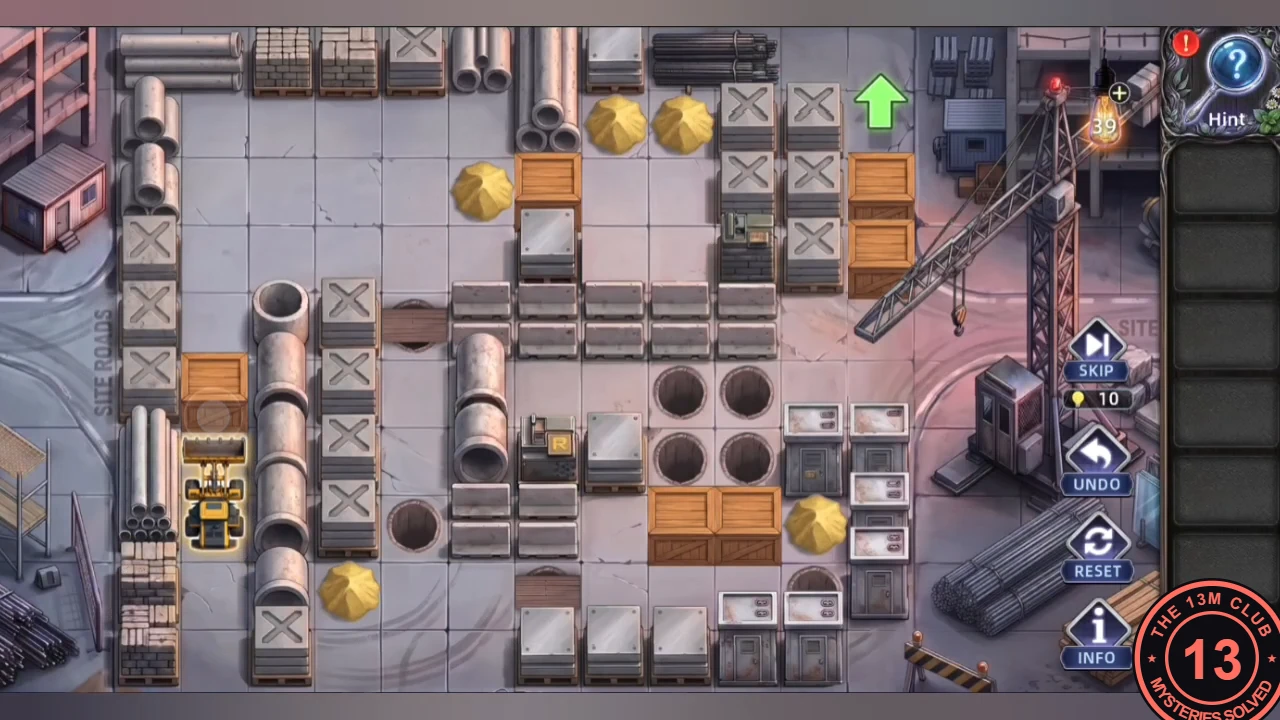
Drive the excavator across the site to the green arrow.
- Drive the excavator from the bottom left of the site map to the green arrow at the top right. Tap the straight arrows beside it to move one square forward or backward and the curved arrows to turn it a quarter turn; UNDO takes back a move and RESET restarts. Stacks of blocks, pipes and walls cannot be crossed. Driving into a wooden crate smashes it out of the way. Open pits block the way until you fill them: drive into a sand pile to scoop it into the bucket, then drive forward into a pit to dump the sand and fill it, after which you can drive over it. There are five sand piles (two side by side near the top, one left of the top crate, one at the bottom left and one on the right beside the crates in the middle) and the successful route fills five pits with them, so do not waste any: the two pits in the left half (one above the other, between the two upright pipes), the single pit near the bottom of the middle, and the two pits in the right-hand column of the square of four pits. Then drive up through that filled column, turn toward the right edge, smash the two crates below the green arrow and drive up onto it.
CHAPTER 7
The statue: crane and TNT
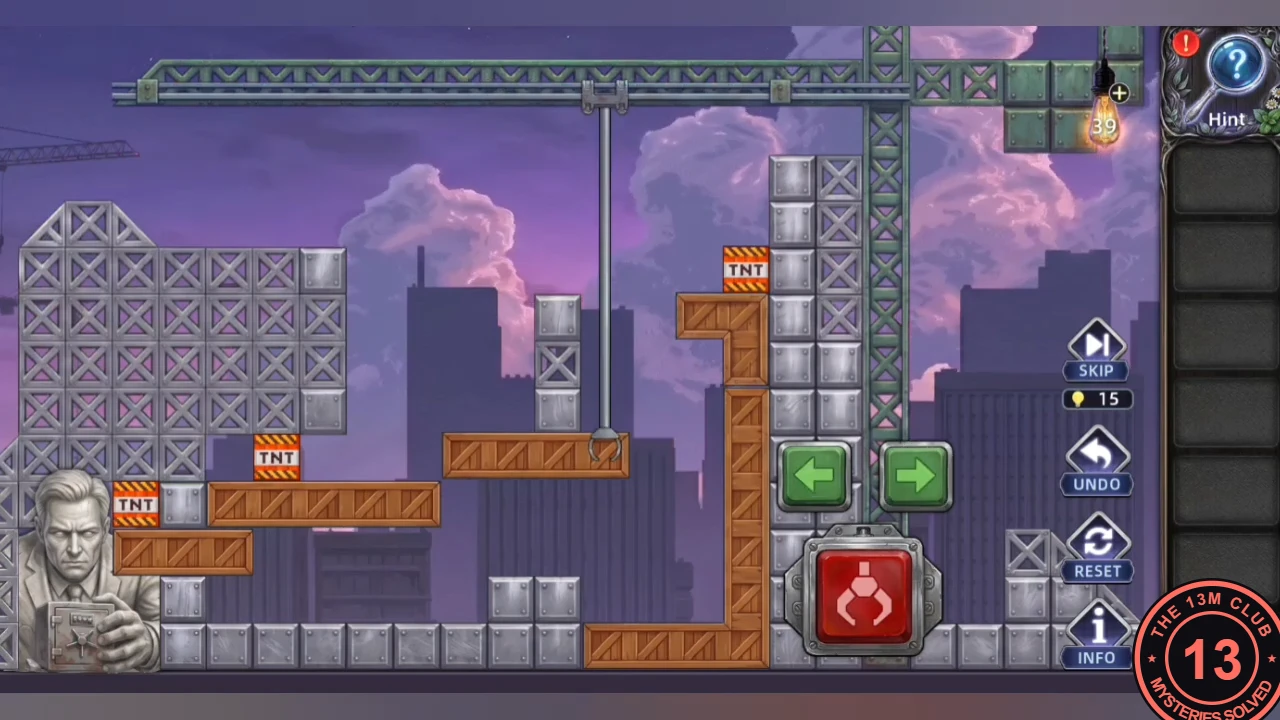
Use the crane and the TNT on Carl's giant statue.
- Take the Cap (a rectangular electrical cover) from the crash debris and put it on the damaged electrical box beside the construction elevator. The Guard says you've repaired the elevator; it rises and the crane controls open. Use the crane. The left and right arrows move the claw; the red button lowers it to grab the top object underneath, or releases what it is holding. Lifting a plank also lifts anything resting on it, and a carried object pushes whatever is beside it. There are three TNT crates: one beside the statue's right hand, one on the long plank lying on the floor in the middle, and one on top of the L-shaped plank at the right. A TNT crate explodes when you drop it, and the blast sets off any TNT close by. The goal is a chain that reaches the crate beside the statue. The sequence that worked: 1) Grab the long floor plank, with its TNT riding on it, carry it left and release it so it lands on the right end of the short plank under the statue's TNT, level with the grey block next to that TNT. 2) Grab the loose plank on the right, set it down on the long plank to the right of the middle TNT, then carry it left so it pushes that TNT one space left, to the very end of the long plank next to the grey block. 3) Lift the loose plank away again and park it on top of the steel scaffold at the upper left. 4) Pick up the TNT on top of the L-shaped plank, carry it left and drop it onto the long plank two spaces right of the middle TNT. It explodes, the blast sets off the other two crates, and the statue's hand breaks so the safe falls. Other move orders may also work; this is the one the game accepted in this playthrough.
CHAPTER 7
The statue's safe
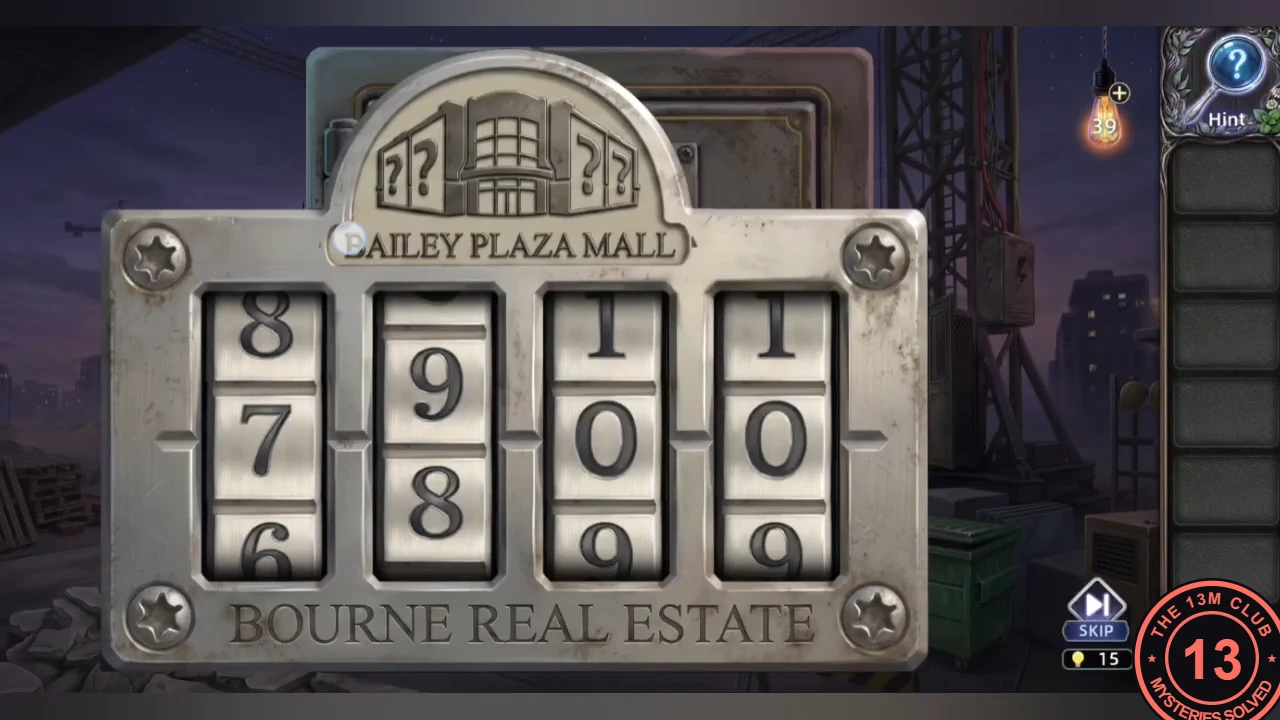
The unfinished building frames behind the statue give the safe code.
- The unfinished building frames behind the statue outline 7 5 on the left and 4 3 on the right. Enter 7543 on the safe and take the Bailey Plaza Mall Construction Quality Inspection Report.CODE7543
CHAPTER 7
The second cracked wall
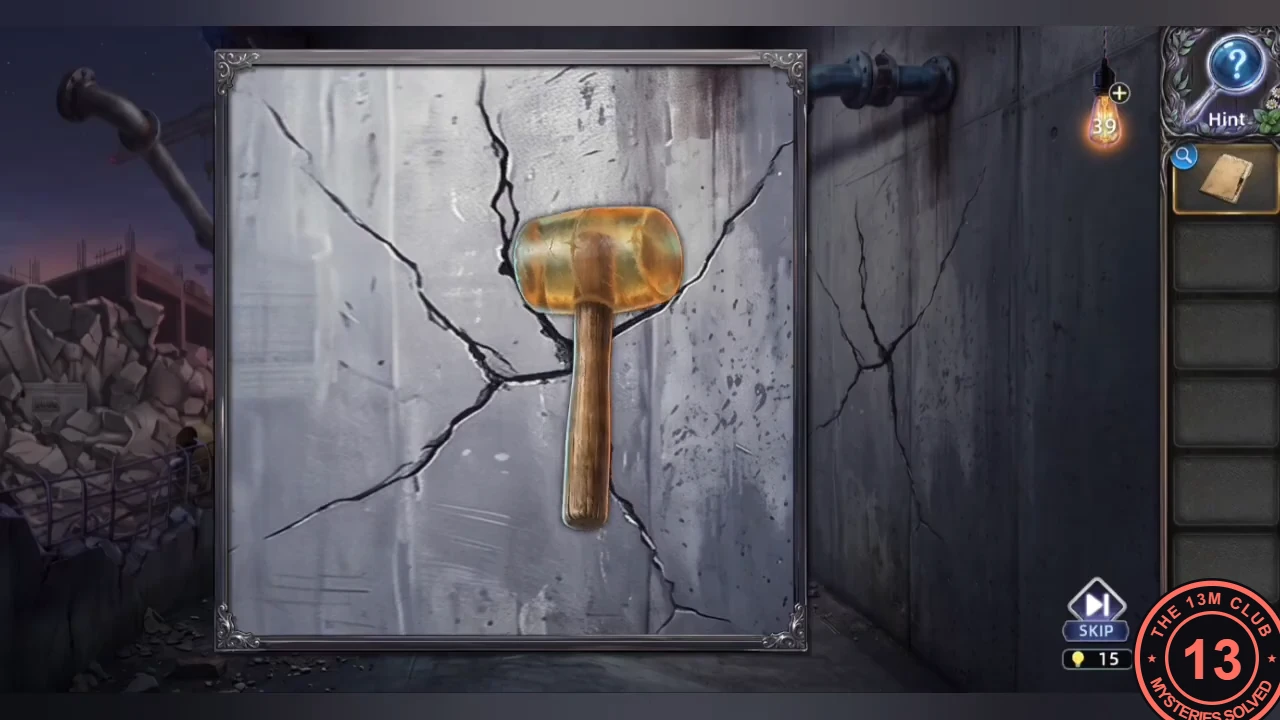
Back in the tunnel, the inspection report gives the order for the second cracked wall.
- Back in the tunnel, read the Construction Quality Inspection Report: the pipe layout is marked 32152. Knock the second cracked wall so the echoes follow 3, 2, 1, 5, 2: the top section (3 rings), the right section (2), the bottom section (1), the left section (5), then the right section again (2).CODE32152