GHOST WEST · CHAPTER 3
The sanctuary trials
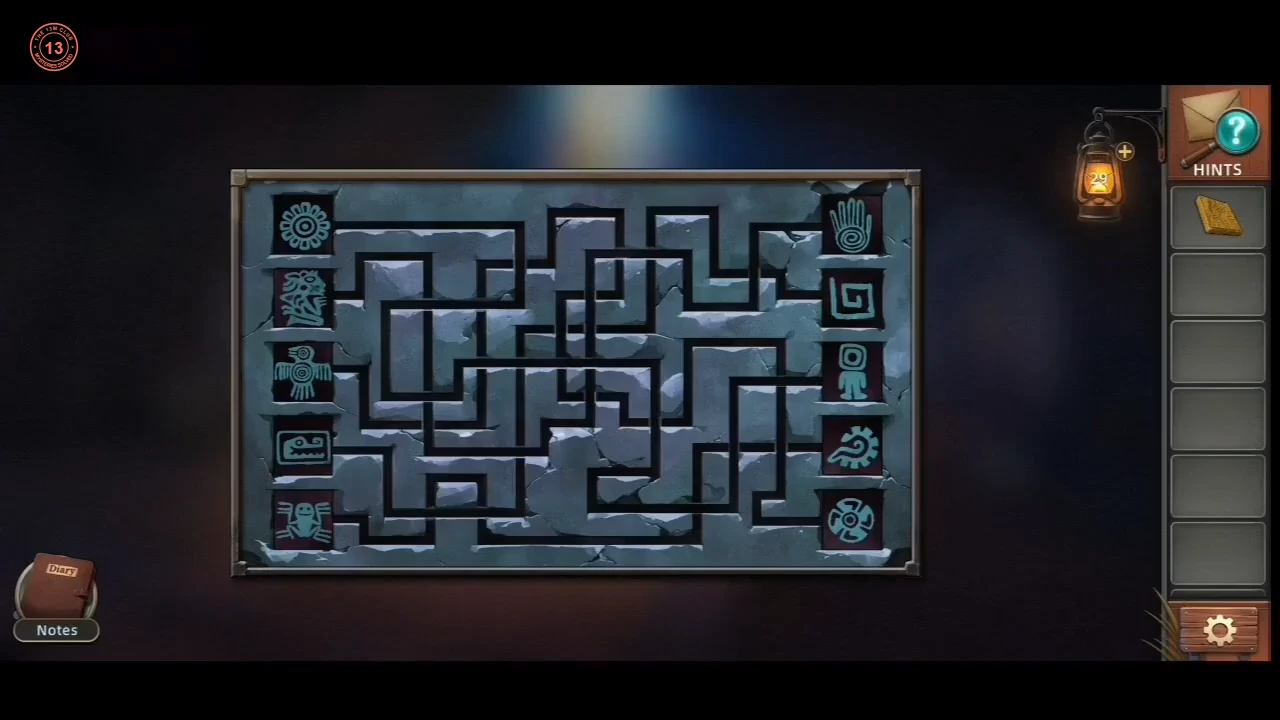
In the sanctuary, trace the stone maze to pair the runes.
- In the sanctuary, take the Mural Fragment from the eagle chest on the left. Tap the stone slab at the foot of the right-hand door to look at the stone maze. Five symbols are on its left edge (sun disc, feathered serpent, bird, crocodile head, frog) and five on its right edge. Follow the channel from each left symbol to see which right symbol it reaches. Then open the two rune tablets. The red runes in the left column are fixed; tap each tile in the right column to change its rune until every row holds a maze pair. The pairs, top to bottom: crocodile head – square spiral; frog – sun with a swirl; feathered serpent – hand with a spiral; sun disc – little figure; bird – round four-petal wheel.CODESquare spiral, swirl sun, hand, figure, wheel
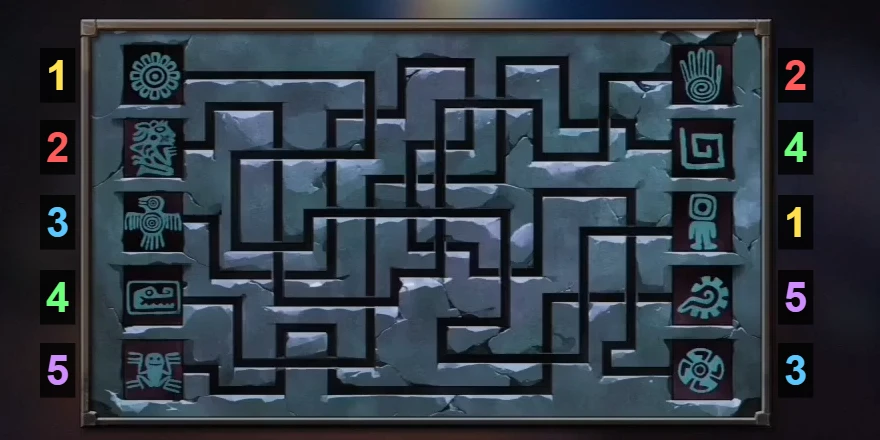
The five maze pairs, numbered: each left symbol and the right symbol with the same number belong in one tablet row. These pairs were accepted by the tablets. 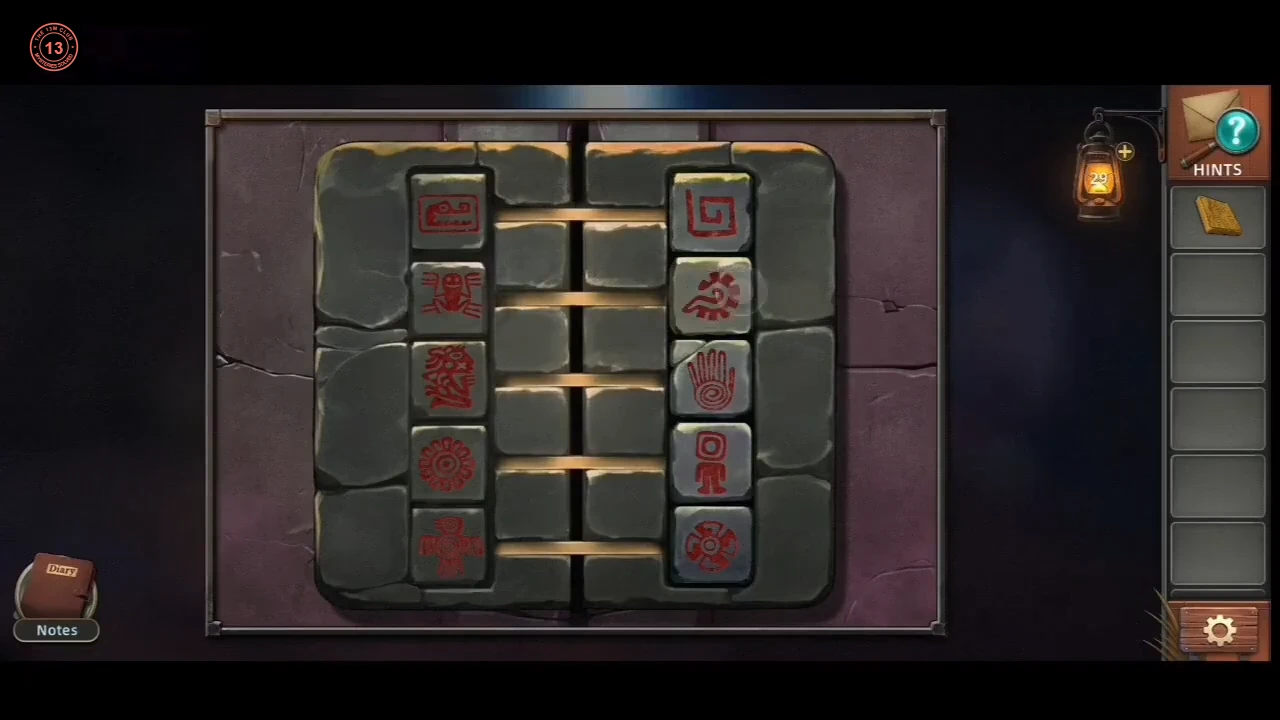
The finished rune tablets.
GHOST WEST · CHAPTER 3
The temple mural
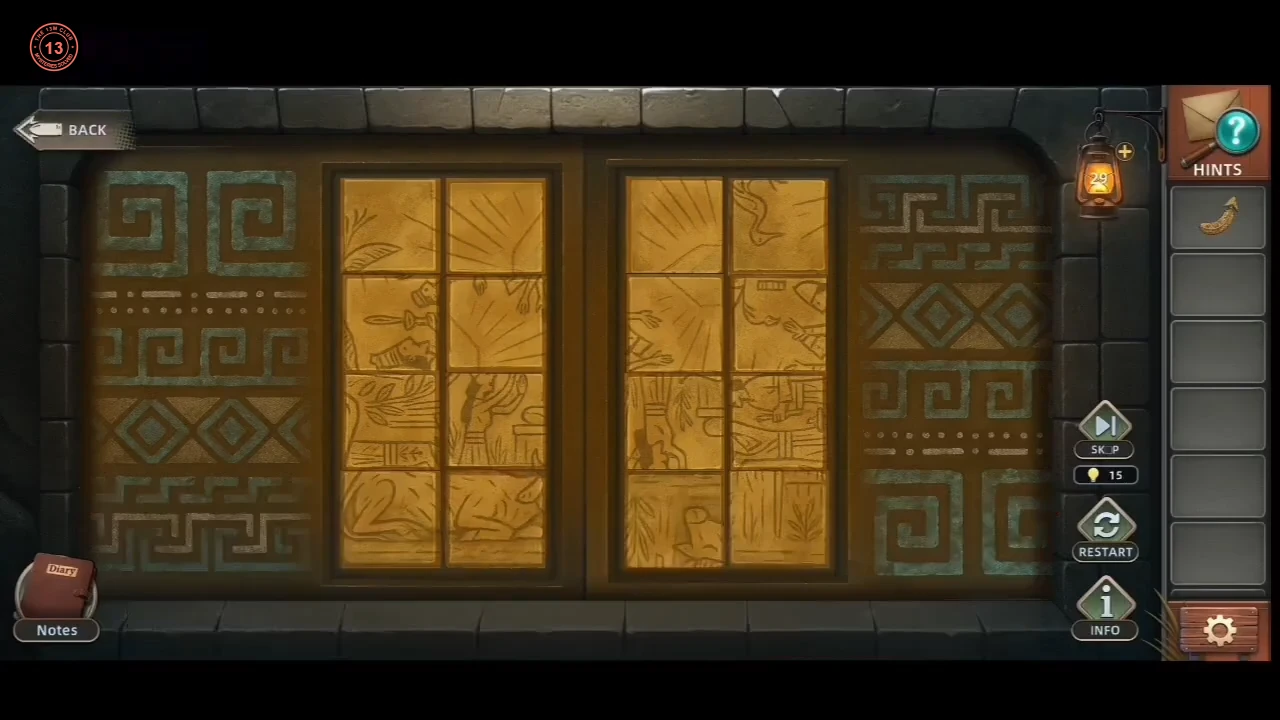
Complete and rotate the mural slabs to open the golden door.
- In the temple corridor, put the Mural Fragment in the gap of the mural on the right wall. In the broken pot on the floor, take the Arrow Feather and a second Mural Fragment, and put that fragment in the other gap. Tap the slabs to rotate them until the engraved lines run on unbroken from slab to slab across both panels. The finished mural shows warriors with spears hunting a bull. The start positions may differ in your game, so line up the edges rather than copying a sequence of taps.
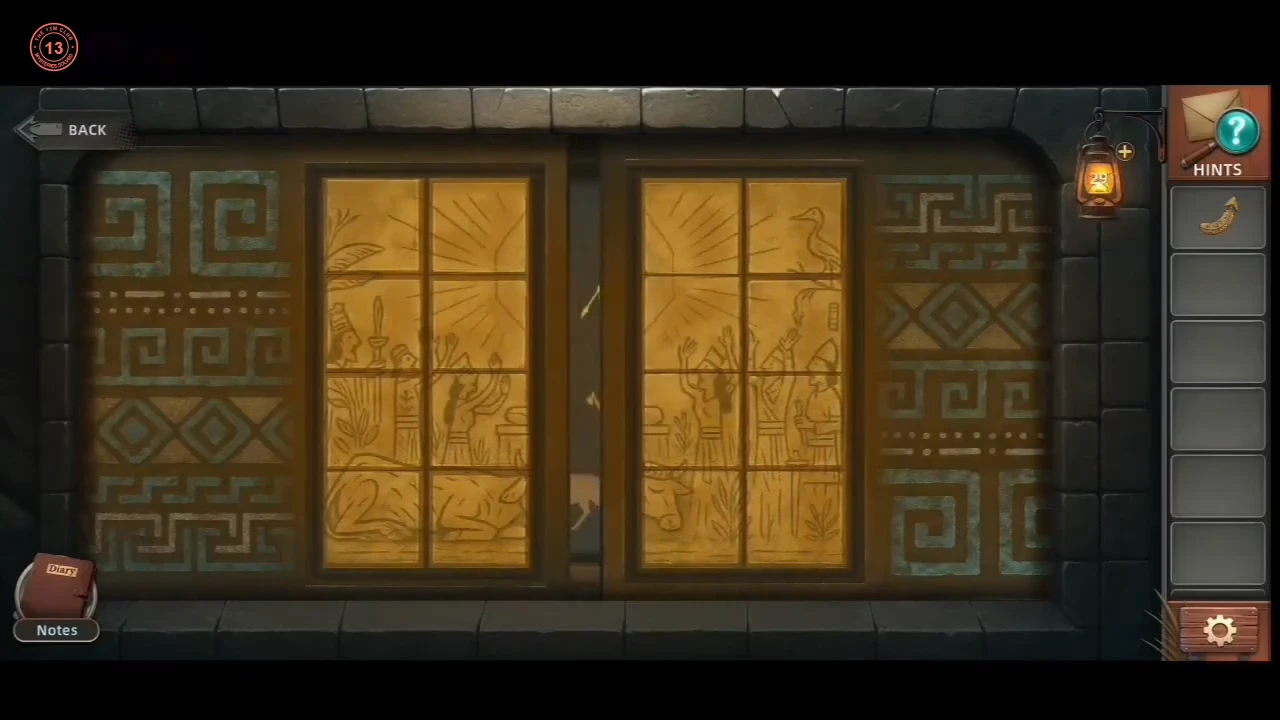
The finished mural.
GHOST WEST · CHAPTER 3
The temple block wall
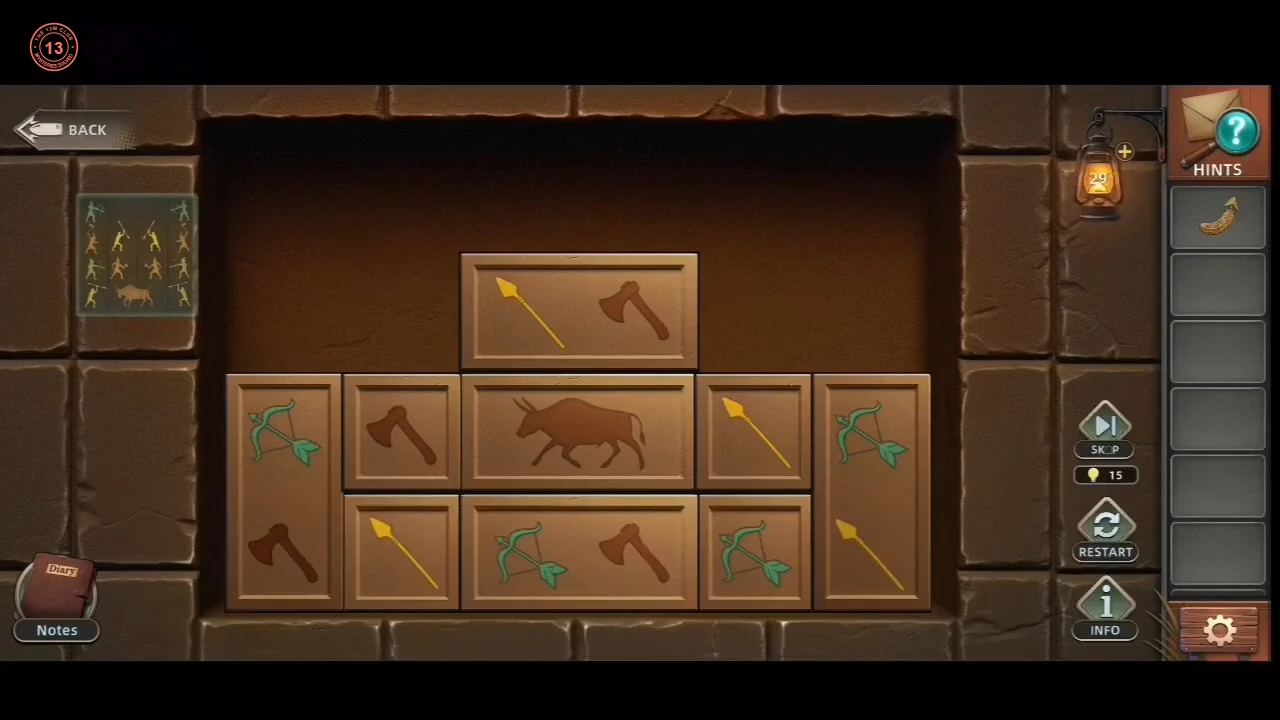
Rebuild the corridor mural with the sliding blocks for the Sun Emblem and the Eagle Eye.
- In the temple corridor (the room with the mural), tap the block niche in the back wall, to the right of the glowing doorway. The game asks you to "drag the top blocks to match the mural layout"; the small picture at the top left of the puzzle is the mural on the right-hand wall. Only a block with nothing resting on it can be dragged, and a dropped block settles on whatever is below it. While you drag, a green outline marks a spot where the block fits and a red outline a spot where it does not. The board is six columns wide, but the finished picture fills only the middle four columns, so the two outer columns must end up empty.
- Build this layout in the middle four columns. Bottom row: one of the two single spear blocks, the wide bull block, then the tall block with a bow over a spear standing on the right. Second row from the bottom: the wide block with a bow and an axe on the left, then the single axe block (the top of the tall bow-and-spear block fills the right end). Third row: the tall block with a bow over an axe standing on the far left with its axe in this row, then the other single spear block, then the wide block with a spear and an axe on the right. Top row: the bow of the tall block on the left, two empty spaces, and the single bow block on the right. Every row then reads like the mural: bow, empty, empty, bow / axe, spear, spear, axe / bow, axe, axe, bow / spear, bull, spear. The starting arrangement in your game may differ, so use the two outer columns to park blocks you need to move out of the way, and fill the bottom row first, then each row above it. When the board is solved, a stone pedestal rises from the slab in the middle of the floor. Tap it to look closer and take the Eagle Eye from it, then take the Sun Emblem from its top. You need both for the next section.
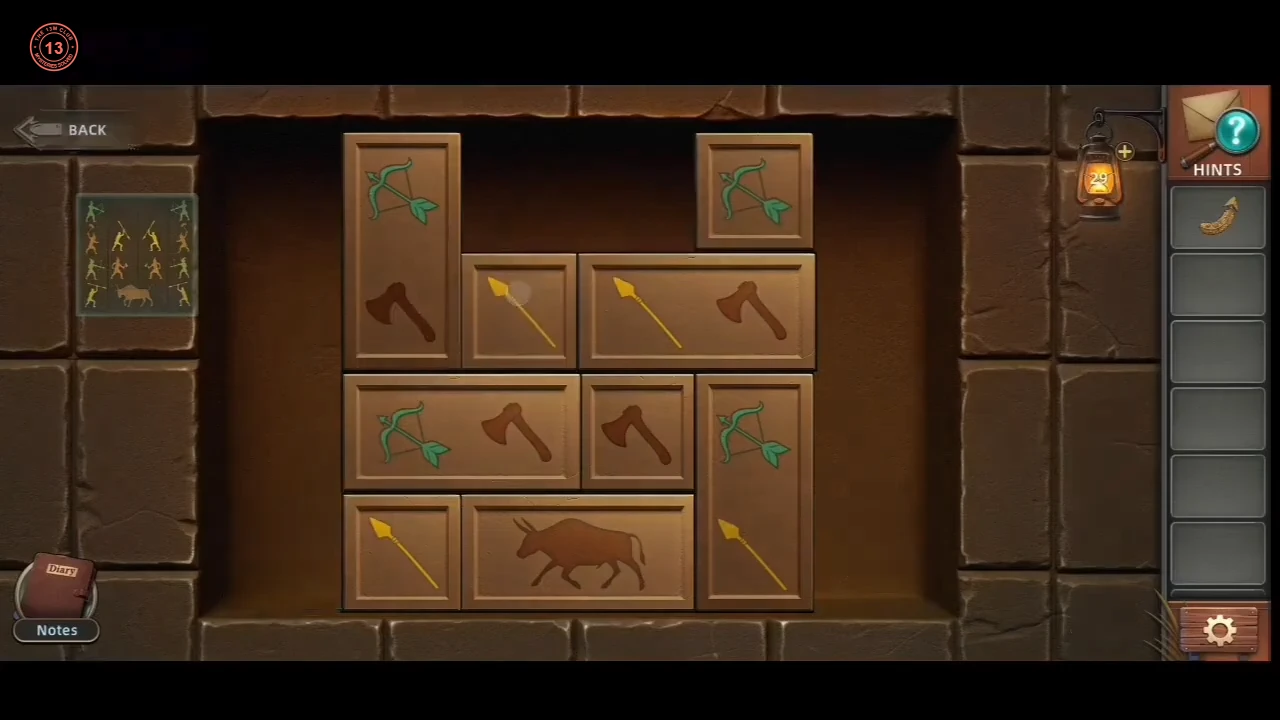
The finished wall, matching the mural row by row.
GHOST WEST · CHAPTER 3
The feather tilt maze
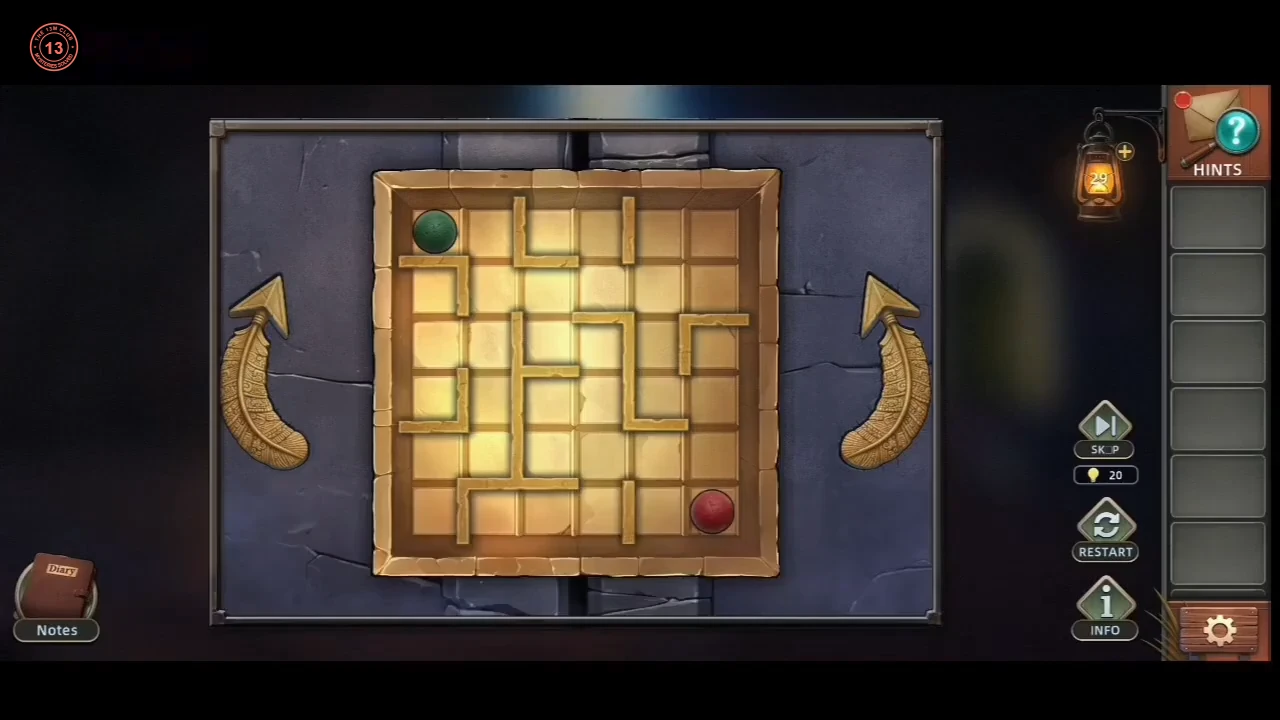
Turn the maze board with the two Arrow Feathers until the red and green balls swap corners.
- Return to the sanctuary and put the Sun Emblem in the round sun-and-crescent disc on the floor. Put the Eagle Eye in the empty eye of the eagle chest beside the left-hand door; the chest opens. Take the second Arrow Feather and read Frank's note. Then tap the stone slab at the foot of the right-hand rune door. It shows a 6 × 6 maze with a green ball in the top-left corner, a red ball in the bottom-right corner and two empty feather-shaped slots; put both Arrow Feathers in the slots.
- Tap a feather to turn the whole board a quarter turn: the left feather turns it clockwise and the right feather turns it anticlockwise. After each turn both balls roll straight down until a wall, the frame or the other ball stops them. Each ball starts on the other ball's target ring, so the two balls have to swap corners, and both must be resting on their own rings at the same moment. The red ring is under the green ball's starting corner and the green ring is under the red ball's. If a ball is stuck in a pocket, tap Restart beside the board. From the starting position, this sequence of 22 taps works (it is the recording's longer 38-tap solve with its back-and-forth detours removed): right, right, left, right, right, left, left, then right six times, left, right, then left seven times. The board ends the right way up with the red ball top left and the green ball bottom right.CODER R L R R L L, R ×6, L, R, L ×7
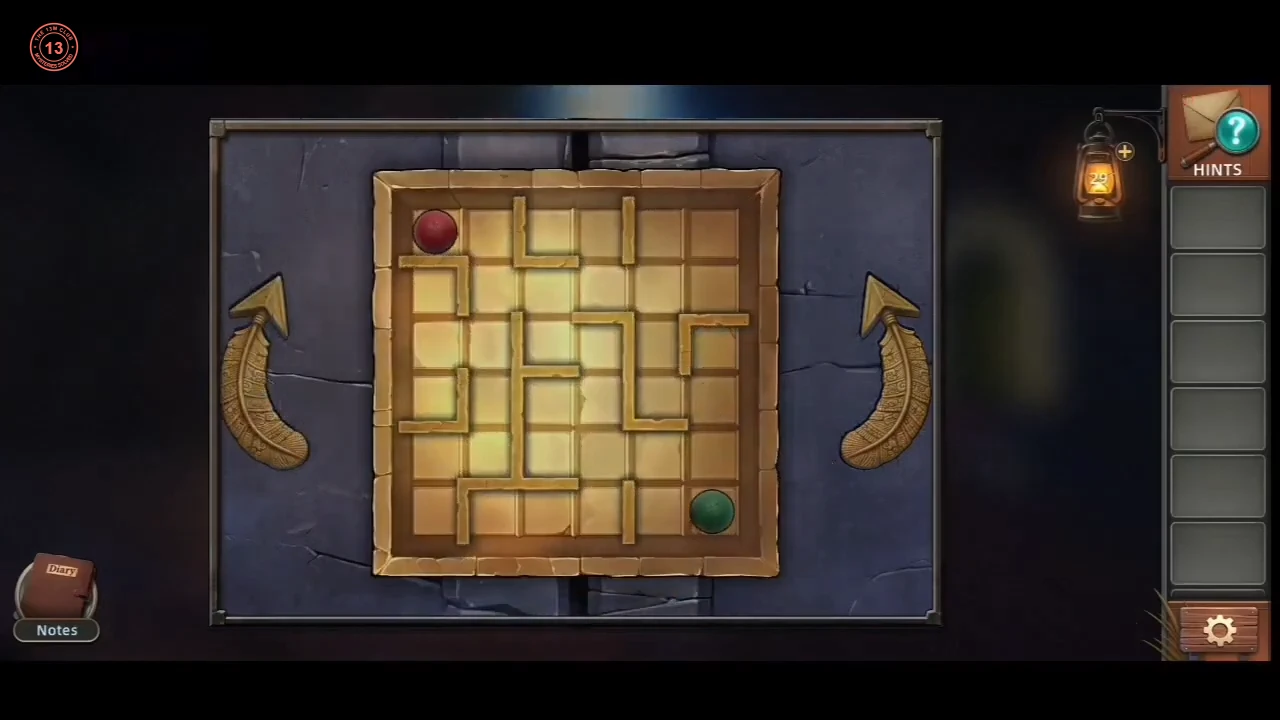
The finish: the balls have swapped corners and rest on their own rings.
GHOST WEST · CHAPTER 3
The animal totem
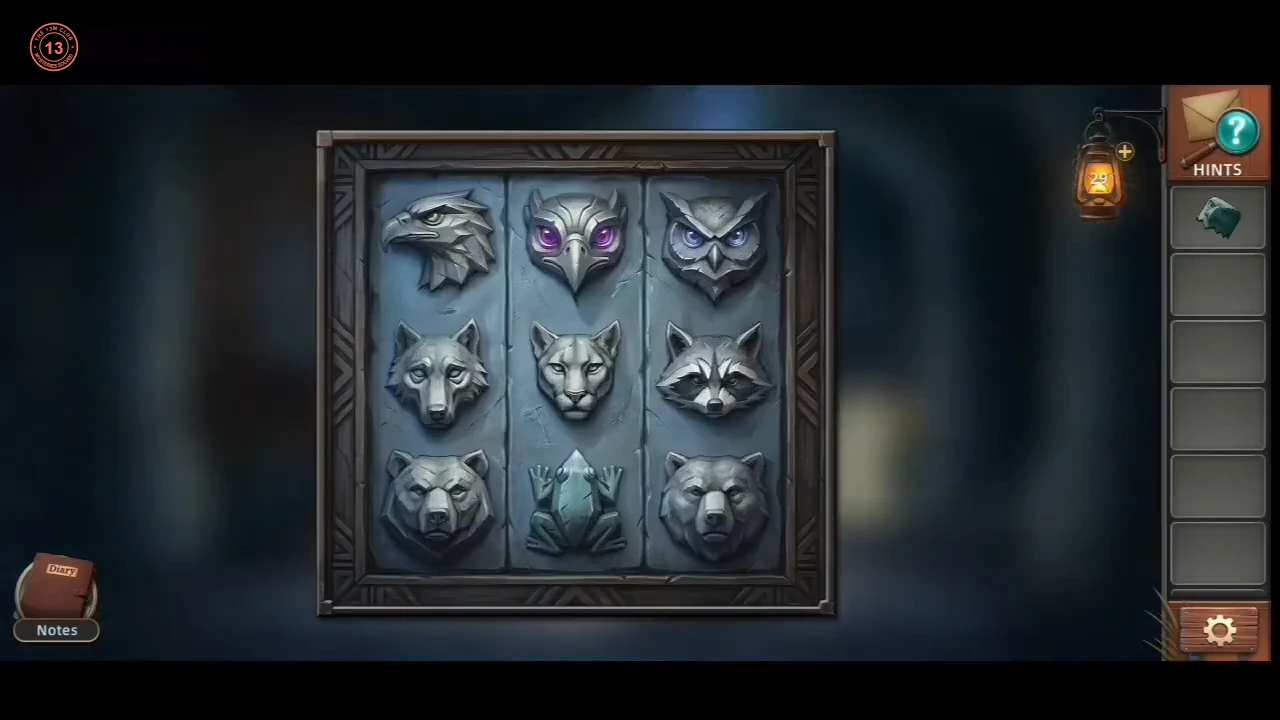
Copy the animal panel's columns onto the totem for the Moon Emblem.
- Go through the left-hand door of the sanctuary into the totem room. Take the Eagle Head Statue from the broken statue on the floor and fit it on top of the totem. The 3×3 animal panel on the wall is the key: each column, read from top to bottom, is one totem combination. Tap a totem segment to change its animal. Set eagle / wolf / bear (left column); the bear's mouth opens; take the Amethyst. Set hawk / cougar / frog (middle column; on the panel the hawk has purple eyes) and put the Amethyst in the hawk's eyes; take the Blue Crystal from the frog's mouth. Set owl / raccoon / bear (right column; the owl has blue eyes) and put the Blue Crystal in the owl's eyes. The bear roars and gives you the Moon Emblem.CODEEagle-wolf-bear; hawk-cougar-frog; owl-raccoon-bear
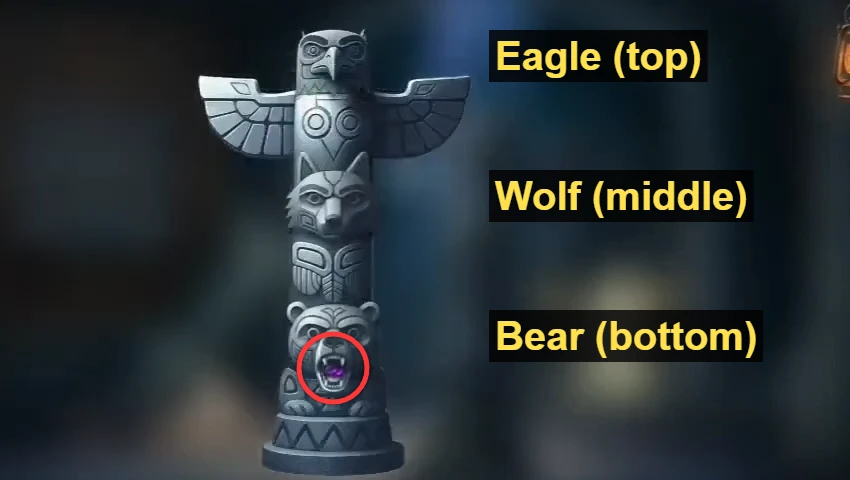
The first combination (the panel's left column): eagle / wolf / bear. The bear's mouth opens with the Amethyst.
GHOST WEST · CHAPTER 3
The ritual table
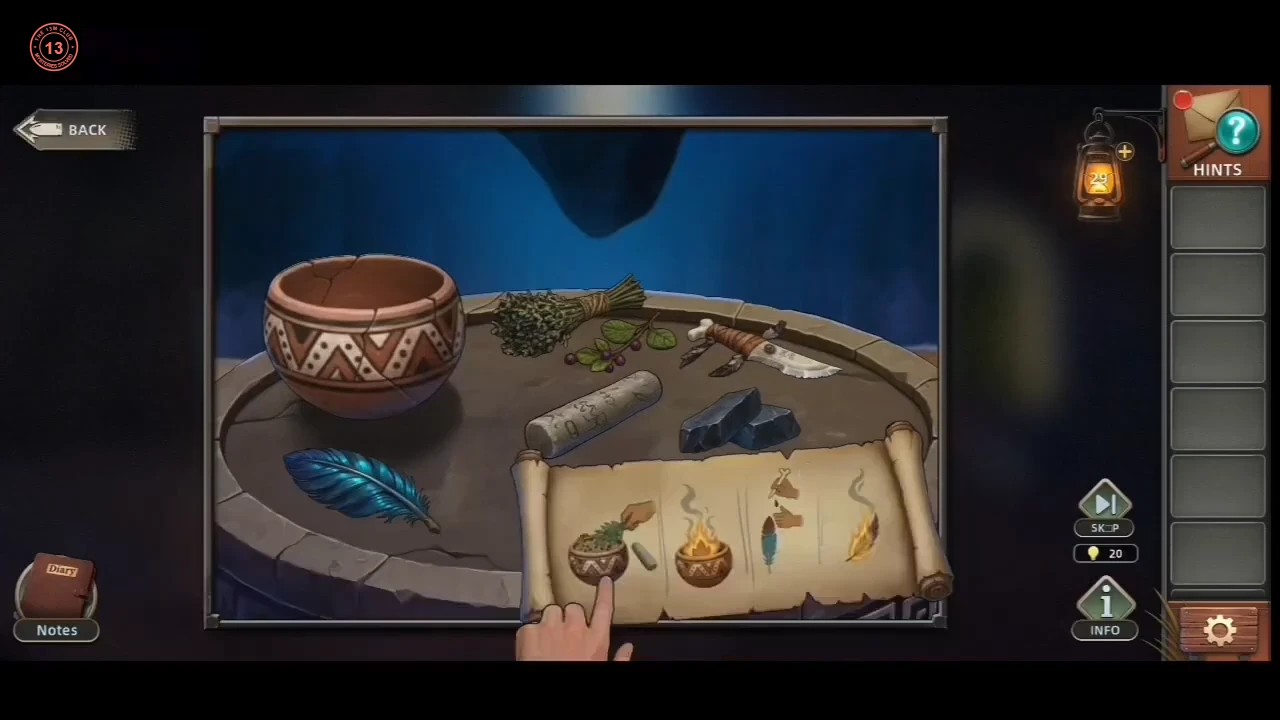
Perform the ritual in the order shown on the scroll.
- In the sanctuary, put the Moon Emblem into the round disc on the floor beside the sun. A ritual table rises. Drag the items on the table onto their targets, following the scroll's four pictures from left to right. Put the herbs in the bowl and crush them with the stone pestle. Drop the dark flint stones on the bowl to light a fire. Hold the knife in the fire until it glows, then drag it onto the scroll's third picture (the bleeding hand). Drag the blue feather onto the same picture so that its tip turns red. Finally, put the feather in the burning bowl.
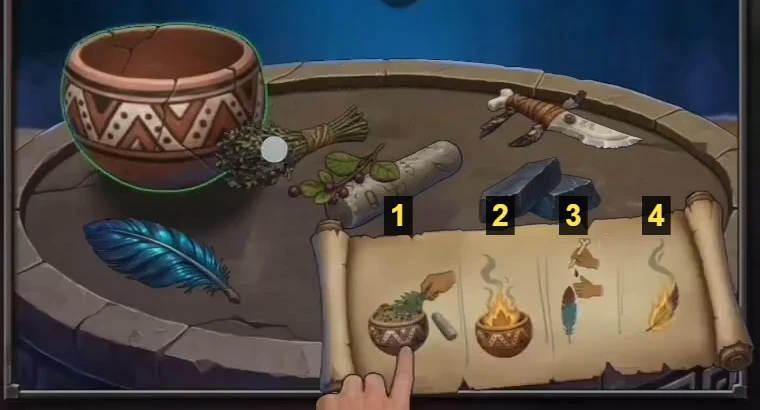
The scroll, numbered left to right: 1 crush the herbs, 2 light the fire, 3 the bleeding hand (heated knife, then the blue feather), 4 burn the feather.
GHOST WEST · CHAPTER 3
The first duel with Father Voss
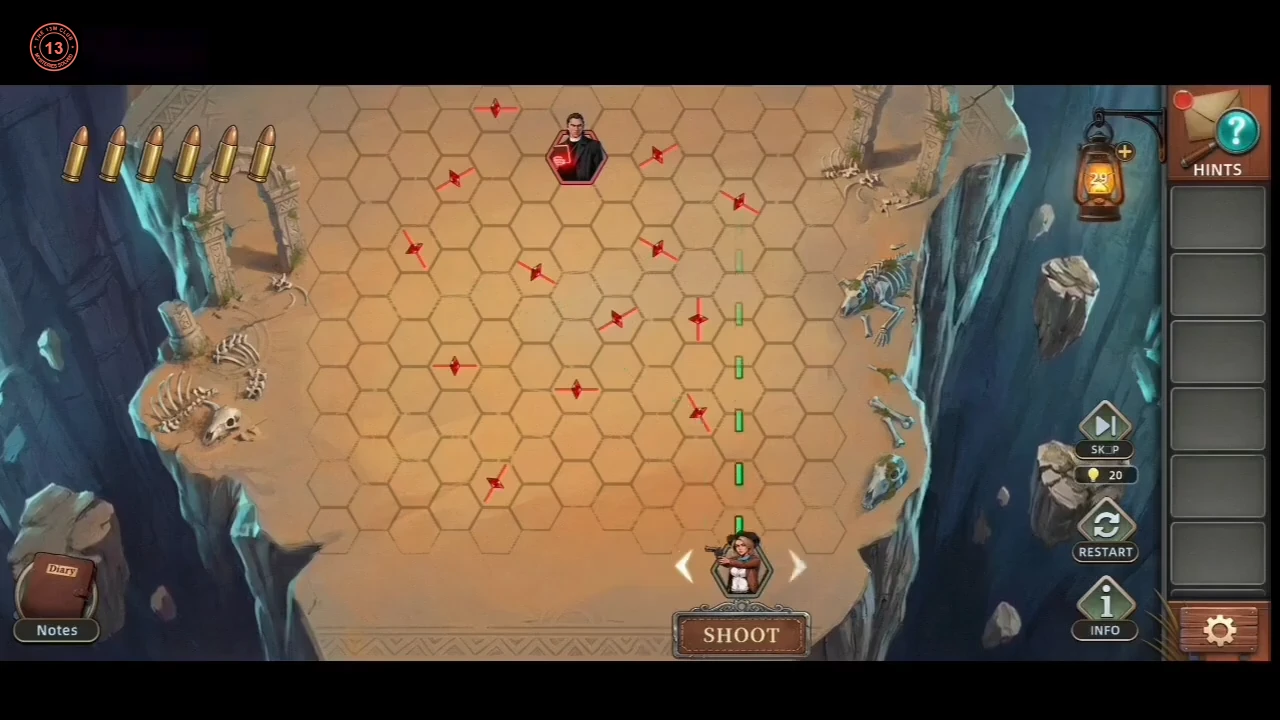
Father Voss attacks: win the first hex-grid duel.
- Father Voss attacks. In the hex-grid duel, Sandy stands on the bottom row and Voss on the top row; the six bullets top left are your shots. Tap the arrows beside Sandy to move her left or right, and watch the green dotted line: it previews where the shot will travel. Each red deflector the bullet meets bends its path and then breaks, so the board gets clearer with every shot. Press SHOOT to fire. A practical plan: clear the deflectors standing in Voss's own column, then step directly below him and fire straight up. In the recording, the first shot from one column right of Voss broke one deflector; the second, from the column left of the middle, ricocheted through three deflectors, including the one in the middle of Voss's column; the third, fired from directly below him along a clear straight line, hit Voss. The chapter then ends with Sandy falling into the pit.