Crisis: Lily's anniversary
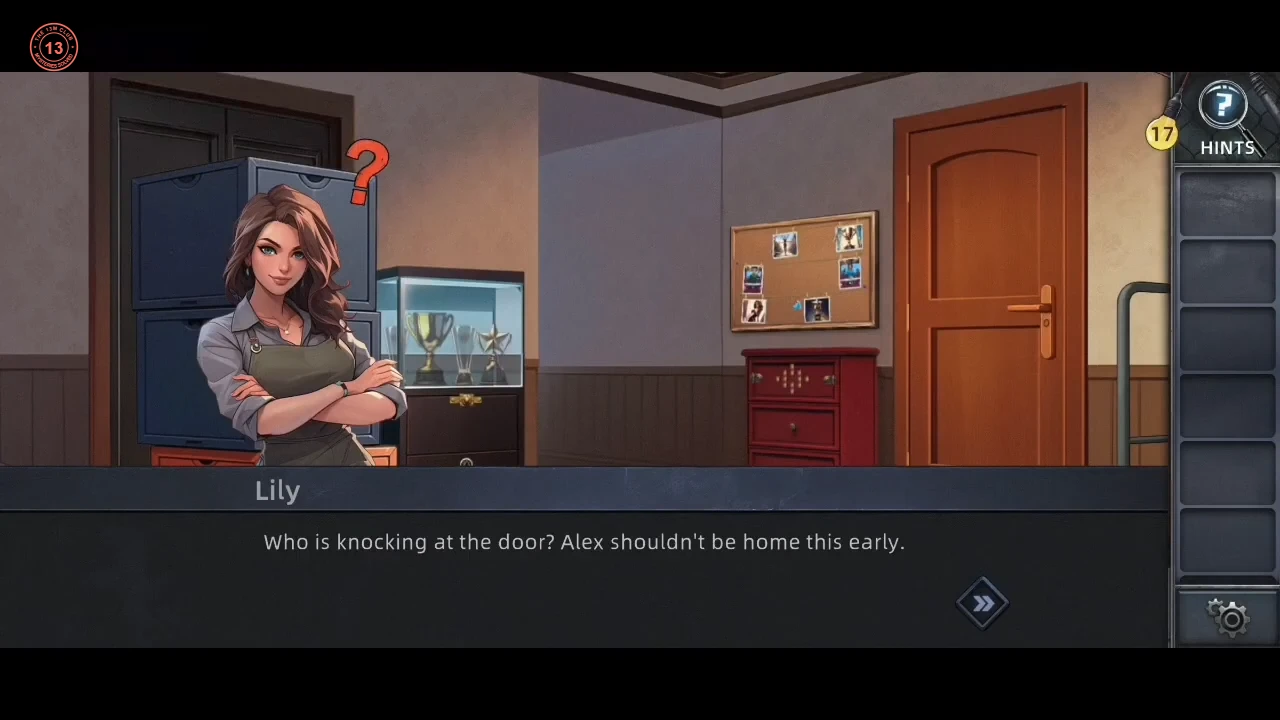
Chapter 4 (Crisis) goes back three days, to Lily preparing their third wedding anniversary while Aunt Susan waits at the door.
- Three days earlier, Lily prepares their third wedding anniversary. Aunt Susan is at the door with a hurt arm. Open the drawer of the red cabinet in the living room and take the Wheel hidden inside. Fit the Wheel on the hand truck, move the boxes from the storage door and take the First aid kit to Susan; she leaves the Lubricant. While you are there, take the Photo from the picture frame on the living-room round table, the Chess piece from the floor by the dark doorway, and the Potato from the sack under the storage-room table.
- Use the Lubricant on the handle of the orange living-room door to open the way to the dining room. In the dining room, take the Photo lying on the table, the Red Wine from the wine box beside the fridge, the Magazine from the bookcase and the Photo on the bookcase's top shelf. Open the fridge for the Tomato, Lettuce and Carrot and another Photo. In the kitchen, take the Sponge from the counter left of the hob and use it on the dirty dishes in the sink for 2 Plates. Open the drawer left of the oven for a Chess piece and the Scissors, and take the Pot from the cupboard right of the oven. Open the recipe book on the counter by the hob and place the Tomato, Lettuce, Carrot, Pot and Potato on it. Lily says only the chicken is still missing. Open the Magazine in your inventory and take the Photo inside it. Back in the dining room, open the bookcase's lower cupboards: take the Triangular handle from the small drawer on the left, then open the right lower cupboard for both the 2 Goblets and the Tablecloth. Lay the table in this order: the Tablecloth, the Plates, the Goblets, then the Red Wine (the wine is not used up until the goblets are on the table). In the living room, use the Triangular handle on the panel at the bottom of the trophy cabinet for the last Photo.
The photo wall
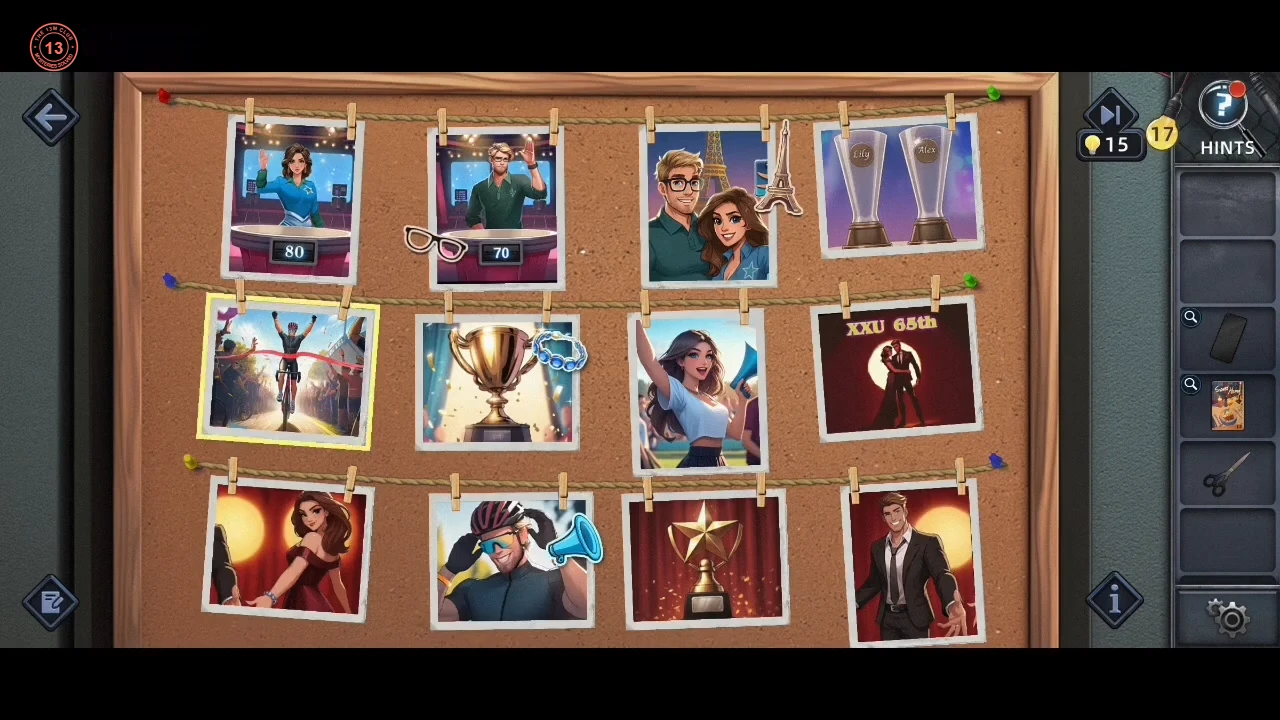
Arrange the anniversary photo wall row by row.
- Arrange the photo wall (drag a photo onto another to swap them) so each row of four tells one story, left to right. Row 1: Lily at the quiz podium with score 80, Alex at the quiz podium with score 70 (the one with the glasses beside it), the Paris selfie and the two engraved glasses marked Lily and Alex. Row 2: Alex in a suit, Lily in a red dress, the XXU 65th dance and the star trophy. Row 3: the cyclist in a helmet, Lily cheering with a megaphone, the finish line and the gold cup.
The red cabinet tiles
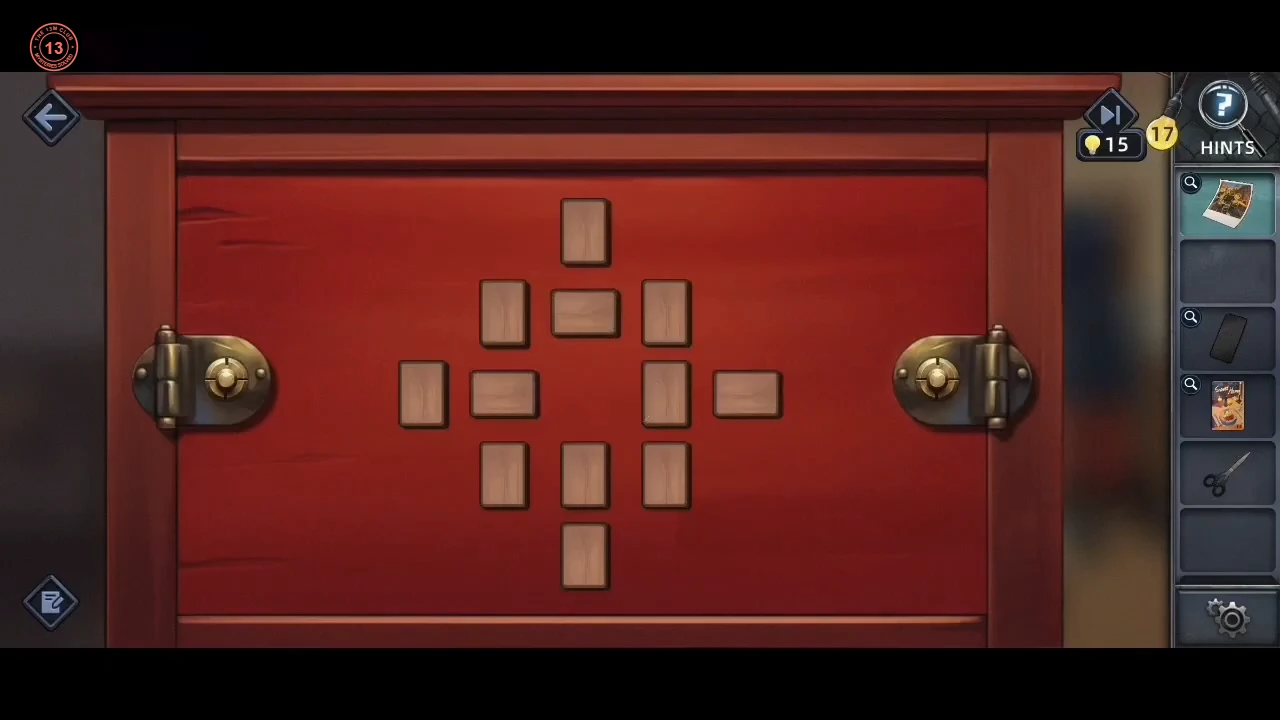
Match the red cabinet's tiles to the outline in the new photo.
- Another photo drops to the floor in front of the red cabinet: pick it up. Its yellow outline shows how the cabinet's wooden tiles should be turned. The tiles stay in their places; tap a rectangular tile to rotate it between upright and sideways, and turn each one to match the outline in Another photo (the cabinet solves when all of them match). Take the Watch from the opened cabinet ("Alex has wanted this watch for a long time") and the Chess piece.
The queen box
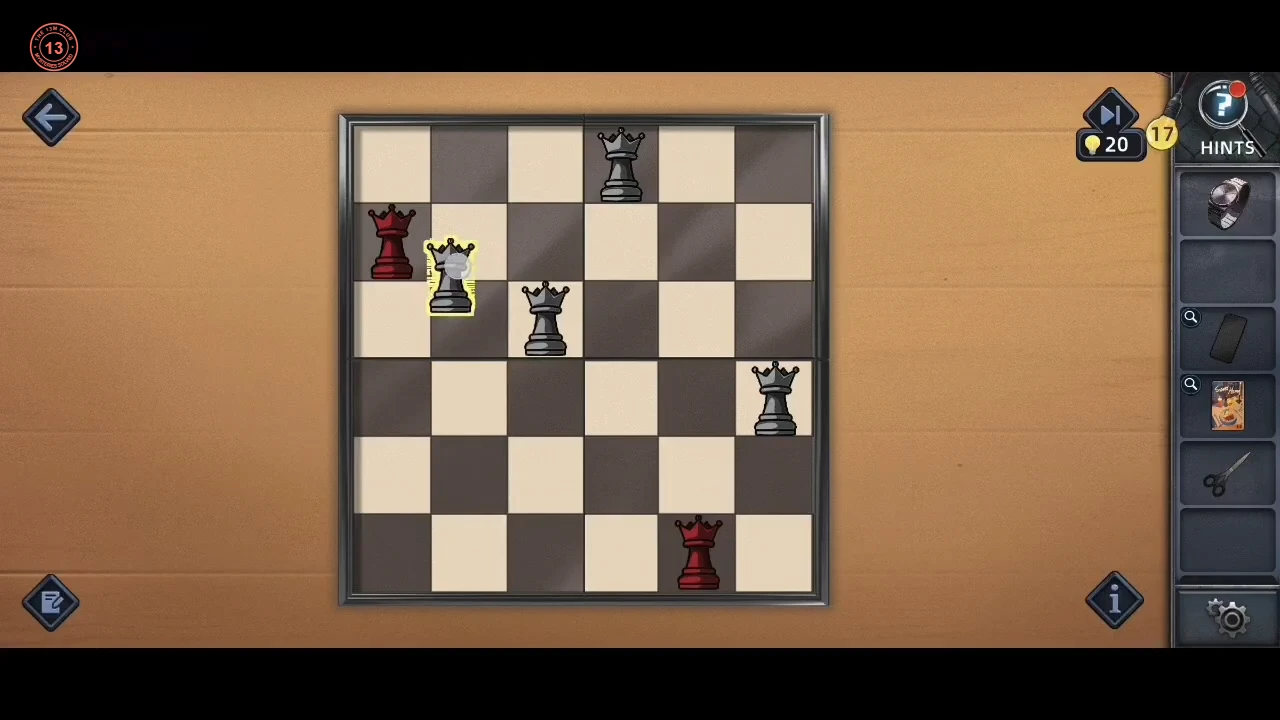
The checkerboard box has two layers of queen placement and holds the gift.
- Use the Chess piece on the checkerboard box and place queens so none share a row, column or diagonal (a queen turns red while it shares a line with another, white when safe). Layer 1 (6x6): r1c4, r2c1, r3c5, r4c2, r5c6, r6c3. A second layer appears: an irregular board of seven rows with a dark gap in the middle of row 4. Place 7 queens, counting from the left end of each row: row 1 (3 squares) the 2nd square; row 2 (6 squares) the 6th; row 3 (6 squares) the 3rd; row 4 (the full-width row with the gap) the 1st; row 5 (6 squares, starting at the left edge) the 5th; row 6 the 2nd; row 7 (3 squares at the bottom right) the 3rd. Take the Thin Line spool from the opened compartment, then put the Watch inside the box as the gift.
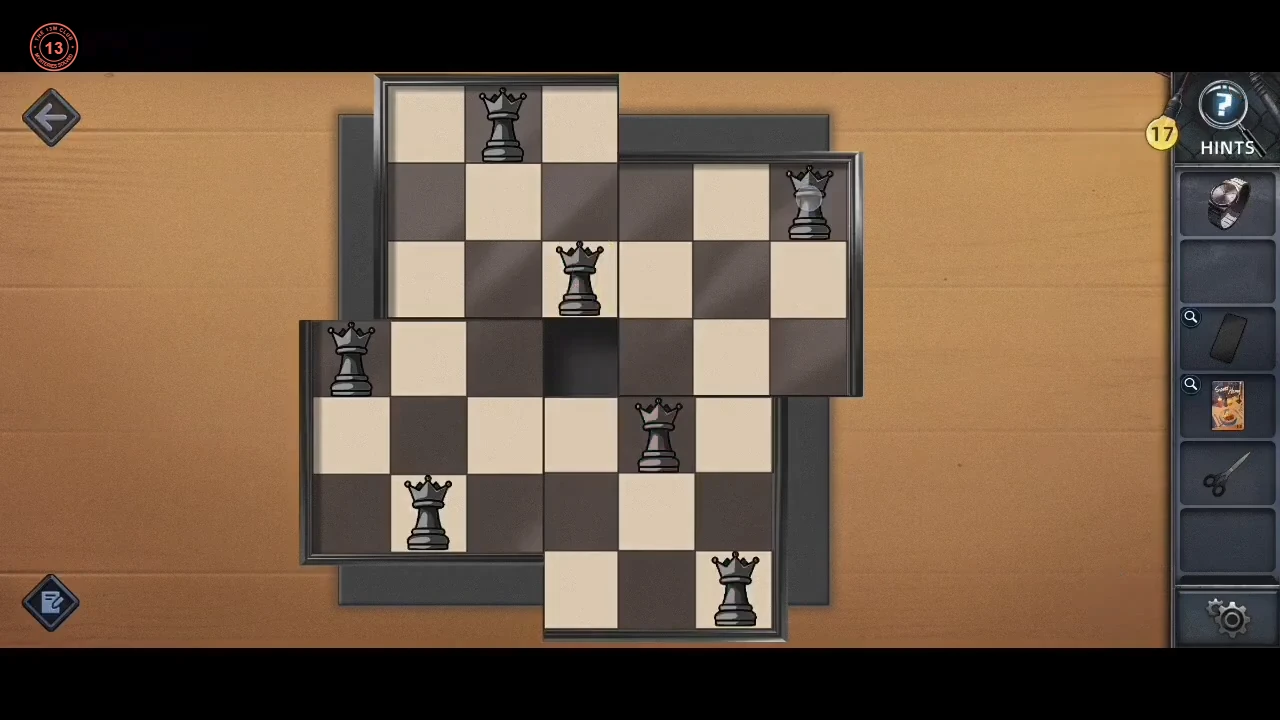
The solved second layer.
The recipe book
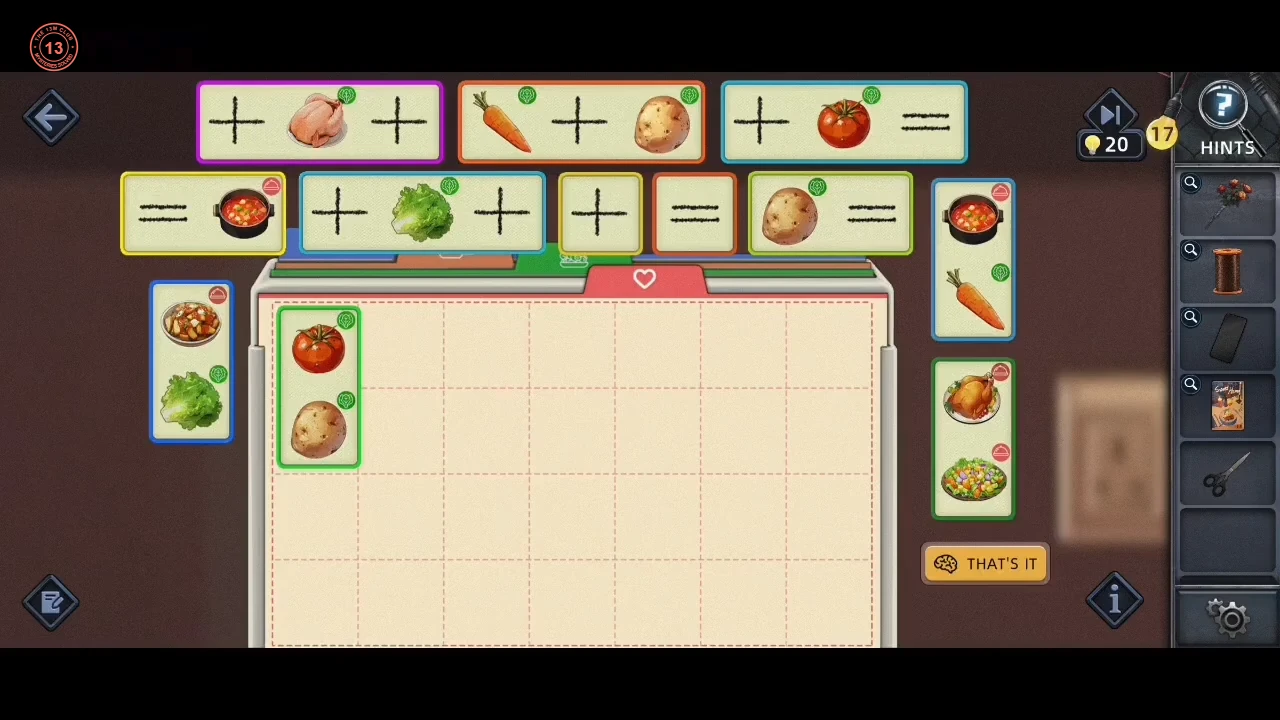
Restore the damaged recipe book to prepare the chicken.
- The courier brings the Untrimmed flowers and the Raw chicken. In the kitchen, place the Raw chicken on the recipe book; its recipes are scattered, so drag the strips back into the grid. Each row must read as a recipe: ingredients joined by +, then = and the finished dish. Row 1: tomato + carrot + potato = pot of soup. Row 2: potato + tomato = bowl of stew (the last two squares stay empty). Row 3: pot of soup + chicken + lettuce = roast chicken. Row 4: carrot + lettuce + potato = salad. The two-square upright pieces sit in the left column (tomato over potato, soup pot over carrot), in the fifth column (stew over lettuce) and in the right column (roast chicken over salad). Press THAT'S IT; following the recipe turns the raw bird into Processed chicken. Put it in the oven.
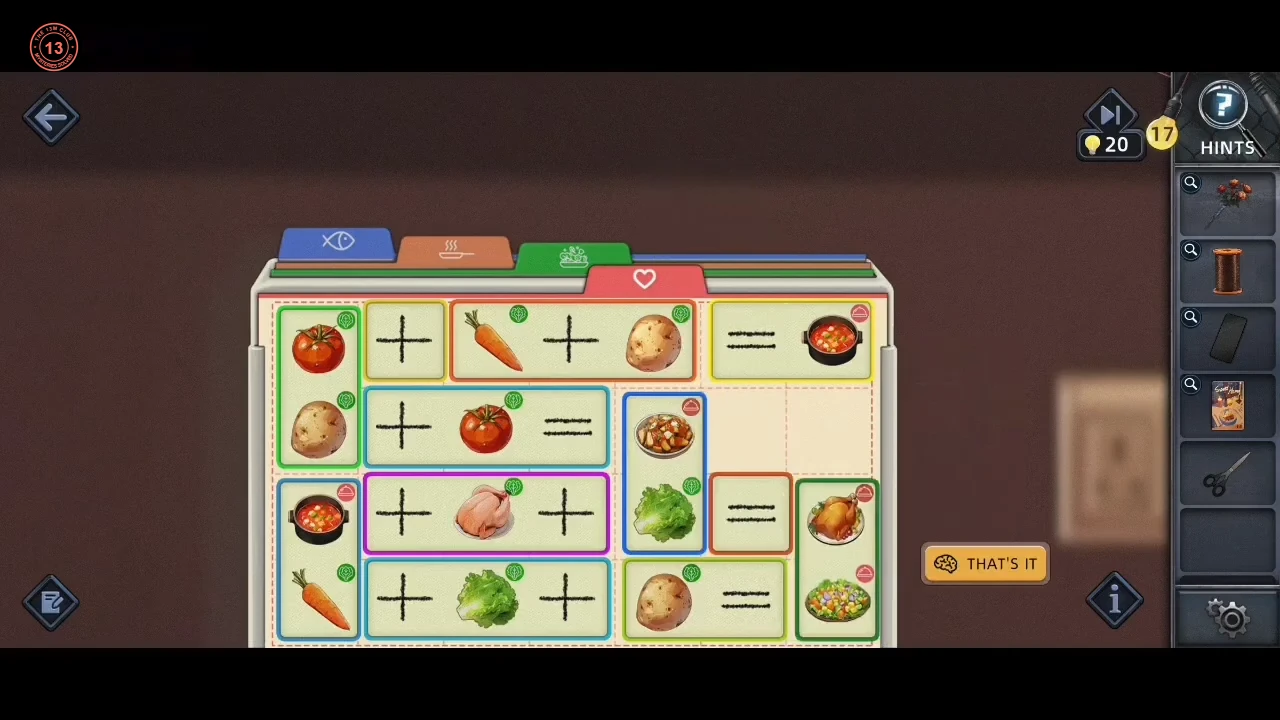
The restored recipe grid.
The rose vase
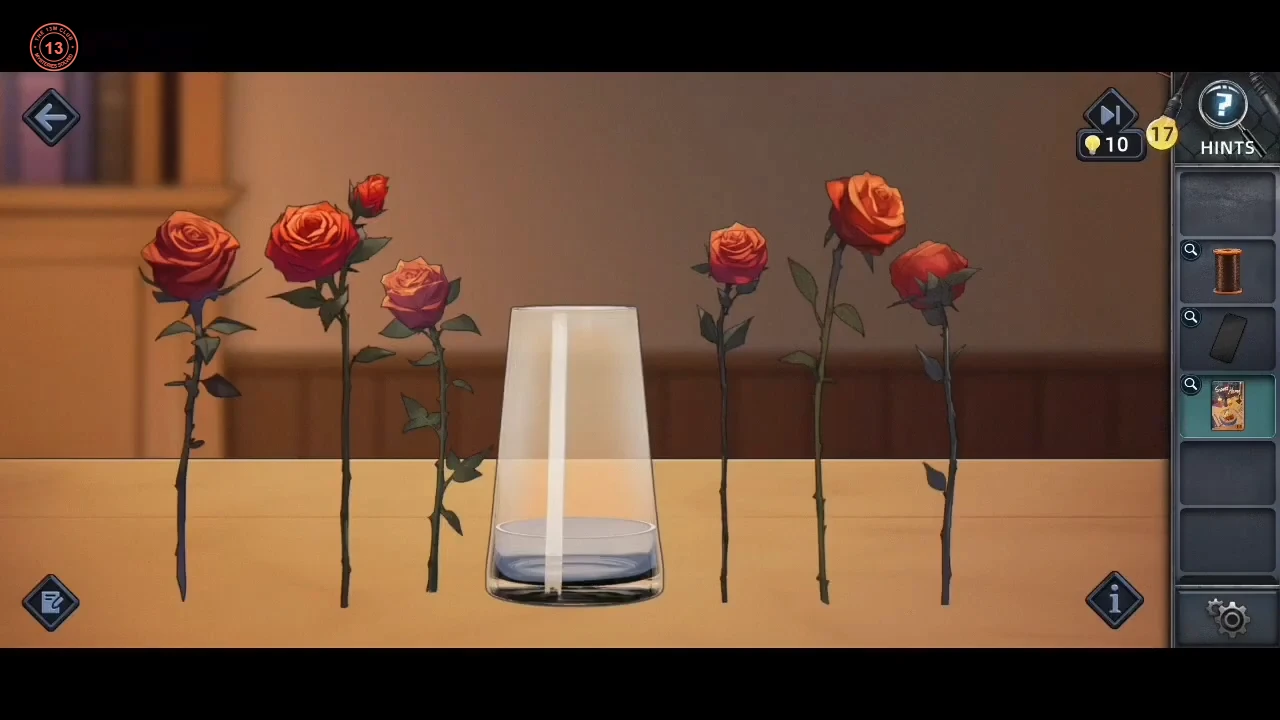
Trim the roses, arrange them in the dining-room vase to match the magazine's bouquet, then add candles to finish the candlelit dinner.
- Use the Scissors on the Untrimmed flowers in your inventory to get Pruned flowers, then use them on the empty vase on the dining table. Open the Magazine at its Flower Arranging page: the right-hand page shows the bouquet silhouette to copy. In the vase view, tap a rose (it gets a yellow outline) and six numbered pins fan out over the vase, 1 at the far left to 6 at the far right; tap a pin to put that rose there. Accepted arrangement in the recording, using the roses' starting places (three on the left of the vase, three on the right): the dark bud at the far right to pin 1, the tall rose at the far left to pin 2, the inner rose of the right-hand group to pin 3, the tall rose remaining on the right to pin 4, the tall rose remaining on the left to pin 5, and the short pink rose to pin 6. The bouquet then matches the silhouette. Your phone's task list for the Warm Candlelight Dinner still has Candles unticked, and the Magazine's 'Make a candlelit dinner' page shows two candles on the table. In the kitchen, open the low cupboard left of the oven and take the Candle (x2), then place them on the dining table. Lily: "Everything is almost ready, just waiting for Alex to come back."
The basement symbol lock
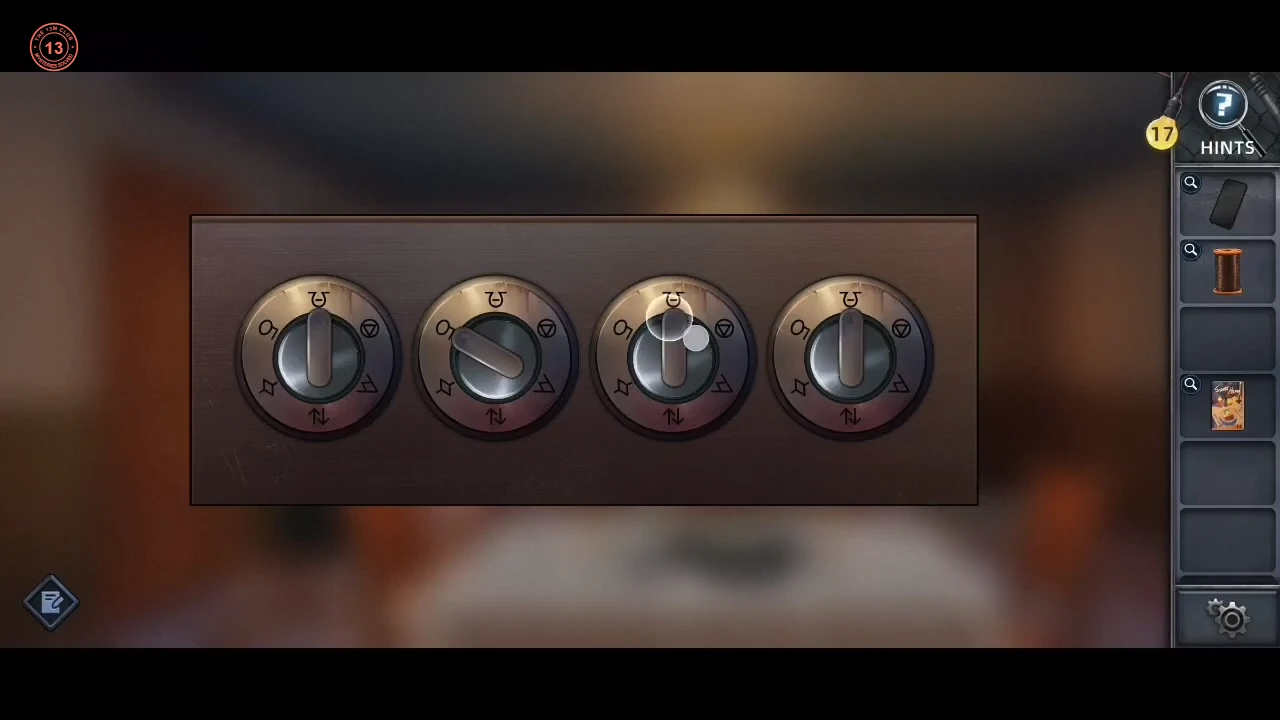
Susan returns, now changed. Alex's password of four symbols opens the basement.
- Susan knocks again, now changed. Alex calls and sends a password of four symbols: U with a bar, loop, wavy triangle, up-down arrows. Point the four dials of the basement lock at those symbols in order.
The fuse panel
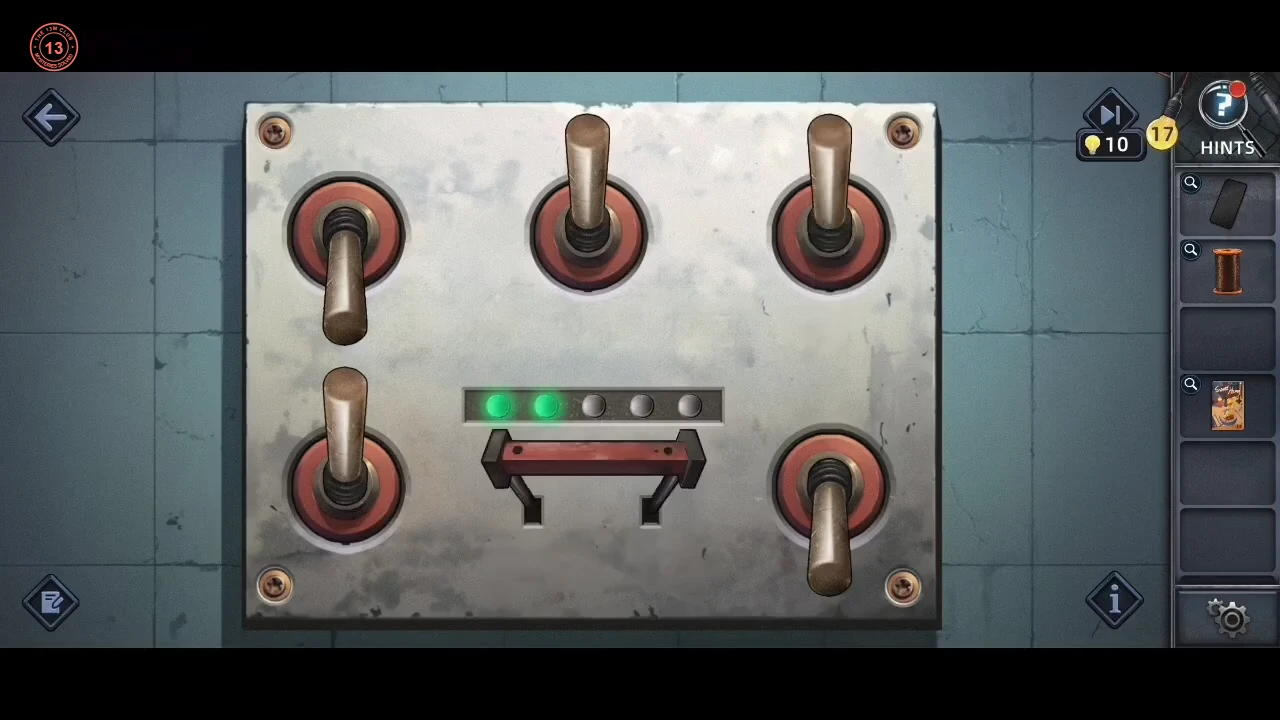
Set the fuse switches until all lights are green.
- Flip the fuse panel switches and pull the lever; the number of green lights shows how many switches are right. Final: top row left down, middle up, right up; bottom row left up, right down.
The blanket safe
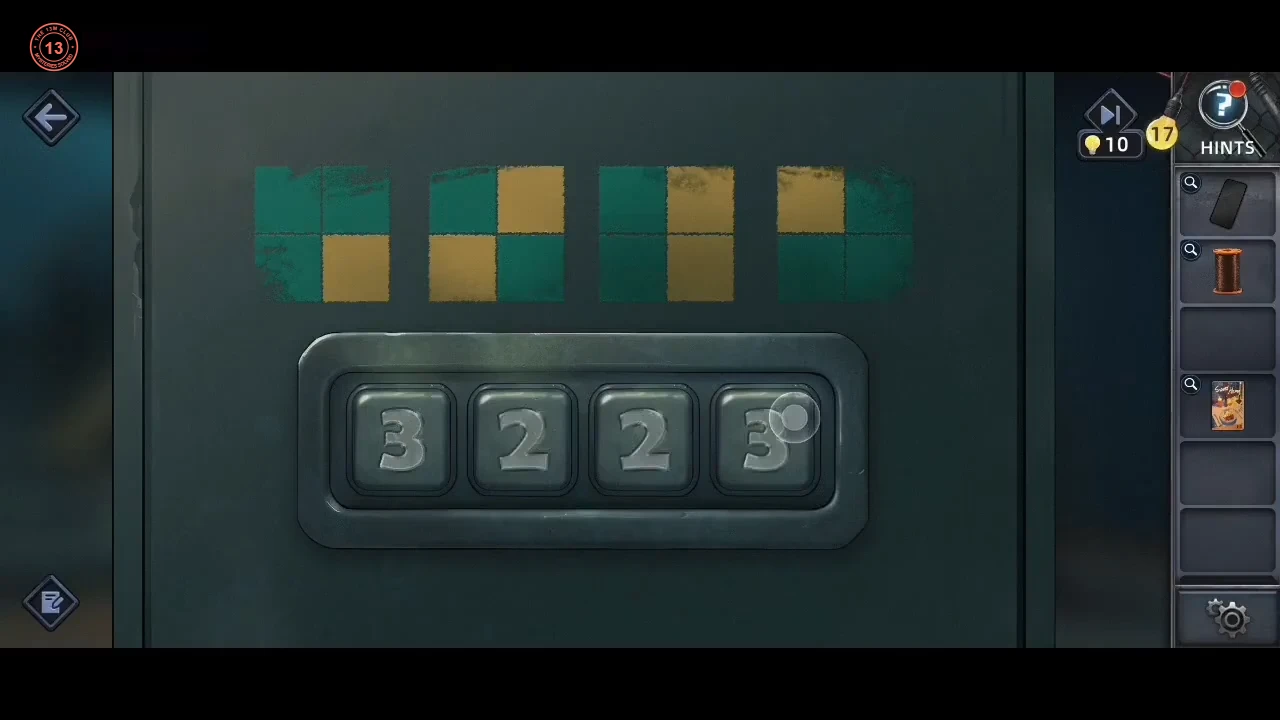
The checkered blanket gives the safe code.
- The safe plate shows four green-and-yellow 2x2 tiles. The clue is the checkered blanket on the cabinet: inside its light border is a 5x5 dark-green grid with yellow squares (Y), read row by row from the top: row 1 Y in columns 2 and 4; row 2 columns 1 and 4; row 3 column 3; row 4 columns 1 and 5; row 5 columns 3 and 5. Check every 2x2 block of neighbouring squares in that grid (blocks may overlap) and count how many match each tile. The tile with only its bottom-right square yellow appears 3 times, the diagonal tile (top-right and bottom-left yellow) 2 times, the right-column tile 2 times and the top-left-only tile 5 times. Open the safe with 3225 and take the Fish Hook from inside. Combine it with the Thin Line spool from the queen box to make the Hook rope, and throw the Hook rope onto the top of the cabinet for the Ring.CODE3225
Alex's puzzle box
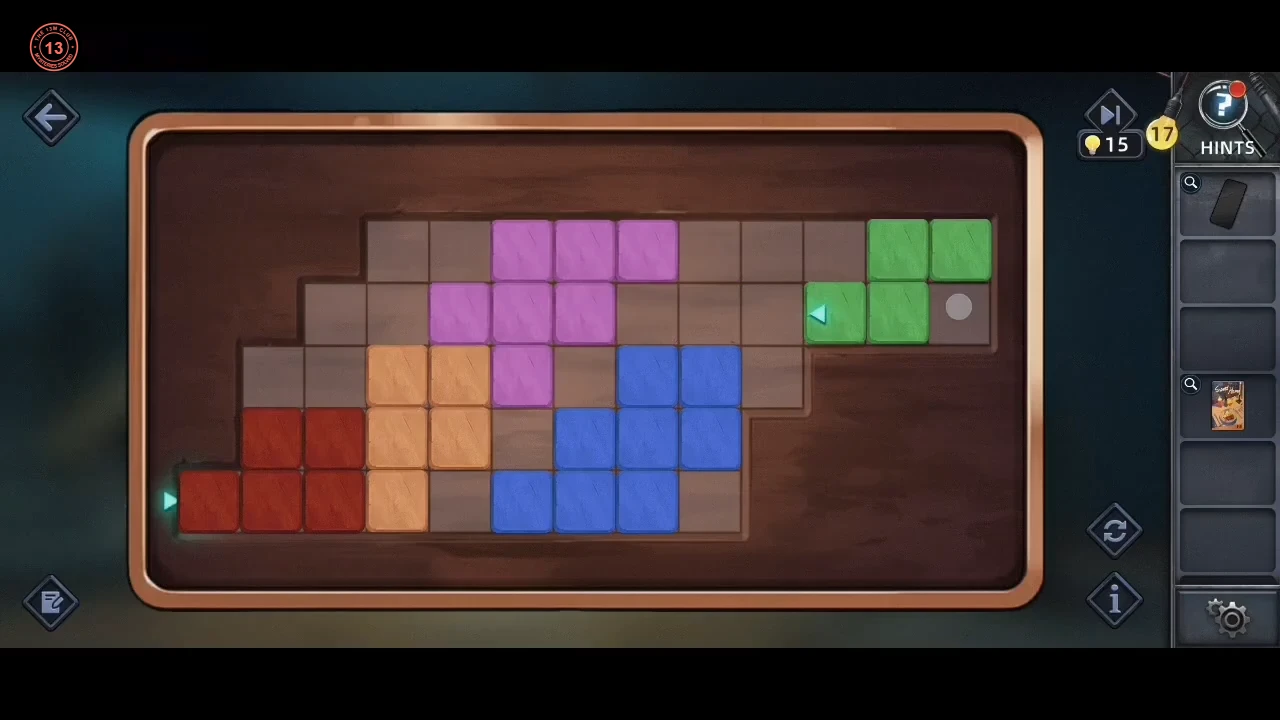
Alex's puzzle box is a sliding-block board; the key inside opens the U-Lock.
- Set the Ring into Alex's puzzle box (the book with a wooden lid) to open a sliding-block board. Drag the coloured blocks to free a path for the green block (the one with the arrow, starting at the top right) to the exit at the bottom left. A practical order: park the pink block in the top-left corner and the orange block against the left edge, then push the blue block up into the top-right corner. Bring green left along the upper rows and down through the middle while the red block moves right along the bottom row. Finally slide orange up out of the bottom-left corner so green can run along the bottom row to the exit. Take the Key from the opened box and use it on the lock beside the safe for the U-Lock.
The stuck door and the hammer
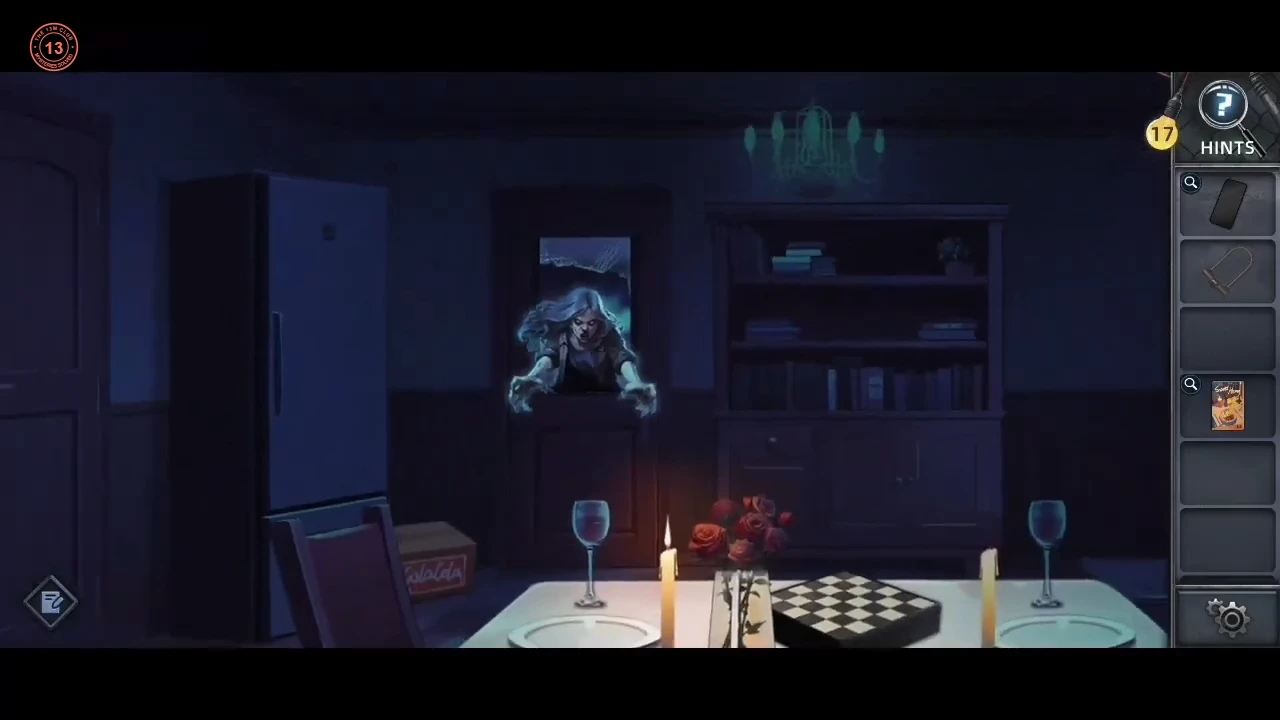
Repair a hammer to break the stuck dining-room door.
- The power fails and an intruder smashes in. With no lubricant left, Lily must break the stuck dining-room door. Pick up the Glass shards on the floor at the front left of the dining room. Use them on the sealed cardboard box under the left chair to cut it open, then take the Broken hammer from among the cans. Use the Glass shards on the front edge of the tablecloth to cut a Cloth strip, then wrap the strip around the cracked hammer handle for the Repaired hammer. Use the hammer on the stuck door at the left.
The trophy nameplates
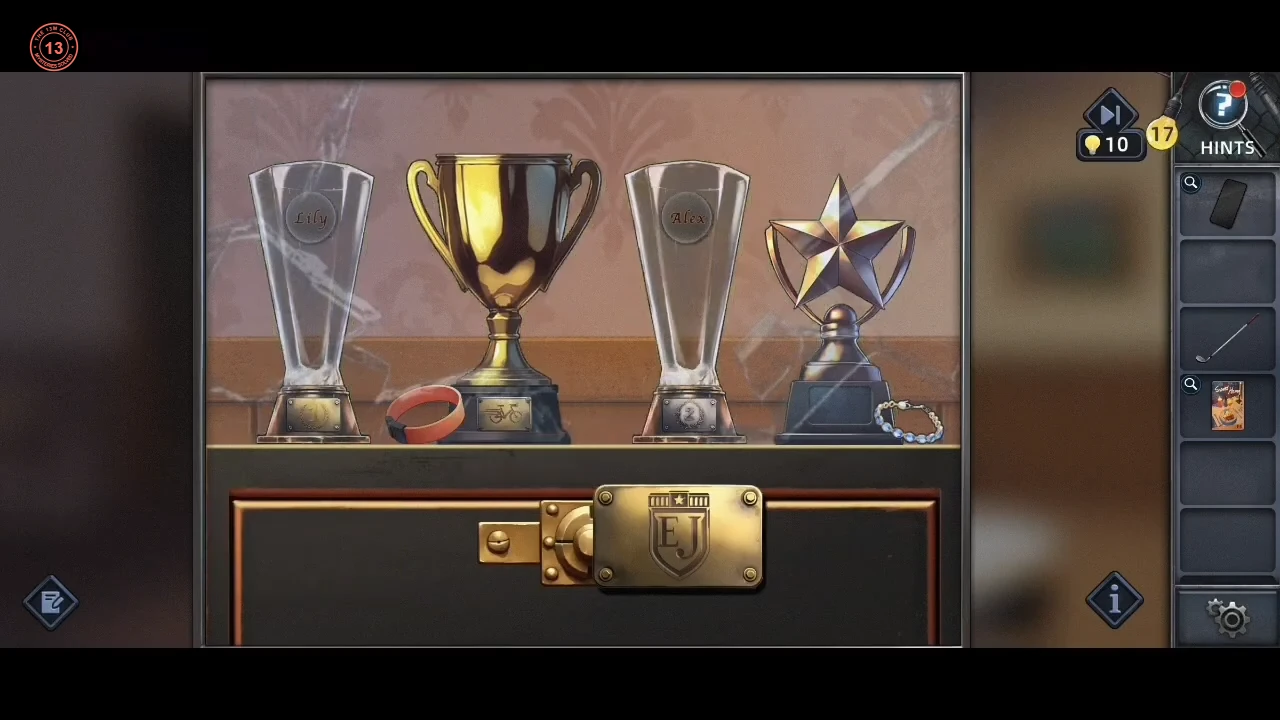
Lock the front door and block the orange door, then match the nameplates to the trophies to get the Foam gun and seal the orange door.
- In the living room, open the close-up of the brown front door and fit the U-Lock to it. Then push the hand truck with its stack of boxes in front of the orange door to block it. Lily fears the door will still be smashed and remembers the foam gun under the trophy cabinet. Take the Nameplate from the open grey case on the floor beside the red cabinet and the Golf club lying on the floor nearby, then open the trophy cabinet: "Match the trophies with their corresponding nameplates to open the cabinet." Place the four plates under the trophies, left to right: the "1" plate under the first glass trophy, the bicycle plate under the gold cup, the "2" plate under the second glass trophy and the crest plate under the star trophy. Take the Foam gun from under the opened cabinet and use it on the orange door to seal it. Lily: "It should be safe to take a break now."
The storage-room chain
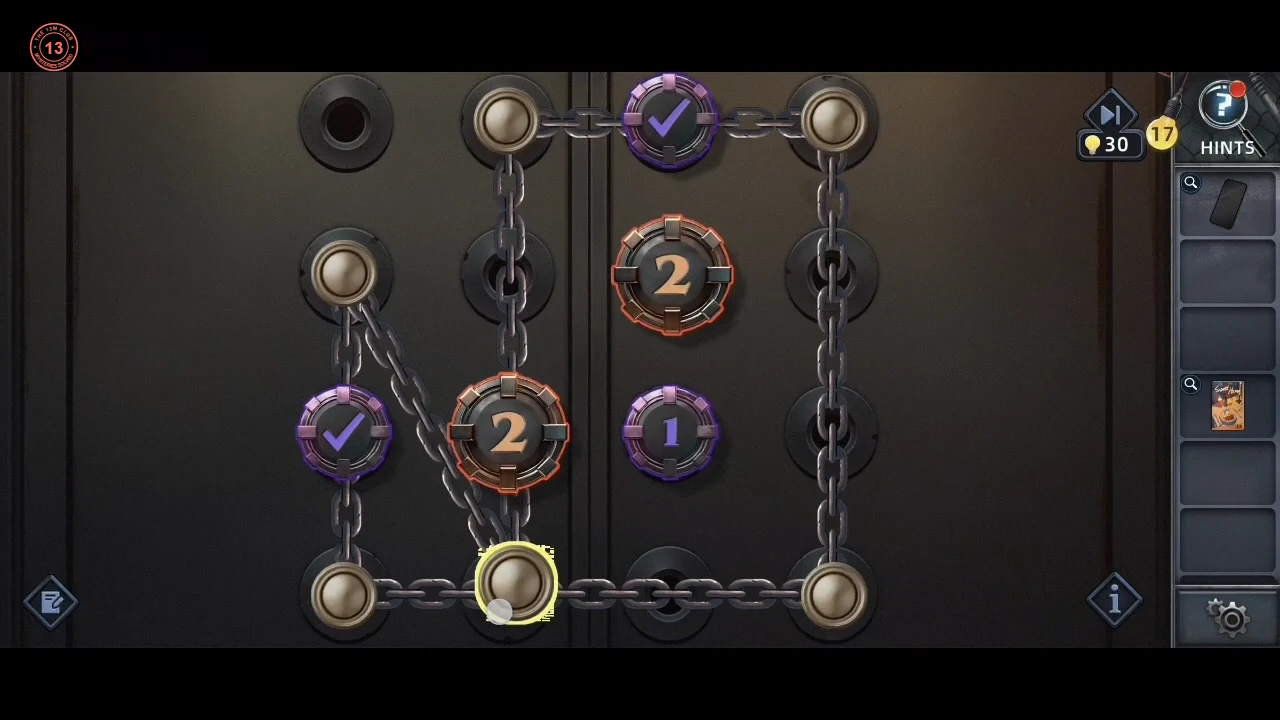
Bar the storage-room door, then lock it with the chain.
- Zombie Susan breaks in and Lily fights her off with the Golf club, cracking it; she hides in the storage room, where the cracked club ends up wedged through the double-door handles. Lily: "But the golf club is almost broken. Need to find something else to lock the door." Take the Wooden stick leaning against the shelves at the left and use it on the door handles; Lily takes the Broken golf club back. Use the Broken golf club on the wooden crate beside the door to pry it open and take the Iron chain, then use the chain on the door handles. "Dragging the node to adjust the chain; the number shows how many times the node needs to be chained through." The board is a 4x4 grid (rows from the top, columns from the left) with six brass anchor pegs that you drag between the empty holes; the chain runs from peg to peg in a closed loop. The numbered rings are r2c3 (2), r3c2 (2) and r3c3 (1); the purple rings at r1c3 and r3c1 show a tick while the chain passes through them once. Accepted layout: pegs at r1c2, r1c4, r2c1, r2c4, r4c1 and r4c2, with the chain running r1c2 to r1c4 along the top row (through r1c3), r1c4 diagonally down to r4c1 (through r2c3 and r3c2), r4c1 up to r2c1 (through r3c1), r2c1 across row 2 to r2c4 (through r2c3 again), r2c4 diagonally down to r4c2 (through r3c3) and r4c2 straight up to r1c2 (through r3c2 again). Every ring then shows a tick. Lily: "I hope you are here." An axe breaks through the door, ending Chapter 4.
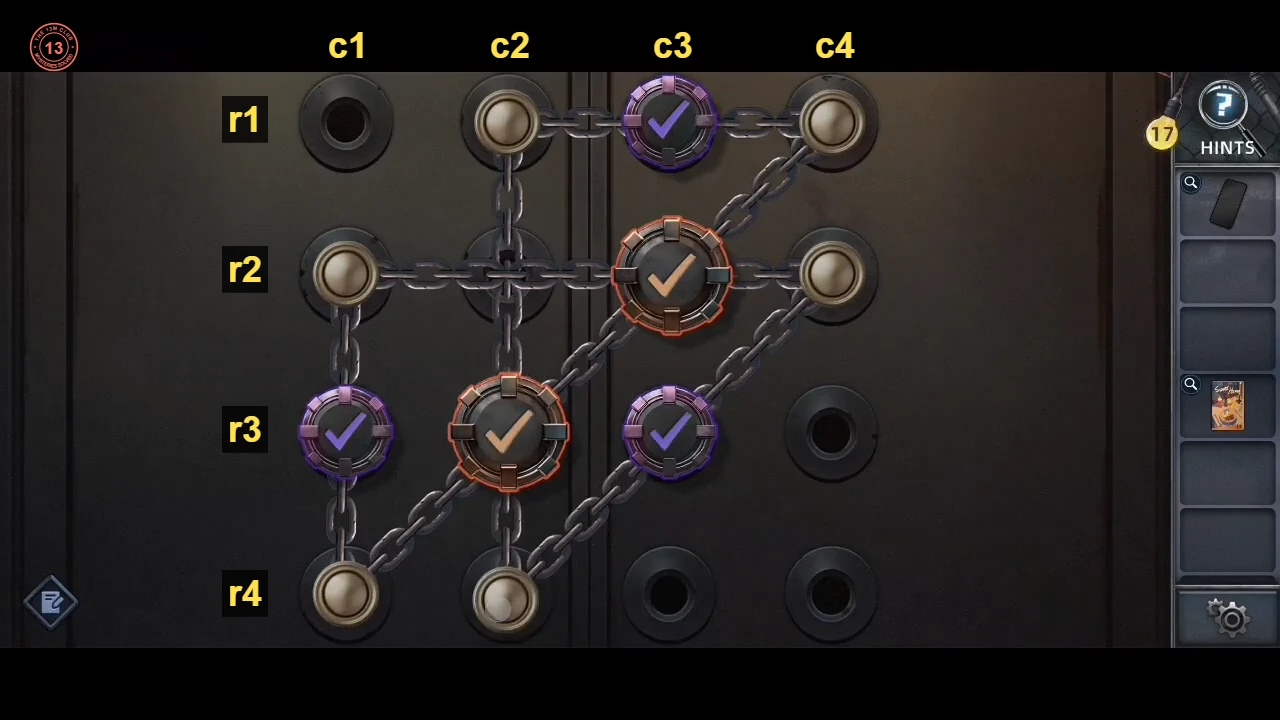
The accepted chain with rows and columns labelled. Every ring shows a tick.