The manor courtyard and the wine-press room
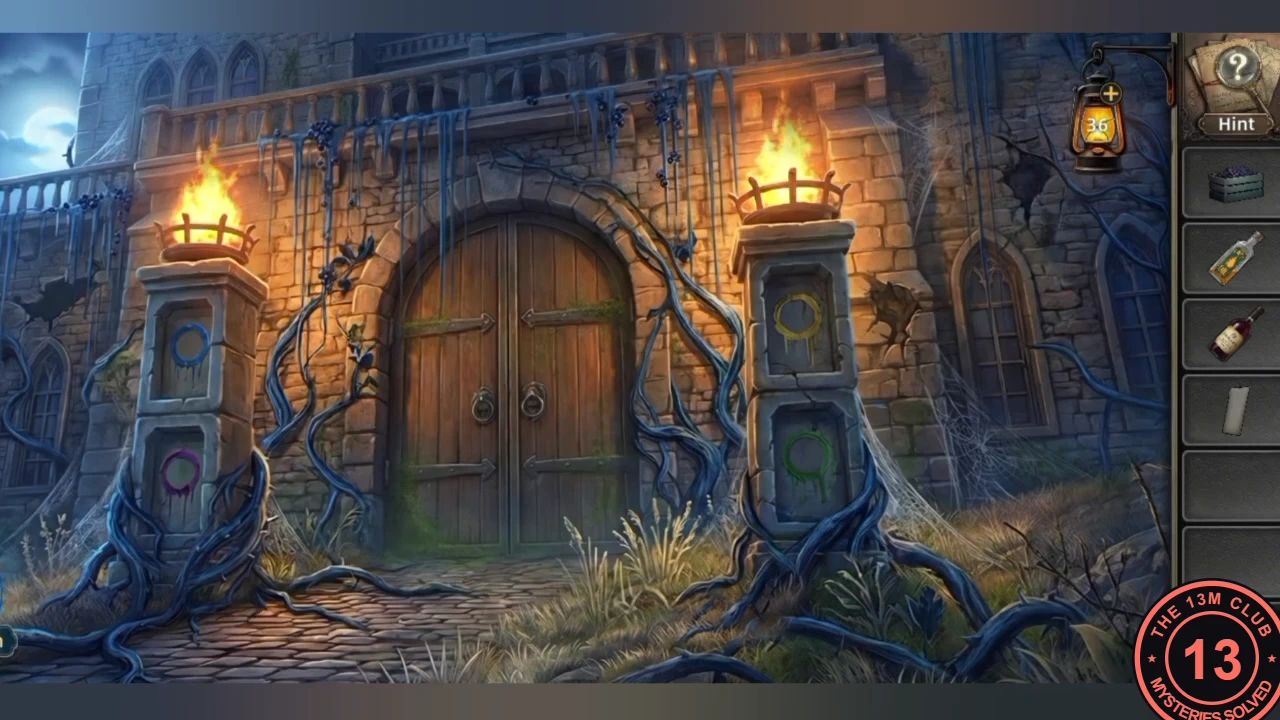
In the manor courtyard, collect the wines and grapes and light the wine-press room.
- In the courtyard, take the Strange Sphere from the fountain. In the Winemaker cabinet take the Key, Pierce's note (wine cabinet code 65263) and the Dry Red Wine, then use the Key on Nelson's locked left cabinet and take the Oil. In the dark wine-press room, pick up the Unlit Candle. At the shed, use the Strange Sphere on the left grapevine: the vine grows and fills a basket; take the Basket of Grapes. Light the Unlit Candle at the torches by the big doors, then put the Lighted Candle in the holder in the wine-press room to light it.
The power lever sliding blocks
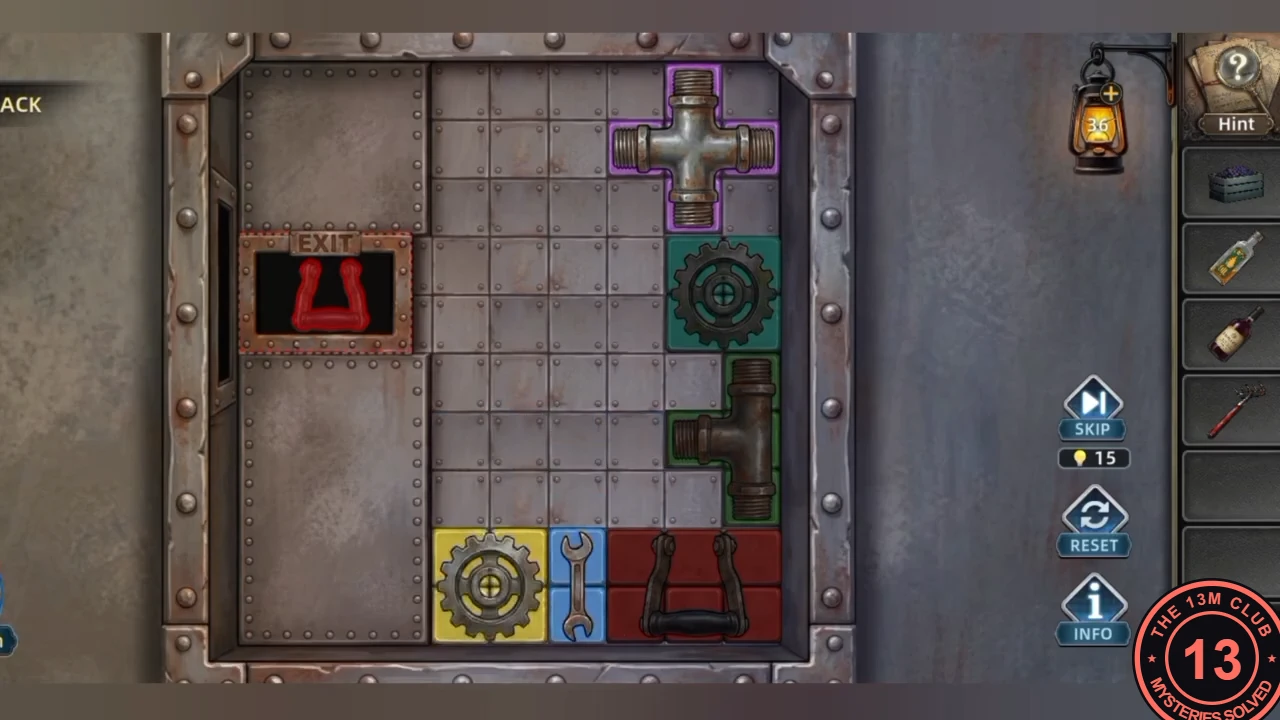
Slide the blocks so the red power lever reaches the exit.
- Take the Iron Rake. Then open the sliding-block board: "Drag the blocks and move the red block (power lever) to the exit on the far left." The playing area is 6 squares wide and 10 tall. The exit is in the left wall at the 4th and 5th rows from the top, and the red block is 3 wide and 2 tall. At the start, the red block sits at the bottom with a gear block, a cross pipe, a T-pipe, a wrench block and a teal gear packed around it. Blocks only slide along open squares. Solve it by parking every other block below the exit rows, so the 4th and 5th rows are completely empty. The parking layout that worked, counting from the bottom-left: the teal gear (2x2) in the bottom-left corner, with the green T-pipe standing upright above it against the left edge; the cross pipe in the bottom middle; the wrench (1x2) upright in the bottom-right corner; and the yellow gear (2x2) above the wrench, against the right edge. Lift the red block up onto the right-hand side of the 5th and 6th rows above the gear, slide it up one row into the exit rows, then drag it left into the exit. Expect some trial and error while you shuffle the blocks into this layout; the guide does not list every slide. Take the Power Lever. Use the Iron Rake on the wine-press inlet to clear the vines blocking it, and take the Yellow Button lying inside. Zoom into the scarecrow beside the workbench (the half-dead man in the armchair warns you to stay away from "his Riggs") and take the Mycelium Powder from the pocket of its patched apron. Load the Basket of Grapes into the inlet ("The ingredients are ready. Now I need to restore the power."), then fit the Power Lever in the fuse box.
The grape conveyor and Pierce's cabinet
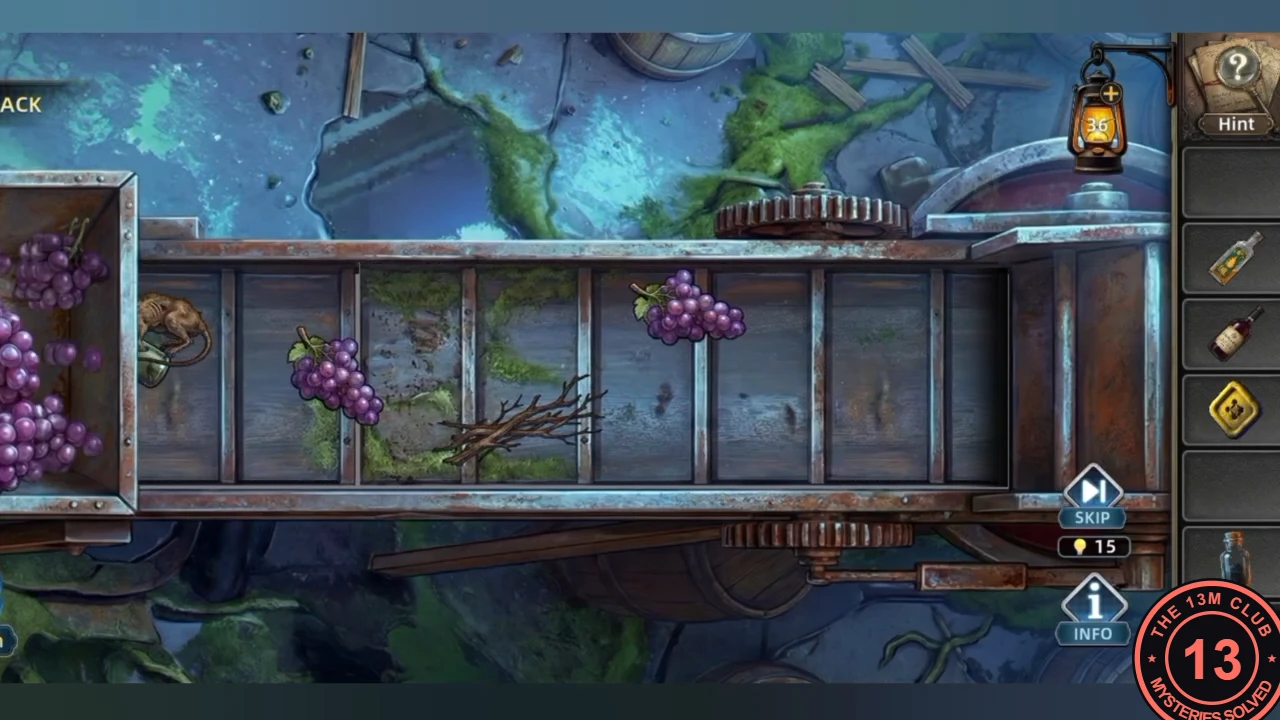
Keep the rats off the grape conveyor, collect grape juice and open Pierce's cabinet.
- On the conveyor, tap the rats to stop them eating the grapes until enough grapes reach the press. Take the Stemmed Glass from beside the machine on the workbench and hold it under the wine-press spout to collect Grape Juice.
- Pierce's cabinet padlock (the right one) is rusted shut: pour the Oil on it first, then open it with 65263 and take the Dry White Wine.CODE65263
The scarecrow face and the Corrosive Essence
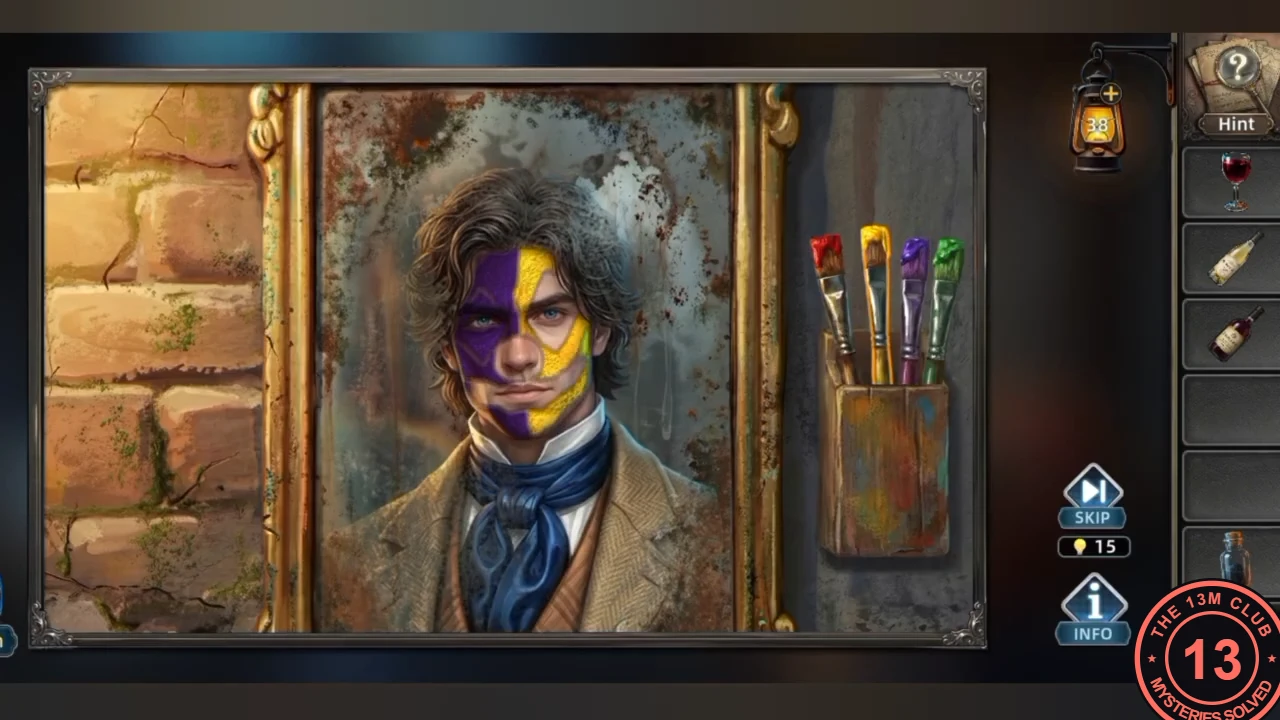
Paint Riggs's face like the scarecrow, then mix the Corrosive Essence from the formula.
- Zoom into the scarecrow and use the Yellow Button on it: it becomes the scarecrow's painted face ("This face is complete now."). In the mirror, paint Riggs's face to match the scarecrow so the half-dead man recognises him; he hands over the Corrosive Essence Formula. It shows four ingredients for the machine on the workbench: the two wine bottles go into the left feed inlets on top, and the grape juice and powder go into the right-hand funnel. Put the Dry Red Wine and the Dry White Wine in the left inlets, pour the Grape Juice and the Mycelium Powder (from the scarecrow's apron) into the right funnel, then turn the red crank on the left of the machine. Take the Corrosive Essence from under the spout and use it on the tangled vines at the left of the press room to clear the way to the cellar.
The wine cellar
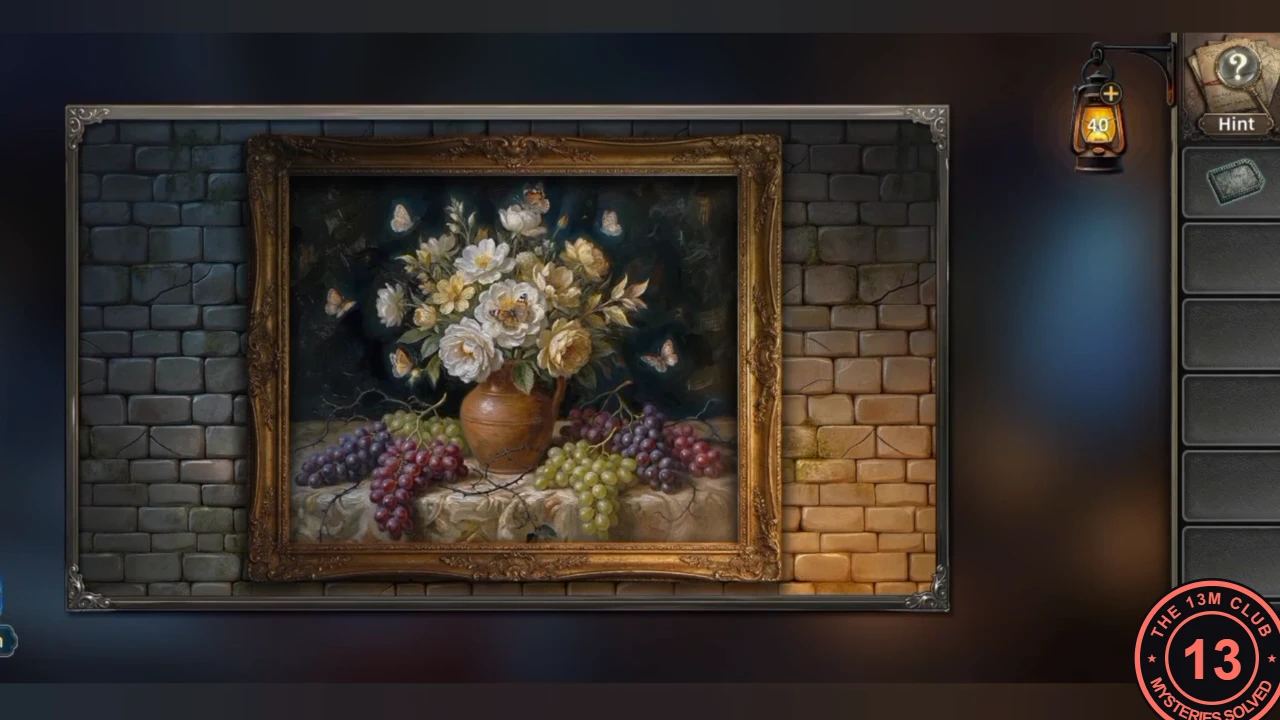
The wine cellar pictures give the symbol lock code, and a wolf guards the Star-shaped Wrench.
- Take the Stone Tablet. Count the creatures in the cellar pictures (lizards 5, frogs 2, spiders 3, butterflies 7) and enter 5237 on the symbol lock. Take the Bandage.CODE5237
- In the room with the barred gate, give the Bandage to the injured wolf. When it moves aside, take the Handle from its straw nest and fit it on the mechanism beside the barred gate; the gate opens (a shortcut to the courtyard) and you can take the Star-shaped Wrench behind it. Go back to the barrel hall: the round lid with a star-shaped socket sits in the broken back wall between the barrels (the wrong tool gives "This won't open the lid"). Turn it with the Star-shaped Wrench. The lid opens onto a tunnel where Riggs finds Will, and the chapter ends in a cutscene.
Fatal Whispers: the barn and the sheep
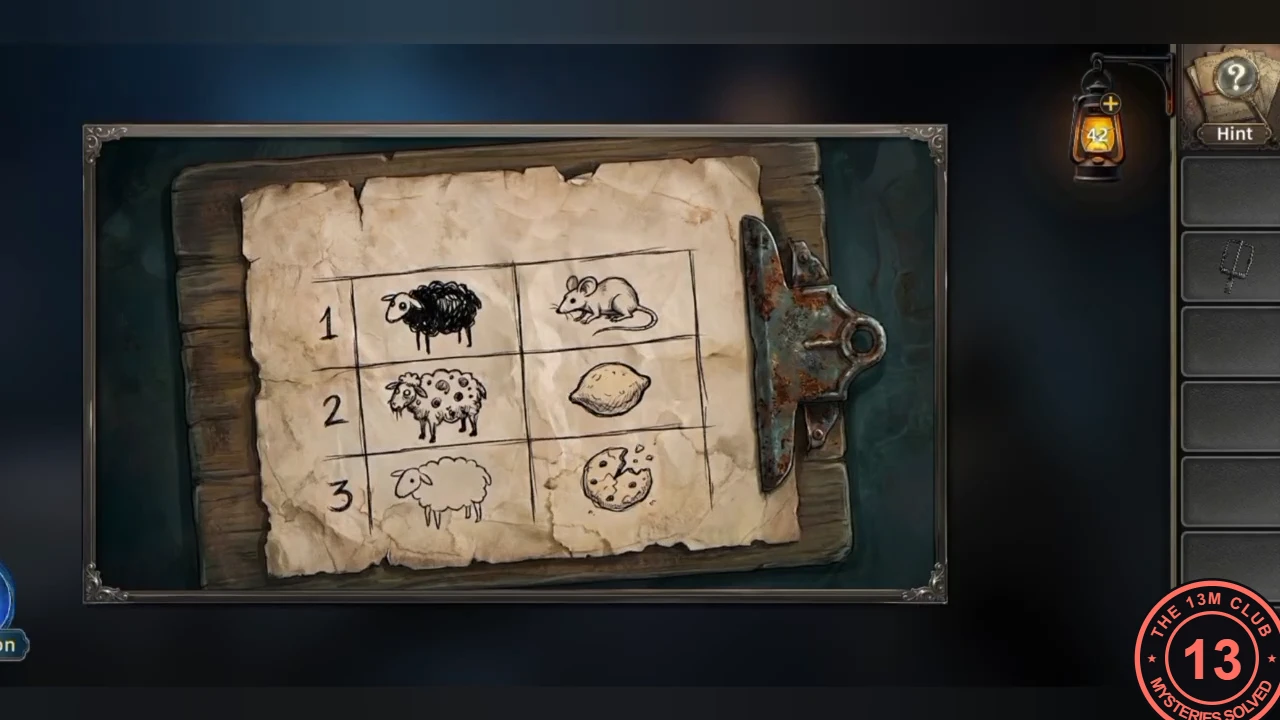
Chapter 3 starts with Riggs tied up. Break free, then feed the barn sheep according to the chart.
- Stop the swinging weight inside the green zone to break free. In the barn, read the feeding chart on the wall: black sheep = mouse, spotted sheep = lemon, white sheep = biscuit.
- Take the Knife and the Part from the tool board on the barn wall. Use the Knife to cut away the vines covering the barrel and cabinet on the right, then take the Biscuit from the cabinet's drawer. Put the Biscuit in the feeding trough: the white sheep eats it and coughs up a piece of Cheese. Repair the broken mousetrap on the barn floor with the Part and bait it with the Cheese to catch the mouse, then put the mouse in the trough for the black sheep, which coughs up a Key. Open the locked drawer of the same cabinet with the Key, take the Handle and fit it on the barn's back door to reach the greenhouse.
The tree monster's hands panel
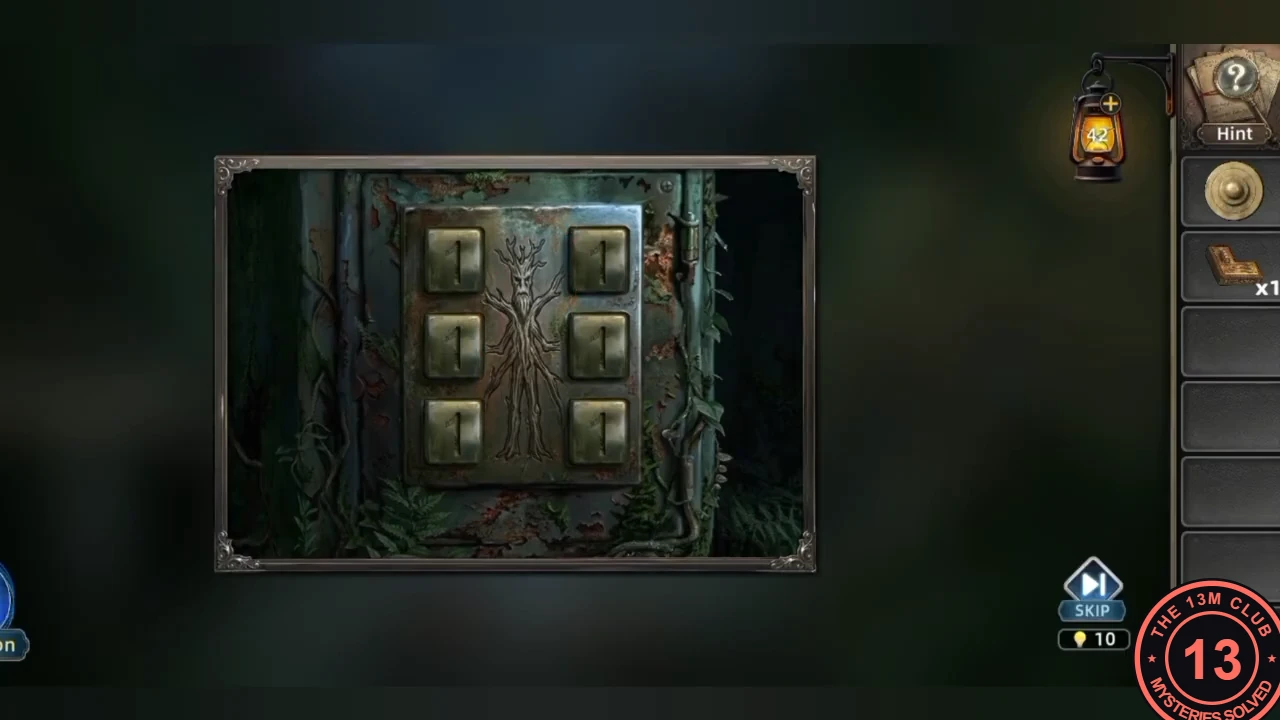
Assemble the saw, clear the greenhouse wall and count the tree monster's hands for the button panel.
- In the greenhouse, take the Saw Blade from the floor in front of the glowing plant. Back in the barn, fit it into the empty saw frame on the tool board to make a Saw. Saw through the plants covering the greenhouse's left wall and take the Disc and the Circuit Component that fall to the floor. On the six-button panel of the cabinet on the left, match each button to the tree monster's hand in the same position and count the fingers that hand holds out. Tap each button until it shows that number: 4, 5, 1 (left column, top to bottom) and 3, 2, 6 (right column). Take the Lemon that appears and put it in the barn trough for the spotted sheep.CODE451 / 326
The sheep-eye rune cabinet
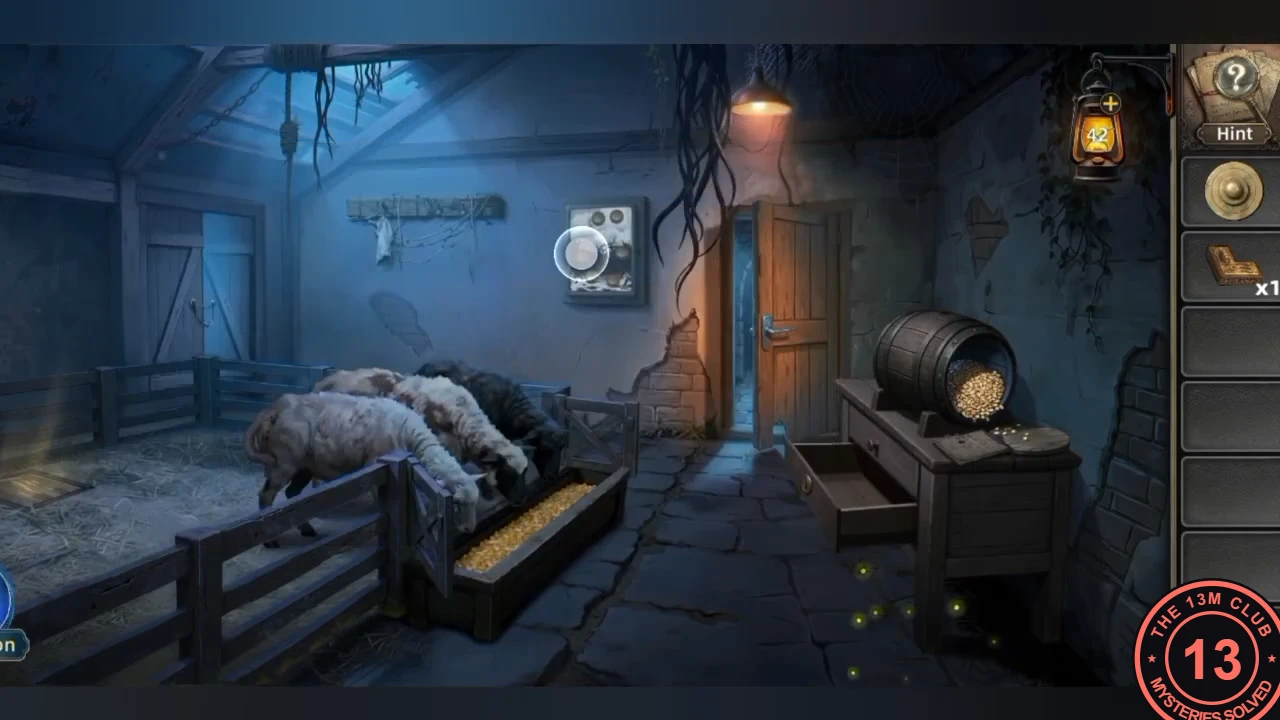
The sheep show runes in their eyes; copy them onto the cabinet's rune discs.
- The spotted sheep coughs up an Iron Crow Emblem: put it on the barrel by the cabinet so it spills Corn Kernel, and put the corn in the trough. The sheep crowd round it and reveal a trapdoor under the trough, but the Tramp hiding below will not let Riggs in. Look closely at the three sheep at the trough: each eye shows a glowing rune. Open the small cabinet on the wall left of the barn's back door; it has six rune discs in three pairs. Tap a disc to change its rune and copy the eyes, left eye on the left: top pair = white sheep (a stroke bent like a hook, then an F-shape with two arms angled upwards); middle pair = black sheep (a diamond standing on two crossed legs, then a stroke with a small triangle pointing right); bottom pair = spotted sheep (a vertical stroke through a small diamond, then an X stacked under a diamond). Take the Syringe and the Citrine from the cabinet. In the greenhouse, use the Syringe on the glowing Dusk Grass plant to take its sap, and hand the Syringe Filled with Sap to the Tramp through the trapdoor.
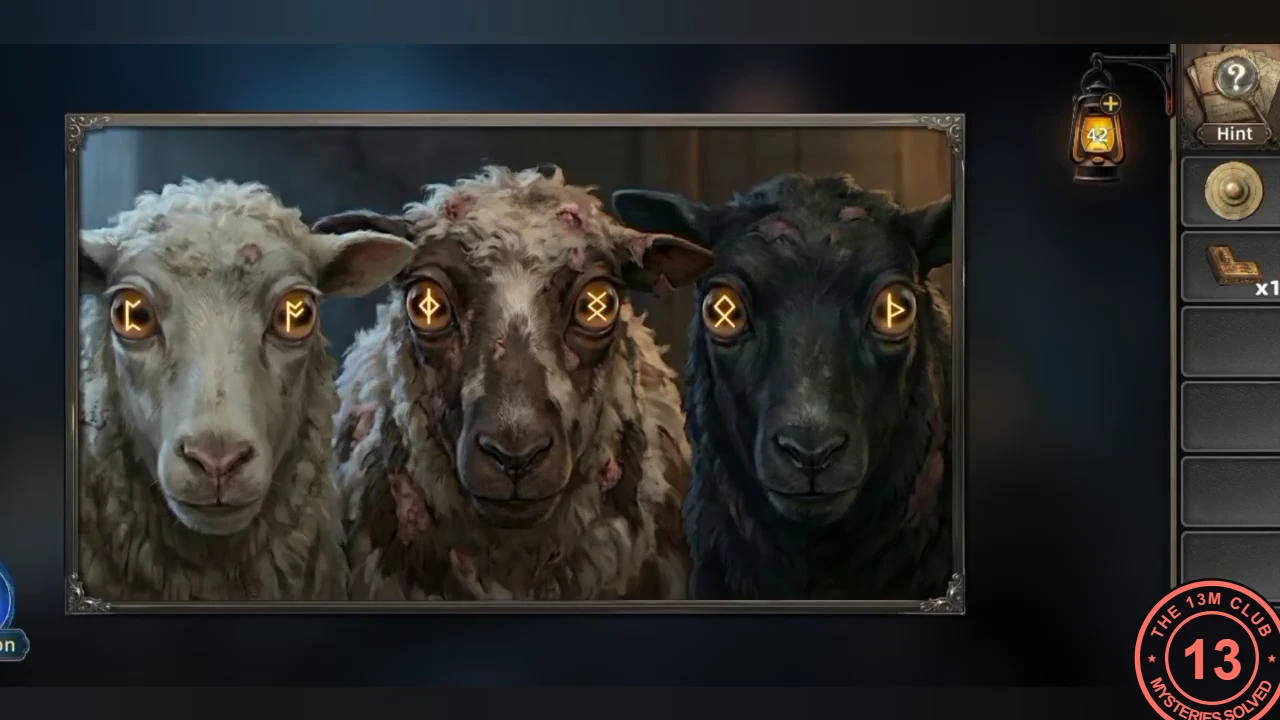
The runes in the sheep's eyes. Each sheep gives one pair of cabinet discs, left eye on the left. 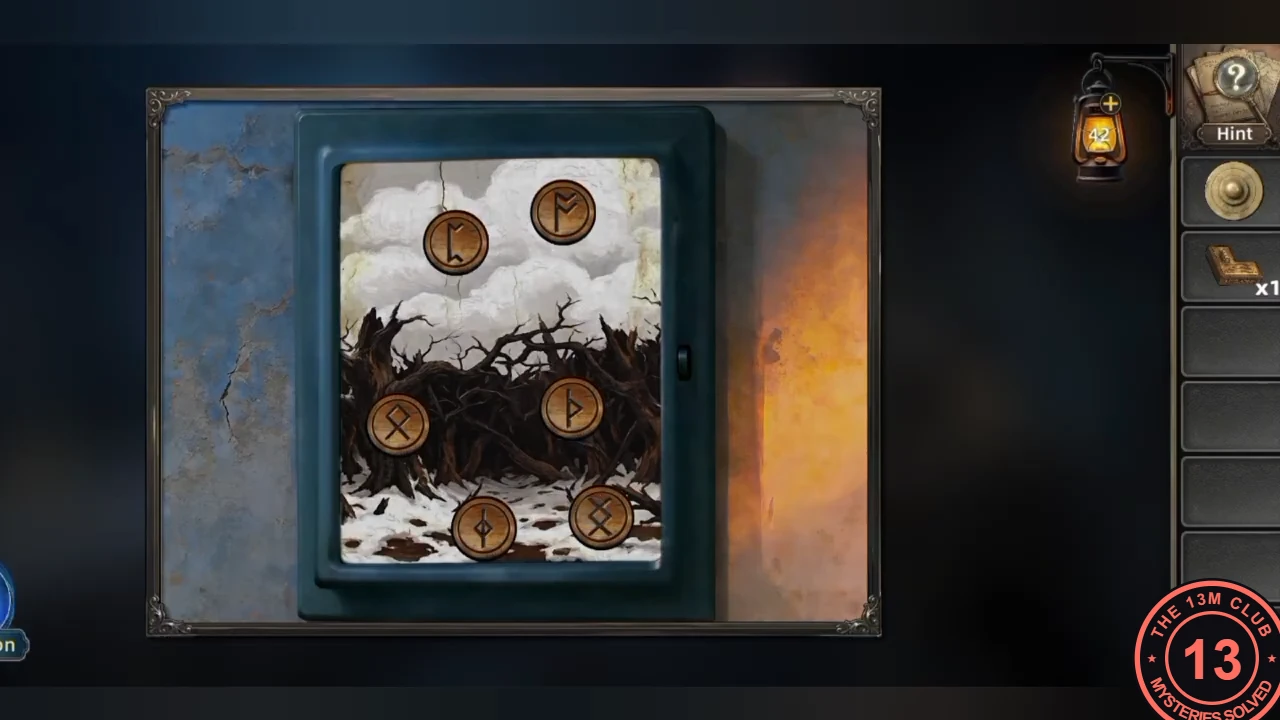
The cabinet discs set to match the sheep.
The copper parts box
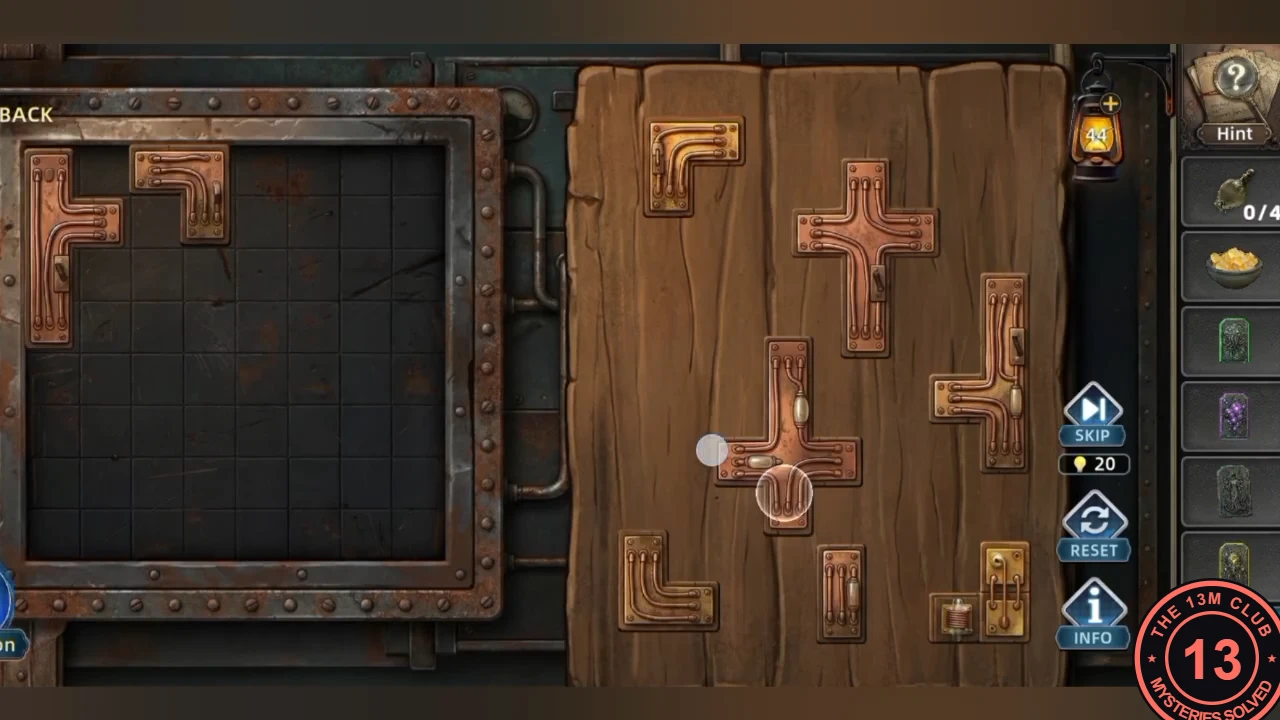
Meet the Tramp, open the ruins pedestal and pack the copper parts box for the Moonstone.
- Climb down through the trapdoor into the Tramp's hideout and talk to him; Riggs offers to share the protection of his bracelet. After the Taboo deduction, read Will's letter and take the Pliers from the floor, then the Green Stone Tablet and the Purple Stone Tablet from beside the bed (two separate tablets; the grey Stone Tablet with Lost Power is a different one you already carry). In the barn, use the Pliers by the left window to cut through to the ruins outside. Put the Disc in the empty centre of the round stone pedestal there; it opens a compartment with the Empty Firefly Jar, the Wasika Flower (a purple lily), the Yellow Stone Tablet and a second Circuit Component. In the greenhouse, put the Circuit Components in the machine on the left workbench ('This is where the part I just found should go'). A box of copper wiring parts opens: drag every part from the board into the box until all of them fit inside (the game's instruction: place all parts inside the box so that no parts touch directly). Use Reset to start over if you get stuck. When it is solved, a light beam falls on the floor disc: take the Moonstone from the bowl and the Copper Whistle that appear.
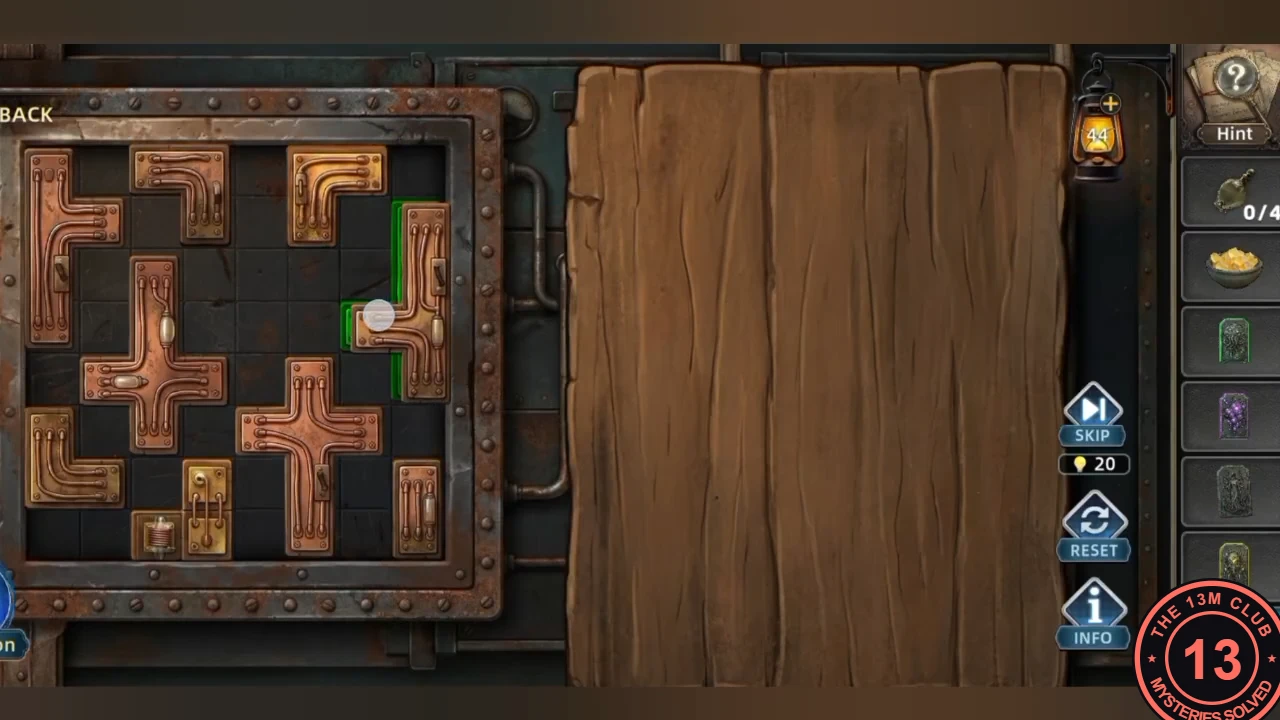
One finished packing of the copper parts.
The crow ritual
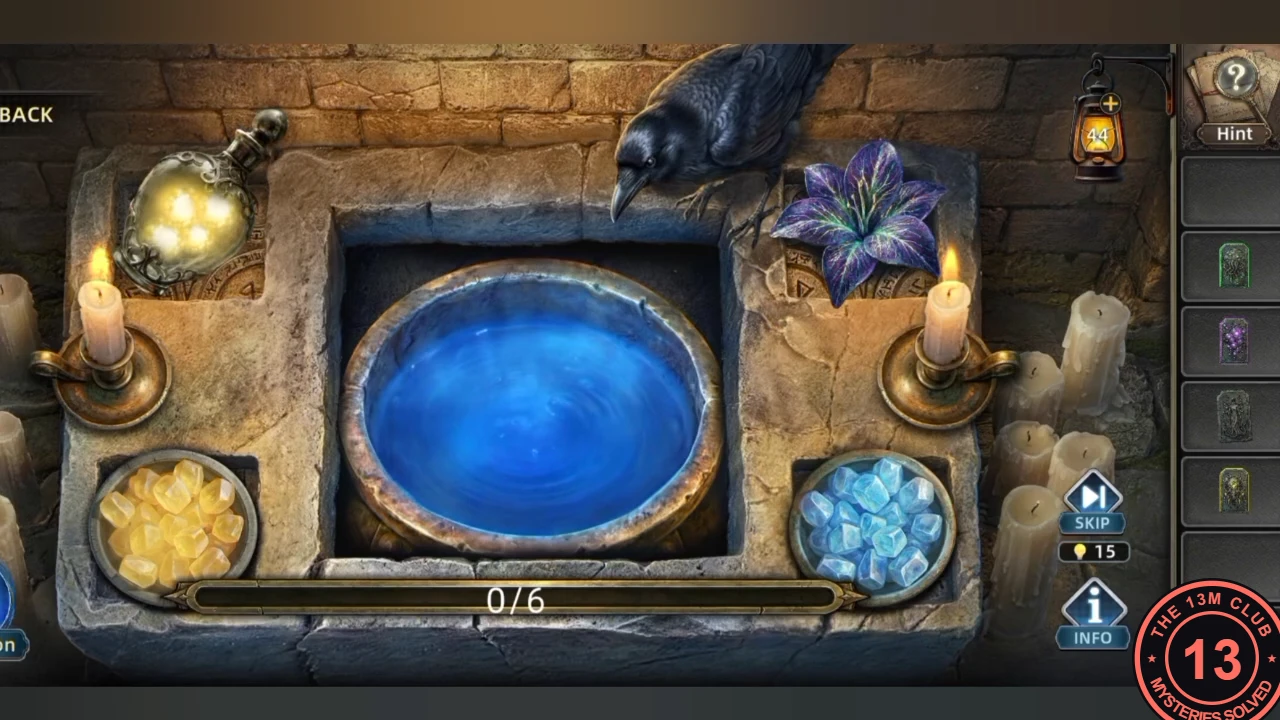
At the altar, the crow's calls tell you which medicine to drop into the basin.
- In the manor courtyard, blow the Copper Whistle: a crow lands and you can take it (Crow). Go to the cellar room with the purple altar and read the book on the altar; its sketch shows the ritual layout: fireflies, citrine, basin, crow and lily. Place the Citrine in the bottom-left bowl, the Wasika Flower top right, the Moonstone in the bottom-right bowl and the Crow on the altar. The Empty Firefly Jar must be filled in four places: tap the glowing fireflies in the cellar altar room, in the courtyard (right of the fountain), in the barn (by the cabinet on the right) and in the greenhouse (on the floor in the middle). At 4/4 Riggs says it is full; put the Jar of Fireflies top left. Riggs says he can begin the ritual. Tap the crow ("Click the Crow, it will tell you"): it calls and big and small ripples appear in the basin. Drag the matching medicine into the basin; a correct one advances the counter. In the playthrough this guide follows, the player's own on-screen notes paired the patterns like this: 1 big + 1 small ripple = Citrine; 3 small = Wasika Flower (lily); 1 big = Jar of Fireflies; 2 small + 1 big = Moonstone. The medicines dropped after those notes were accepted, but the ripples are too faint in the recording to confirm each pairing independently, so if a medicine is not accepted, watch the next call closely and try another. Repeat until 6/6 (the six accepted medicines in that playthrough were citrine, lily, lily, fireflies, moonstone, lily). Take the Blue Stone Tablet.
- Insert the stone tablets into the big doors.