ECHOES · CHAPTER 1
The carriage: plush toy hearts
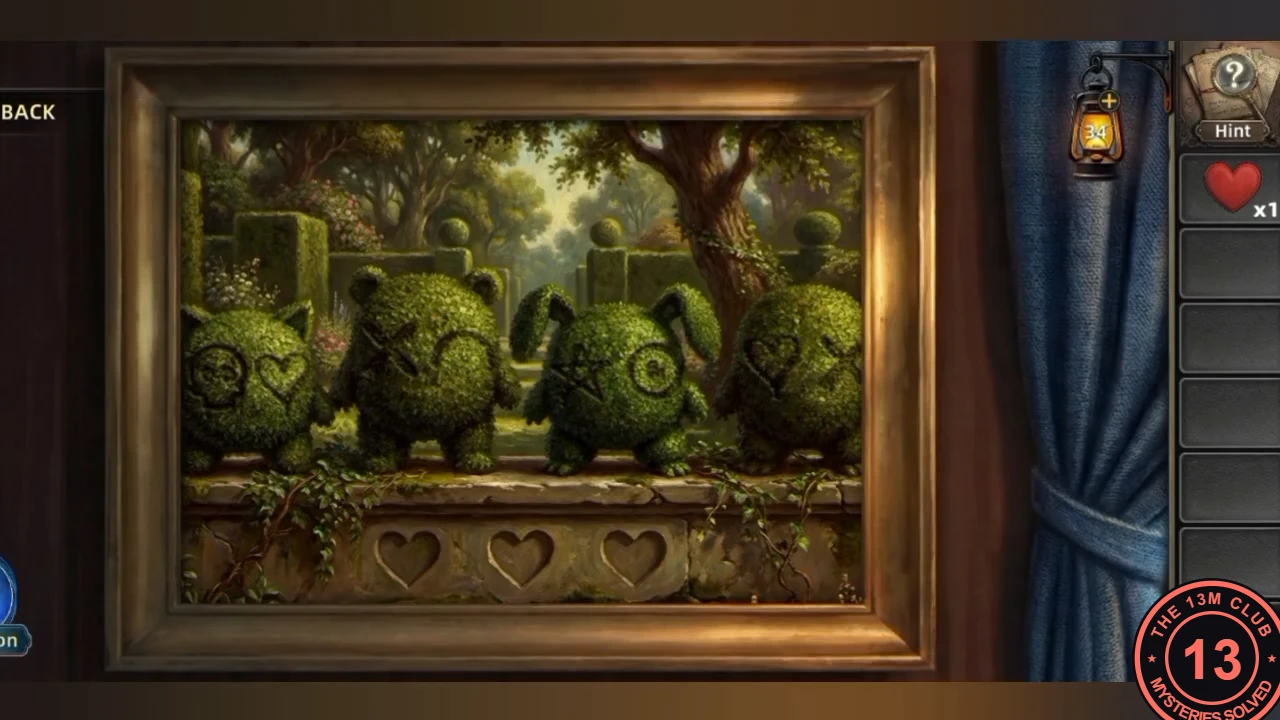
In the carriage, match each plush toy's eyes to its shrub in the topiary painting to collect three hearts.
- The topiary painting on the wall shows animal-shaped shrubs with symbols for eyes, and three heart slots below. Each plush toy matches one shrub: tap a toy's eye to cycle its symbol, and when both eyes match its shrub the toy gives a Heart. Bear (on the floor, bottom left): X on the left eye, a closed arc on the right. Rabbit (on the sofa, right): star on the left, bullseye circle on the right; also take the Paper Clip from its ear. Use the Paper Clip on the locked drawer under the right end of the sofa and take the Wooden Stick and the Pliers. The pig on the left cabinet is tangled in wire: use the Pliers on it to take the Wire, then set its eyes to skull (left) and heart (right). Put the three Hearts in the painting.CODEBear X + arc · Rabbit star + bullseye · Pig skull + heart
ECHOES · CHAPTER 1
The balance scale and lever lock
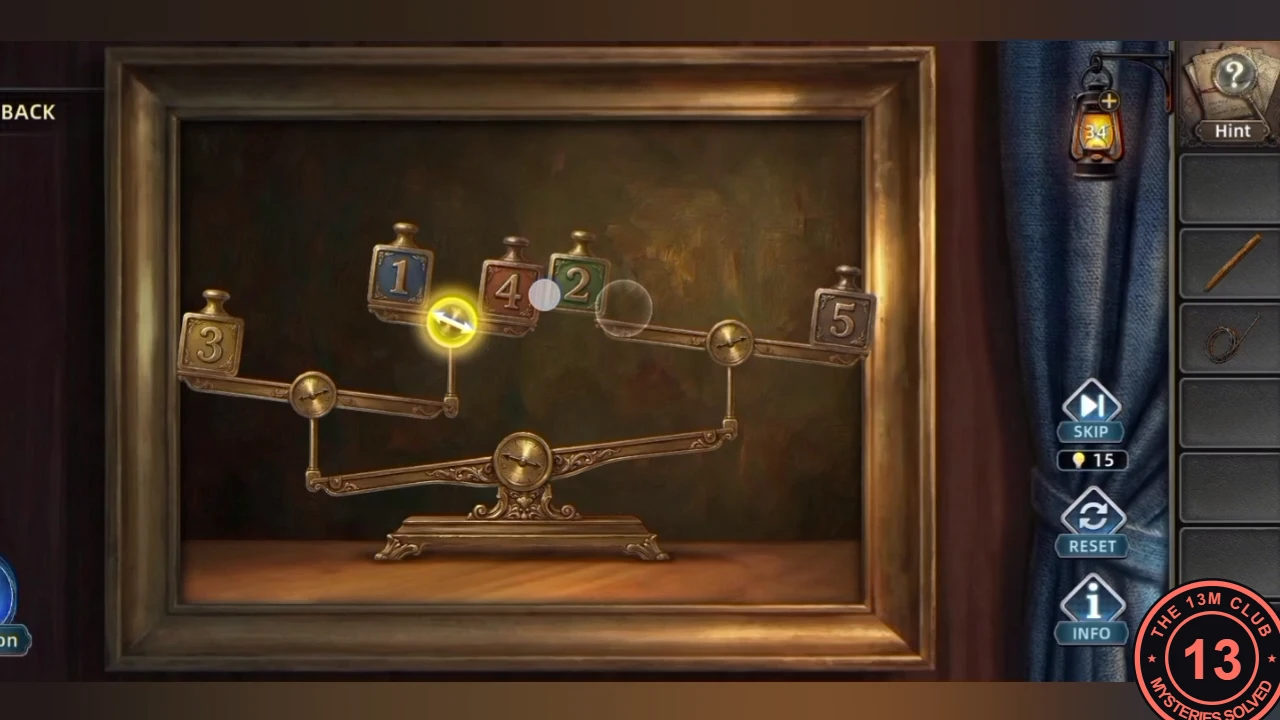
The hearts reveal a balance scale; its weights give the lever lock code.
- In the painting, tap two weights to swap them. Balance the scale with this arrangement: 4 alone at the far left end; 1 and 2 on the small balance at the top (1 on its left, 2 on its right); 5 and 3 on the right-hand arm (5 on the left, 3 on the right). Reading the balanced weights from left to right gives 41253. Enter it on the five-reel lever lock on the cabinet left of the sofa and pull the lever. The cabinet door opens: take the Iron Ball and the Telescope from inside.CODE41253
ECHOES · CHAPTER 1
The telescope constellation and the road
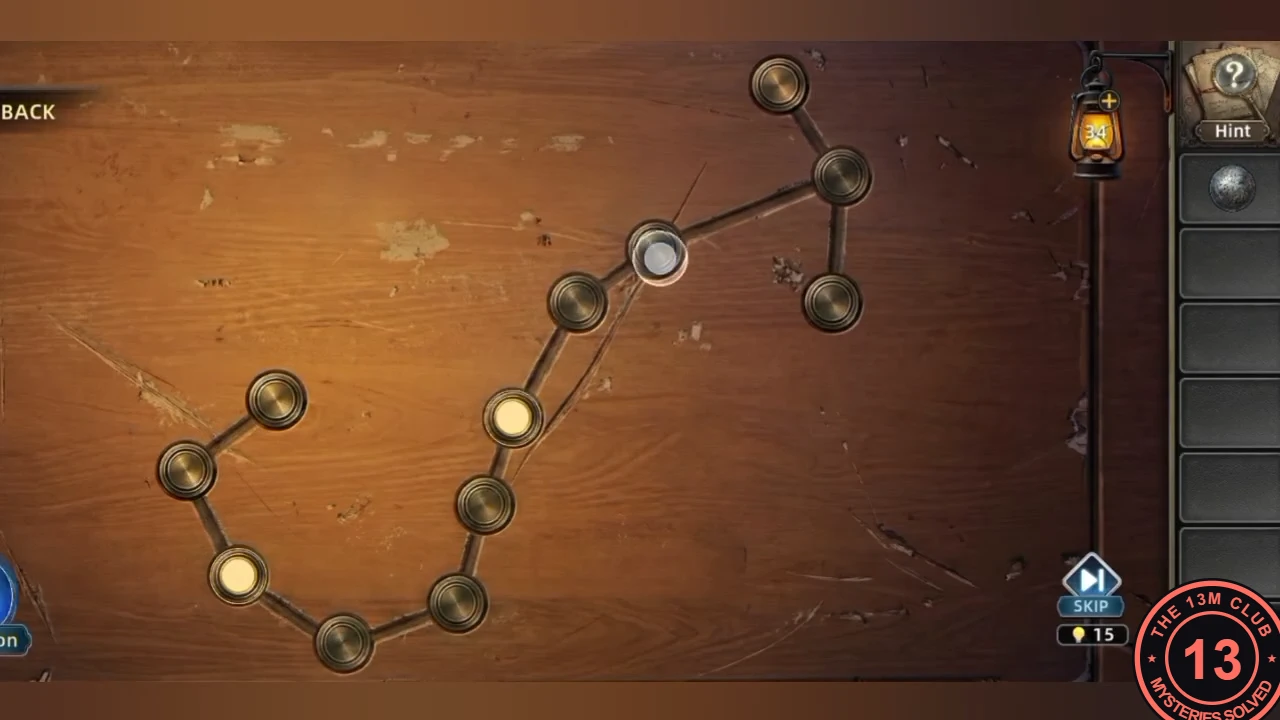
Mount the telescope, copy the star pattern from the roadside rock and drive the carriage on to the camp.
- The Telescope needs a stable support: put the Wooden Stick on the tripod beside the table, secure it with the Wire, then mount the Telescope and look through it (a vision of the manor gate follows). After the crows appear, look through the telescope again: a rock beside the road shows a star pattern with some points glowing red. On the matching pattern carved into the table top, tap the same five points to light them (in the solved board: the top end, the end of the short branch hanging below the top corner, the first point down the long arm below the corner, the third point down that arm, and the point at the lower-left bend). The board solves as soon as the fifth point lights. The table's compartment opens: take the Gun and the Reins from it. At the front of the carriage, crows block the way: select the Gun and tap the crows to shoot and scare them off. Riggs says he has to get the reins back: use the Reins on the horses, then dodge the obstacles on the road with the up and down arrows beside the carriage until the camp.
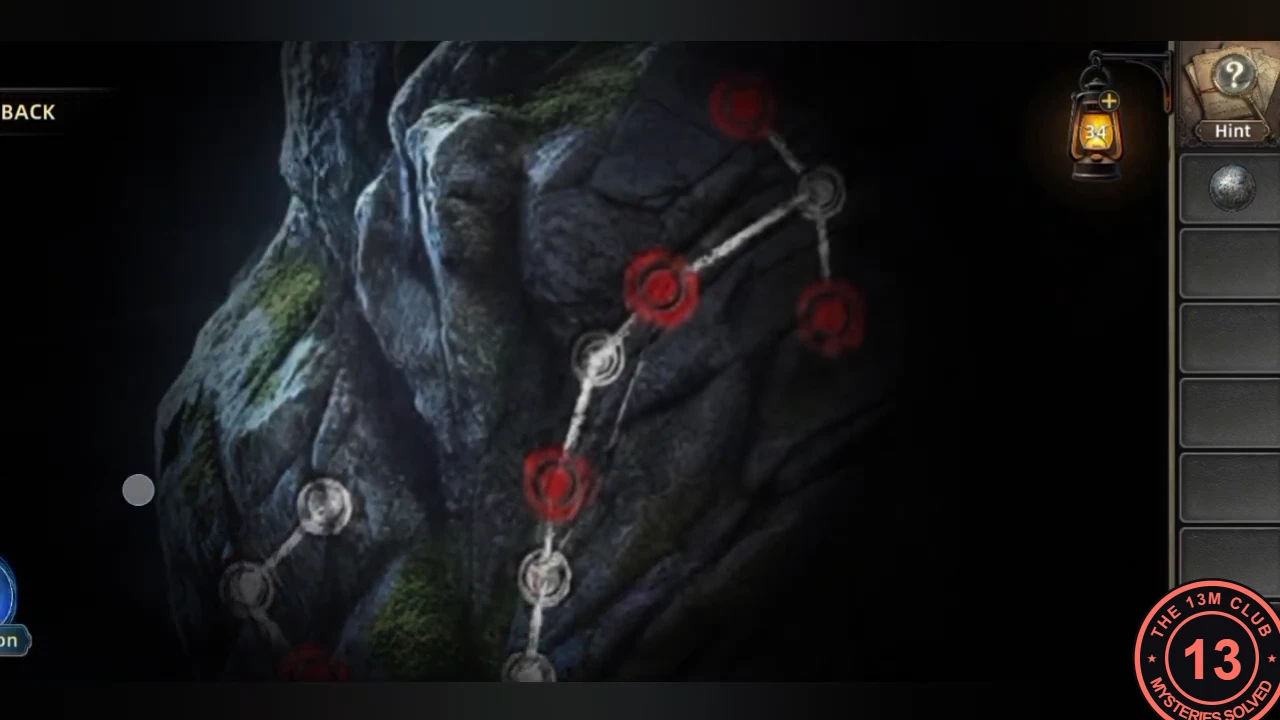
The clue on the rock: the points glowing red are the ones to light on the table. 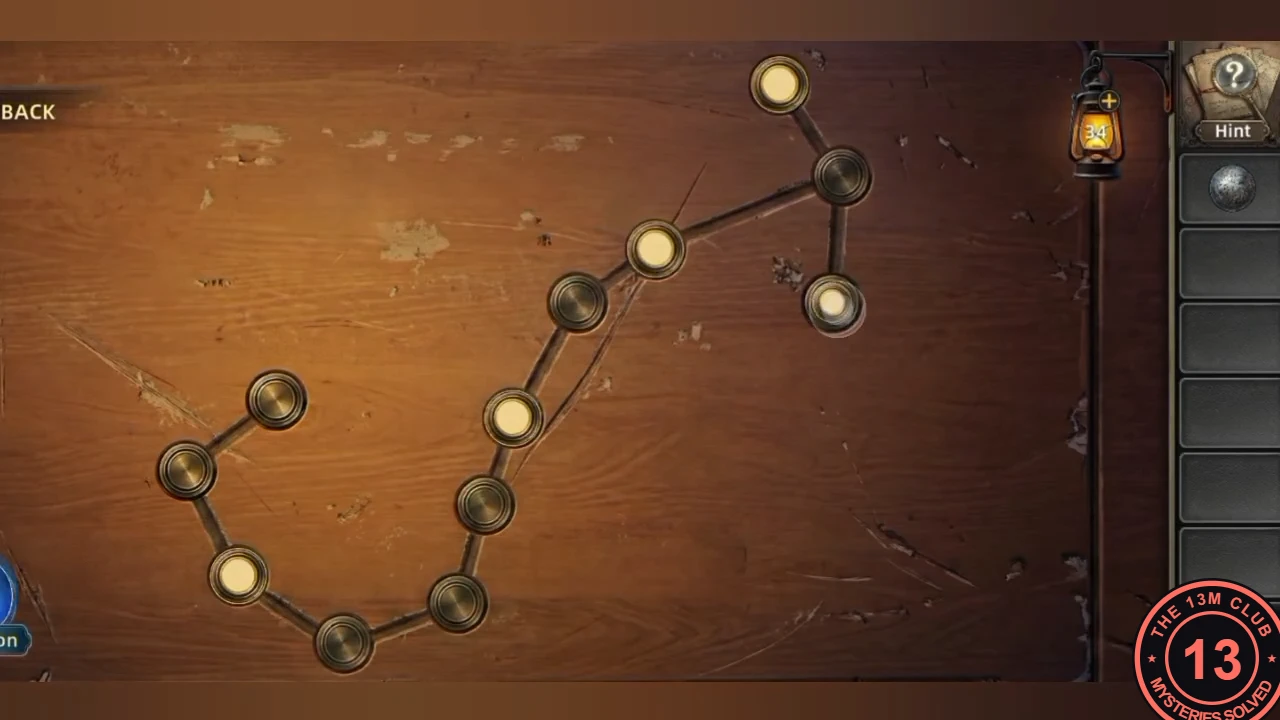
The solved table pattern: all five points lit, matching the five red points on the rock.
ECHOES · CHAPTER 1
The camp colour lock
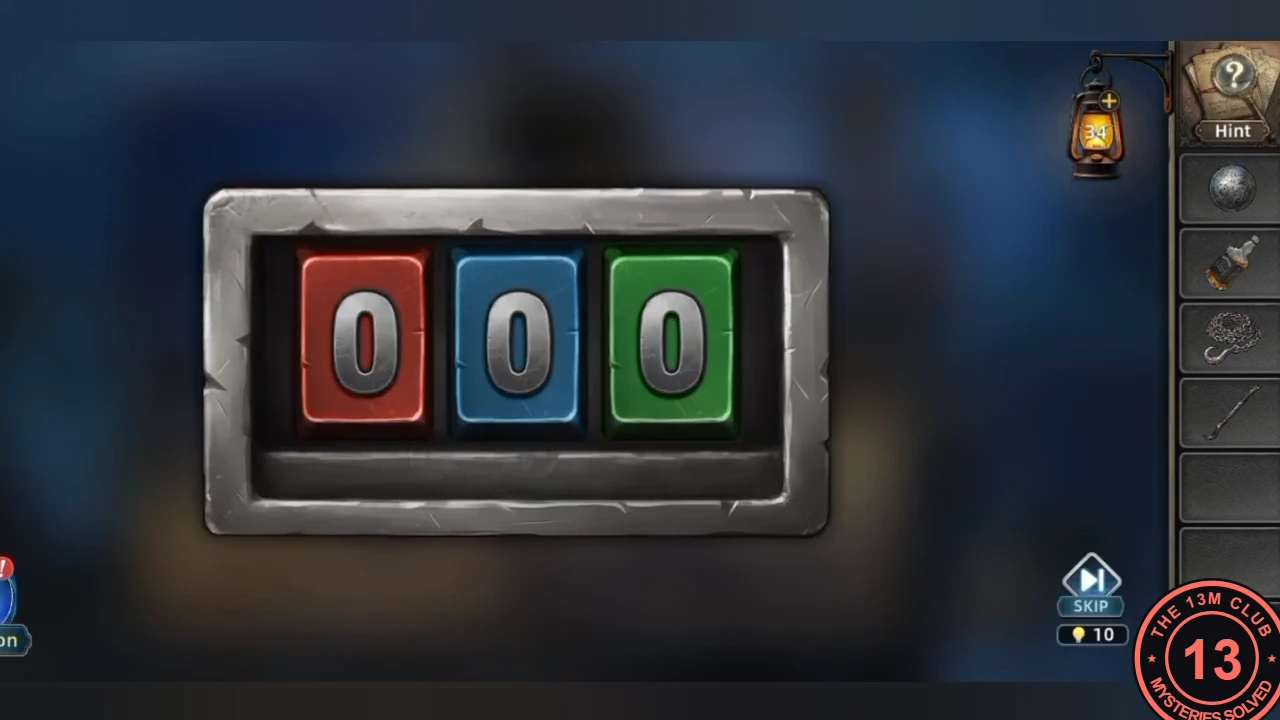
At the camp, collect the tools and read the three coloured digits for the colour lock.
- At the camp, take the Alcohol bottle beside the Tramp and the Iron Chain hanging at the tent by the campfire tripod. The wooden crate holds a padlocked Small Shovel under green slime. Throw the metal ball from the carriage lever lock (Iron Ball, shown as Exquisite Metal Ball) at the blue glass cabinet on the left and take the Crowbar. Prise open the red mailbox with the Crowbar and take the Dipper and Will's letter. Scoop the slime out of the crate with the Dipper. Now read the three colour digits: red 4 painted inside the mailbox lid, blue 8 behind the broken cabinet glass, green 3 laid in pebbles in the crate. Enter 483 on the small colour-lock box beside the Tramp's chair and take the Matches.CODE483
ECHOES · CHAPTER 1
The hanging crate chains
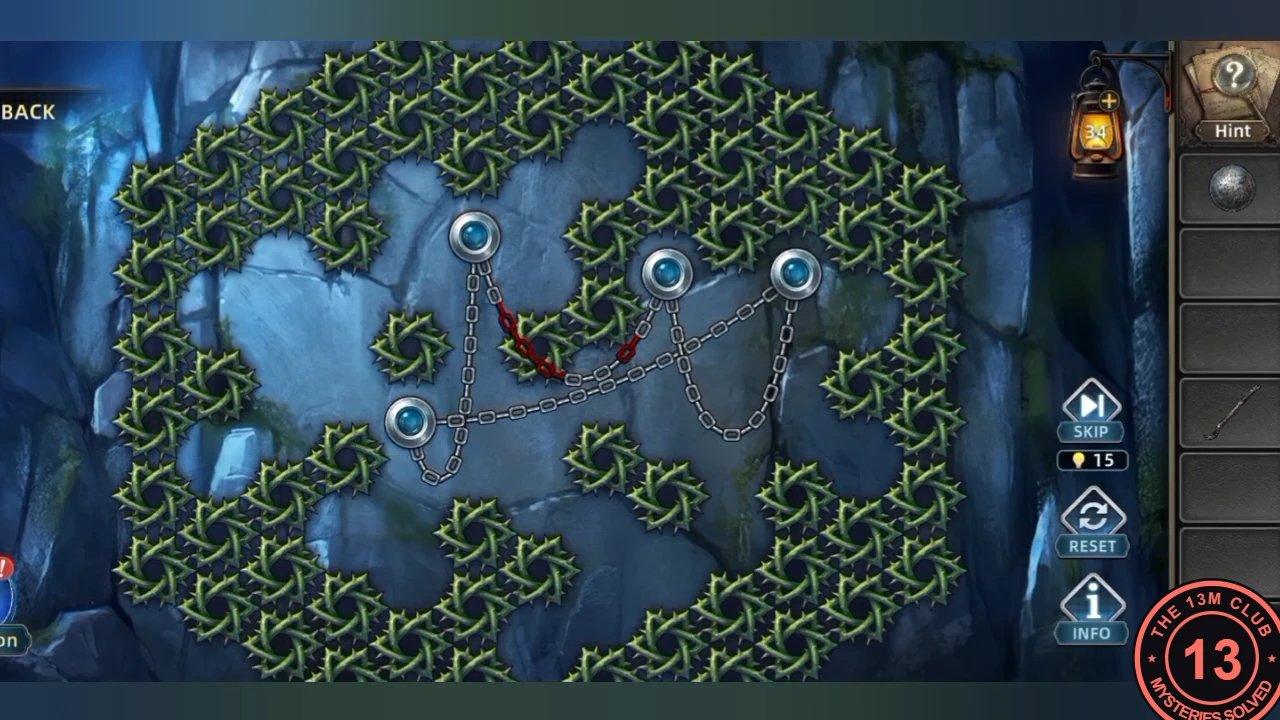
Light the campfire and haul up the crate hanging below the cliff without touching the thorns.
- Pour the Alcohol on the firewood and light it with the Matches. At the cliff edge a crate hangs from the tree below: use the Iron Chain there, then drag the chain anchor points so no chain touches a thorn. Open the recovered crate with the Crowbar and take the Canned Food.
ECHOES · CHAPTER 1
The tent-pole ring map
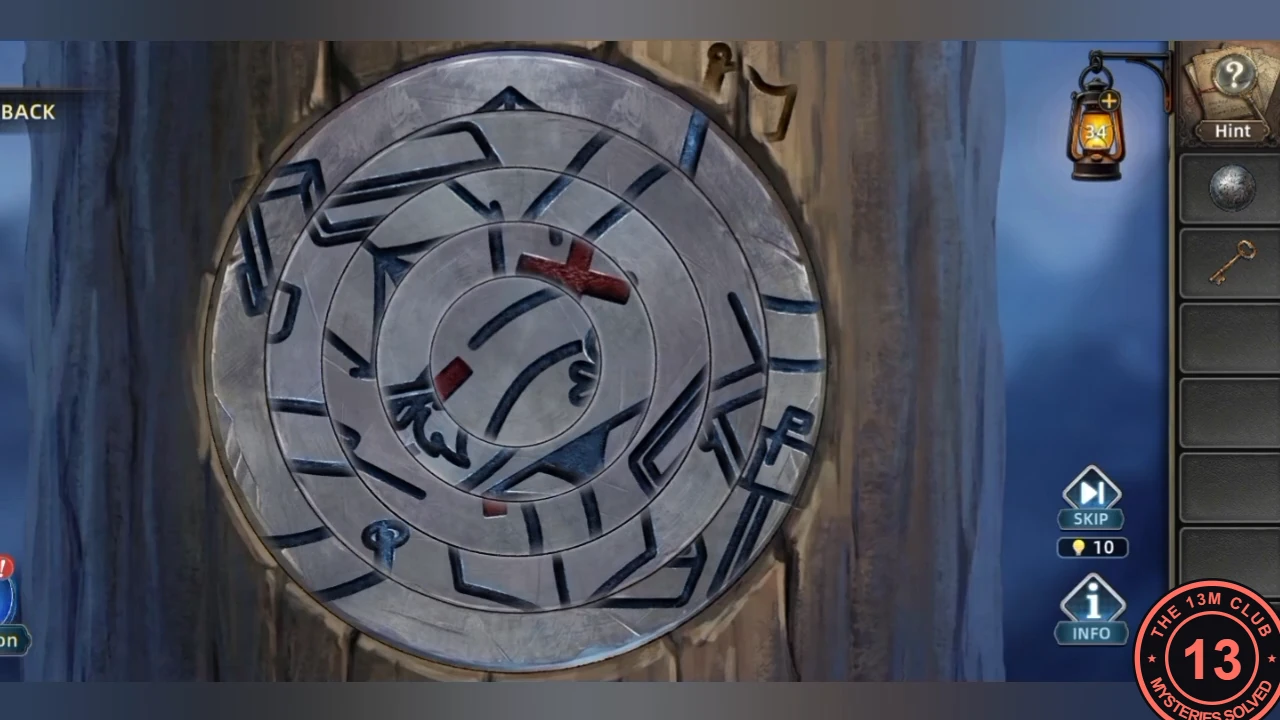
The Tramp, the wax block and the tent-pole rings lead to the buried Axe.
- Give the Canned Food to the Tramp; his bag opens and you can take the Wax Block. Put it on the grill over the fire to melt it, then take the Key and the Iron Ring from the melted wax on the grill. Fit the Iron Ring into the socket on the tent pole to open a disc of rotating rings: turn the rings until their lines join into a map showing the tent (top), the campfire (right) and a red X (lower left). Open the slime crate's padlock with the Key and take the Small Shovel, then dig on the path left of the campfire, in front of the wooden crate, and take the Axe.
ECHOES · CHAPTER 1
The manor gate dial
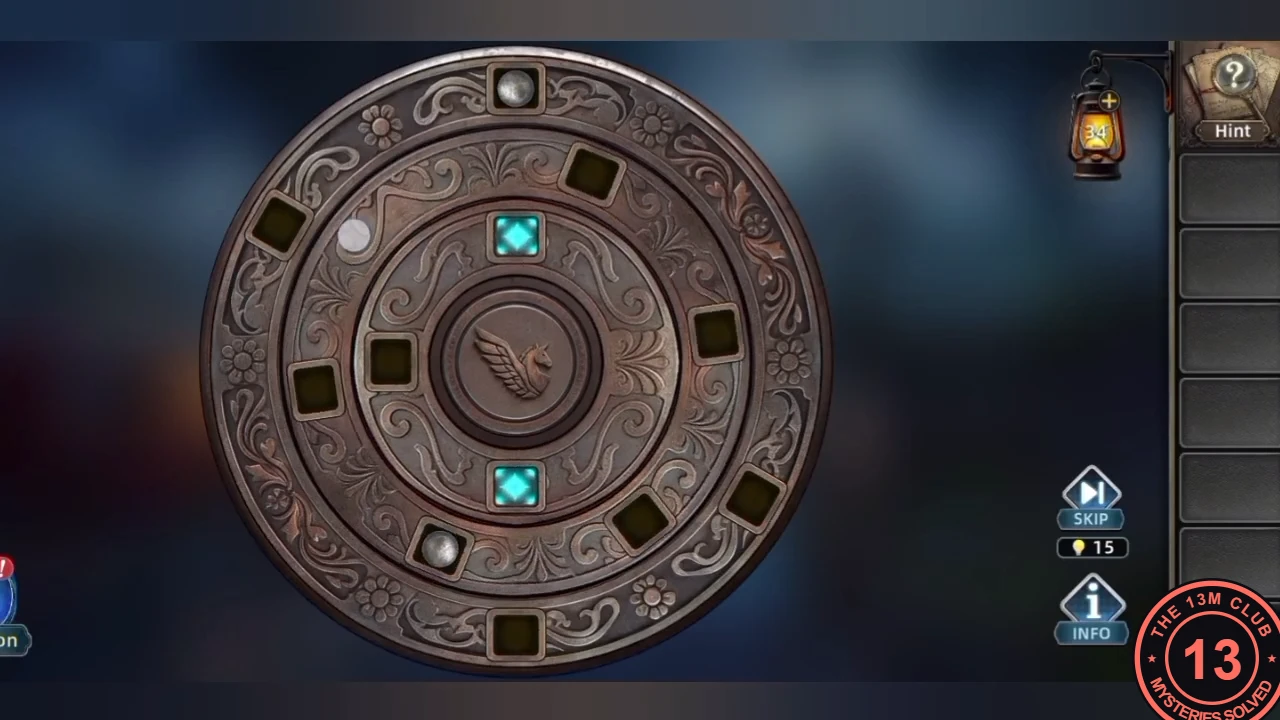
Both metal balls must drop into the blue slots of the manor gate dial.
- Before leaving the camp, use the Axe on the wooden spiked barricade behind the campfire; it falls and Riggs can continue to the manor. At the manor gate, after the stranger moves aside, pick up the second Exquisite Metal Ball from the ground in front of the gate. Put both balls in the gate dial. The dial has concentric rings: drag a ring to rotate it. A ball rides in its ring's pocket and drops one ring inward when that pocket lines up with an empty square opening in the next ring. Work each ball inward until it rests in one of the blue slots of the innermost ring, turning the inner rings to bring an opening under a stuck ball. This is a long trial-and-error puzzle (about three minutes in the playthrough this guide follows) and is solved when both blue slots hold a ball.