GHOST WEST · CHAPTER 4
The Dust Settles: the cave maze
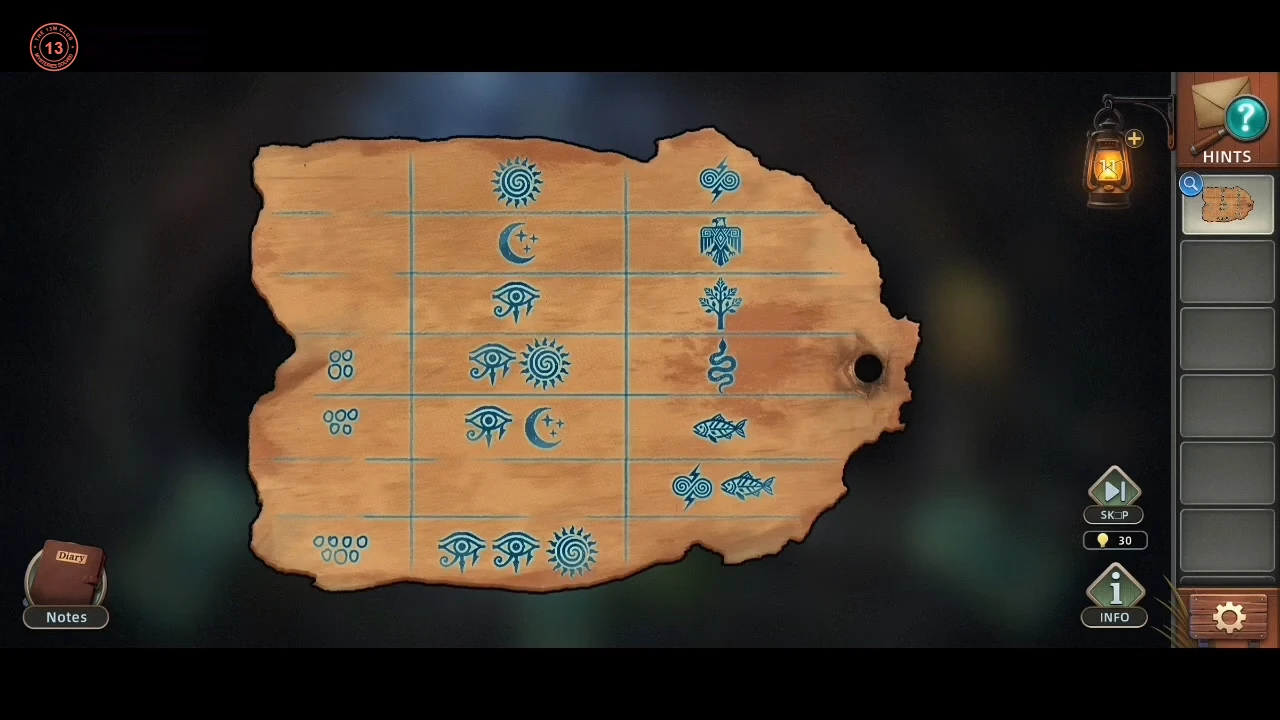
Chapter 4: Frank's spirit asks Sandy to stop the preacher. Tend to Aponi, then cross the cave maze with the map's number key.
- Frank's spirit asks Sandy to stop the preacher. Take the Animal Hide and the Wooden Plank lying with it, and the Staff. Use the Staff to reach the Blue Cloth Strip hanging in the dead tree. Put the Wooden Plank on Aponi's injured leg as a splint, then bind it with the Blue Cloth Strip. At the wall tablet, take the Stone Bowl and the Blue Flower growing beside it. At the statue, put the Blue Flower in its mouth and hold the Stone Bowl under it: blue liquid runs out and fills the bowl (Bowl Filled with Blue Liquid). Pour it on the wall tablet so the carvings glow, then press the Animal Hide onto the glowing tablet and take the Runed Animal Hide: it is the map.
- Pass through five caves. The map is a number key: sun = 1, moon = 2, eye = 3 (the dot rows confirm eye + sun = 4, eye + moon = 5, eye + eye + sun = 7), and storm spiral = 1, eagle = 2, tree = 3, snake = 4, fish = 5. In each cave, add up the symbols on the standing stone and take the passage whose gold symbols add up to the same total. The caves met in this guide's playthrough were: cave 1 moon (2), left passage (eagle); cave 2 eye + sun (4), centre (snake); cave 3 eye + eye (6), centre (storm + fish); cave 4 moon + sun + moon (5), left (eagle + tree); cave 5 eye + moon + eye (8), right (snake + snake). If your stones show other symbols, add them up the same way.CODELeft, Centre, Centre, Left, Right
GHOST WEST · CHAPTER 4
The festival and the mayor's house
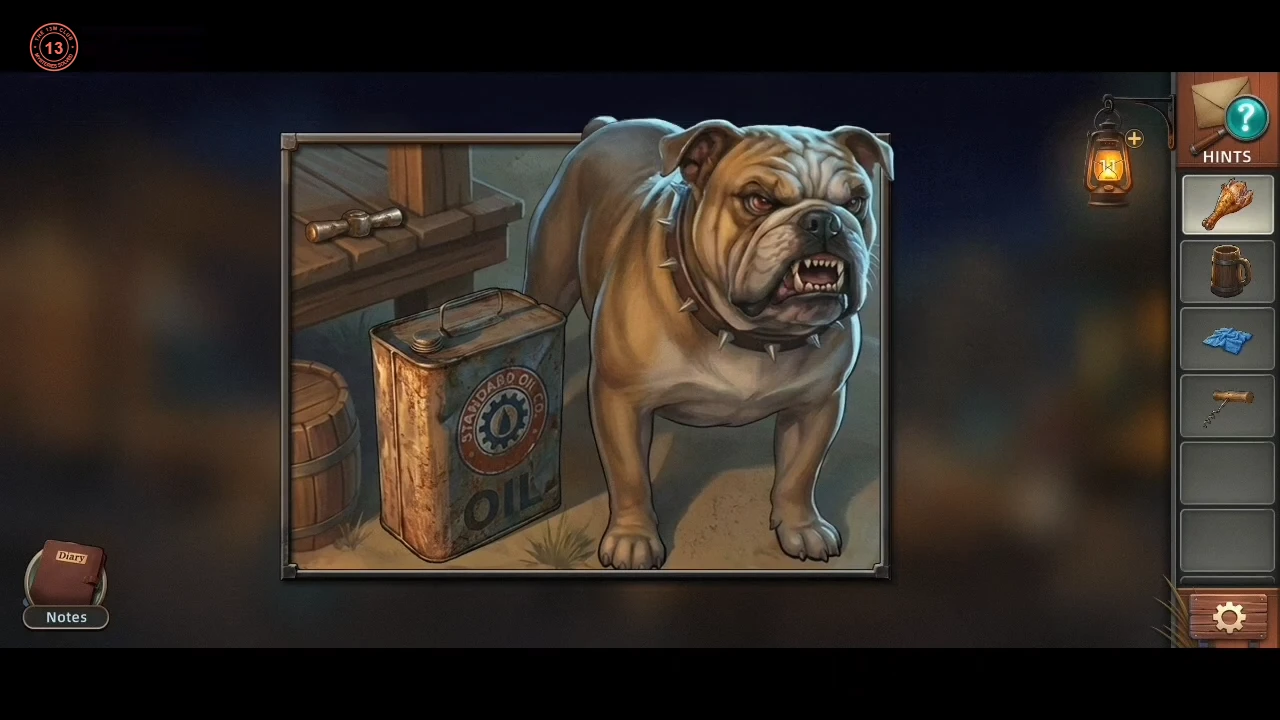
At the festival, nobody listens. Gather the tools you need to get into the mayor's house.
- Nobody at the festival listens. On the food table, take the Chicken Leg from the roast chicken and the Cup beside it. On the Free Drinks barrel, take the Dry Rag and the Bottle Opener lying under it. Give the Chicken Leg to the barking dog and take the Handle from the porch beside it. Fit the Handle on the tap of the Free Drinks barrel, put the Cup under it and take the Liquor. Look at the guard outside the mayor's house, then return to the festival street: Marcel comes over. Give him the Liquor there; he goes to the mayor's house and distracts the guards, and the door turns out to be locked. Tip the oil can beside the dog over the Dry Rag and take the Oil-Soaked Rag. Rub it on the rusty lock of the toolbox at the festival; the box opens. Take the Lock-Picking Tool.
GHOST WEST · CHAPTER 4
The bullet-wheel door lock
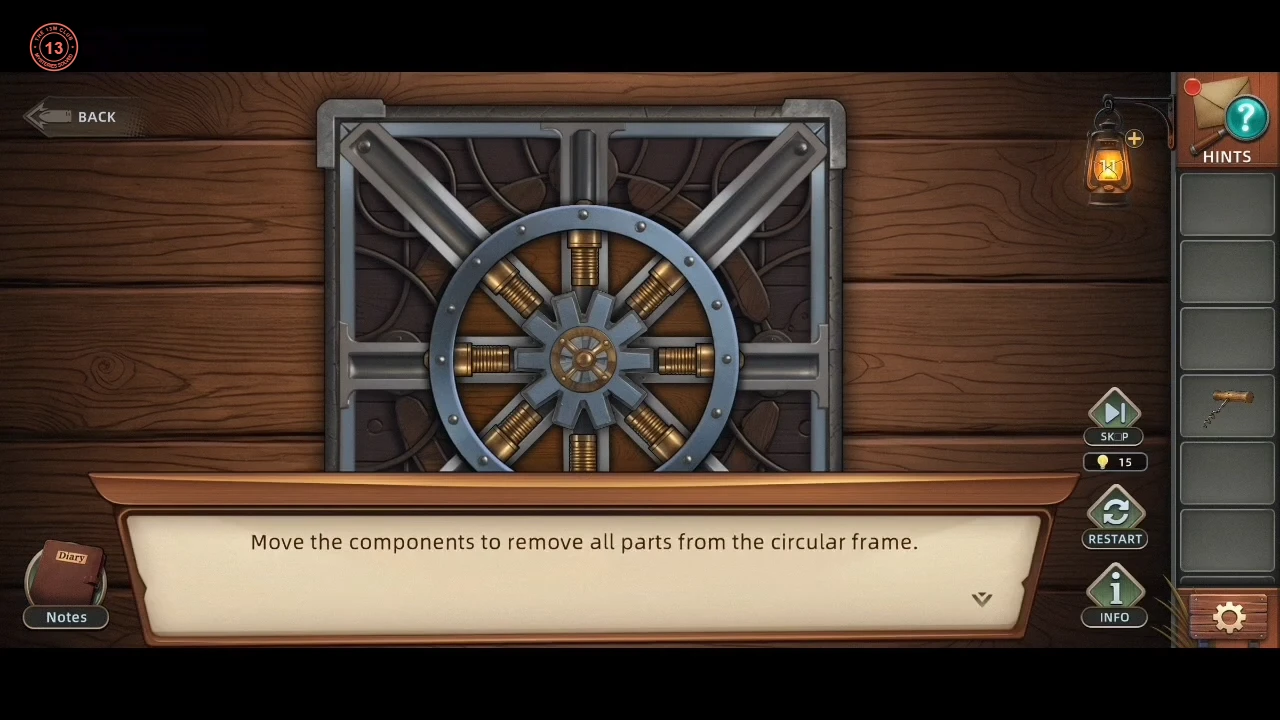
Clear every bullet out of the mayor's door lock.
- Use the Lock-Picking Tool on the mayor's door. The lock is a wheel with eight bullets on its spokes, inside a frame with eight channels (four straight, four diagonal). The goal, "remove all parts from the circular frame", means getting all eight bullets off the wheel and into the channels. The rules: tap a bullet on the wheel and it slides out into the channel it points at, but only if that channel is empty. Tap a bullet in a channel and it slides back onto the wheel spoke in front of it, but only if that spoke is empty. After every move the wheel turns one spoke (an eighth of a turn) clockwise and carries its remaining bullets with it; bullets in the channels stay where they are. Directions below are fixed screen positions (N = top, NE = top right, E = right, and so on). "Out X" means tap the wheel bullet pointing at X; "in X" means tap the bullet in the X channel. From the starting position, this 12-tap order clears the wheel: out N, out E, out NE, out SW, out NW, out SE, in N, in E, out E, out S, out W, out N. The recording solved it in a longer order using the same rules; this shorter order was worked out from them. If a tap goes wrong, use Restart, or keep going with the rules: shoot out every bullet whose channel is free, and when all the wheel bullets face full channels, pull one channel bullet back in so different spokes line up after the turn.CODEout N, out E, out NE, out SW, out NW, out SE, in N, in E, out E, out S, out W, out N
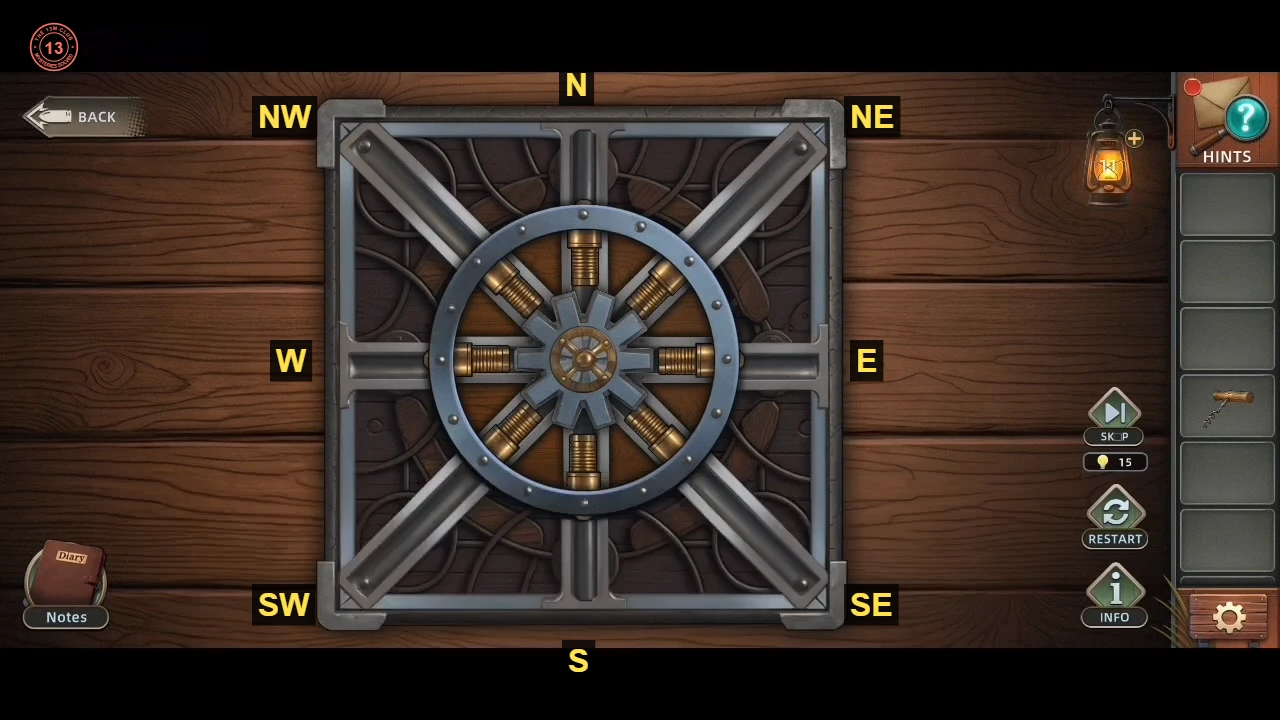
The starting position, with the fixed directions used in the tap order: N is the top channel, then clockwise NE, E, SE, S, SW, W and NW.
GHOST WEST · CHAPTER 4
The gemstone abacus and the fireplace
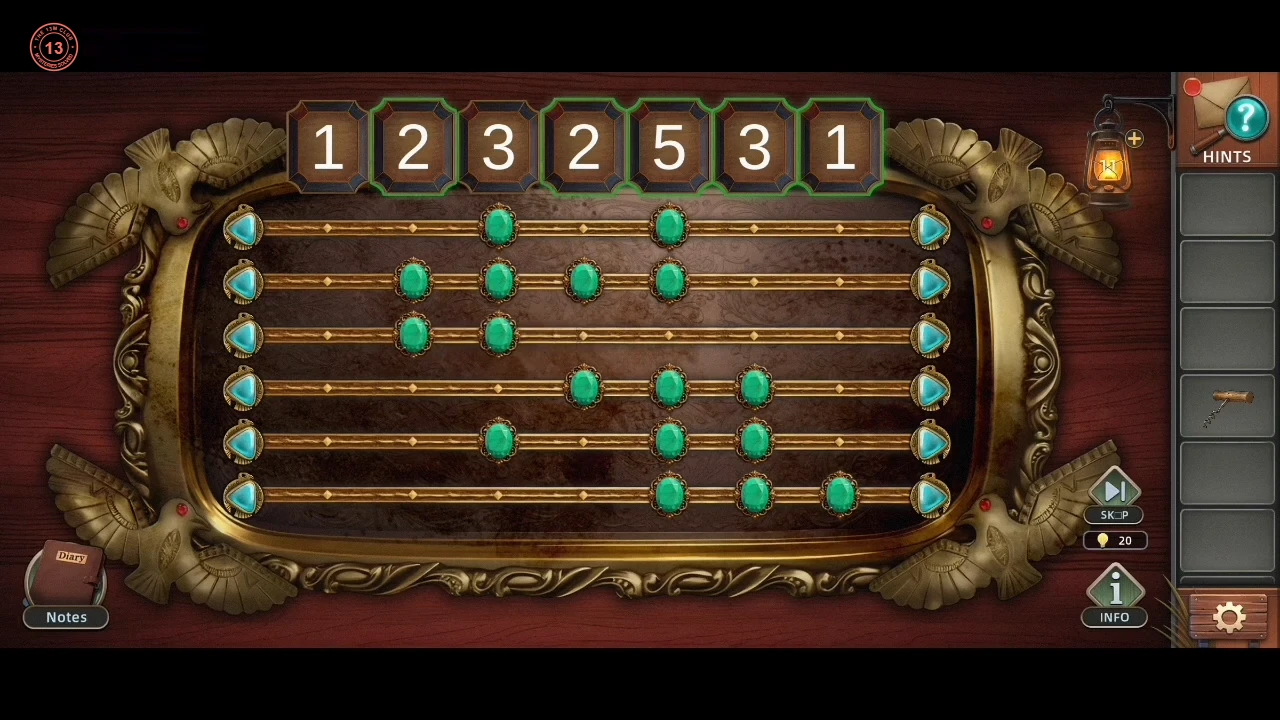
Set the abacus to the numbers above it, then find the coins and the photos.
- In the mayor's house, take the two Gemstones: one on the lower shelf of the glass-front drinks cabinet beside the standing lamp, and one on the round table beside the glass. The desk on the right has three gem slots, one already filled; put both Gemstones in. This opens an abacus: "Move the gemstones so each column matches the number shown above." Slide the beads so the seven columns hold 1, 2, 3, 2, 5, 3, 1 beads (the numbers above them). The desk opens; take the Toy (a toy horse) and then the Coin lying in the desk. The cabinet on the left holds a coin box that is "short two coins". Open the locked drawer of the dresser with the Bottle Opener and take the Screws and Nuts and a second Coin. At the festival, put the Screws and Nuts in the toolbox and take the Heavy Pliers. Back in the house, cut the chains in the fireplace with them. Read the note and take the Stack of Photos.CODE1 2 3 2 5 3 1
GHOST WEST · CHAPTER 4
The photo wall and the hex coin box
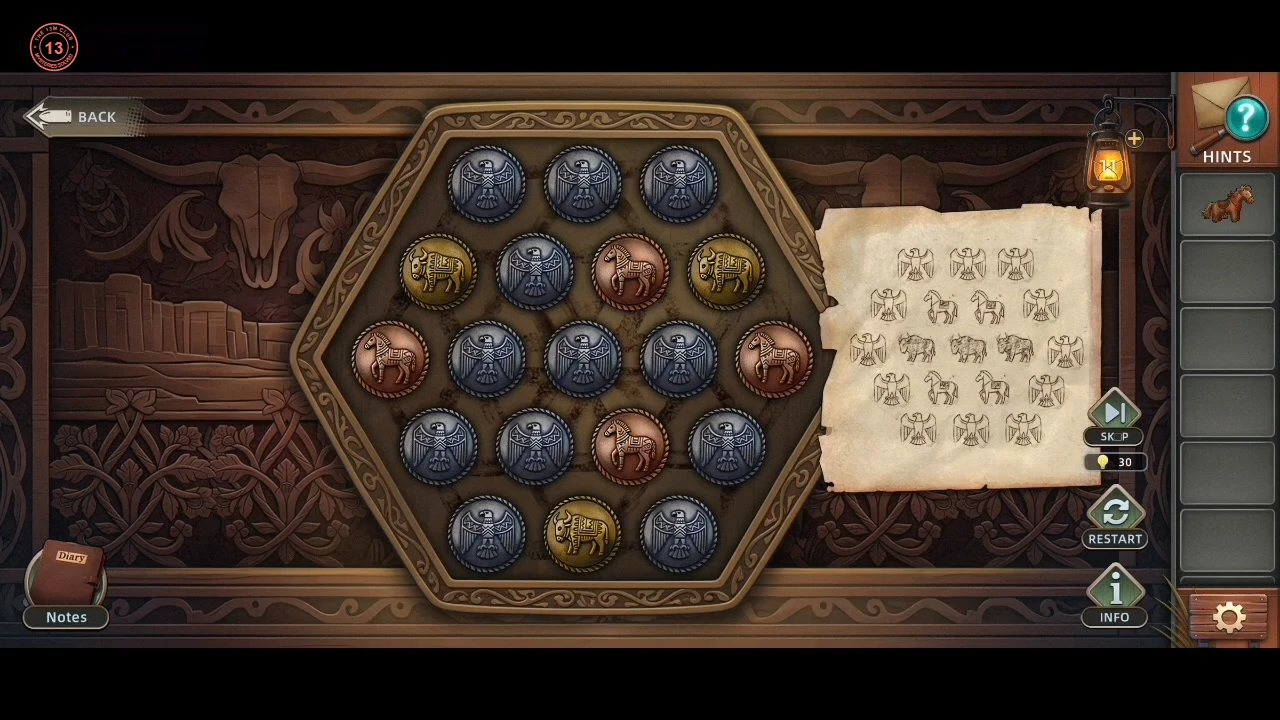
Rehang the photos, then turn the hex coins into the pattern for the evidence.
- Use the Stack of Photos on the wall above the fireplace. "Drag all photos into the correct positions based on size": each frame fits only a space of its own size and shape, so place the large frames first and fill the small gaps last. When the wall is complete, take the Note that drops out. It shows the coin pattern. Put the two Coins into the coin box in the left cabinet. This opens a hexagonal board of 19 coins (rows of 3, 4, 5, 4 and 3): silver eagles, copper horses and gold bulls. Tapping a coin turns the six coins around it one step clockwise; the tapped coin stays put. Target (from the Note): every outer coin is an eagle. In the second and fourth rows, the two middle coins are horses. In the middle row, the three middle coins are bulls. Strategy: use taps on the seven inner coins to carry the gold bulls into the centre row first, then bring the horses into the four spaces above and below them. Then fix any eagles left inside. Use Restart if the board gets badly mixed up. Take the Evidence Photo from the opened box.
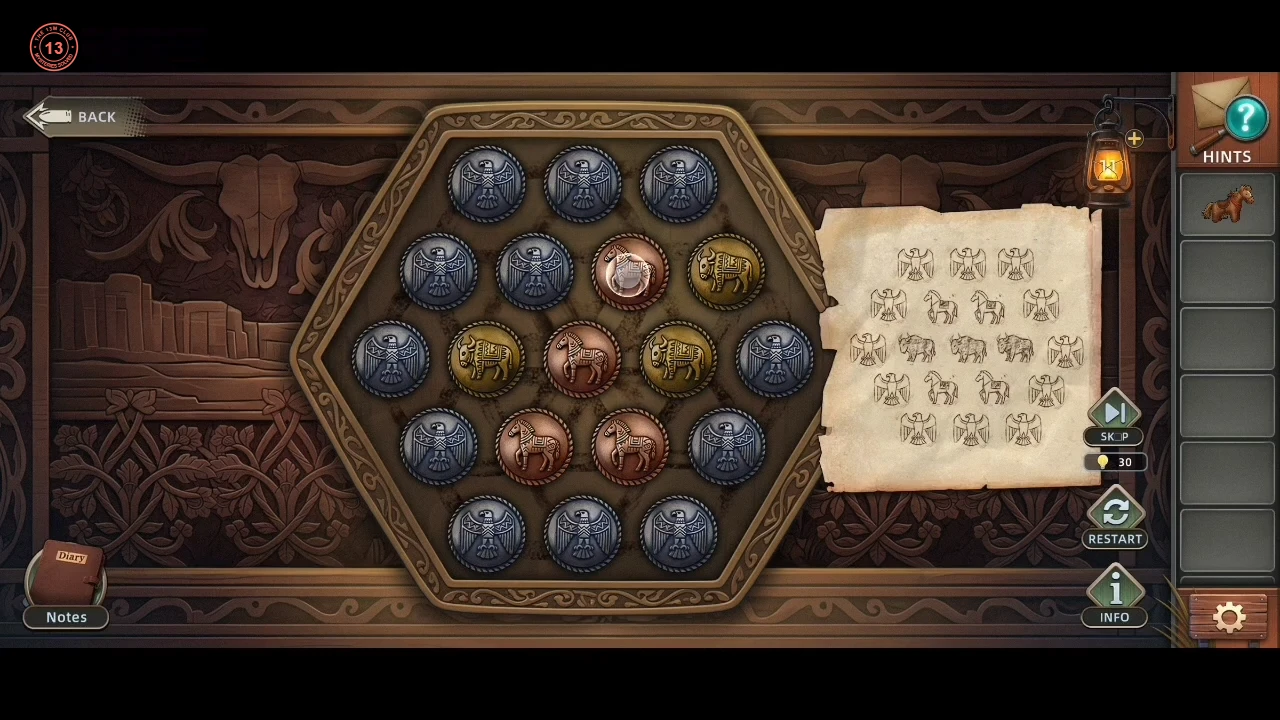
The last tap: the highlighted horse turns the six coins around it one step clockwise, which moves the last horse and bulls into place and completes the pattern. - Return to the festival and tap the Mad Woman. Sandy shows her the Toy (the toy horse from the mayor's desk): "This is... your child's, isn't it?" The Toy and the Evidence Photo are handed over, and the Mad Woman exposes the preacher in front of the town; the townsfolk are saved.
GHOST WEST · CHAPTER 4
The final duel and the ending
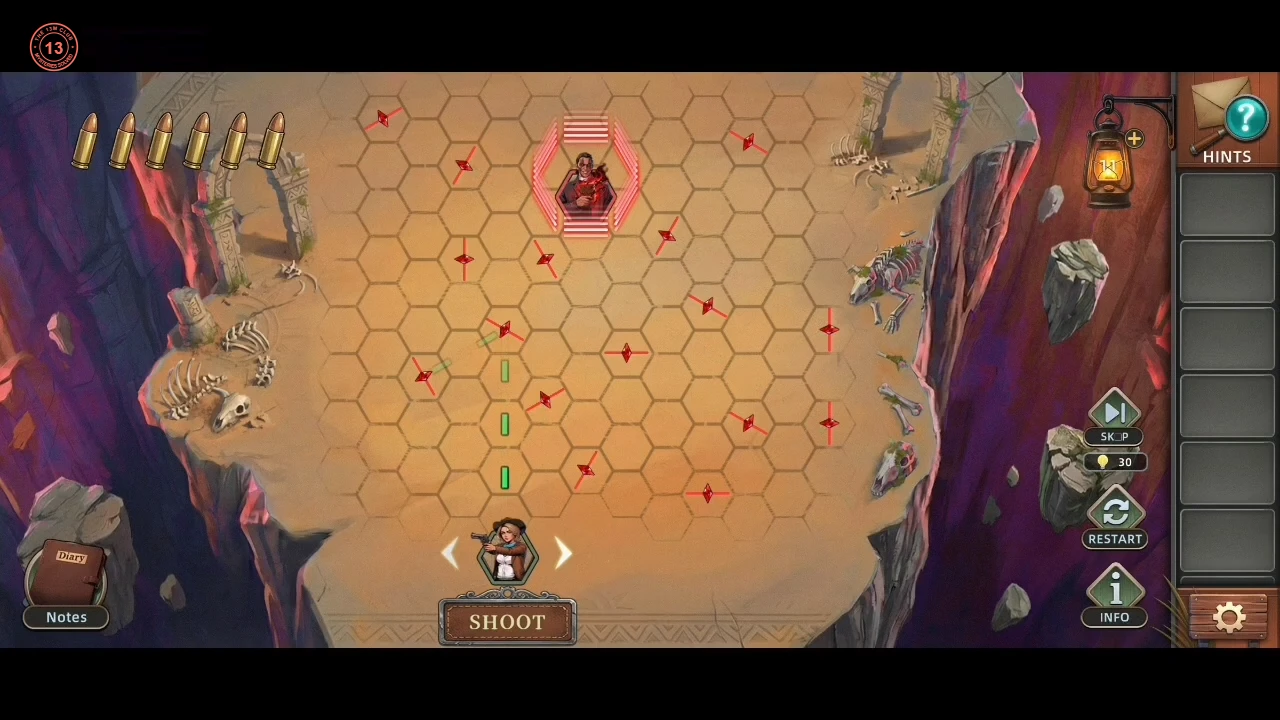
The final duel against Father Voss, followed by the ending.
- In the sanctuary, Father Voss stands inside a hexagonal red barrier on the same hex-grid board as before. Aponi explains: "He's protected by a Black Crystal barrier. The shield will fall only after all the crystals are shattered." The red crystals are the deflectors from the first duel. Move Sandy along the bottom row with the arrows beside her, check the green dotted preview, then press SHOOT. A bullet bends at every crystal it meets and shatters it, so one well-aimed shot can clear several. You have six bullets for all the crystals, so before each shot step left and right and pick the position whose preview passes through the most crystals. Leave a column with a crystal close above Sandy for last. In the recording, the sixth bullet was fired at a crystal just above her; it bent the shot to the right into the final crystal on the right-hand side. The barrier vanished and "Problem Solved" appeared. If you run out of bullets with crystals left, use the RESTART button to the right of the board to try again.
- Watch the ending. Frank's spirit is taken home and Sandy rides off at sunset. There is one ending.