DEADCITY ESCAPE · CHAPTER 5
The control room coin case
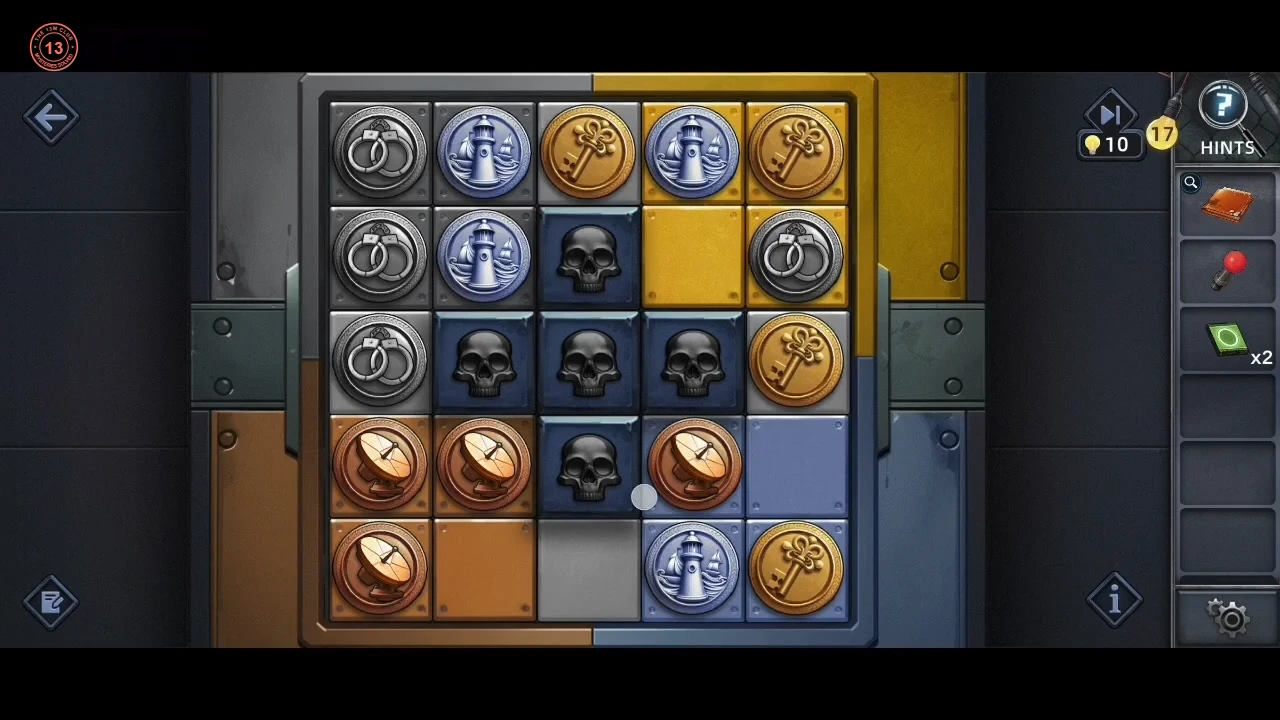
In the control room, sort the coins in the floor case for the chips.
- In the control room, take the Chip lying on the floor at the lower right. Pull the cloth off the boxes at the left and take the second Chip lying in front of them. Open the coin case on the floor by the boxes and slide the coins so each metal fills its own corner: silver top-left, gold top-right, copper bottom-left, blue bottom-right. Take the Key from the opened case and the Fire extinguisher from the wall right of the console.
DEADCITY ESCAPE · CHAPTER 5
The console wires
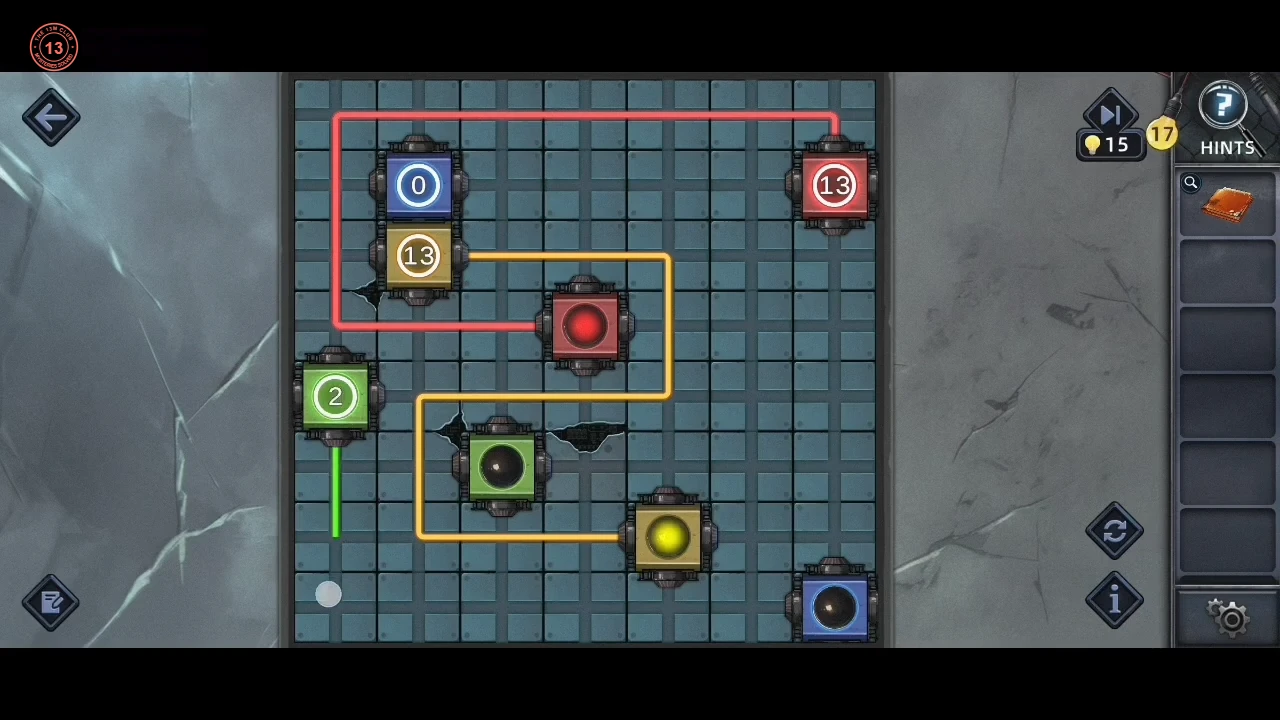
Repair the console and connect the chips with wires of equal length.
- Unlock the console cover with the Key and read the staff table on the wall. Fit the Handle; lightning strikes, sets the console on fire and throws a third Chip onto the floor at the right. Take it, then put the fire out with the extinguisher. Some board chips are broken: place the three Chips from your inventory in the empty sockets. The rule is: connect the chips of the same colour, making all the lines the same length. Drag a wire out from each outlined chip; the number on it counts the squares the wire has covered, and every wire must reach the other chip of its colour at exactly 13. Wires may not cross, so the direct routes are too short and need detours. Red: from the top-right chip run along the top edge to the left side, down, then right to the red chip. Yellow: from the outlined yellow chip go right, down, back left above the green chip, down, and right to the yellow chip. Green: from the outlined green chip on the left go down to the bottom row, right, up, and back left to the green chip. Blue: from the top-left blue chip run right along the second row, then zigzag down near the right side (down, right, down, back left, down, right again) and go straight down to the blue chip in the bottom-right corner.
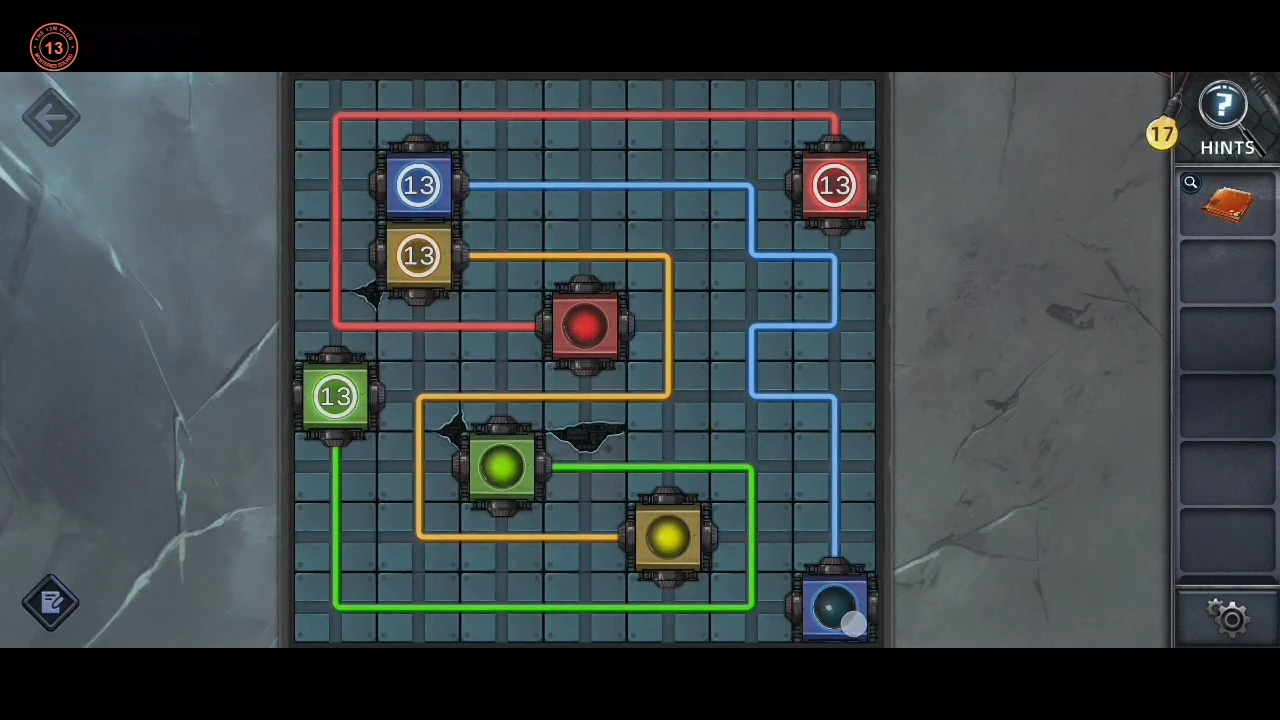
The finished wires, each 13 squares long.
DEADCITY ESCAPE · CHAPTER 5
The Skeleton Corps radio

Answer the Skeleton Corps radio questions.
- Answer the Skeleton Corps radio. Who are you looking for: Diego. Who told you: Jacob — the business card in the doctor's Wallet names SSU, and on the staff table Jacob is the researcher from SSU. How many children: 2 — the family photo in the Wallet shows two boys. The doctor's number: 1249 — Jacob's number on the staff table shows only 1 … 9 with the middle digits worn away, and 1249 is the option the game accepts. Where are you: FlyPeople 98, from the line under the staff table ("98, 1934 FlyPeople. Santiafter, CR"); the Sapphira options are wrong.CODEDiego, Jacob, 2, 1249, FlyPeople 98
DEADCITY ESCAPE · CHAPTER 5
The lightning photo and the rivet hatch
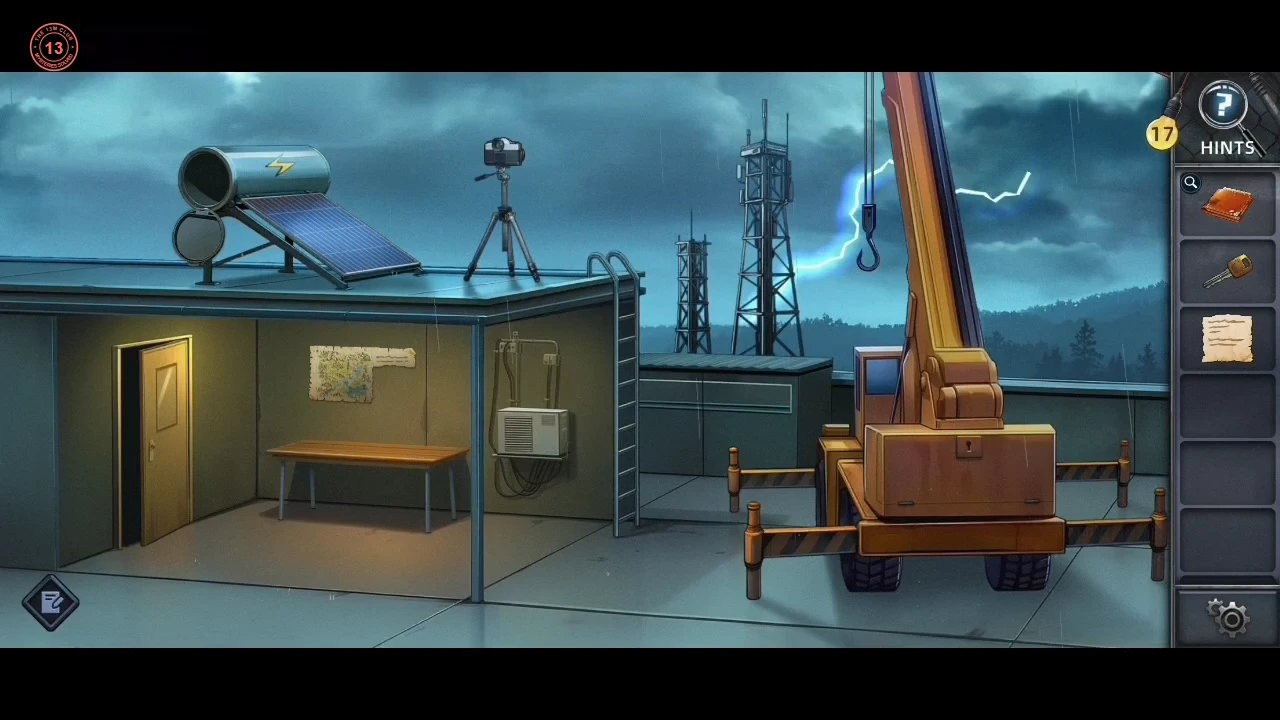
Photograph the lightning and copy its shape on the rivet hatch.
- On the roof, take the Camera from the bench in the shelter and set it on the tripod; after the next lightning strike you get the lightning Photo. Open the round rivet hatch on the dark wall between the shelter and the crane. Tap rivets to light them (a second tap turns one off again). Light these seven: top-left (leave top-right dark), all three in the second row (left, centre, and the one just left of the gold bolt), the far-left rivet, the one below the centre, and the lower-left one. Leave dark the rivet beside the bolt's lower tip, the lower-centre, lower-right and bottom rivets. The hatch flies off and the end cap of the solar water heater opens: tap the open end to take the Crane key, then tap again for the Pieces of paper (the Action Report map). Use the Crane key on the crane to open its control panel.
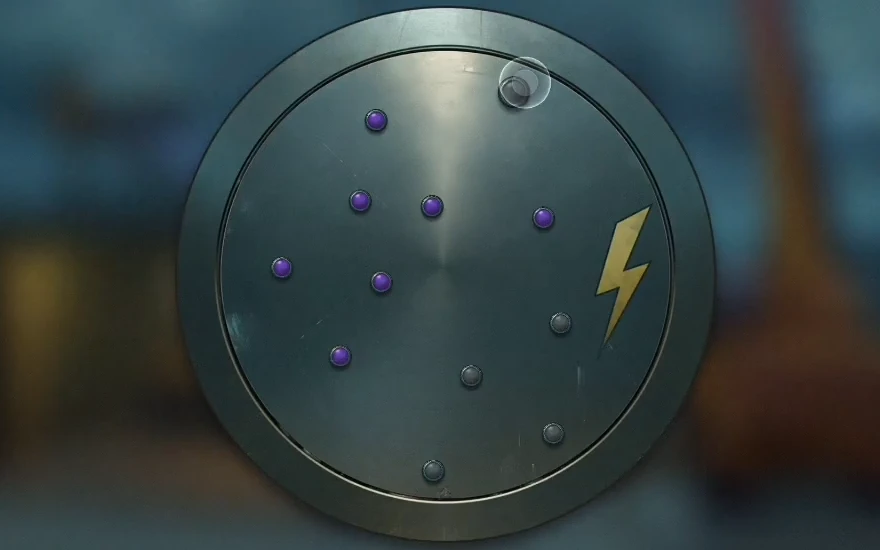
The accepted rivets: seven lit, top-right dark. The faint ring at the top right is the recording's touch marker.
DEADCITY ESCAPE · CHAPTER 5
The crane panel pattern
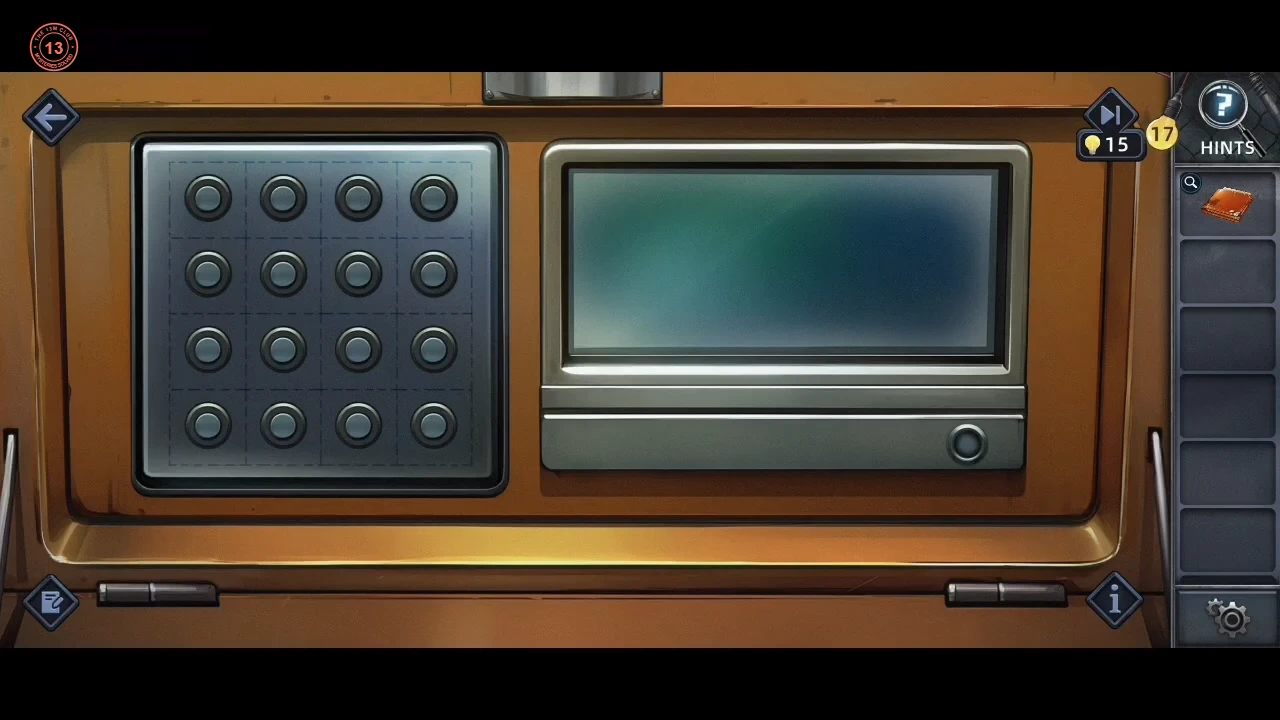
Draw the one-stroke pattern on the crane panel to boot the crane.
- Open the crane panel and draw the 4x4 pattern in one stroke: bottom-right, second row second column, top-left, bottom-left, second row third column.
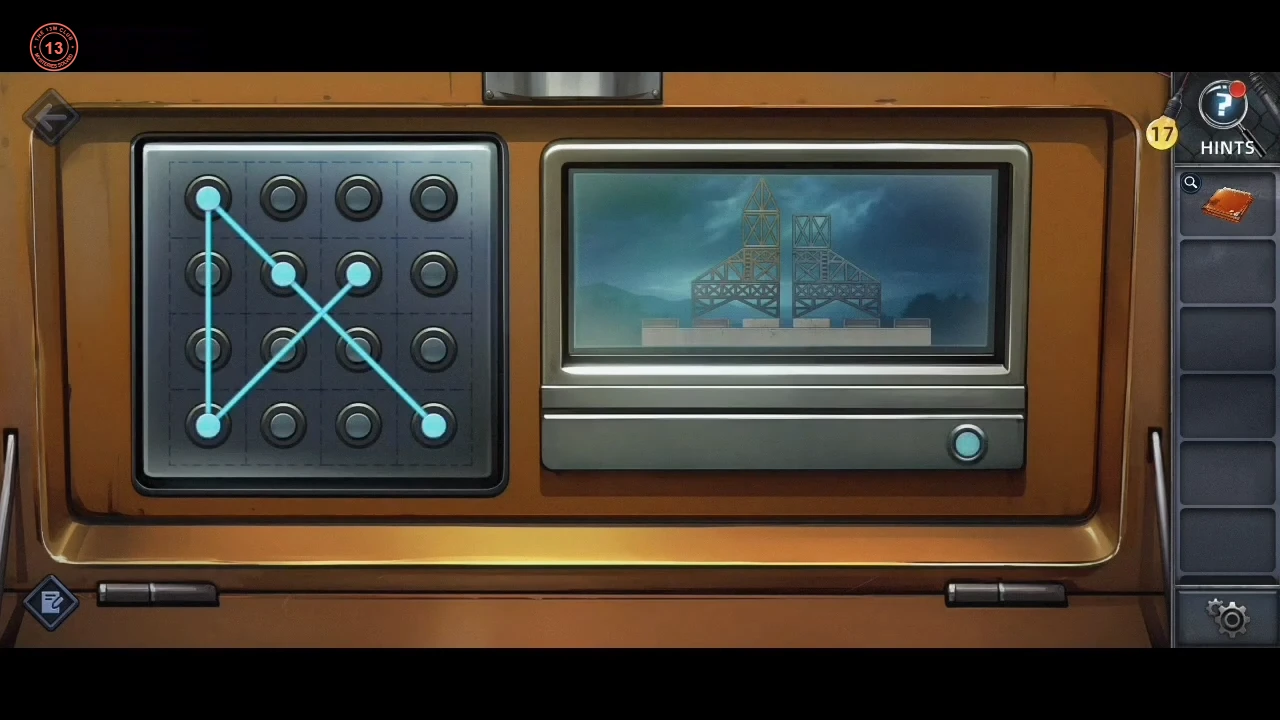
The crane panel pattern.
DEADCITY ESCAPE · CHAPTER 5
The cell towers
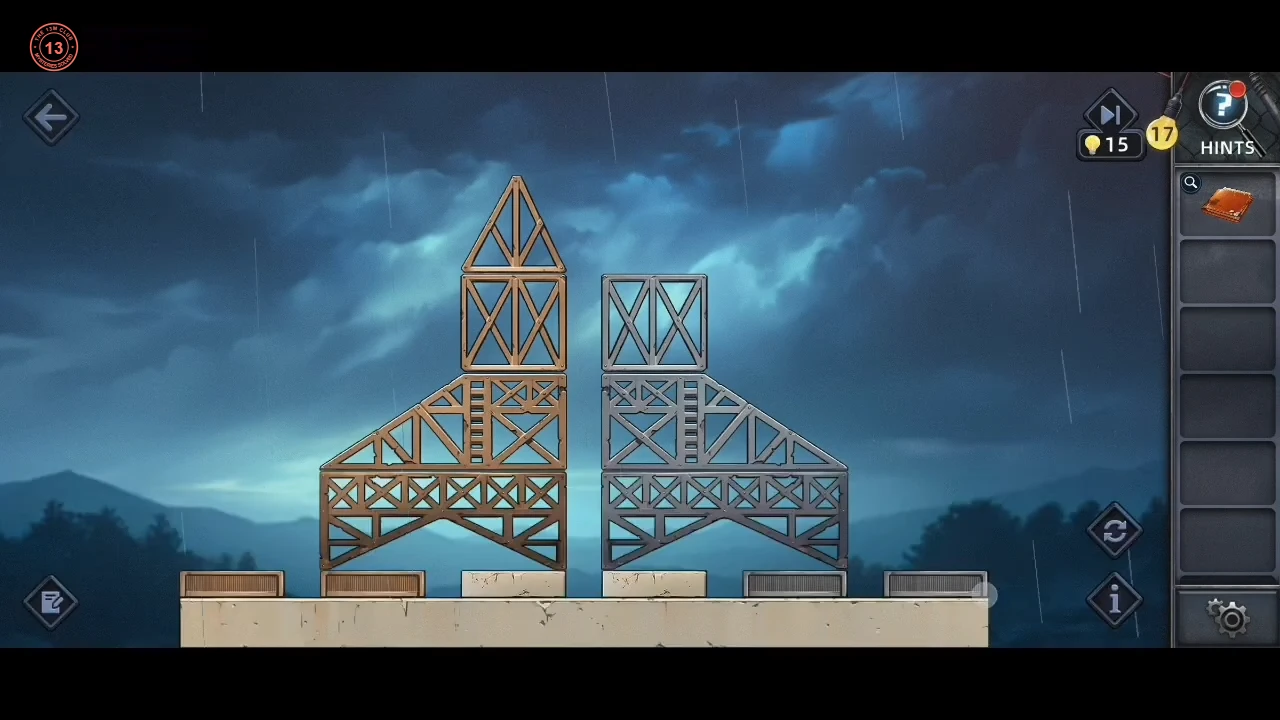
Rebuild the two cell towers on their own pads.
- The crane screen shows the two cell towers standing one pad too close to the middle. The base has six pads: two wooden pads at the left, two stone pads in the middle and two grey metal pads at the right. Rebuild the wooden tower on the wooden pads and the grey tower on the grey pads; the stone pads are free working space. Drag the pieces one at a time from the top of a stack (a green outline shows where a piece will land, and it needs something under it). Park the small pieces (the wooden triangle, the X boxes and the stair sections) on the stone pads or on the other tower, slide each wide base arch outward onto its own pair of pads, then restack in the original order: arch, stair section, X box and, on the wooden tower only, the triangle on top. The circular-arrow button at the right resets the board.
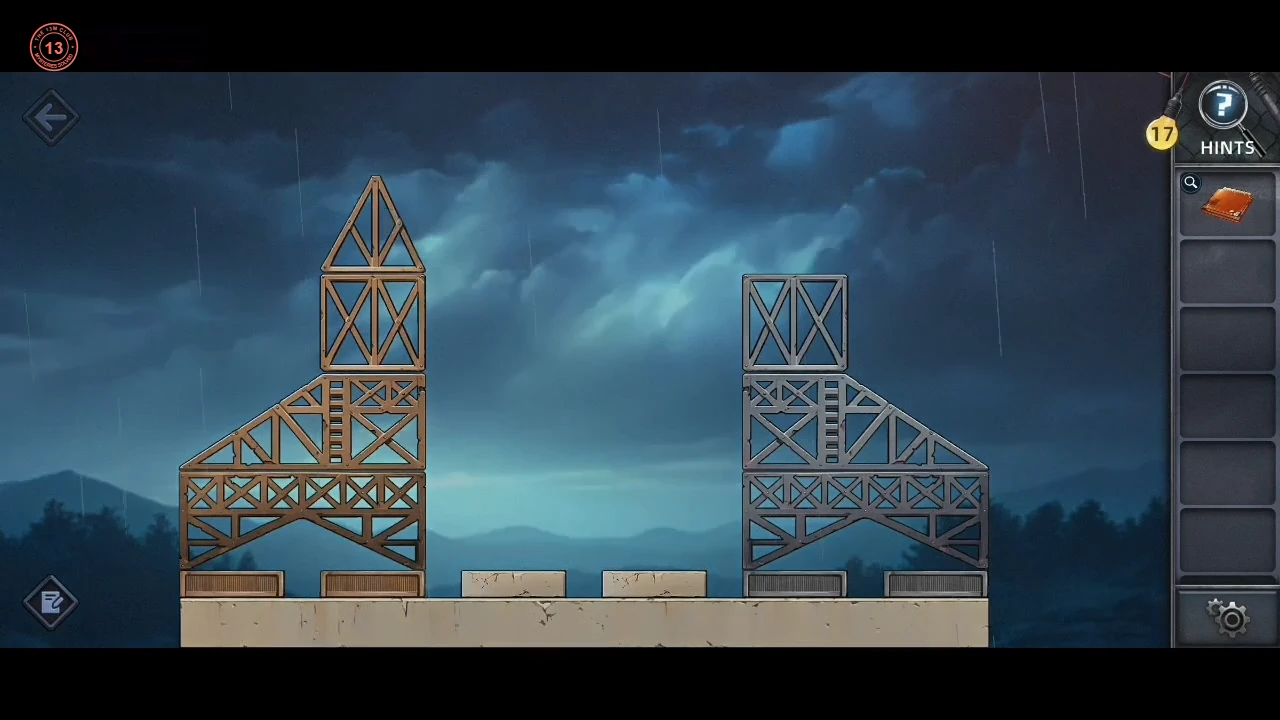
The rebuilt towers.
DEADCITY ESCAPE · CHAPTER 5
The console sliders and the weapon case
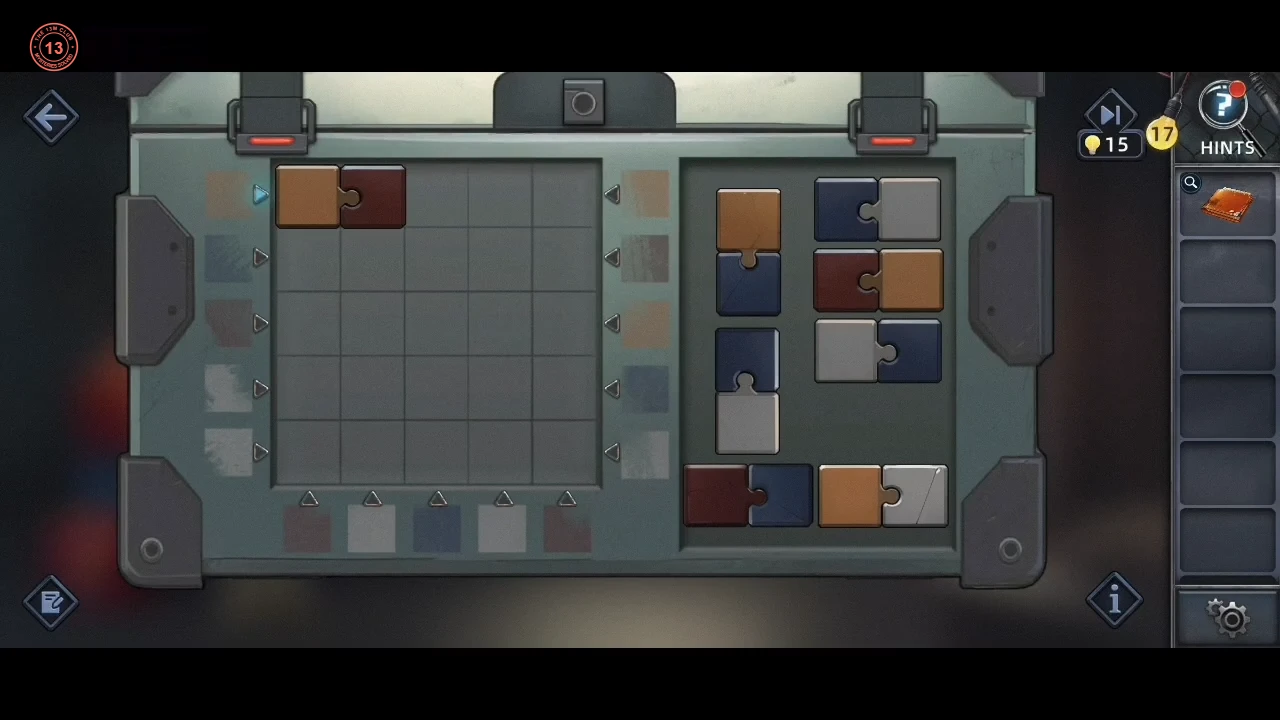
Enter Diego's slider code and pack the weapon case.
- Diego gives the console code BADCDCBA. Set the eight sliders to B, A, D, C, D, C, B, A. Then pack the weapon case: drag the eight two-square pieces from the right tray onto the 5x5 grid (they fit in the same orientation as in the tray, and squares may stay empty). Each arrow on the left, right and bottom edge has a colour swatch beside it, and the first coloured square that arrow looks at along its row or column must be that colour. Finished layout, rows from the top (- = empty): row 1 orange, white, orange, -, -; row 2 blue, white, blue, orange, red; row 3 red, blue, red, orange, -; row 4 -, white, blue, blue, -; row 5 -, -, -, white, -.CODEBADCDCBA
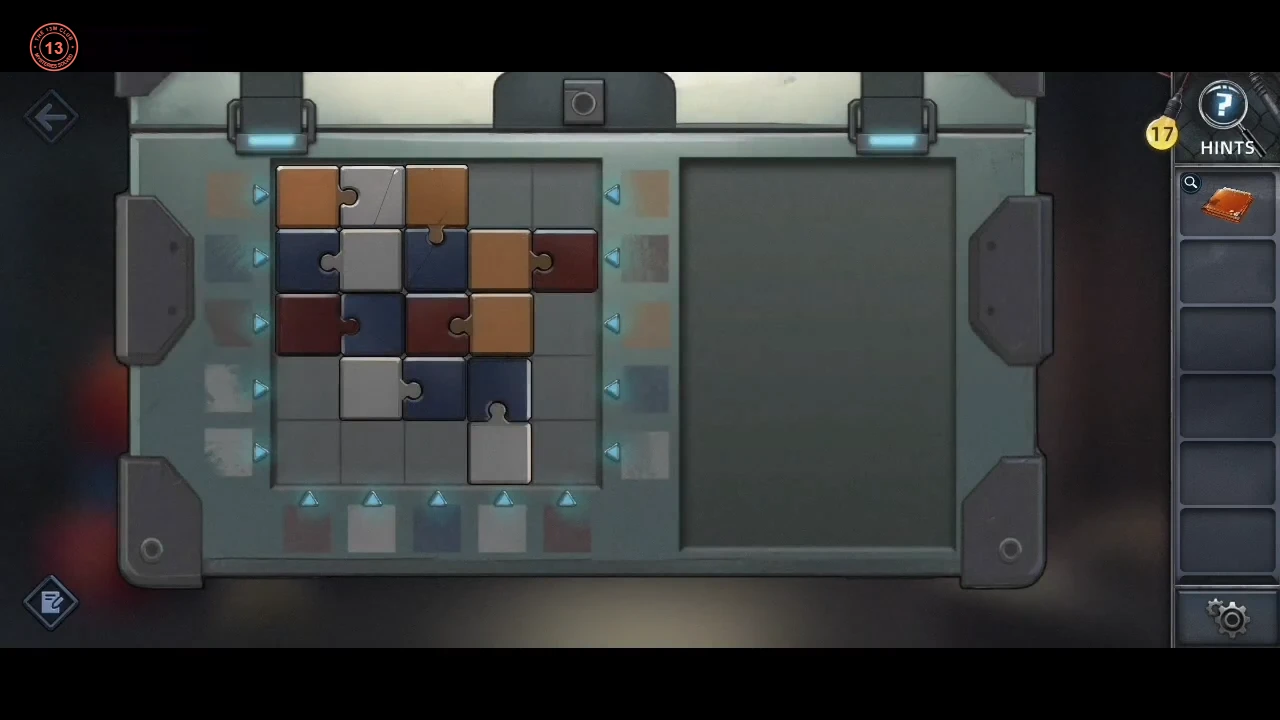
The finished weapon case.
DEADCITY ESCAPE · CHAPTER 5
The zombie sights
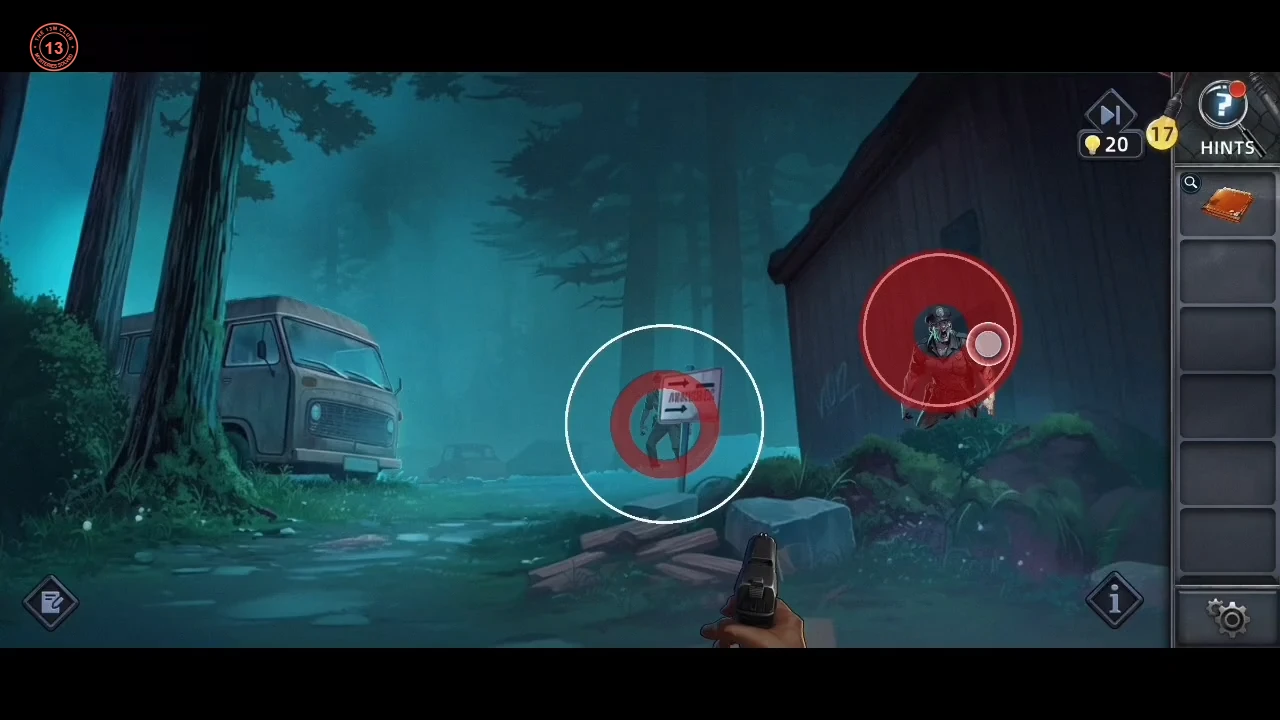
Time your shots at the zombies.
- Shoot each zombie when the shrinking sight reaches the red circle; too early or too late misses. Then load the fireworks onto the console launcher.
DEADCITY ESCAPE · CHAPTER 5
The final code panel
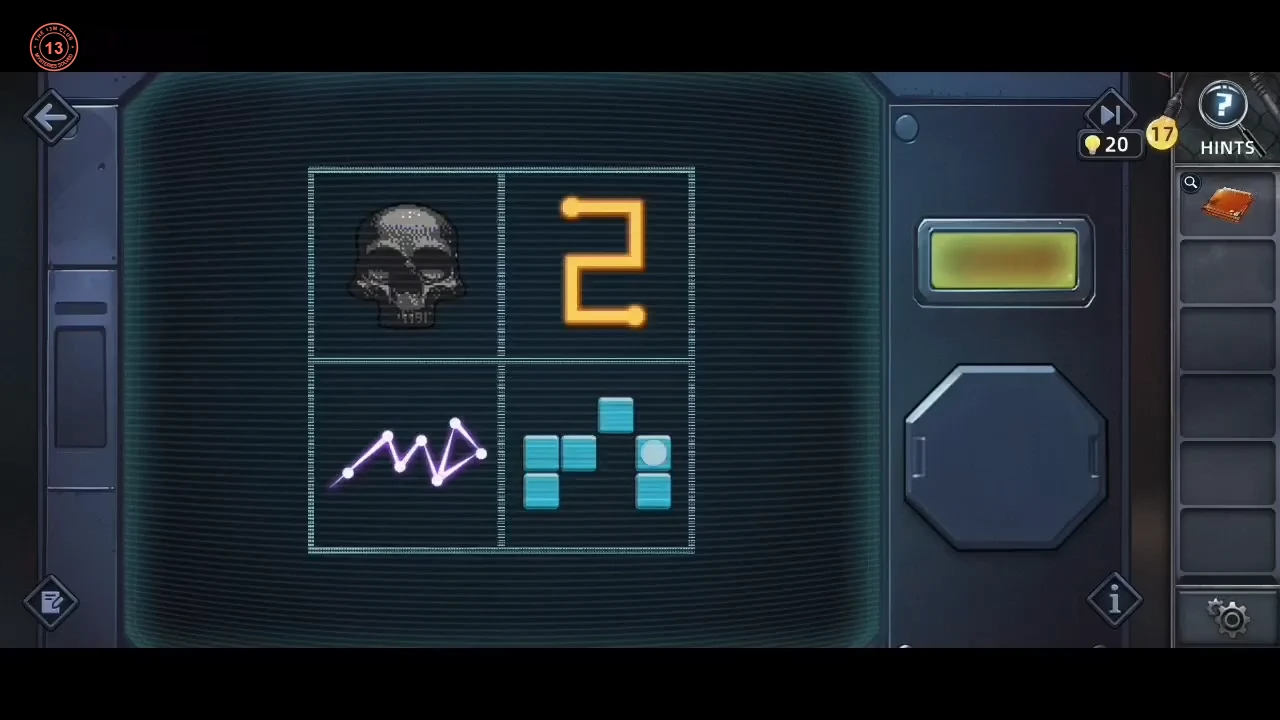
Set the four tiles of the final code panel.
- Open the final code panel. Tap each of the four tiles to cycle it. Top left: the skull (it cycles radar, coin, skull). Top right: the number 2 (it cycles through 1 to 5, so its starting number can differ; tap it until it shows 2). Bottom left: the bent seven-star constellation shaped like a leaning W with a tail. Bottom right: a pattern of five squares on a four-column grid: columns 1 and 3 on the top row, column 2 on the middle row and columns 3 and 4 on the bottom row. The panel solves as soon as all four match. This guide could not trace where each symbol comes from, but two separate playthroughs were accepted with this same combination (the screenshot below shows it). In one of them the number passed through 1 a moment before reaching 2; the panel did not solve on 1 and solved immediately once 2 appeared. If your panel still does not solve with the other three tiles matching, tap only the number tile, one step at a time, until it accepts.
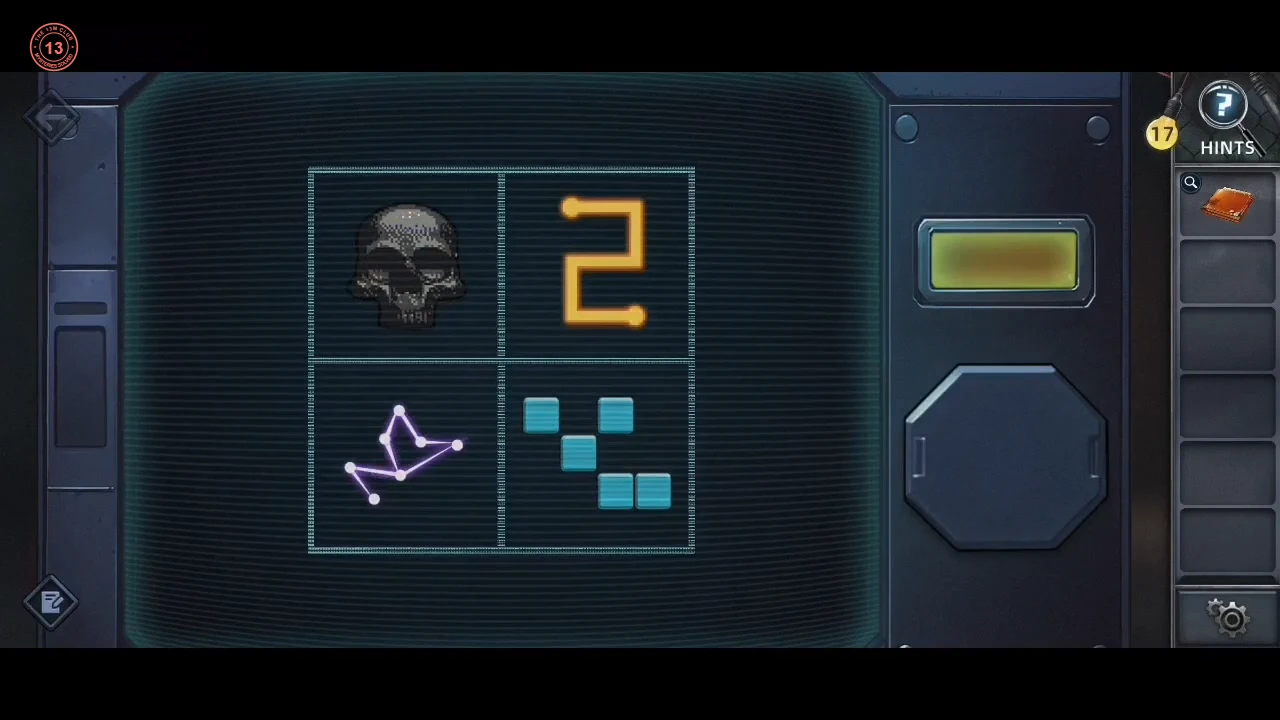
The four tiles in the combination that solved the panel.
DEADCITY ESCAPE · CHAPTER 5
The zombie plots and the ending
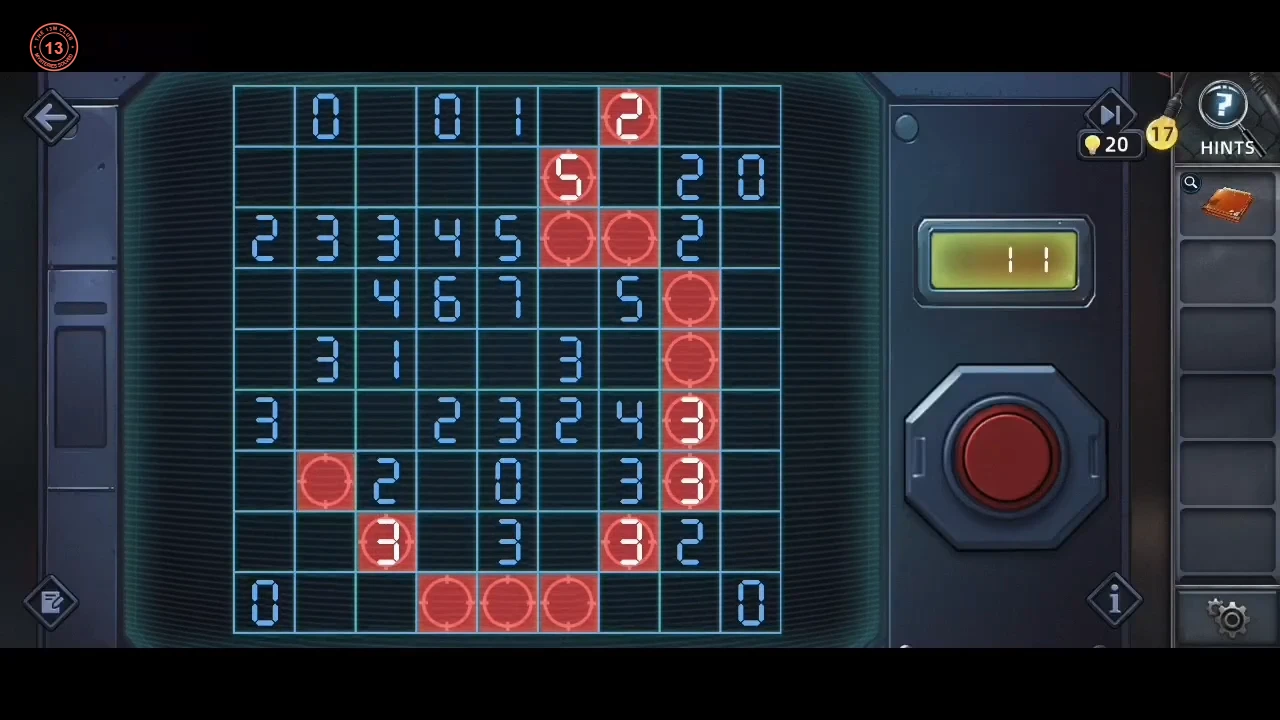
Mark every zombie on the plot board, then watch the ending.
- "Find all the plots": each number counts the zombies in its own cell and the eight cells around it, so a numbered cell can itself hold a zombie. Tap a cell to mark it; the counter starts at 25. A practical way in: every cell touching a 0 is empty, and the 7 in row 4 needs seven of its nine cells. The 9x9 board solved in the recording has these 25 zombies (rows top to bottom, columns left to right): row 1 column 7; row 2 column 6; row 3 columns 2–7; row 4 columns 1, 5 and 8; row 5 columns 1, 4, 5, 6 and 8; row 6 columns 1 and 8; row 7 columns 2 and 8; row 8 columns 3 and 7; row 9 columns 4–6. When the counter reads 0, press the red button.
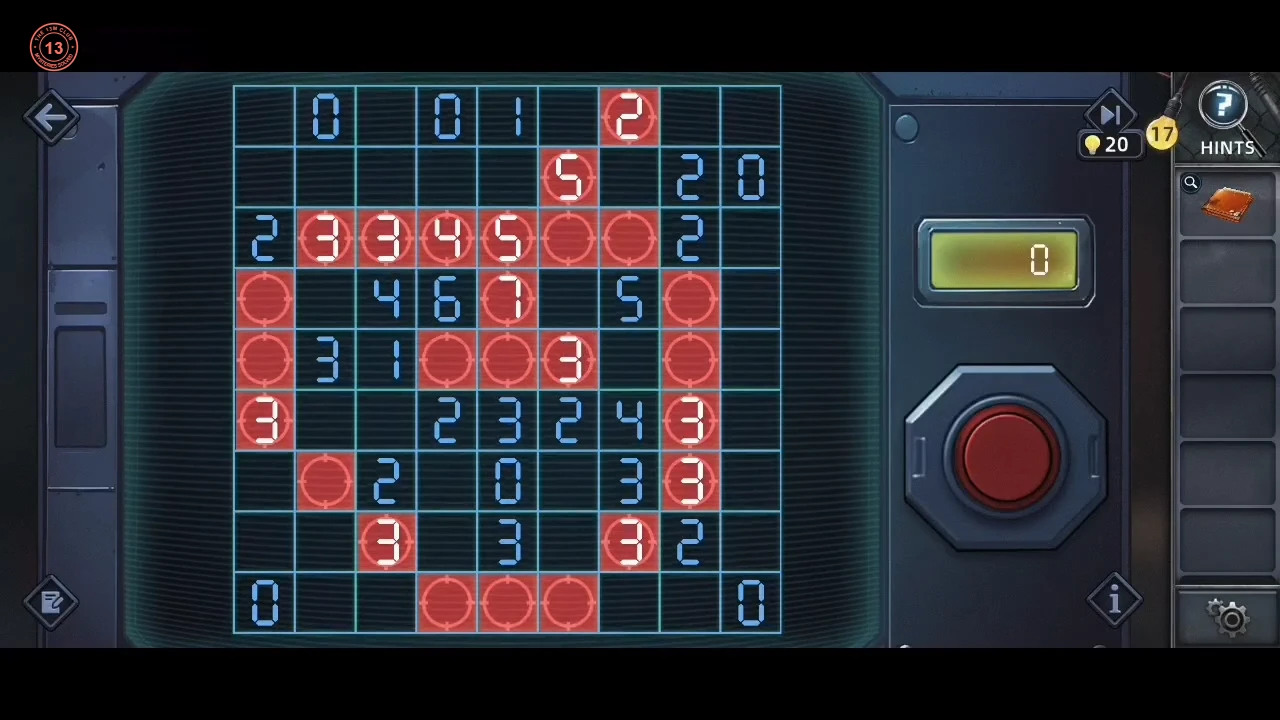
The solved board: 25 cells marked and the counter at 0. - Watch the ending: the fireworks rocket, the helicopter rescue at the cell tower and the explosion. "Now it's the end, or another beginning?" There is one ending.