Dust and Clues: the Rusty Barrel saloon
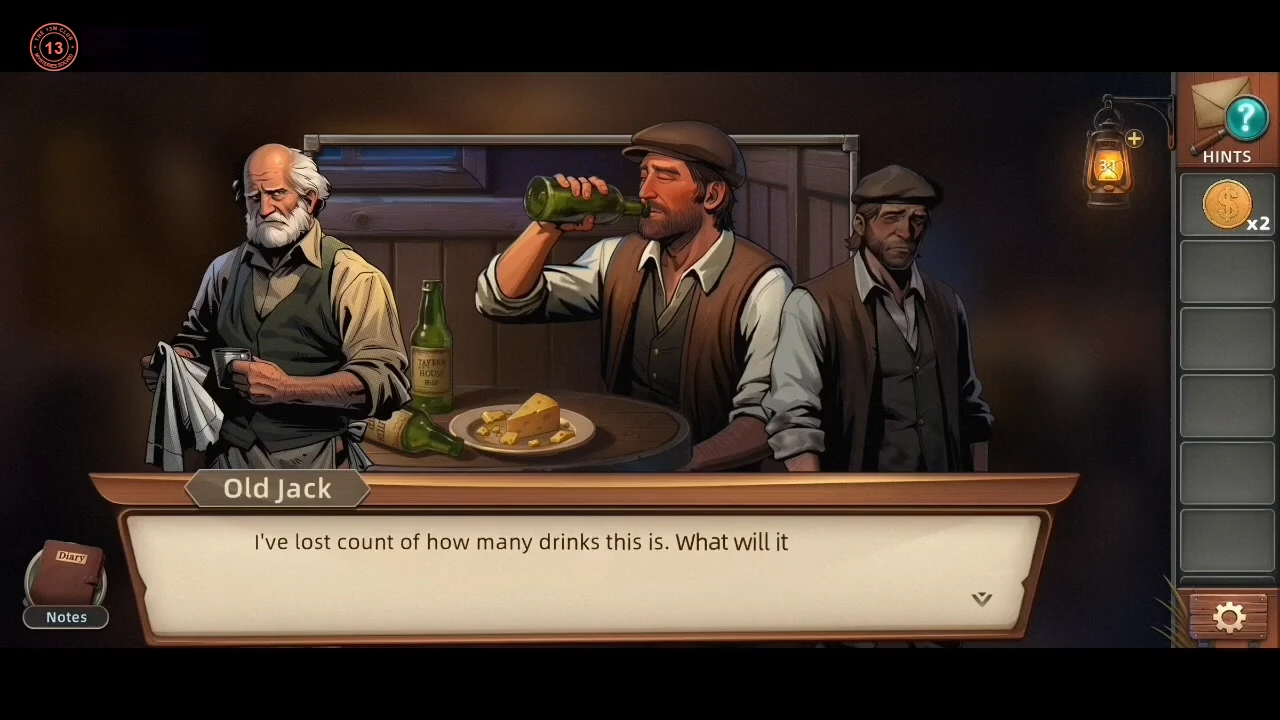
Chapter 2 opens in Dust Town. Sandy recognises Lucky Lou as the man who took Cindy's ring. She needs five coins to play him at cards.
- Collect three coins. 1) In the saloon, talk to Sam Wu, the man in the waistcoat who is worried about Cindy; he gives you a Coin. 2) Zoom into the mousehole at the bottom of the saloon wall and take the Coin lying beside the mouse. 3) Outside, zoom into the crate beside the barrel by the saloon porch. Lift the cowboy hat off the crate and take the Gear underneath, then take the Water Trough Lever leaning against the crate. Fit the lever on the water pump in the street, read the note there, and pump it: a Coin drops out. Keep the Gear for the next panel.
The gear-track panel and the gramophone
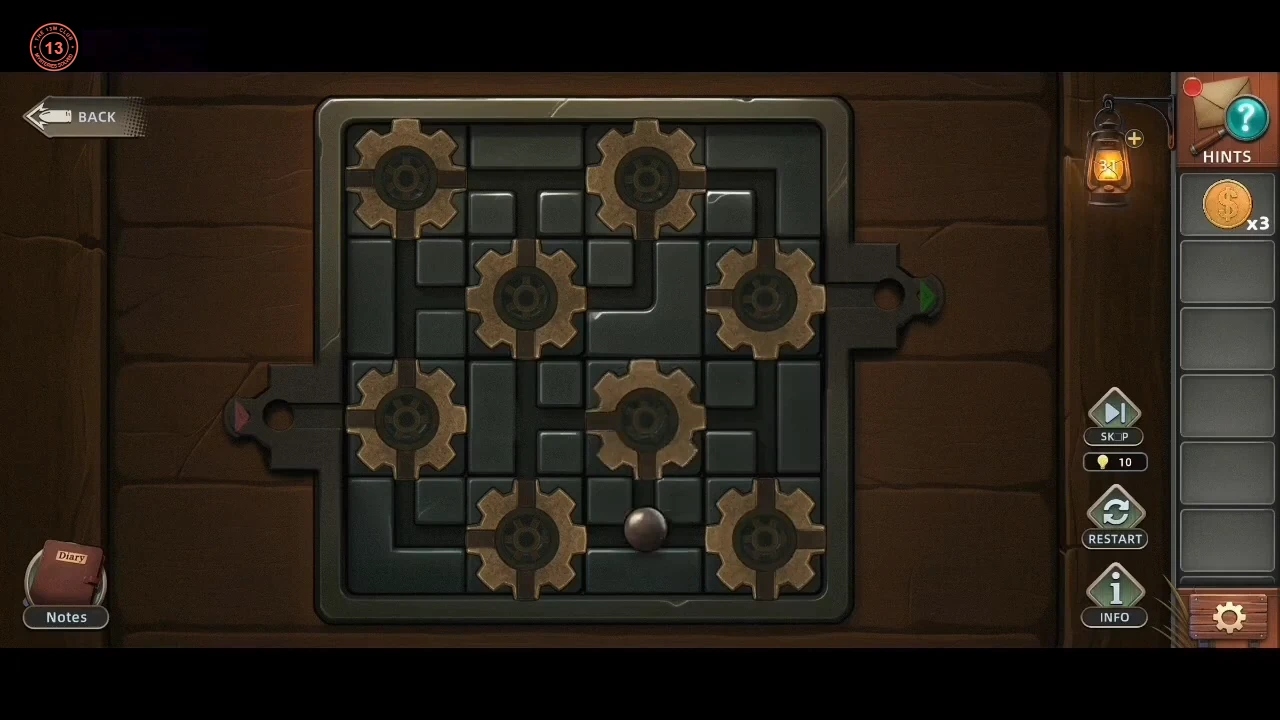
Steer the ball through the saloon's gear-track panel, then play the Record.
- Tap the small chest on the saloon porch and fit the Gear into its lid to open the gear-track panel: "Click the arrows around the small ball to move it to the right exit and complete the puzzle. Note that when the ball passes over gear spaces, the gears will rotate counterclockwise." The ball enters at the left of the third row and must leave through the opening on the right edge of the second row. Eight gears sit in a checkerboard pattern. Each gear carries a piece of track, and every time the ball rolls over a gear, that gear turns a quarter-turn anticlockwise. A gear whose track points the wrong way can be turned by rolling the ball onto it and off again. Before heading for the exit, look at the two gears beside it: you need a track that links them to the exit opening. The recorded route was long: about 30 arrow taps over half a minute, including several loops back over the same gears. The guide does not list every tap. Landmarks of that route: the ball went down from the entry gear along the bottom row to the bottom-right gear, back through the centre, up to the top-left corner, then across the upper gears to the exit. Take the Coin and the Record from the opened chest, then put the Record on the gramophone at the bar and play it for the cupboard Key.
The whisky cupboard tile grid
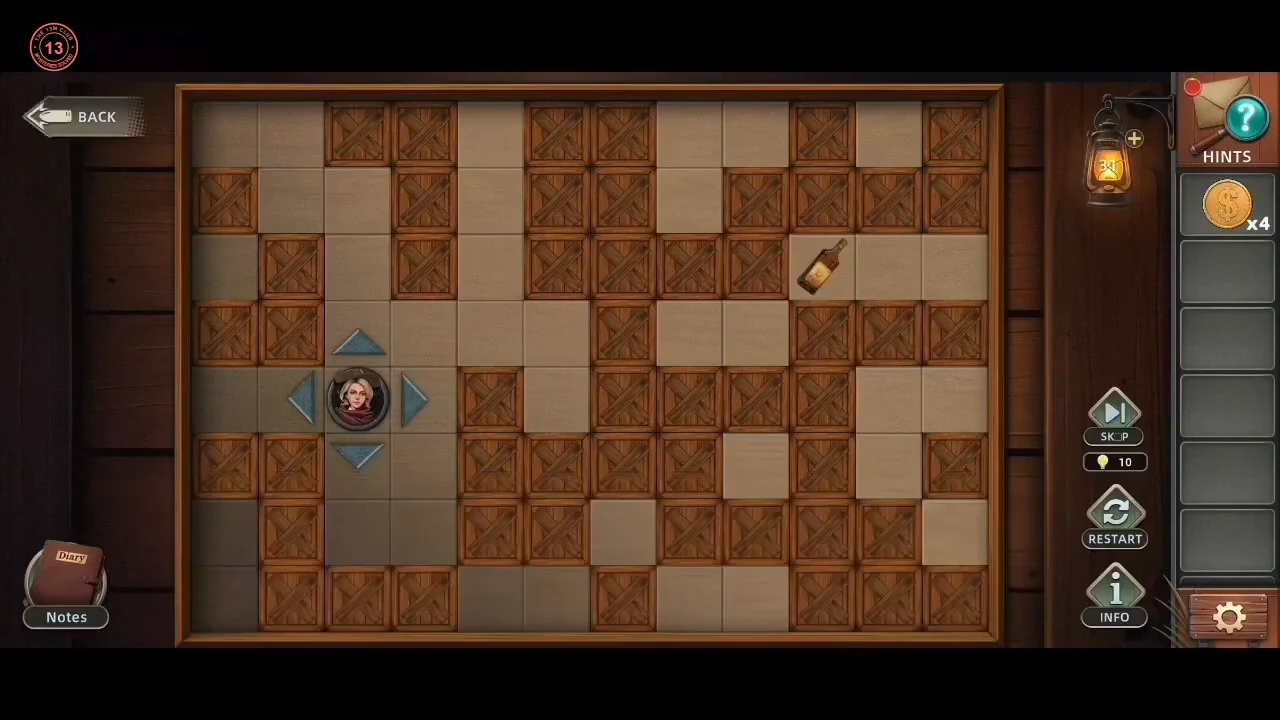
Push the token across the cupboard tile grid to reach the whisky.
- Open the cupboard behind the bar with the Key. "Click the arrows around Sandy to move her. As long as there's space, Sandy can push all the boxes in the direction she's moving. Find the correct path to help Sandy get the whisky." Sandy starts at the left of the crate-filled grid and the whisky bottle is up and to the right. The moves that worked: Up, Right, Right, Right, Down, Right, Right, Up, Right, Up, Right. Each tap moves Sandy one square and pushes any crates in front of her. If a push jams, press RESTART. Take the whisky. Pour it into the empty glass on the counter beside the gramophone to make A Glass of whisky, and give that to Marcel, the drinker at the bar. Take the Cheese he leaves on his table and put it at the mousehole: the mouse pushes out the fifth Coin.
The card game with Lucky Lou
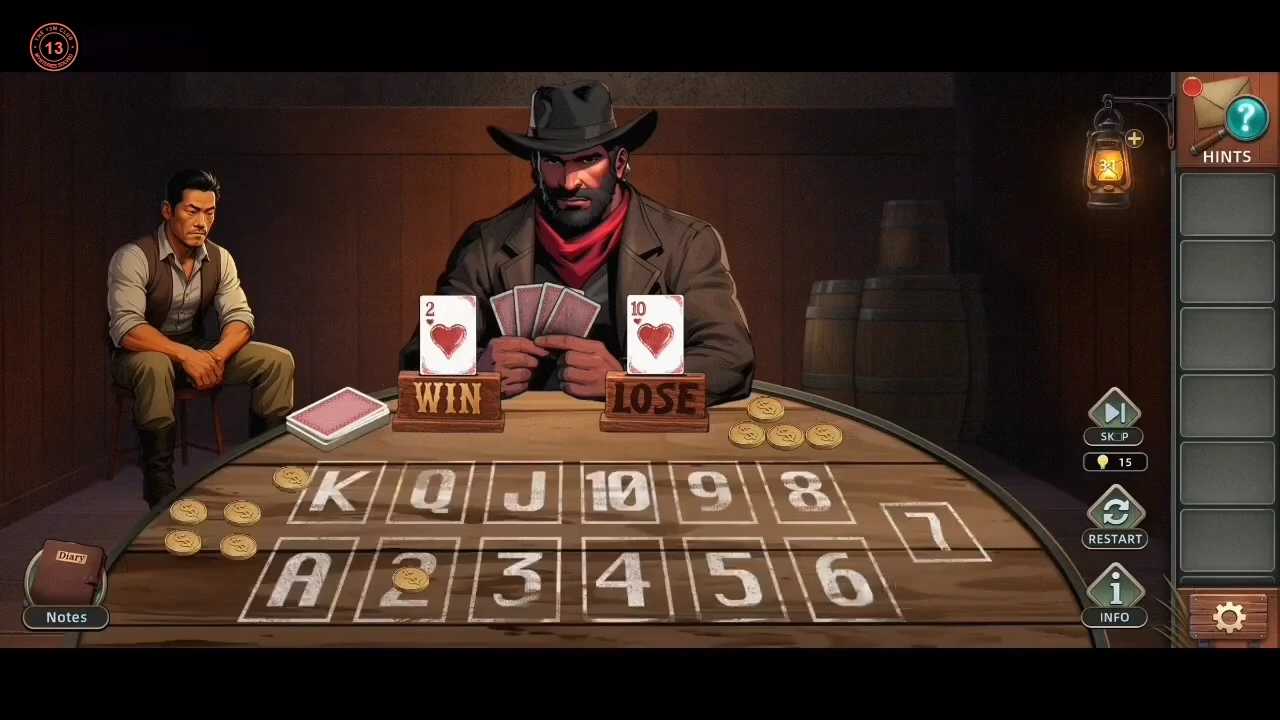
Lucky Lou cheats: once you bet, he draws a losing card that matches your bet (the 10♥ in the playthrough this guide follows). Sam Wu distracts him so you can move your coin, and the mark on the back of the face-down WIN card tells you its value.
- Place your coin on a value; Lou flips the matching losing card. While Sam Wu distracts him, look at the mark on the back of the face-down card beside WIN and move your coin to that card's value. Marks and values met in this guide's playthrough: red back with a lizard = 2♥, red back with a snake = J♣, plain blue back = 4♥, blue back with a red sun = 8♦. The first time a mark appears its value is a guess; a wrong guess here ended in a tie and returned the coin. Win five rounds.CODELizard 2 · Snake J · Plain blue 4 · Red sun 8
- Return the ring to Sam Wu, take the Lighter and show Old Jack the photo. He says the mining crew were killed and only the deputy survived, and mentions the key to the sheriff's office. Then someone shoots Jack: take the Sheriff's Office Key from him and use it to unlock the sheriff's office door.
The sheriff's office
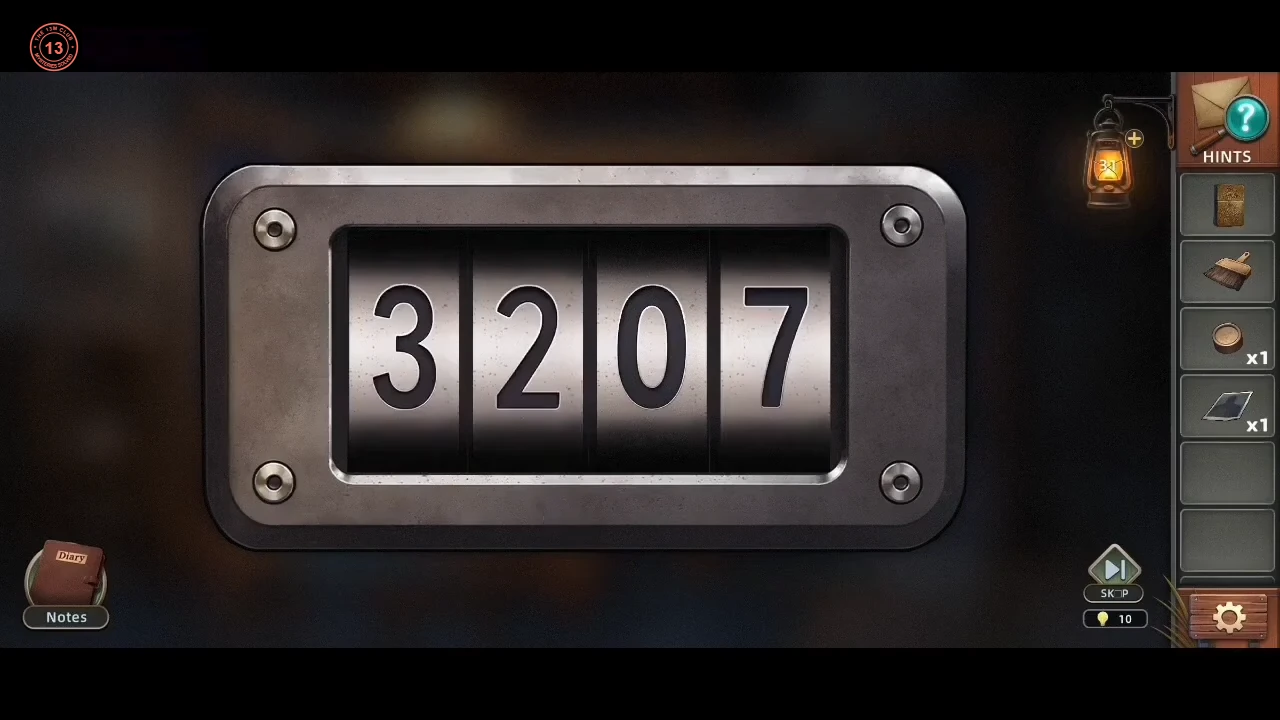
In the sheriff's office, the bounty poster gives the drawer code.
- Lift the blue cloth on the floor in front of the desk and take the Broom. Take the Keycap from the desk drawer and the Photo from the case book on the desk. On the poster note, "The bounty for the dead wanted criminal is halved": add the bounties, halving those marked with a red skull: 55 + 1,200 + 200 + 1,250 + 200 + 300 = 3205. Enter 3205 on the drawer lock and take the Photo and the cell Key.CODE3205
The jail cell tally bricks
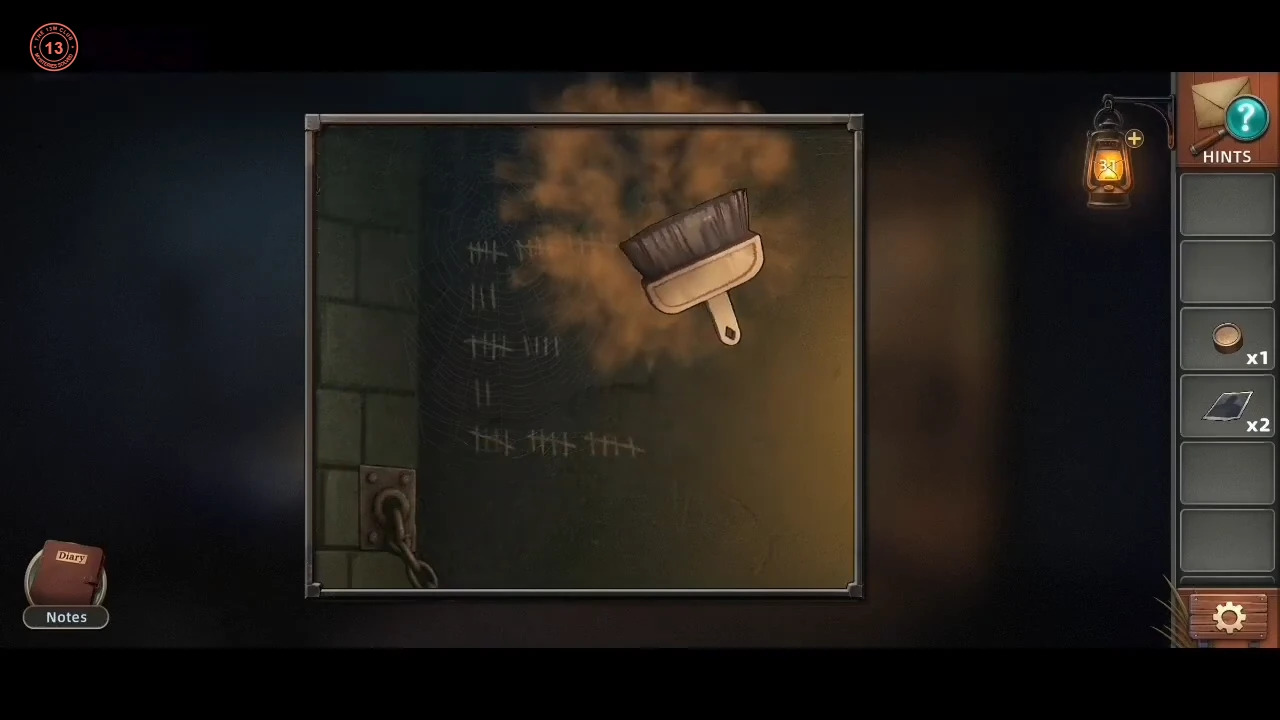
The tally marks behind the cobweb in the jail cell give the brick order.
- Open the jail cell with the Key. Pick up the Candle from the cell floor, put it in the empty wall holder and light it with the Lighter. Zoom into the cobwebbed wall by the bed and sweep the cobweb away with the Broom. The tally marks count 19, 3, 9, 2, 15; press those numbered bricks in that order. A compartment opens in the bricks: take the Photo inside (another portrait for the evidence board).CODE19, 3, 9, 2, 15
The sheriff star
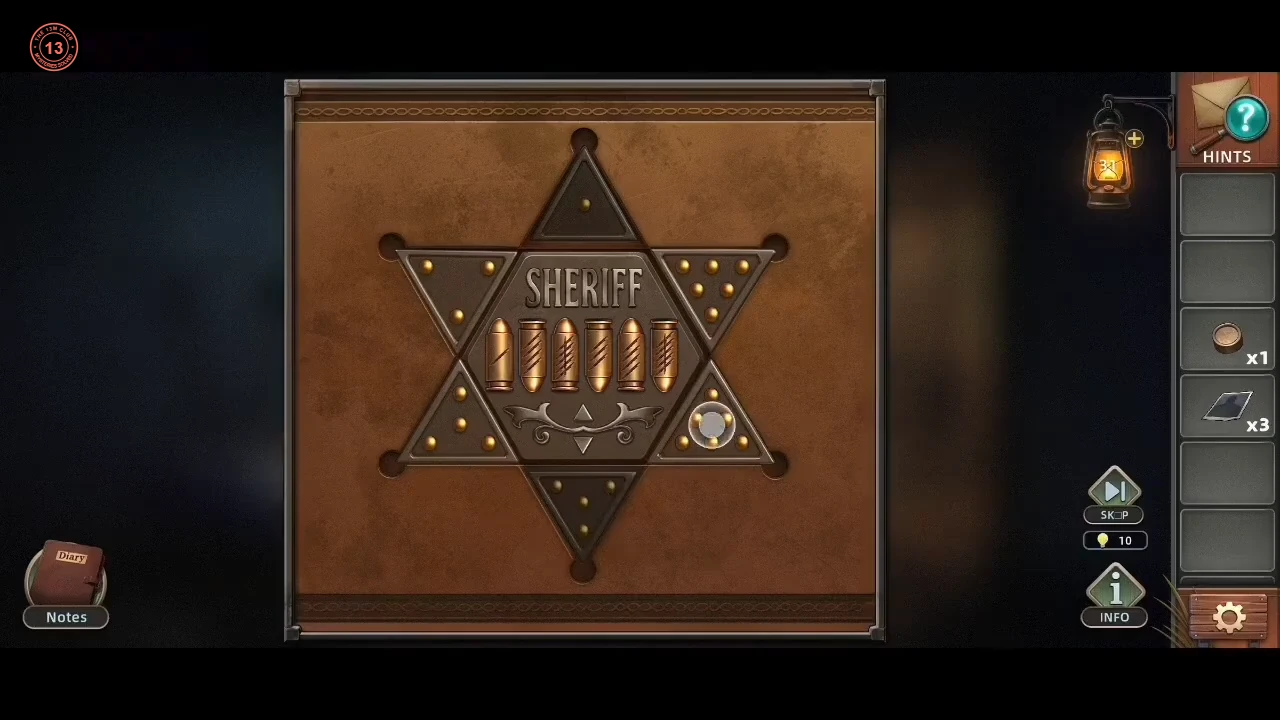
Match the sheriff star's points to the scratches on the bullets.
- On the sheriff star, each of the six points has a number of brass pips (top 1, upper-left 3, upper-right 6, lower-left 4, lower-right 6, bottom 4). The six bullets in the middle carry scratch marks (1, 4, 6, 3, 4, 6 from left to right). They alternate between pointing up and pointing down, so match an upward bullet to an upward-pointing star point and a downward bullet to a downward-pointing one. Tap the points in bullet order: top (1), bottom (4), lower-right (6), upper-left (3), lower-left (4), upper-right (6). Each pressed point darkens. Take the Photo from the bed crate.
The evidence board and the typewriter
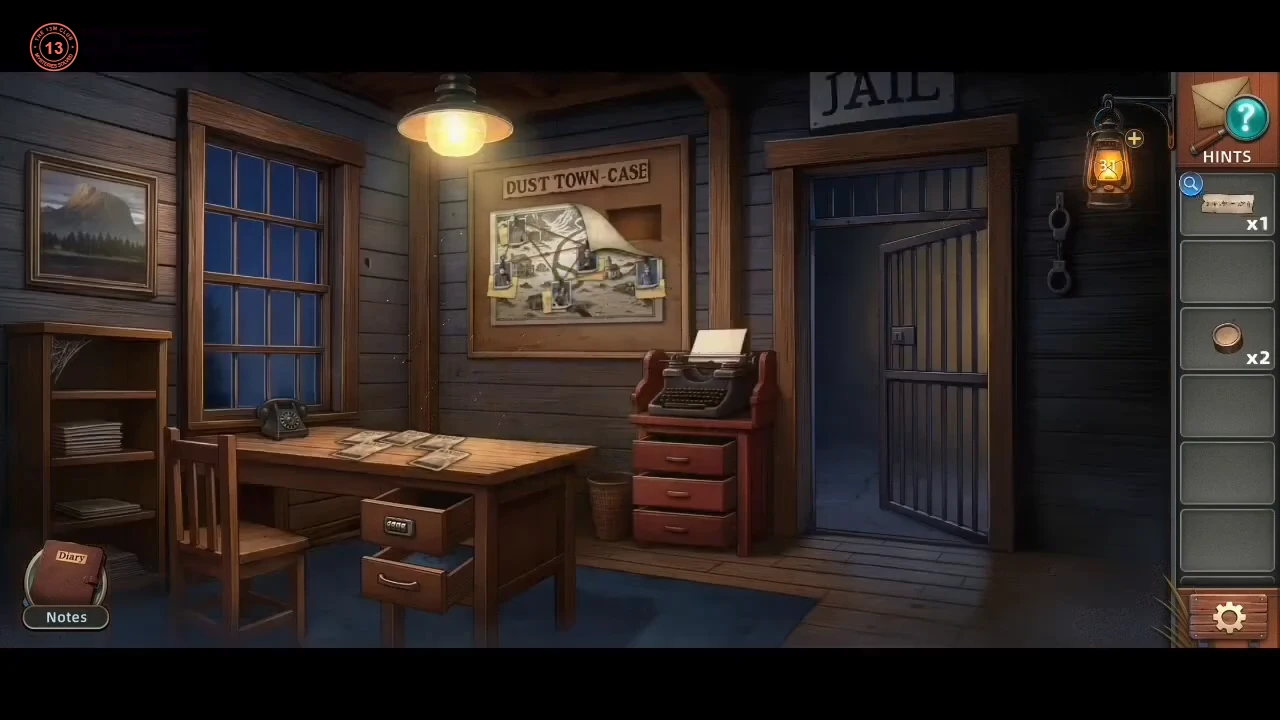
Pin the photos to their notes, then type the symbols on the typewriter.
- Pin each photo by its note: miner → "truth behind the mining tragedy", mayor → "pure water, why him only?", priest → "tricks in the ceremony", Mad Woman → "her spirit has already collapsed", boy → "an innocent child". A hidden compartment opens: take both the paper scrap and the second Keycap from it (Keycap x2).
- The typewriter is missing two keys: fit one Keycap in the middle gap of the bottom row (5th key from the left; it becomes the lightning key) and the second in the other bottom-row gap, 7th from the left with one key between the two gaps (it becomes the dash key). Then type the six symbols from the scrap in order.
Outside the church
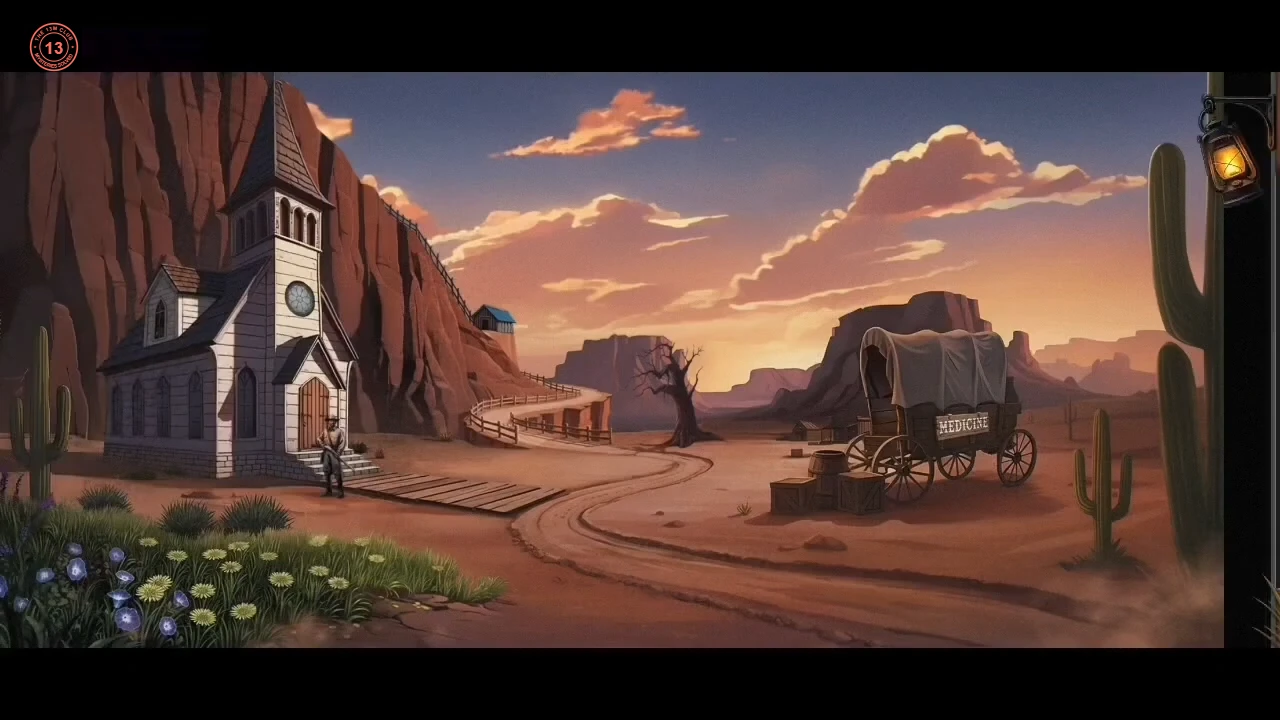
Buck guards the church door. Collect tools around the wagon, hay trough and barn.
- Buck guards the door. Zoom into the back of the covered wagon and take the Gloves, the Oil Lamp and the Carrot from the open box. Go right to the barn yard. Put the Carrot in the hay trough at the front right, then take the Y-shaped Stick and the Rubber Band from the hay. Zoom into the thorn bush beside the trough and use the Gloves on the thorns: take the Iron Hoop and the Sickle tangled inside. Zoom into the green water trough on the left; the broken barrel beside it is missing a hoop. Fit the Iron Hoop on it and take the Wooden Barrel. Use the barrel on the trough to bail out the water, then take the Shovel from the bottom.
- In the barn yard, take the Pebbles from the rock pile in front of the barn. Zoom into the barn front and take the Awl from the wall beside the horse. Open the side door on the right of the barn and use the Oil Lamp to light the dark room inside. Take the Herbal Formula from the workbench and read the Frontier Slingshot Assembly Guide pinned to the wall. Build the Slingshot on the workbench by placing the Pebbles, the Y-shaped Stick and the Rubber Band, then use the Awl to fix the band to the stick. Take the finished Slingshot. Only one Rubber Band is needed.
The slingshot and the red fruit
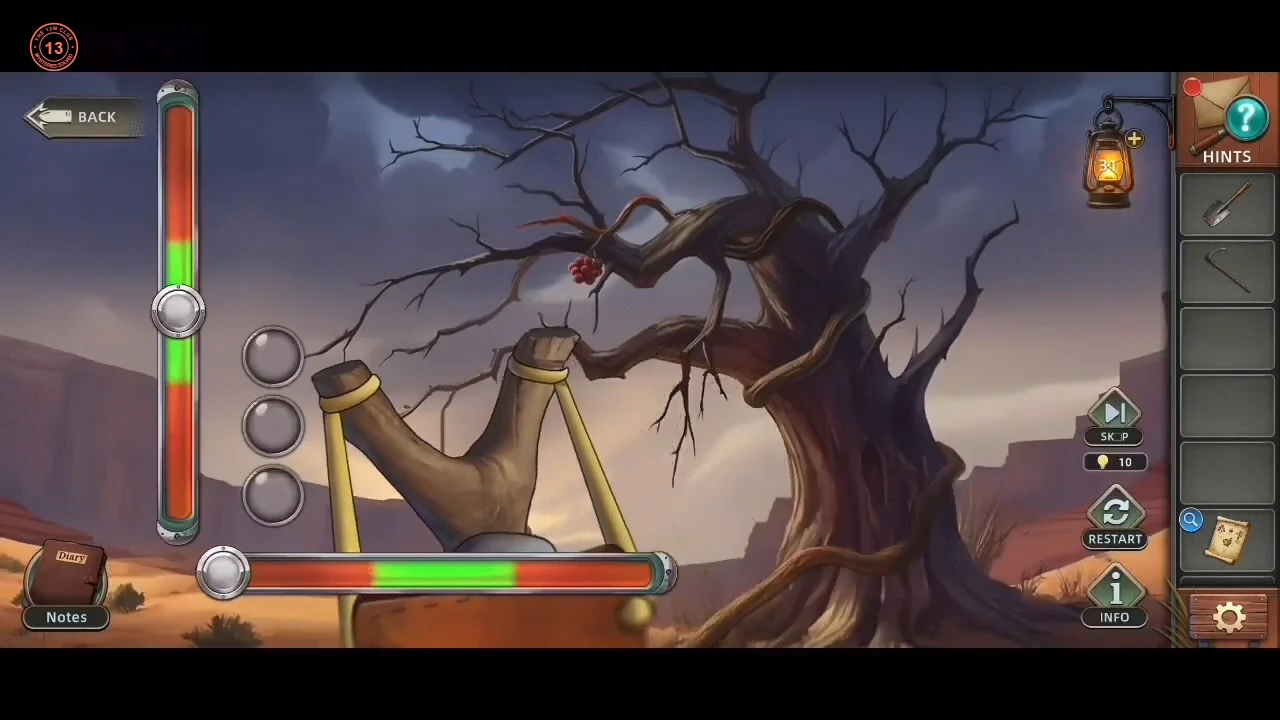
Build a slingshot and shoot the Red Fruit off the dead tree.
- Use the Slingshot built in the barn to shoot the fruit off the dead tree: stop both power sliders in their green zones for three hits. Take the Red Fruit.
The purple flowers and the herb mortar
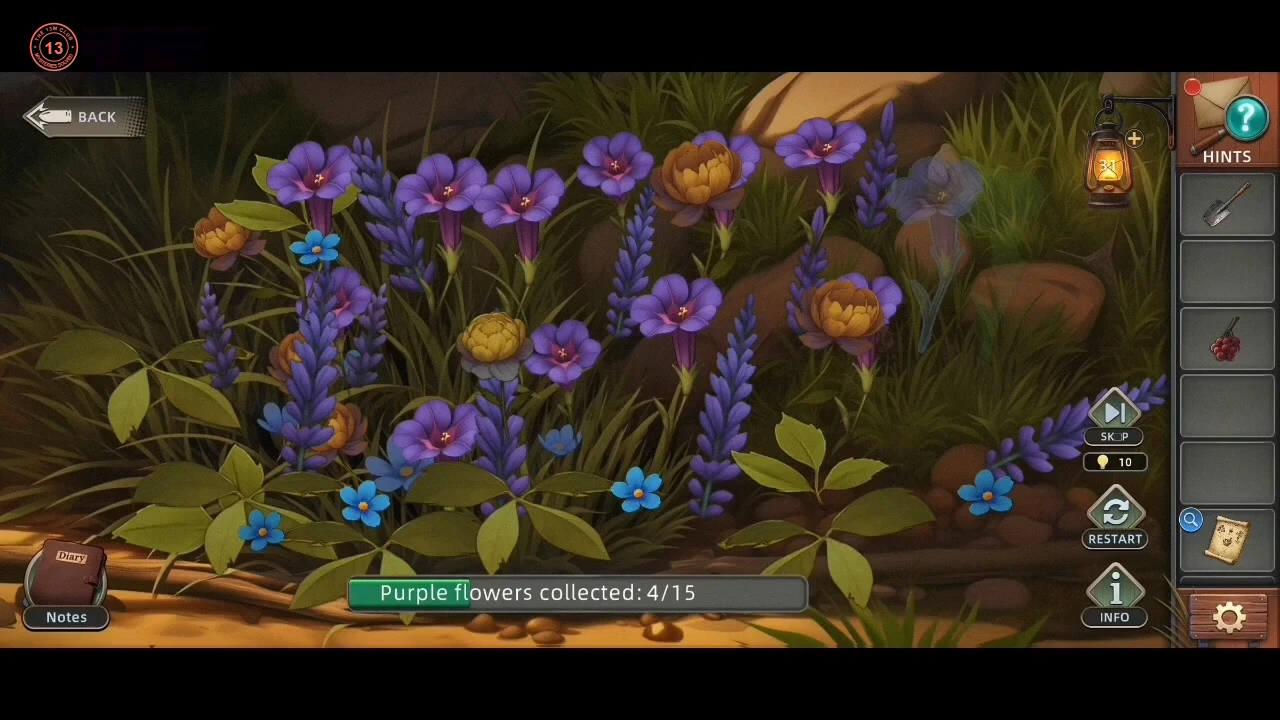
Pick the purple flowers, dig up the Green Plant and grind the herbs for the horse.
- Use the Sickle (from the thorn bush) on the flower bed at the front left of the church. Swipe the weeds aside and tap all 15 purple flowers, then take the Purple Flower. Zoom into the back of the wagon and dig the patch of earth at its foot with the Shovel to get the Green Plant. Zoom into the open lower drawer of the wagon to reach the mortar box. Put in the three ingredients listed on the Herbal Formula (it stays in the clue slot of your inventory): the Green Plant, the Purple Flower and the Red Fruit, then grind them with the pestle to make the Herb. Feed the Herb to the horse in the barn.
The rope-linked rocks
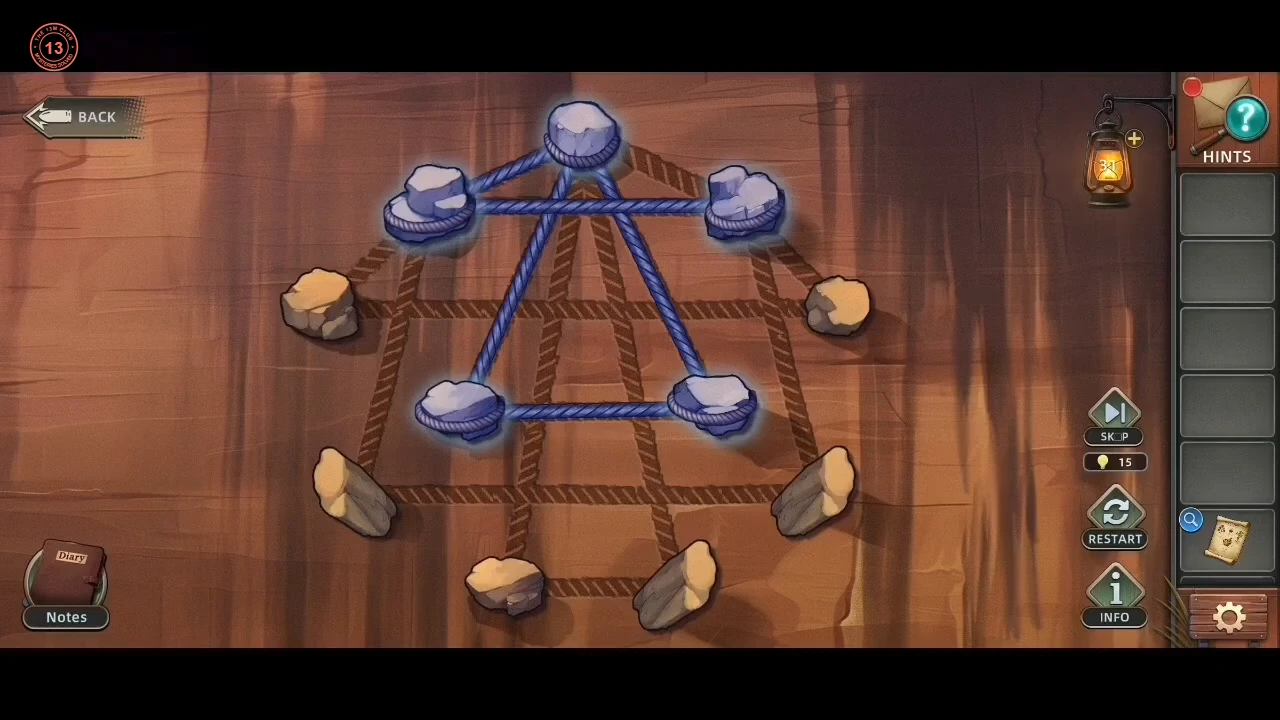
Fix the Grappling Hook to the cliff tree, then link the rocks with rope, tracing every path once.
- The healed horse walks out of the barn to the feed trough. Tap the barn doorway where it stood and take the Grappling Hook from the stall. Follow the path up to the dead tree at the cliff edge and use the Grappling Hook on its branch ("It's hooked onto the tree").
- Tap the next neighbouring rock to run the rope on from the last one; every rope line drawn on the board must be covered exactly once. Rock names used here: top; upper left/right (second row); far left/right (the outer ends of the long middle rope); inner left/right (the two centre rocks); lower left/right (the outer corners of the lower row); bottom left/right. The recording solved it as one loop that starts and ends at the top rock: top → inner right → inner left → top → upper left → upper right → lower right → lower left → upper left → far left → far right → upper right → top → bottom left → bottom right → top. "Problem Solved" appears and Sandy slides down the rope.