Interrupted: the agency bookshelf
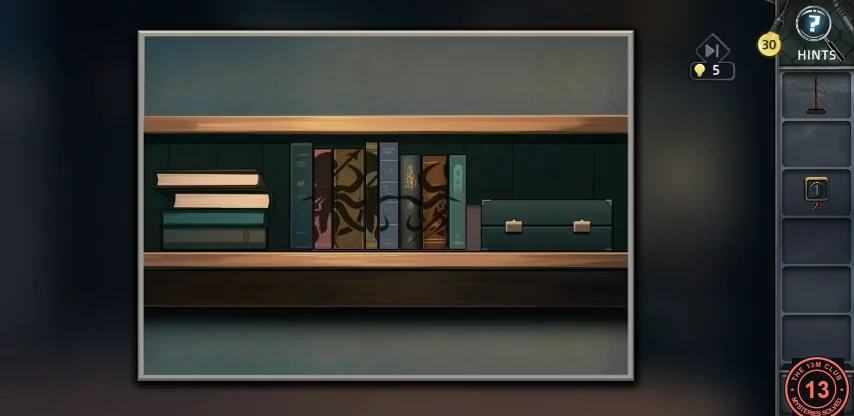
Codename: Silver Sword is the detective story in the collection menu. Detectives Martin and James of the EJS Agency look into the death of Dr. Keynes. Its four chapters unlock in order (Interrupted, Traces, Nowhere, Echoes). A chapter card may first download content.
- In the agency office, take the Broom lying on the floor. Tip over the trash can under the desk to uncover the Button and take it (the safe keypad under the desk is missing its 1 key). Take the Ladder.
- Set the Ladder at the bookshelf and slide the book spines until the tentacle picture lines up. The compartment holds a note with 14.CODE14
The torn Red Riding Hood painting
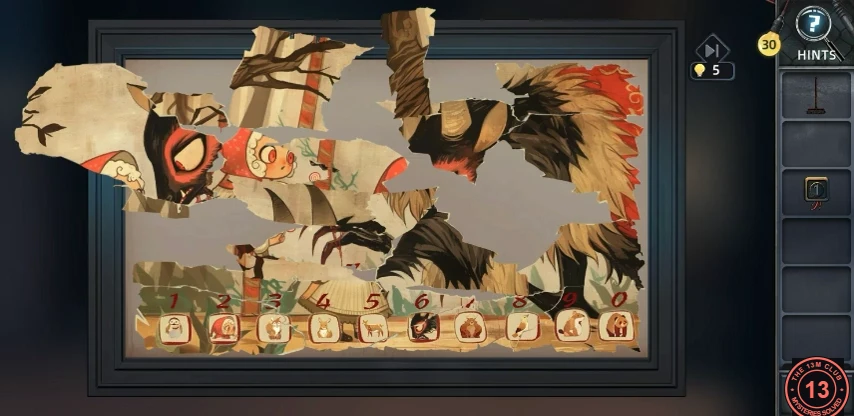
The torn painting in the agency office hides the second part of the safe code.
- Drag the torn pieces of the Red Riding Hood painting back into place. The strip along the bottom numbers ten animals; the finished picture shows the girl (2) and the wolf (6), giving 26.CODE26
The stained-glass window and the agency safe
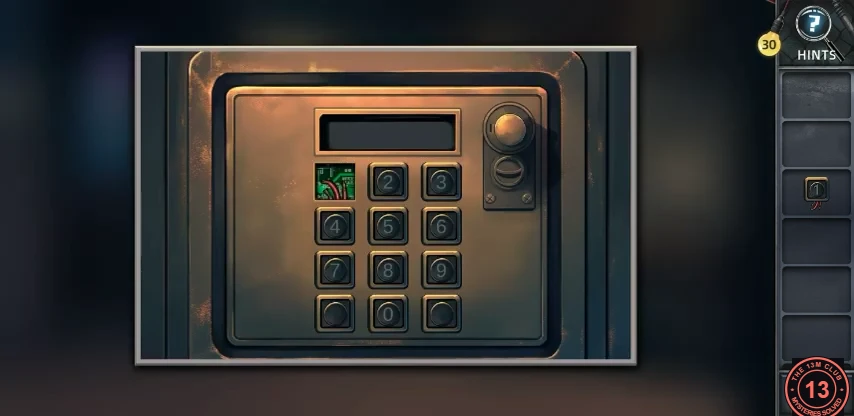
The stained-glass window gives the last part of the code, and the book on the desk gives the order for the safe keypad.
- Sweep the cobweb off the window with the Broom to reveal 87 in the stained glass.CODE87
- The book on the desk gives the order: books first, then puzzles, then the Window of Light. Fit the Button into the keypad and enter 142687.CODE142687
The logging camp and the chainsaw
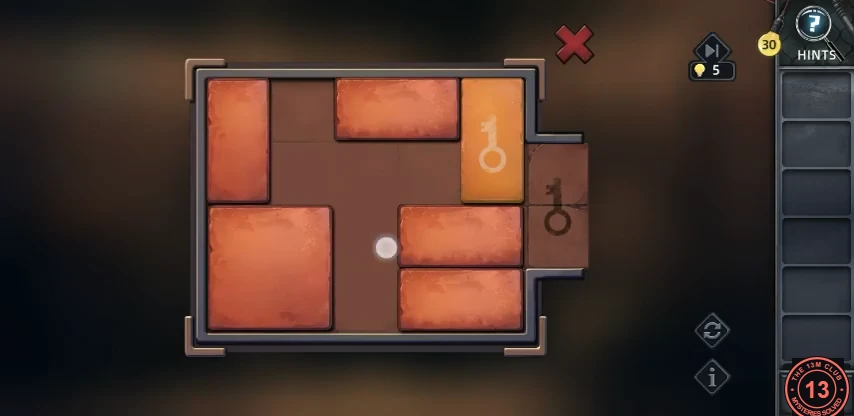
A fallen tree blocks the road. The caretaker's diary at the logging camp leads to the chainsaw.
- A fallen tree blocks the road. Walk to the logging camp and read the caretaker's diary: on 4th October he hid a spare key in the loose brick in the hut.
- In the hut, tap the loose brick and slide the brick blocks until the orange key block leaves through the slot on the right. Use the Key on the lumber shed.
- In the shed, take the Empty oil can, the Pipe lying on the floor and the Cord by the right-hand window. Use the Pipe on the barrels to siphon out oil, then fill the can there to get the Filled oil can. On the workbench, pour the Filled oil can into the chainsaw, fit the Cord, then drag the pull-start dial round.
- Use the Chainsaw on the fallen tree to clear the road.
Traces: Hunter's house
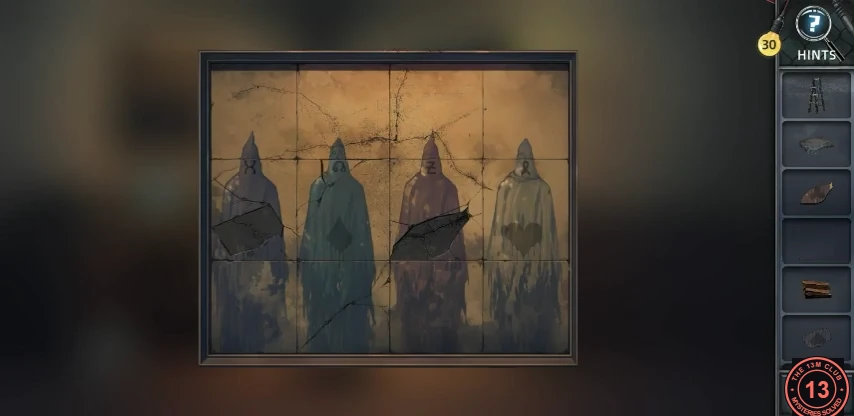
Chapter 2 (Traces) begins in Hunter's house. Search the office and the courtyard for the three mural fragments.
- In Hunter's office, take the Ladder leaning against the right-hand wall (the inventory starts empty in this chapter). Take the Key from the coat hooks and use it to unlock the filing cabinet, then take Mural fragment 1 from it, and take the Rag from the desk. In the courtyard, dip the Rag in the bucket for a Wet rag, and take the Firewood, the Crowbar from the fountain and the Shovel. Dig the soil patch for Mural fragment 3, then pry up the office floorboard with the Crowbar for Mural fragment 2.
- Put the three fragments into the mural. Each hooded figure pairs a card suit with a rune: spade with the barred X, diamond with the double loop, club with the Z, heart with the ribbon loop.
The briefcase rune reels and Hunter's computer
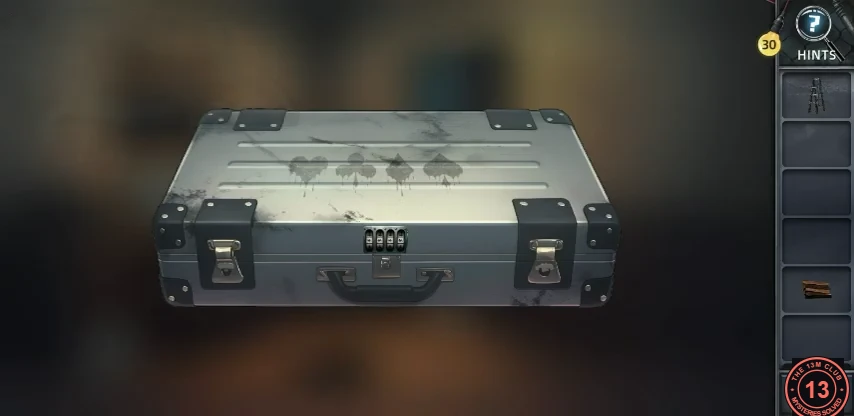
The mural pairs each card suit with a rune. Use it on Hunter's briefcase, then use Amy's letter to log in to his computer.
- Wipe the briefcase lid with the Wet rag to show the suits heart, club, diamond, spade. Set the reels to the matching runes: ribbon loop, Z, double loop, barred X. Take Map fragment 1 from the open case, then tap the letter to read it: it is a love letter from Amy to Hunter about their wedding vows, signed "Amy 7.14". The letter stays in the case; only the map fragment goes into your inventory.
- On Hunter's computer, enter the date written under Amy's signature on the letter (7.14) as the password: 0714. The letter does not say what the date is; it is simply the date on Amy's letter.CODE0714
The hidden channel network tiles
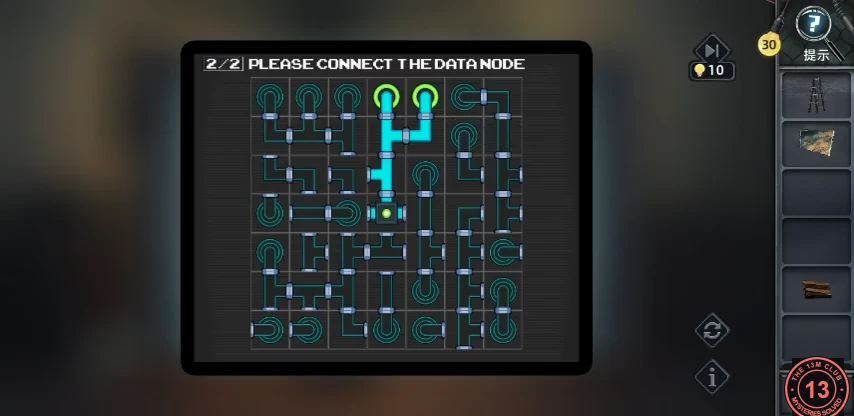
Hunter's hidden channel program is a tile-rotation network with two boards. Solving it opens the hatch to the basement lab.
- Open the hidden channel program and tap tiles to rotate them until every round end node is joined to the centre node and lit. Board 1 (4x4): from the centre node, run the bottom row left to the bottom-left node and use the elbow on its right to drop into the bottom-right node. Its left exit goes through a T that also points up: one end feeds the left node, the upright joins a T in row 2 that sends the line both ways along row 2. Elbows at both ends of row 2 turn up into row 1, where elbows turn inward into the two top nodes. Board 2 (7x7) is too long to list tile by tile, so work from fixed landmarks. Each end node has only one opening, so set the edge and corner pieces first. The five top-row nodes on the left drop into a comb of T-pieces that funnels down the middle into the top of the centre node. The node directly left of the centre is fed straight from the centre's left exit. The top-right node runs along the top-right corner and down the right edge. The centre's lower exit feeds a long line across row 5 that branches down to the bottom-row nodes. In the recording, the last fix was turning the piece just above the centre so the top comb connected.
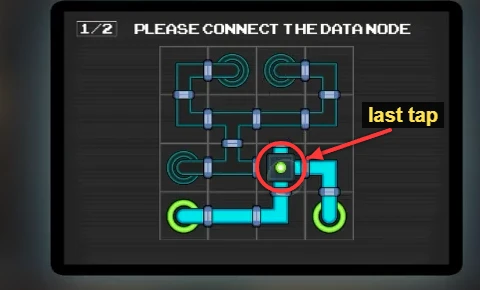
Board 1 one tap from finished: every other tile is already in place. The last tap turns the centre node (circled) so it opens left, right and down, and the whole network lights. 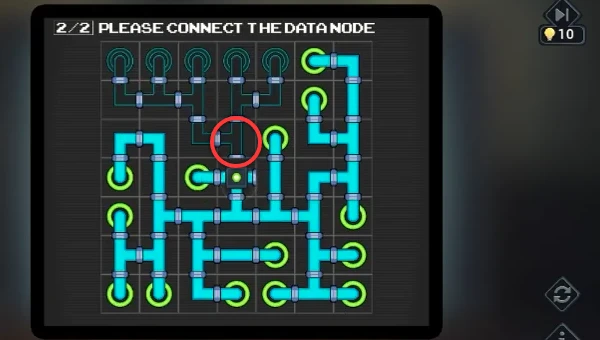
Board 2, one turn from finished. Turning the circled piece above the centre connects the top comb.
The basement lab and the eagle's nest
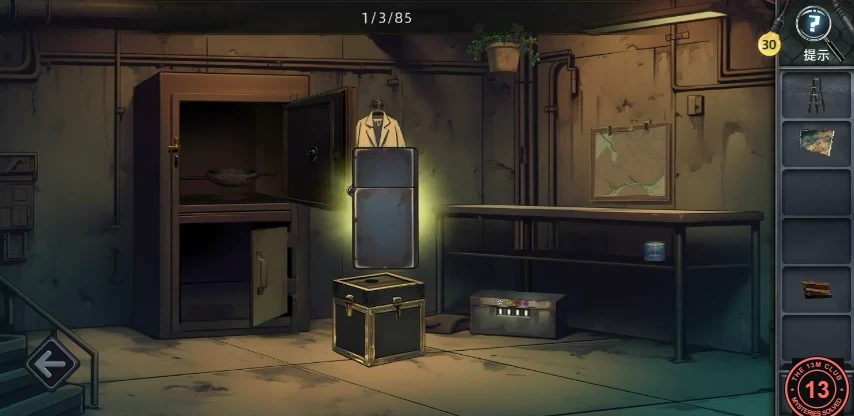
In this chapter the game may show placeholder codes (such as "1/3/36" or "1/name/Martin") instead of dialogue and item names, and parts of the interface may switch to Chinese. In the recording this was fixed by opening the settings with the gear button and tapping the Language row to select English again; afterwards dialogue, item names and buttons were back in English.
- In the basement, take the Lighter from the floor in front of the small grey box, the tin of fish from the right-hand table and the key from the pocket of the lab coat hanging beside the cabinet.
- In the courtyard, lean the Ladder against the birdhouse. An eagle sits on its nest on the roof: use the tin of fish on it. The eagle flies down to eat, so tap the empty nest for a map fragment.
The four-drawer chest and the silver frame
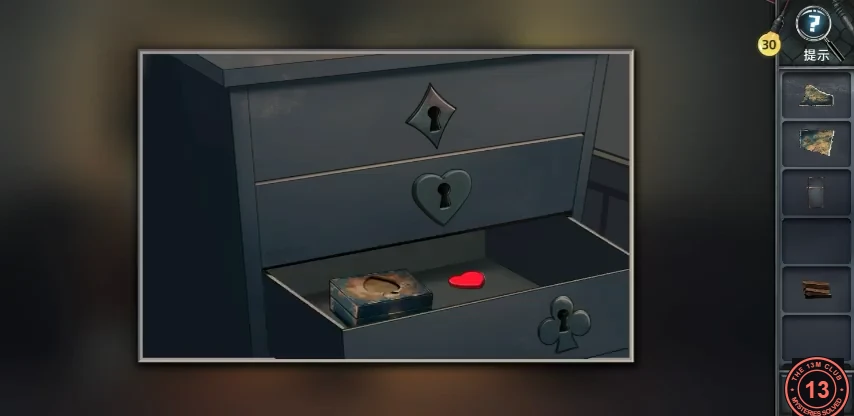
The key from the lab coat starts a chain of drawer keys. The silver object at the end becomes the frame for Hunter's map.
- Open the four-drawer chest; its drawers have diamond, spade, heart and club keyholes, and each opened drawer holds a small box with a red shaped slot. Open the diamond drawer with the lab-coat key: it holds the Spade key. Open the spade drawer: it holds a red club-shaped insert; put it in the box in that drawer to get the Heart key. Open the heart drawer: it holds the Club key. Open the club drawer: it holds a red heart-shaped insert; put it in the box in the heart drawer to get a red rectangular insert. Put the rectangle in the box in the diamond drawer for a red spade-shaped insert, and put that in the box in the club drawer: it opens on the silver object.
- In the basement cabinet furnace, put the silver object in the pan in the upper compartment and the Firewood in the lower compartment, then light the wood with the Lighter. The furnace doors close while it heats; open the upper door again and take the pan of molten silver. Pour it into the mould (the box on the floor in front of the furnace), then cool the hot frame in the courtyard bucket.
The flower lock box and Hunter's map
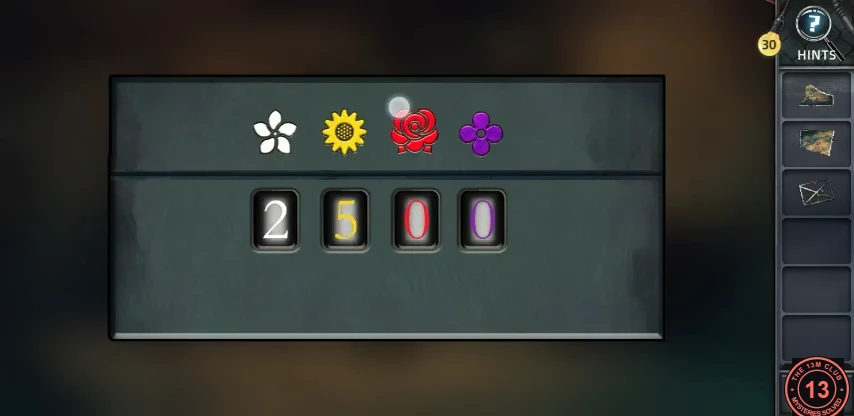
Count the flowers in the basement, the courtyard and Hunter's photo to open the flower box, then assemble the map.
- Set the flower lock box by counting each kind of flower: white flower 2 (the two white blooms on the hanging pot in this basement), sunflower 5 (the sunflower pots on the shelf in Hunter's computer photo of Amy), red rose 9 (the left courtyard bed) and purple flower 7 (the right courtyard bed). Enter 2 5 9 7 to open the box and take the Map fragment inside.CODE2597
- Fit the three map fragments together (from the briefcase, the eagle's nest and the flower box), then lay the Crafted silver frame over the map. Its crossed bars point to the place Hunter marked.
The town gate keypad
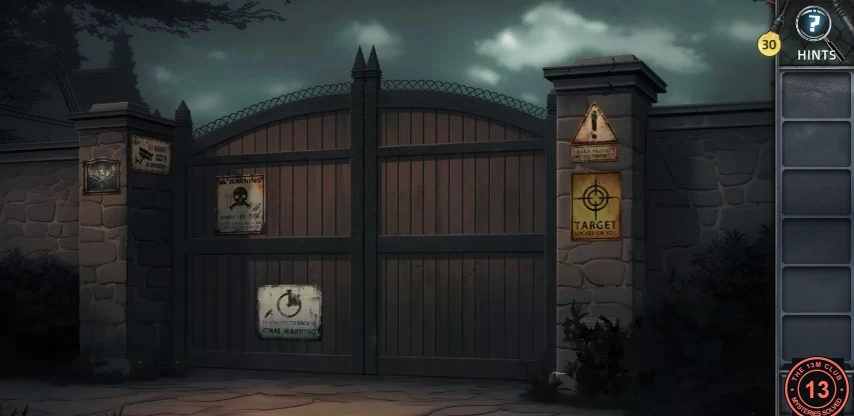
At the town gate, the three signs give the six-digit keypad code.
- At the town gate, read all three signs: "15 MINUTES TO VACATE" on the gate, "CASTLE LAW 59" on the skull sign and "24 HOURS CCTV IN OPERATION" on the left pillar. Enter 155924 on the keypad and the gate opens. In the recording, 1559 alone was not accepted; the gate opened only after 2 and 4 were added. The keypad display flickers as you type, so watch the keys you press rather than the display.CODE155924
The patrol board
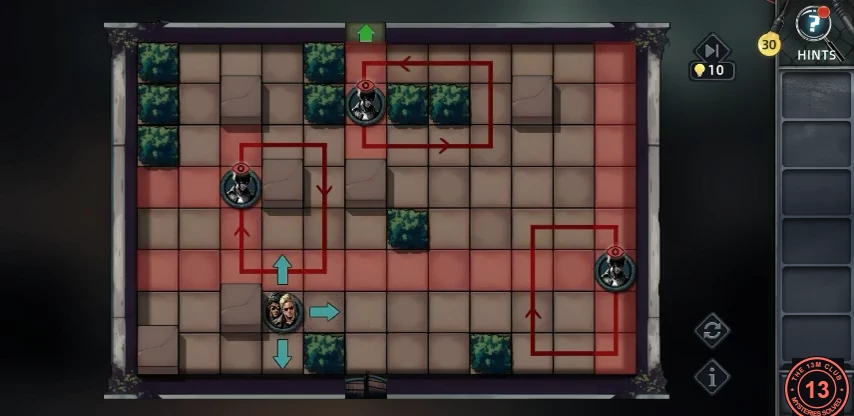
Inside the gate, guide the detectives past the patrolling guards to the exit.
- Move the detectives' token one tile at a time with the arrow buttons to the green exit at the top. The dark red outlined loops with arrowheads are the guards' patrol routes, not forbidden ground: you may stand on or cross them. The red-shaded tiles are what the guards can currently see, along their row and column until a bush or crate blocks the view. The guards stand still while you think and move on along their loops after every move you make, so the red shading changes each turn. Plan each step so that you are not left in a red lane after the guards move. Cross a loop when its guard is on the far side, and use bushes and crates as cover. The second board is larger and has more guards, but the rules are the same. This is a step-by-step puzzle with no single listed route. This guide could not confirm what happens if you are seen, and the skip button costs hint bulbs.