GHOST WEST · CHAPTER 3
Buried Secrets: the church and the graveyard
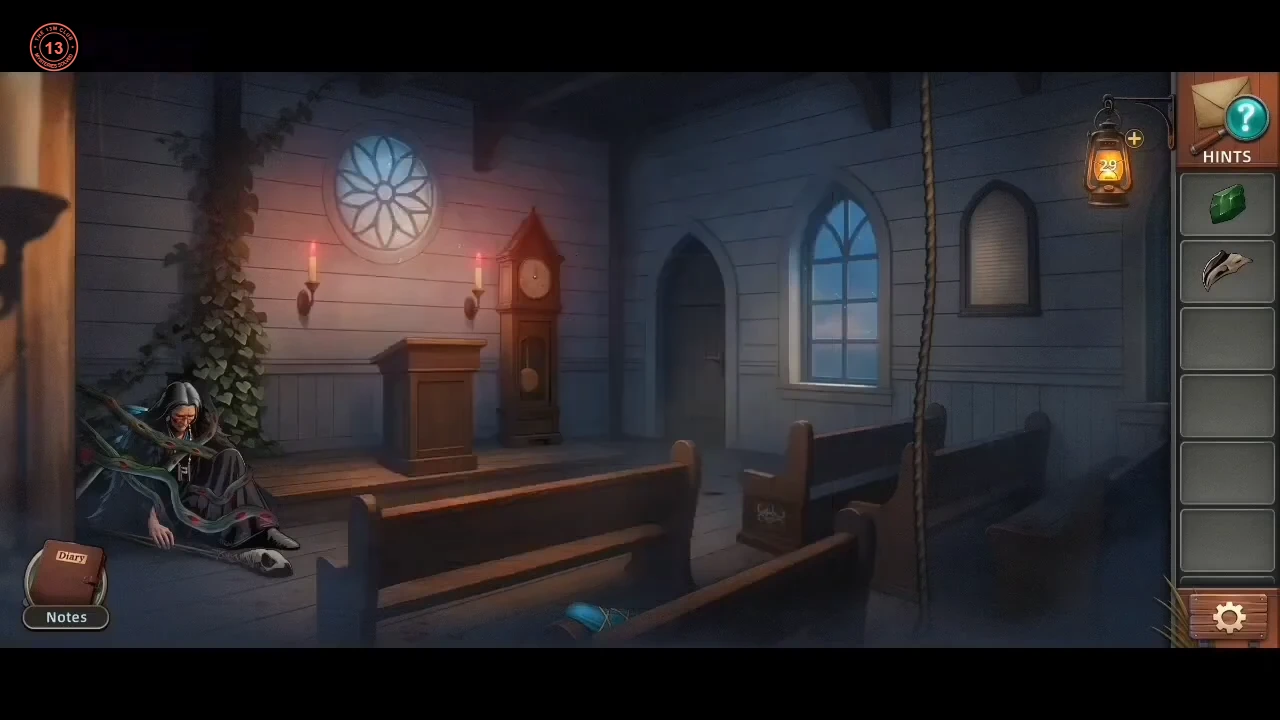
Sandy learns of the Night of Souls ritual and finds Aponi bound inside the church.
- Inside the church, take the Emerald from the front pew seat and the Sharp Staff Fragment beside Aponi. Cut the rope around the blue-wrapped bundle on the pew with the fragment, then take the Key Core and the Crown from it, and pick up the Magnet. Use the Crown on the side door to go out to the graveyard. Take the Thin Wooden Stick from the eye tombstone and the Horse Badge from the eagle statue's base. Back at the front pew, pry up the loose board with the stick and take the Fan. Put the Horse Badge in the horse-shaped slot and read the Message Note, the Sacred Scripture – Seventh Chant.
GHOST WEST · CHAPTER 3
The serpent groove on the shed door
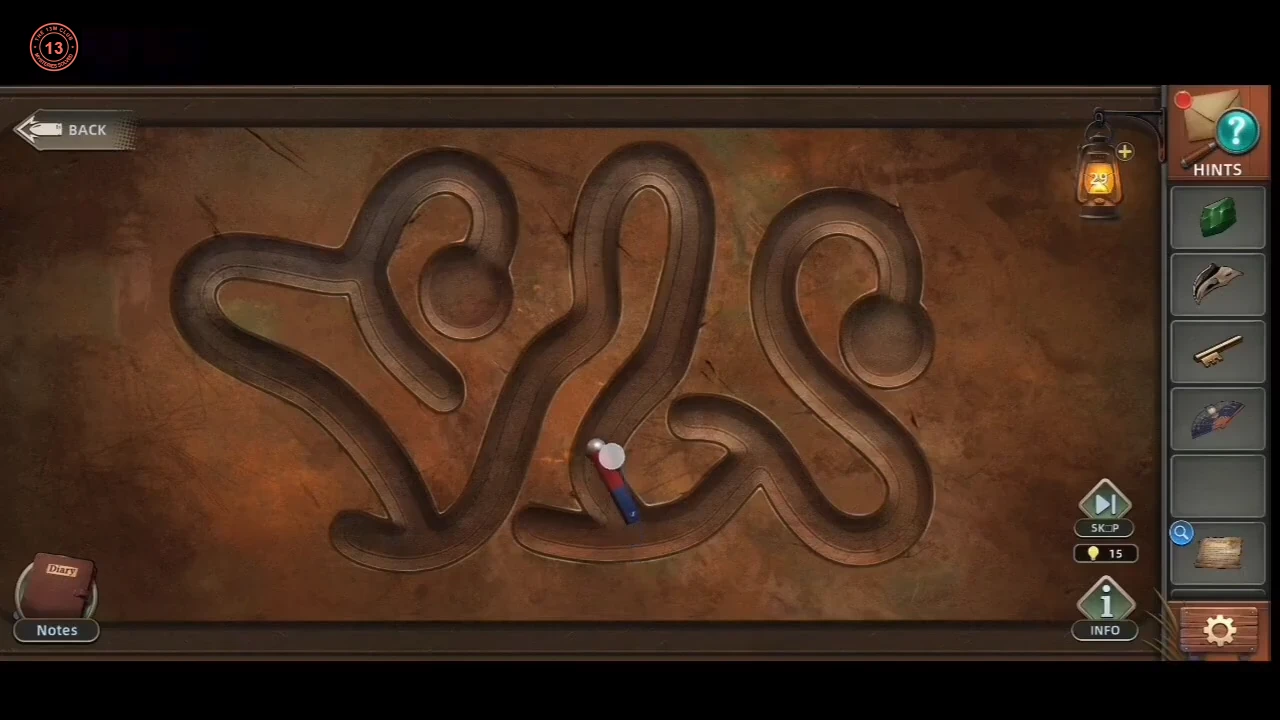
Guide the ball along the serpent groove to open the graveyard shed.
- Use the Magnet on the plate of the graveyard shed door. Drag the ball with it along the serpent grooves to the left socket without touching the edges. The shed door opens. Open the small wooden chest on the shelf inside and take both items from it: the Clock Hand and the first Pliers (Half).
GHOST WEST · CHAPTER 3
The grandfather clock
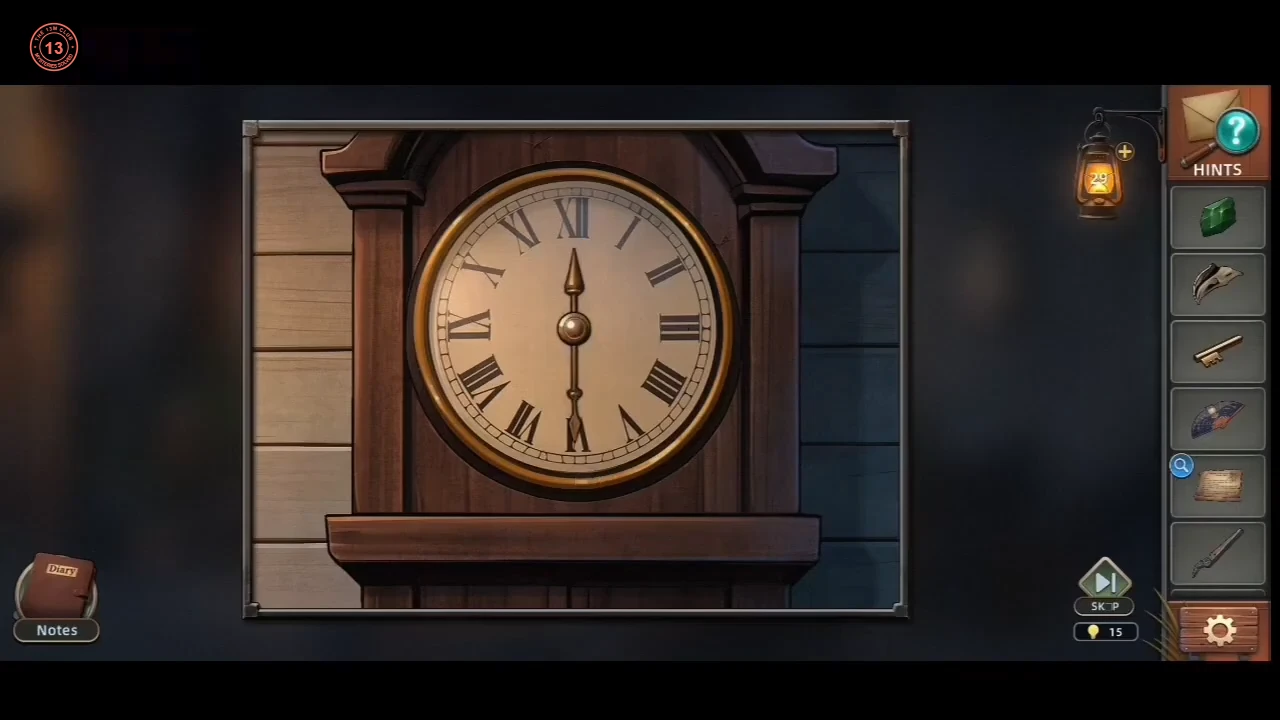
Set the grandfather clock in the church for the Angel Crystal Ball, then assemble the Pliers.
- In the church, fit the Clock Hand on the grandfather clock beside the lectern and set the hands: the short hand pointing straight at VIII and the long hand straight down at VI. That exact position is the one the game accepted. The clock face swings open. Take the Angel Crystal Ball and the second Pliers (Half) from the compartment.CODEShort hand VIII, long hand VI
- Combine the two Pliers (Half) pieces (one from the shed chest, one from the clock) in the inventory to make the Pliers. At the front pew, put the Key Core into the lock of the small blue container; it will not turn by hand, so turn it with the Pliers. Take the Holy Grail from inside. In the graveyard, break the lock of the chest in front of the eye tombstone with the Pliers and take the Playing Card.
GHOST WEST · CHAPTER 3
The coffin symbols and the chant tablet
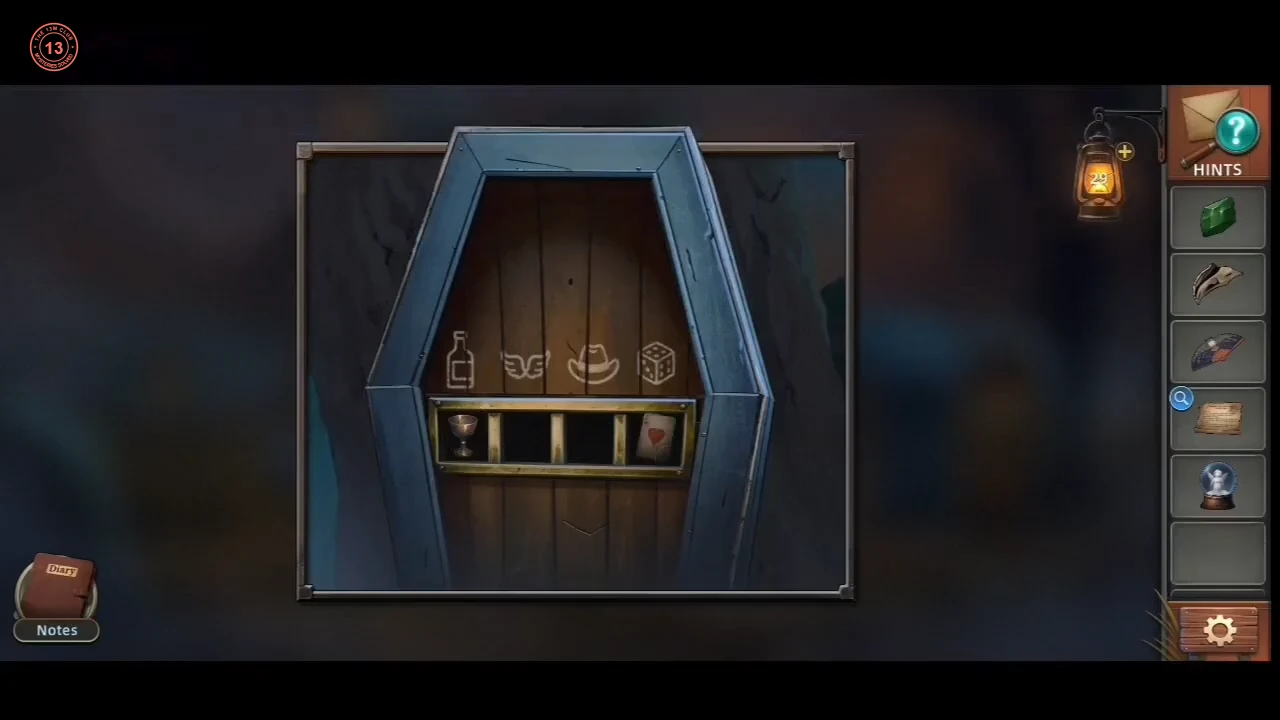
Fill the coffin's symbol slots and set the chant tablet for the Ruby.
- Open the coffin standing beside the graveyard shed. Four symbols are carved above its four slots: bottle, wings, cowboy hat and dice. Put each object under its symbol: Holy Grail under the bottle, Angel Crystal Ball under the wings, Playing Card under the dice. The hat slot stays empty for now. Use the Fan on the misty grave marker in the graveyard to blow the mist away and take the Horseshoe. On the chant tablet below the eagle statue, set sun ×1, serpent ×4, feather ×3, eye ×6. The eagle then holds a Ruby in its beak; take it.CODESun 1, Serpent 4, Feather 3, Eye 6
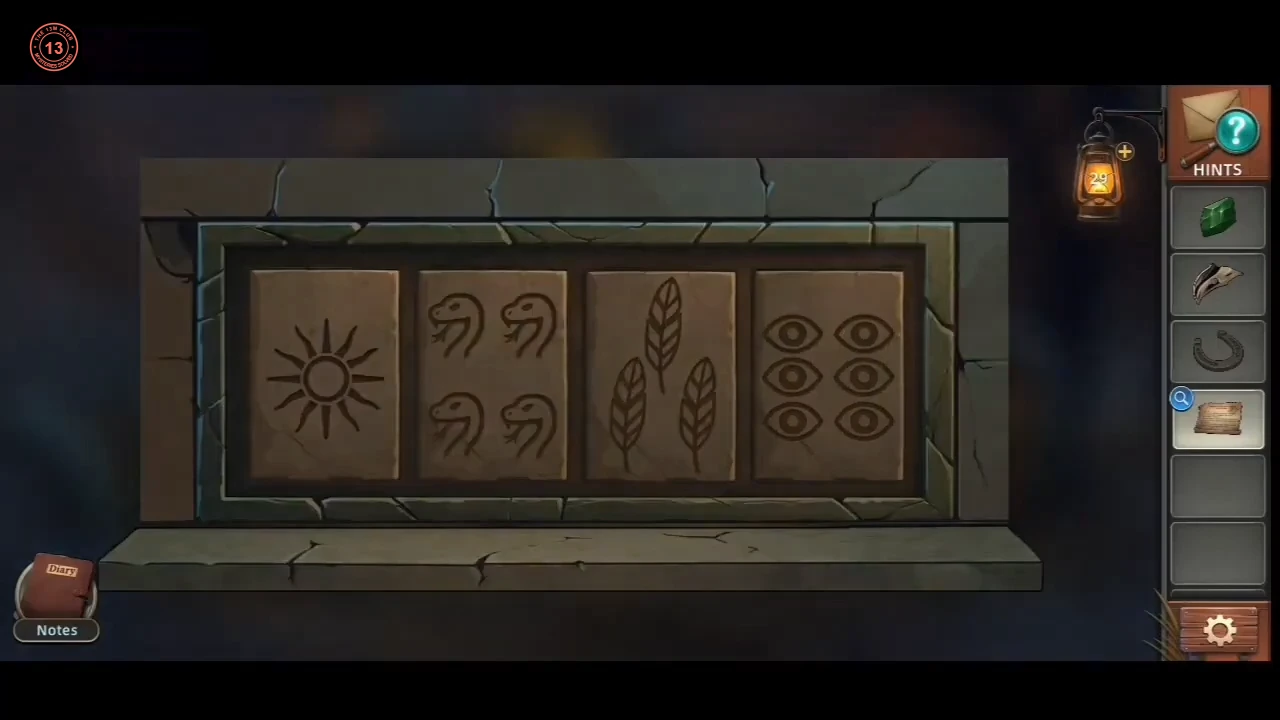
The completed chant tablet: sun ×1, serpent ×4, feather ×3, eye ×6.
GHOST WEST · CHAPTER 3
The lectern light-beam board
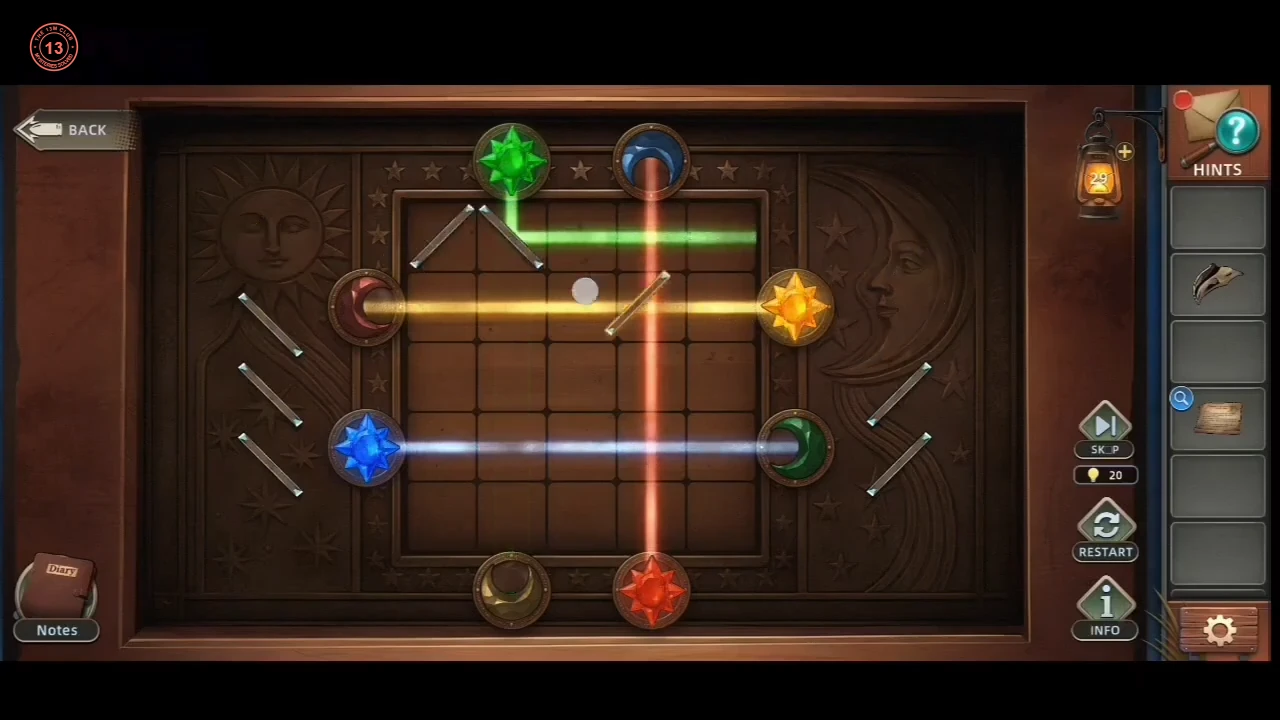
Direct each coloured light beam to its crescent to free Aponi.
- Put the Horseshoe in the last coffin slot under the hat. The coffin opens on a skeleton; take the Sapphire from its eye. In the church, put the Sapphire, the Emerald (from the front pew) and the Ruby into the horned skull carved on the lectern. This opens a light-beam board. Each coloured star sends out a beam, and each beam must end in the crescent of the same colour: green star (top) → green crescent (right), blue star (left) → blue crescent (top), yellow star (right) → yellow crescent (bottom), red star (bottom) → red crescent (left). Drag the eight diagonal mirrors from the sides of the board onto grid crossings. Each mirror turns a beam 90° on either face, and beams may cross. A working layout: green goes right along the top row and down the right side; blue goes along the lower row and up the fourth line; yellow goes left along the second row and down the second line. Red runs round the outside: up, right, down, left along the bottom, up the left side and back into the red crescent.
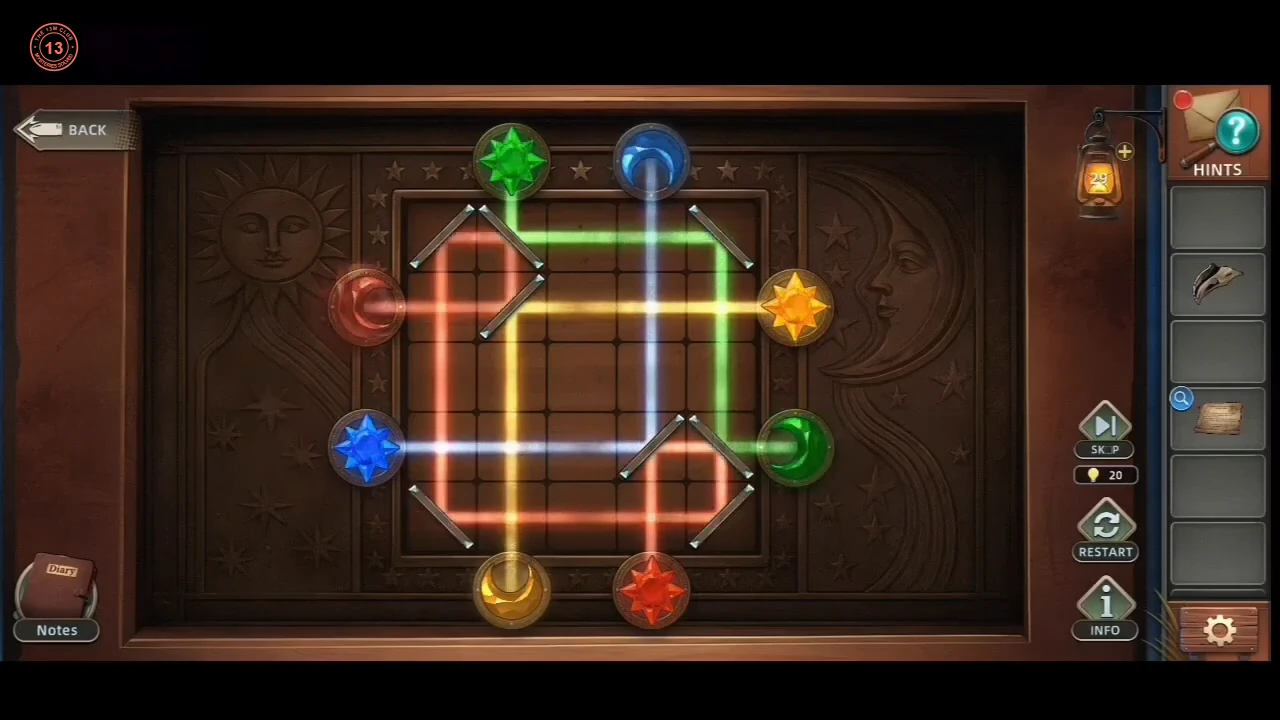
One working mirror layout for the light-beam board. - Use the Sharp Staff Fragment on the vines binding Aponi. The game then says: "Click the topmost vines and remove them one by one." Tap the vine lying on top of the others to remove it, then the next one that is now on top, and keep going layer by layer until Aponi is free.
GHOST WEST · CHAPTER 3
The lake shrine and the legend
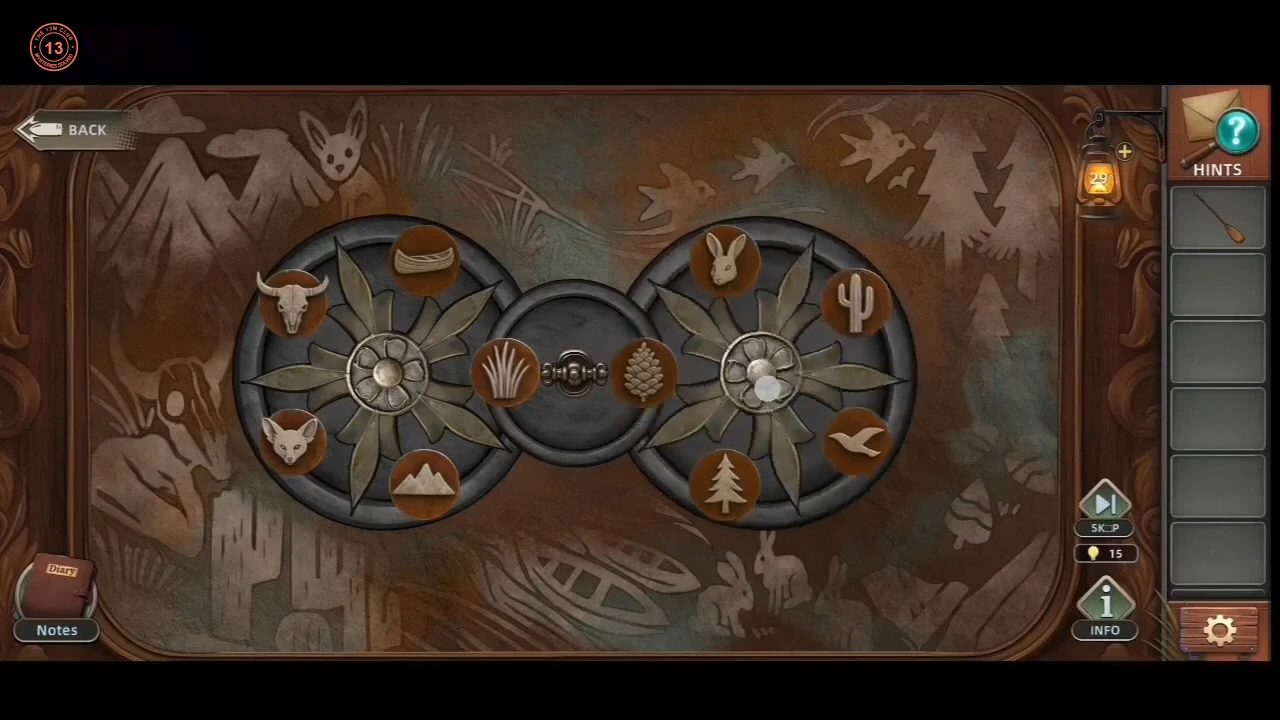
At the lake, the symbol wheels guard the Pliers you need to reach the shrine.
- At the lake, take the Oar from the one-armed idol sitting under the tree and the Token from the animal skull on the shore. Put the Token into the lock of the chest in the grass. This opens a symbol puzzle with two wheels and a small dial between them. Tap a wheel or the dial to turn it. The small dial shares one slot with each wheel, so turning it swaps symbols between the wheels. Turn them until every symbol sits next to its matching carving in the background. Left wheel: fox at the top, mountain on the left, bull skull lower left, cactus at the bottom. Small dial: grass on the left, canoe on the right. If you see canoe left and grass right, keep turning the small dial until they swap; the chest stays shut in that state. Right wheel: bird at the top, pine tree upper right, pinecone lower right, rabbit at the bottom. Take the Pliers from the chest.
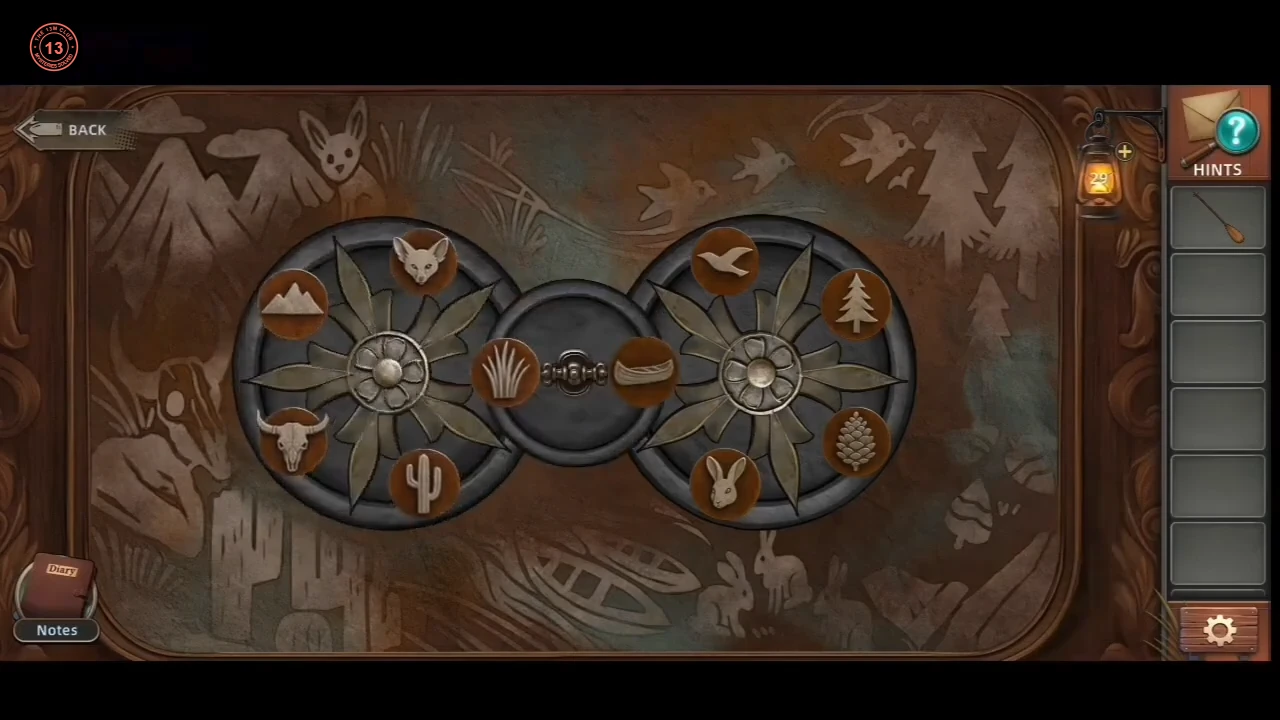
The solved lake wheels. The small dial shows grass on the left and canoe on the right. - Pull the fang from the shore skull with the Pliers to get the Tooth. Use the Oar on the boat to row to the shrine. Take the Stone Arm from the base of the moss-covered wildcat statue, then scrape the moss off the statue with the Tooth. Take the unlit Torch from the idol sitting behind the drums. Cut the net hanging from the dead tree with the Tooth; it drops, giving you the Fish and the Net. Put the Fish in the bowl in front of the wildcat. Its eyes glow and a red symbol (a sun over a crescent) lights up on its chest.
- At the stone door, light the Torch in the burning right-hand brazier, then use the Burning Torch on the empty left-hand brazier. A ring lock appears on the door, but the pile of leaves beside it is still there: use the Burning Torch on the leaves to burn them away, then take the Drum hidden underneath.
GHOST WEST · CHAPTER 3
The fishing net and the stone arm
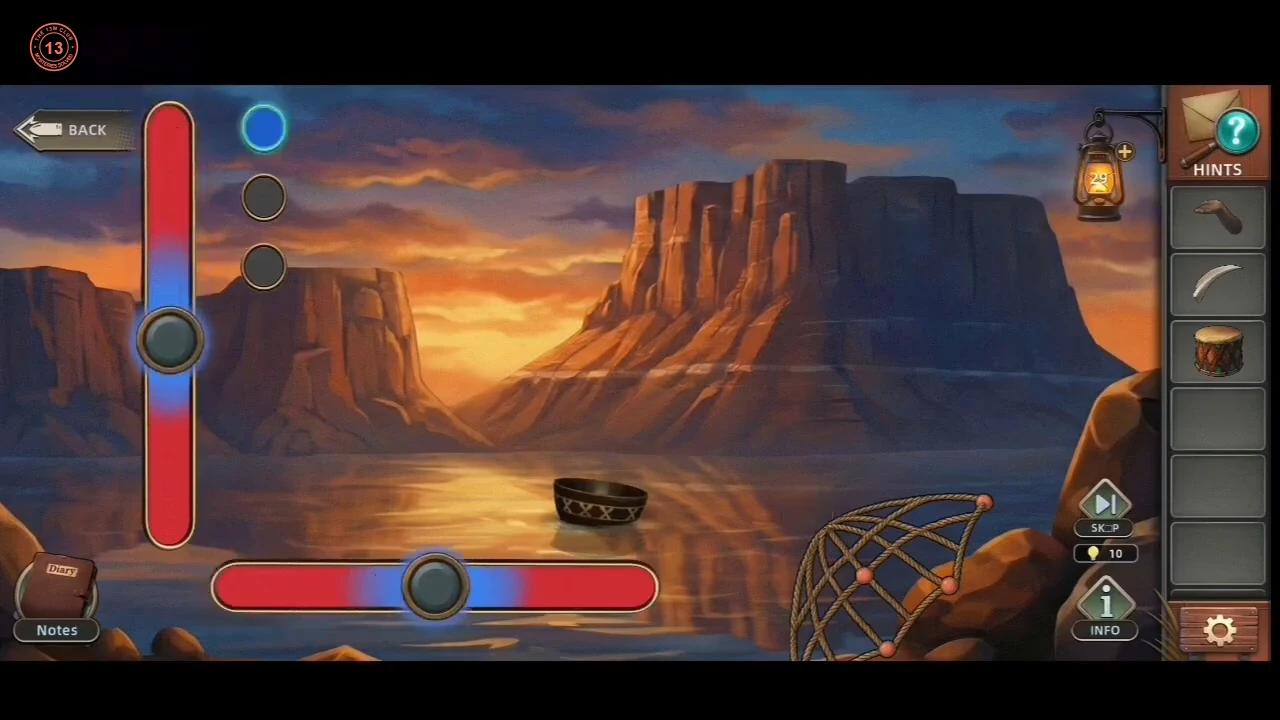
Fish the Bowl out of the lake and give the idol back its arm for the Yellow Orb.
- Return to the lake and use the Net on the bowl floating on the water. A vertical and a horizontal slider move back and forth; tap at the right moment to stop each one while it is inside the blue zone. Three catches bring in the Bowl. Cut the bark of the tree with the green triple-spiral symbol using the Tooth, hold the Bowl under the cut and take the Resin. Spread the Resin on the idol's arm stump and attach the Stone Arm. The idol opens its palm and a yellow diamond symbol lights on its shoulder; take the Yellow Orb.
GHOST WEST · CHAPTER 3
The idol drums
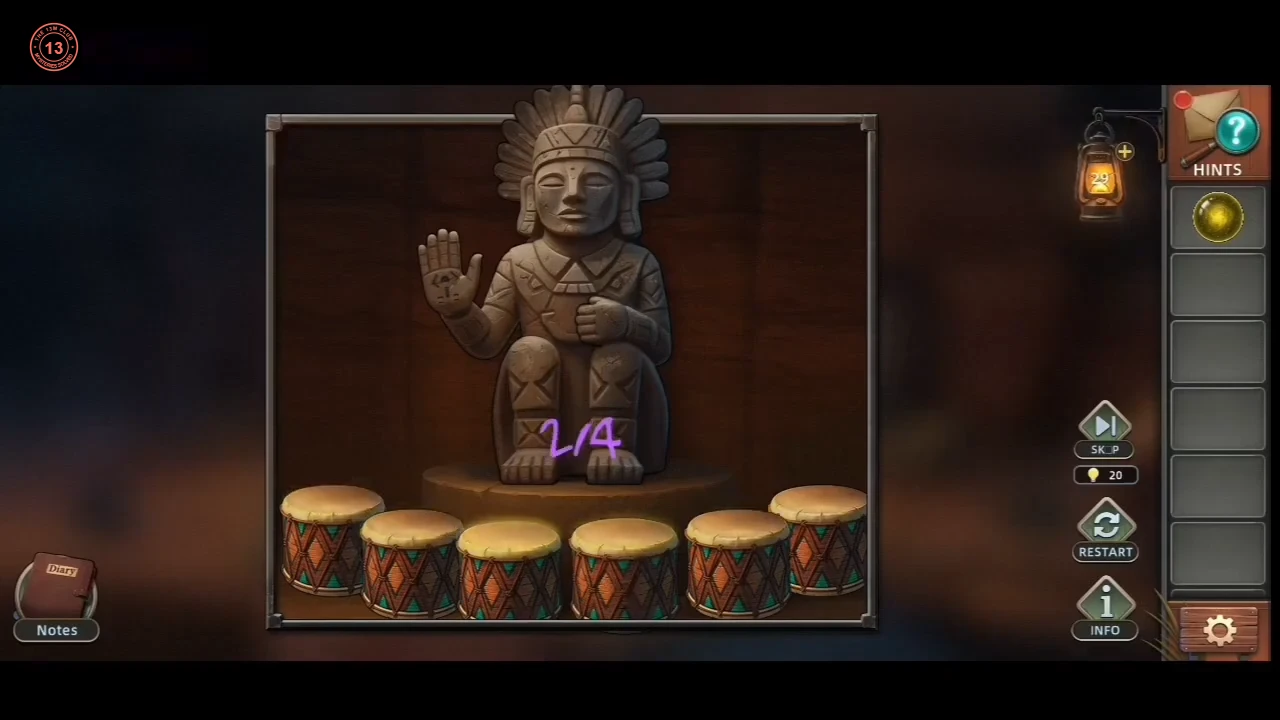
Repeat the drum sequences for the Purple Orb.
- At the shrine, add the Drum to the row of drums in front of the seated idol. The drums light up in a sequence; tap the same drums in the same order. Complete four rounds (the counter on the idol reaches 4/4). Watch each round, because this guide cannot confirm that the sequence is the same in every game. A purple symbol glows on the idol's raised palm; take the Purple Orb.
GHOST WEST · CHAPTER 3
The shrine ring lock and the legend
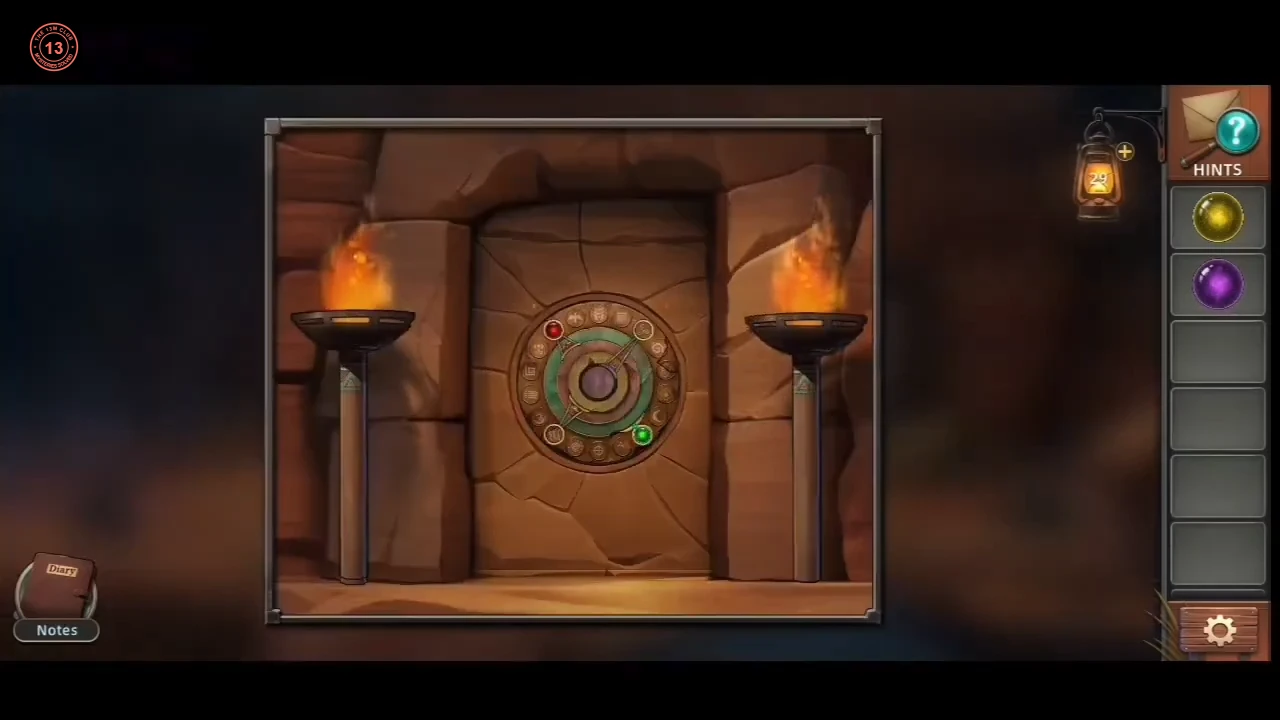
Point the ring lock's coloured pointers at the symbols that lit up, then hear Aponi's legend.
- Put the Purple and Yellow Orbs into the ring lock on the door. Drag the four coloured pointers round the ring so that each points at the symbol that lit up in its colour: red to the sun over a crescent (wildcat's chest; lower left of the ring), green to the triple spiral (lakeside tree; upper right), yellow to the diamond with a dot (lakeside idol's shoulder; right), purple to the glyph on the drum idol's palm (upper left). The portal opens. Inside, Aponi tells the legend of the black stone and the Sacred Stone.
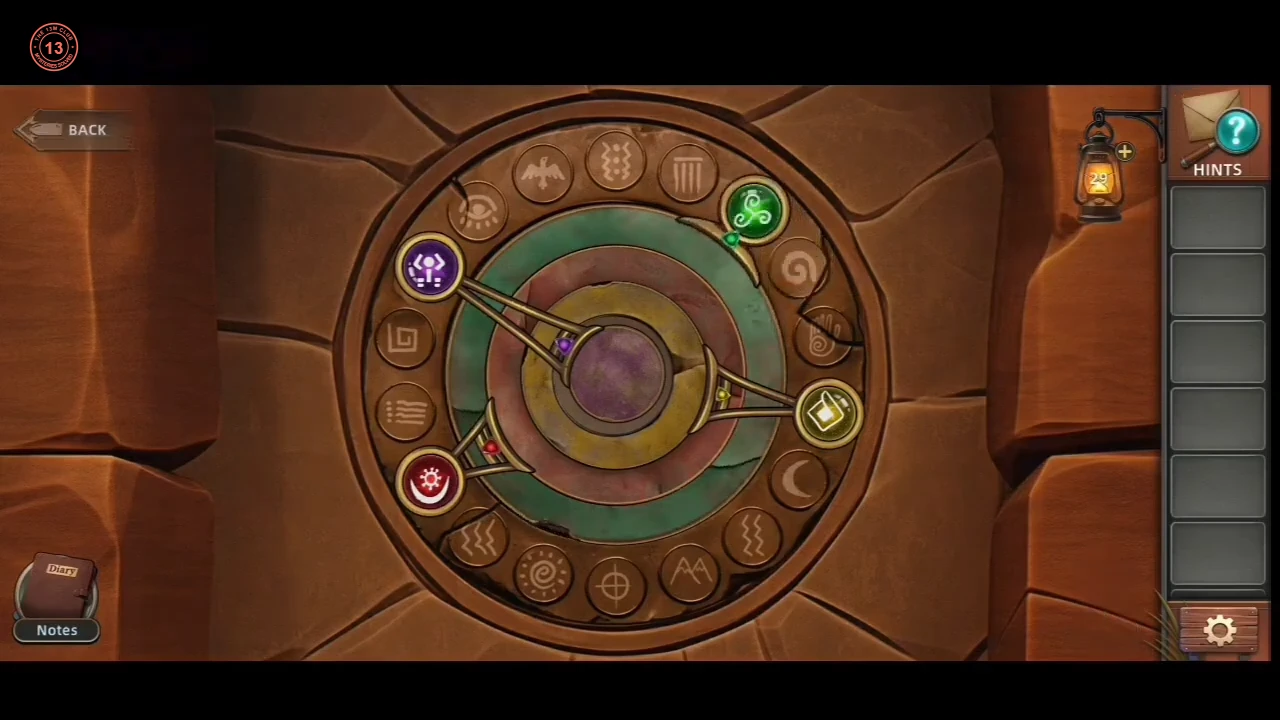
The four pointers in their final positions.