The rooftop padlock
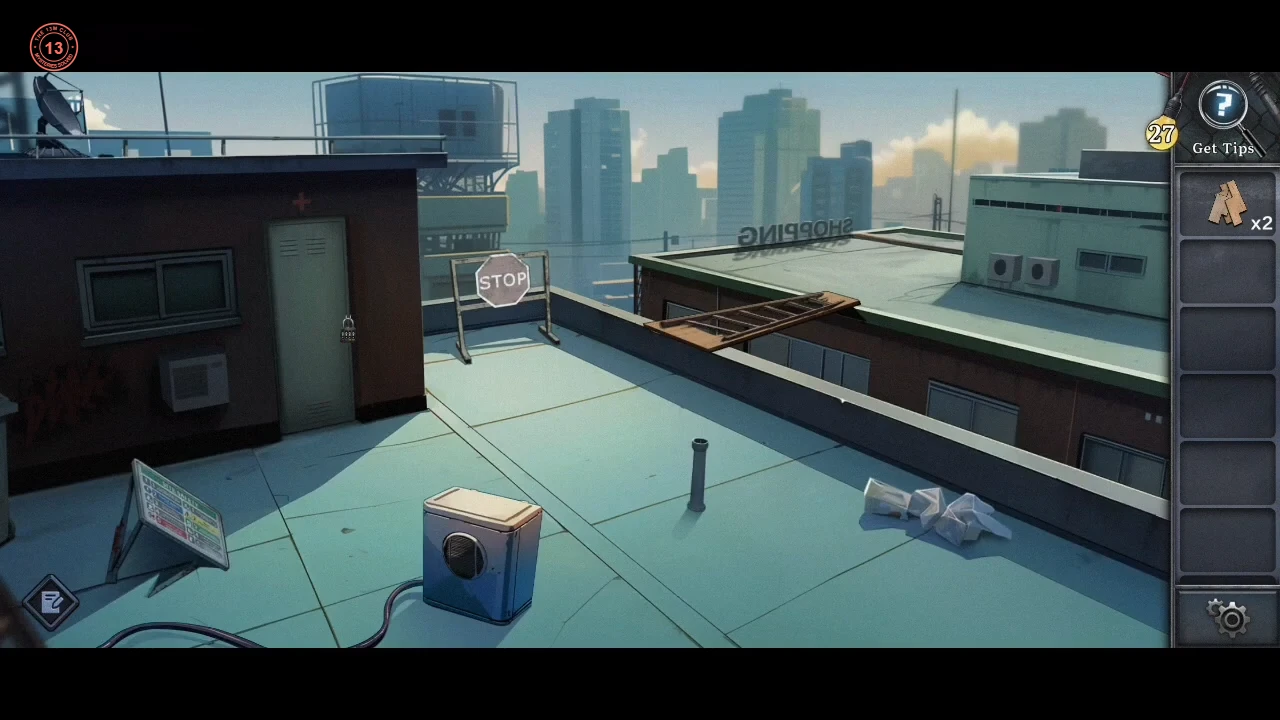
The rooftop is the last scene of Chapter 1: Chapter 2 (Allies) opens only after Alex crosses from this roof, with the chapter card and the convenience store back room. The Site Safety sign gives the colours for the shed padlock.
- On the rooftop, read the Site Safety sign: its coloured panels show red 2, blue 5, green 3 and yellow 2. Take the Ladder and lay it over the gap; the game says it still needs "something to be the surface of the bridge." Pick up the Board from the plank pile at the front edge of the roof. Tap the blue cloth draped in the middle of the roof to uncover the Crowbar and take it. Use the Crowbar on the boards nailed over the shed door for a second Board. This also uncovers the shed door's padlock.
- Set the padlock's red, blue, green and yellow dials to 2 5 3 2 to open the shed. Take the Scissors and use them to cut a length of Wire. Back at the gap, the ladder still needs "something to hold the ladder firmly": use the Wire on the left end of the ladder to tie it in place.CODE2532
The plank bridge
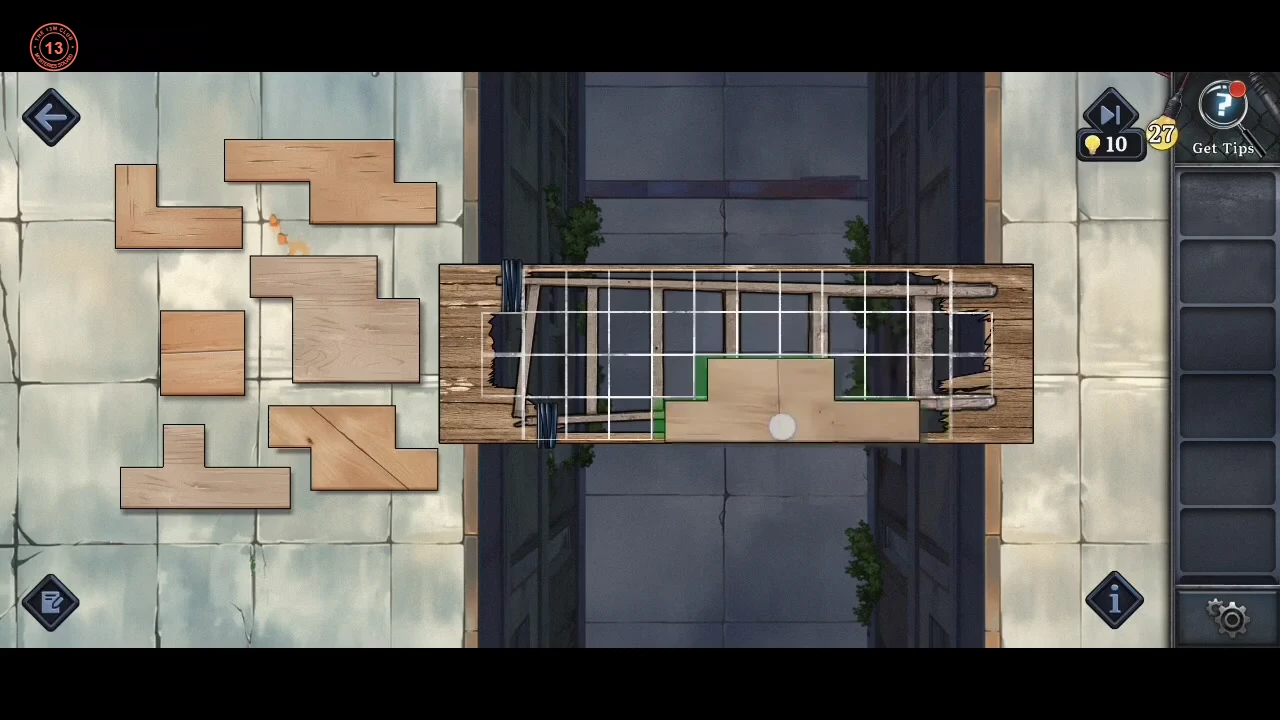
Cover the ladder frame with planks to cross the gap. Crossing this bridge finishes Chapter 1; the Chapter 2 (Allies) card follows.
- Drag the seven wooden pieces onto the ladder frame until it is completely covered, then cross. Think of the frame as a grid 12 squares wide and 4 rows tall; the top and bottom rows only use columns 2 to 11. The finished layout in the recording was: the 2×2 square at columns 1–2 of rows 2–3 (left end); the 6-square step piece with a diagonal grain line at row 1 columns 2–4 plus row 2 columns 3–5; a 9-square piece at row 3 columns 3–5 plus row 4 columns 2–7; the 7-square piece at row 1 columns 5–8 plus row 2 columns 7–9; the 4-square L piece at row 2 column 6 plus row 3 columns 6–8; the other 9-square piece at row 1 columns 9–11 plus rows 2–3 columns 10–12; and the 5-square piece at row 3 column 9 plus row 4 columns 8–11.
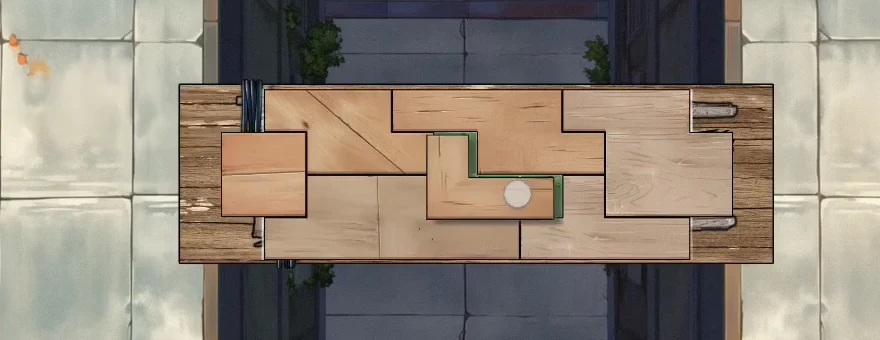
The finished bridge: every square of the frame is covered.
The convenience store lamp board
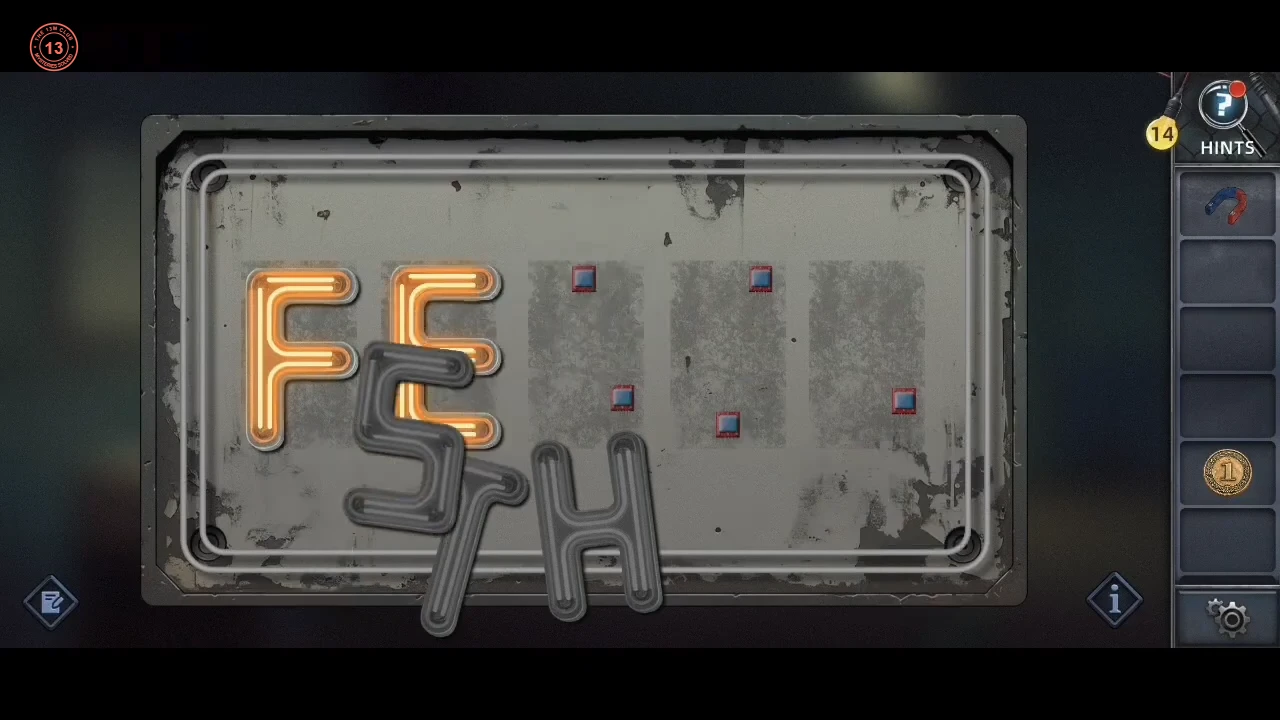
In the convenience store back room, get the Magnet down and light the letter-lamp board.
- In the back room, tap the big crate on the floor at the front right to take the Crate; the FS lamp is revealed where it stood. Tap the tipped-over bucket on the floor for the Rag and the TH lamp. Place the Crate on the two crates by the shelves: the three-crate stack lets Alex reach the top shelf for the Magnet, and it uncovers the low cabinet beside the shelves. Take the Rust remover and the E lamp from that cabinet, and turn on the first red water valve inside it. Open the grey box on the right-hand wall to reach the second red water valve. Use the Magnet on the grey panel under the sink to pull it open and reach the third valve. Alex then says "The valves are all on, should be able to have the water." The tap is rusted ("Need to remove the rust"): spray it with the Rust remover. Water runs and a Coin shoots out of the tap onto the floor: take it. Wet the Rag under the tap to get the Wet rag, then wipe the dirty lamp board on the wall with it.
- Drag the letter lamps into place so the whole board lights: F E S T H from left to right. The lit board powers the narrow cabinet beside it, which opens: take the Key and the Wire from it, and tie the Wire to the Magnet. Use the Key on the back-room door to get into the shop. In the shop, open the drawer of the cabinet under the TV and take the Flashlight.CODEFESTH
The vent coins and the vending machine
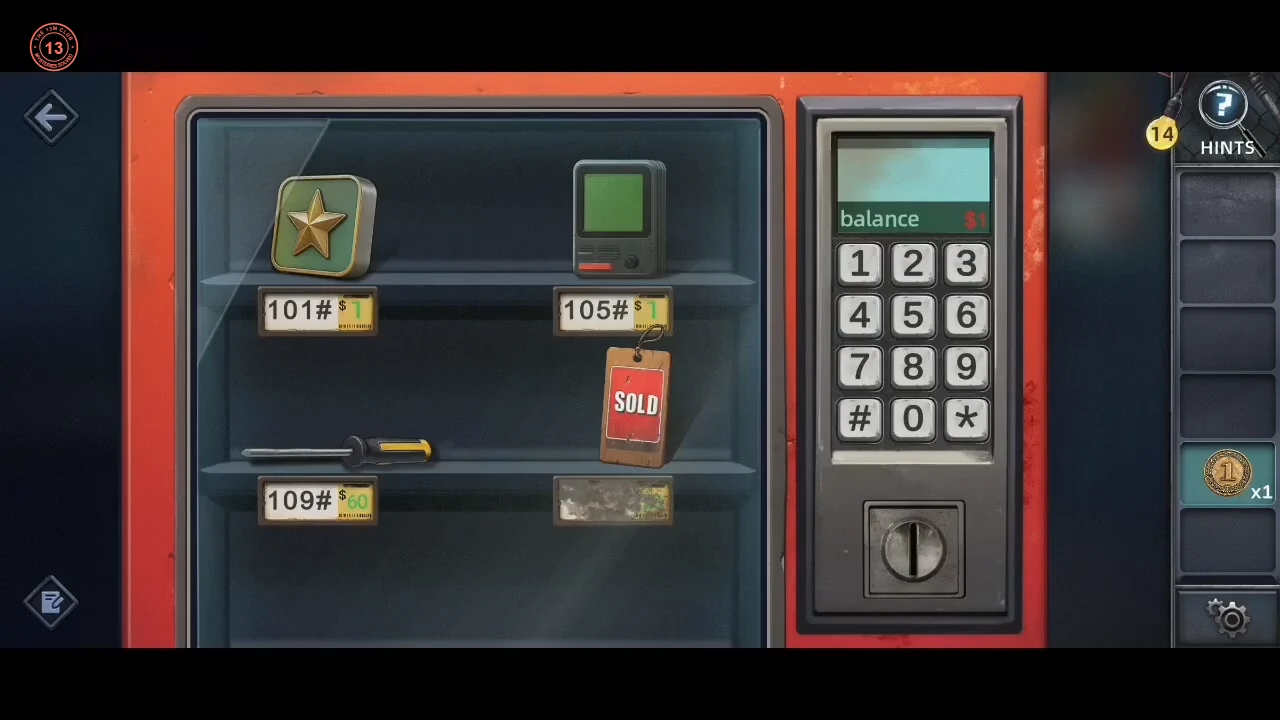
Fish the coins out of the vent and buy the Green ornament.
- In the shop, tap the vent grate in the floor beside the counter and lower the Magnet on its wire between the bars to fish out a Coin. Together with the Coin from the back-room tap you now have two. On the vending machine, the green star ornament sits in slot 101 and a green handheld device in slot 105. Insert a Coin, key in 101 and press # for the Green ornament. Insert the second Coin and key in 105 # for the Pickup. Use the Pickup on the round keyhole lock of the cash register: it fits there as a letter screen, but the lock still has no handle to turn.CODE101# · 105#
The hand-print lock
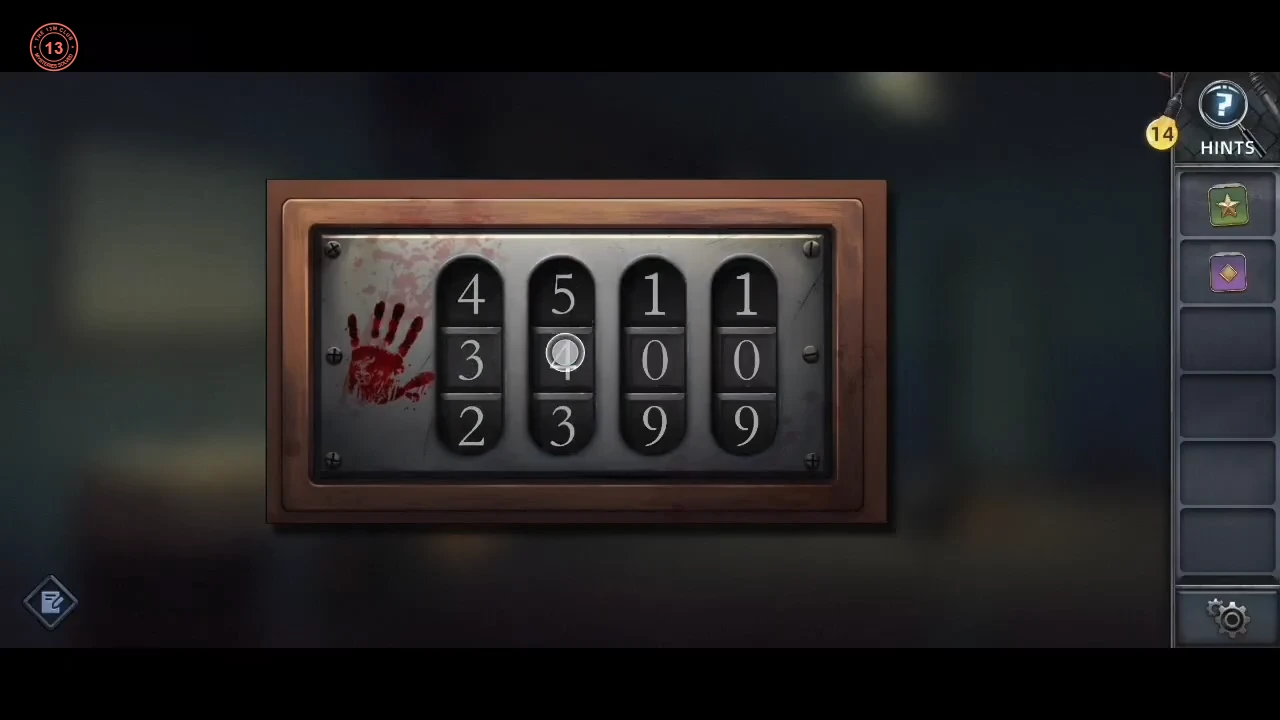
The zombie poster's hand prints give the code for the glass hand lock.
- Tap the cupboard door under the shop counter (lower left) and take the Purple ornament from the cardboard box inside. The photo by the register shows the glass lock box in the back room. The zombie poster has four red hand prints with 3, 5, 2 and 4 fingers. Set the middle row of the hand lock to 3524 for the Blue ornament.CODE3524
The display case
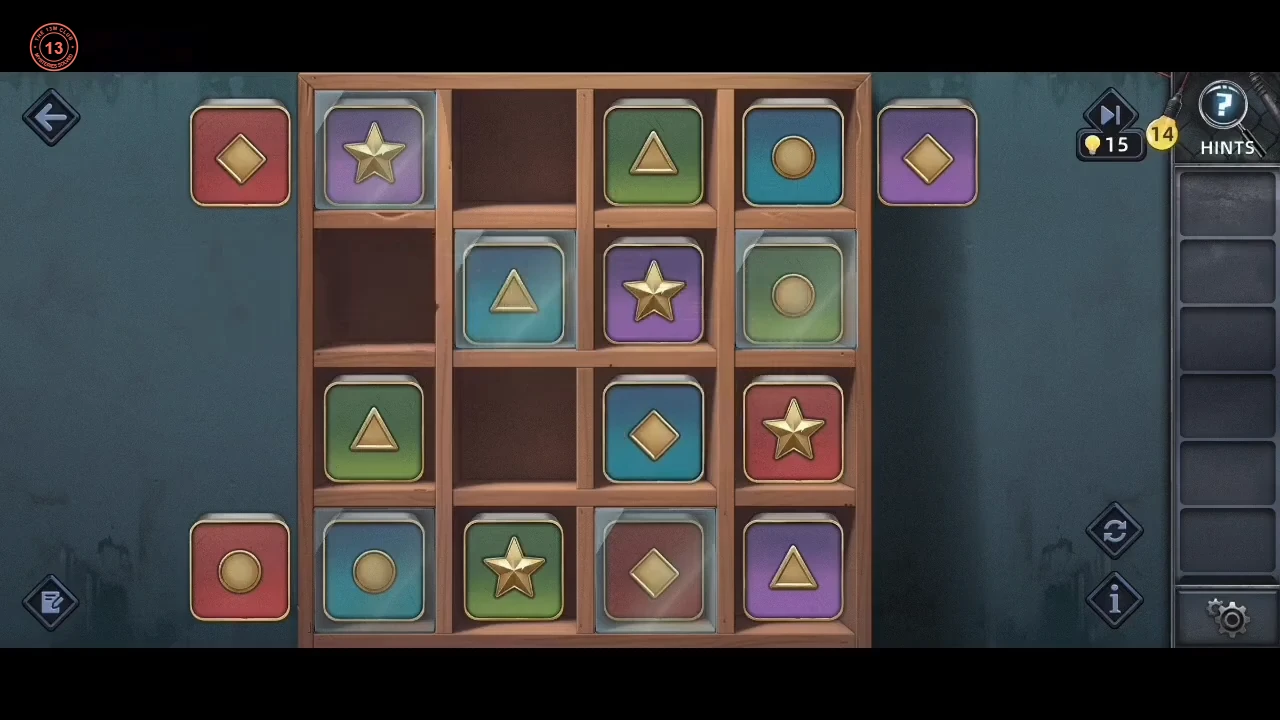
Fill the display case so no colour or shape repeats in any row or column.
- Fill the display case so no row or column repeats a colour or a shape. Final rows, top to bottom: purple star, red circle, green triangle, blue diamond / red diamond, blue triangle, purple star, green circle / green triangle, purple diamond, blue circle, red star / blue circle, green star, red diamond, purple triangle. Take the Gardening scissors.
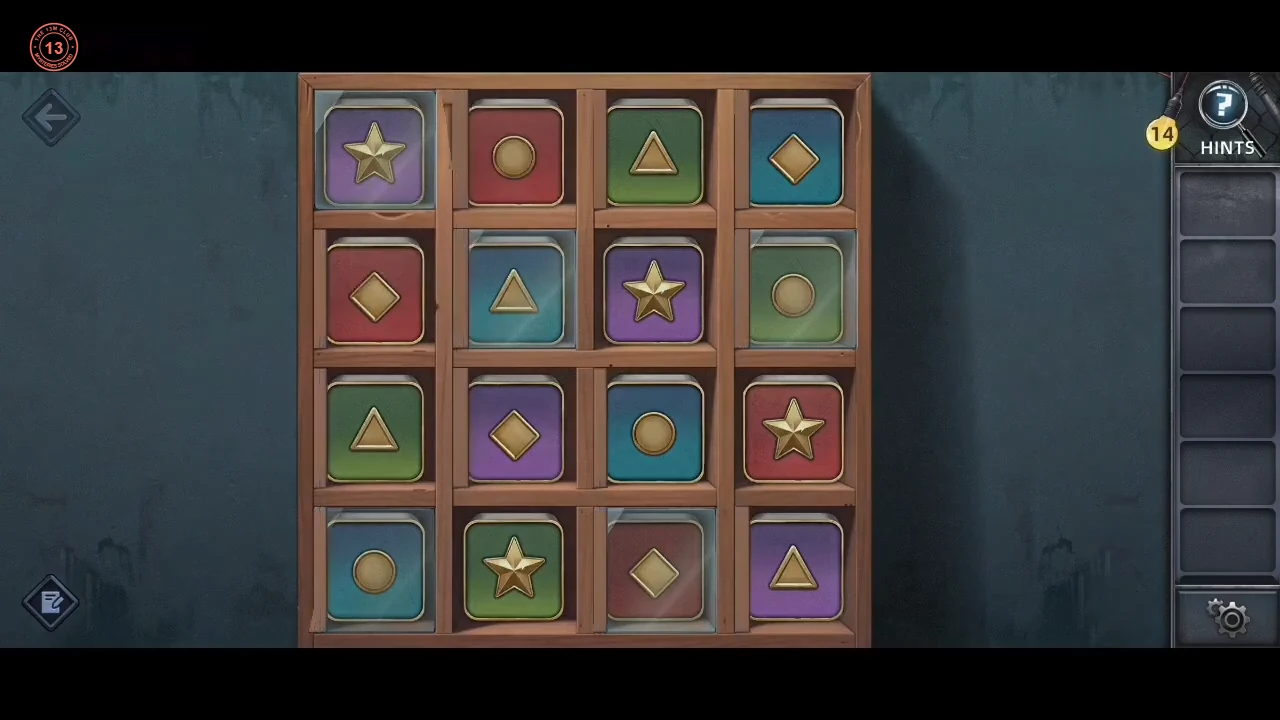
The completed display case.
The hanging stars
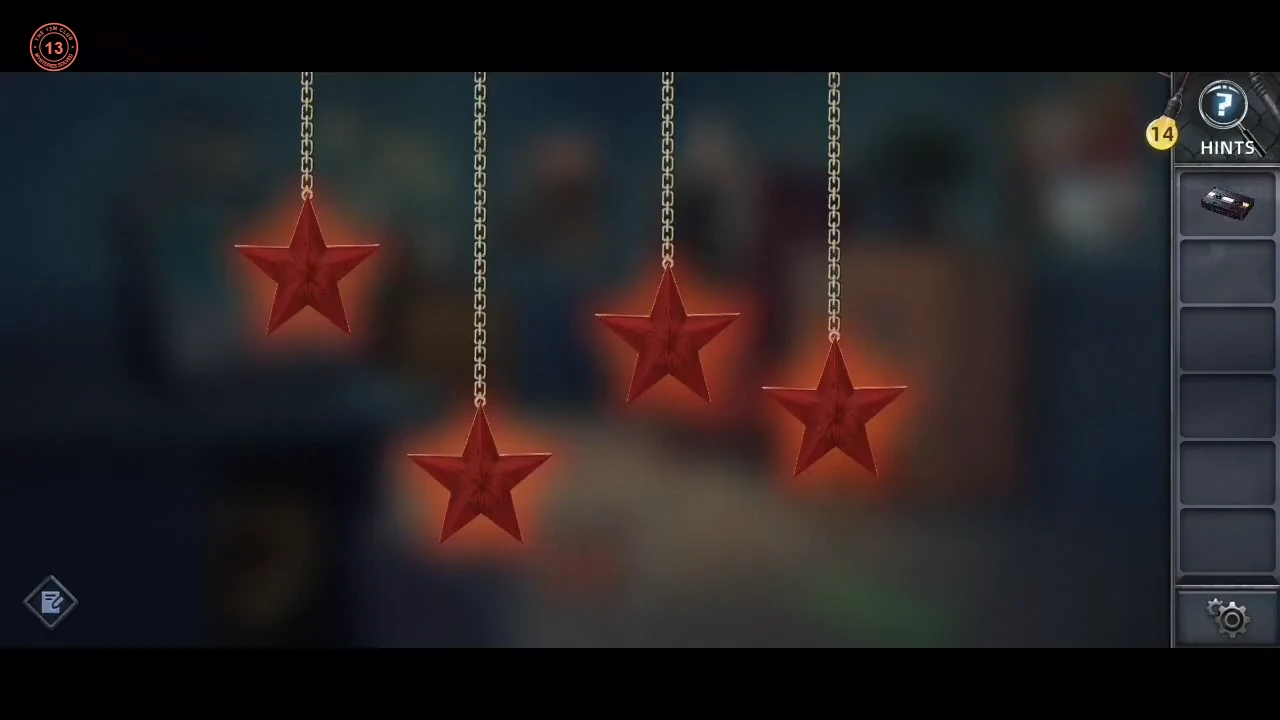
The star ornaments left in the case show the heights for the four hanging stars.
- Trim the bonsai to find a cassette. Set the four hanging stars at the heights of the star ornaments left in the case: star 1 at the top, star 2 lowest, star 3 high, star 4 in the middle. Take the Awl from the doll.
The DEFACE letter safe
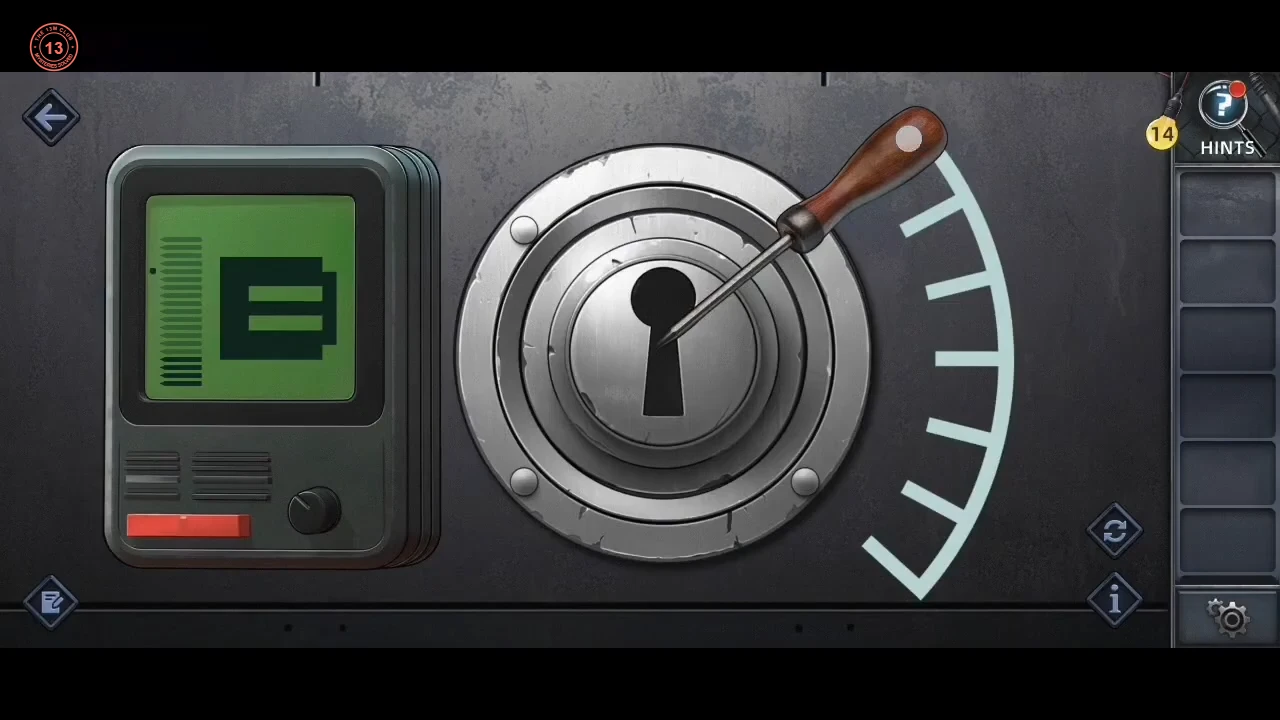
The cassette gives the word for the letter safe, and the vending machine sells the screwdriver for the vent.
- Play the cassette in the TV: it shows DEFACE. Go back to the cash register's lock with the Pickup fitted and use the Awl on it as a handle. Drag the handle along the scale: the big letter on the Pickup's screen changes with the handle's position (in the recording A sat near the top, then E, D and F further round, with G and C lower still). Each new drag adds one letter to the end of the word along the top of the screen, and that letter keeps changing until you let go. Spell D-E-F-A-C-E, one drag per letter, to open the register for Lots of coins. Buy 109 from the vending machine for the screwdriver and use it to remove the floor vent grate.CODEDEFACE
The sewer raft
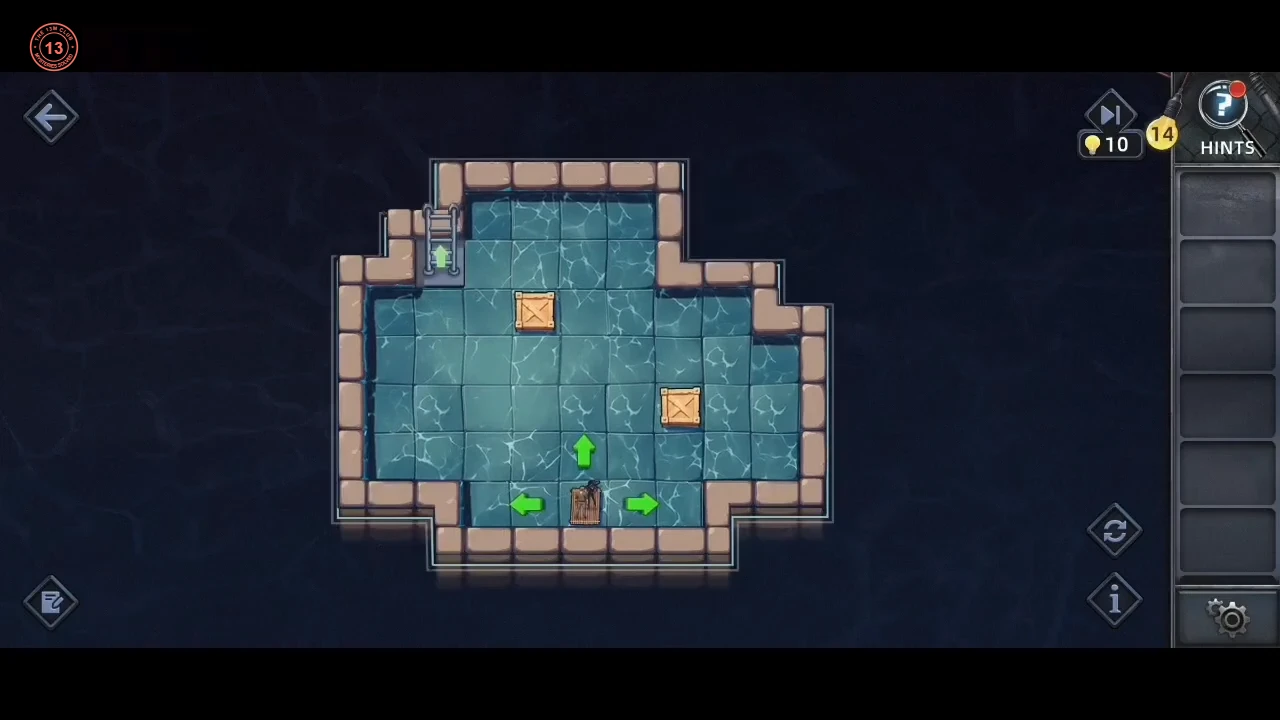
Drain the sewer and steer the raft to the exit.
- With the Flashlight from the shop's TV cabinet lighting the way, open the valve to drain the water. The raft board has two stages. Press the arrow buttons around the raft to steer it. It slides until it hits a wall or a crate; a crate it hits keeps sliding in the same direction until that crate is stopped. First stage (exit on the right wall): Up (the raft stops under the crate, which slides to the top), then Right into the exit. Second stage (exit is the ladder in the top-left corner; the raft starts at the bottom middle): Right, Up (pushing the lower crate to the upper row), Left, Up, Right (the raft knocks the left crate along until it stops against the other crate), Up, Right, Down (pushing that crate to the bottom), then Left into the ladder exit.
The subway car and the cuckoo clock
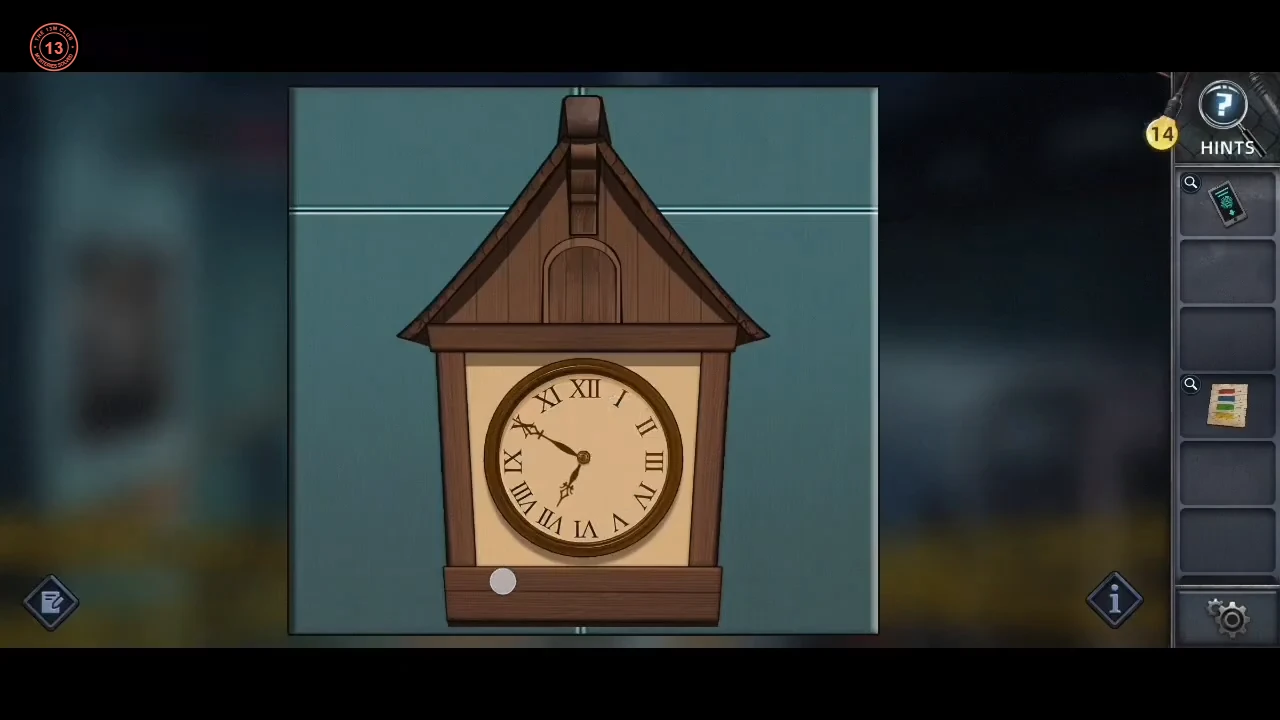
The dead painter's phone and his forest painting lead to the cuckoo clock and the route paper.
- On the platform, the train roof is "Too high to climb". Take the Ladder leaning against the wall to the left of the poster and set it against the train beyond the police tape, then climb into the subway car. Inside, open the closed red case lying on the carriage floor and take the Paint can from it, then take the Paintbrush lying beside the dead painter. Dip the Paintbrush in his blood for the Bloodstained brush. Pick up the phone by his hand and unlock it with his fingerprint. His Memo says he split the escape route clues with "Little Bird".
- Open the Paint can: the paint is "All dried out, won't work", but a torn half of the route paper is inside (Pieces of paper). Paint the forest painting with the Bloodstained brush; a red clock showing 7:00 appears. Set the platform cuckoo clock to 7:00. The cuckoo comes out with the other half (Pieces of paper), which joins the first half into the Complete paper. It reads: red Go North, blue Go West, green Go East, yellow Go South.CODE7:00
The tunnel junctions
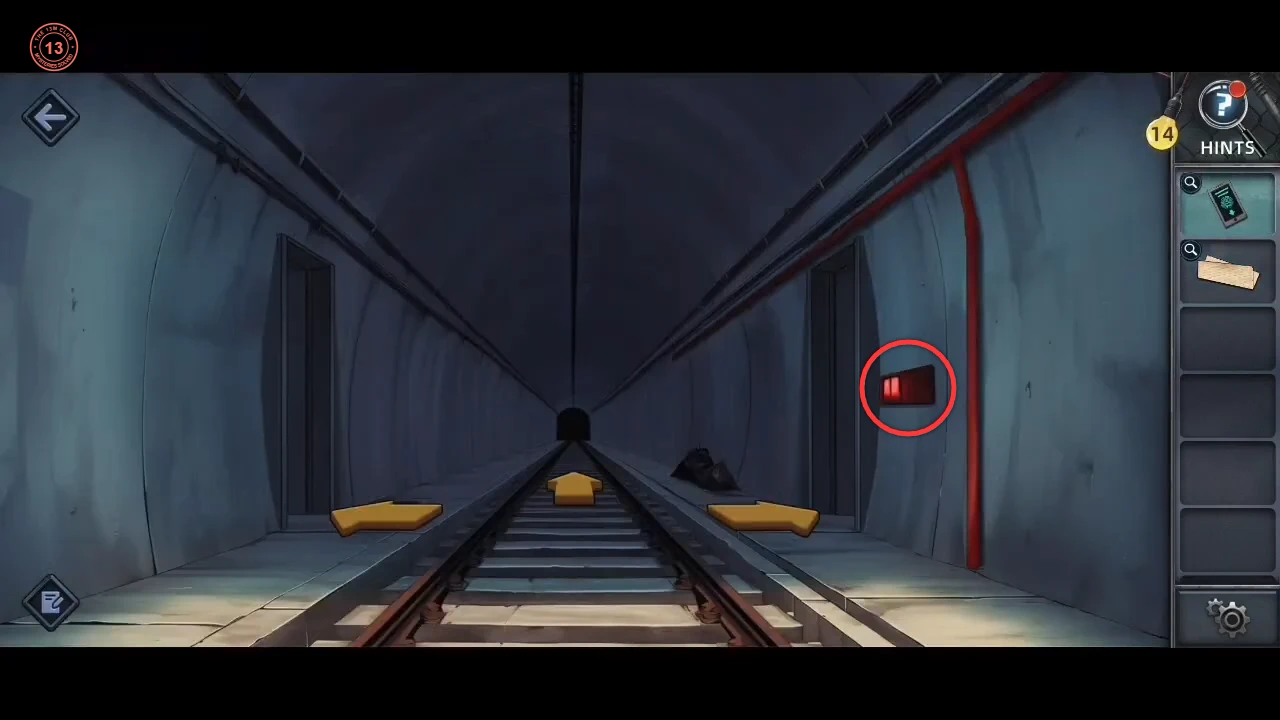
Follow the colour route from the paper through the tunnel junctions.
- In the tunnels, find the coloured marker at each junction, check the phone Compass and take the passage in that colour's direction until you reach the exit.
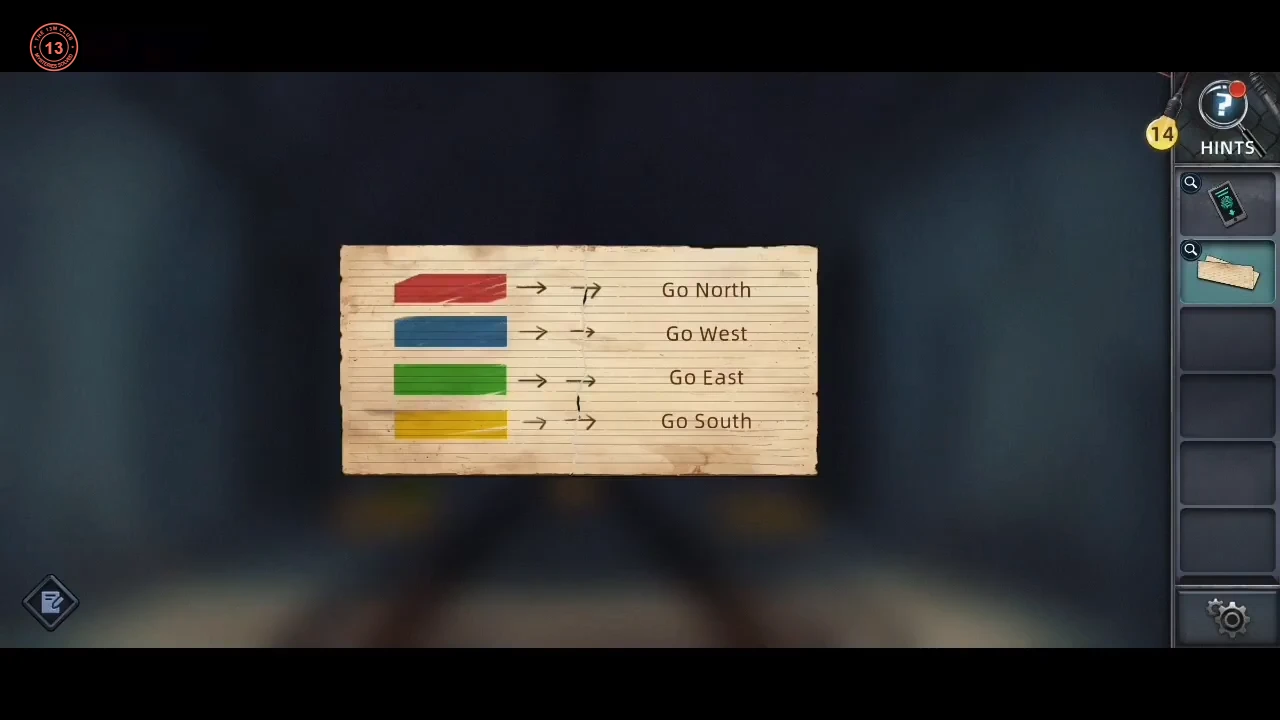
The complete paper: red north, blue west, green east, yellow south.
The road to the school
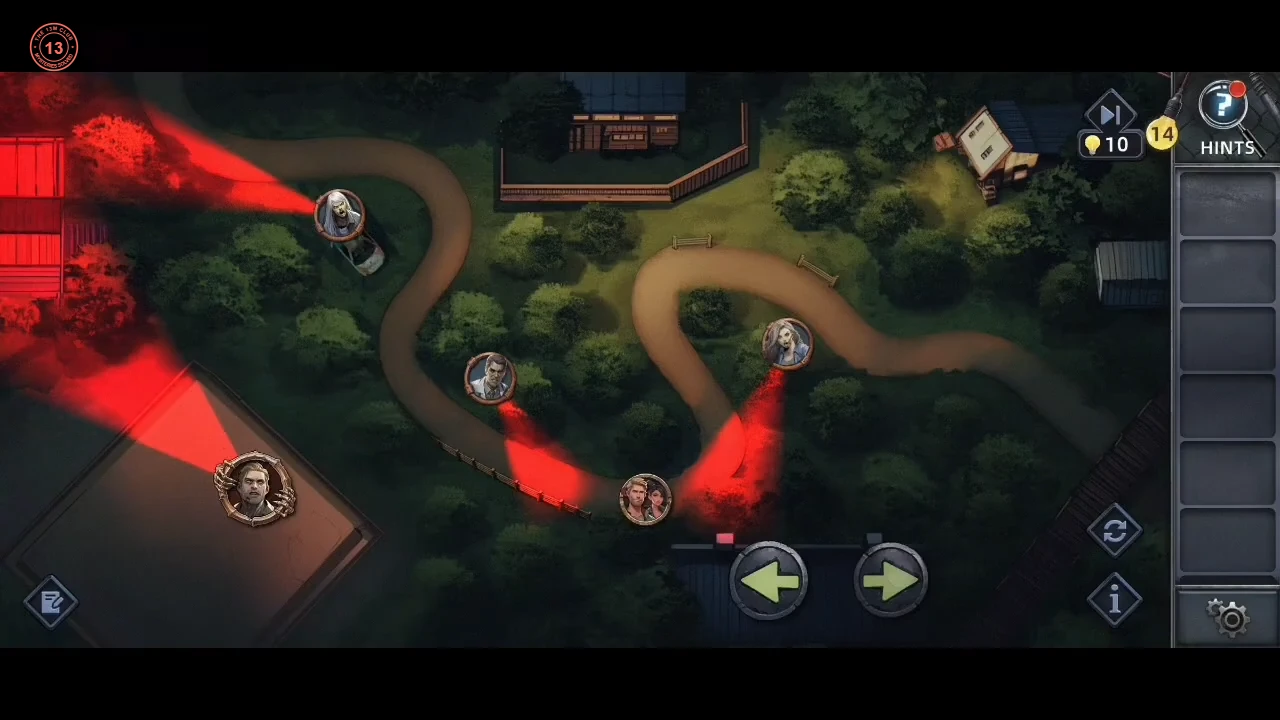
Walk Alex and Nora to the school without stepping into the zombies' vision cones.
- Move Alex and Nora along the road to the school with the arrow buttons. Only step forward when the next stretch is outside the zombies' red vision cones.