GHOST WEST · CHAPTER 1
The Stolen Keepsake: the bridge and the mine gate
Ghost West is the Wild West story in the collection menu. Gunslinger Sandy follows a boy who stole Frank's pocket watch to Dust Town. Its four chapters unlock in order. Picked-up items are named at the top of the screen, and the Notes book keeps clues.
- At the broken bridge, zoom into the gap in the bridge planks and take the Hook. Take the Rope from the scarecrow and the Bucket lying on the ground in front of it. At the well, attach the Rope, then the Hook, then the Bucket, and lower it: it brings up the Pitchfork Head. Fit the Pitchfork Head on the wooden handle leaning against the haystack; it rakes the hay aside and uncovers a plank. Take the Wooden Board and lay it over the gap in the bridge.
- At the Black Hex Mine entrance, zoom into the skeleton sitting by the minecart and take the Tweezers. The Pickaxe is stuck in the skeleton, so take the Stick from the crate on the left and use it on the skeleton to lever the Pickaxe free. Break the small rock pile beside the rails with the Pickaxe to get a Miner Badge.
- At the cabin, take the Sandbag from the porch. A crumpled paper by the doghouse is a child's note about feeling dizzy; it is story only. Smash the cabin window with the Pickaxe and go in. Take the Table Knife beside the plate on the table, the second Miner Badge from the laundry basket and the Music Box Joystick (a crank handle) from the floor right of the table. A broken ladder frame lies on the floor; leave it for now. At the lakeside hanging tree, empty the Sandbag through the sieve screen to sift out a Key.
- Open the cabin cabinet's padlock with the Key and take the Match. Read the newspaper about the Disaster of Dust Town. Zoom into the music box on the lower shelf and fit the Music Box Joystick into its side. The skull-and-snake box on the upper shelf stays locked for now.
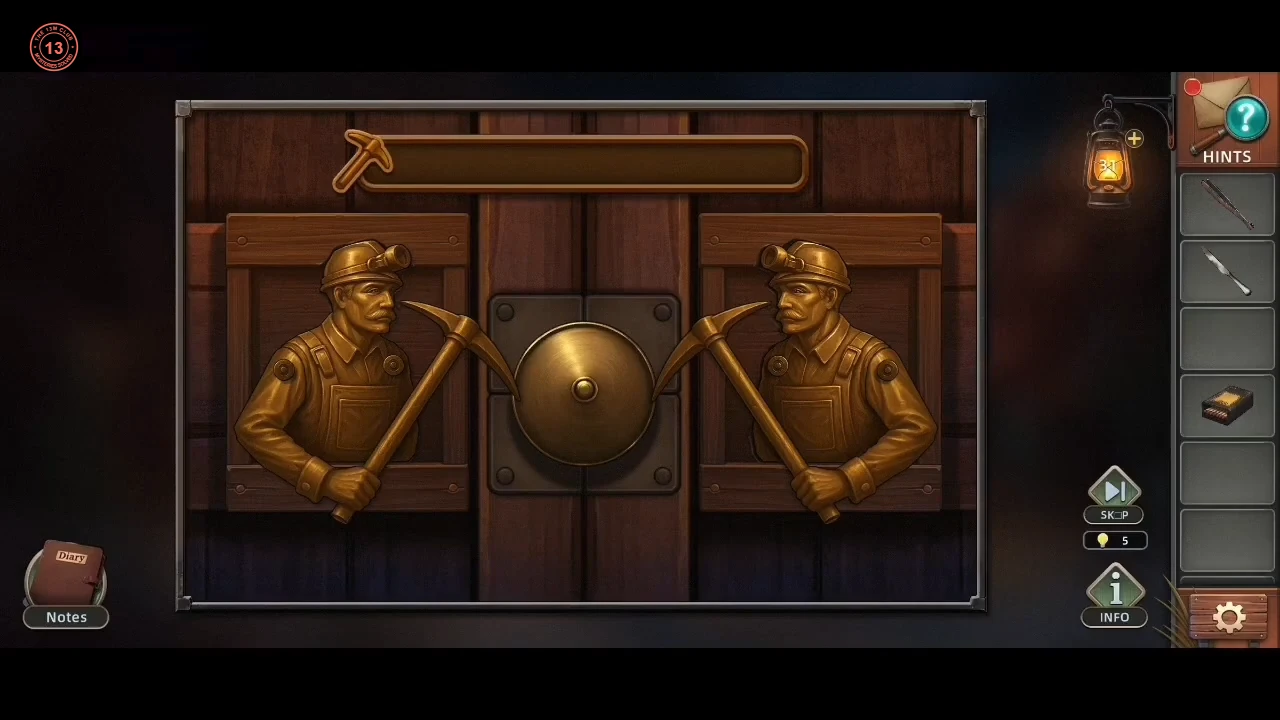
- Put both Miner Badges in the two statue outlines on the mine door. The game then says "Click fast to bust the gate open!": tap the miner statues quickly and repeatedly. Each tap makes the pickaxes strike the round lock in the middle and fills the bar at the top. Keep tapping until the bar is full and the gate opens.
GHOST WEST · CHAPTER 1
Inside the mine: map, music box and dynamite
Inside the mine, find the Butterfly Badge, launch the boat and repair the minecart.
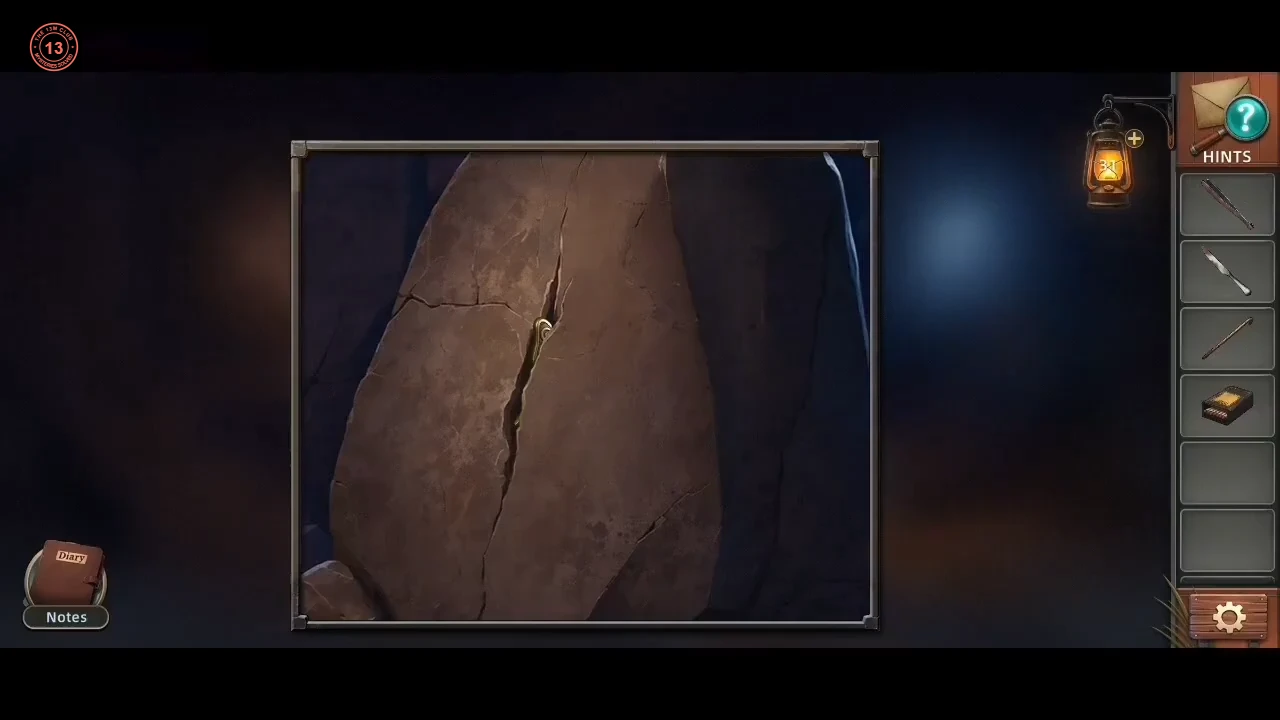
- Inside the mine, zoom into the rock pile blocking the tunnel and take the Climbing Stick wedged in it. Zoom into the cracked boulder right of the minecart and use the Tweezers in its crack to pull out the Butterfly Badge. (The blue saw frame lying by the rails cannot be used yet.) At the lake, use the Climbing Stick on the water to hook the boat and pull it in. Take the Wheel from the boat, then open the box on the boat: take the Saw Blade and the Hammer that lie inside it.
- Back in the mine, fit the Wheel on the minecart and take the Crowbar from it. At the mine entrance, pry open the nailed crate with the Crowbar for the Nails.
- Take the Liquor bottle at the mine entrance. Inside the mine, fit the Saw Blade into the blue saw frame by the rails to make the Saw. Saw the boards off the doghouse beside the cabin for a Wooden Board.
GHOST WEST · CHAPTER 1
The skull-and-snake box and the hanging tree
The rusty plate on the cabin table reveals the code for the skull-and-snake box; then climb the hanging tree.
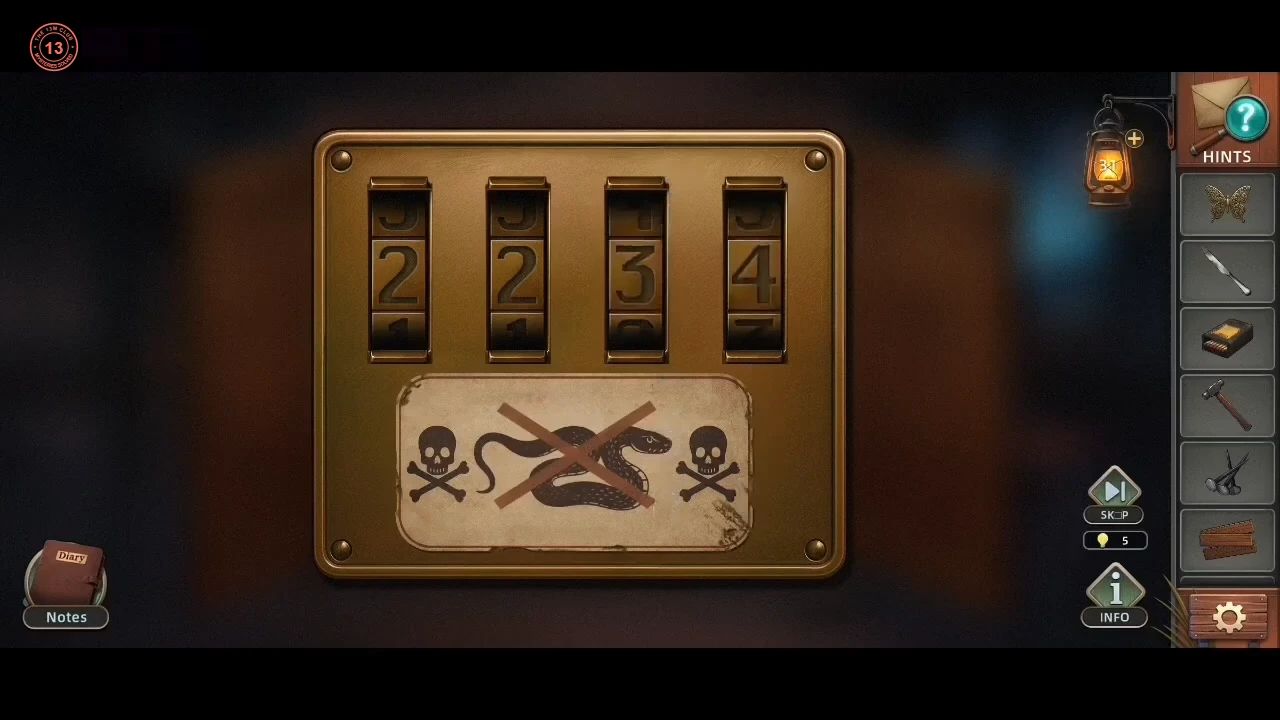
- Pour the Liquor on the rusty plate on the cabin table. The number 2234 appears. Enter 2234 on the skull-and-snake box in the cabinet and take the Snake Repellent.CODE2234
- Use the Snake Repellent on the snake coiled round the lakeside hanging tree to drive it off. In the cabin, zoom into the broken ladder frame on the floor and add the Wooden Board, then the Nails, then hit them in with the Hammer to make the Wooden Ladder. Prop the ladder against the hanging tree and climb up. Cut the rope with the Table Knife so the hanged miner falls. Take the Fuse from him, then open his satchel with the Butterfly Badge for the 'Twilight Melody' Cowboy, a Map Fragment and a letter.
GHOST WEST · CHAPTER 1
The mine map tiles
Rotate the mine map tiles to join the track.
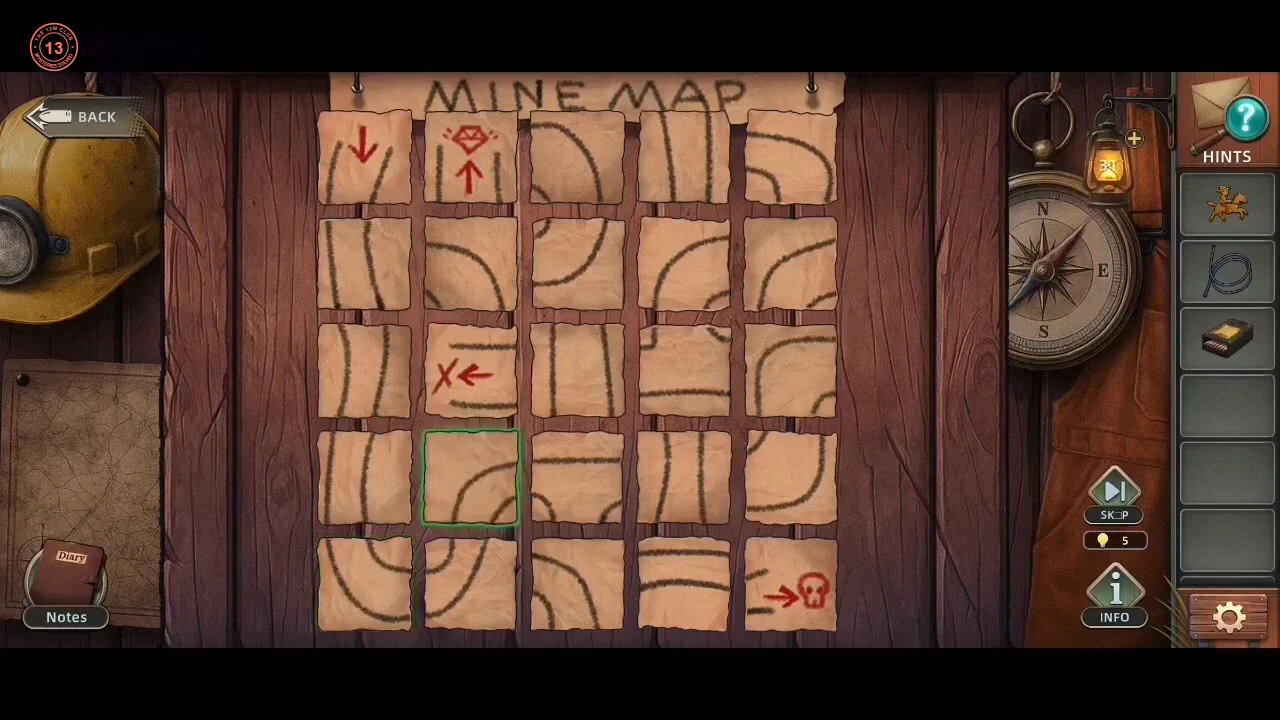
- Put the Map Fragment on the board in the mine. The 5 x 5 mine map has four fixed tiles: the start arrow in the top-left corner, a gem with an upward arrow next to it, an X with an arrow in the third row (second column) and a skull in the bottom-right corner. Each tunnel runs between two drawn lines. Tap tiles to rotate them until two tunnels are complete. One runs from the start arrow straight down the left column, then winds through the bottom two rows to the skull. The other leaves the gem downward, loops up through the top-right corner, comes back down the fourth column and turns left along the third row into the X. The game accepts the board only when the X is joined as well; in the recorded playthrough the last tile turned was the one directly right of the X. The tiles in the middle of the fourth row that are left over do not matter. Sandy: "Finally got a path to follow."
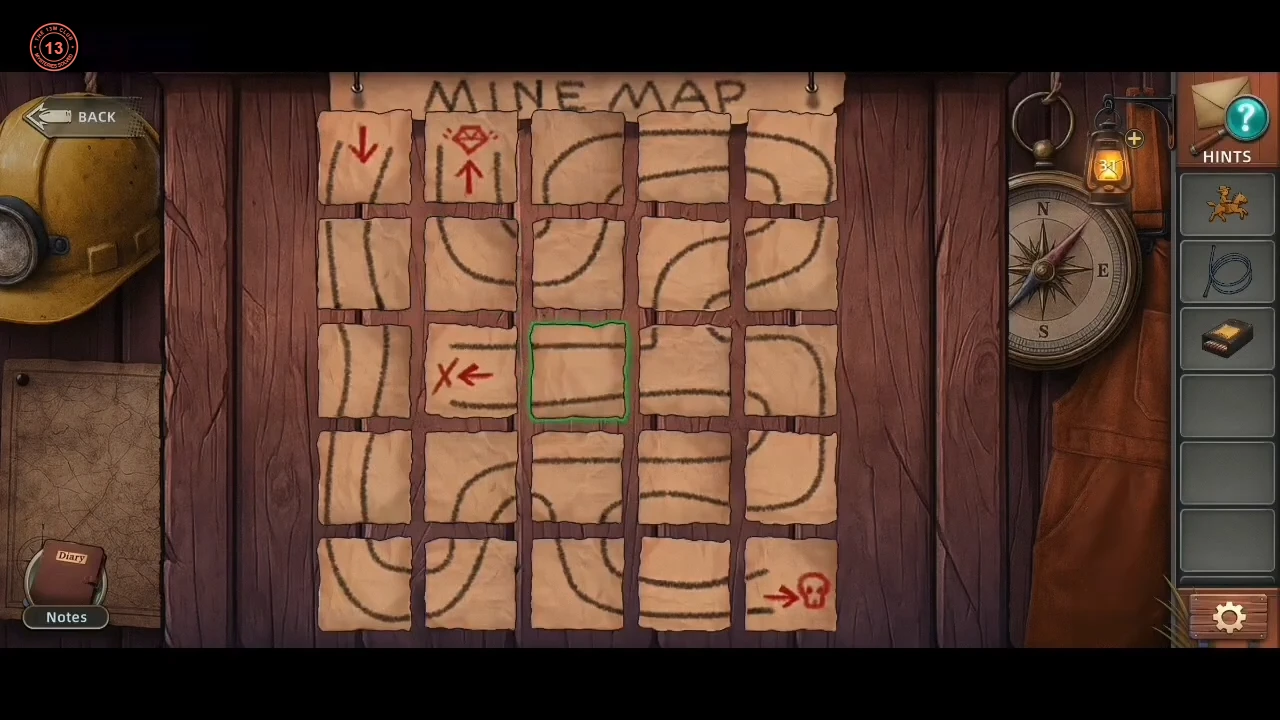
The solved mine map. The outlined tile was the last one turned.
GHOST WEST · CHAPTER 1
The music box runner and the dynamite
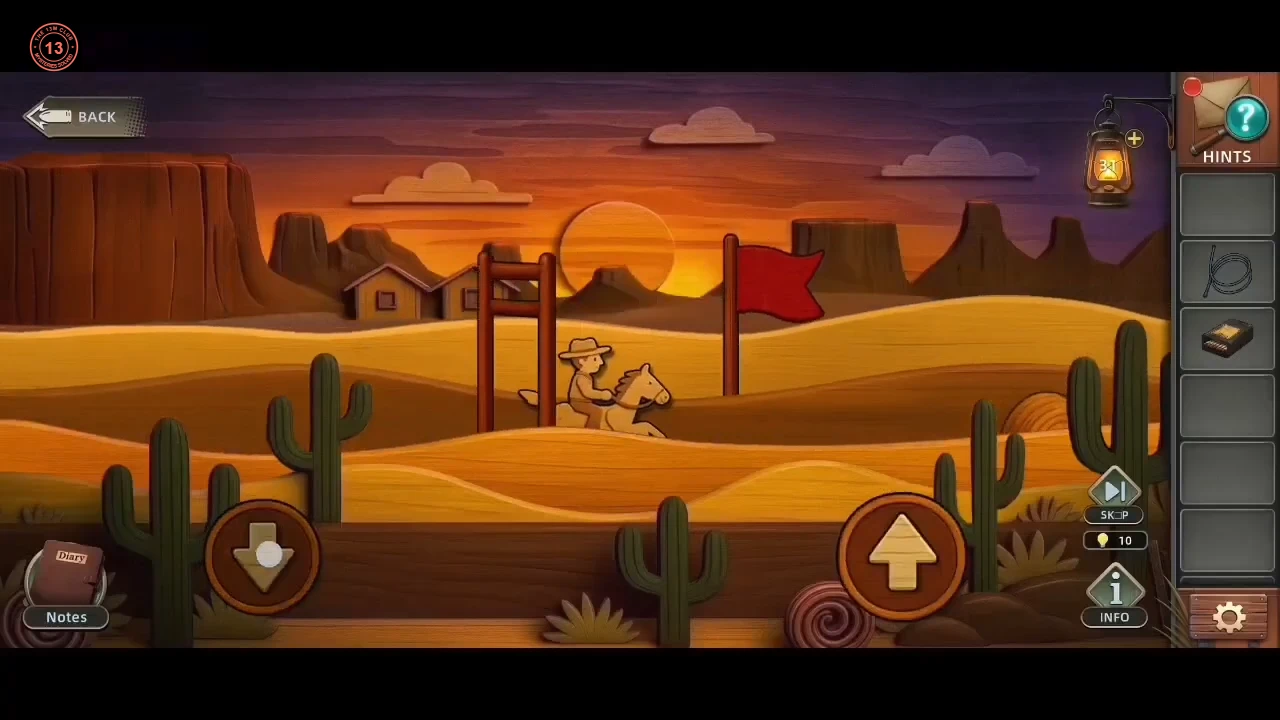
Play the music box runner game for the Dynamite, then blast the boulder in the tunnel.
- Put the Cowboy in the music box on the lower shelf of the cabin cabinet (its crank was fitted earlier). In the runner game, the up-arrow button (bottom right) jumps and the down-arrow button (bottom left) ducks. Jump over the round logs lying on the track. The tall red frame gates must be passed underneath: press and keep holding the down button so the cowboy stays crouched until every gate in a row has passed; a quick tap lets him stand up too soon. The red flag in the background never moves and is not an obstacle. Reach the end of the course to finish. Then take the Dynamite (without fuse) from the drawer that opens in the music box.
- Combine the Dynamite with the Fuse, place the Prepared Dynamite at the boulder in the tunnel and light it with the Match.