DEADCITY ESCAPE · CHAPTER 5
Hope: the route map to the prison
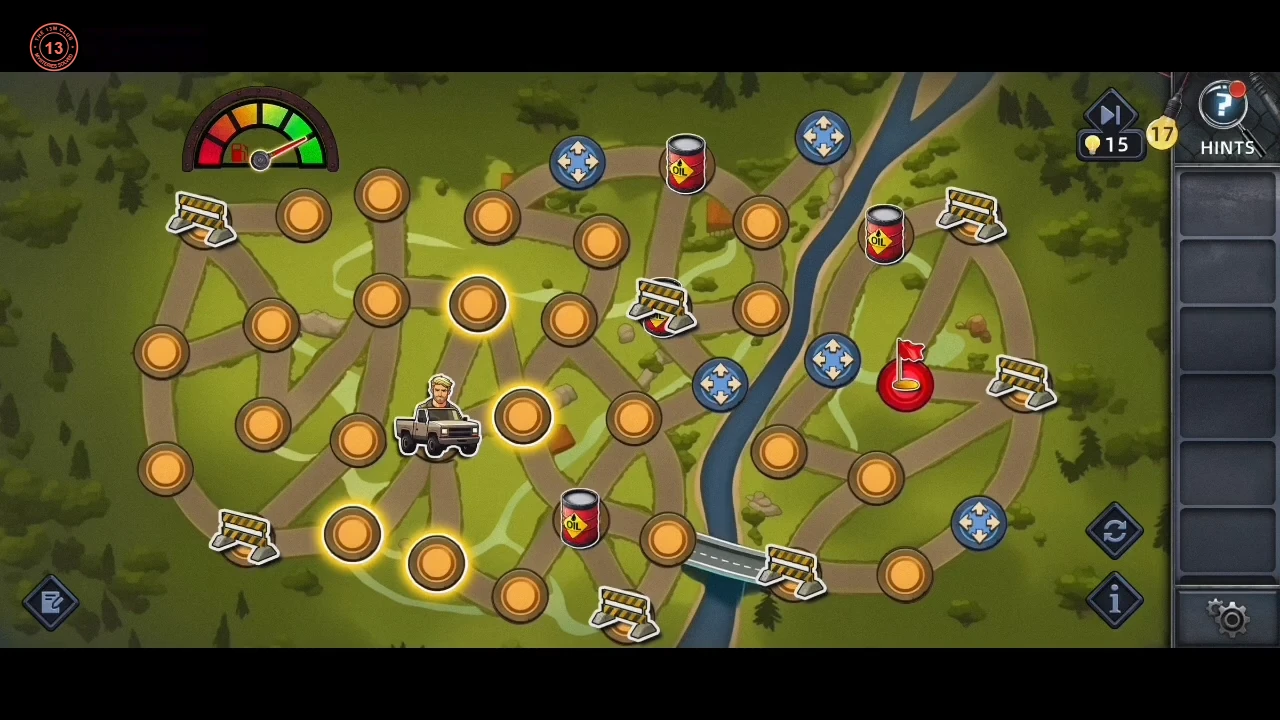
Chapter 5 (Hope): Alex reaches Lily and drives to the prison.
- Alex reaches Lily, and in the car he says there is not much fuel left: "Plan a route for the car." Tap a neighbouring node to drive there; every move uses fuel (gauge at top left), and stopping on a red OIL drum refills the tank. Yellow-and-black barricades block nodes. "The blue mechanism can be used once to move any of the barricades to an adjacent square": stop on a blue node, then tap a highlighted barricade and the square to move it to. The car starts at the top-left node and the red flag is right of the river. Route used in the recording, with every barricade move it needed: 1) Drive down the left edge to the left blue mechanism and use it to move the barricade just below-right of the start node up onto the start node. 2) Drive back up and right through the square that barricade vacated, then down to the left oil drum to refuel. 3) Go up to the top-left blue mechanism and move the barricade at the west end of the bridge down onto the node below it. 4) Drive down through the left-centre nodes to the oil drum at the bottom left and refuel. 5) Head right across the middle to the blue mechanism just left of the river and move the barricade sitting on the centre oil drum up onto the top oil drum; then refuel at the centre oil drum. 6) Drive up to the blue mechanism at the top by the river and move that barricade from the top oil drum back down onto the centre drum's node, then refuel at the top oil drum. 7) Drive left to the top-centre blue mechanism and move the barricade at the east end of the bridge right onto the next node, which opens the bridge. 8) Drive down the middle, refuel at the oil drum at the bottom centre, and cross the bridge. 9) Drive up to the blue mechanism beside the red flag and move the barricade right of the flag down-left onto the lower-right blue node. 10) Refuel at the top-right oil drum, come back down to the node below the flag, then go right to the freed node and left into the red flag. Alex: "We're here. The navigation ends here." The route between these landmarks is summarised, not listed move by move; watch the gauge and plan each stretch to end on an oil drum.
DEADCITY ESCAPE · CHAPTER 5
The yellow sign and the mailbox
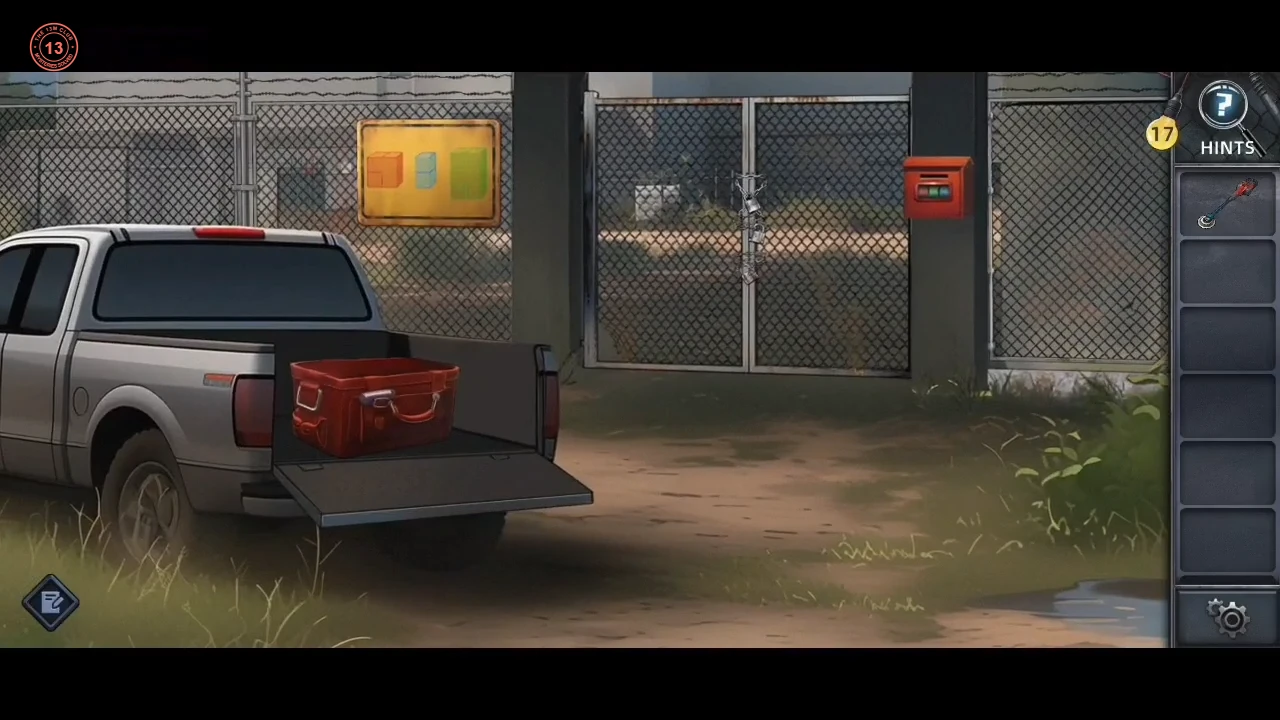
The painted sign gives the mailbox code, and the saw blade gets you through the fence.
- At the chained gate, take the Wrench and the Dipped roller. Paint the yellow sign to reveal three cube stacks in orange, blue and green. Trace the outline and dividing lines of each stack and they form a digital-style number: orange 4, blue 7 and green 8. The mailbox wheels are coloured red, green and blue, so enter 4 8 7 and take the Saw blade.CODE487
- Fit the Wrench and Saw blade to the brush cutter and cut through the overgrown fence. Crawl through the breach.
DEADCITY ESCAPE · CHAPTER 5
One Hour Ago: the storeroom rings
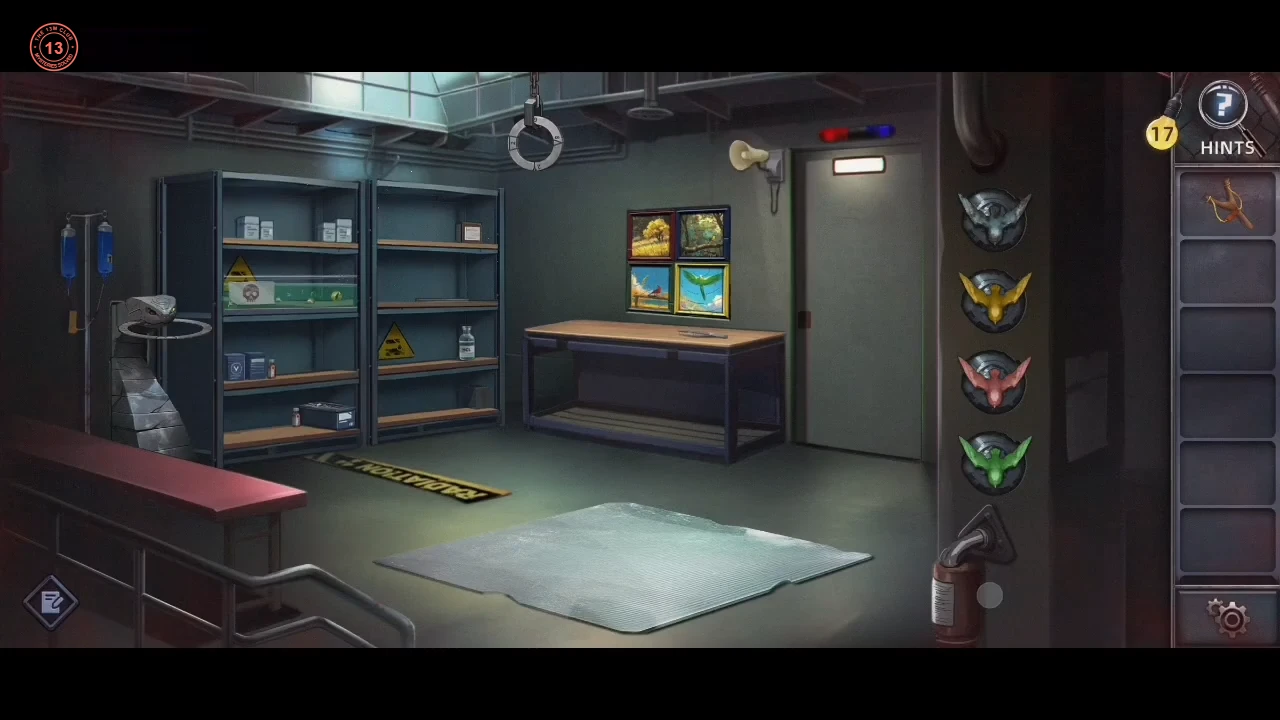
This part starts one hour earlier, as Nora. Collect the rings and the acid in the storeroom.
- "One Hour Ago": play as Nora. Take the Tweezers from the workbench and use them on the small green aquarium on the middle shelf to pull out the Snake eye. Put the eye into the snake statue at the left for the Large-sized ring. Use the Slingshot you start this part with on the ring hanging from the ceiling to knock down the Small-sized ring. Take the Hydrochloric acid bottle from the lower right of the shelves, then tap the floor blanket to pull it aside and reveal the round hatch.
DEADCITY ESCAPE · CHAPTER 5
The bird badges
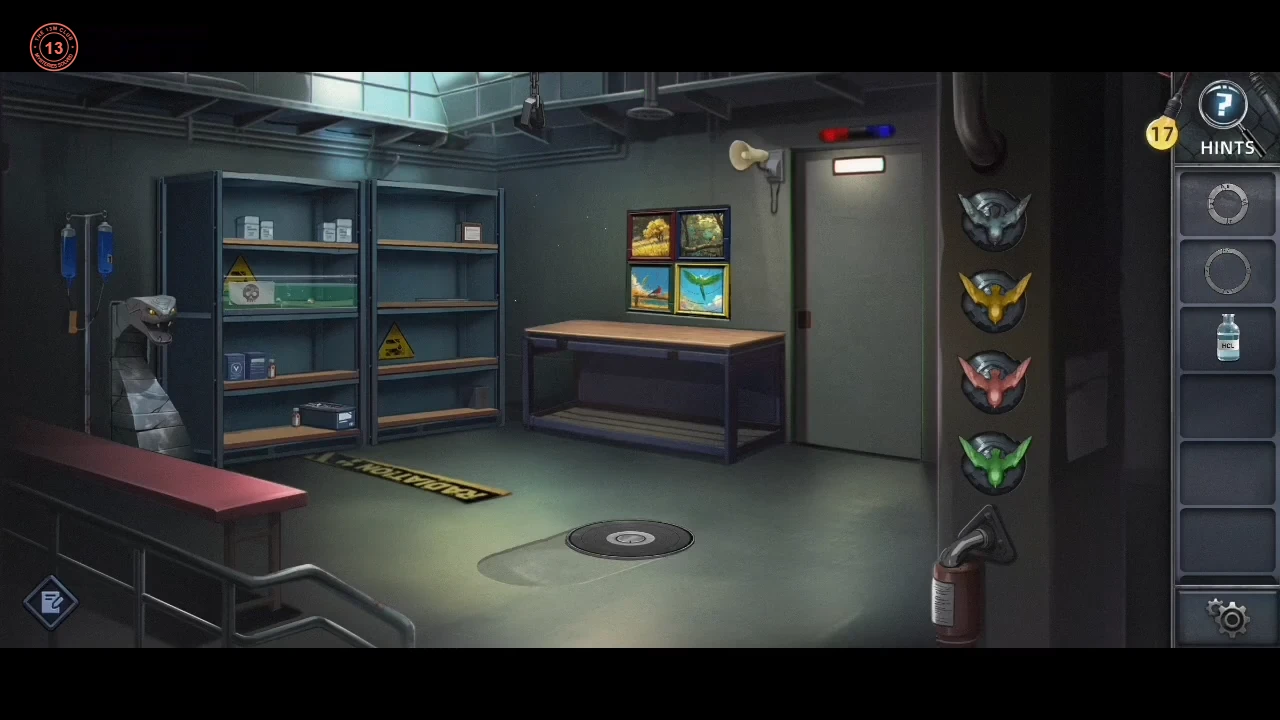
Turn the bird badges to match the paintings.
- Clean the corroded top badge on the wall with the acid. Turn the bird badges so blue faces up, yellow right, red right and green up, like the birds in the four paintings. Take the Medium-sized ring from the opened shelf door.
DEADCITY ESCAPE · CHAPTER 5
The floor hatch rings
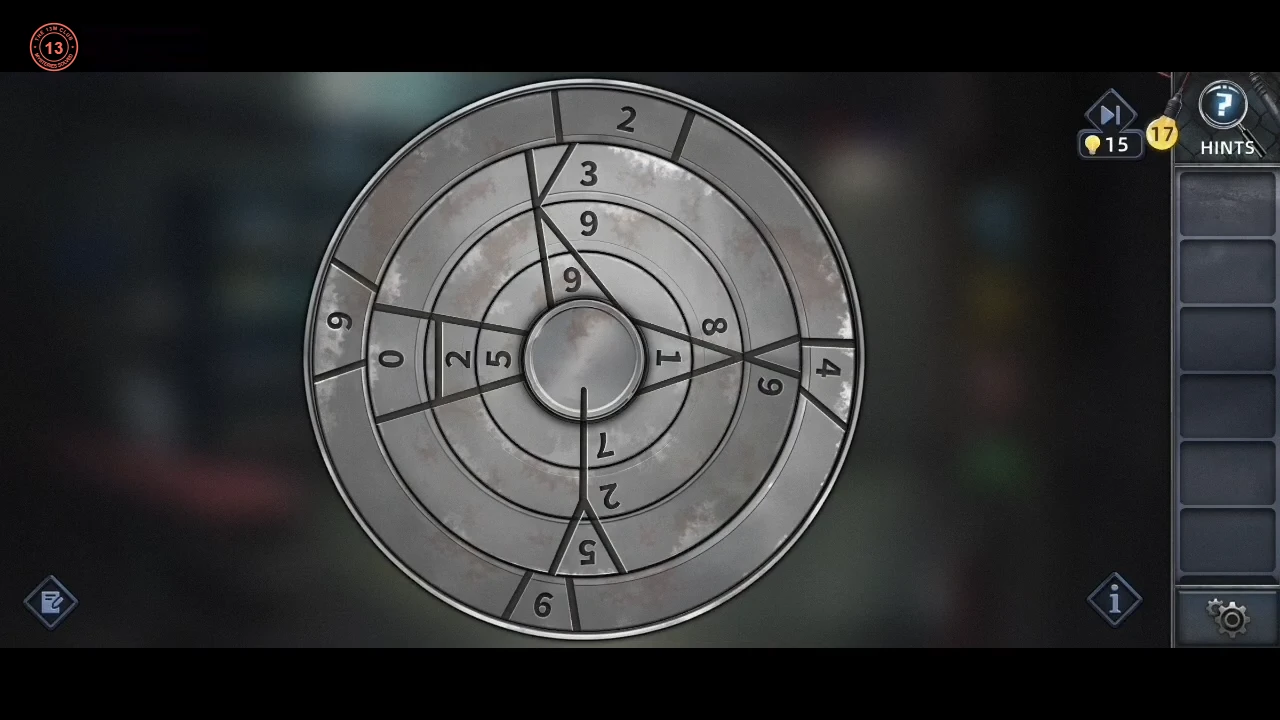
Line up the engravings in the floor hatch.
- Put the three rings in the floor hatch. "Rotate the outer four rings to match engravings": turn them until the engraved lines run unbroken from the centre to the rim. Take the Button fragment.
DEADCITY ESCAPE · CHAPTER 5
The elevator arrow
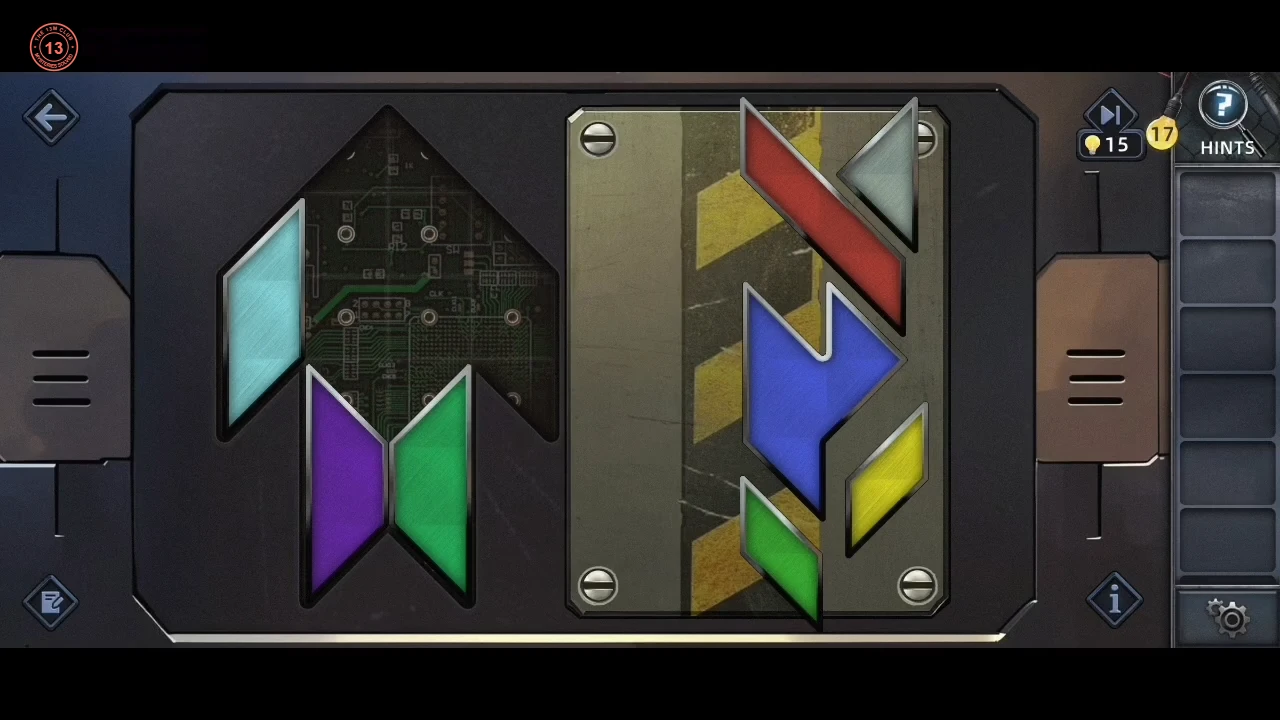
Fill the upward arrow on the elevator panel.
- At the elevator panel, fit the Button fragment, then drag the eight coloured pieces from the tray into the upward arrow outline until it is filled. Landmarks for the finished arrow: the grey triangle forms the tip; the long red bar runs down the upper-right edge with the small green piece under it; the cyan bar forms the upper-left edge; the blue zigzag sits in the middle under the tip with the small yellow piece to its right; the purple and large green bars form the left and right halves of the shaft.
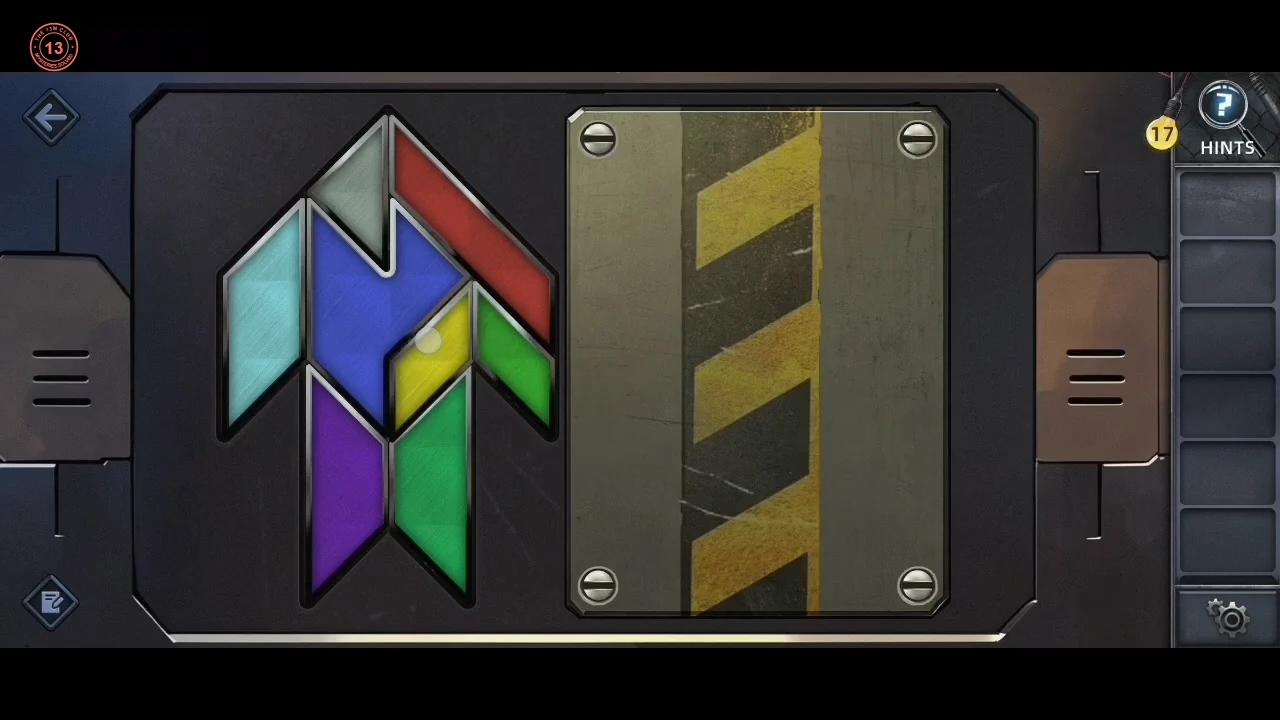
The finished upward arrow.
DEADCITY ESCAPE · CHAPTER 5
The cells and the downward arrow
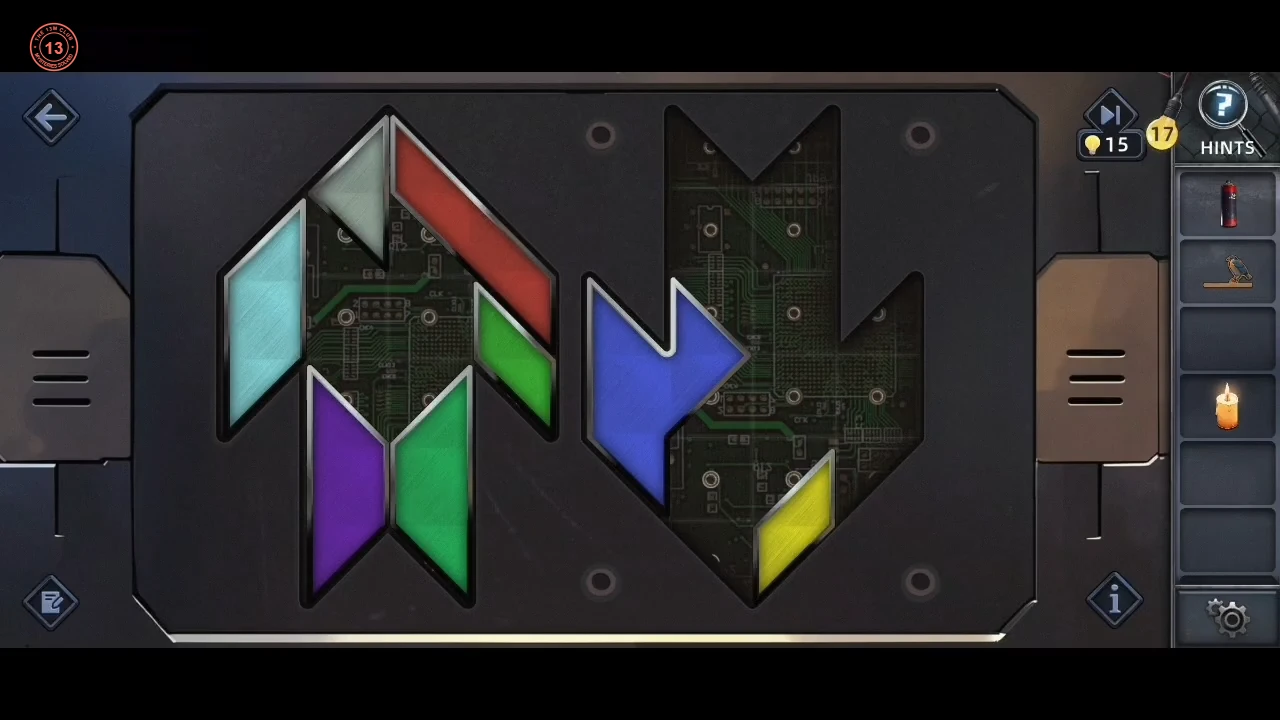
Back with Alex and Lily, collect the cell items, then fill the second, downward arrow.
- Back with Alex and Lily in the storeroom, take the Visor Spray. Go through the shelf door to the cells, where Sophia is locked up. In her cell take the Bird toy, the Coin and the Burning candle.
- At the elevator panel, unscrew the hazard plate with the Coin: a second, downward-pointing arrow outline is behind it. Move the eight pieces out of the upward arrow into it. Landmarks for the finished arrow: the long red bar runs from the top-left corner down to the middle, with the grey triangle to its right at the top and the small green piece under it; the blue zigzag forms the left wing; the large green and purple bars stand side by side in the middle, the cyan bar forms the right wing, and the small yellow piece fills the bottom tip.
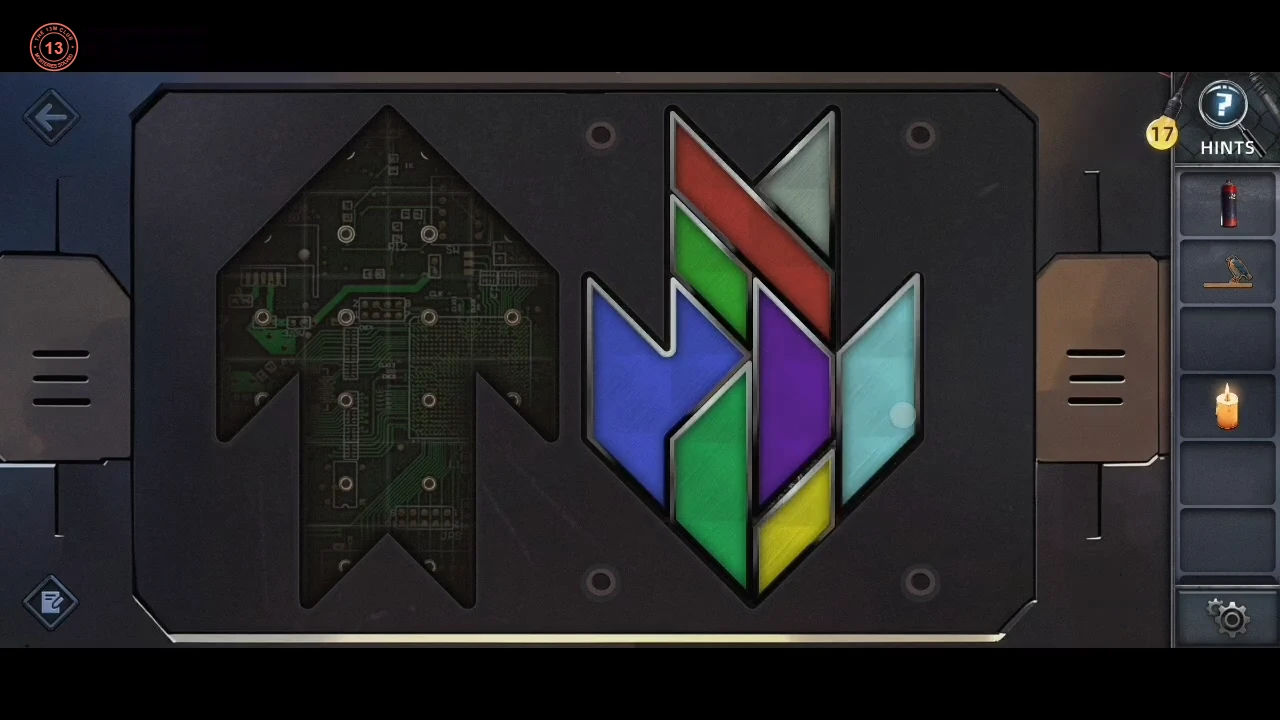
The finished downward arrow.
DEADCITY ESCAPE · CHAPTER 5
The bird paintings and the safe
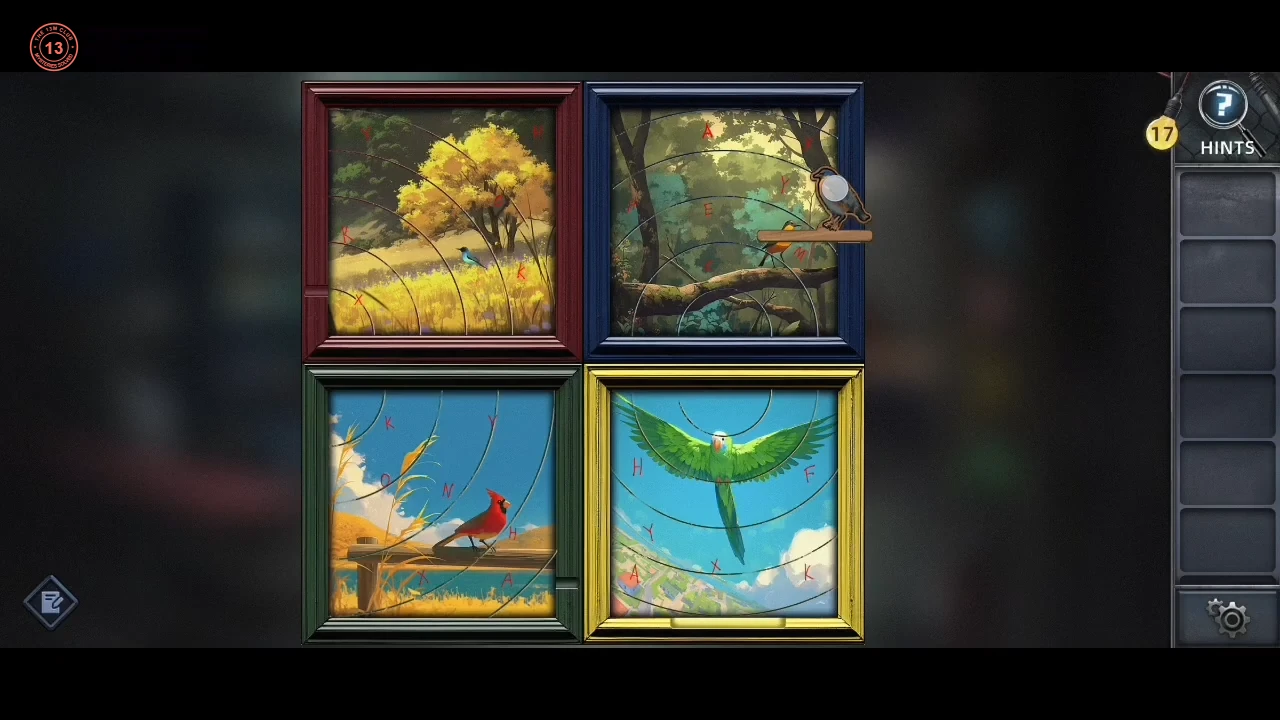
The bird paintings and the floor dial lead to the safe with the prison keys.
- Light the dry firewood with the Burning candle. Spray the four bird paintings (red, blue, green and yellow frames) with the Visor Spray to reveal hidden red letters among their faint rings; the Bird toy can be perched on a peg at the edge of each frame, and the floor hatch shows a ring dial full of digits. Set the safe's red, yellow, green and blue wheels to 9 9 2 5 and take the Set of prison keys. This guide could not work out how the letters and rings give 9925, but two separate playthroughs opened the safe with it, so the code appears to be fixed.CODE9925
- Free Sophia with the keys. In the next cell, the bitten doctor realises the serum was real and the cure is with them: "I don't have much time. Take these and call in the radio room for..." He hands over his Wallet and the Handle ("This girl is the only hope to cure...") before he turns.