Unquenchable Fire: the treatment room
Nightmare Doctor is the first story in the Mystery Case collection. Chapters unlock in order; a locked card says "Please complete the previous level first".
- Open Nightmare Doctor and start Chapter 1, Unquenchable Fire. After Ruth's intake, tap the side table in the treatment room to take the Incense and open the drawer for the Lighter.
- Put the Incense in the burner, then use the Lighter on the candle to start Ruth's dream.
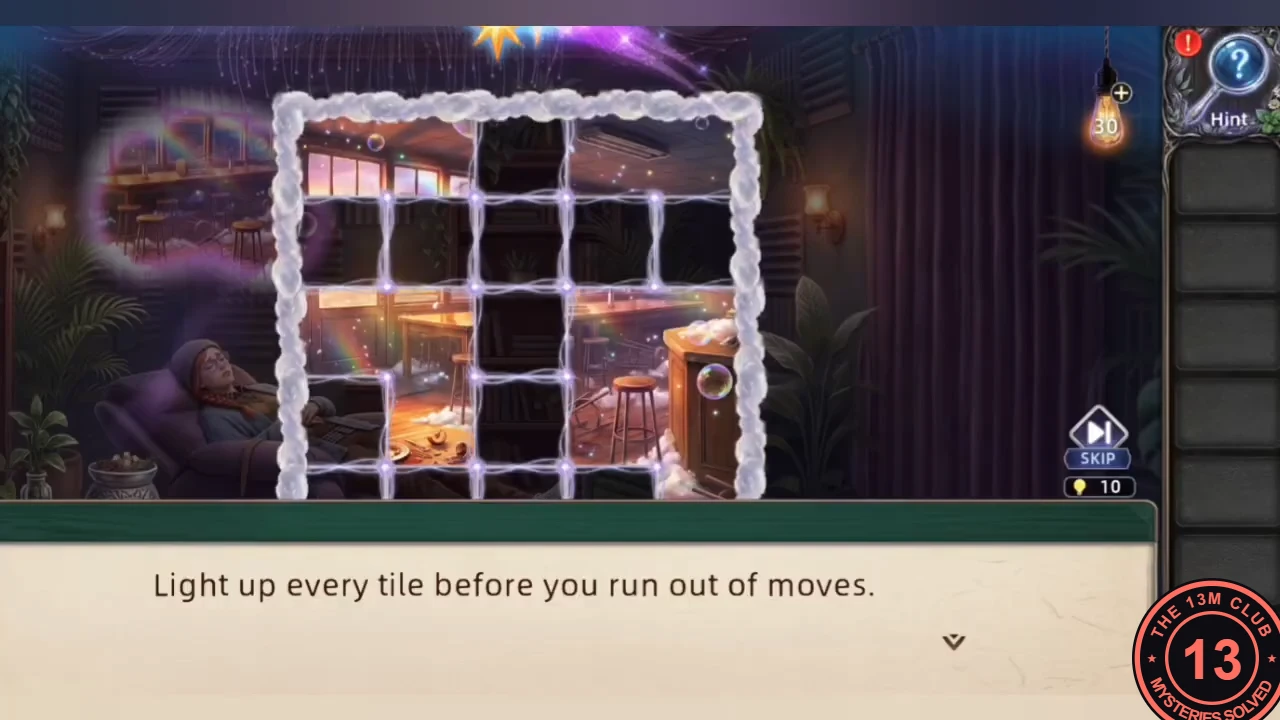
- Solve the dream-entry light grid. Tapping a dark tile lights it, and the light runs along its row and column in all four directions until it reaches a tile that is already lit or the edge of the board. Light every tile before the move counter runs out; if you go wrong, press RESET. Count rows from the top and columns from the left. This first board (5 x 5) needs two taps: row 5 column 1 (bottom-left), then row 2 column 3.
The burger restaurant: closing up
Ruth's dream opens in a burger restaurant at closing time. Follow the Off Work Precautions poster to close up; cleaning the table starts the fire.
- Read the Off Work Precautions poster: flip the sign, clean the table and return the stools. Set the overturned stool upright and take the Cleaning Cloth from the top of the cart.
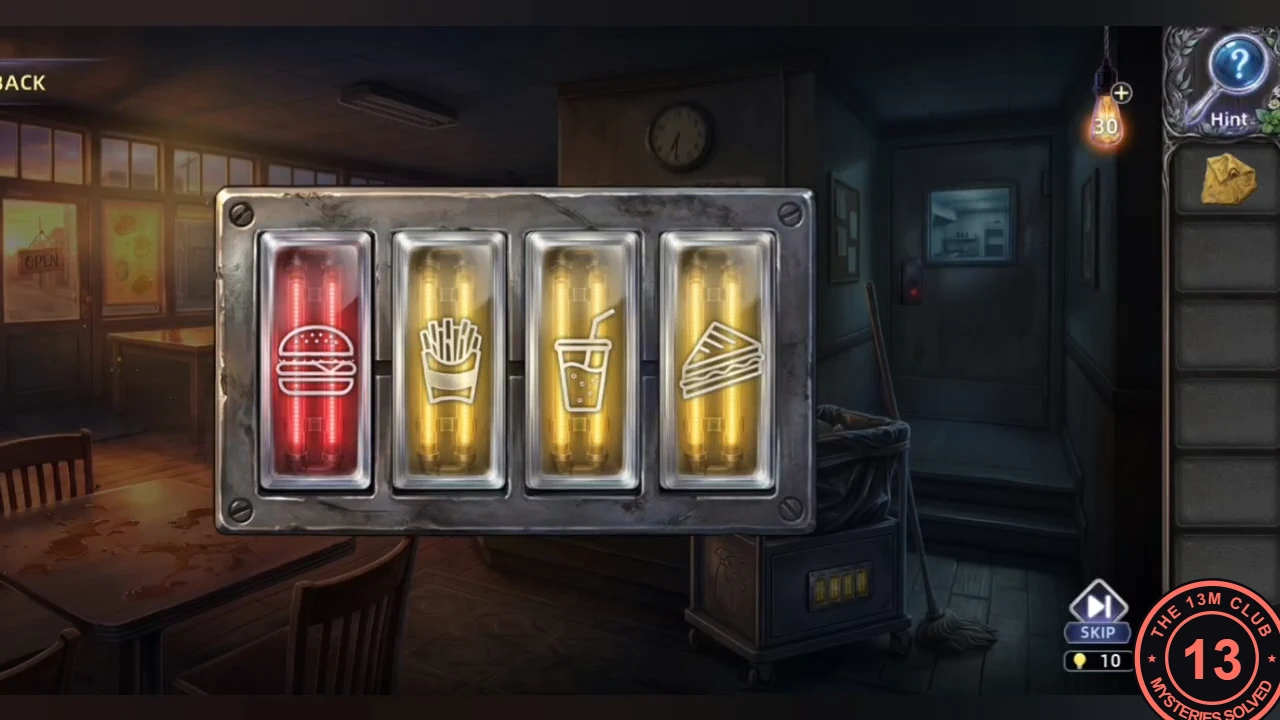
- Tap the front door and flip the sign from CLOSED to OPEN. Note the menu colours: burger red, fries yellow, drink blue, cake green.
- Open the cart's colour lock with red, yellow, blue, green (burger, fries, drink, cake) and take the foam Cleaner.CODERed, Yellow, Blue, Green
- Use the Cleaner on the dirty table, then wipe it with the Cleaning Cloth. A fire starts when the table is clean.
The counter: slider lock
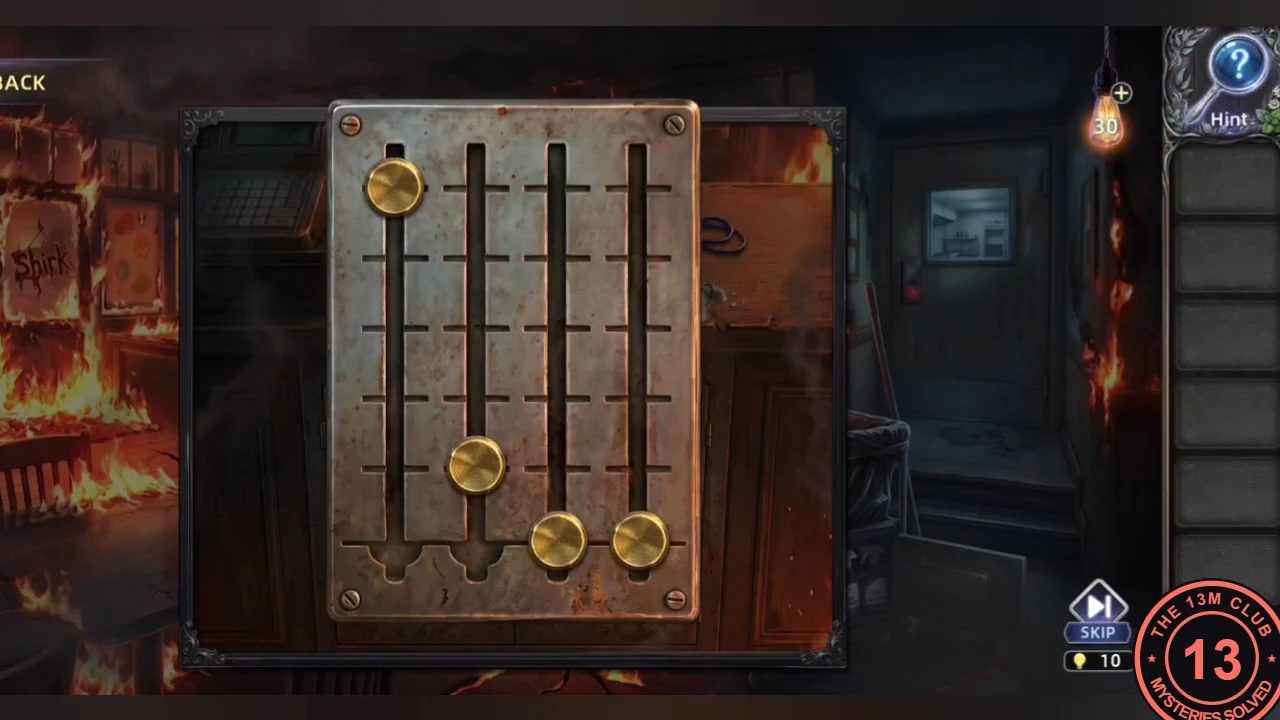
The employee ID on the counter is caked in tar and needs foam and clean water. The kettle for the water is locked in the counter cabinet.
- Inspect the counter. The employee ID on top is caked in tar: use the Cleaner on the card. The foam dissolves the tar, but the card is still sticky and needs rinsing with clean water. Ruth remembers her kettle is in the combination locker beneath the counter.
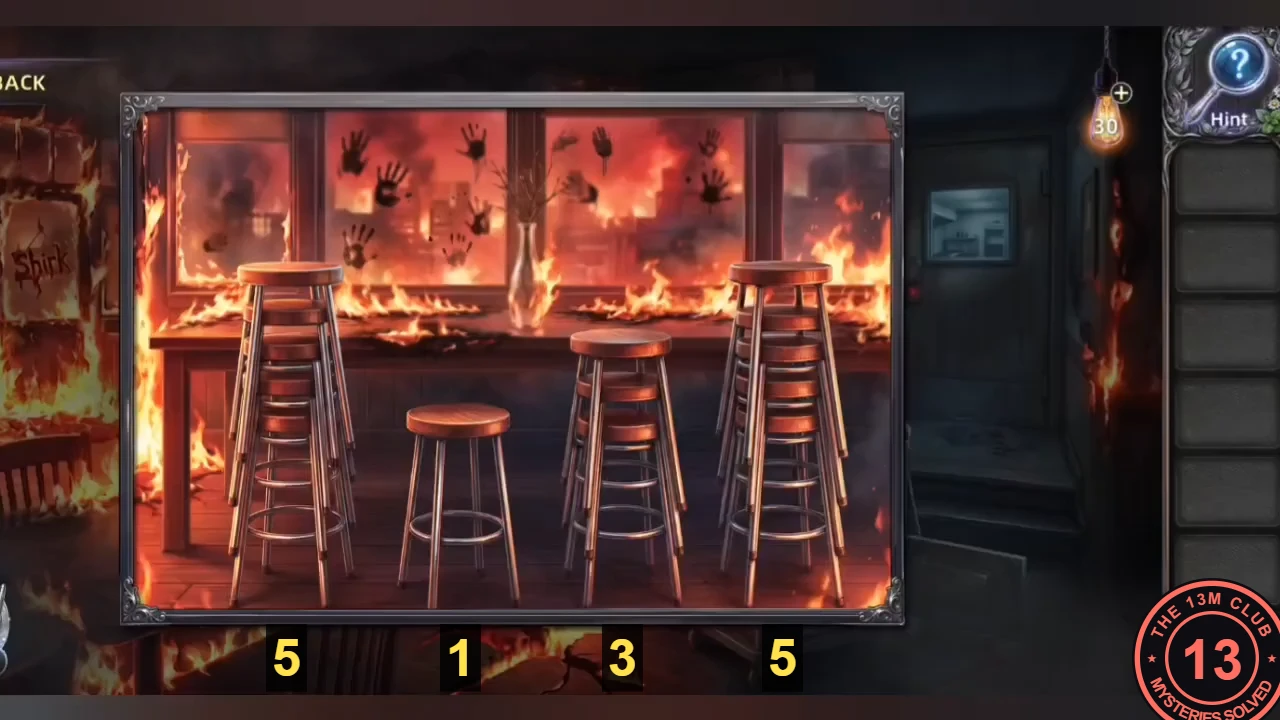
The slider clue: count the stools in each stack by the window, left to right 5, 1, 3, 5. - Count the stacked bar stools by the window (5, 1, 3, 5) and set the four sliders on the locker to those notches counted from the bottom. Take the Kettle from the opened locker.CODE5 1 3 5
The employee ID: portrait jigsaw
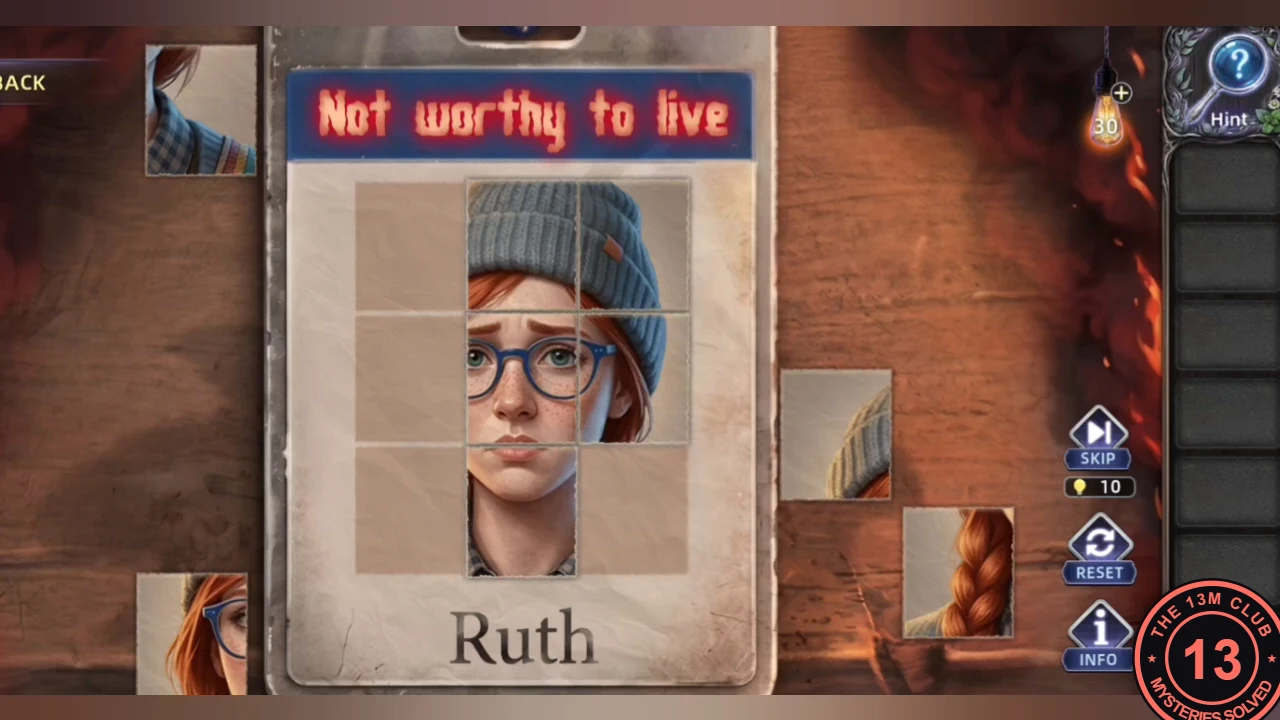
Rinse the tar off the employee ID with the kettle water, then restore its portrait.
- Pour the Kettle over the employee ID, then complete the 3x3 portrait jigsaw to restore it. Take the Employee ID.
- Use the Employee ID on the metal door's card reader to enter the kitchen.
The kitchen: sliding sink puzzle
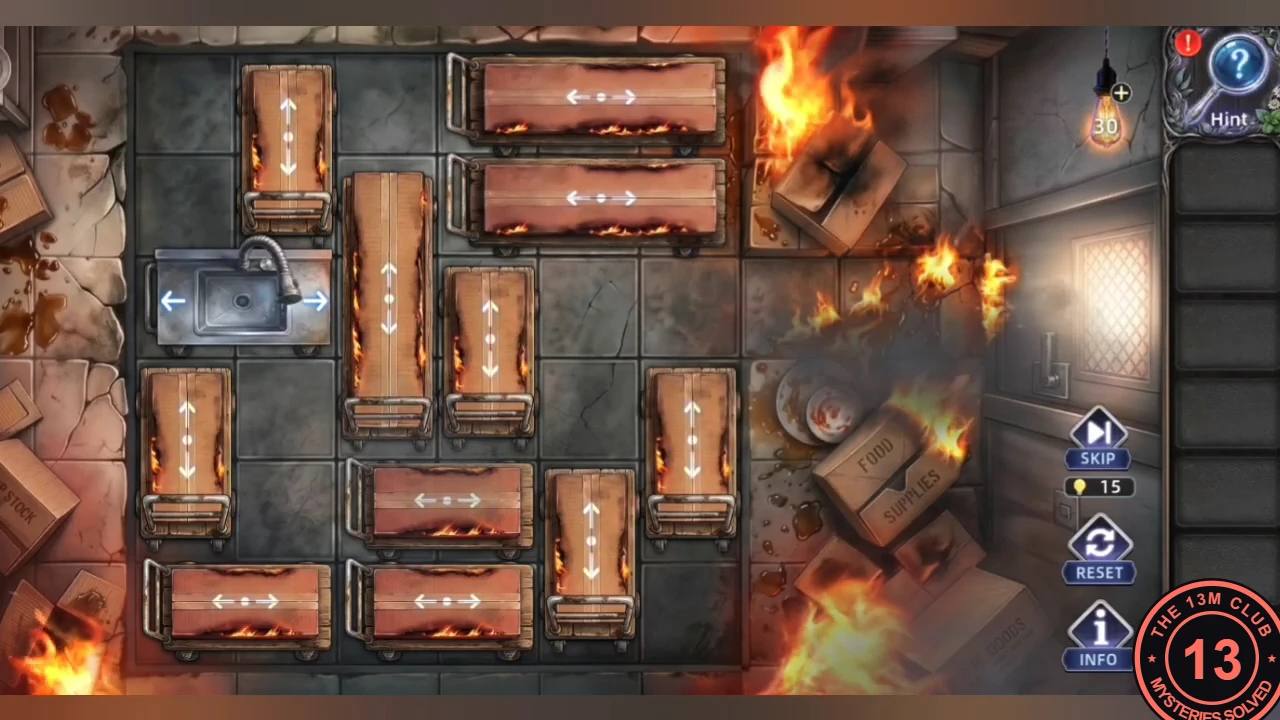
The kitchen floor is a sliding-block puzzle. Get the sink out through the right-hand exit to reach the sprinkler and end the dream.
- Slide the carts to clear a path and move the sink (row 3) out through the exit on the right. One order that works: clear the lower carts and the long column-3 cart downward, slide the sink right two spaces, move the column-2 and top-row carts out of the way, raise the right-hand carts, then slide the sink to the exit.
- The sprinkler briefly puts the fire out before it re-ignites; the dream ends and Ruth leaves the office calmer. Chapter 2 unlocks.
The Darkened Lighthouse: dream entry
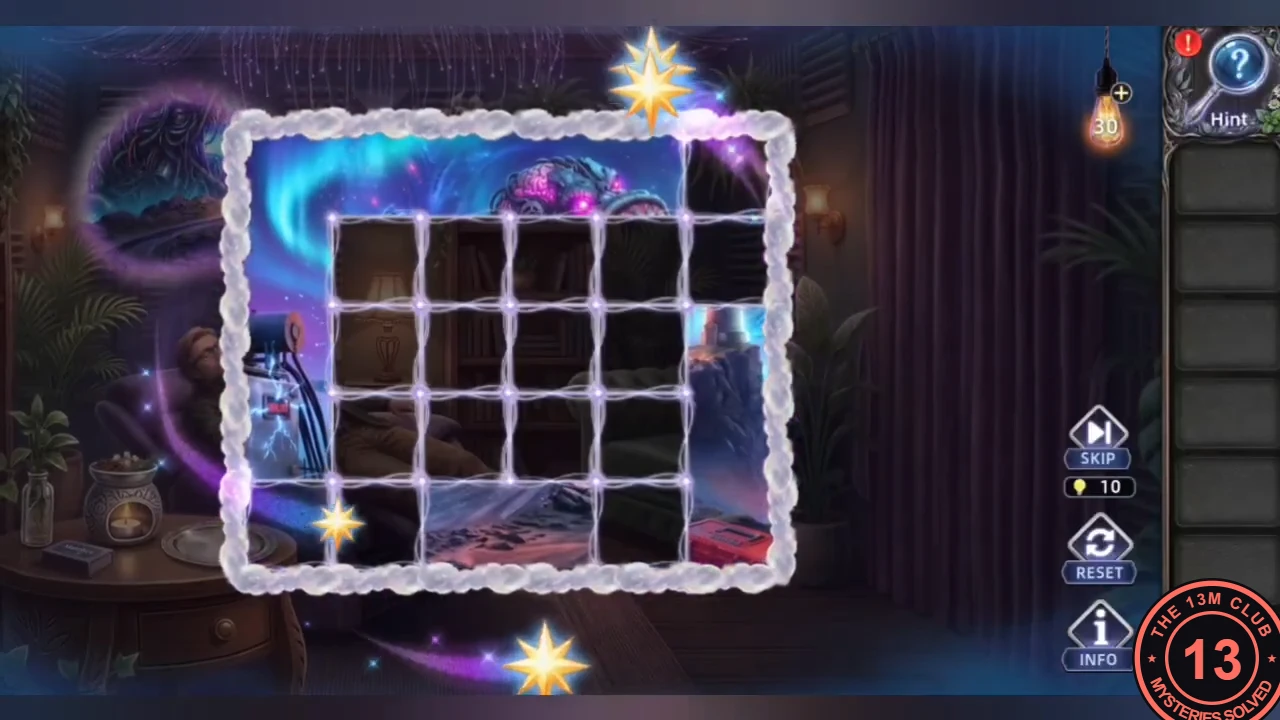
Paul, an electrician who is afraid of switches, is the second patient. His dream opens the same way as Ruth's.
- Start Chapter 2. Paul, an electrician afraid of switches, is the patient. Use the treatment room as before to open the dream.
- Solve the dream-entry light grid. Tapping a dark tile lights it, and the light runs along its row and column in all four directions until it reaches a tile that is already lit or the edge of the board. Light every tile before the move counter runs out; if you go wrong, press RESET. Count rows from the top and columns from the left. This board has 6 columns and 5 rows. Tap row 1 column 1, row 5 column 2, row 2 column 6, row 3 column 3, then row 4 column 5. The layout and these taps were the same in a second playthrough.
The cliff: date lock and transformer
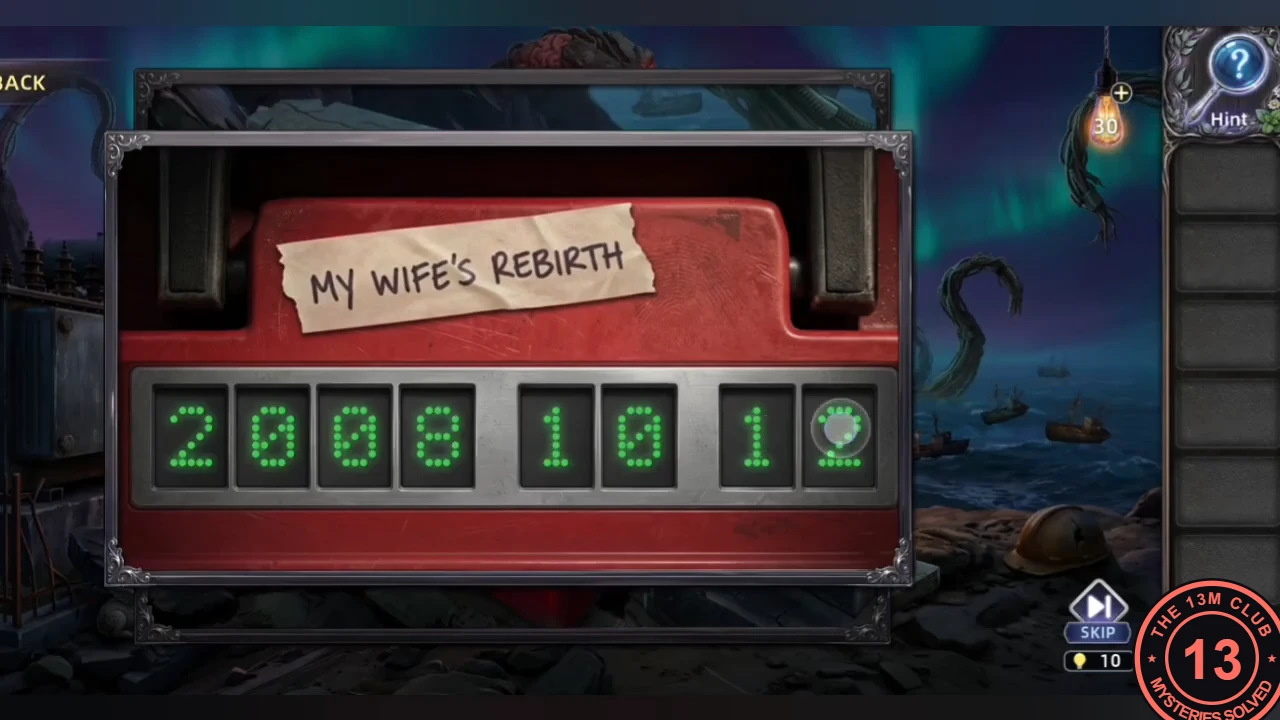
On the cliff, open the red toolbox with its date lock for the insulated tools, then reset the transformer switch to NORMAL.
- Open the transformer box on the left; read the clipped note (the surgery succeeded three days after the fire) and take the Steel Bar.
- Use the Steel Bar on the stone slab "MY CAREER BURIED HERE WITH FIRE". Its back is carved 2008.10.13.
- The toolbox lock asks for MY WIFE'S REBIRTH: three days after the fire. Enter 2008 10 16 and take the Insulated Wrench and Insulated Gloves.CODE2008 10 16
- Use the Insulated Wrench on the four bolts of the transformer panel. Then use the Insulated Gloves on the high-voltage switch to set it to NORMAL.
The lighthouse box: pipe rotation
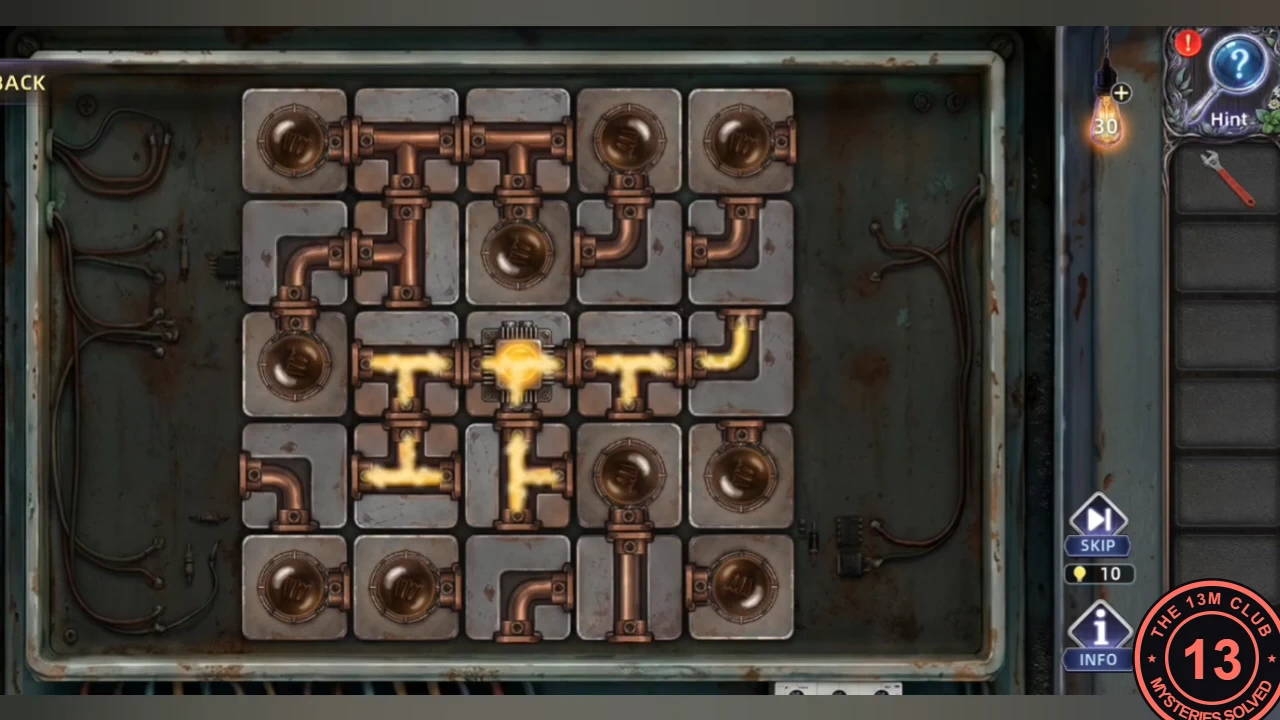
Power the lighthouse through the electrical box at its base, then search the docks.
- Open the electrical box at the base of the lighthouse and rotate the tiles until every pipe carries power.
- At the docks, smash the top-hat figure's sturdy chest lock with the Insulated Wrench and take the wedding snow globe.
The hospital room: pawning everything
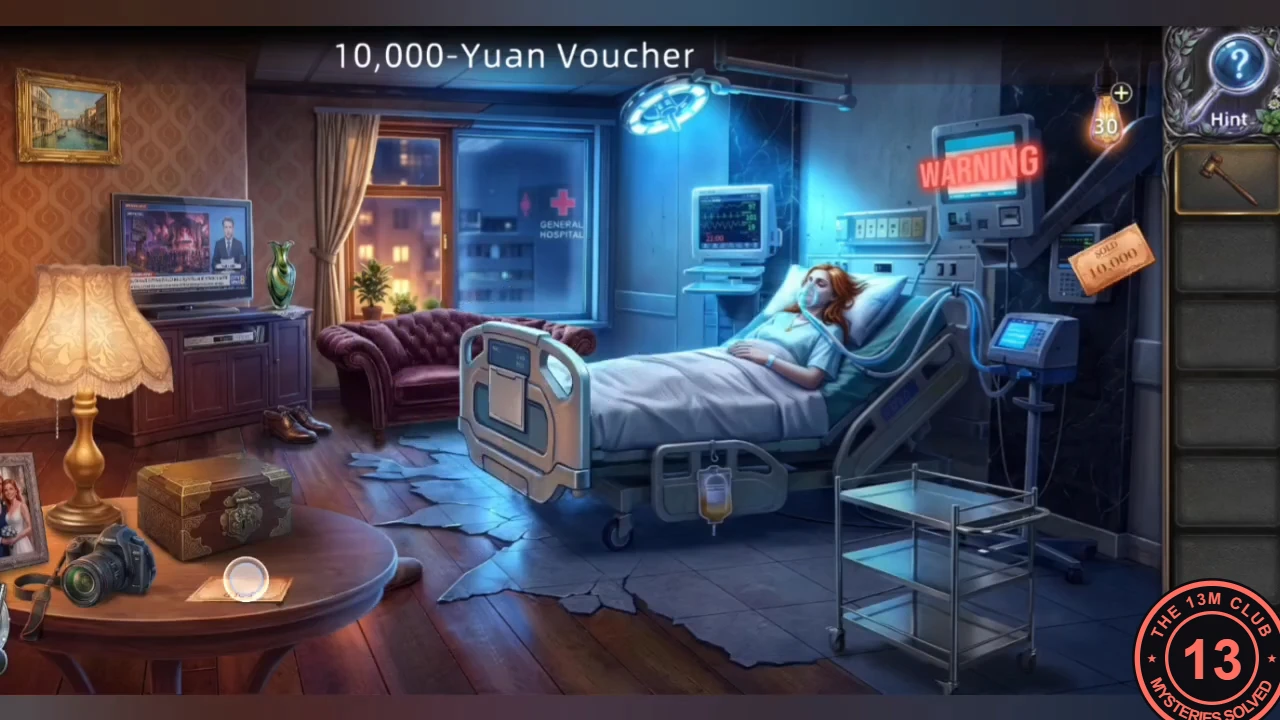
In Paul's hospital room, everything can be pawned for vouchers with the Pawnshop Gavel. The fleshy safe in the wall is the goal.
- Take the Pawnshop Gavel from the medical cart by the bed. Tap it on each item to turn it into vouchers, including the snow globe. Paul refuses to sell the wedding photo; leave it.
- Pawning the old radio on the TV cabinet uncovers a Copper Key underneath it: take the Copper Key. Use it on the jewellery box on the round table, then use the gavel on the necklace inside too (Paul hesitates, but it is pawned).
- Insert the vouchers into the hospital payment terminal. Then use the gavel on Paul's reflection and take the Cross-Shaped Electronic Key from the bloody paper.
- Put the key into the cross-shaped slot of the fleshy safe in the wall.
The Electrician's Code circuit
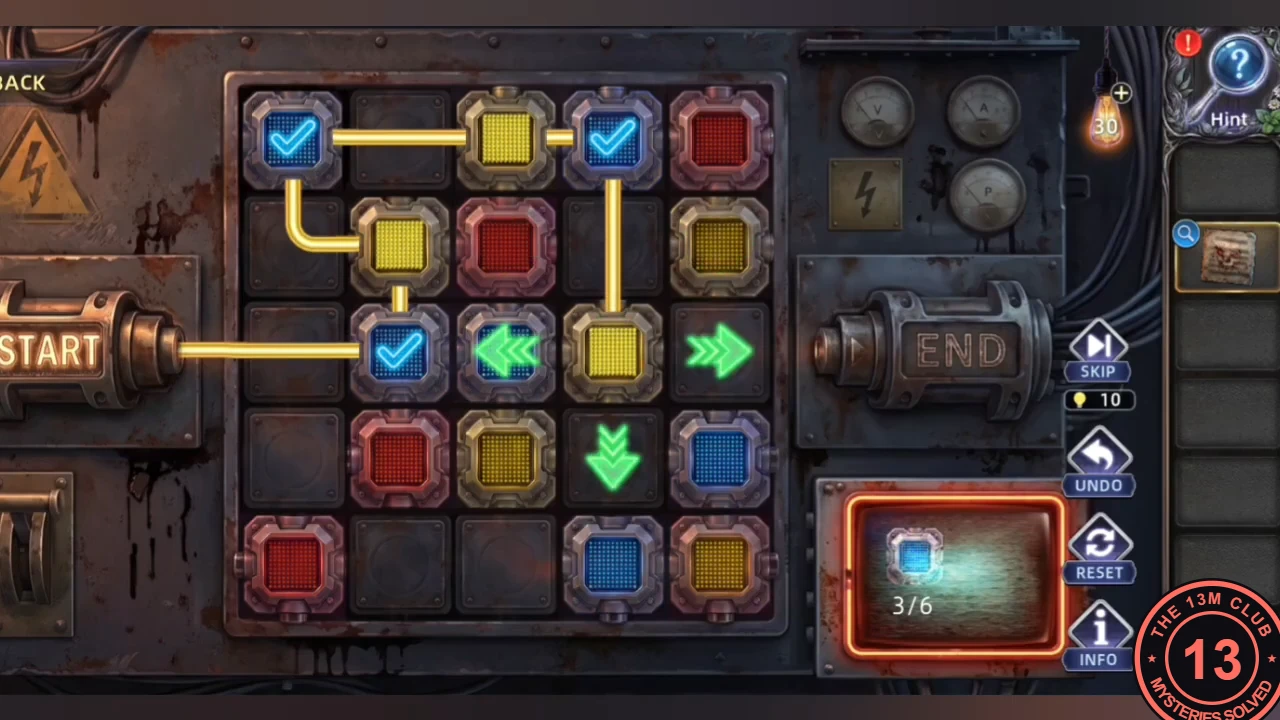
The circuit board follows the Electrician's Code. Draw one wire path from START to END.
- Follow the Electrician's Code: pass through every blue neutral wire, never touch a red live wire, and use yellow-green ground wires only as a route when needed. Draw a path from START to END that covers all six blue wires.
- Insert the Unmarked Black Card into the terminal. Molly wakes and the monster scene follows.
The door maze
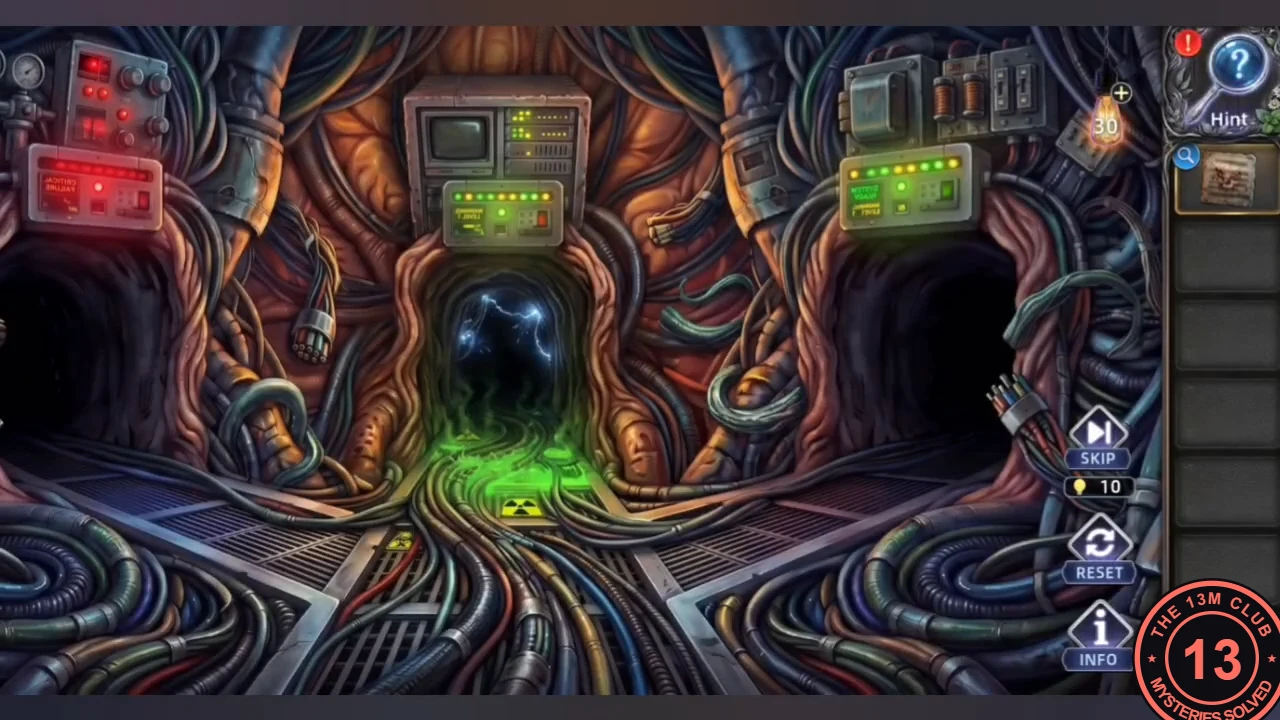
Six rooms with three doors each. The Electrician's Code also decides which door to take.
- Pass through six rooms of three doors using the same code: choose the blue door; if none is blue, take the yellow-green one; never choose red. In the playthrough this guide follows, that gave centre, right, right, centre, centre, left; if your doors are coloured differently, go by the colours. The third room has yellow-green panels over both the centre and the right door; the playthrough took the right door, whose panel has no red light (the centre panel has a red light and its doorway sparks), and that was correct.
- Paul confesses he was paid to disable the mall's fire alarm. Collect the dream core and return to the office. Chapter 3 unlocks.