LAST CHANCE · CHAPTER 4
Escape From Dungeon: the triangle-plate chest
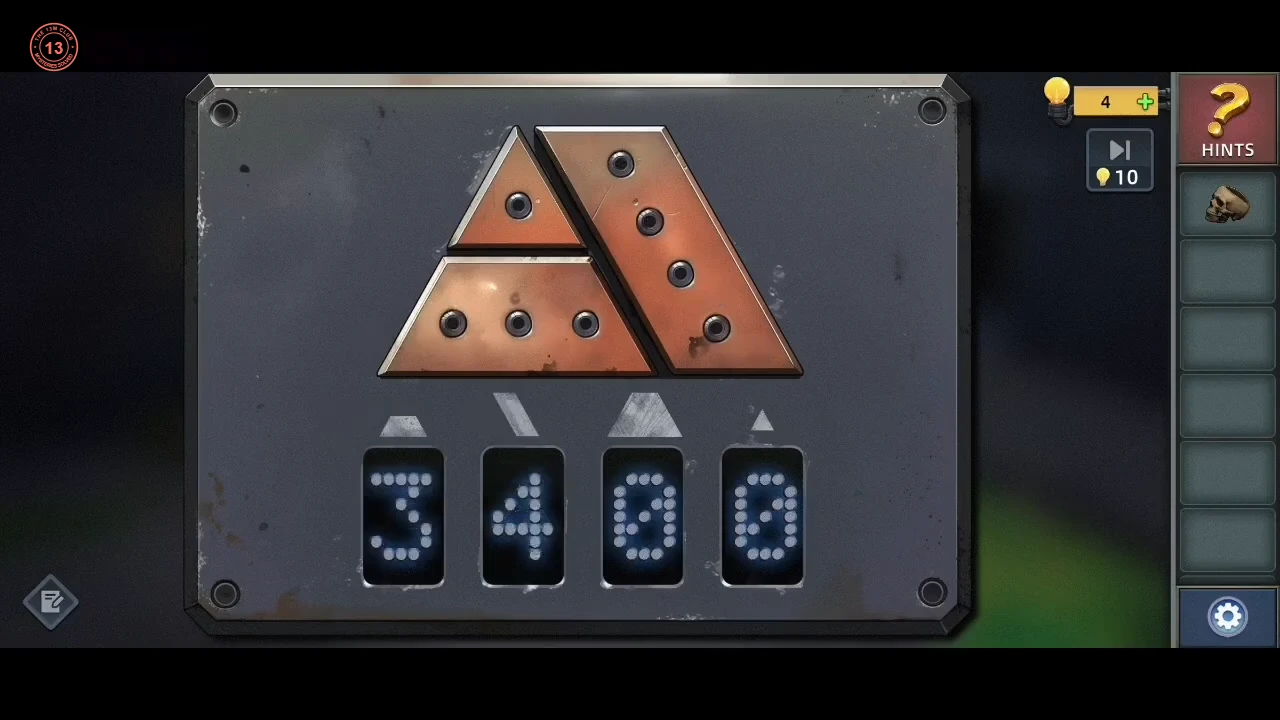
Chapter 4: Ethan wakes in a dungeon cell beside an acid channel. A chest with a triangle-plate lock holds the first tool.
- Ethan wakes in a cell beside an acid channel. Pick up the human Skull lying on the floor just in front of the floor lever. The chest has a triangle-plate lock with four displays, each marked with a plate shape. The first, second and fourth shapes are the bottom bar (3 bolts), the slanted right-hand piece (4 bolts) and the small top triangle (1 bolt). The third, larger shape takes 8, the total number of bolts on the whole plate. Enter 3 4 8 1 and take the Long Hook.CODE3481
LAST CHANCE · CHAPTER 4
The acid lever and the bone relief door
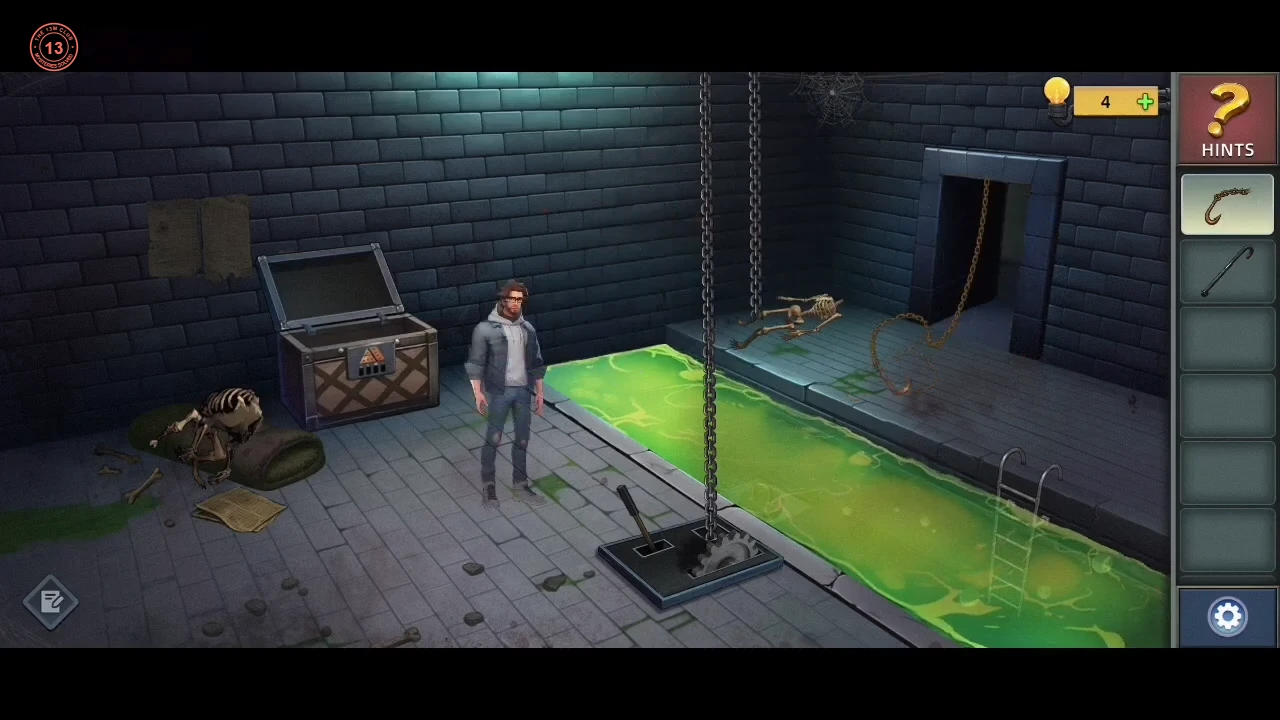
Cross the acid on the chain, then set the skulls on the relief door as its verse describes.
- Use the Long Hook on the acid channel: Ethan only sees bones floating in the acid. Then use the human Skull from the floor on the acid to scoop up the Acid (the skull now full of acid). Pour the Acid on the rusted gear of the floor lever and pull the lever. Then select the Long Hook again and use it on the chain hanging over the acid to hook it within reach: Ethan grabs it and swings across to the far ledge, where the door shuts behind him. Keep the empty human skull.
- On the far ledge, use the Long Hook on the skeleton hanging above it: it drops onto the ledge, and you can take the Sheep Skull from it. Tap the hanging chain to swing back to the cell side. From the bone pile beside the chest take the Double Hook Chain and the Wolf Skull, then swing across again. The relief door shows a standing figure holding out a dish, a kneeling figure holding up a dish, and the verse "To be a wolf, forge bonds of bone. If desire falters, you'll be a sheep alone." It has three empty round recesses. Put the human skull in the kneeling figure's dish, the Sheep Skull in the standing figure's dish and the Wolf Skull on the standing figure's head. An iron ring drops out under the dishes. Hook the Double Hook Chain onto the ring to get the Other End of Chain. While still on the far ledge, use the Other End of Chain on the hanging chain, then swing back across on it. The pull drags the relief door open and the acid drains from the channel, leaving the ladder clear.
LAST CHANCE · CHAPTER 4
The round acid maze
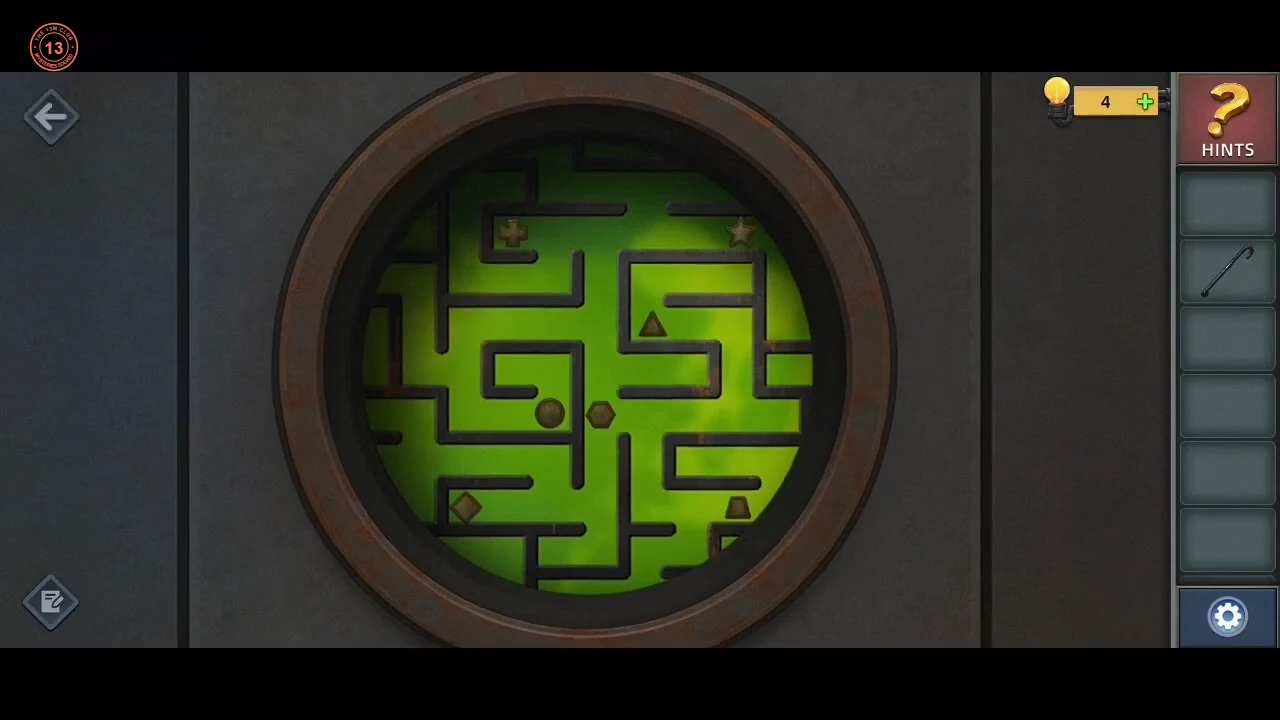
Use the symbol paths of the round acid maze to set the four-digit code panel.
- Beyond the drained channel are a round acid maze and a code panel. The maze is a fixed picture with seven symbols: cross, star, triangle, circle, hexagon, diamond and trapezoid. Each of the panel's four displays is labelled with a pair of symbols: triangle → trapezoid, cross → hexagon, circle → diamond and triangle → star. In the recording, the player traced the route from the first symbol to the second through the maze for each pair, then set that display. The accepted code is 2 7 9 6 (an entry of 2795 was not accepted; the last display had to go up to 6 before the panel solved). The recording does not make the counting rule clear, so if your panel shows the same four pairs, simply enter 2796.CODE2796
LAST CHANCE · CHAPTER 4
The labyrinth and the monster
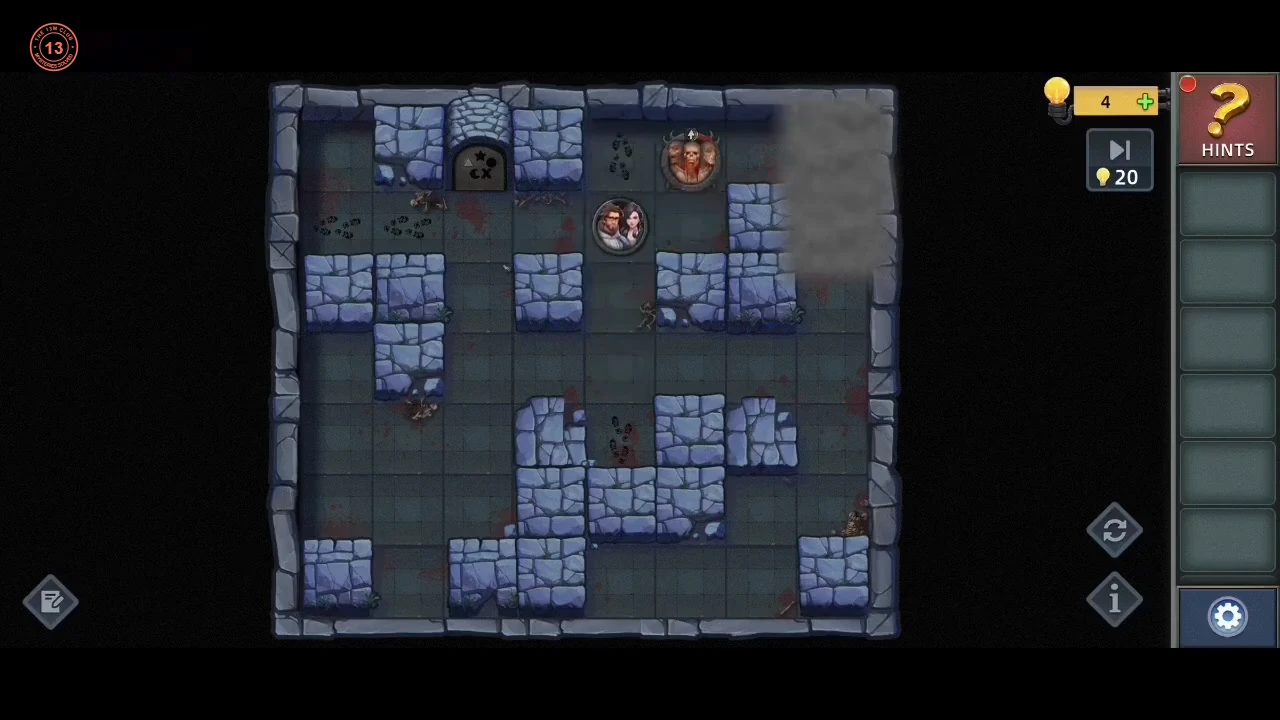
Guide Ethan and Lin through the dark labyrinth and collect the three door keys while a monster follows your footprints.
- Lin leads Ethan into a dark labyrinth seen from above. The game says: "Find the exit in the labyrinth and collect the keys required to unlock it." and "The monster will track you by your footprints." Ethan and Lin move as one token. Tap a highlighted neighbouring tile to step one square, and the grey fog clears around the tiles you reach. The exit is the arched door in the top wall, and its plate shows the three keys it needs: a star, a crescent moon and an X. In the playthrough this guide follows, the X lay against the left wall near the top, the moon lower down on the left side, and the star near the top-right corner. Walk onto each symbol to collect it. The monster follows the trail of footprints you leave rather than heading straight for you, so keep moving away from it. Use loops around the stone blocks to make it trail behind you, and never step next to it into a dead end. In the playthrough this guide follows, it started near the bottom of the board. When the door plate has all three symbols, step into the door.
LAST CHANCE · CHAPTER 4
The crypt coffin lock
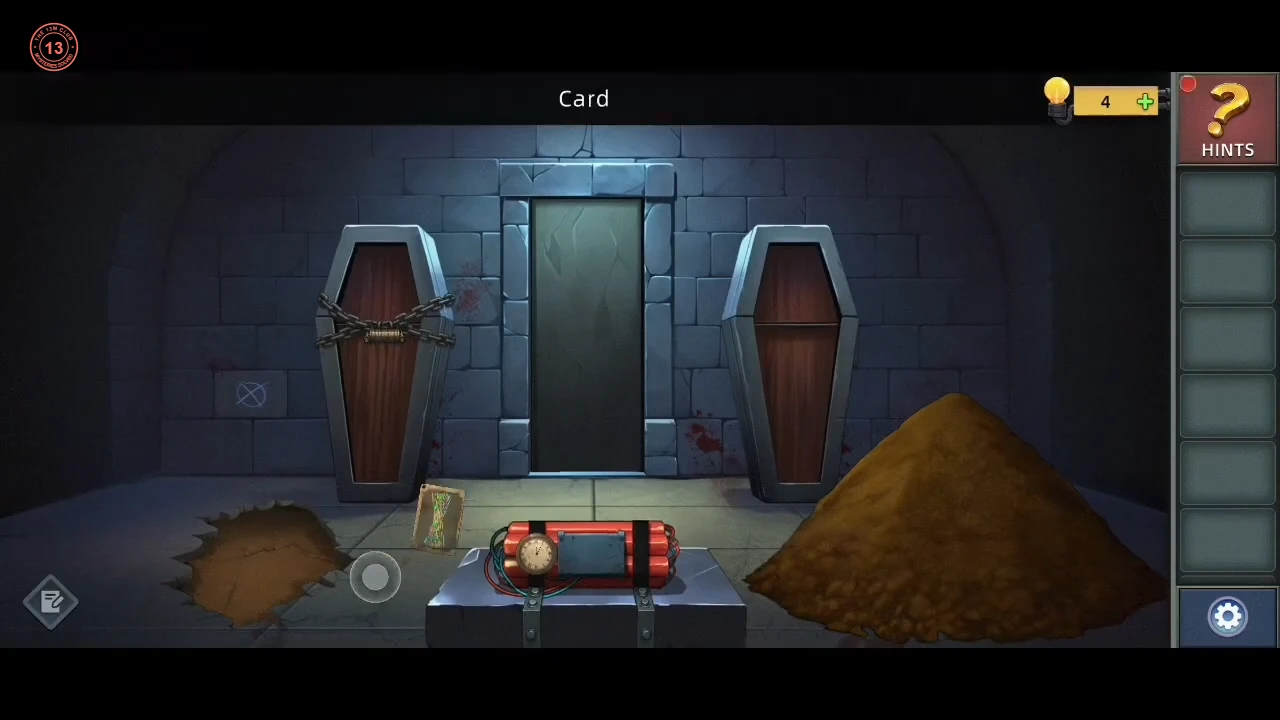
In the crypt, open the left coffin's wheel lock for the Shovel.
- Open the right wooden coffin first: its cracked inner lid holds the Screwdriver; take it. Set the left coffin's four-wheel lock so the middle row reads 9 5 7 2, and take the Shovel. The clue is the Card with tangled pick-up sticks in yellow, green, red and blue. This guide could not work out how the card gives 9572, but two separate playthroughs opened the lock with the same code, so it appears to be fixed.CODE9572
LAST CHANCE · CHAPTER 4
The four Jewels and the jewel disc
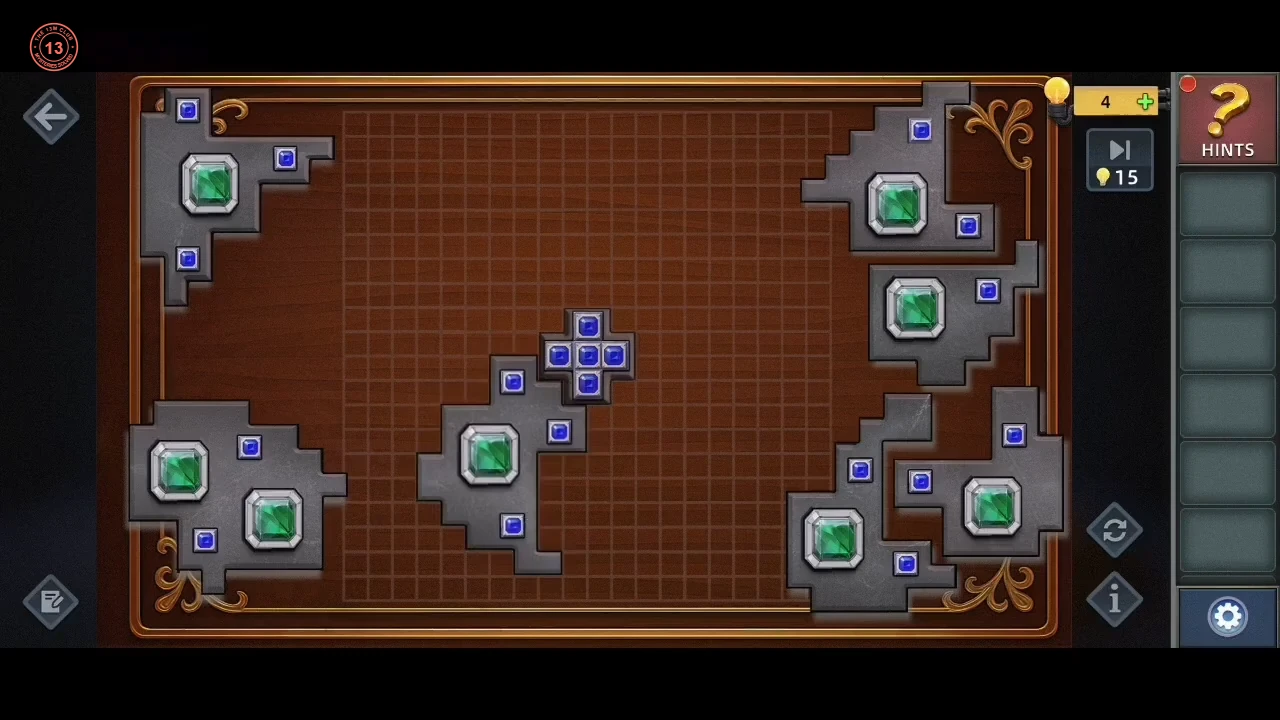
Find the four Jewels around the crypt and complete the jewel disc for the Wire cutter.
- Collect the four Jewels. The first is in the small niche in the wall to the left of the left coffin; it was picked up before the coffin lock. Unscrew the bomb cover with the Screwdriver and take the Key. Use the Key on the small box at the skeleton's feet in the opened left coffin for the second Jewel. Dig the dirt pile on the right with the Shovel for the third. Pry open the right coffin with the Shovel to find a knight in armour and take the Pickaxe. Break up the rubble patch on the floor at the left with the Pickaxe for the fourth Jewel. Then tap the board between the coffins: it is a grid with a fixed blue cross of studs in the middle. Use the Jewels on it to lay out grey jewel pieces at its edges, each with green gems and small blue studs. Drag the pieces in one at a time and lock them edge to edge around the blue cross. The finished shape is a single round disc with eight green gems and no gaps, centred on the cross. Start with the pieces that have a notch matching an arm of the cross, then fill the outer ring. If the outline turns lopsided, drag the edge pieces off and try them on the opposite side. The picture under this step shows the finished disc. Take the Wire cutter.
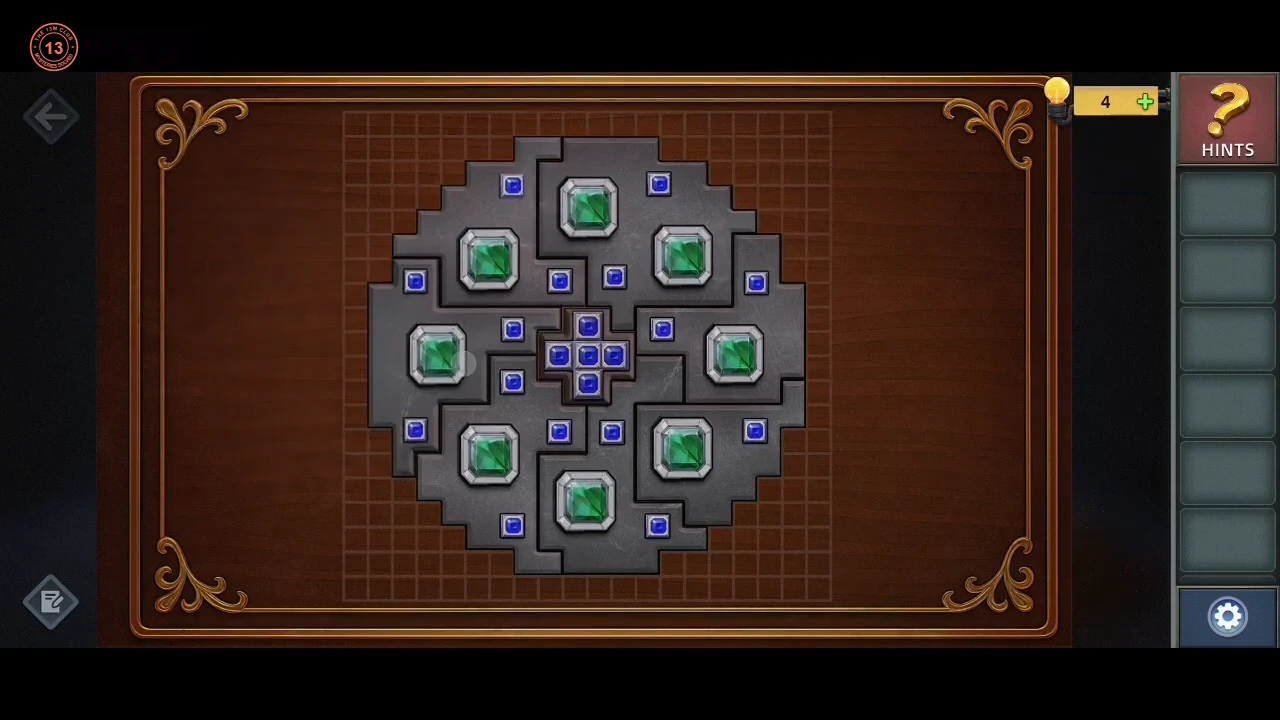
The finished jewel disc.
LAST CHANCE · CHAPTER 4
The bomb wires
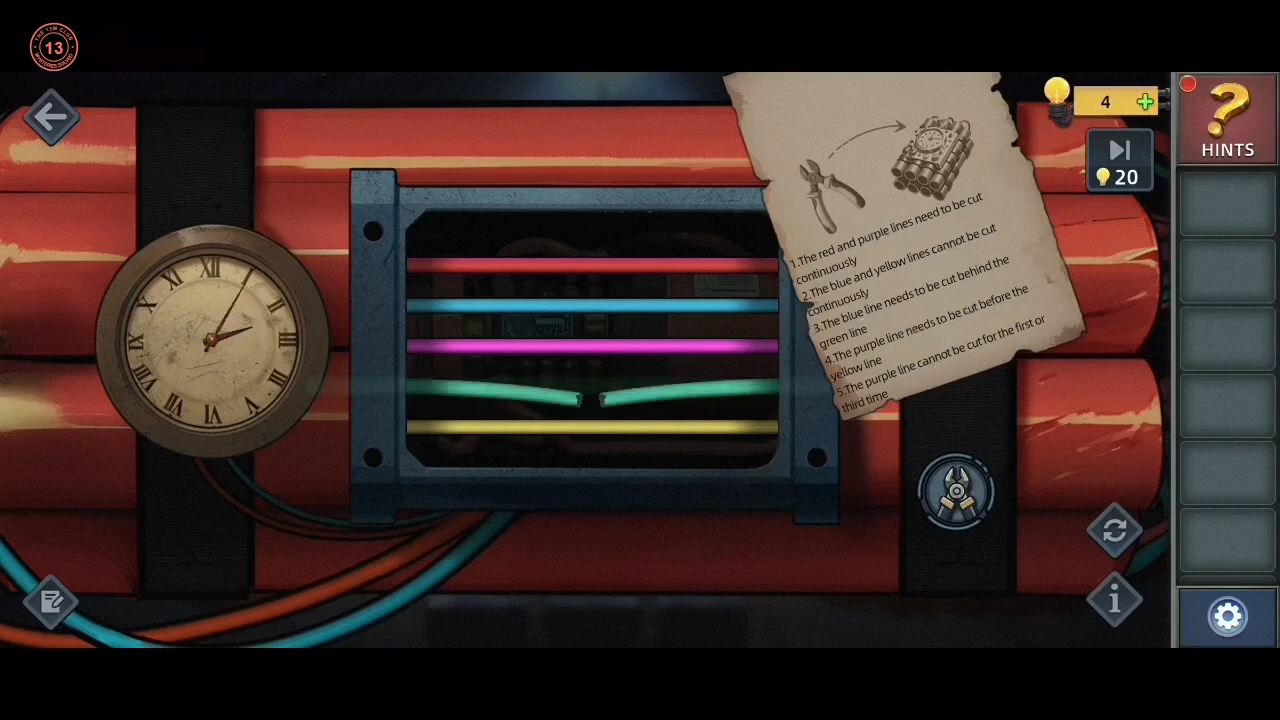
Cut the bomb wires in the order the manual's rules allow.
- Read the Bomb Disposal Manual: cut red and purple one after the other; never cut blue and yellow one after the other; cut blue after green; cut purple before yellow; purple must not be cut first or third. Cut green, blue, red, purple, yellow.CODEGreen, Blue, Red, Purple, Yellow
LAST CHANCE · CHAPTER 4
The elevator shaft
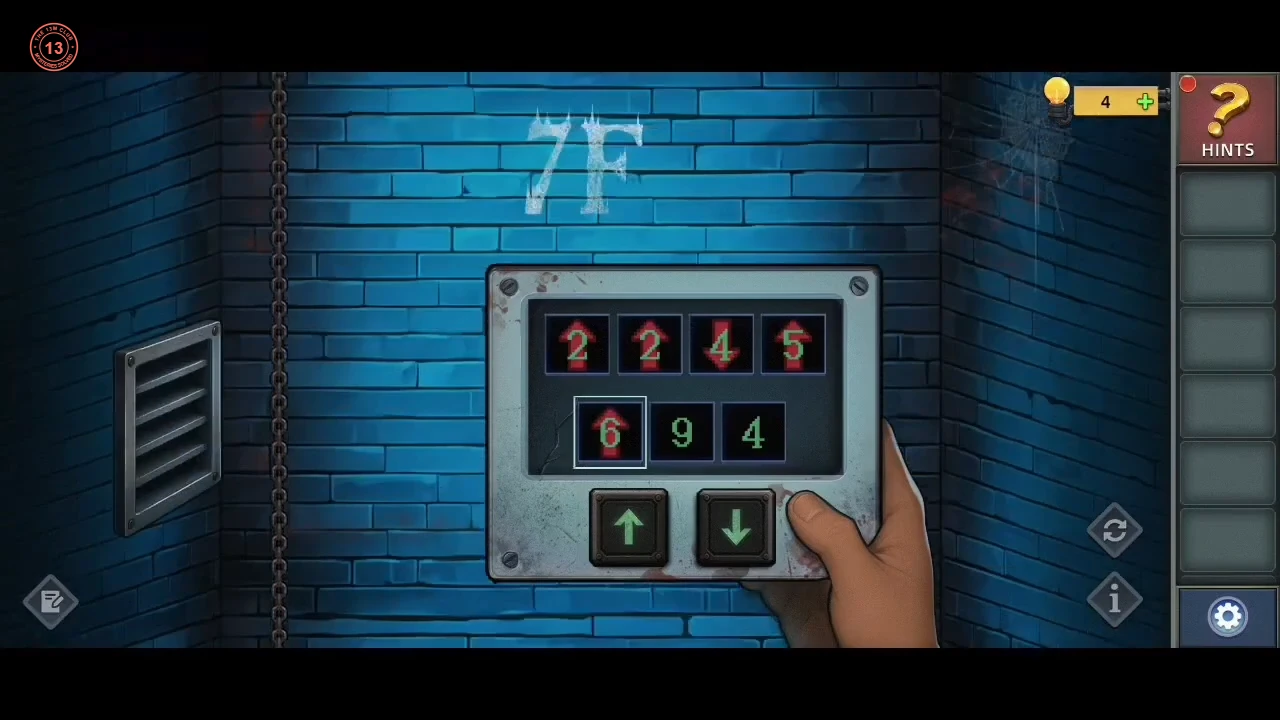
Climb the elevator shaft with the number buttons without dropping into the acid.
- In the elevator shaft, each number button (2, 2, 4, 5, 6, 9, 4) can be used once, followed by up or down. Going below 0F means falling into acid. A working sequence is +2, +2, −4, +5, +6 (11F, where Lin is chained), −9, +4. At 6F Lin climbs over from the vent.CODE+2 +2 −4 +5 +6 −9 +4