Crash Site
Chapter 2 opens beside the crashed police car near the park. Victor finds his own face on a Tarot card showing this very bend in the road. First repair the signpost, then get into the car.
- Open the bronze statue of two children on the bench and take the Goldfish Lake sign (Pointers 1 of 2).
- Open the tree with the signpost (Dead Hill / Salem Harbor). Pop the Bottle of Champagne so the cork knocks down the Measuring Tape caught above the signs, then take the Measuring Tape.
- Open the car's driver-side window. Wedge the Ball into the gap and slide the Measuring Tape down to pull the latch; the door opens. Take My Coat, then open the hood and take the Dead Battery.
- Open the electrical cabinet behind the barbed-wire fence. Lay My Coat over the wire and take the Eden Park sign (Pointers 2 of 2). Put the Dead Battery down by the sparking wires — it cannot be charged without proper equipment yet, so it stays there for now.
- Open the signpost again and add the Pointers. The signpost puzzle starts.
Signpost
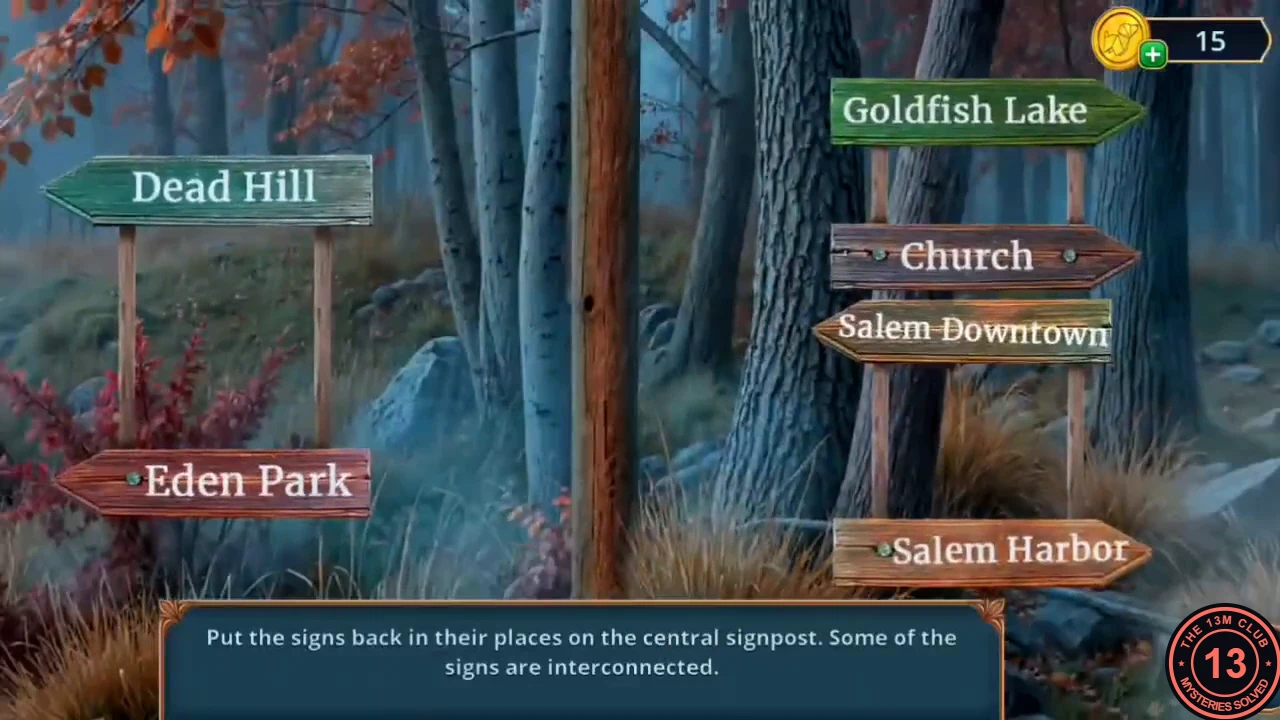
The instruction reads: put the signs back in their places on the central signpost; some of the signs are connected. The six signs work in linked pairs that move together: Dead Hill with Eden Park, Salem Downtown with Salem Harbor, and Goldfish Lake with Church.
- Place the Dead Hill / Eden Park pair first, with Dead Hill high on the post and Eden Park at the bottom. Next set the Salem Downtown / Salem Harbor pair so that Salem Downtown sits above Dead Hill. Finally fit the Goldfish Lake / Church pair below Dead Hill. The finished order from top to bottom is Salem Downtown, Dead Hill, Goldfish Lake, Salem Harbor, Church, Eden Park.CODESalem Downtown, Dead Hill, Goldfish Lake, Salem Harbor, Church, Eden Park
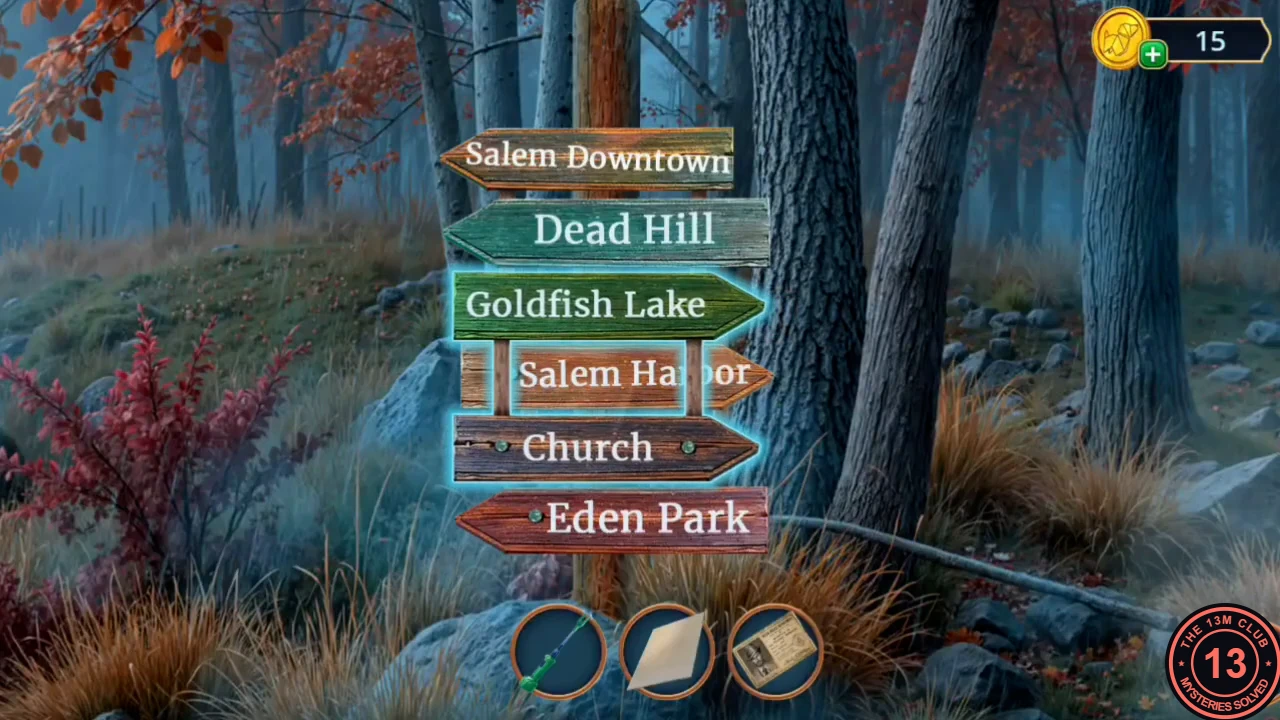
Solved: the finished order from top to bottom.
The Brighton House Door
Your new task is to talk to the family. The intercom at the Brighton house has no microphone, so nobody can hear you yet.
- Open the water pump by the fence and take the Empty Watering Can and the Clipper.
- Open the front door close-up. Mercury has spilled under the broken window; gather it with the Thick Paper Sheet from Chapter 1. Then take the Masquerade Mustache from the window.
- Open the drain grate beside the water pump and use the Masquerade Mustache to hook the Microphone out between the bars.
- Fit the Microphone into the intercom beside the door. A battery-grid puzzle starts.
Intercom Battery Grid
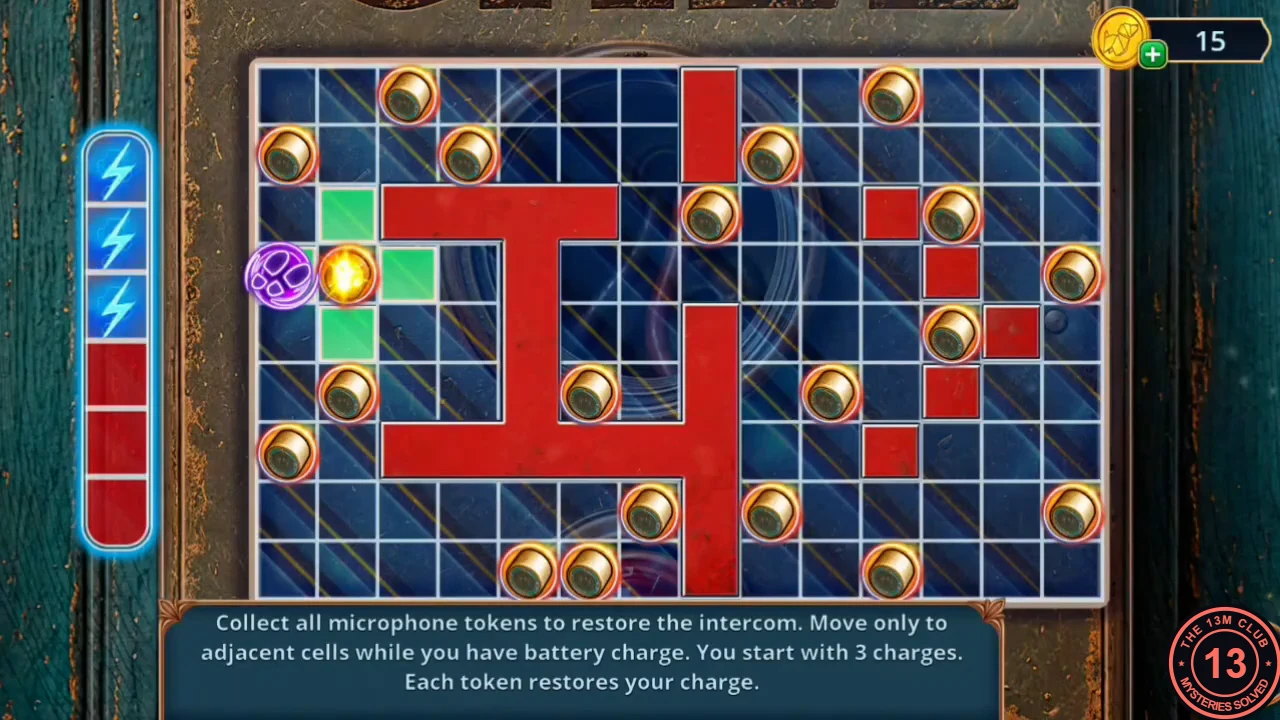
'Collect all microphone tokens to restore the intercom. Move only to adjacent cells while you have battery charge. You start with 3 charges. Each token restores your charge.' The board is 14 columns by 9 rows with red wall cells; there are 20 tokens. Moves may be diagonal. Cells you have walked on stay lit, and you can tap back onto lit cells to return to them. Below, columns are lettered A-N from left to right and rows numbered 1-9 from top to bottom; you start at A4 on the left edge.
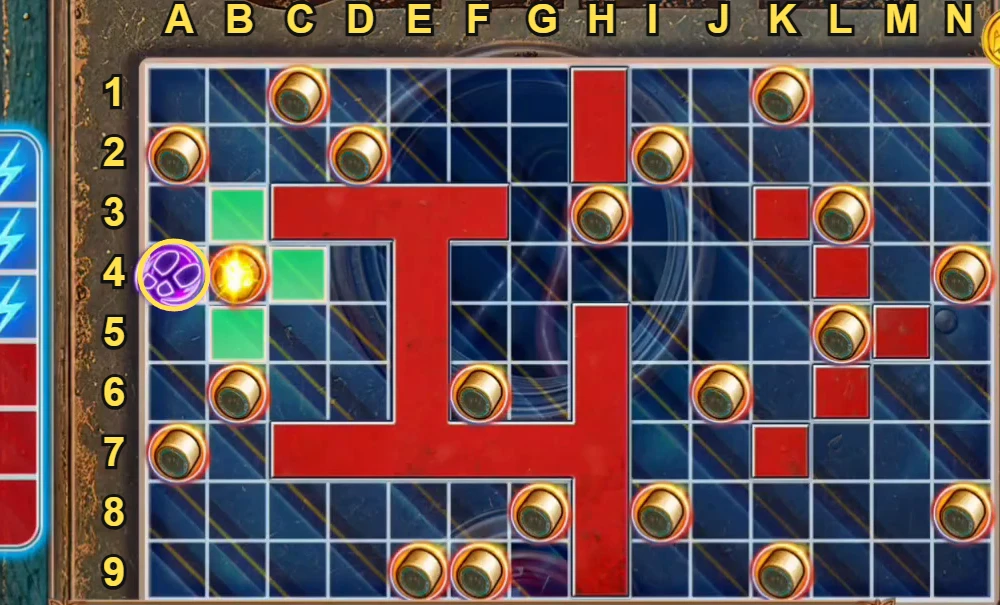
- Follow this route (tokens in brackets). Bottom-left: B4 [token], B5, B6 [token], B7, A7 [token], B7, B8, C8, D8, E8, E9 [token], F9 [token], G9, G8 [token]. Top-left: tap B3 next to your first token, then B2, A2 [token], B2, C2, C1 [token], D1, D2 [token], E2, F2, G2, G3, H3 [token], G4, G5, G6, F6 [token], G5, H4, I3, I2 [token]. Middle and bottom-right: J2, J3, J4, J5, J6 [token], K6, K5, L5 [token], K6, J7, J8, I8 [token], J8, J9, K9 [token], L9, M9, N9, N8 [token]. Top-right: tap J2 again, then K2, K1 [token], L2, L3 [token], M3, M4, N4 [last token]. The intercom comes back on.
Porsha Brighton's Dining Room
The intercom answers and you are invited in. Talk to Porsha Brighton, the victim's widow.
- Decision: Porsha mentions her husband's workshop. Choose 'Agree to inspect the workshop.' for +1 point; this also opens Lionel's Workshop, the Chapter 2 Bonus Location. 'Do not inspect the workshop.' gives 0. Your new task is to examine the house.
- Open the fireplace. Cut the wire holding the grate with the Clipper and take the Silver Dish Handle from the coals. Victor notes the coals are hot enough to melt metal if you had a mold — remember this for later.
- Open the covered dish on the table. Take the Metal Clamps and the Hairband lying on the lid, then fit the Silver Dish Handle and lift the lid. A search starts.
Dinner Table
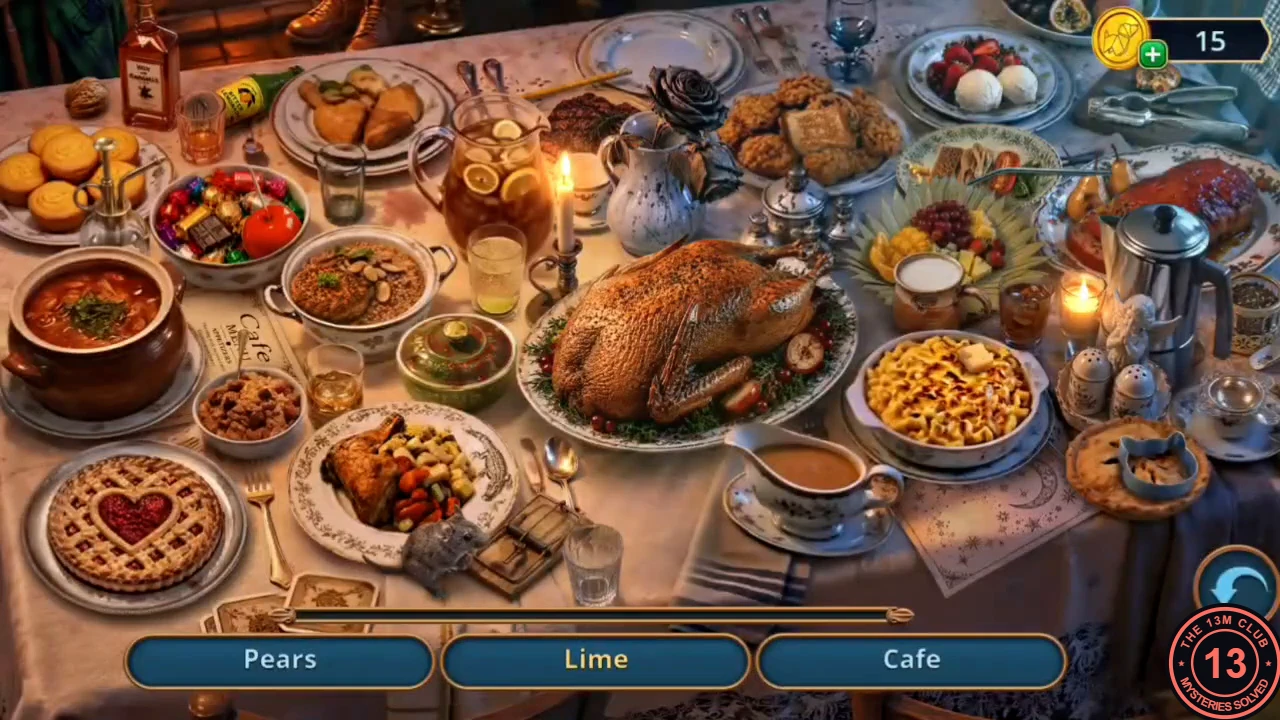
A list search with three names shown at a time. One entry needs an extra action first; everything else is a single tap. The reward is the Canape.
- Find the twelve objects. Lime = the lime slice in the iced-tea glass next to the pitcher; Pears = the pear on the fruit platter (top right); Cafe = the 'Cafe' menu card under the soup pot (left); Cat = the cat-shaped cookie cutter on the pie at the right; Heart = the heart-lattice pie (lower left); Petal = the red rose in the white jug; Caiman = the crocodile drawn on the rim of the chicken plate (lower middle); Angel = the small white angel figurine in front of the coffee pot; Stain = the red stain on the tablecloth left of the iced-tea pitcher; Palm Leaves = the palm-leaf fan under the fruit platter; Meat = the grilled steak behind the iced-tea pitcher. Nighttime: tapping the star-patterned napkin by the pie only says 'I have to finish the drawing.' Take the pencil lying on the steak behind the pitcher and drag it onto the napkin to complete the moons, then tap the napkin. Completing the list gives the Canape.
- Give the Canape to the Pomeranian on the rocking chair (this earns the GUARD achievement). Read Lionel's note that was underneath the dog — he was investigating the cards on his own — and take the Bunch of Keys. The keys are useful, but not in their current form.
Lionel's Workshop (First Visit)
Lionel's Workshop is the Chapter 2 Bonus Location, available if you agreed to inspect it. Enter through the doorway at the back right of the Brighton dining room. Your task is to find out what Lionel discovered. The workshop cannot be finished on this first visit because the vise is missing its handle. The countdown badge next to the coin counter is a shop offer, not a time limit.
- Open the typewriter beside the teddy bear. Lionel's note lists The Moon (deception, illusion), The Tower (a sudden end, destruction) and The Hanged Man (sacrifice, a turning point). The typewriter is missing parts: you need three Typewriter Keys.
- Open the window sill with the bird's nest and the red box. Read the card inviting Porsha on a first date — again — and take the Typewriter Keys (1 of 3) from the box.
- Open the vise on the workbench at the right and take the Aquarium Net from it. The box beside it is a puzzle with one piece missing; it comes back later.
- Return to the window sill and use the Aquarium Net on the bird's nest to fish out the Comb.
- Open the boarded-up shelf (middle right) and run the Comb along the pins holding the board; the board falls away. Read Lionel's note about Porsha and take the Lovers card behind it — this is a story card, not one of the collectible Tarot cards. From the lower shelf take the Bent Figurine, a small gold horse figurine (its name is not shown; it is used later on the workshop toolbox) and the Wind-Up Key.
- Wind the teddy bear's red music box with the Wind-Up Key. Read the wedding-anniversary card to Porsha and take the Pearl Necklace.
- Put the Bent Figurine into the vise on the workbench. The vise has no handle yet, so leave the workshop for now.
Victim's Study
Back in the Brightons' living room, the glass china cabinet holds a photo album of Lionel and Porsha, but its door has no handle — you will need to find something suitable. Go through to the Victim's Study. The nightstand by the sofa has a dial, so it seems to be a safe as well.
- Open the bookcase doors to the right of the desk. Take the Craft Paper tied around the handles, the Taurus Pendant and the first Gnomes with Hammers figure. The bookcase is locked and has no key, so use the Bunch of Keys on the keyhole. A key-wheel lock opens.
Bookcase Key Wheel
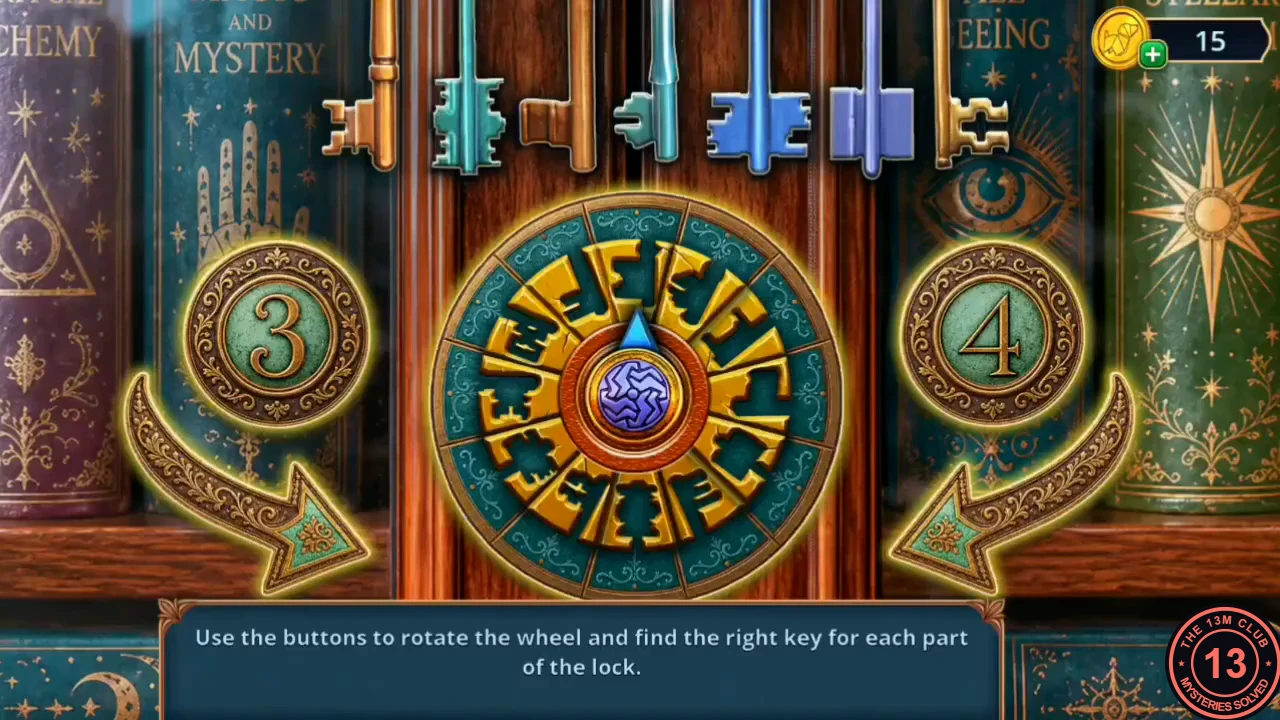
The instruction reads: use the buttons to rotate the wheel and find the right key for each part of the lock. Tap a number medallion to choose the step size (3 or 4 segments), then tap an arrow: the left arrow turns the pointer anticlockwise and the right arrow turns it clockwise. The pointer starts at the top. The seven keys above the wheel light up one at a time, left to right, each time the pointer stops on the correct segment.
- Key 1: 3 + left arrow. Key 2: 3 + left arrow. Key 3: 3 + left arrow. Key 4: 3 + left arrow twice, then 4 + right arrow. Key 5: 3 + left arrow three times, then 4 + right arrow. Key 6: 4 + right arrow twice. Key 7: 4 + right arrow twice, 3 + left arrow three times, then 4 + right arrow. The bookcase opens.
- Take the Projector Bulb and the Moon Bookmark from the open bookcase. One book is still missing from the shelf; it is found later.
Drafting Table and Alarm Clock
The film projector in the study clearly needs repairing; you will come back to it.
- Open the drafting table on the right. One ruler is missing and the other is screwed down. Use the Moon Bookmark as a screwdriver on the ruler and take the second gnome (Gnomes with Hammers 2 of 2).
- Open the alarm clock on the nightstand and place the Gnomes with Hammers on either side of it. The gnome puzzle starts.
Gnomes with Hammers
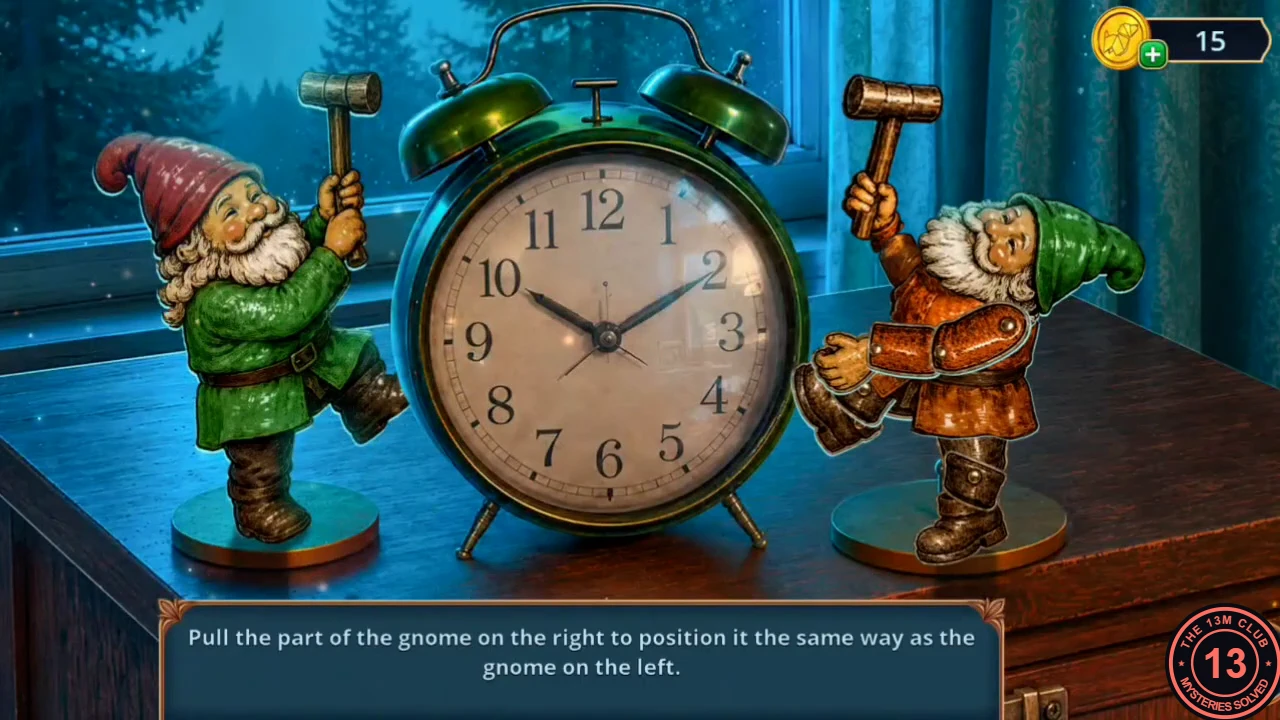
The instruction reads: pull the parts of the gnome on the right to position it the same way as the gnome on the left. Drag the right gnome's head, arms and legs until it copies the green gnome on the left.
- The target pose for the right gnome: head tipped forward and down; both hands together on the handle, holding the hammer upright beside his face; one foot kicked back behind him toward the clock while the other leg stays straight on the base. When the pose matches, the clock opens.
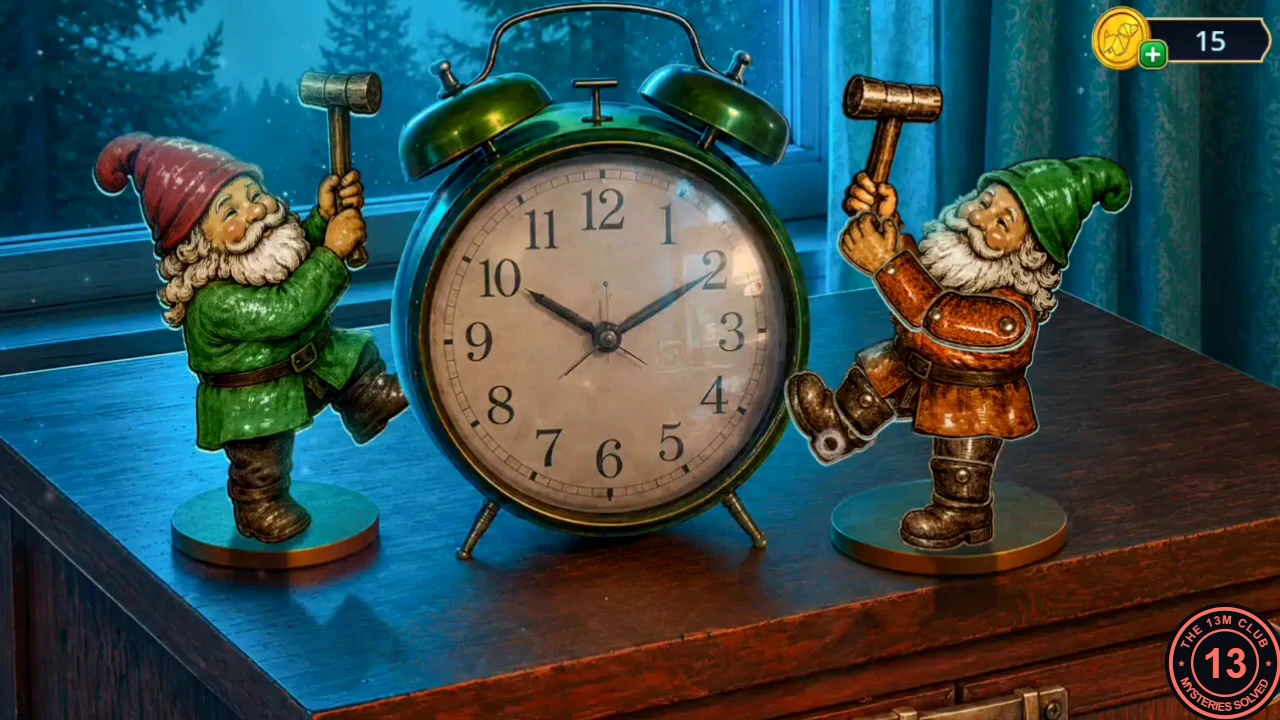
Solved: the right gnome matches the left gnome's pose. - Read Lionel's note inside the open clock: he wanted to meet Sebille and planned to visit Dakota and Sebille's shop. Take the Clock Face, the Reel with Torn Film and the Construction Tape Piece.
- Porsha comes in. Decision: 'Ask more about cards.' costs 60 coins and gives +2 points; 'Be skeptical about Tarot.' is free and gives 0. Porsha then hands you Lionel's Briefcase.