Mold, Daisy and the Bouquet
The living-room fireplace has three slots for casting: the metal to melt, a mold, and something to lift the hot mold with.
- Open the fireplace in the Brightons' living room and put the Broken Toy Soldier in the first slot as the metal to melt. (The Old Banknote does not work here.)
- In Sebille and Dakota's shop, open the drawer under the counter. Take the Daisy and the Mold (a square relief plate). The torn film strips on the counter cannot be used yet; they need to be joined back together.
- Open the Craft Paper and add the Daisy as the fourth flower. The paper wraps into a Bouquet of Flowers (this earns the FOR ROMANCE achievement).
- On Mountain Road, open the bronze children on the bench and put the Bouquet of Flowers in the boy's hand. A compartment opens in the bench: take the Coil, the Monocle and the Sewing Kit.
- Back in the living room, open the cushion on the rocking chair. Unpick its seam with the Sewing Kit (you keep the kit) and take the Potholder. The business card underneath is Lieutenant Hawkins's, with the number NEwtown 3-2456.
- Open the fireplace again. Put the Mold in the second slot and the Potholder in the third. The mold is lifted from the coals full of molten metal and the relief puzzle starts.
Witch Relief Mold
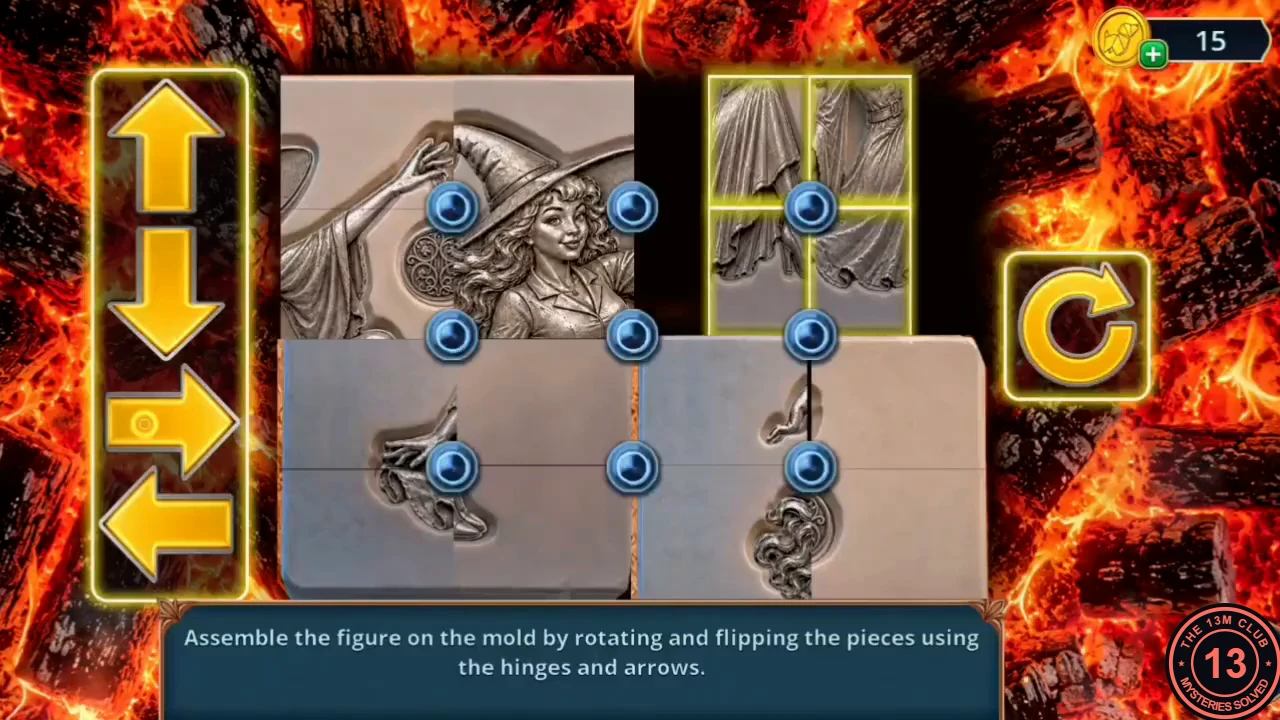
The instruction reads: assemble the figure on the mold by rotating and flipping the pieces using the hinges and arrows. The relief is cut into square pieces with blue hinges between them. Tap a hinge to select the block of pieces around it (outlined in yellow), then use the buttons: the up/down arrow flips the block top to bottom, the left/right arrow flips it side to side, and the round arrow on the right turns it a quarter turn clockwise. This guide describes the target and a working approach rather than every move.
- The finished picture is a seated witch in a pointed hat filling the whole plate: her head and hat sit top left of centre, her raised right arm reaches to the top right where a round knotwork medallion hangs, and her skirt sweeps down to the bottom right with one shoe showing. Work one block at a time: first turn the face-and-hat block (top left) upright using the right-hand hinge, then fix the skirt blocks on the right with flips, and finish with the bottom-left block showing the hand on the ground. When every seam lines up, the plate glows and you receive the Witch Figurine.
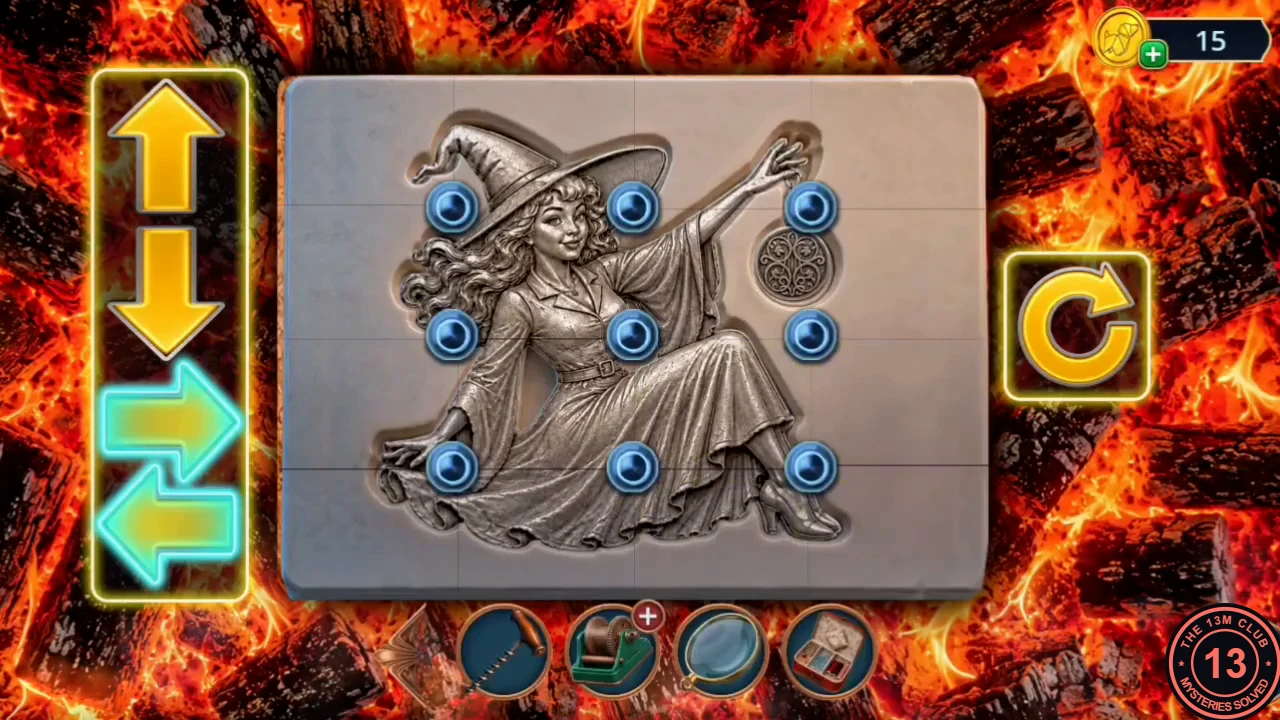
Solved: the finished witch picture.
The Growth Potion
Back in Sebille and Dakota's shop, gather the four growth-potion ingredients: something priceless, time that stood still, a beauty's weapon and the eye of a blind man.
- Travel to Sebille and Dakota's shop and open the drawer under the counter. Set the Witch Figurine on the lid of the red box and the box opens. Drag the roll of tape from the box up onto the counter; the Lipstick stays inside for now.
- Lay the Reel with Torn Film on the counter next to the tape. It cannot be repaired yet — the Old Banknote and other items do not help.
- Open the cauldron by the recipe book. Put the Old Banknote in the first slot (it can no longer be spent, so it is priceless), the Clock Face in the second slot (time stands still on it) and the Monocle in the fourth slot (the eye of a blind man).
- Go back to the counter drawer and take the Lipstick from the open box. Put it in the third cauldron slot as the beauty's weapon. The potion mini-game starts.
Potion Card Shuffle
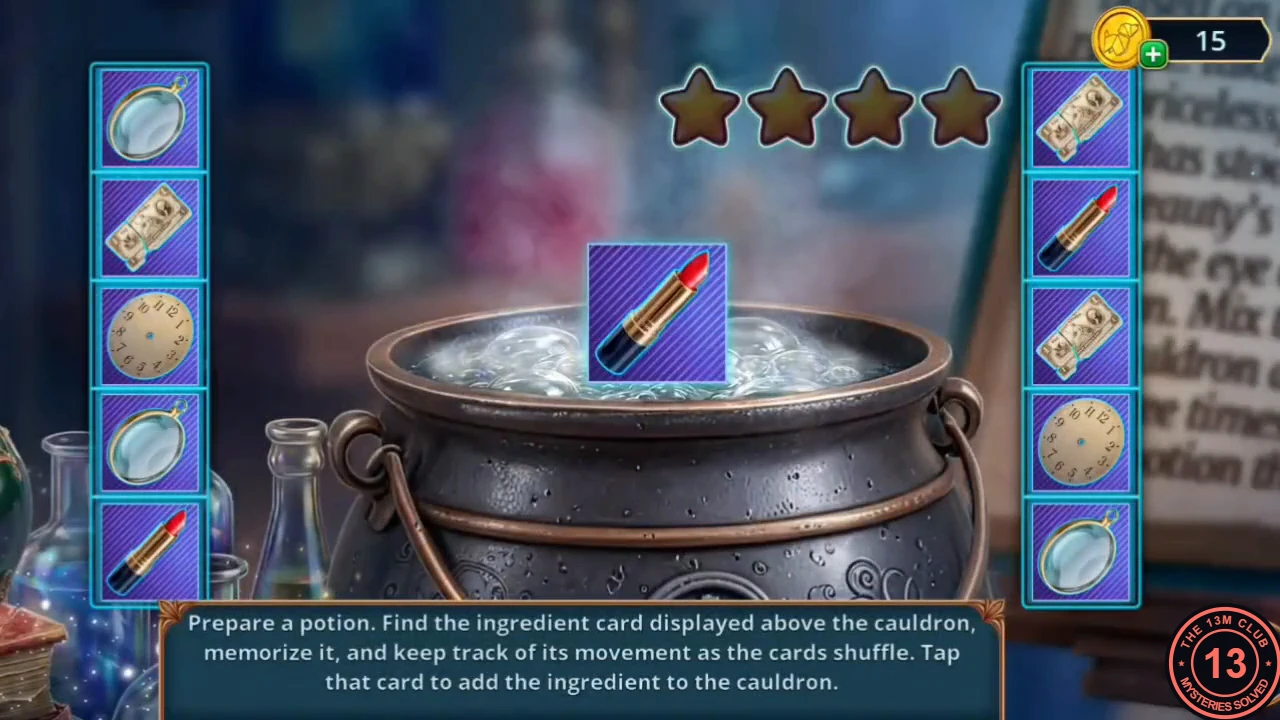
The instruction reads: prepare a potion — find the ingredient card shown above the cauldron, memorise it and follow it as the cards shuffle, then tap that card to add the ingredient. There are four rounds, each worth one star. The shuffle is animated live, so there is no fixed answer: simply keep your eye on the right card.
- Press START. The cards are shown face up in two columns, then turn face down and shuffle. Follow the card that matches the ingredient pictured above the cauldron and tap it when the shuffle stops. The ingredient asked for changes each round (for example Lipstick, Old Banknote, Monocle, then Clock Face). After the fourth star the potion is bottled: take the Magic Growth Potion.
Bonsai and the Whole Film Reel
The potion revives the bonsai, which provides the tools to repair the film.
- Open the bonsai on the window sill and pour the Magic Growth Potion over it. The tree grows; take the Spool Handle and the Razor Blade from the pot.
- Open the counter drawer again and use the Razor Blade on the tape. The torn film is taped and trimmed back together; take the Whole Film Reel.
- Go out to the street. Open the Coil in your inventory (the green winch with a copper drum from the bench statue) and fit the Spool Handle into the first of its three part slots. Two parts are still missing. (The organ-grinder automaton does not accept the Spool Handle.)
Projector Film Scene: Fragments

The repaired film plays a second fortune-teller scene. This time the tray at the bottom shows three cut-out fragments of the picture; tap the place in the scene that each fragment shows. A new fragment fills each free slot until all ten are found.
- Go to the Victim's Study, open the projector and mount the Whole Film Reel on the front spool. The film scene starts.
- Find the ten fragments: the pearl string on the table to the right of the crystal ball; the base of the left gold candlestick on the red cloth; the crate of apples behind the bowling pins (far left); the shelf of bottles to the right of the blue clock (top right); the crowd and balloons at the top left; the green bowl on the lower-right table; the area just right of the right-hand candle, below the skulls; the left side of the crystal ball with the fortune teller's hand; the top of the fortune teller's veil; and the shelf between her head and the blue clock. Always compare the tray picture with the scene, as the order can vary. When the last fragment is found, the pendulum swings aside to reveal a niche in the brick wall: take the Constellations Stencil.
Pattern Code and the Call to Sam
The stencil leads to a hidden compartment under the gnome clock, and from there to the broken phone on the street.
- In the Victim's Study, open the drafting table and lay the Constellations Stencil on the dotted paper. The pencil traces the constellations through it; take the traced sheet, the Pattern Code. If you have not collected it yet, a Tarot card lies on the right side of this close-up, by the ruler.
- Open the gnome clock and place the Pattern Code on the round dotted lock below it. A compartment opens under the clock: take the Torn Puppet and the sheet music, and pull the Police Phone Number tag off the sheet.
- Travel to the street and open the organ-grinder automaton. Put the sheet music on the stand beside his barrel organ. He plays, his head springs open, and you get the Cable with Hook and the Wire.
- Open the yellow phone booth. Reconnect the cut phone cord with the Wire, then use the Police Phone Number on the phone to call Sam.
- Decision: the line is bad and Sam can barely hear you. 'Shout into the phone' is free (0 points), 'Try to stop Sam' costs 30 coins (+2) and 'Warn Sam' costs 60 coins (+6, the best result). Sam heads out either way. The Call Sam task is complete and the new task is to run to Zosta. The phone's coin return drops open: take the Strong Bolt.
Manual Winch and the Fallen Tree
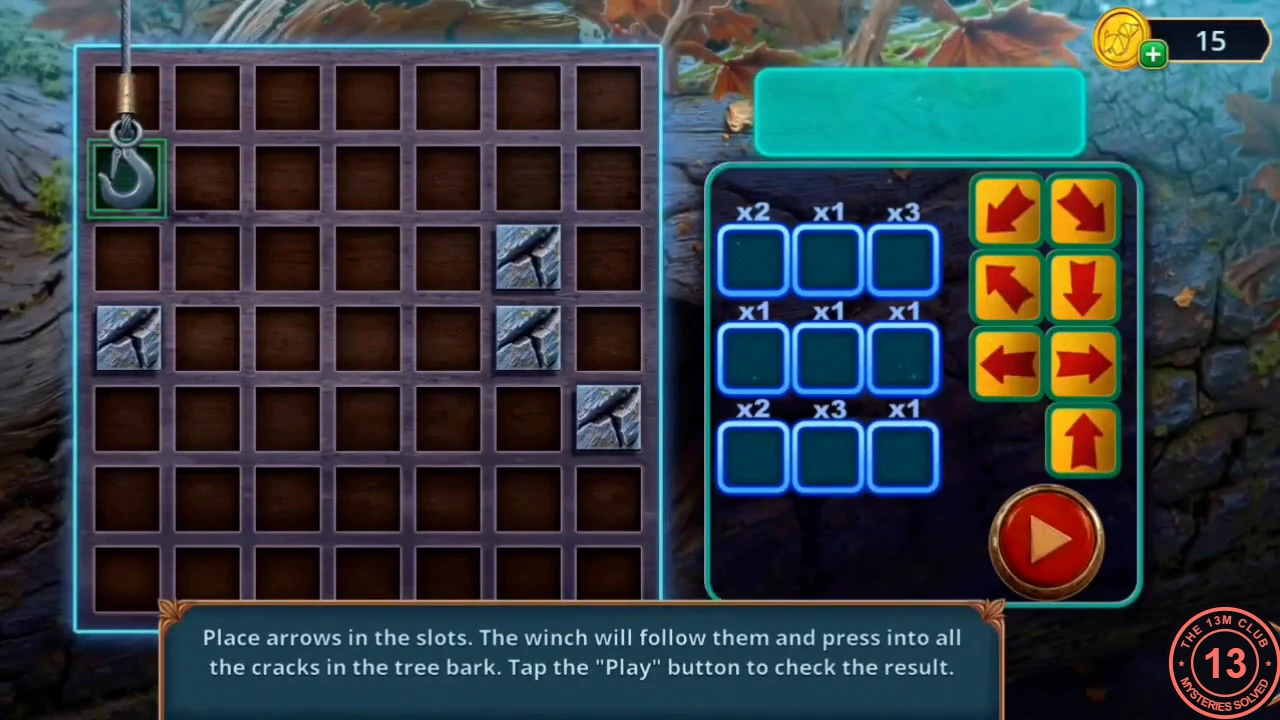
A fallen tree blocks the far end of the street. The instruction reads: place arrows in the slots; the winch will follow them and press into all the cracks in the tree bark; tap Play to check the result.
- Open the Coil again and add the Strong Bolt and the Cable with Hook to its two empty slots. Take the Manual Winch.
- Tap the fallen tree trunk at the far end of the street and set the Manual Winch on the stone block at its foot. The hook is attached and the arrow puzzle opens.
- The grid is 7 × 7. Counting from the top left, the hook starts at column 1, row 2, and the four cracks are at column 6 row 3, column 1 row 4, column 6 row 4 and column 7 row 5. Each program slot has a fixed multiplier. Fill the slots like this — top row: down-right (×2), up (×1), right (×3); middle row: down (×1), down (×1), right (×1); bottom row: down-left (×2), up-left (×3), left (×1). Press Play: the hook reaches the crack at column 6 row 3, moves down through column 6 row 4, steps right into column 7 row 5, then loops back down-left and up-left to finish on column 1 row 4. The tree is pulled aside and the road is clear.
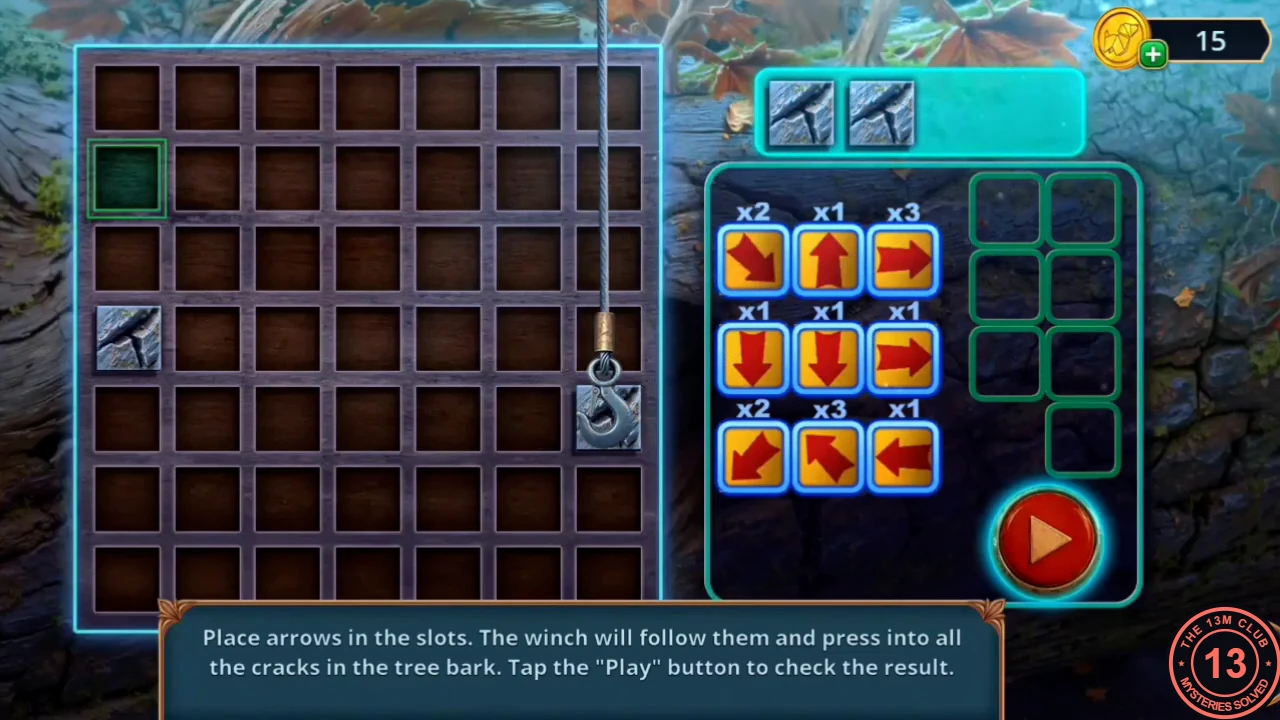
The complete arrow program from the step, shown while it runs.