Serenity's Crypt
Chapter 4 opens in Serenity's Crypt, where her spirit offers to explain how Zosta can be stopped.
- Chapter 4, 'The Death', begins after the ghosts vanish: Sebille notices the magic is gone, yet nothing happens. In Serenity's Crypt the witch's spirit appears: 'There is only one way to destroy Zosta - by destroying the "Magician" card. It's a long story, and in order to tell it, we need to shed light on the past in this crypt.' Decision: 'I can help, tell me.' costs 60 coins and gives +2 points; 'Maybe we can find another way?' is free and gives 0. The task to summon the captive's ghost is complete.
Lighting the Old Lantern
Collect the crypt's loose items and assemble and light the Old Lantern.
- Open the round mosaic in the middle of the floor and take the Cracked Bowl. The mosaic itself is incomplete ('Several parts are missing.').
- Open the wax-covered ritual altar on the left ('Ritual altar - ritual weapons.'). Take the first gold mosaic piece (1/3) and the Books. The altar still needs something ('Something is missing here.').
- Open the seated statue surrounded by candles on the right ('What do you want, statue?'). Sweep the cobwebs from its base with the Fox Tail, then take the second gold mosaic piece (2/3), the Hair Sticks and the Wick from among the candles.
- Open the Old Lantern in your inventory (it has three empty slots) and add the Matches, the Wick and the Essential Oil. The lantern lights.
- Hold the lit lantern up to the seated statue. Its light reveals a bottle in the statue's hand: take the Bottle of Essential Oil.
Shadows of Centuries
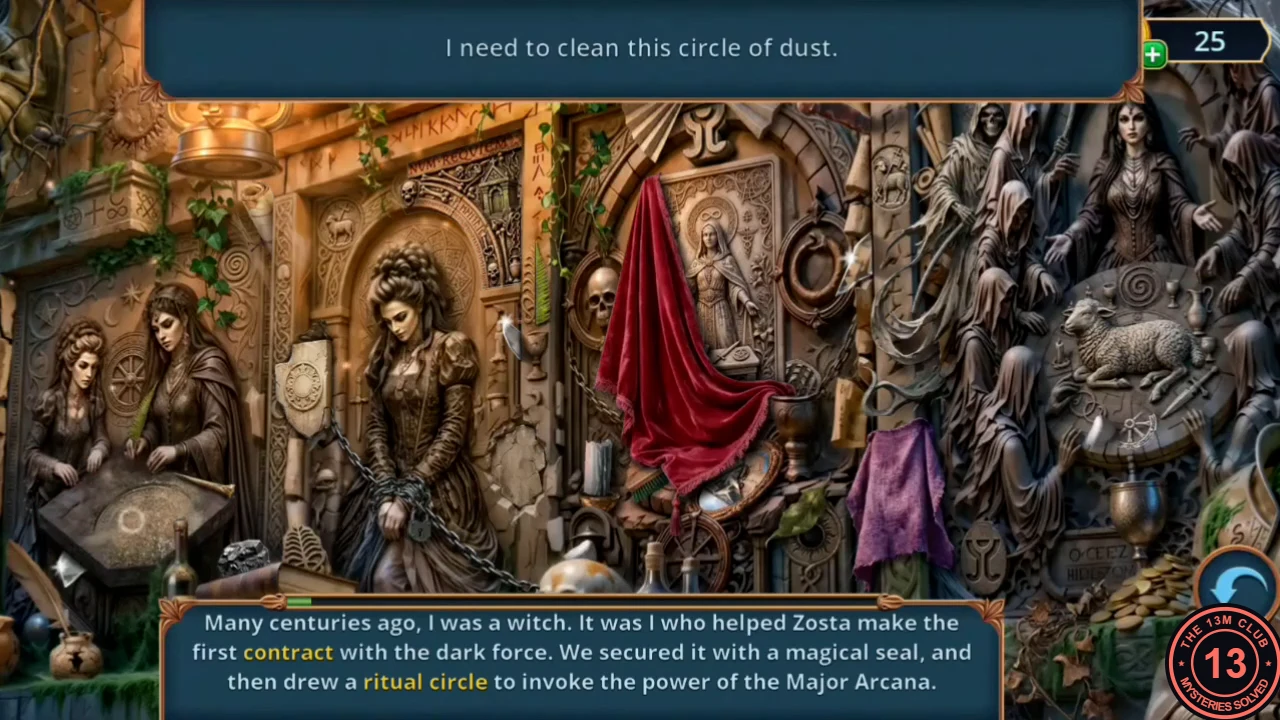
The bas-relief beside Serenity's ghost is titled 'Shadows of Centuries - Complete the bas-relief'. While Serenity tells her story, each of its four panels has a small task: tap a loose part of the carving and drag it to where Victor's hint points. The reward is the Ritual Knife.
- Open the wall bracket next to Serenity and hang the lit lantern on it. The bas-relief opens.
- Panel 1 ('I need to clean this circle of dust.'): take the cloth hanging on the right and wipe the dusty ritual circle on the witches' table at the left. Panel 2 ('Everything here is covered with stone tiles... Hmm, what can help me here?'): tap the carved ornament at the top of the arch above the woman in the dress so that it comes loose, then use it on the cracked round stone tile to the right of her skirt; the tile breaks away. Panel 3 ('The more shards, the bigger the mirror, right?'): collect the glinting mirror shards — one on the pillar beside the woman's right shoulder and one by the iron ring at the right edge — and drop them onto the broken oval mirror below the red cloth. Panel 4 ('How to make this candle black?'): drag the dark lump of coal from the lower left, in front of the witches' table, onto the white candle left of the red cloth. Meanwhile Serenity tells how she helped Zosta make the first contract with a dark force, how Zosta then chained her soul to a deck, and how she escaped through a rift in the mirror and learned that only destroying the Magician Arcana can stop Zosta; once the black candle goes out, Zosta's power weakens. Zosta collects the souls marked by the Major Arcana and returns each sign to the chalice on the altar. When the carving is complete, Serenity gives you the Ritual Knife.
The Ritual Altar
Pry the plaque off the ritual altar with the Ritual Knife.
- Back at the ritual altar, push the Ritual Knife into the narrow crack under the wax-covered plaque ('You can fit something very narrow into this crack.'). Prying it loose blunts the blade: you get the round symbol stone, and the knife becomes the Blunt Knife.
The Wall of Symbol Stones
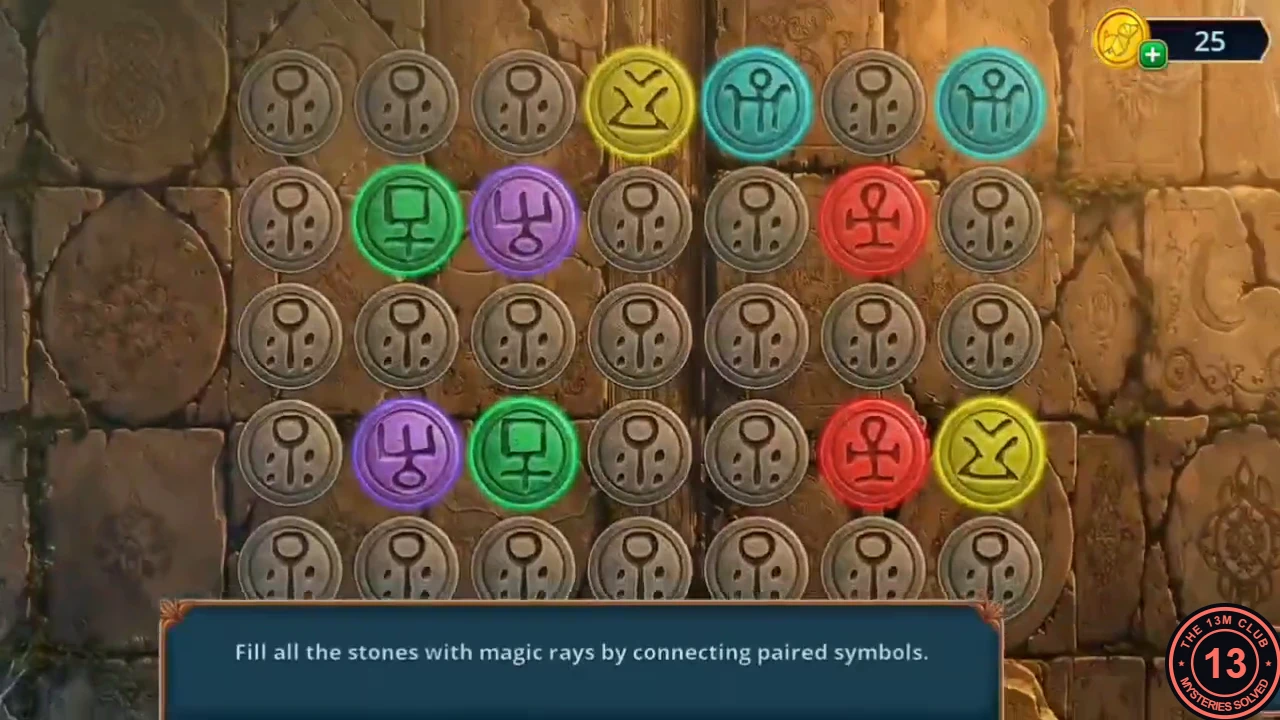
The instruction reads: fill all the stones with magic rays by connecting paired symbols. Draw a path between the two stones of each symbol; the paths may not cross. The five paths below are accepted by the game even though six stones stay grey, so you do not have to fill every stone.
- Open the back wall of the crypt and put the round symbol stone into the empty socket. The symbol-stone grid opens (7 columns by 5 rows).
- Counting columns 1–7 from the left and rows 1–5 from the top (r = row, c = column), draw these paths. Green squares: r2c2 → r1c2 → r1c1 → down column 1 to r5c1 → r5c2 → r5c3 → r4c3. Purple tridents: r2c3 → r3c3 → r3c2 → r4c2. Yellow: r1c4 → down column 4 to r5c4 → r5c5 → r5c6 → r5c7 → r4c7. Red ankhs: r2c6 → r3c6 → r4c6. Blue: r1c5 → r1c6 → r1c7. The wall slides apart and reveals a staircase.
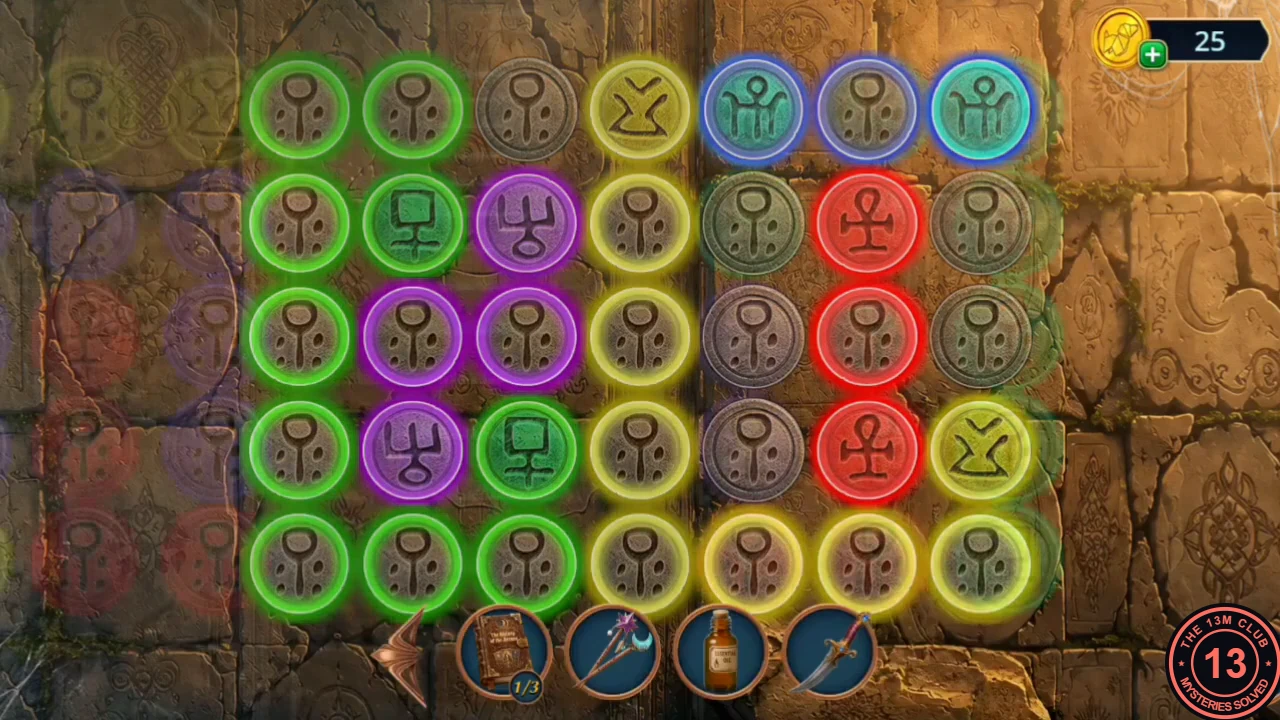
Solved: the five paths are accepted even though six stones stay grey.
The Abandoned Police Car
The crypt stairs lead to the mountain road, where the abandoned police car and the old trailer hold the next items.
- The stairs lead out to a mountain road with a police car and an old trailer. Sebille: 'We won't get far like this! We need to find somewhere to refuel to move on.' Open the car's front seat and take the skull-shaped Lighter and the Antique Stamp.
- Open the gap in the seat cushion and fish out the Glove Compartment Button with the Hair Sticks. Press it into the glove compartment, which opens: take the Cookie.
- Look at the fuel cap behind the car ('Yeah, and this is where the gasoline should go.'). Then open the pigeon's nest in the tree on the right and give the pigeon the Cookie. It flies off: take the Tarot card, the Keychain Screwdriver and the Old Key from the nest.
- Open the padlocked trailer door and put the Old Key into the padlock. The lock is too rusty for the key to turn, so pour the Bottle of Essential Oil over the padlock; the key then turns and the trailer opens. A search scene starts.
The Trailer
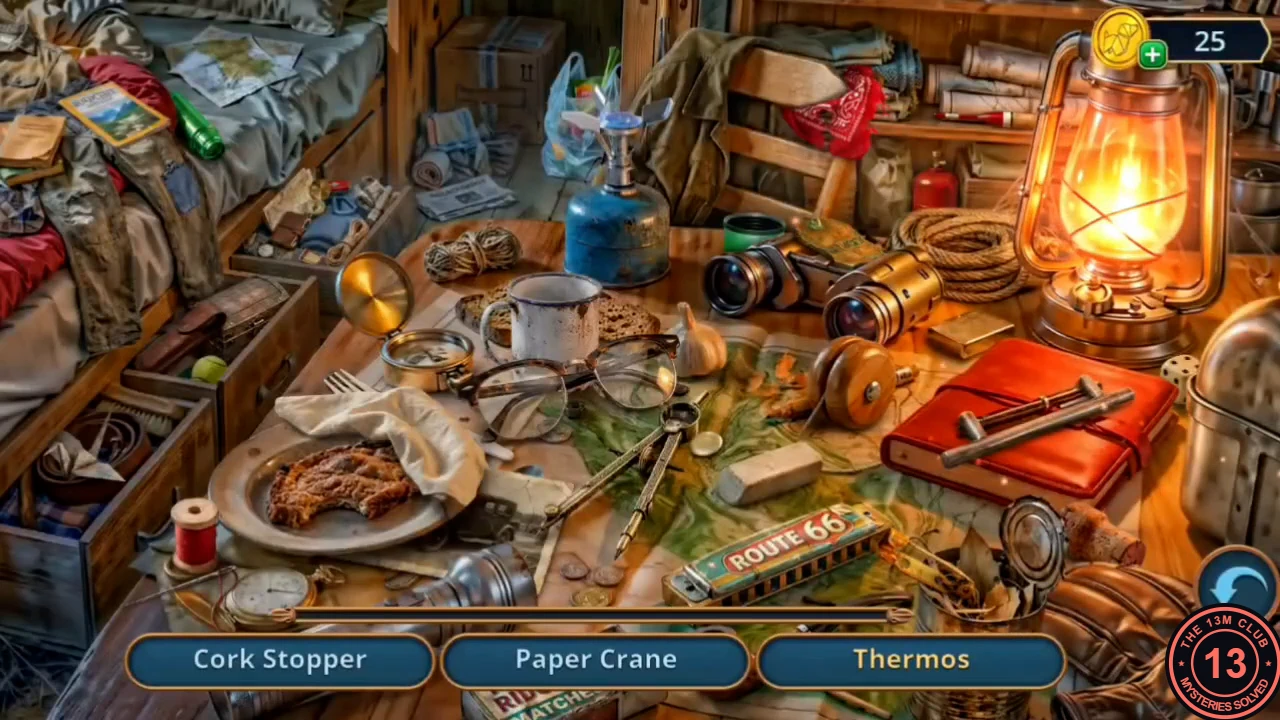
A list search inside the trailer. Three names are shown at a time, and each found name is replaced by the next. A wrong tap gives 'I'll try something else.' The reward is the Flag.
- Find: Thermos, Paper Crane, Bandana, "Motel" Magnet, Old Photo, Knife, Dice, Mug, Plastic Fork, Fishing Float, Ranger Badge and Cork Stopper. When the list is done, take the Flag (a green Salem pennant on a pole).
The Rockfall
Clear the rockfall on the mountain road to reach the cable car station.
- Open the rockfall blocking the road beside the 'Caution! Rockfalls!' sign and plant the Flag on the rocks. The road clears and you drive on to the cable car station.