City Fair: Claw Machine
With the tree gone, the road leads to the City Fair outside Madame Zosta's shop. A crowd blocks her door and you need a way to distract it. The red-and-blue timer icon at the top left is a shop offer, not a gameplay timer.
- Go up the cleared road to the City Fair. Open the claw machine in front of the crowd and take the Fireworks rocket lying on its control panel. The machine has no lever yet.
- Open the ACME Pyro-Display box in the middle of the square and pull the red-knobbed Machine Lever out of the lock of the chest beside the launcher. Fit the Machine Lever into the hole on the claw machine's panel. The claw-machine search starts.
Claw Machine
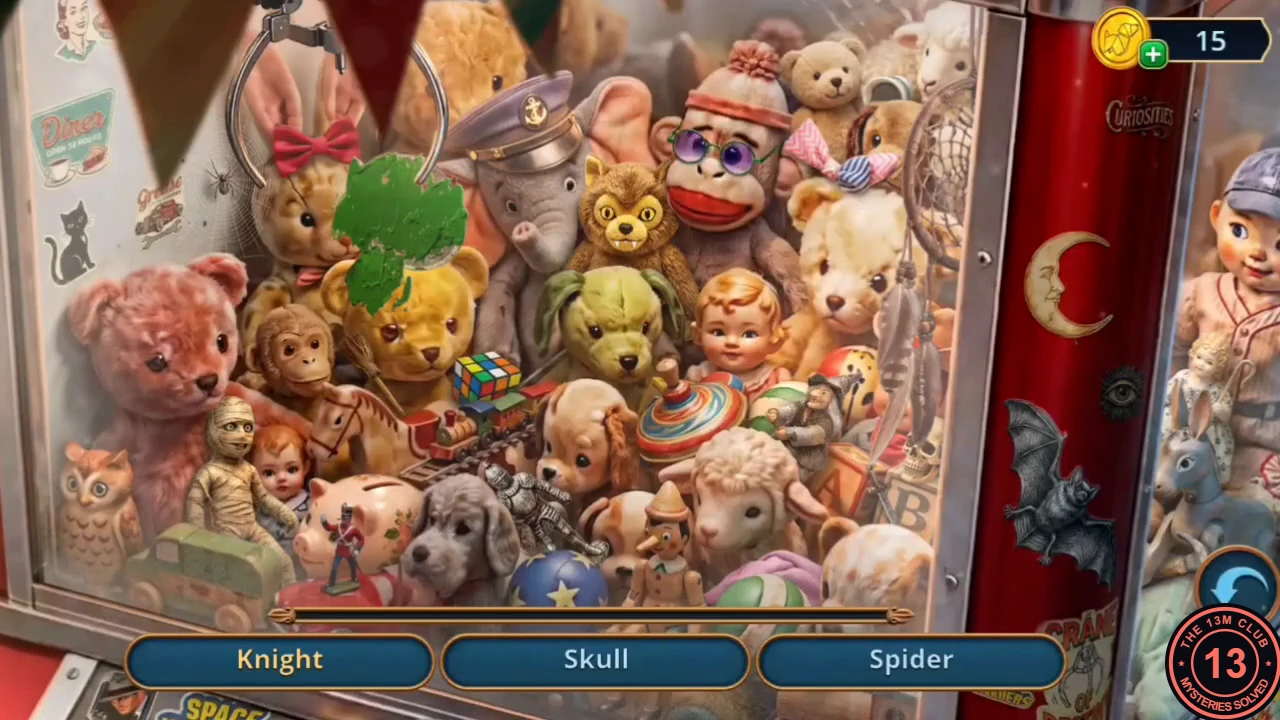
A list search inside the glass, with three names shown at a time. Three entries need an extra action first. The reward is the Sturdy Hairpin.
- Spider = on the cobweb on the left glass wall, right of the 'Grease' sticker. Knight = the silver knight lying between the grey dog and the brown puppy, above the blue star ball. Dreamcatcher = hanging at the right edge of the glass behind the striped bow. Werewolf = the furry brown wolf with yellow eyes between the grey elephant and the sock monkey. Mummy = the bandaged doll at the lower left by the green toy car. Black Cat = the cat sticker on the left wall. Witch with Broom = the grey witch figurine on a broom beside the spinning top and the striped ball. Skull = on the 'B' block at the right edge. Coins: tap the black bat on the red post at the right to uncover a small hammer, drag the hammer onto the pink piggy bank at the lower left and tap the Coins that spill out. Bat = then tap the black bat itself. Umbrella: a green paint splash covers the area between the bunny and the elephant; drag the white rag from beside the spinning top onto the paint, then tap the Umbrella underneath. Milkmaid: zoom in on the lower right — the small white porcelain milkmaid sits at the very bottom right, beside the red post. The claw then grabs the prize: the Sturdy Hairpin.
Marionette Theater
The Marionette Theater is the puppet booth on the right side of the fair.
- Open the Marionette Theater and use the Sturdy Hairpin on the knotted curtain. The curtain opens on a wolf and a boy in a boat; take the Fan from the boat. One puppet is missing, so the show cannot run yet.
Under the Porch and Lionel's Briefcase
Travel back to the front of the Brightons' country house.
- Open the gap under the porch (left of the steps, by the striped post). Use the Fan to blow away the broken glass covering the pipes, then take the Pump and the Garden Shear.
- Open the nettles beside the anthill in the yard and cut them with the Garden Shear. Take the Metal Amulet. If you have not collected it yet, the Tarot card here is among the purple flowers at the top right.
- Open Lionel's Briefcase from your inventory and put the Metal Amulet into the round gold clasp. The fastener lock appears.
Briefcase Amulet Lock
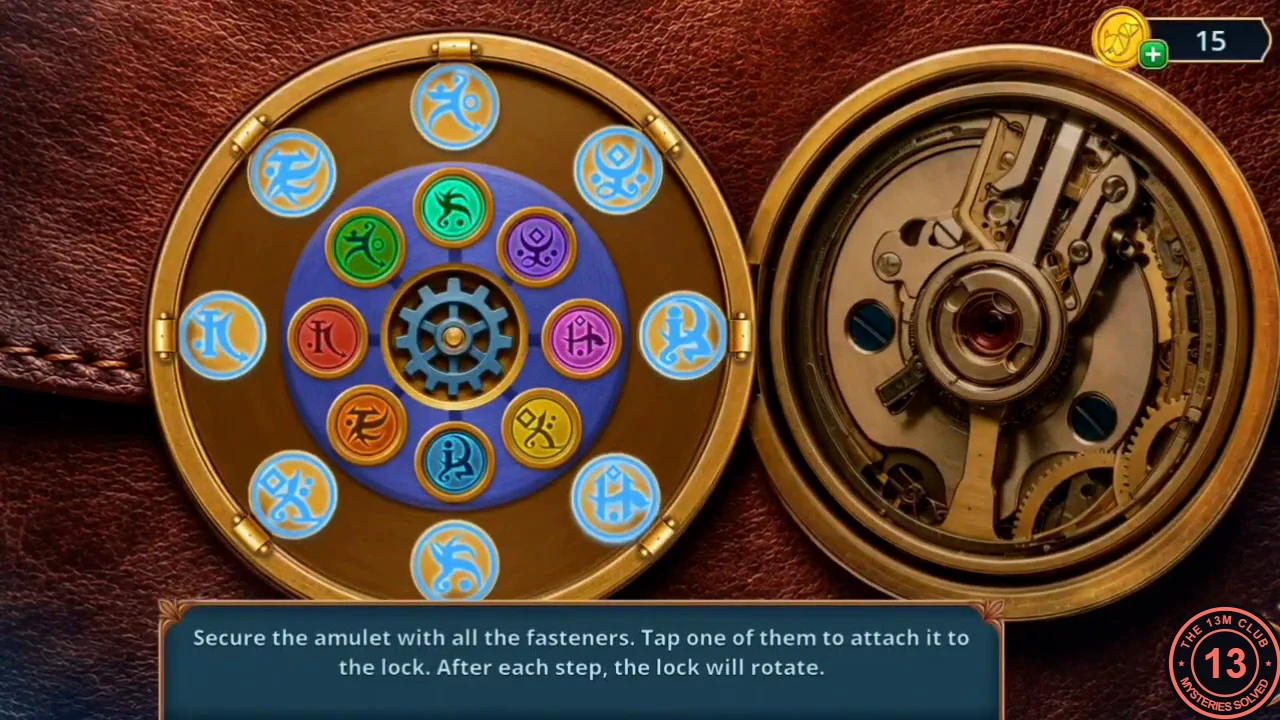
The instruction reads: secure the amulet with all the fasteners; tap one to attach it to the lock; after each step the lock rotates. Eight coloured fasteners sit on the inner blue disc, and eight empty sockets around the rim each show a symbol. Tapping an inner fastener sends it to the rim socket in line with it; tapping an attached fastener sends it back. Because the disc turns after every tap, the exact order depends on how it lands — use the method below.
- Each fastener belongs in the rim socket with its matching symbol: green runner = top, purple = upper right, blue = right, pink = lower right, teal runner = bottom, yellow = lower left, red = left, orange = upper left. Whenever a fastener is lined up with its own socket, tap it. If none is lined up, tap any fastener to make the disc turn, then tap that wrongly placed fastener later to bring it back. When all eight fasteners sit in their own sockets, the briefcase opens.
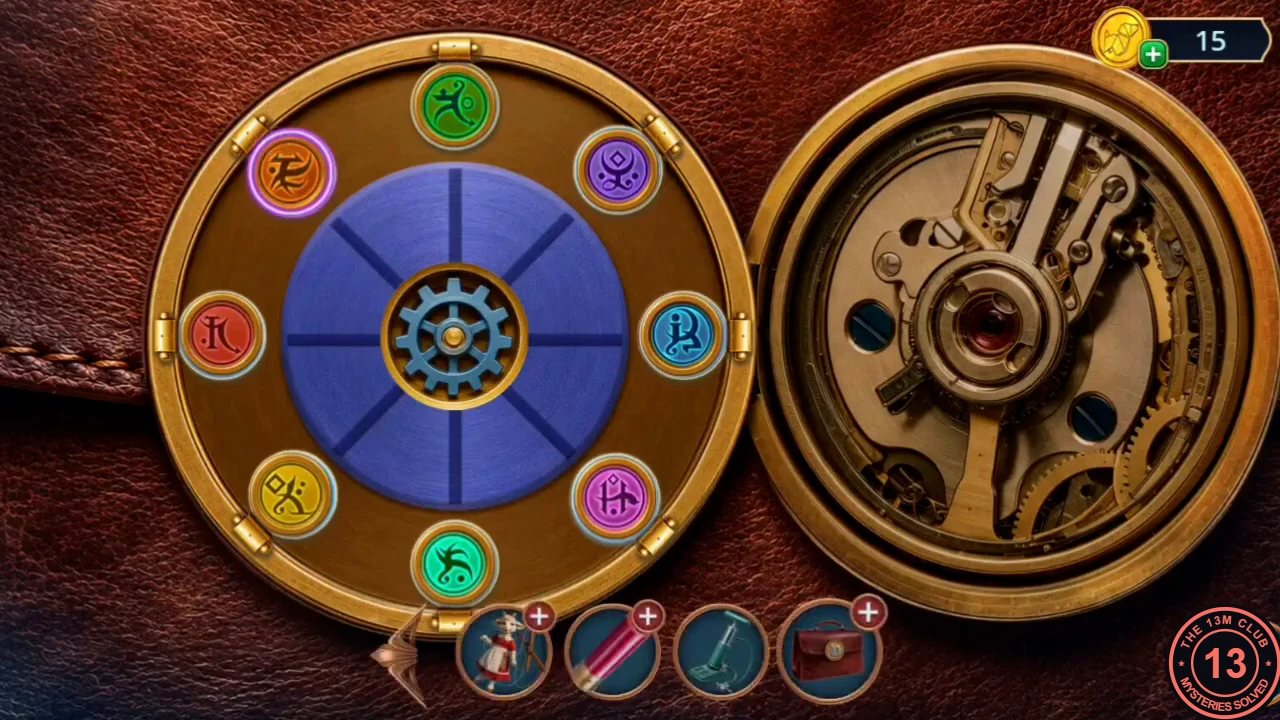
Solved: every fastener in its own socket. - Read Lionel's letter inside the briefcase: he had his future read, was told he would return, and planned to go to Zosta the next day. Take the Lighter and the Suction Cup.
Funeral Reception Menu
The Suction Cup opens the handle-less china cabinet in the Brightons' living room.
- Go into the Brightons' living room and open the glass china cabinet whose door has no handle. Stick the Suction Cup on the glass and slide the door open. Take the Funeral Reception Menu and the Lock Pick Set.
Funeral Reception Table
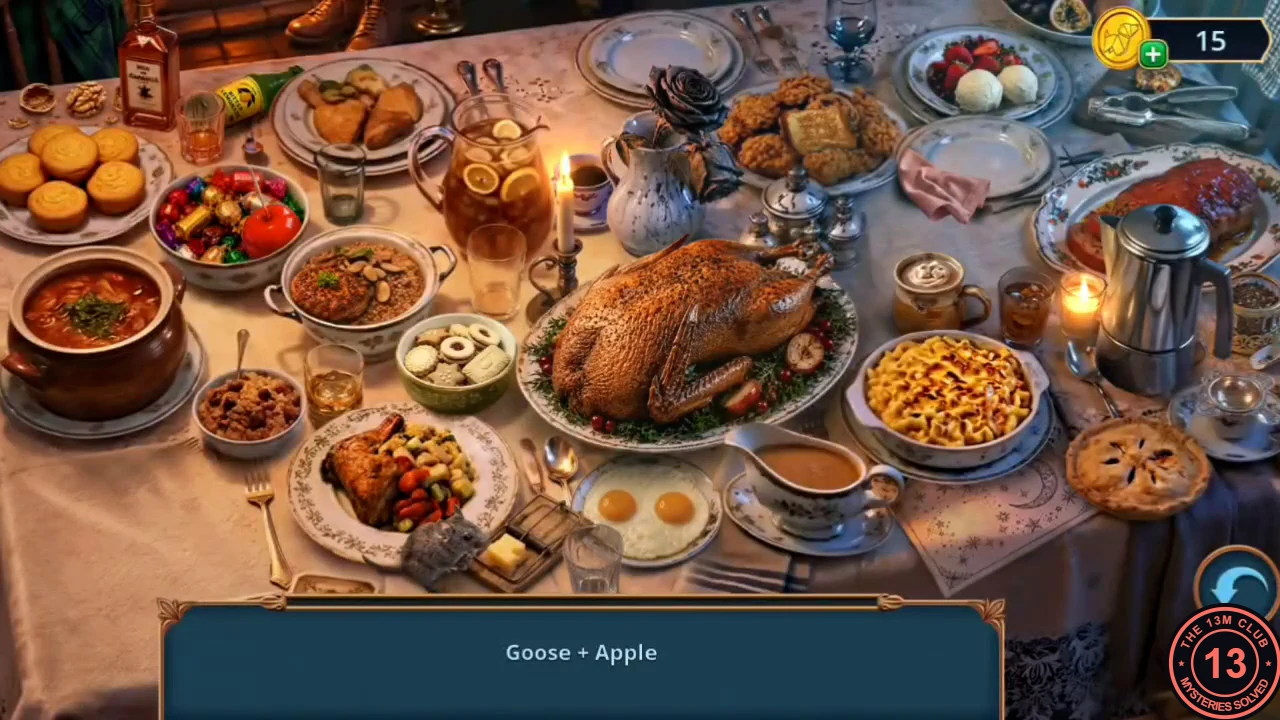
Open the platter on the living-room dining table and lay the Funeral Reception Menu on it; the table becomes a search. Each clue names two things; find the one dish or object that combines them. One clue is shown at a time. The reward is the Teapot.
- Goose + Apple = the big roast goose in the centre. Rolling Pin + Cookie Cutters = the plate of iced ring cookies left of the goose. Milk + Snowflake = the scoops of ice cream at the top right. Piece of Meat + Meat Grinder = the minced-meat cutlet in the buckwheat dish (left, beside the bowl of sweets). Rodent + Burrow = the grey mouse by the mousetrap at the bottom. Bread + Toaster = the toast at the top centre. Egg + Frying Pan = the two fried eggs at the bottom. Chocolate + Cream = the mug topped with whipped cream between the salt cellars and the pasta. Brain + Nut = the walnuts in the top-left corner. Coffee Bean + Cup = the cup of coffee by the candle and the milk jug. Apple + Candy = the red candy apple in the bowl of sweets. Lemon + Bubbles = the lemonade bottle at the top left. A teapot outline then appears at the bottom left: tap the Teapot.
- Put the Teapot in the empty spot in the china cabinet. A compartment beside it opens: take the Cigar Cutter and the Patch.
Marionette Theater River Crossing
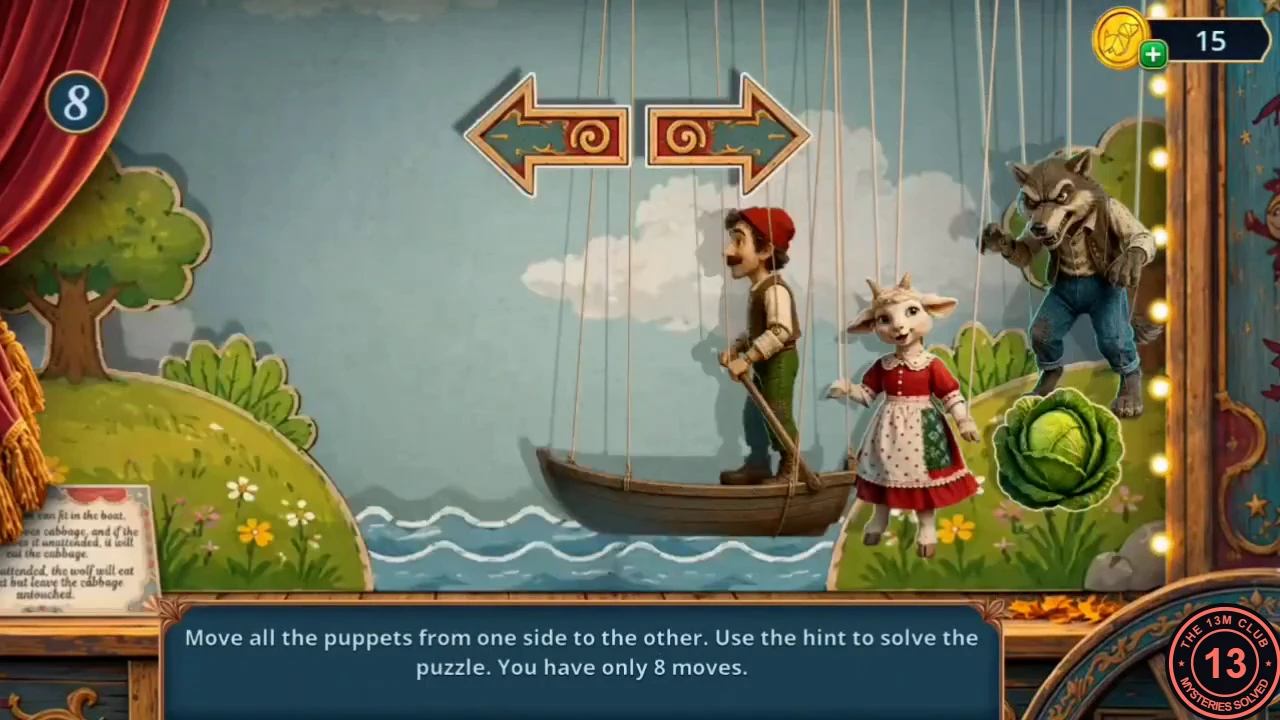
The repaired goat puppet completes the theater's cast. The instruction reads: move all the puppets from one side to the other using the hint; you have only 8 moves. The hint card's rules: only one passenger fits in the boat with the farmer; the goat eats the cabbage if they are left alone together; the wolf eats the goat if they are left alone together (but leaves the cabbage).
- Open the Torn Puppet (the goat marionette) in your inventory. Put the Patch over the tear in its apron and stitch it with the Sewing Kit. Take the repaired Puppet.
- Travel to the City Fair, open the Marionette Theater and stand the Puppet on the right of the stage. The river-crossing game starts with the farmer, wolf, goat and cabbage on the right bank.
- Tap a puppet to put it in the boat or take it out, and tap an arrow to row across. Make seven crossings: 1) take the goat across; 2) row back alone; 3) take the wolf across; 4) bring the goat back; 5) take the cabbage across; 6) row back alone; 7) take the goat across. With everyone on the far bank, the stage releases a Spring and a Wick: take both.
Claw Machine: Second Prize
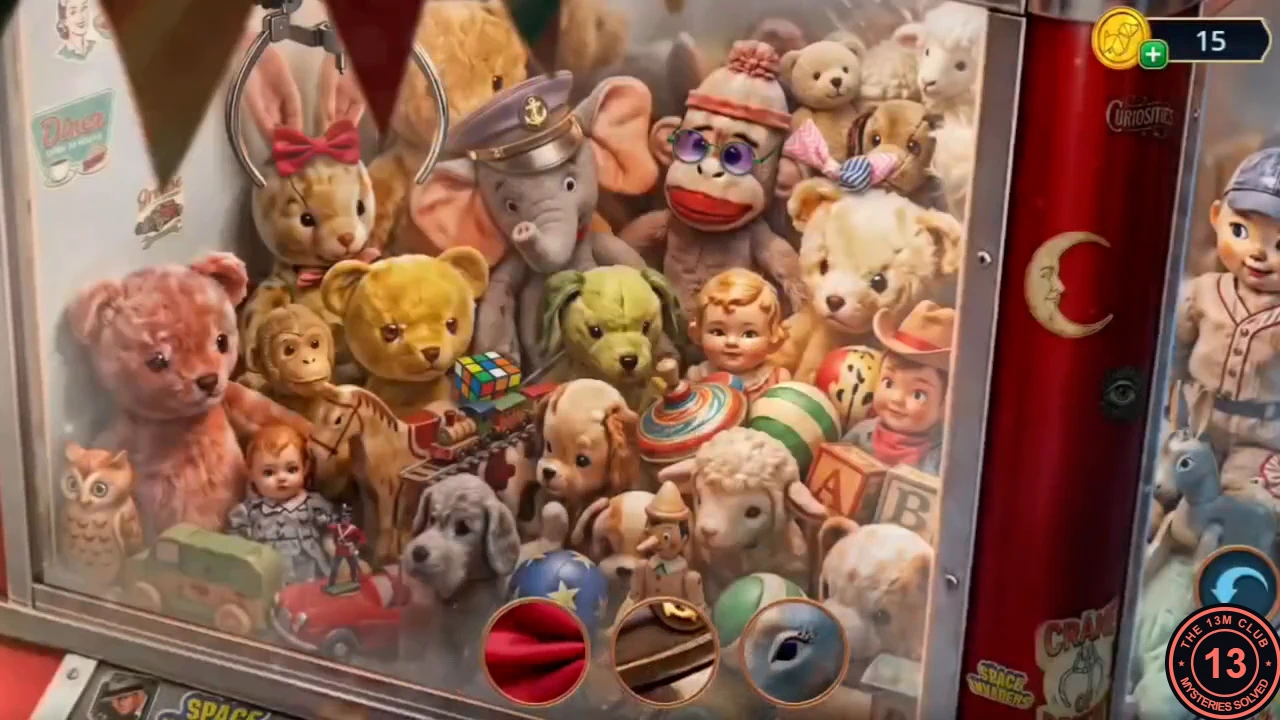
The claw machine can now be played properly. This time the tray at the bottom shows three close-up fragments of toys; tap the toy each fragment comes from. A new fragment fills each free slot until all twelve are found. The reward is the Rubber Squeaker.
- At the City Fair, open the ACME Pyro-Display box again and put the Spring into the round lock on the red chest. A jack-in-the-box bat springs out holding the Machine Token: take it. Open the claw machine and drop the Machine Token into the TOKEN slot to start the game.
- Red fabric = the bunny's red bow (top left). Brown visor with gold = the elephant's sailor cap. Red, white and blue stripes = the spinning top in the middle. Rubik's cube = the cube on the toy cart left of centre. Brown feathers = the owl at the lower left. Red fabric (second) = the red scarf of the cowboy doll right of the striped ball. Purple eye = the sock monkey's glasses. Wooden piece with a red stripe = the rocking horse left of centre. Moon face = the crescent moon on the red post. Blue-grey eye = the blue-grey toy donkey outside the glass on the right. Pink zigzag = the pink striped bow beside the sock monkey's head. Orange ball = the wooden puppet at the bottom centre between the blue star ball and the green striped ball. The claw then grabs the prize: the Rubber Squeaker.