Station Hall
The station hall connects to the morgue and, upstairs, to Sam's office. A Tarot card in this room is on the front panel of the reception desk.
- Open the sofa where the police cat is sitting and take the Origami Book next to the food bowl.
- Open the evidence cabinet. Take the Brush hanging beside the red wax seal at the upper right. The door is sealed with sloppy sealing wax — melt it with the Lighter. A Tarot card is in the lower left of this close-up, beside the EVIDENCE notices.
- Take the Control Panel Key from inside the evidence cabinet.
- Open the panel beside the MORGUE STAFF ONLY door. Insert the Control Panel Key and turn it; the cover opens to reveal loose wiring with a piece missing. Take the Paper Clip lying inside the opened panel.
- Open the stair railing close-up. Use the Paper Clip to hook the Wire that is caught behind the railing, then take the Wire.
- Put the Wire into the open morgue door panel. The wiring puzzle starts.
Morgue Door Wiring
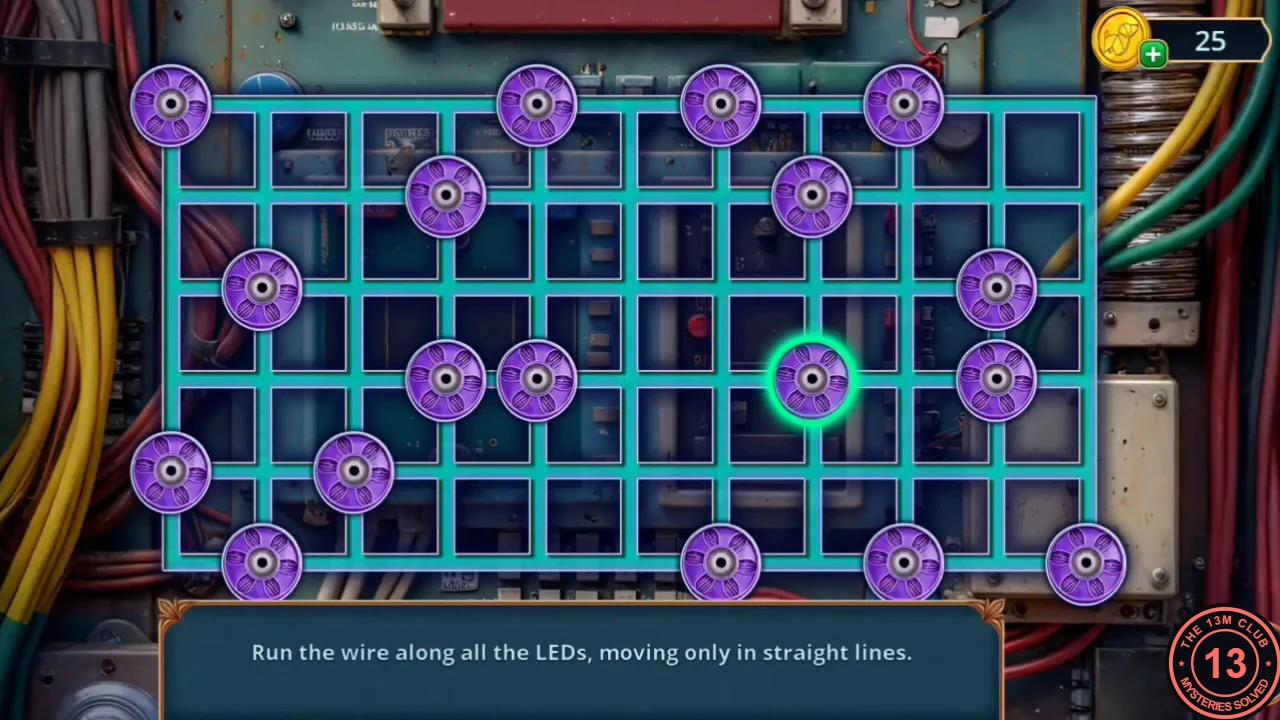
The instruction reads: run the wire along all the LEDs, moving only in straight lines. You draw one continuous path that must pass through every LED on the board.
- Drag the wire in straight lines from LED to LED; an LED lights green when the wire reaches it. The wire can only change direction at an LED, and runs may cross earlier runs. One working path (shown in the solved picture): start at the LED second from the left in the second-lowest row and go left to the edge LED, up to the top-left LED, right to the next LED in the top row, down that column to the fourth row, left one LED, up to the second row, right to the next LED, down to the fourth row, right one LED, up one LED to the third row, left along the third row to its far-left LED, down to the bottom row, right to the next LED, up that whole column to the top row, right to the last LED in the top row, down that column to the bottom row and finally right to the bottom-right LED. When the last LED lights up, the morgue door unlocks.
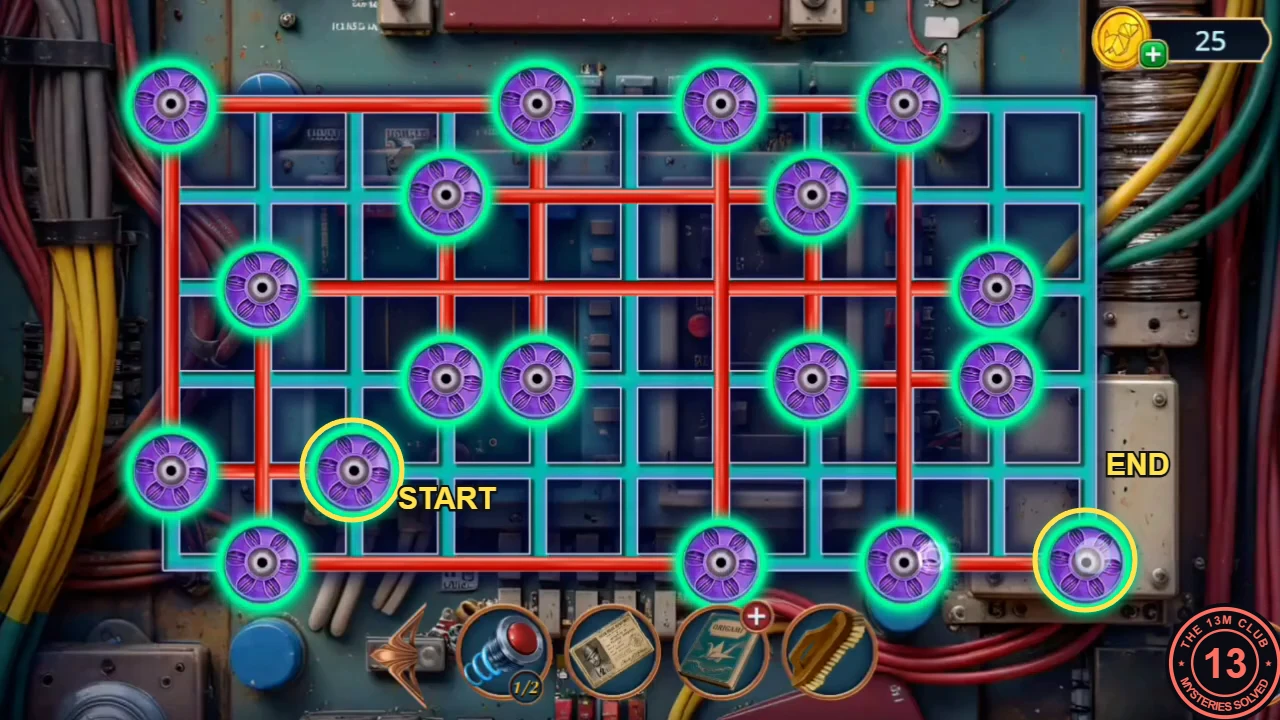
One finished path: it starts at the circled LED in the second-lowest row and ends at the bottom-right LED.
County Morgue
Morris, the coroner, asks you to fetch documents from the anatomy cabinet. A Tarot card is on the storage lockers to the left of Morris.
- Open the body tray and take the Disinfecting Solution.
- Open the sink close-up. Pour the Disinfecting Solution over the dirty work surface, scrub it with the Brush and take the Hand Warmer (a hot-water bottle). A Tarot card is under the counter, just below the sink basin at the bottom of this close-up.
- Use the Hand Warmer on the frozen latch of the cold-storage drawer and take the heart emblem inside.
- Place the heart in the empty spot on the skeleton relief of the anatomy cabinet. Take the Forensic Report from inside, then tap the sparkling tray to start a search.
Morgue Tray: Counted Items
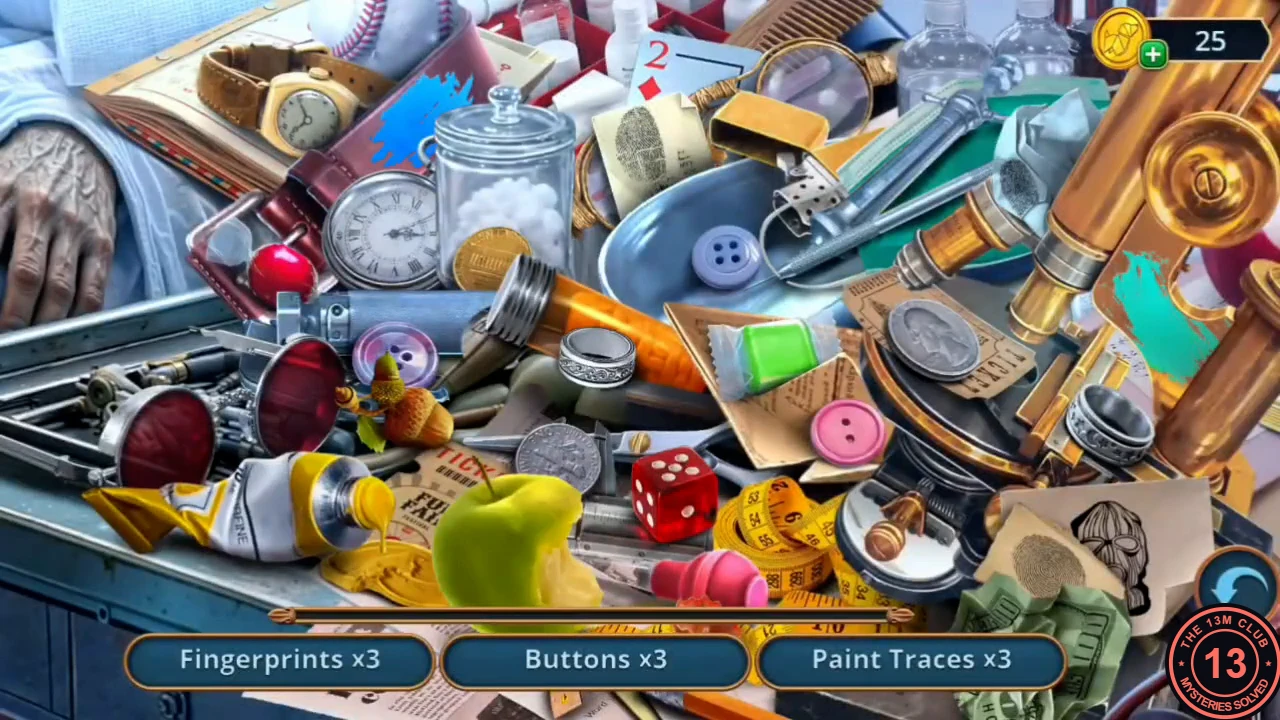
This search uses counted categories: find three Fingerprints, three Buttons and three Paint Traces scattered over the morgue tray. As soon as the Buttons are done, a Coins ×3 entry takes their place, so you also need three Coins.
- Find all three items of each category until the list is empty. Finishing the search triggers a scene with the corpse.
The Corpse's Grip
The body moves in the morgue: make the decision, then Morris hands over the Scraper and an old case number.
- Decision: the body suddenly grabs Sam. 'Freeze with fear' is free and gives 0 points, 'Ask for help' costs 30 coins and gives +2, and 'Help Sam' costs 60 coins and gives +6 (the best result). The paid options are only available if you have enough coins.
- Talk to Morris. She gives you the Scraper and the case number of last week's victim. Your new task is to find the connection between the cards and the body.
Milk Vending Machine
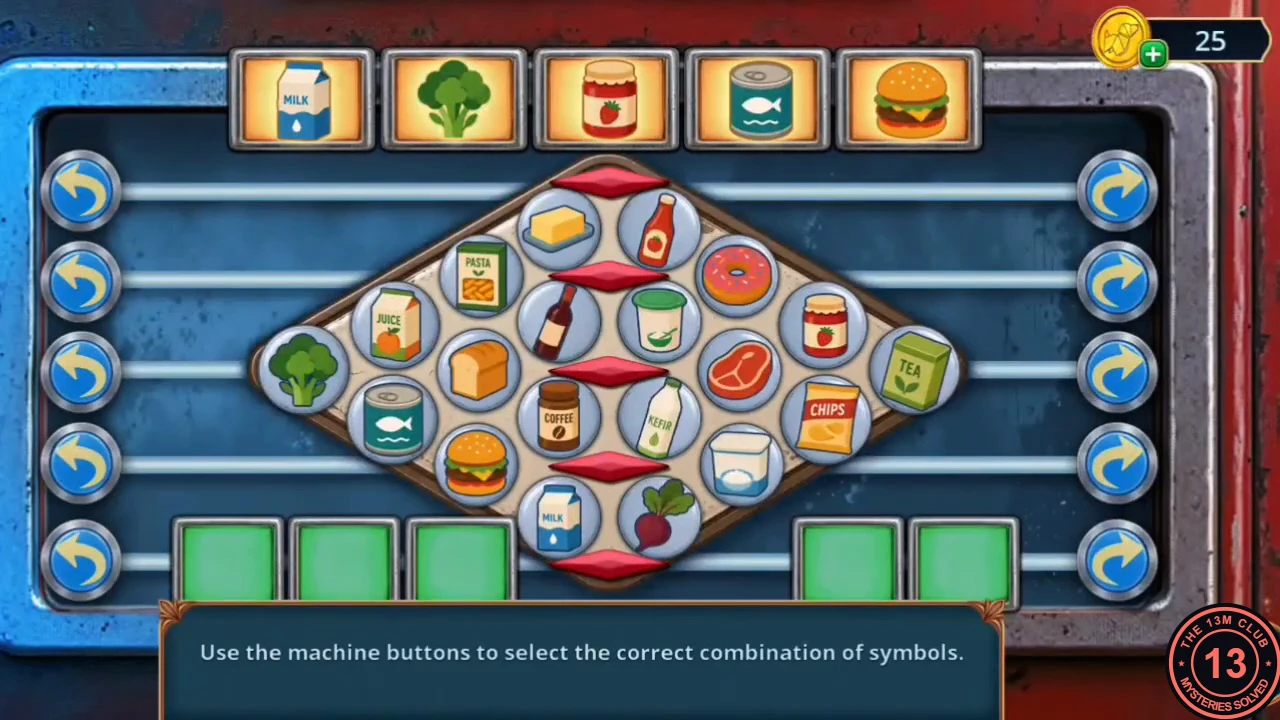
The milk vending machine on the street needs two red buttons and payment. You already have the first button from the police station window; the second is hidden under the posters by the clown gate.
- Go back to the street and use the Scraper on the posters beside the clown gate (you keep the Scraper). Take the second red button that was underneath.
- Open the vending machine close-up. Fit both red buttons into the empty sockets, then insert the Banknote into the cash slot. The symbol puzzle opens.
- The instruction reads: use the machine buttons to select the correct combination of symbols. The food pictures never move. Each round arrow button at the ends of the five rails turns the red pointer on that rail (left and right buttons turn it opposite ways), and a tilted pointer aims along one diagonal line of pictures. When two pointers aim at the same picture, it lights green and drops into the next empty slot at the bottom. Select the pictures in the order shown on top of the machine: Milk, Broccoli, Jam, Canned Fish and Burger. For example, Broccoli at the far-left corner is selected by aiming the top pointer down-left and the bottom pointer up-left, so both point along the edges that meet at that corner. When all five slots are filled correctly, take the Milk.
Fuse and the Archive Offer
Feed the station cat, restore the power upstairs and decide whether to open the Police Archives bonus location.
- Return to the station hall and pour the Milk into the cat's bowl. The cat moves; take the Fuse it was hiding.
- Insert the Fuse into the fuse box beside the stairs and go up to Sam's office.
- Decision: Sam suggests checking old cases. Choose 'Go to the Archive.' (+1 point) rather than 'Refuse the offer.' (0). Choosing the Archive opens the door marked DETECTIVE to the Police Archives, which is this chapter's Bonus Location.