Old Town of Salem
The town square in front of St. Libelia's Church. The church door is locked, and the fountain is missing its valve ('Yeah, there should definitely be a valve here... And not only that.').
- Open the fence on the right of the square. Take the Tarot card and the Thick Resin. Leave the knotted green hose for later.
- Open the mailbox at the church door and read the closure notice. Use the Magnet on the mailbox slot to pull out the Newspaper (the Salem Gazette).
Salem Museum
The Salem Museum is Chapter 3's Bonus Location, shown with a gold frame on the map. It opened here after agreeing with Sebille's museum idea. New task: find records of Zosta's past.
- Open the easel holding Zosta's portrait and take the Boomerang (an orange four-bladed toy) from the palette.
- Open the music-box tower beside the mechanical panther ('It can't turn without all of its parts.') and add the Boomerang. The tower spins and opens: take the Knitting Needles.
- Open the centre of the large tapestry, where threads are tangled ('There's definitely something under there... Can I untangle it?'). Use the Knitting Needles on them and take the Palette Knife.
- Back at the portrait, pry open the paint-tray drawer with the Palette Knife and take the Suspenders Buckle.
The Locked Shed
The small brick shed on the right of the Old Town square is locked, and its key is still in the lock on the inside.
- Open the shed door. Slide the Newspaper under the door, then push the key out of the lock with the Sticky Stick so it falls onto the paper. Pull the paper back out and unlock the door with the key.
Shed Desk: List
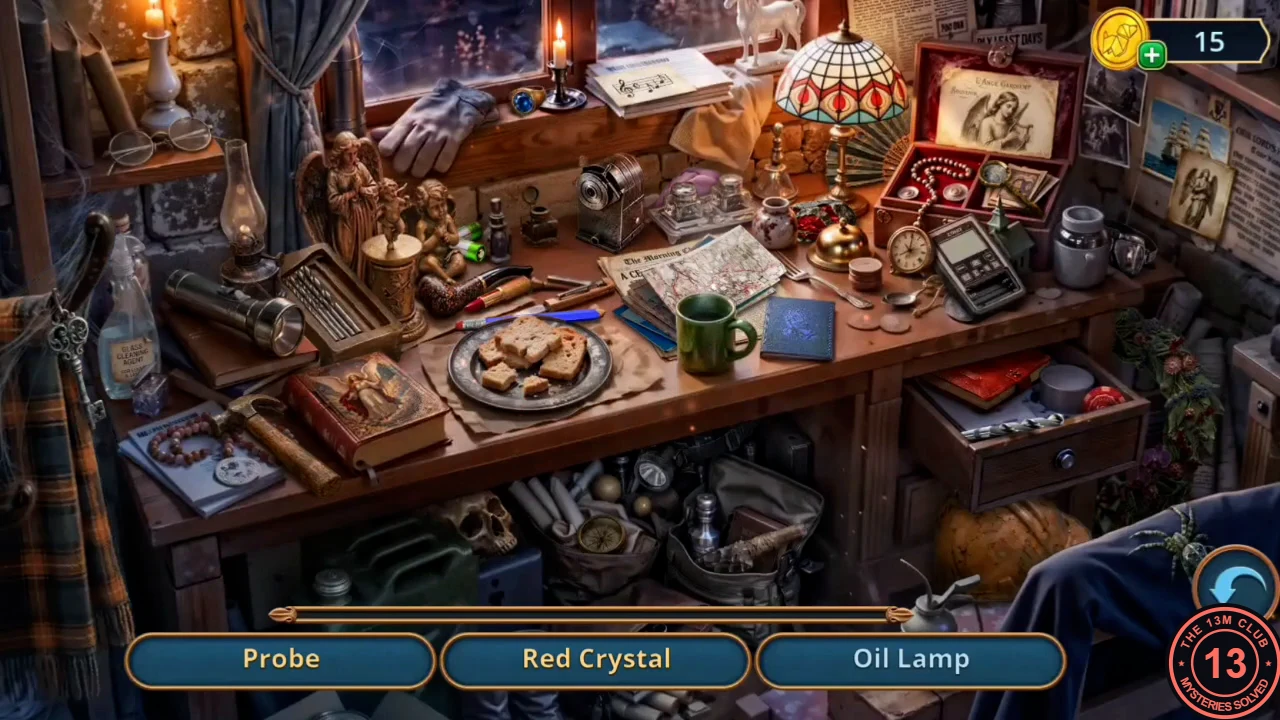
A list search on the shed desk. Each name you find is replaced by a new one. The reward is the Plastic Fan.
- Oil Lamp = the small oil lamp on the top-left shelf. Pencil = the blue pencil on the plate of bread. Magnifying Glass = the jewellery box at the top right is too dirty ('I need to clean it.'), so spray the glass-cleaner bottle from the left onto it, then take the magnifier from the box. Miner's Hat = the round helmet under the blue coat at the bottom right. Compass = in the open bag under the desk. Red Crystal = the red crystal lump beside the brass bell. Geological Map = the folded map on the desk. Probe = the multimeter on the right of the desk is dead ('It's out of power.'): drag the green batteries lying behind the bread plate, left of the pipe, onto the multimeter, then tap the lit meter to find the Probe. Notebook = the red notebook in the open right-hand drawer. Drill Bit Set = the box of drill bits left of the angel figurines. Ancient Stone Knife = in the bag under the desk. Protective Glasses = behind the grey jar at the right of the desk. Finally, find the Plastic Fan silhouette in the open right-hand drawer.
Into St. Libelia Church
Blow the pollen off the flowers for the Bunch of Keys and open the church door.
- The Plastic Fan cannot chase off the flies at the shed door ('Where is that bug spray when you need it?'). Use it instead on the pollen-covered flowers by the fence ('Blow off the pollen with a fan.') and take the Bunch of Keys. Keep the fan.
- Put the Bunch of Keys in the church door lock, left of the mailbox. The key puzzle starts.
Church Door Key
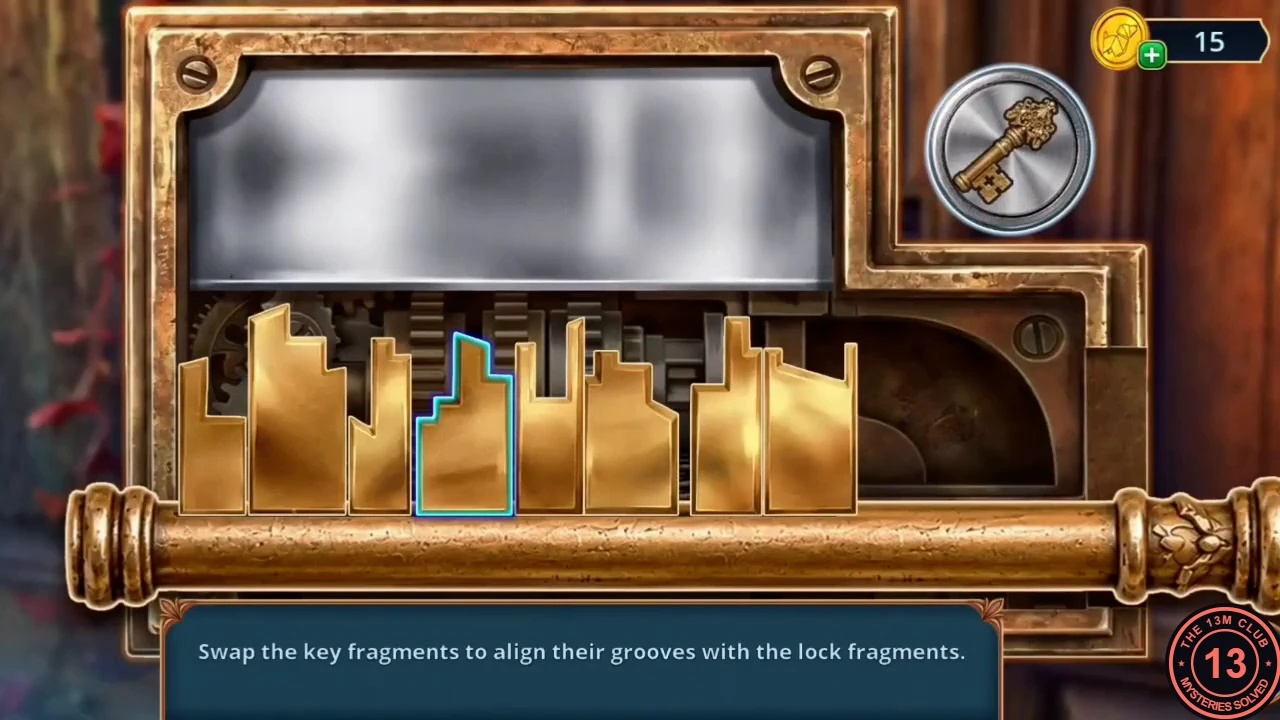
The instruction reads: swap the key fragments to line up their grooves with the lock fragments. Eight gold fragments make up the key's teeth; tap one fragment and then another to swap them. When the order is right, the key rises into the lock. A wrong attempt shows 'You lose. Please try again.'; tap OK and the fragments are shuffled again. This guide gives the target and a working approach rather than every move.
- Arrange the fragments from left to right so that the top edge forms this outline: 1) a narrow piece with a tall peak on the left and a lower step on the right; 2) a wide piece whose top dips and then rises to a tall right edge; 3) a narrow piece, low on the left with a tall post on the right; 4) the widest and tallest piece, peaking on the left and stepping down to the right; 5) a short narrow piece; 6) a medium piece rising in steps to a peak right of centre; 7) a medium piece peaking on the left and stepping down; 8) a narrow piece, low on the left with a tall spike on the right. The solved key is shown in this section's screenshot.
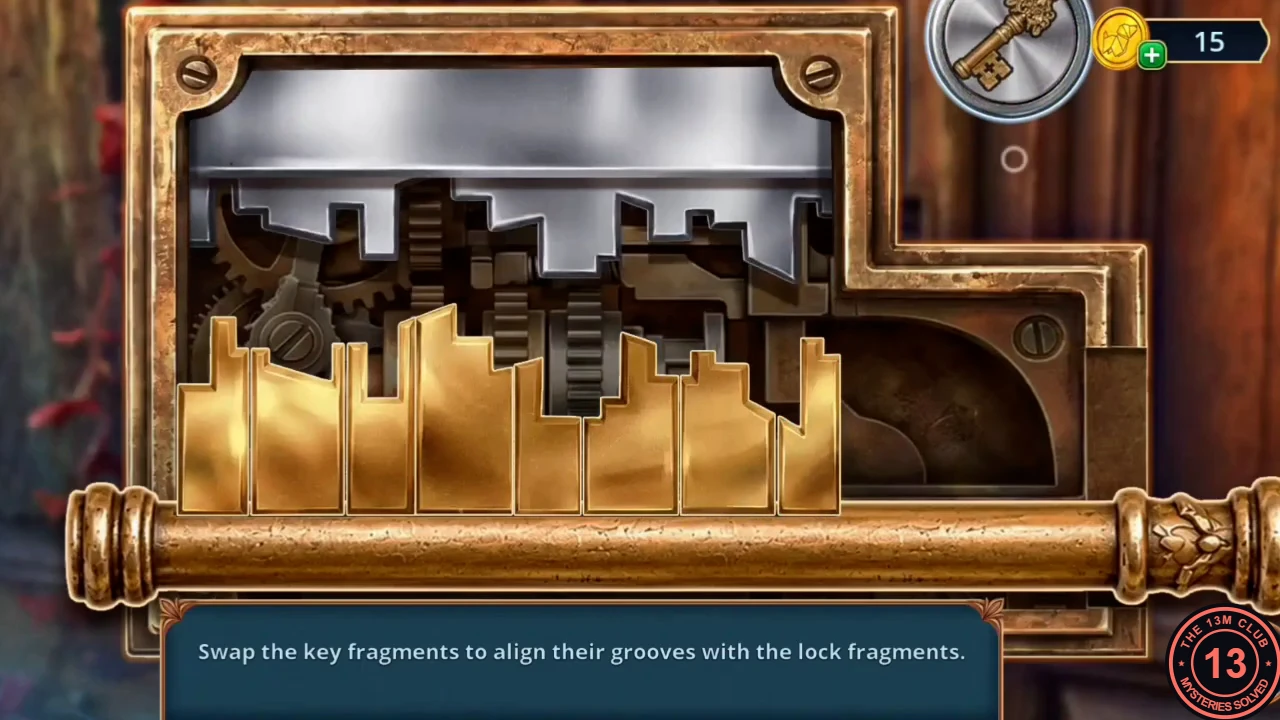
Solved: the key outline matches the lock grooves. Copy this order from left to right.
Inside the Church
Sebille: 'There must be a secret passage somewhere inside. We need to find it and fast.'
- Decision: 'Agree with Sebille.' costs 60 coins and gives +2 points; 'Express doubt.' is free and gives 0. The new task is to find Zosta.
- Look at the confessional's stone wall ('Am I imagining things, or is something really written on here?') and the broken raven mosaic on the floor ('Some pieces are missing.'). You will solve both later.
- Open the lectern by the chalice and take the Light Bulb, the Tarot card and the Acetone.
- Open the knight statue in the nave and shoot it with the Gun with Rubber Bullets. Take the Grape Amulet that falls.
- Put the Grape Amulet on the chalice at the lectern. A drawer opens: take the Blood Pressure Monitor.
- Open the confessional door. Wedge the Blood Pressure Monitor's cuff into the gap and pump it until the door is forced open. Take the Attraction Ticket.
Apple Tub: Fragments
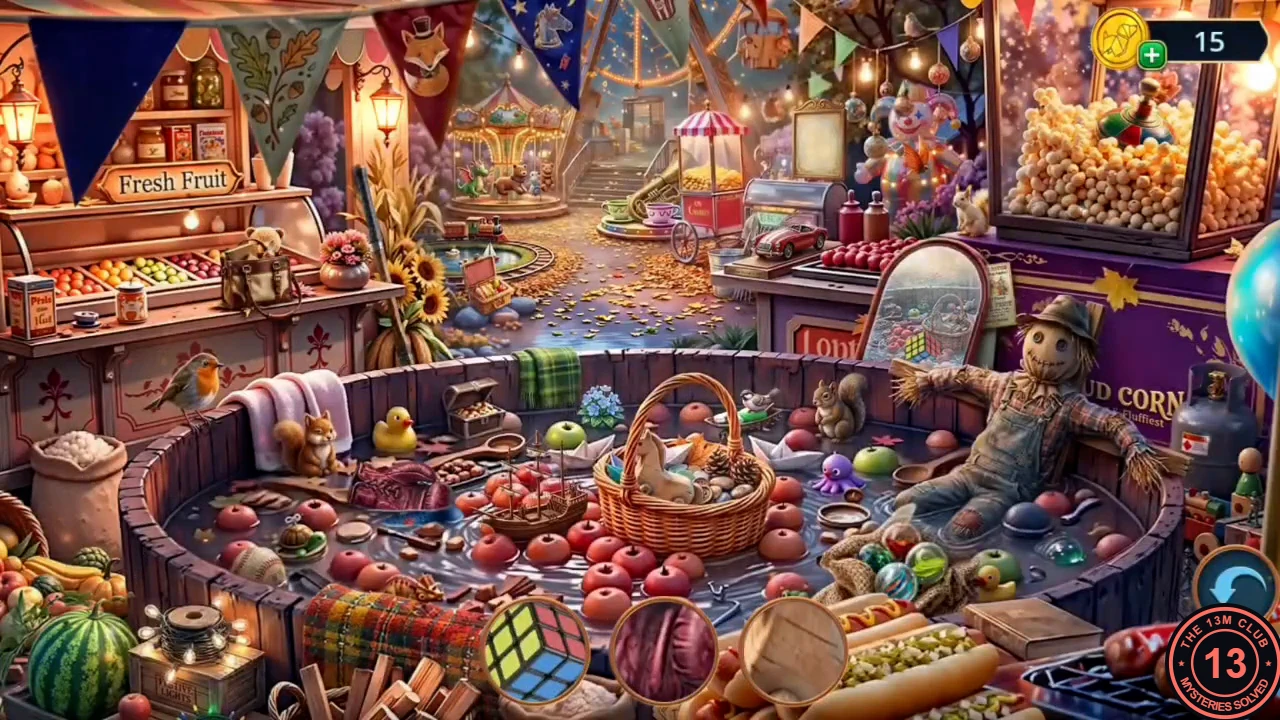
Travel to the City Fair. The map now lists Madame Zosta's Magic Shop, Secret Cellar Under the Shop, City Fair, Old Town of Salem, Salem Museum (bonus) and Inside the Church. This time the bar shows close-up fragments of objects; tap the object each fragment comes from. The reward is the Toy Bone.
- Put the Attraction Ticket in the Apple Tub's ticket box to start the search. Find the object behind every fragment circle. The fragments include a Rubik's cube, a purple cloth, a string of lights, a black knotted cord, a ship, a red object, a striped ball, a wooden piece, a baseball, marbles and a puppy's face; compare each circle with the scene and tap the match. When all are found, take the Toy Bone.
The Witch Heart
Give the Toy Bone to the puppy at the fair for the Witch Heart, which starts the dark-magic puzzle in the Secret Cellar.
- At the foot of the carousel pole at the City Fair, give the Toy Bone to the puppy guarding a red heart. The puppy runs off: take the Witch Heart.
- Go to the Secret Cellar and put the Witch Heart into the chest of the hooded mannequin. The dark-magic puzzle starts.
Dark Magic Clots
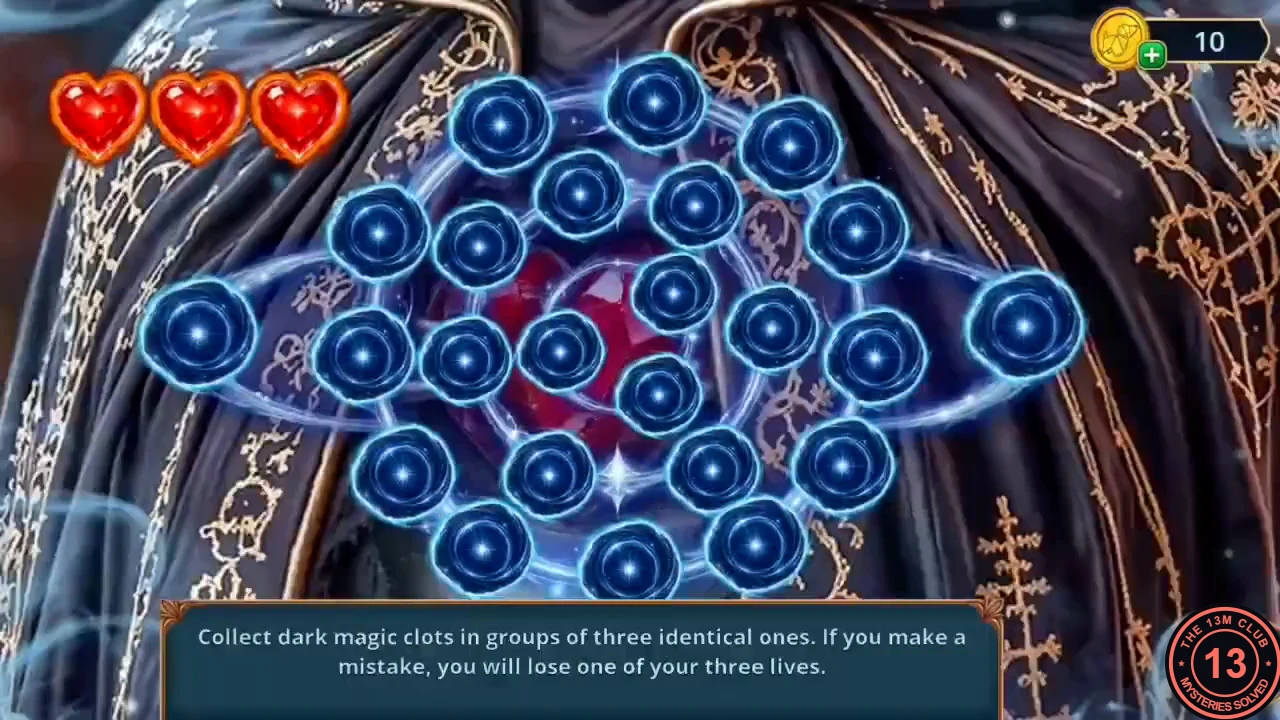
The instruction reads: collect dark magic clots in groups of three identical ones; each mistake costs one of your three lives. All the clots start blue and hidden, and tapping one reveals its colour.
- Tap the clots one at a time. When three of the same colour are showing, they are collected; a mismatch costs a heart. Remember where you saw each colour so you can complete trios without mistakes. Collect every group (cyan, purple, yellow, red, green, white and the rest) to finish.
- The mannequin's hand opens: take the Ballerina Figurine. Put it on the gold music box beside the raven's cage. The box opens: take the Powder.
- Go back to the church and dust the Powder over the confessional's stone wall. Hidden runes appear on the tiles and the rune puzzle starts.