Madame Zosta's Empty Shop
Chapter 3, 'The Magician', opens inside Madame Zosta's Magic Shop. Zosta has vanished with Sam, and Sebille comes along to help.
- Sebille warns that Sam will die unless you find a lead. Decision: 'Start the search right away.' costs 60 coins and gives +2 points; 'Suggest calling for backup.' is free and gives 0. Either way the new task is to search Zosta's shop carefully.
- Open Zosta's round table and take the Crystal and the Paper. The Hermit card (IX) lying here is part of the story, not one of the 140 collectible Tarot cards.
- Look at two things you will come back to: the coil machine with coloured shape buttons on the back counter, and the brass lantern in the dark back room ('It's a bit dark. Some light wouldn't hurt.').
- Go out to the City Fair and put the Pump on the police car's flat front tyre ('I don't suppose there's a spare tire around... I'm gonna have to fix this one.').
- Open the Shooting Gallery counter, where a chest is covered in melted blue paint. Take the Sticky Stick and the Gun with Rubber Bullets. The Apple Tub barrel beside it stays closed for now.
Refilling the Lighter
Back in Zosta's shop, a corner of the rug hides a floor hatch.
- Open the rug corner by the floor hatch. Take the Lighter Fluid, then cut a Carpet Tassel from the rug's edge with the Cigar Cutter.
- Open the Lighter in your inventory and fill its two slots with the Lighter Fluid and the Carpet Tassel. The lighter now works.
- In the dark back room, light the candle in the brass lantern with the Lighter. The room brightens and a search scene opens on the table.
Zosta's Back Room: Pairs
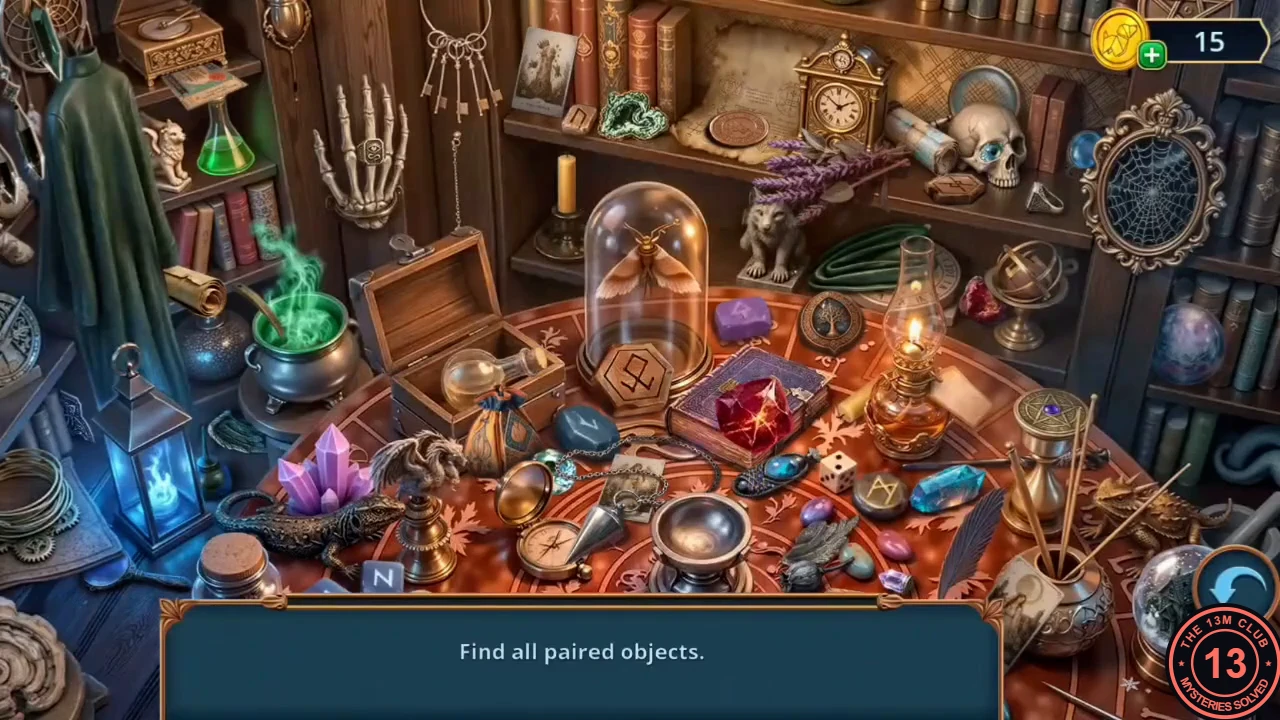
The instruction reads: find all paired objects. Tap two identical objects to remove them. The reward is the Stamp Pad.
- Remove every matching pair from the table. When the last pair is gone, take the Stamp Pad.
The Code Imprint
Take a code imprint from the coil machine and use it on the hidden floor hatch in Zosta's shop.
- Go to the coil machine on the back counter. Press the Stamp Pad onto the scratched wood beside it, then lay the Paper over the ink. The imprint shows the code 3 2 4 1 6 5.
- Put the code imprint on the floor hatch under the rug corner. The hatch puzzle starts.
Floor Hatch Amulets
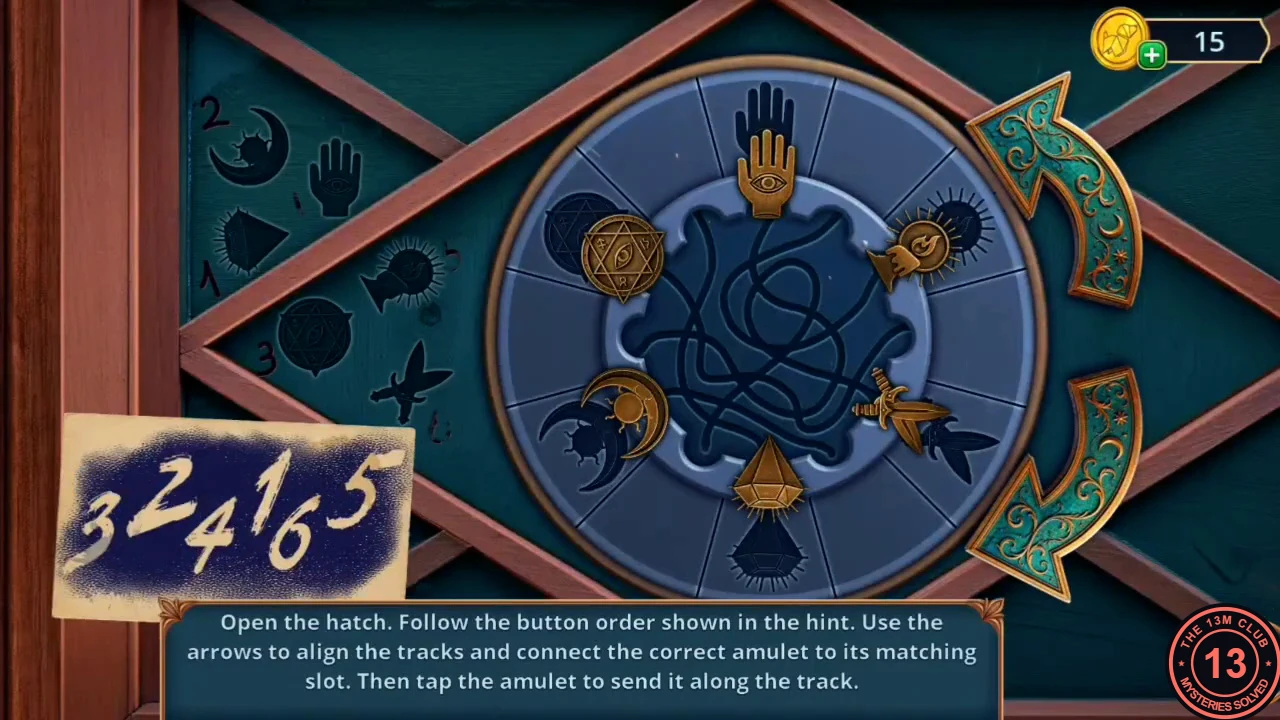
The instruction reads: open the hatch by following the button order in the hint. Use the arrows to line up the tracks so each amulet connects to its matching slot, then tap the amulet to send it along its track. The numbers painted beside the symbols on the left board tell you each amulet's number: 1 crystal, 2 crescent moon, 3 hexagram, 4 hand with an eye, 5 hand holding a sun, 6 crossed daggers.
- The code 3 2 4 1 6 5 gives the order, so send the amulets like this: hexagram, crescent moon, hand with an eye, crystal, crossed daggers, hand holding a sun. For each one, turn the outer ring with the two arrows until the slot with the matching silhouette sits at the end of that amulet's track, then tap the amulet. A seated amulet glows green. When all six are in place, the hatch opens.CODE3 2 4 1 6 5
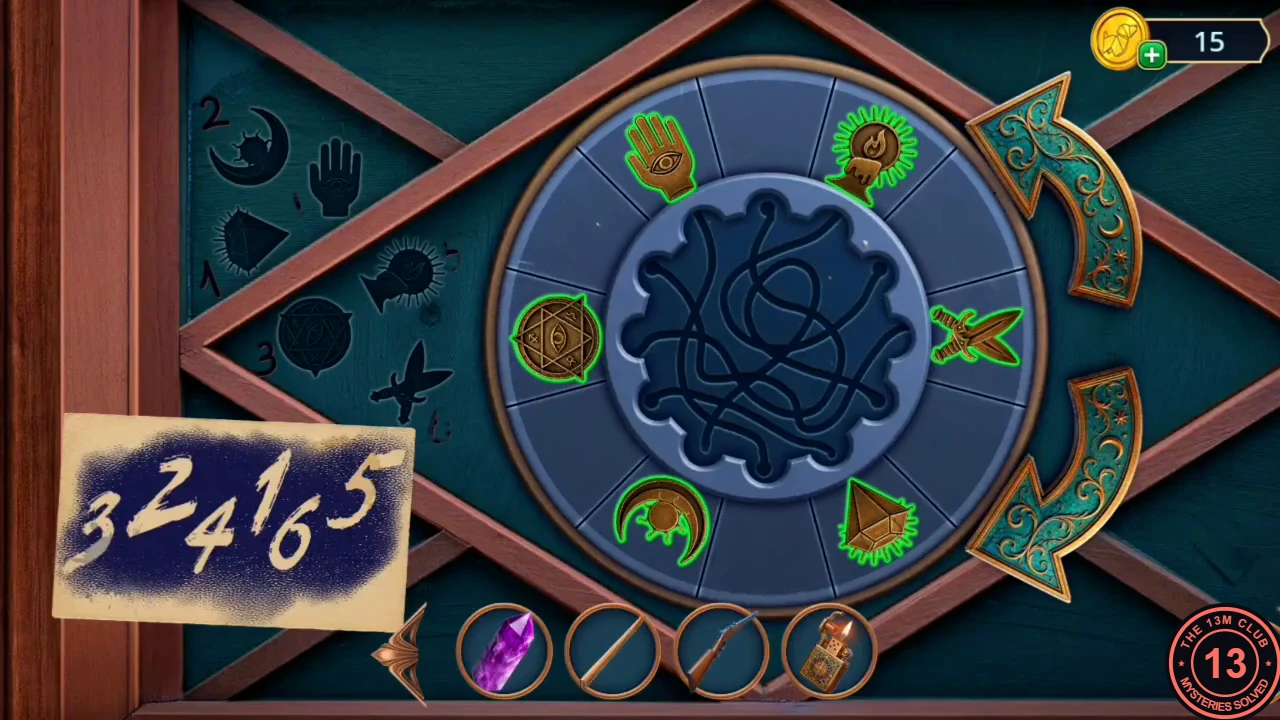
Solved: all six amulets are in their slots.
Secret Cellar Under the Shop
Climb down through the hatch into the Secret Cellar Under the Shop.
- Take the Tarot card beside the raven's cage, then take Zosta's Box from the skull table. The table needs something else ('Something is missing here.').
- Put the Crystal on the carved stand beside the skull. The skull opens: take the Star Toy.
- Open the low shelf by the red robe, where needles are scattered ('It's time to collect these needles.'). Use the Star Toy to gather the needles, then take the Seam Ripper.
- Open the hooded mannequin and cut the red stitches on its cloak with the Seam Ripper. Read Zosta's note: the deck is hidden in the crypt under St. Libelia's Church. Take the Magnet.
- Use the Magnet on the metal plate inside the cloak to pull out the Flag Lock. The task is complete, and the next one is to get into St. Libelia's Church. Chapter 3 on the map now has a Bonus Location tile, which is still locked.
Fixing the Police Car
Victor wants to drive to the church: 'I can get to that church quicker by car. All I have to do is find a map...'
- Go to the police car's tyre, fit the Flag Lock onto the valve and work the pump until the tyre is full. Take the Car Keys and the Horseshoe that were under the wheel.
- Unlock the car door with the Car Keys.
- Hook the Horseshoe onto the two hooks on the Apple Tub lid to lift it off, then tap the open tub.
Apple Tub: Riddles
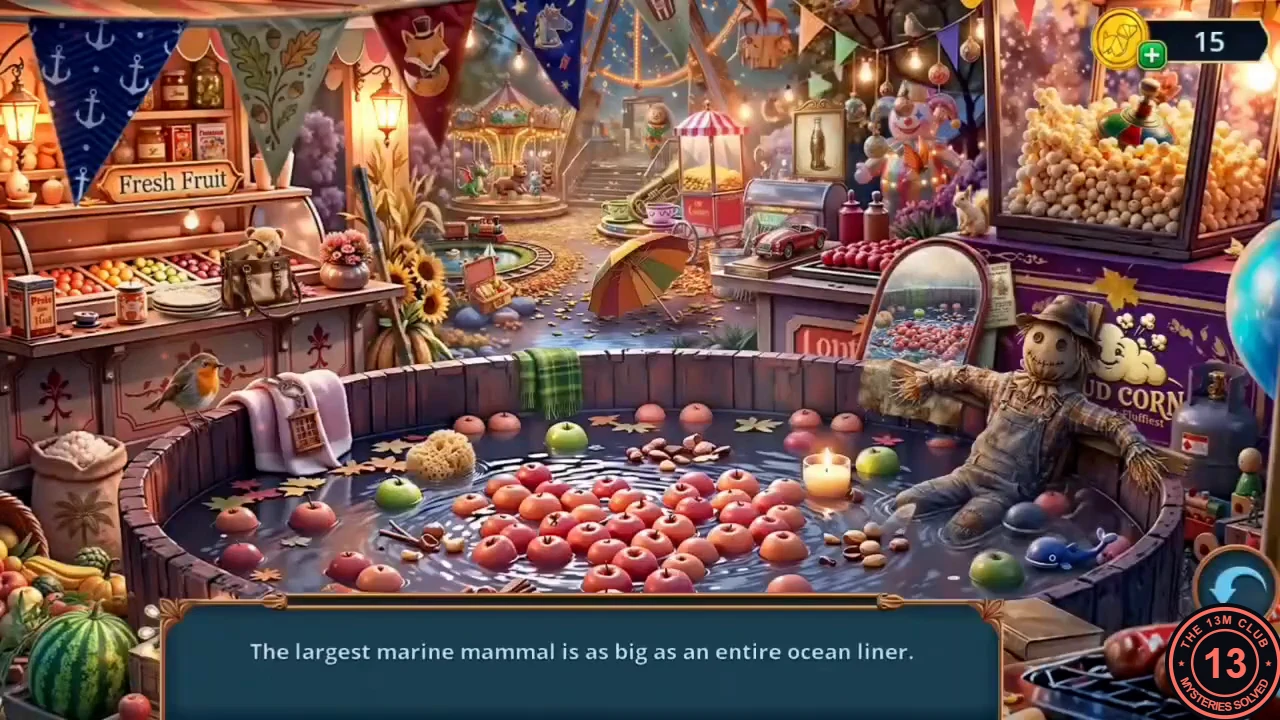
A riddle search: one riddle is shown at a time, and you tap the object it describes. The reward is the Toy Grabber.
- Answers, in the order the riddles appear. 'The largest marine mammal' = the blue toy whale floating at the right edge of the tub by the scarecrow's boot. 'I sail on a ship... and I guard the vessel at sea' = the anchor on the blue pennant at the top left. 'What's full of holes but still holds water?' = the sponge floating in the left part of the tub. 'I'm tall when I'm young and short when I'm old' = the lit candle floating right of centre. 'What has a neck but no head?' = the bottle in the small framed picture by the popcorn cart (top centre). 'What has to be broken before you can use it?' = the egg figure on the stall behind the tub (top centre). 'What kind of tree can you carry in your hand?' = the palm print on the sack at the far left. 'What invention lets you look right into the darkness?' = the little lantern hanging on the pink towel at the tub's left rim. 'I do not have wings, but I can fly. I don't have eyes, but I can cry' = the cloud on the popcorn sign at the right. The riddle about cities where no people live = the sacking map draped over the tub rim under the scarecrow's arm. 'You buy me to eat, but never eat me' = the stack of plates on the fruit-stand counter at the left. 'When water comes down... I go up' = the umbrella in the background centre. Finally, find the Toy Grabber silhouette among the apples in the middle of the tub, left of the scarecrow.
Road Signs to Old Salem
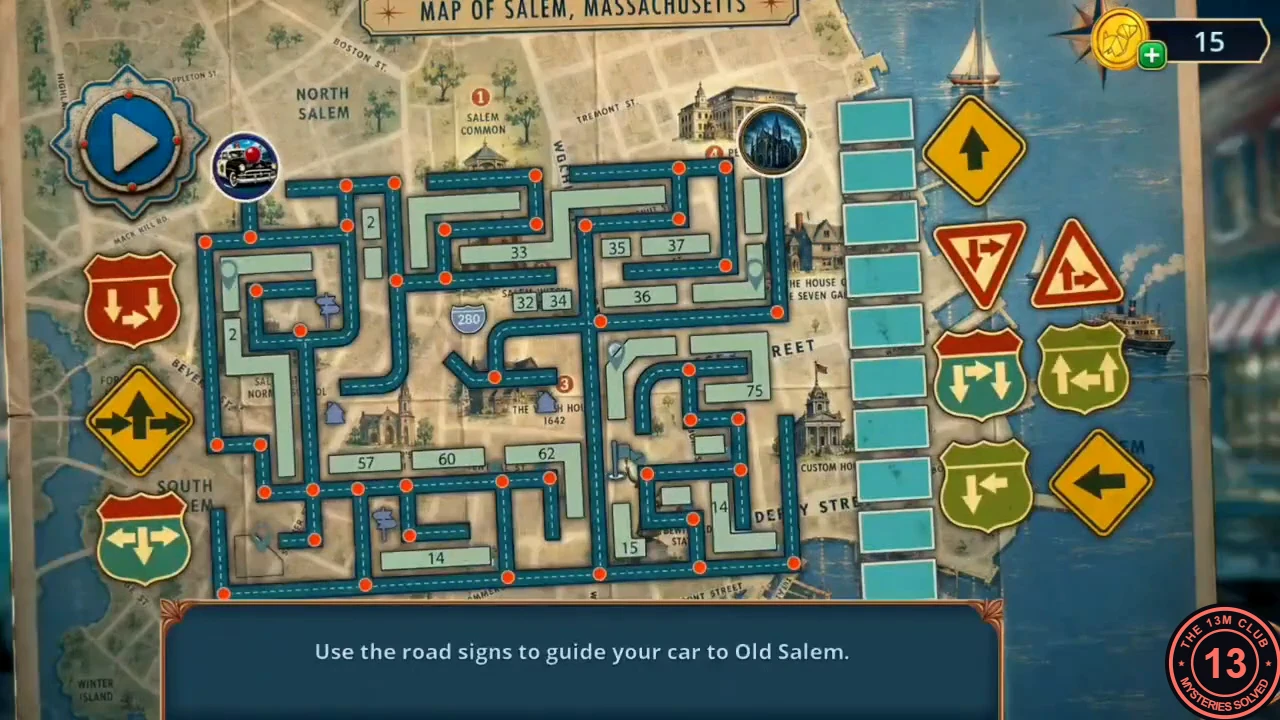
The instruction reads: use the road signs to guide your car to Old Salem. Drag signs into the empty column of slots beside the map, from top to bottom, then press Play.
- Reach through the bars of the Shooting Gallery chest with the Toy Grabber and take the City Map. Put the City Map in the open police car.
- Fill the slots in this order: 1) green shield with a red top and arrows pointing right and down (right group, third row, left); 2) yellow diamond with a left arrow (right group, bottom right); 3) red shield with arrows down and right (left group, top); 4) yellow diamond with arrows left, up and right (left group, middle); 5) green shield with a red top and arrows left, right and down (left group, bottom); 6) red-bordered triangle with arrows up and right (right group, second row, right); 7) yellow diamond with a straight-up arrow (right group, top). Leave the other three signs unused and press Play. The car drives to Old Salem.
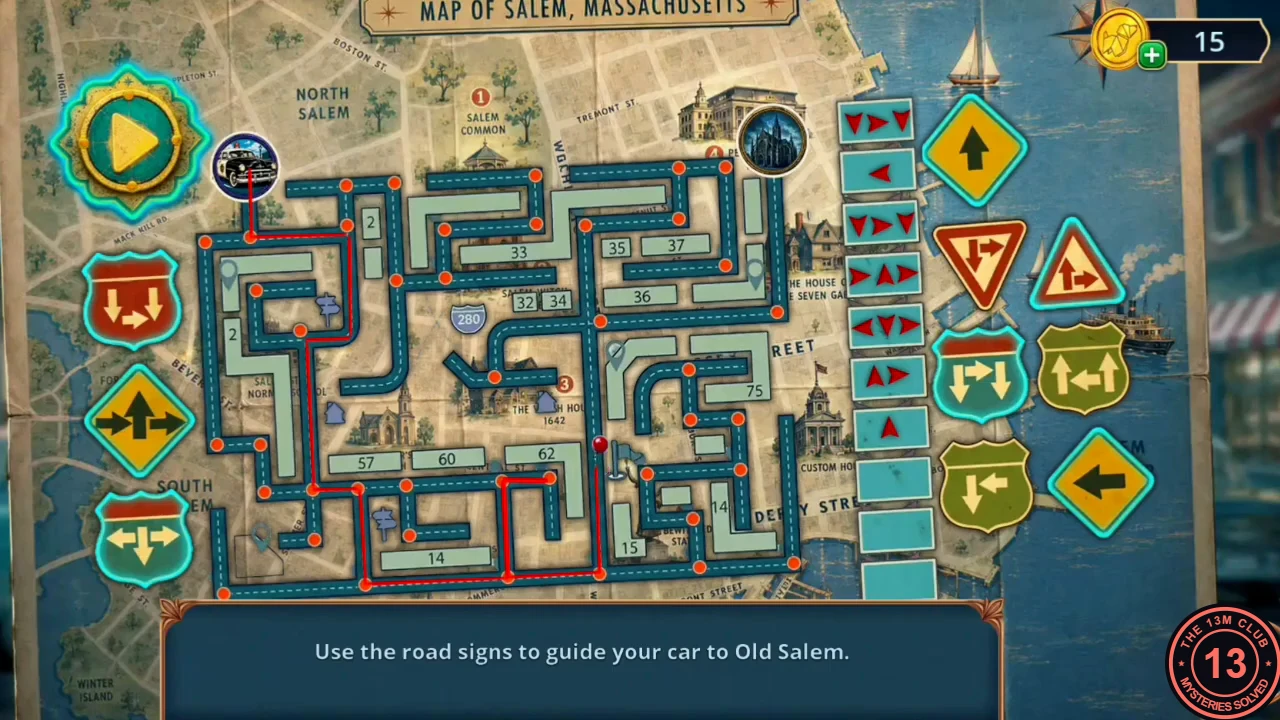
The seven signs from the step in their slots, with the route the car follows. - On arrival, Sebille suggests looking inside the museum. Decision: 'Praise the idea and agree.' is free and gives +1 point; 'Question her assumptions.' gives 0. Agreeing is the choice that leads to the Salem Museum bonus location below.