Set the alpenstock sequence
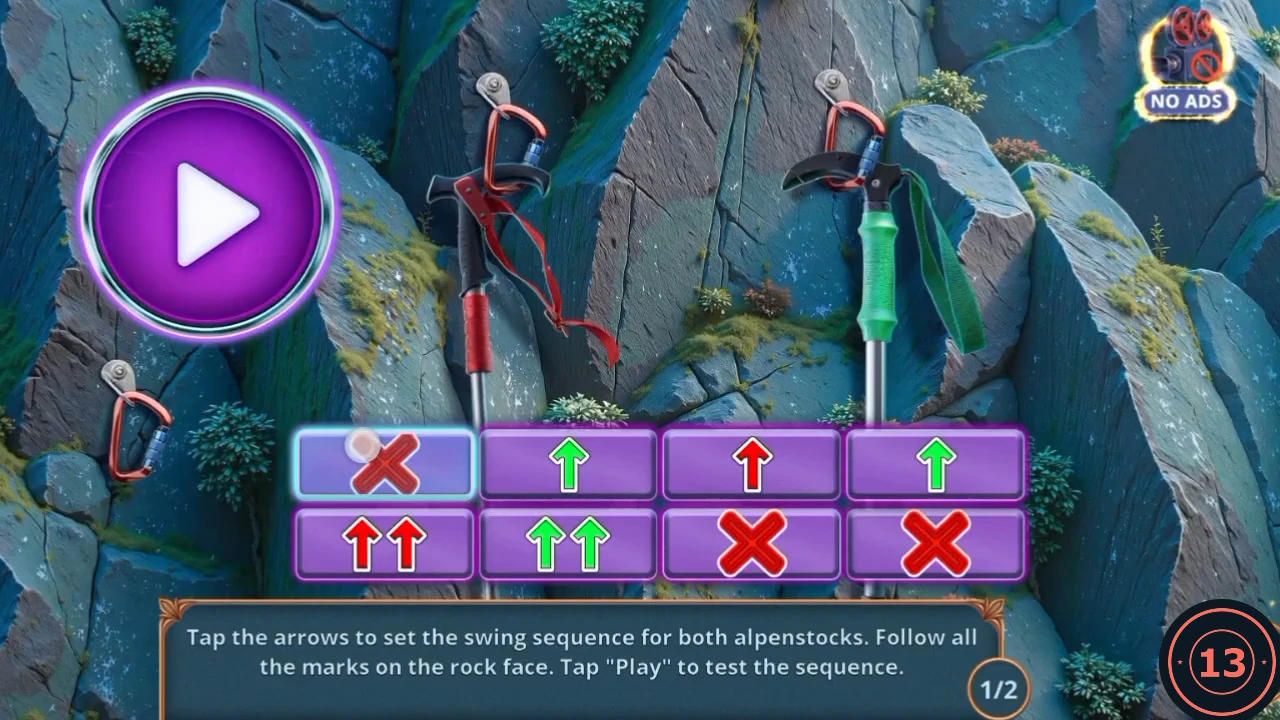
Each cell cycles through a single arrow, a double arrow and an X when tapped. Columns 1 and 3 belong to the red pick and columns 2 and 4 to the green pick. Press Play to test. Both rounds were solved with the settings below.
- On the Slope, open the chain and use the Acid on it. The chain gives way and you get the second Alpenstock.
- Open the anchors on the rock face and place the Alpenstocks. The board opens.
- Set round 1/2 and press Play. U is a single arrow, D is a double arrow and X is the cross.CODETop: U D X D Bottom: U X U D
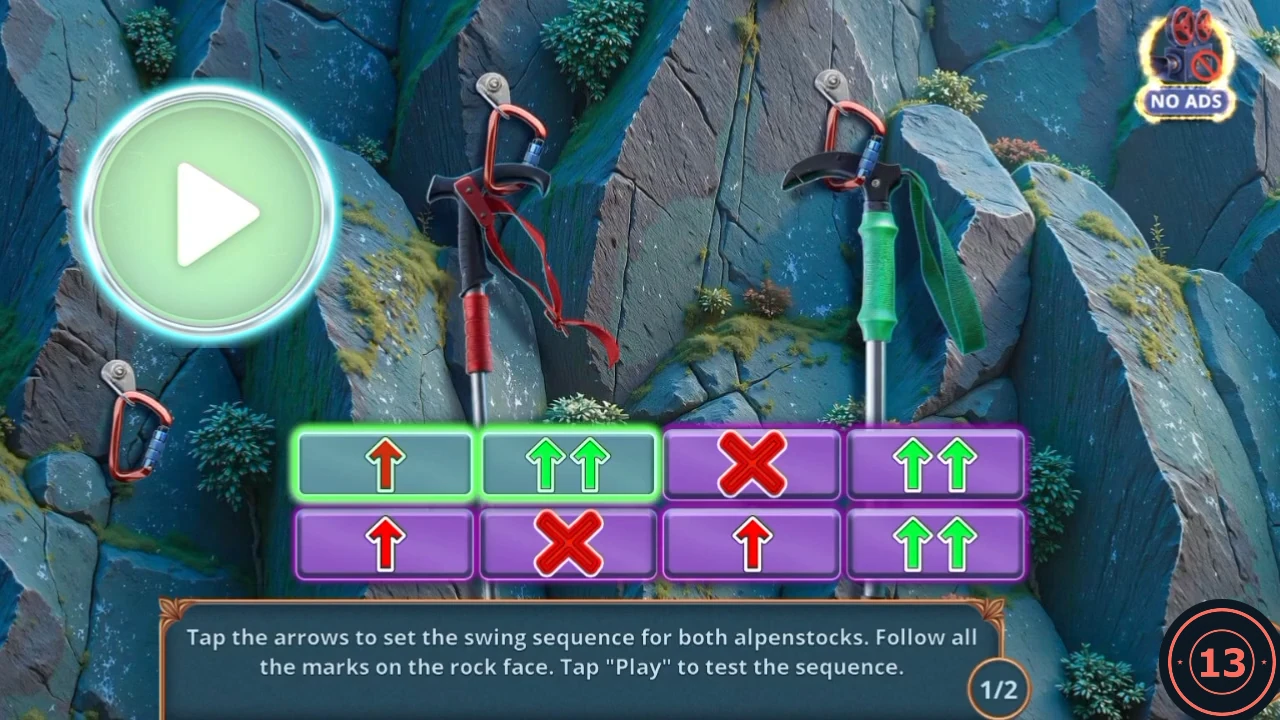
Round 1/2 settings, with the sequence running after Play is pressed. - Set round 2/2 and press Play.CODETop: D U D X Bottom: D D X U
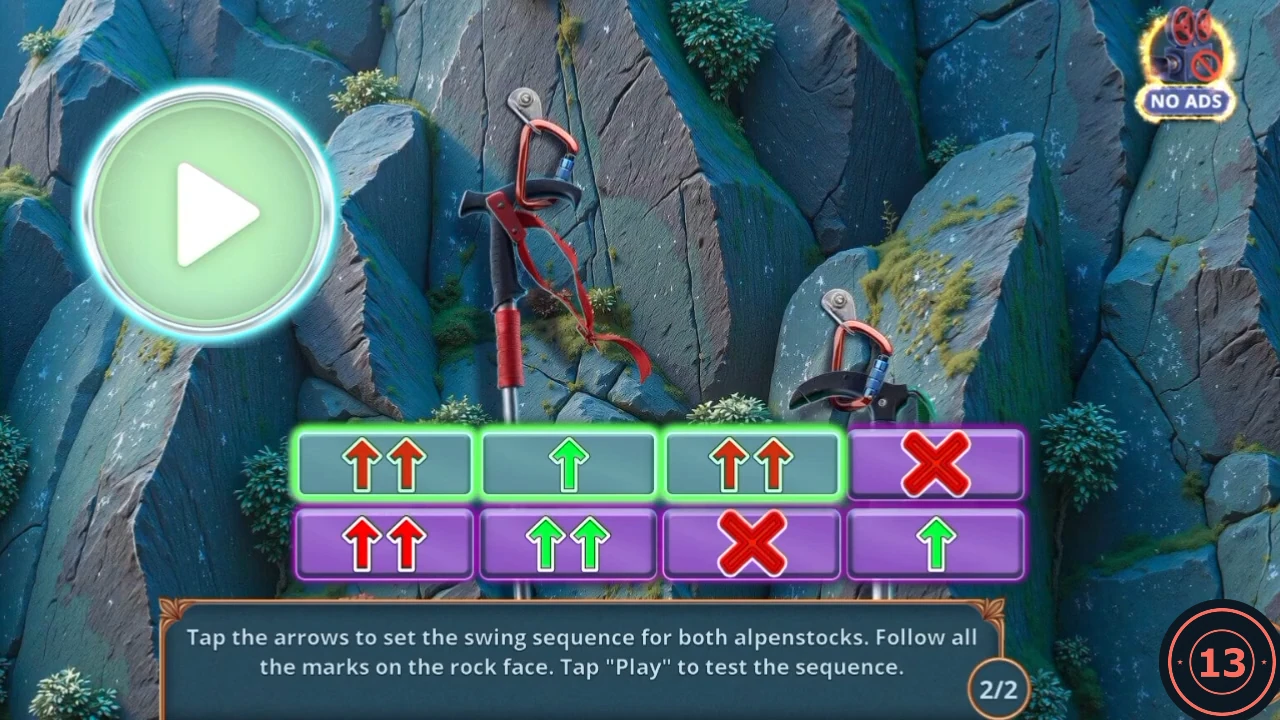
Round 2/2 settings, with the sequence running after Play is pressed.
Work the Viewpoint
The Viewpoint scene appears in the journal as Cliff Top.
- Talk to the man you rescued from the wolf. He says the storm blew the antenna over. "What brought you here?" earns 2 Decision Points; the other choice is "Are you stuck here?" He hands over the first Wooden Amulet, and the new task is to fix the antenna.
- Open the crane base. Tap the paper on the rope coil to read Page 2 and see the rune diagram, then take the Slingshot.
- Open the waterfall ledge and place the Sign under the falling water. The water parts. Take the Rope and the Supports from behind it.
- Open the tree stump and use the Hair Dryer on the puddle covering the note. Read Page 3, then take the Ranger Badge underneath.
- At the Truck Wreck, open the collapsed tarp and use the Supports. Take the Boot and the second Wooden Amulet from the tent.
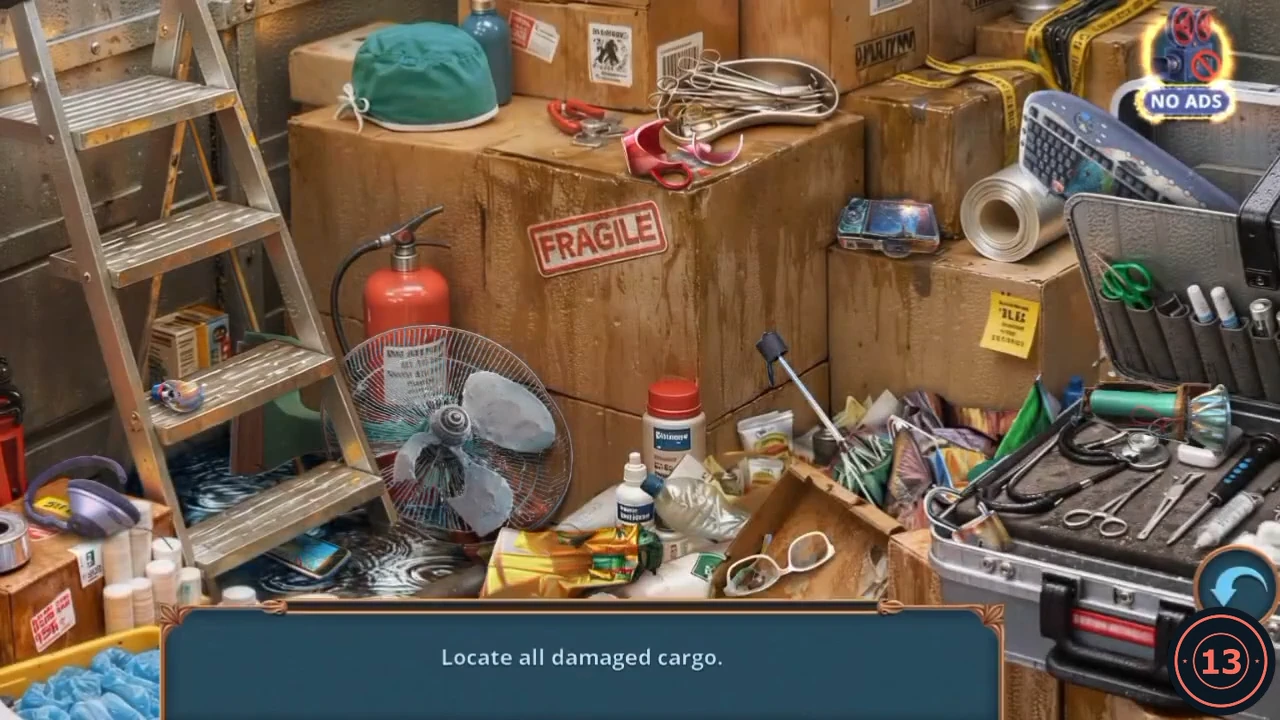
- Sparkles appear at the back of the truck. Open the cargo and tap every damaged item. The game gives no list, only "Locate all damaged cargo", and each correct item is removed. Positions are from the recording, and the order can differ. Small painted figure: on the second step of the ladder at the left. Phone with a cracked screen: in the water under the ladder's bottom step. Purple headphones: on the box at the far left, beside the ladder. Broken fan: in front of the fire extinguisher. Broken red glasses: on top of the big FRAGILE carton, near the steel tray. Cracked blue camera: on the box at the right, just left of the silver roll. Cracked keyboard: leaning at the top right, above the silver roll. Broken umbrella: leaning between the bottles and the silver case, low on the right. Crushed yellow packet: on the floor below the extinguisher, in front of the bottles. Broken sunglasses: on the floor just right of the yellow packet. Cracked green flashlight: lying across the top of the open silver case. The Pole then appears leaning against the fire extinguisher. Tap it to take it.
- At the Viewpoint, open the waterfall ledge and use the Pole to lever the boulder aside. Take the Paper Clip.
- Open the carved rock wall and use the Paper Clip on the crack. Read Page 4, which points to evidence in a jacket lining.
Trace the diagram on the jacket
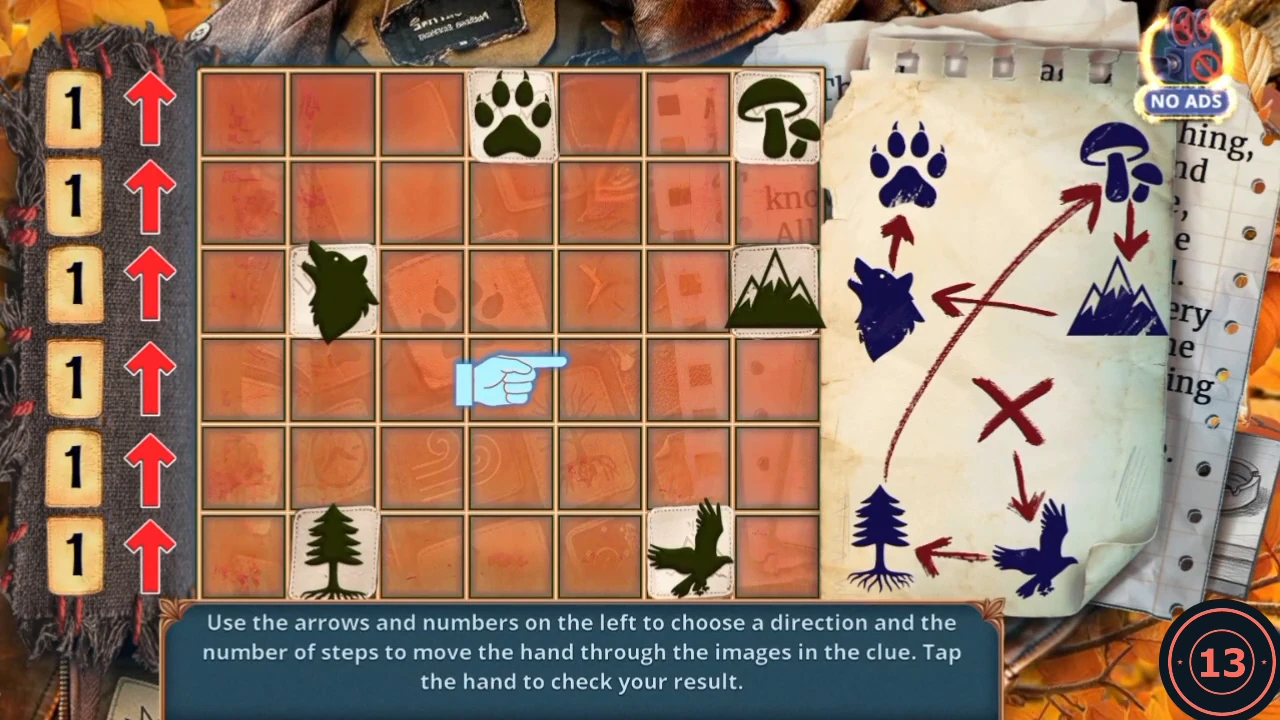
Each of the six rows sets one move for the hand: an arrow and a number of steps. The clue page shows the order of the pictures, from the red X to the raven, tree, mushroom, mountain, wolf and paw. Tap the hand to test.
- At the Shoreline, open the patched jacket. The notebook diagram starts the board.
- Set the six rows from top to bottom, then tap the hand. It lands on each picture in the clue's order.CODE2 down-right 4 left 5 up-right 2 down 5 left 2 up-right
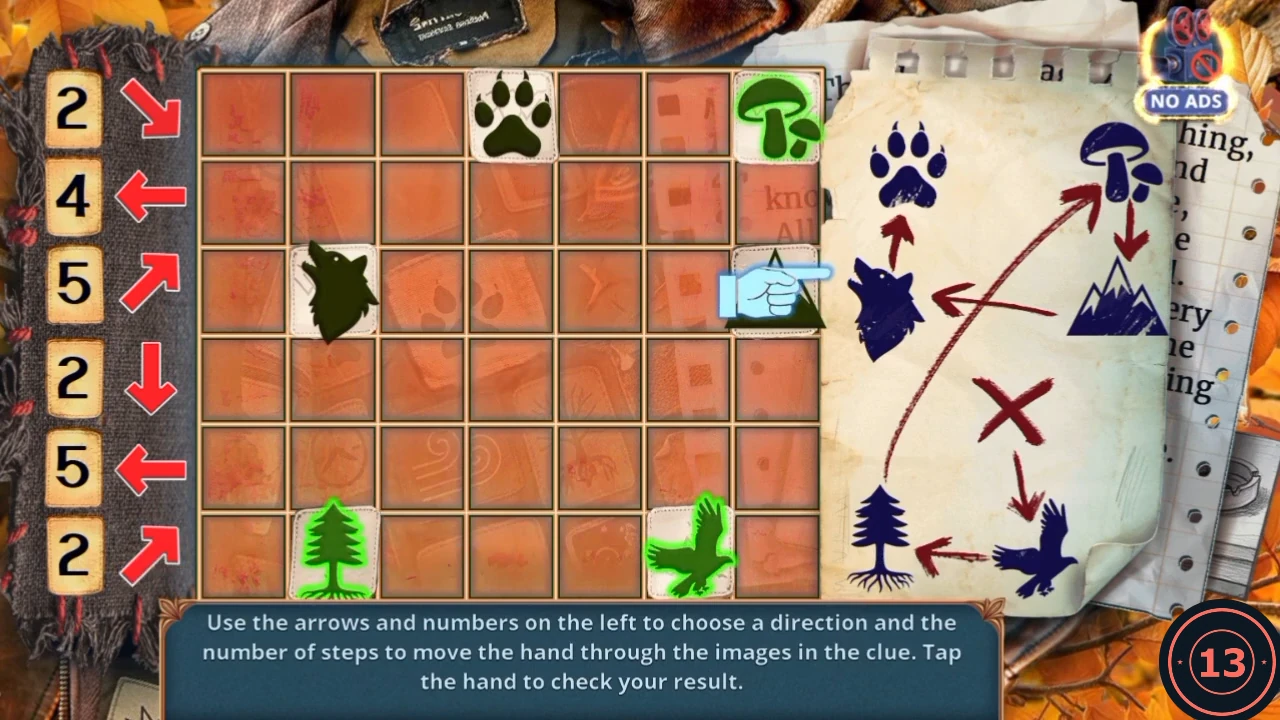
The recorded settings, with the hand part way through its run. The first three pictures are already green. - Tap the paw patch on the jacket to lift it and take the third Wooden Amulet. The Elastic Band arrives in your inventory as you leave.
Fill the altar and clear the butterflies
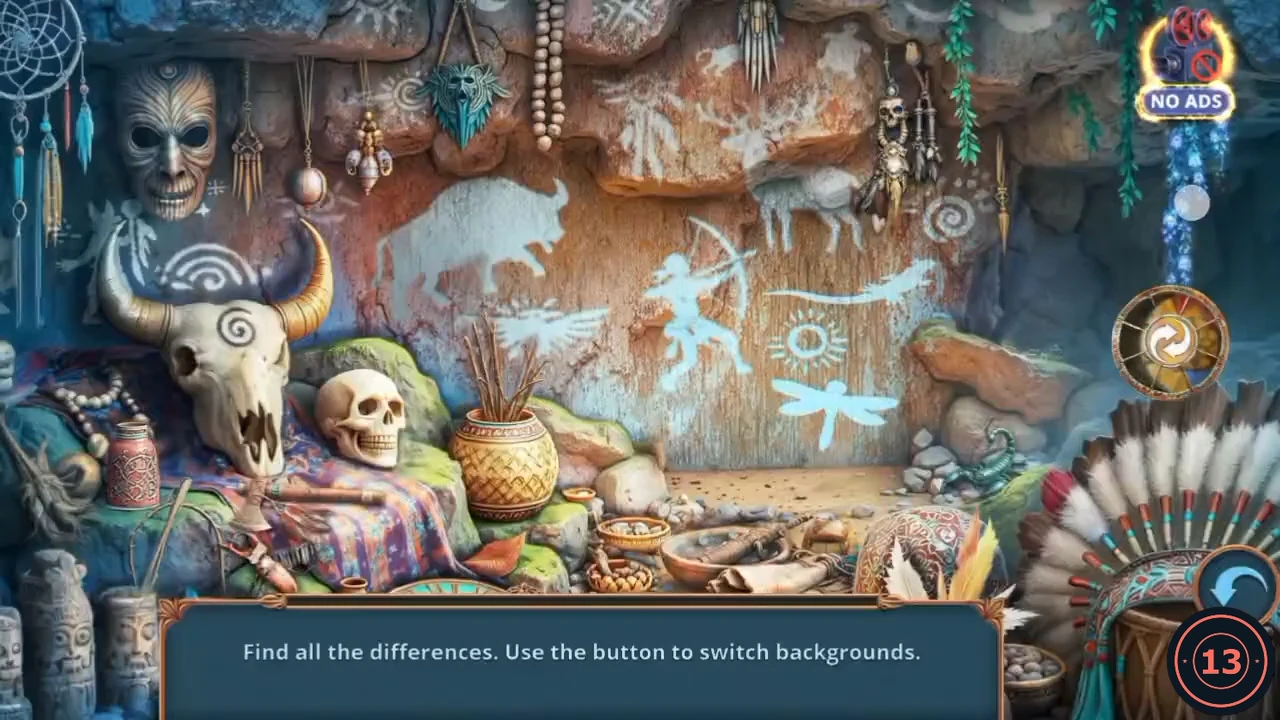
The second scene is a spot-the-differences: use the button on the right to switch between the two backgrounds.
- On the Slope, open the altar and place the three Wooden Amulets in their matching wedge slots. A compartment opens. Take the Camping Pot and read the scroll.
- Open the cave wall on the Slope. Find all the differences: tap the round button at the right to switch between the two backgrounds and compare them. Each correct tap gets a green tick. There are twelve in the recording, and they sit here. The green mask at the top centre. The small skull charm hanging at the upper right. The strand of blue lights at the far right. The spiral on the bull skull's forehead. The patterned jar at the left. The small axe under the bull skull's jaw. The knife below it, on the striped blanket. The human skull. The sticks in the woven pot. The painted dragonfly on the wall. The scorpion on the rocks at the right. The red feather on the headdress. When all twelve are ticked, the Censer appears on the ground just right of the woven pot. Tap it to take it.
- At the Truck Wreck, open the butterflies by the headlight and set down the Censer. Open it, add the flowers and light them with the Matches. The smoke drives the butterflies off.
- Take the Ranger Badge and the Double Hairpin from where the butterflies were.
- Open the glovebox and use the Double Hairpin on its red button. Take the Ranger Badge inside.
Crack the carved rock
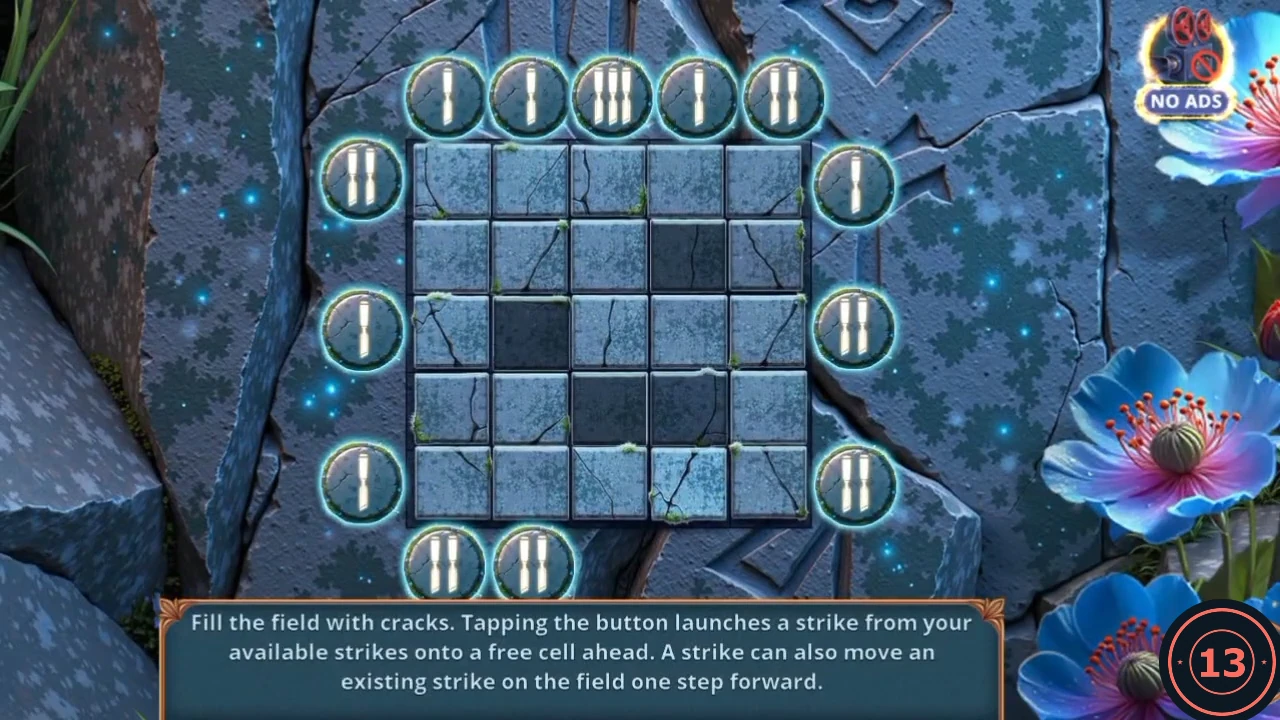
The 21 strikes on the buttons around the board match the 21 free cells, so every strike must land on the board. A new strike pushes any strike in its path one cell forward. The arrow at the left undoes moves.
- At the Viewpoint, open the carved rock and use the Boot on the chisel at its foot. The board opens.
- Recorded order: tap the buttons as listed. Rows count from the top and columns from the left.CODELeft row 1 twice Top column 1 Top column 2 Top column 3 three times Top column 4 Right row 1 Right row 3 twice Top column 5 twice Right row 5 twice Left row 3 Bottom column 1 twice Bottom column 2 twice Left row 5
- Take the Scraper and the Wind-up Crab from the opening.
Chapter 3 badges before the antenna
Collect these before raising the antenna, because that ends the chapter. This group holds 9 pickups worth 17.
- Shoreline, main scene: on the far bank, to the right of the red raft. This position is approximate. Worth 2.
- Truck Wreck, main scene: on the dirt road at the bend, left of the big mossy rock. This position is approximate. Worth 3.
- Truck Wreck, butterflies close-up: on the bronze disc at the upper right, on the dirt. Worth 1.
- Truck Wreck, glovebox close-up: near the top centre, on the dashboard by the paper. This position is approximate. Worth 1.
- Slope, main scene: on the path between the red helmet and the mossy rock. This position is approximate. Worth 1.
- Slope, chain and red helmet close-up: on the stone at the upper left. Worth 2.
- Slope, stone disc close-up: at the upper left, beside the standing stone. Worth 2.
- Cliff Top (the Viewpoint), main scene: at the foot of the low stone wall, left of the steps. Worth 2.
- Cliff Top, tree stump and rope close-up: at the upper left, beside the root. This position is approximate. Worth 3.
Raise the antenna
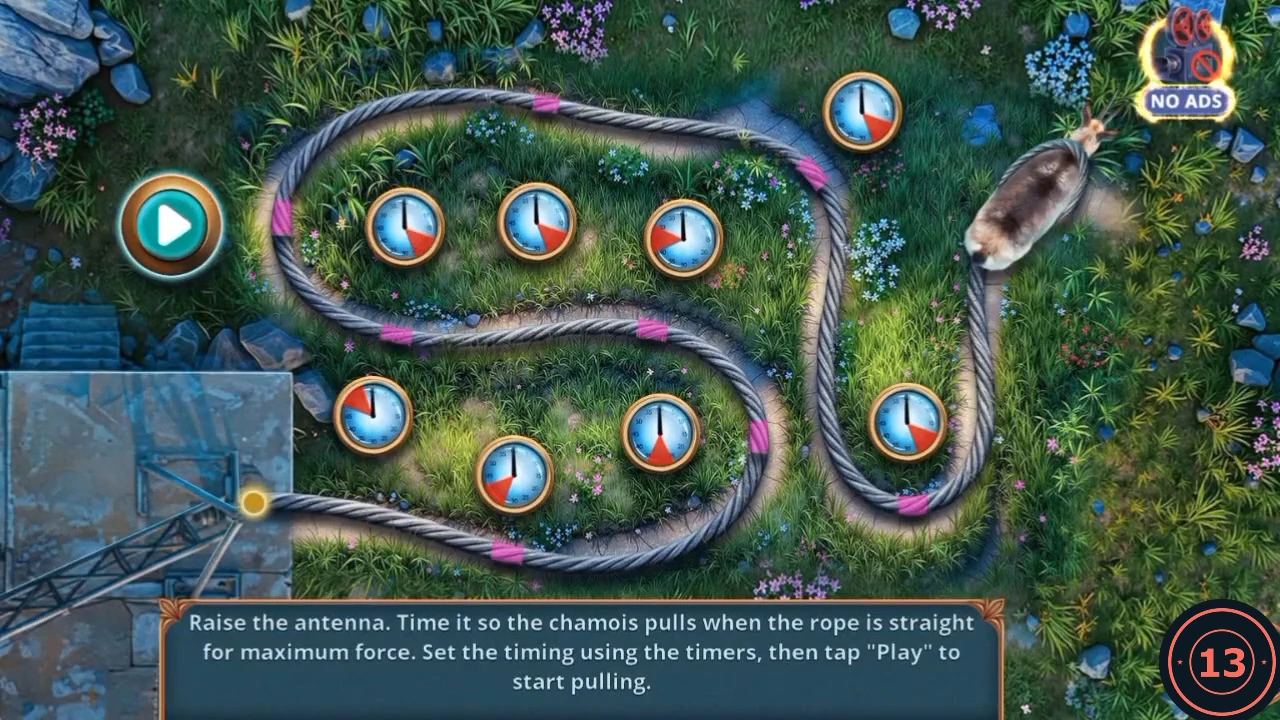
A ball runs along the rope when you press Play. The chamois must pull when the ball is on a straight stretch, so each dial sets the moment of one pull. Tap a dial to turn its red wedge. The wedge positions below are from the winning run; if a pull is mistimed, adjust that dial and try again.
- Open the tree stump and use the Wind-up Crab on the rope. Take the Clamps.
- Open the crane base and fit the Clamps on the arm. Drag the chamois icon onto them. The board opens.
- Set the red wedges to these clock positions, then press Play.CODELone dial, top right: 9 o'clock Upper row, left: 6 o'clock Upper row, middle: 8 o'clock Upper row, right: 3 o'clock Lower row, left: 4 o'clock Lower row, middle: 1 o'clock Lower row, right: 3 o'clock Lone dial, bottom right: 11 o'clock
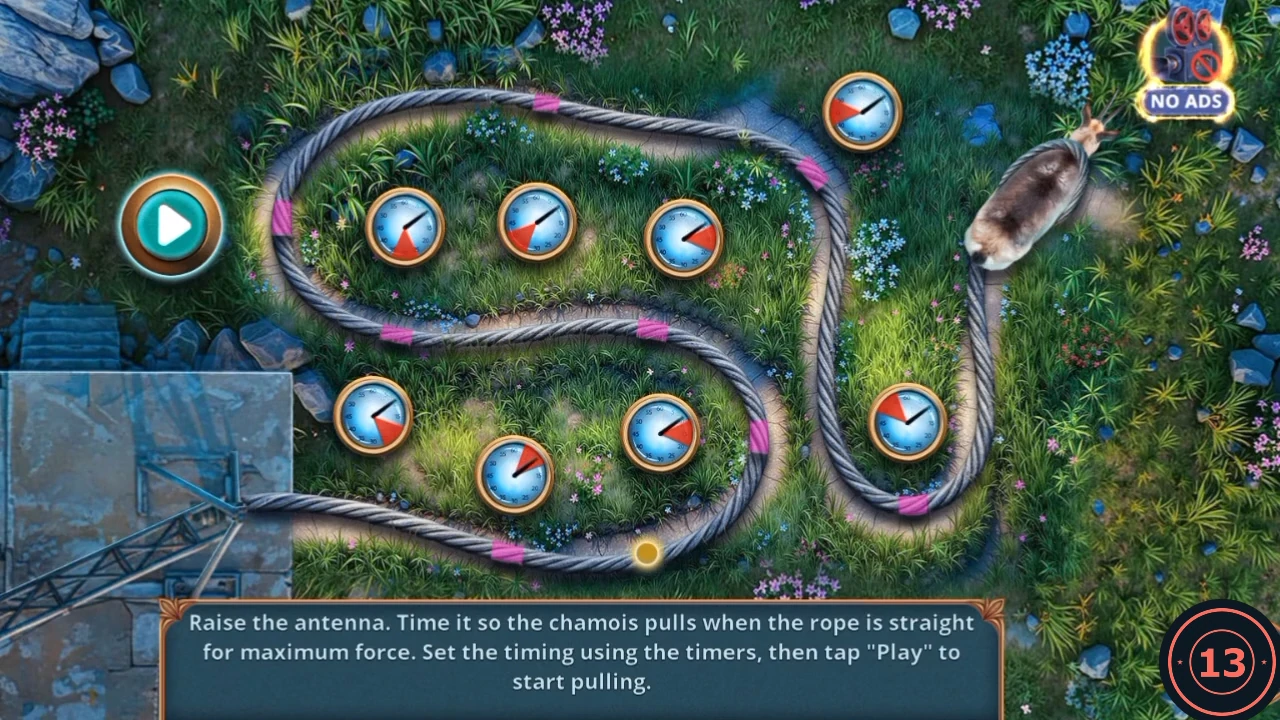
The recorded dial settings, with the ball on its way along the rope. - The chapter results list your Decision Points, out of 13 here. The highest choices are Go get some extra gear, Discuss the poachers' motivation, Regain control, Come to a conclusion and Ask a logical question. The reward pictures sit at 0, 4 and 10 points. A short cutscene shows the antenna working, then Chapter 4 begins.