Burnt forest path
Your new task is to reach the Ornithologist's Camp, but Leah says you can't get through without tools.
- Open the bench. Read the note about the stalled saw, take the pistol lying under it, then take the Knife.
- Open the blue net at the lower right and use the Knife on it. A sparkling nest is left behind.
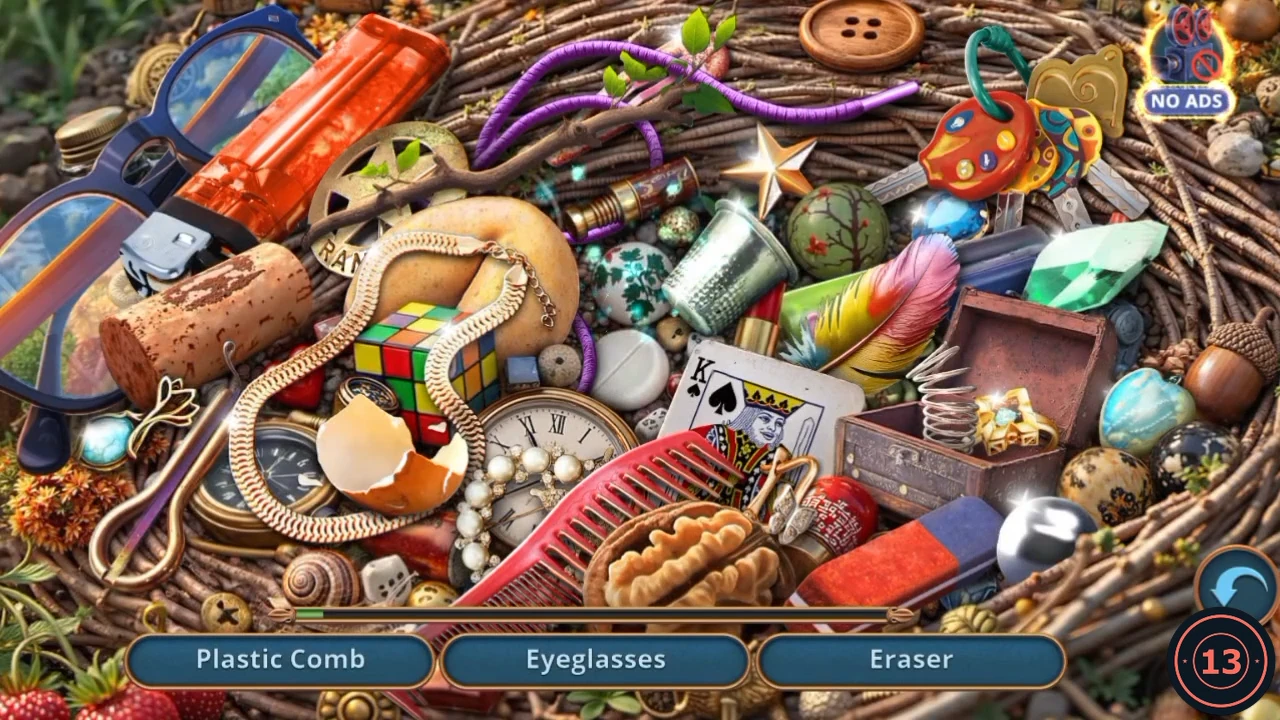
- Open the nest. There are twelve names, and the bar shows three at a time. Each item is removed when you tap it. Positions are from the recording, and the order can differ. Plastic Comb: the pink comb at the bottom centre. Maple Leaf: the big orange leaf at the upper centre, left of the metal thimble. Eraser: the red and blue block at the lower right, beside the chrome ball. Eyeglasses: the big blue frames at the top left. Heart-Shaped Pebble: the pale teal stone at the right, just left of the acorn. Ranger Badge: the round gold badge with RAN on it, partly hidden behind the red lighter at the upper left. The gold star at the top centre is not the target and stays in place. This badge is only a search item and does not add to your Ranger Badge counter. Plastic Lighter: the big red lighter at the top left. Shoelace: the purple lace across the top centre. Plastic Keys: the colourful baby's key ring at the top right. Spring: the metal coil on the open jewellery box at the right. Feather: the rainbow feather right of centre. Egg Shell: the cracked shell left of centre, under the toy cube. When the bar is empty, the Feathers land in the middle of the nest. Tap them to take them.
- At the bench close-up, use the Feathers on the dirt mound and take the funnel it uncovers.
- Open the chainsaw. Place the funnel on its filler, then pour in the Gas Can. Take the Chainsaw.
Cut through the logs
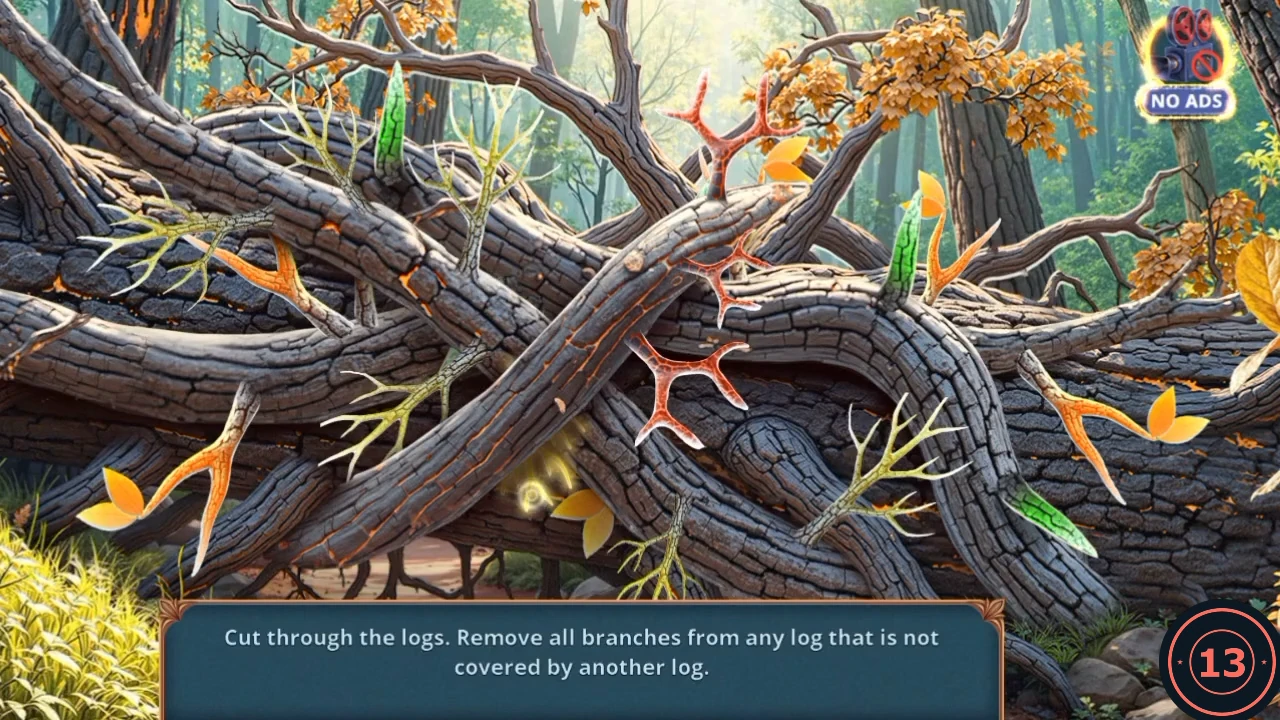
Only the top log can be worked on. Clearing all its branches lets the chainsaw cut it, which exposes the next log.
- Use the Chainsaw on the fallen logs ahead. Tap every branch on the log that nothing else lies across. When the last branch goes, the saw cuts the log away. Repeat on each log revealed underneath until the way is clear.
Tame the beaver
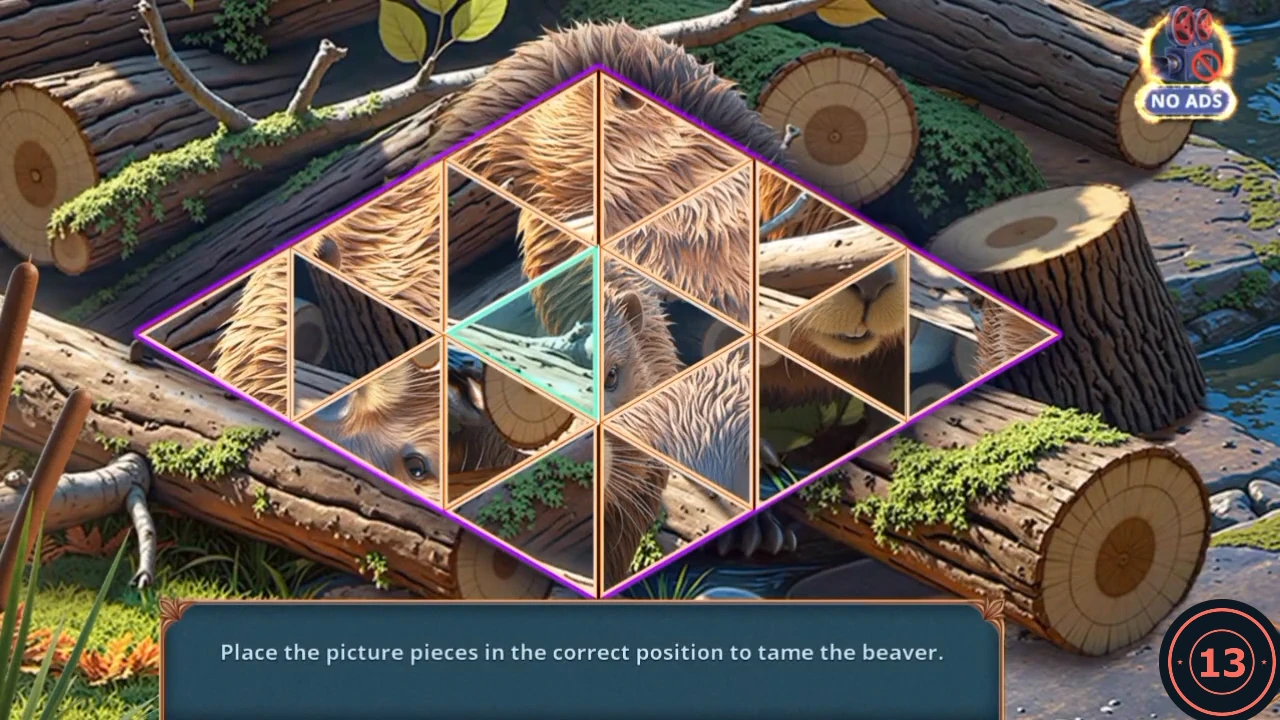
Triangular pieces in a diamond. The starting layout may differ, so solve by the picture of the beaver among the logs.
- At the stream, open the beaver under the logs. Take the Burner and the butterfly pin from beside it, then use the Hex Key on the logs as a lever.
- Tap two triangles to swap them. Put the fur at the top, the face and teeth in the middle right, and the logs along the bottom and sides.
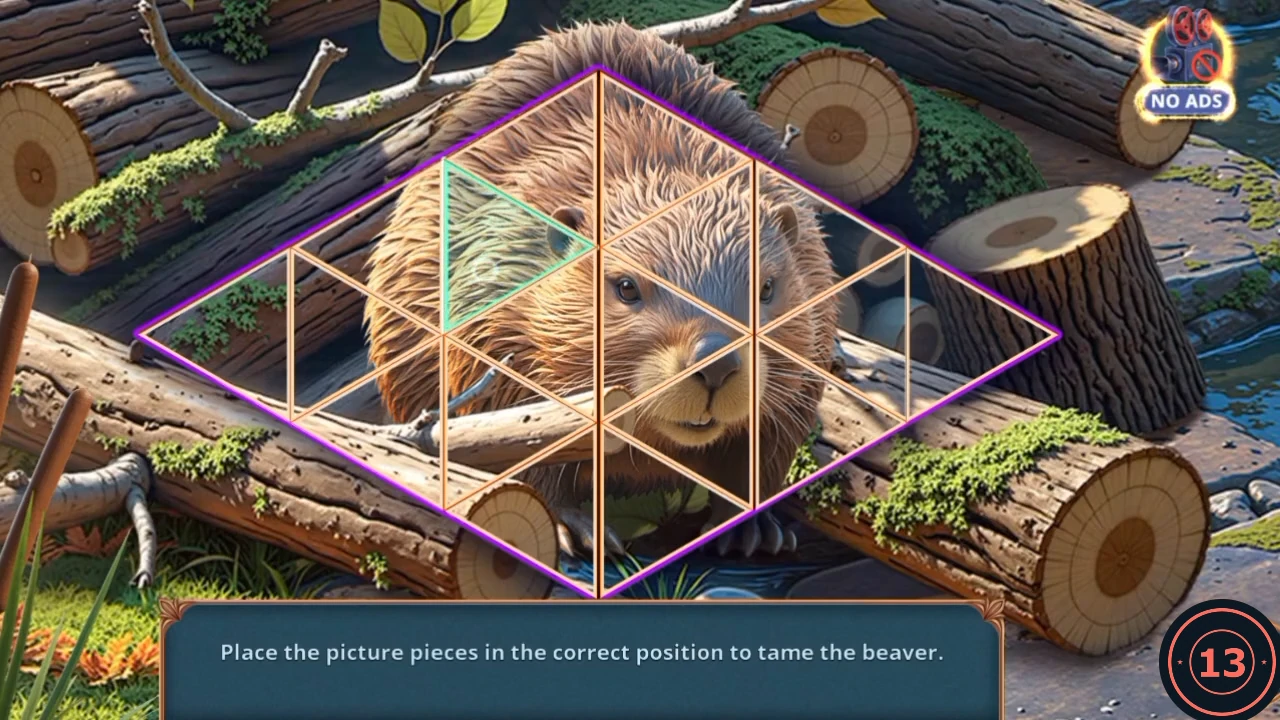
Target picture: the completed beaver. The pale outline is only the last piece placed.
Find the safe route
The beaver can now free the crate, and the map inside shows why the direct route is unsafe.
- Open the log pile with the red crate and use the beaver helper. It gnaws the crate free. Take the Reserve Map from the top: the direct route to the bridge is dangerous.
- Open the signpost marked Ranger Dock 2, Purple Trail and Swamp, and place the Reserve Map on it. The route puzzle opens.
Walk the reserve map
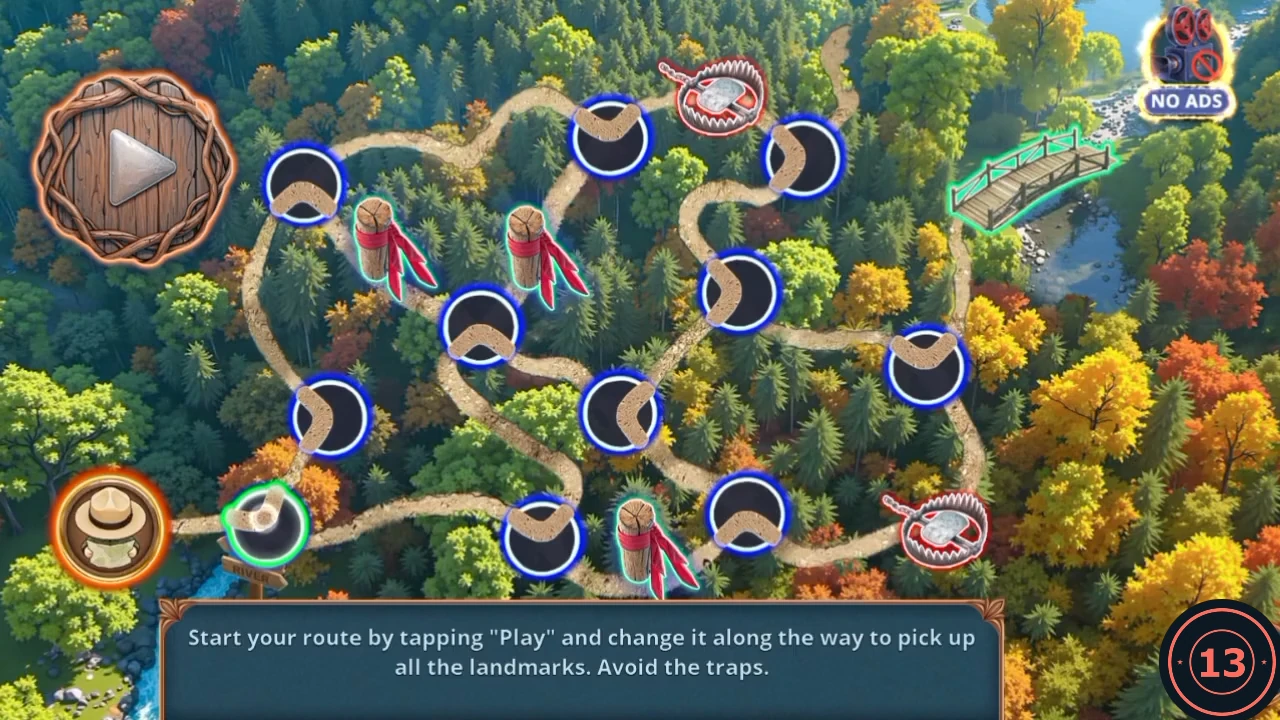
The ranger's hat keeps moving after you tap Play. Tap a junction to change where the hat goes next; a green ring marks the next junction on its way. The bear traps sit between the top centre and top right junctions, and between the bottom right and far right junctions.
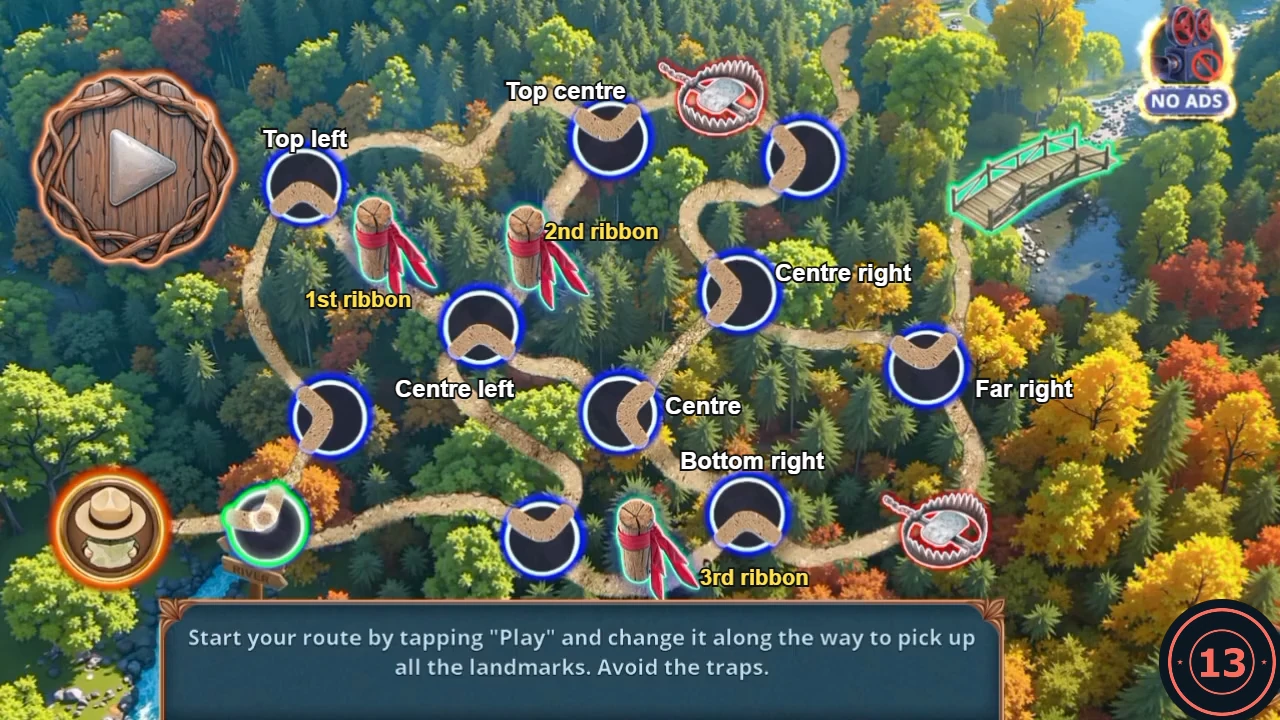
- Tap Play. Take the hat up the left side to the top-left junction, then down past the first ribbon to the centre-left junction, then up past the second ribbon to the top-centre junction.
- Head back to the centre-left junction, then through the centre to the bottom-right junction. Turn left to the third ribbon, then come back to the bottom-right junction. The recording took a few detours on the way, which are not needed.
- Go through the centre to the centre-right junction, then to the far-right junction and up to the bridge.
Ranger's cabin
Leah suspects someone cut the bridge supports.
- Answer Leah with "The logs didn't even have time to float far; this was clearly done recently." It earns 2 Decision Points; the other answer is "The fasteners could have simply come off on their own. It happens." She adds that you need your new friend's help and some new rope.
- Open the stump with the carved deer and take the Sieve.
- Open the cabin door. Slide the Flat Tray under it, then push the key through with the butterfly pin. It lands on the tray, and the door opens onto a desk.
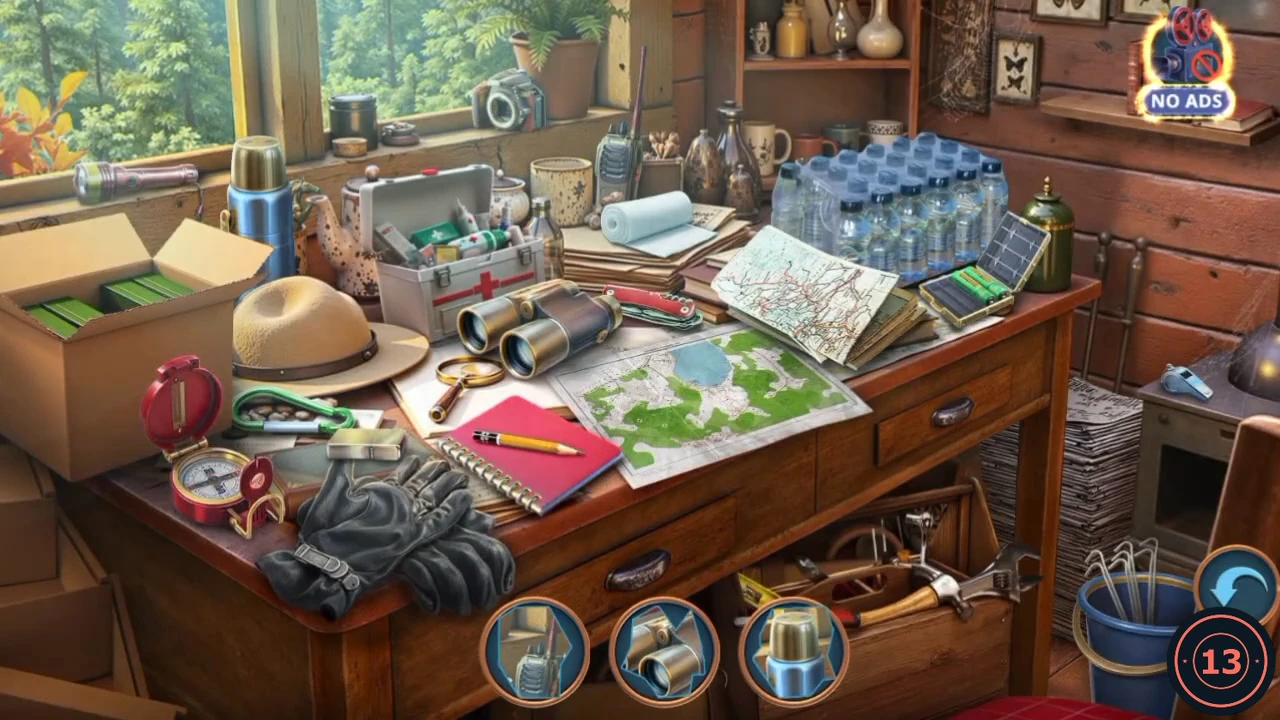
- Open the desk. Each circle at the bottom shows a close-up of an object, and it stays on the desk after you tap it. Three show at a time, and the order can differ. Positions are from the recording. Walkie-talkie: on the far side of the desk, behind the paper roll. Binoculars: centre of the desk. Thermos: the blue flask at the upper left. Red pocket knife: on the books right of the binoculars. Whistle: on the small stand at the far right. Flashlight: on the windowsill at the upper left. Small metal block with a paper band: on the desk just above the gloves. Road map: the big folded map at the right of the desk. Pink notebook: in front of the gloves. Green carabiner: left of the desk, below the hat. Compass: the red compass at the front left. Paper roll: on the stack of papers behind the first-aid box. When all are found, the Horse Amulet lands on the spotted teapot at the upper left. Tap it to take it.
Excavate the bank
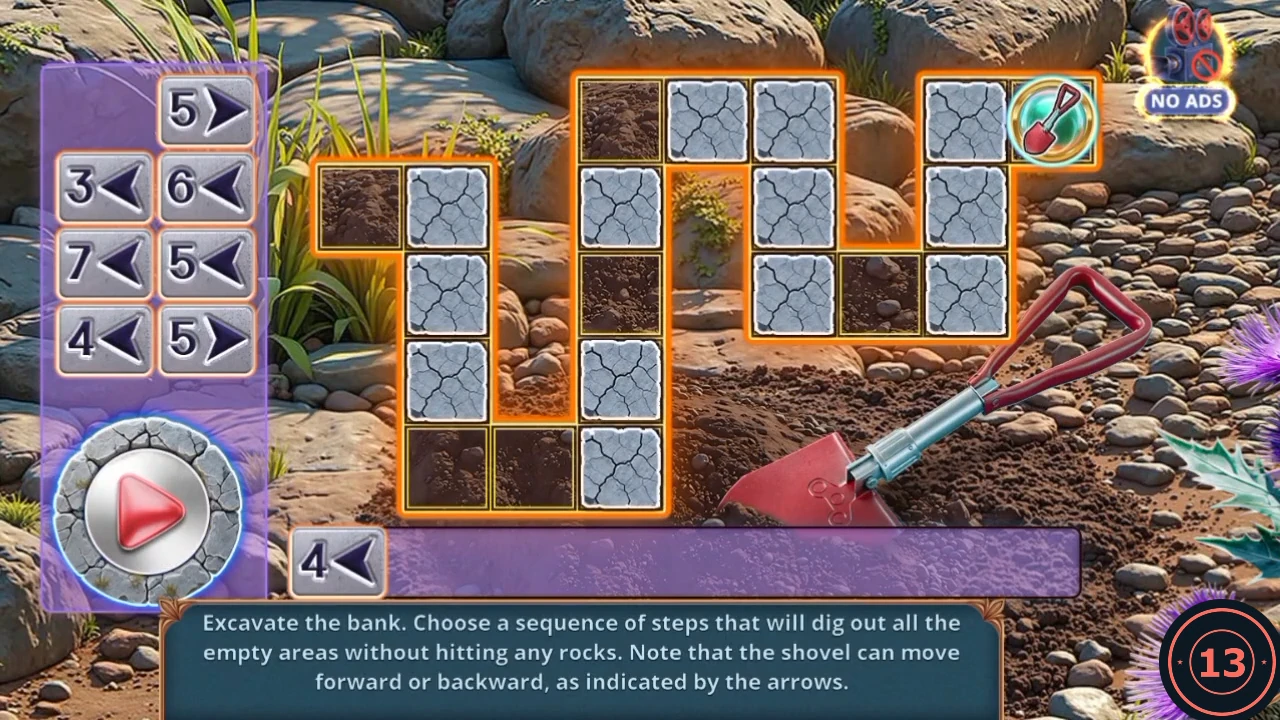
Each tile moves the shovel that many squares, forward or backward. It must clear every empty area and never hit a rock.
- At the stream, open the red crate and place the Horse Amulet in the lid. Take the Shovel.
- Open the dirt mound and use the Shovel. Recorded order: move the tiles to the bar as 4 back, 5 back, 5 forward, 7 back, 3 back, 5 forward, 6 back, 4 back. Back means the tile's arrow points left. Tap Play.CODE4< 5< 5> 7< 3< 5> 6< 4<
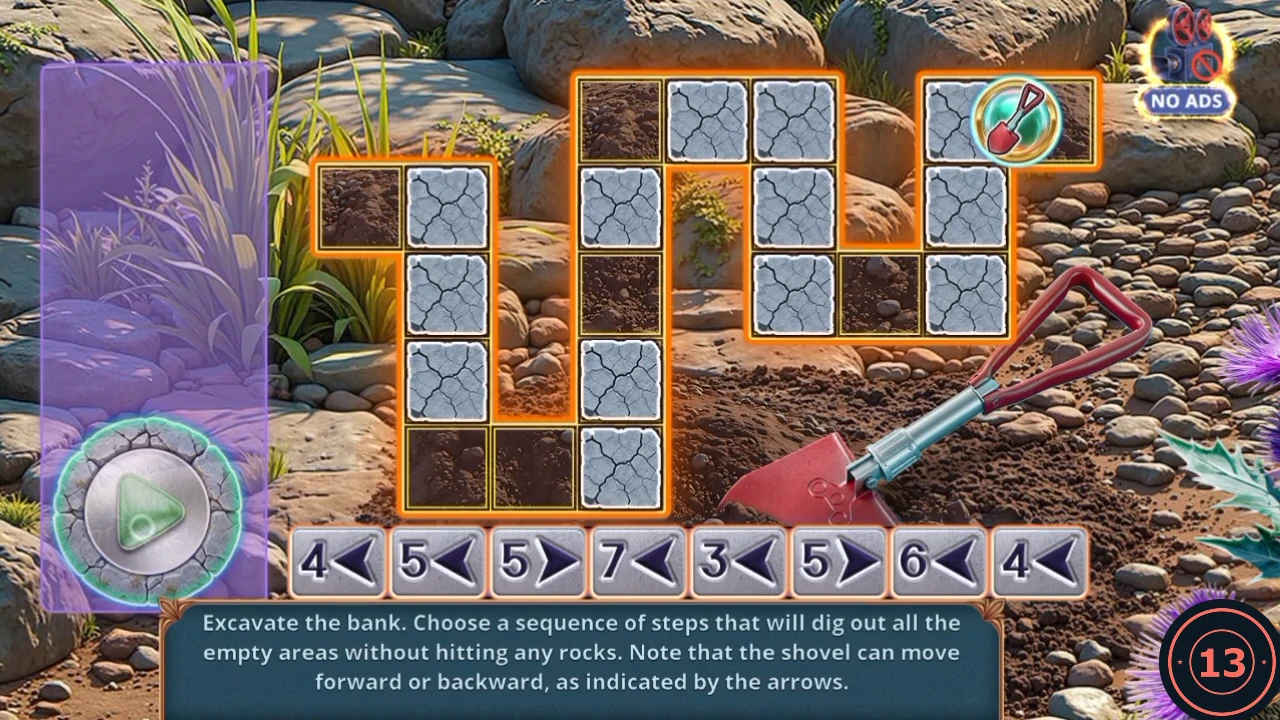
The recorded tile order on the bar, as the shovel starts its run. - Take the Bullets from the hole.
- Open the pistol from the inventory and load the Bullets to get the Loaded Pistol.