Back to the Watch Tower
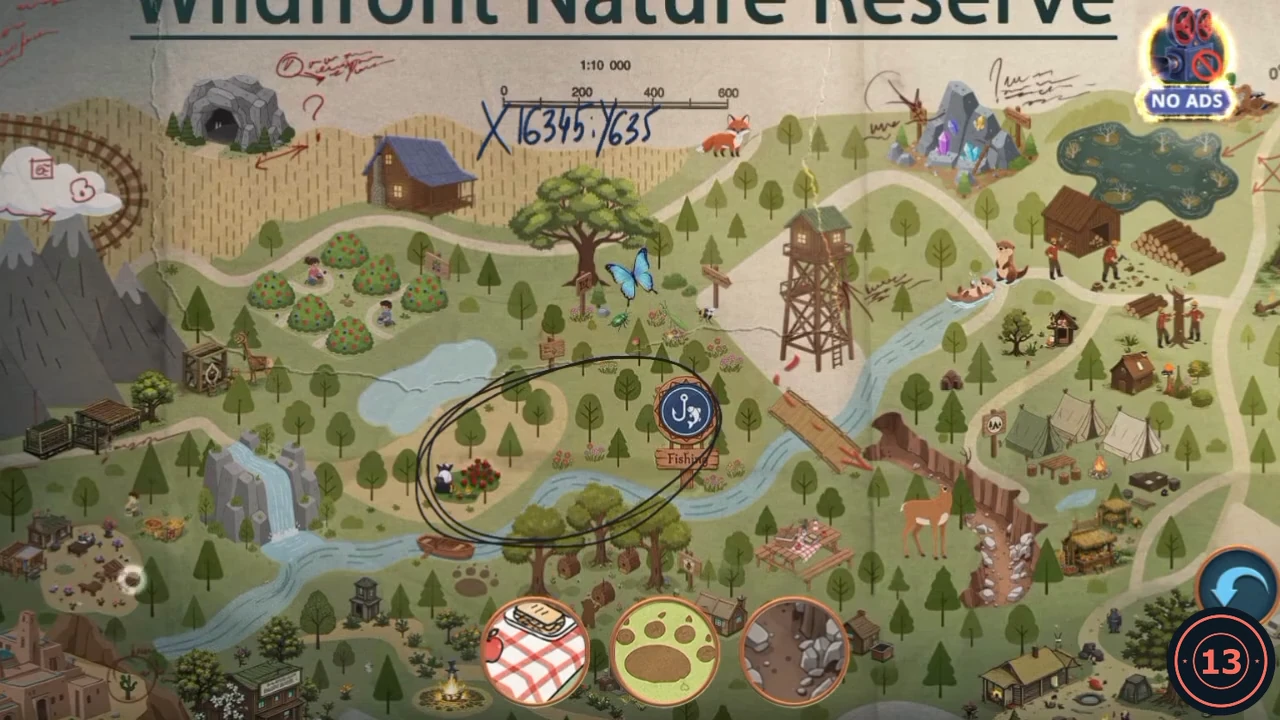
Use the journal map to travel. Locations with an available action are marked.
- At the Watch Tower, open the radio and use the Screwdriver on the two screws of the blue panel. Open the panel and take the Lubricant.
- Open the jacket and use the Lubricant on the stuck zipper. Take the Peg from the pocket.
- Open the sparkling wall map. It's the same map as before, and you can drag and zoom it. Each picture on the bar shows part of the map, and places stay in place after you tap them. Positions are given on the fully zoomed-out map, and they're from the recording. Log stack: upper right, beside the brown hut. Purple crystal: on the rocks at top centre-right. Red-checked picnic table: lower centre, below the river. Blue butterfly: right of the big oak. Fox: at the top, right of the coordinates. Paw prints: on the ground just below the river, under the red boat at lower left. Green tower roof: the top of the watchtower. Ducks: top right, above the dark swamp. Green tents: right of centre. Berry bushes: upper left, below the blue cabin. Railway track: the curve at the top left, by the cloud. Rocky ravine: the stone-filled gully right of the deer. When the bar is empty, the Letter Amulet drops onto the map. Tap it to take it.
Forest Clearing: bedroll and box
The Letter Amulet and the Peg open what you had to leave behind here.
- Open the WS bedroll and place the Letter Amulet on its clasp. The bedroll unrolls. Take the Kitchen Tongs.
- Open the box under the purple tarp and put the Peg in the gap under the lid. Then take the Hunting Knife from the opened box.
- Open the lens view of the box and use the Kitchen Tongs on the broken glass to lift out the Handle-Mount with Bolt.
Free and tame the otter
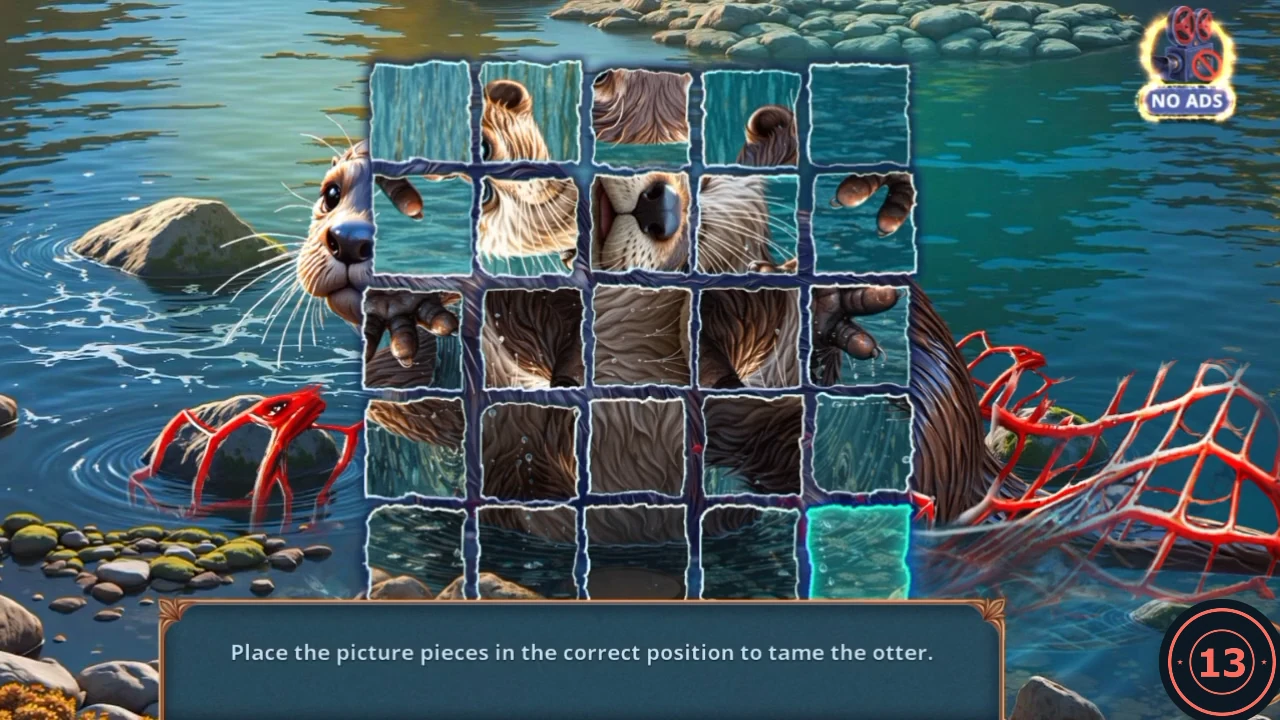
A 5x5 picture of the otter facing you. The starting layout may differ, so solve by the picture.
- At the Riverbank, open the otter in the red net and use the Hunting Knife to cut it free.
- Tap two squares to swap them. Build the face in the top rows, the two front paws in the middle row, and put the plain water squares around the outside.
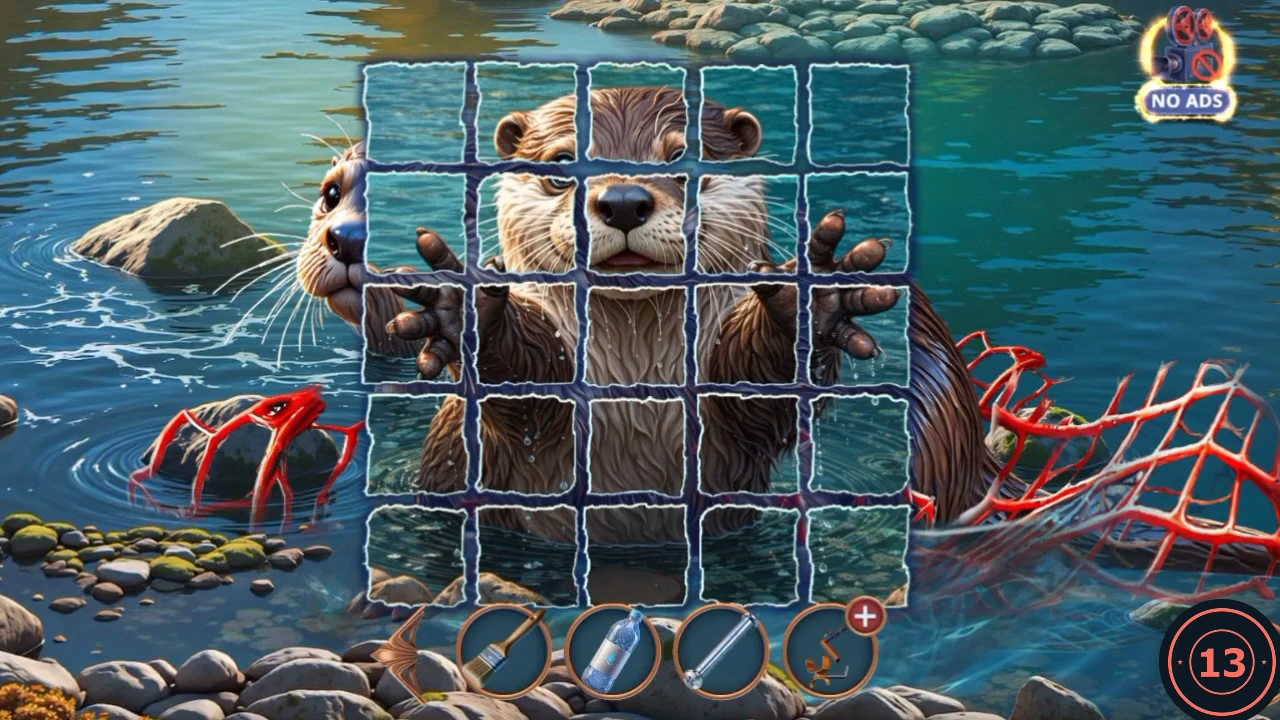
Target picture: the completed otter. - Leah thinks the waste comes from upstream and suggests checking the source. "I agree. If the source really is there, we need to figure it out." earns 1 Decision Point and opens the gold Bonus Location on this chapter's journal page. The other reply is "I don't think it's worth the time. Maybe the river will clean itself." Only the first reply was played, so what declining does is unknown, and the steps after this assume you accept. Leah then gives you the Saw and your task becomes crossing the river.
Riverbank: cart and control panel
Leah's Saw starts the work on the broken cart.
- Open the cart and use the Saw on the log. Take the Scraper. The cart still needs a wheel, an axle and something to secure them.
- Open the mossy stump and use the Scraper on the moss. Take the Control Panel.
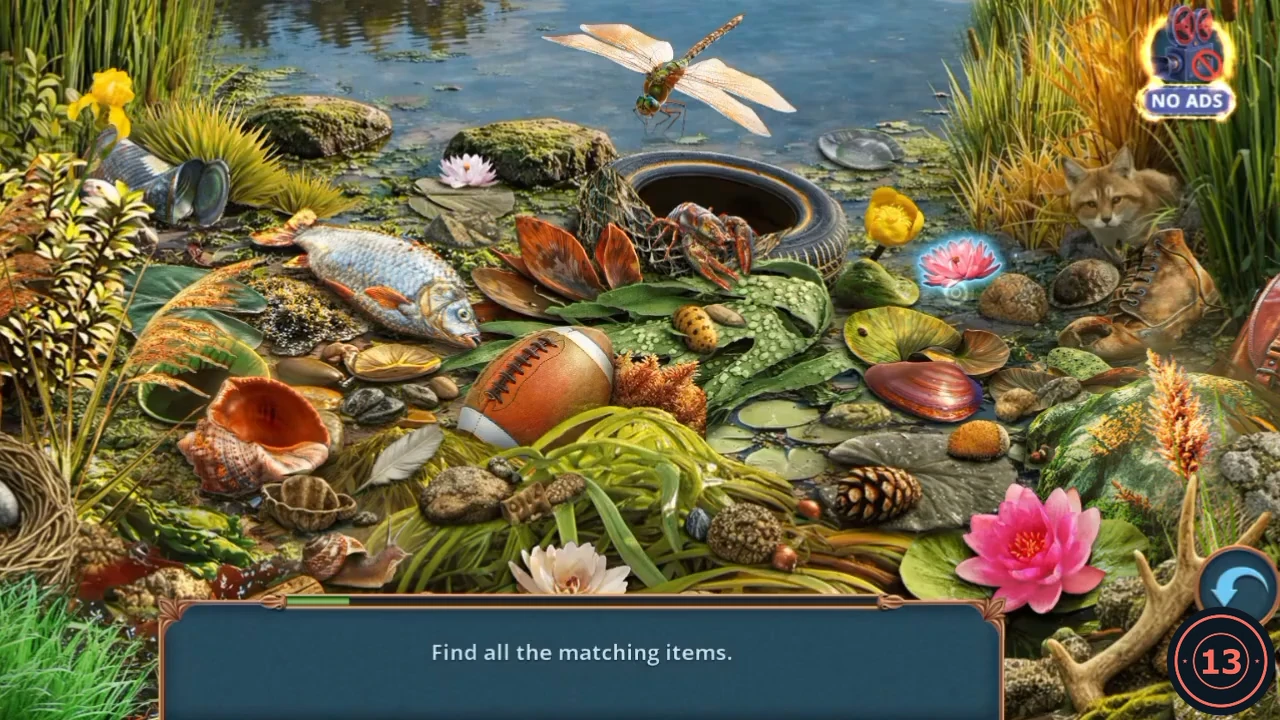
- Open the river scene again. The bar just says "Find all the matching items": the objects here come in sets, and in the recording the members of a set light up with a blue outline as you work through it. Tap each one and it's removed. Water lilies: the big blue one at the far left, the small blue one right of centre, the big pink one at the lower right, the small pink one right of the tyre, the pale one at top centre and the cream one at the bottom centre. Shells: the big conch at the left, and the red-brown clam on the right. Feathery plumes: the pale plume at the left edge, and the orange spike at the right. Yellow iris: top left corner. When all of them are gone, the Nail Puller lands above the fish. Tap it to take it.
Assemble and use the Metal Detector
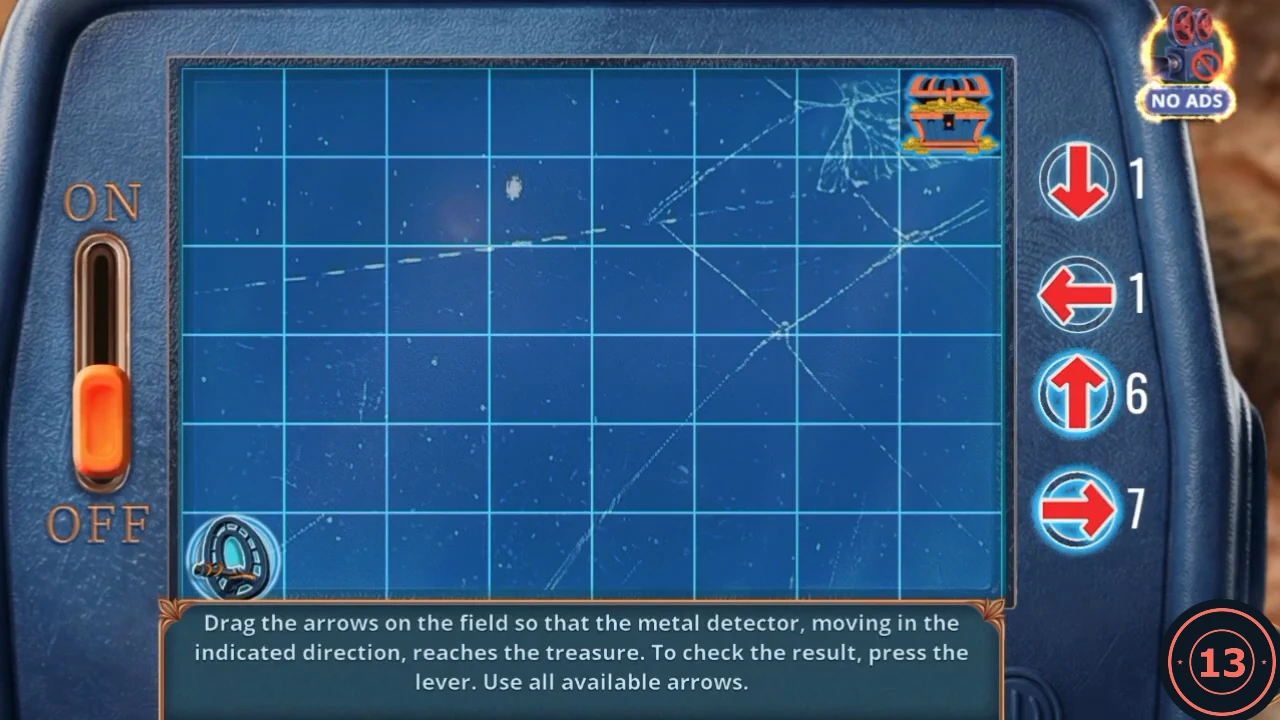
The grid is 8 squares wide and 6 tall. The detector starts at the bottom left and the treasure is at the top right. All 15 arrows must be placed.
- At the Pond Clearing, open the tree and use the Nail Puller on the plank. Take the hexagonal device and the detector coil from the hollow.
- Open the Metal Detector panel and add the Handle-Mount with Bolt, the Control Panel and the coil.
- Open the dirt mound beside the fire box and use the Metal Detector. Recorded layout: drag arrows to these squares, counting columns from 1 at the left and rows from 1 at the top. Row 6: column 2 right, column 3 up. Row 5: column 3 up. Row 4: column 3 right, column 4 up. Row 3: column 3 up, column 4 left, column 7 right, column 8 up. Row 2: column 3 right, column 4 right, column 5 right, column 6 right, column 7 down, column 8 up.
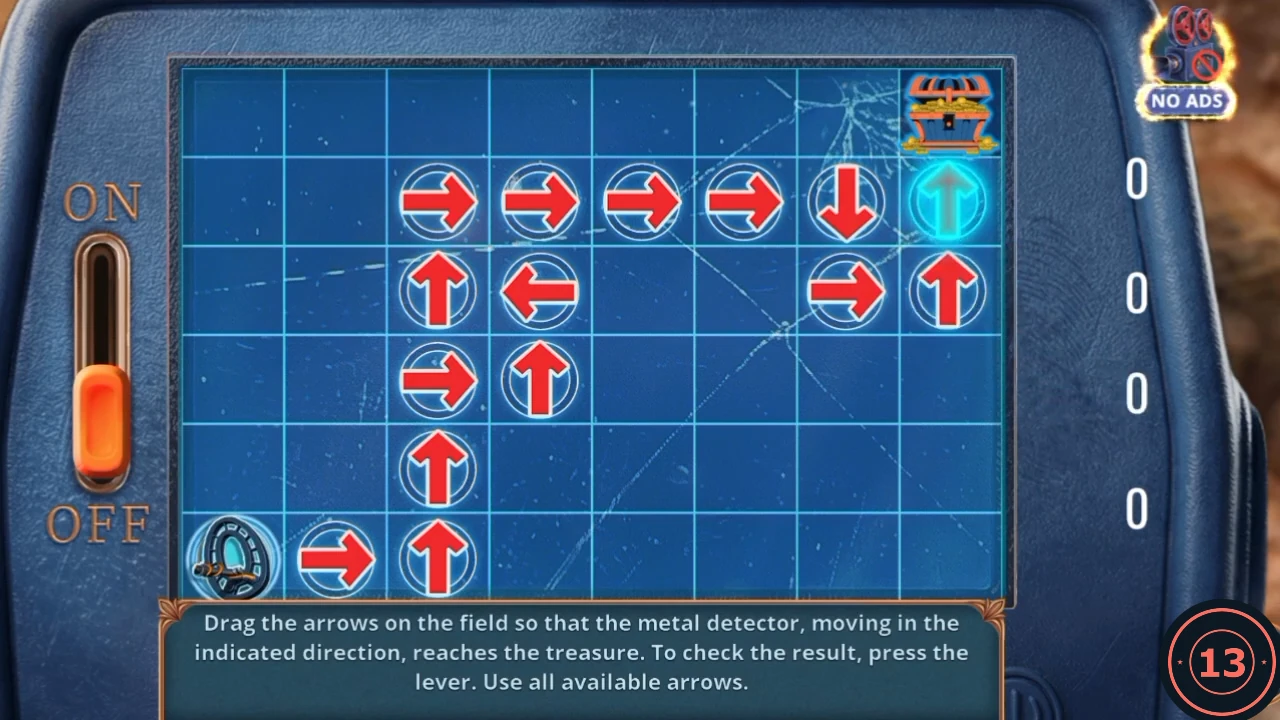
The recorded layout with all 15 arrows placed, just before you push the lever to ON. - Push the lever up to ON. The detector follows the arrows to the treasure, and you receive the Lighter.
Make the broom and clear the firepit
The Lighter melts the resin that was too sticky to touch at the Pond Clearing.
- Open the tree and use the Lighter on the resin to melt it. Dip the Brush in the melted resin to get the Brush with Resin.
- Use the pink band on the twigs at the foot of the tree, then take the Broom.
- Open the firepit and use the Broom on the glass shards. Take the Cracked Amulet.
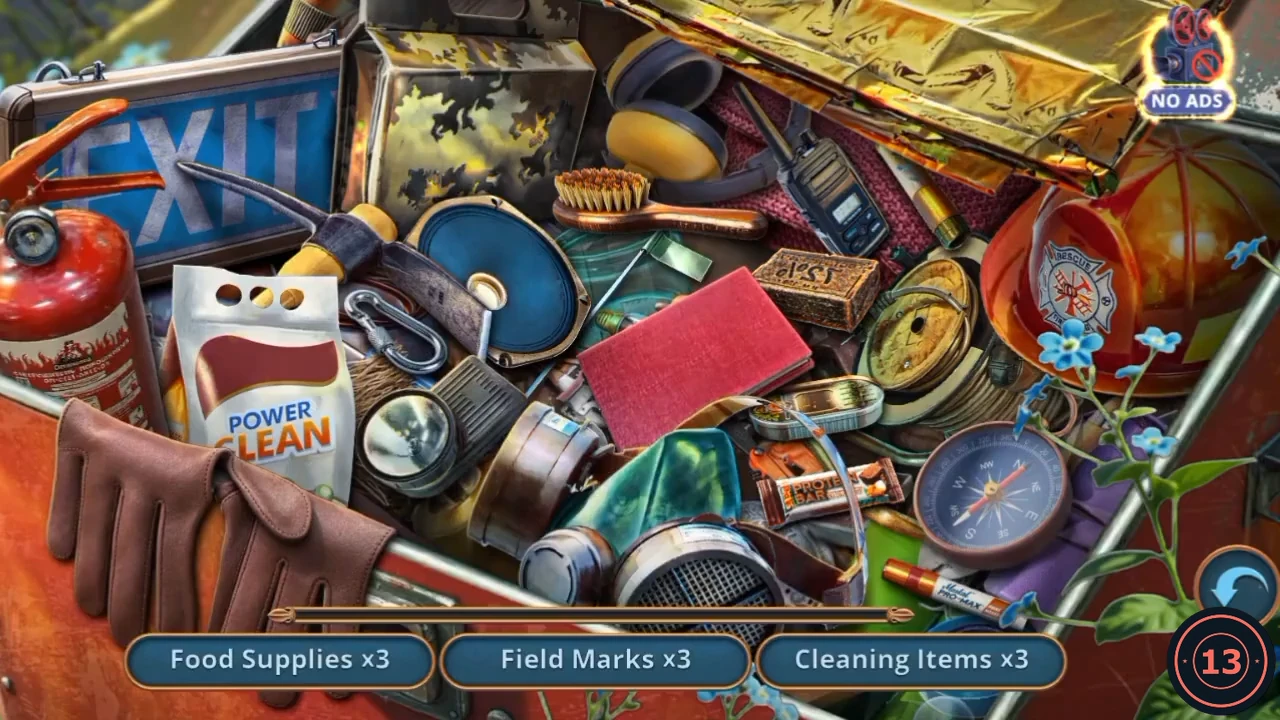
- Open the fire box again. The bar lists categories, and the count falls as you find each item. Positions are from the recording. Food Supplies: the protein bar at the lower right, the sardine tin just above it, and the camouflage-patterned box at the upper left. Field Marks: the marker pen at the bottom right, the EXIT sign at the upper left and the small green flag behind the red book. Cleaning Items: the Power Clean bag at the left, the wrapped bar of soap on top of the pile, right of the red book, and the wooden brush at top centre. Communication: the wire reel to the right of that soap, the radio at top centre and the blue round speaker in the middle. Taking the speaker uncovers the Wheel, your reward. Tap it.
Repair the cart and enter the cabin
The Wheel lets you fix the cart, which clears the way to the cabin across the river.
- At the Riverbank, open the cart. Place the Wheel, use the Brush with Resin on the axle joint, then use the long metal rod on the wheel. The cart lifts and clears the way.
- Take the Ropes from under the cart. The cage rods are too strong to cut for now.
- Tap the log cabin across the river to enter it.
Old Ranger's Cabin
This is Chapter 1's gold Bonus Location, opened by your reply to Leah after the otter. The other release's journal names it Old Ranger's Cabin, and the reserve map's Forest Cabin appears to be the same place. You finish it later with the Handle: see the section Old Ranger's Cabin: carve the wooden block.
- Open the desk and take the Net Weaving Hook.
- Open the green workbench and take the carved Fishermen figure.
- Open the barrel under the net and use the Net Weaving Hook on the net. Take the second figure. The barrel lid has a broken handle, so you need something for its peg.
- Open the red cabinet and place both figures on the door brackets. The cabinet opens. Take the Large Scissors.
- Open the green tarp by the fireplace and cut it with the Large Scissors. Take the Pliers from under it.
- At the Riverbank, open the cage and use the Pliers on its rods. Take the Dried Fruits.
- Back in the cabin, open the timber pile by the armchair and place the Dried Fruits. Take the Carved Figurine.
- Open the barrel and place the Carved Figurine on the lid's peg. The lid opens. Take the Suction Cup from the pickles.
Otter river swim
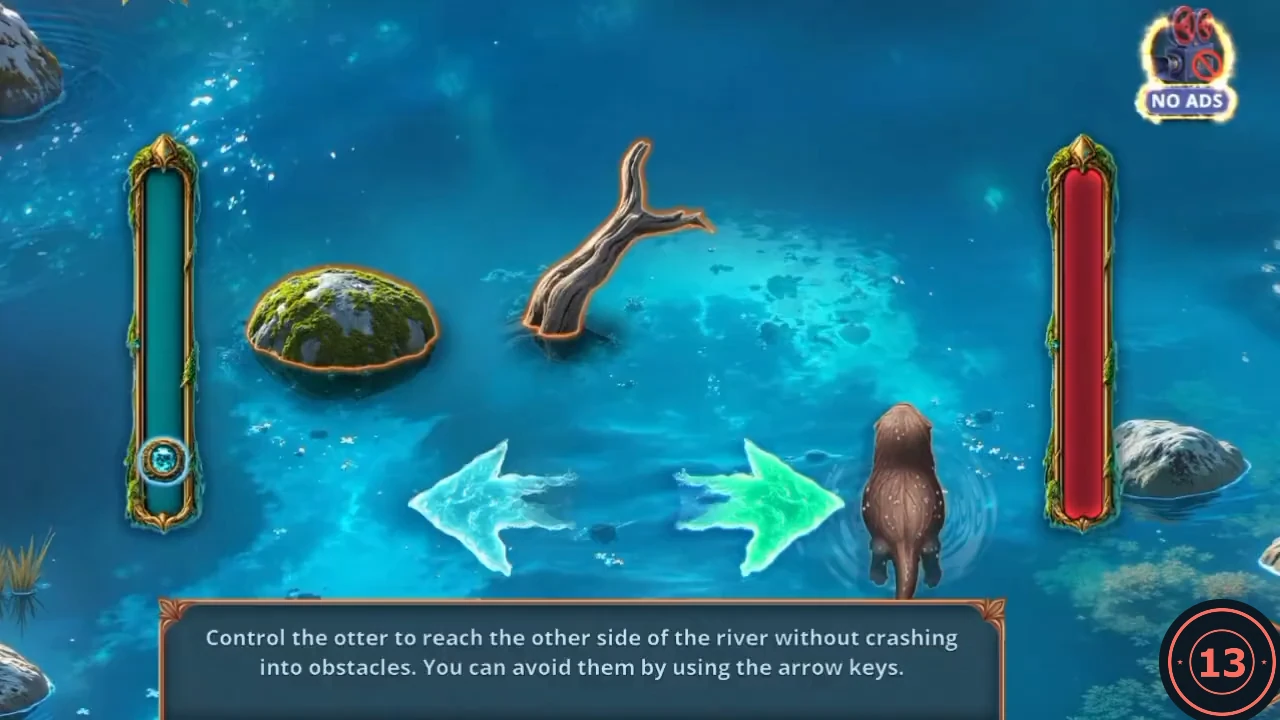
A reflex mini-game, so the obstacles are not worth memorising.
- At the Riverbank, open the rope bridge. Place the Ropes on the planks, then use the otter helper. The swim starts.
- Use the left and right arrows to steer around rocks, logs and litter. The green meter at the left fills as you cross. Reach the top to fix the bridge: "Now, the path is open."