Free the badger on the Mountain Trail
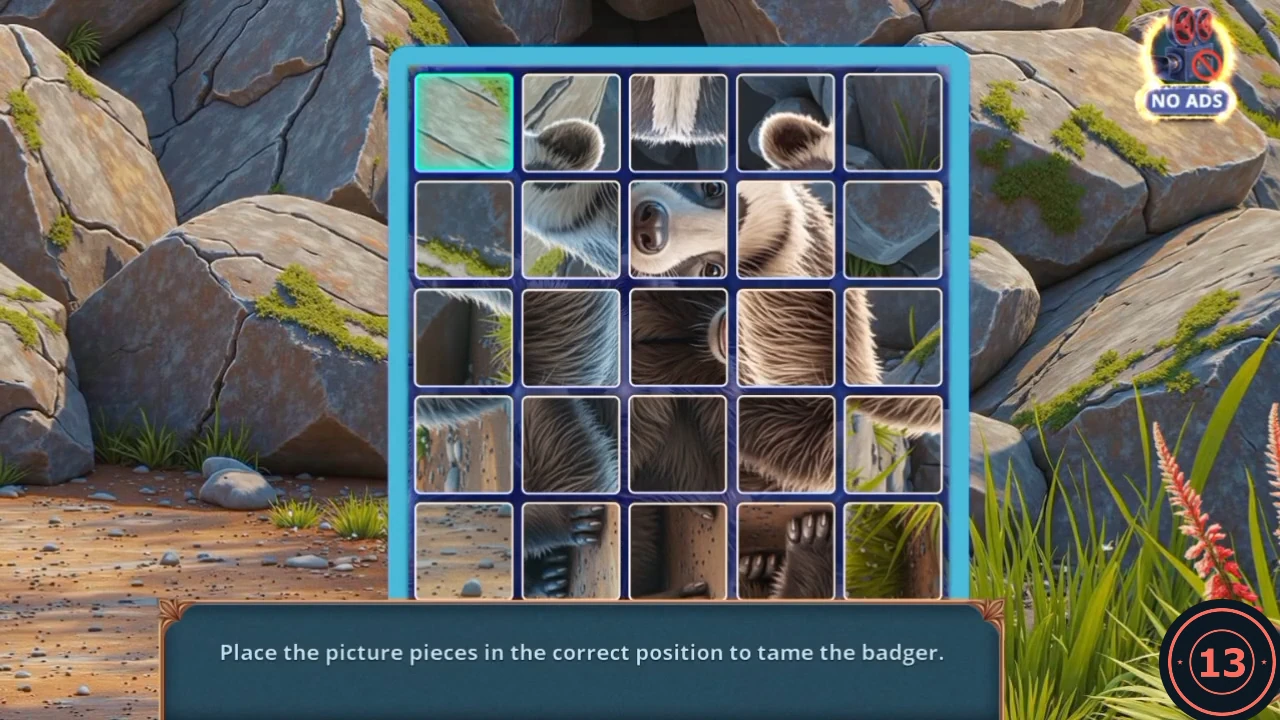
Chapter 3 begins here. The badger's picture is a tile puzzle. The starting layout may differ, and a full move list would be long, so this is the approach rather than every swap.
- Chapter 3 opens with a landslide on the southern slope. The new task is to reach the communication point.
- Open the red bag and take the Pump and the Pickaxe.
- Open the rocks where the badger is trapped and use the Pickaxe.
- Swap tiles until the badger picture is whole: tap a tile, then the tile it should change places with. The face stripes are the best place to start. When it is done the badger joins your helpers.
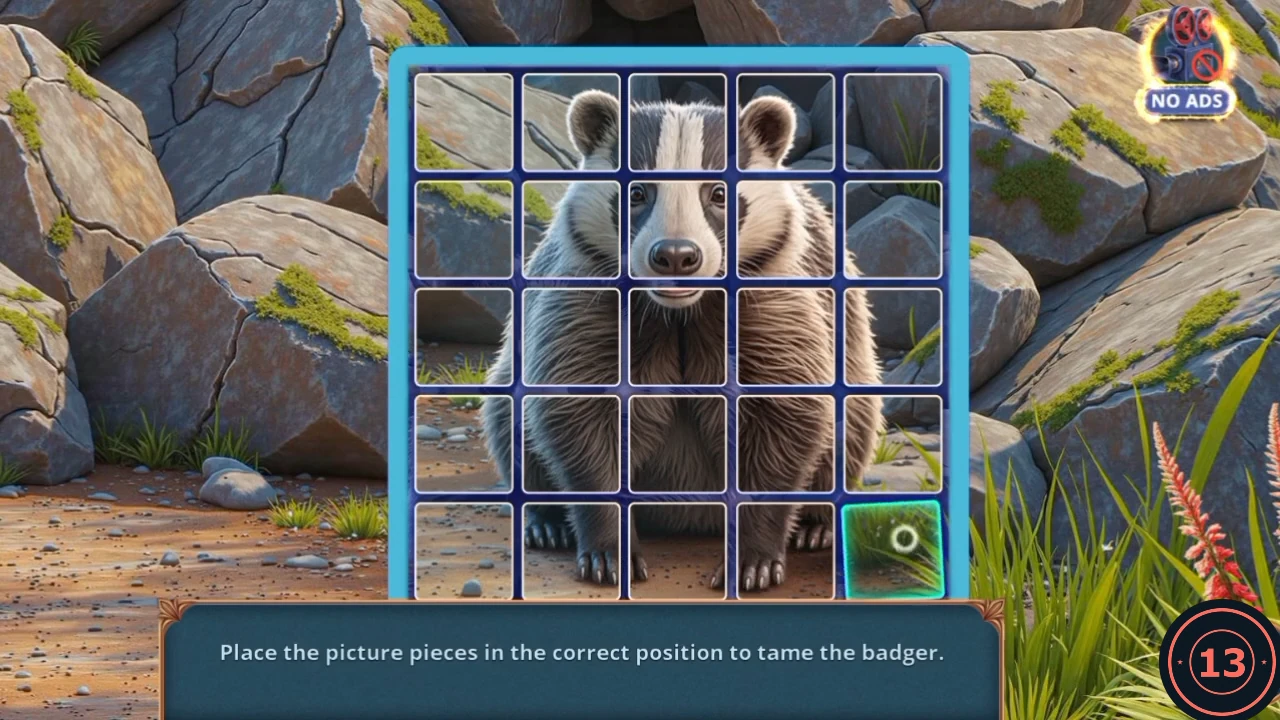
Target picture: the completed badger. The green square is only the last one moved. - Open the Caution! Underground Labyrinth! sign and drag the badger icon onto the ground beneath it. The badger digs through to the next scene.
Open the Old Warehouse
The Old Warehouse is Chapter 3's gold Bonus Location. The recording reaches it through this dialogue choice with no purchase. The other reply was not played, so its effect is unknown, and the steps after it assume you accept.
- At the Crevice, Leah suggests popping into the old warehouse. Answer "It wouldn't hurt to be on the safe side. Let's go." This earns 1 Decision Point and the warehouse door lights up. The other answer is "There's no time. And the park needs it more."
Fill the Toolkit
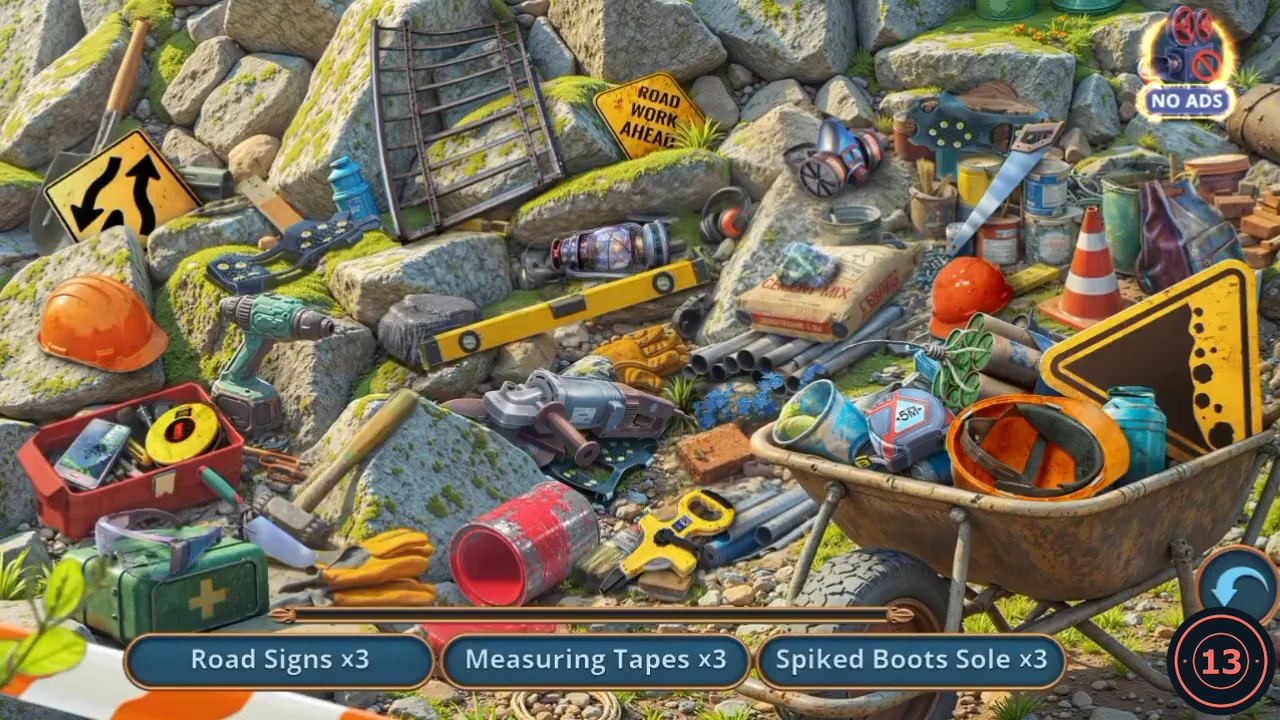
The cable car panel needs a full Toolkit, and its parts are around the Crevice.
- Open the rubble by the road sign. Take the Hook, then the green circuit tray beneath it.
- Open the Toolkit from the inventory and put the green tray in the first slot.
- Open the flowers by the stream and place the Pump. The pollen blows away and uncovers the Trowel. Take it.
- Open the rubble again and use the Trowel. The hidden-object scene opens.
- Find the items for each button along the bottom, and tap each one to remove it. Positions are from the recording, and the order can differ. Road Signs x3: the merge-arrows diamond at the top left, the Road Work Ahead sign at the top centre, and the big yellow sign leaning in the wheelbarrow. Measuring Tapes x3: the small round blue and white tape in the wheelbarrow, the yellow tape on the gravel at the bottom centre, and the yellow and black tape in the red toolbox at the left. Hard Hats x3 (this button appears when Road Signs clears): the orange hat at the left, the orange hat lying in the wheelbarrow, and the red hat right of centre. Spiked Boots Sole x3: the dark sole on the rocks under the ladder at the left, the dark sole with blue spikes at the top right behind the saw, and the sole on the gravel just below the angle grinder. When all the buttons are clear, the bar shows one last silhouette. Tap the Soldering Iron that lands in the wheelbarrow to finish.
- Open the Toolkit and place the Soldering Iron in the last slot. The tools drop into the box.
Light the searchlight in the Old Warehouse
Your reply to Leah opened the warehouse door. A locker here stays shut for now, but the searchlight works.
- Enter the Old Warehouse. Open the left locker: it has two keyholes, and a Staple Remover is clipped through Purple Paper on its handles. Take the Purple Paper and the Staple Remover.
- Open the mannequin firefighter and use the Staple Remover on the stapled box he holds. Take the Bulb.
- Open the searchlight, fit the Bulb, then cover it with the Purple Paper. The UV beam reveals a handprint on the wall and a Magnet. Take the Magnet.
Fix the cable car panel
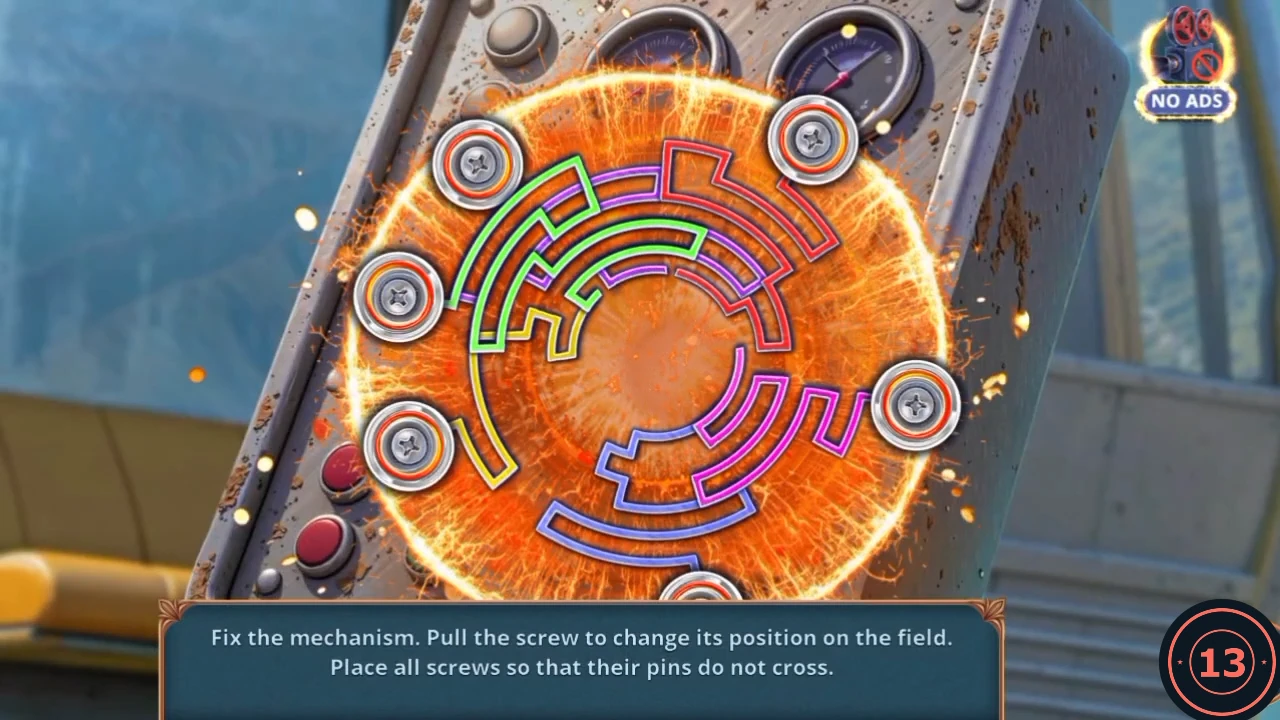
Each of the six screws carries its own pattern of pins and can be pulled to another position around the disc. A pattern turns green once it no longer crosses another one.
- Back at the Crevice, open the cable car panel and use the full Toolkit. The screw puzzle opens.
- Drag the screws around the disc until no patterns overlap. In the recorded solution, going clockwise: yellow at about 11 o'clock, purple at about 1, red at about half past 3, green at about 5, blue at about half past 7 and pink at about 9.
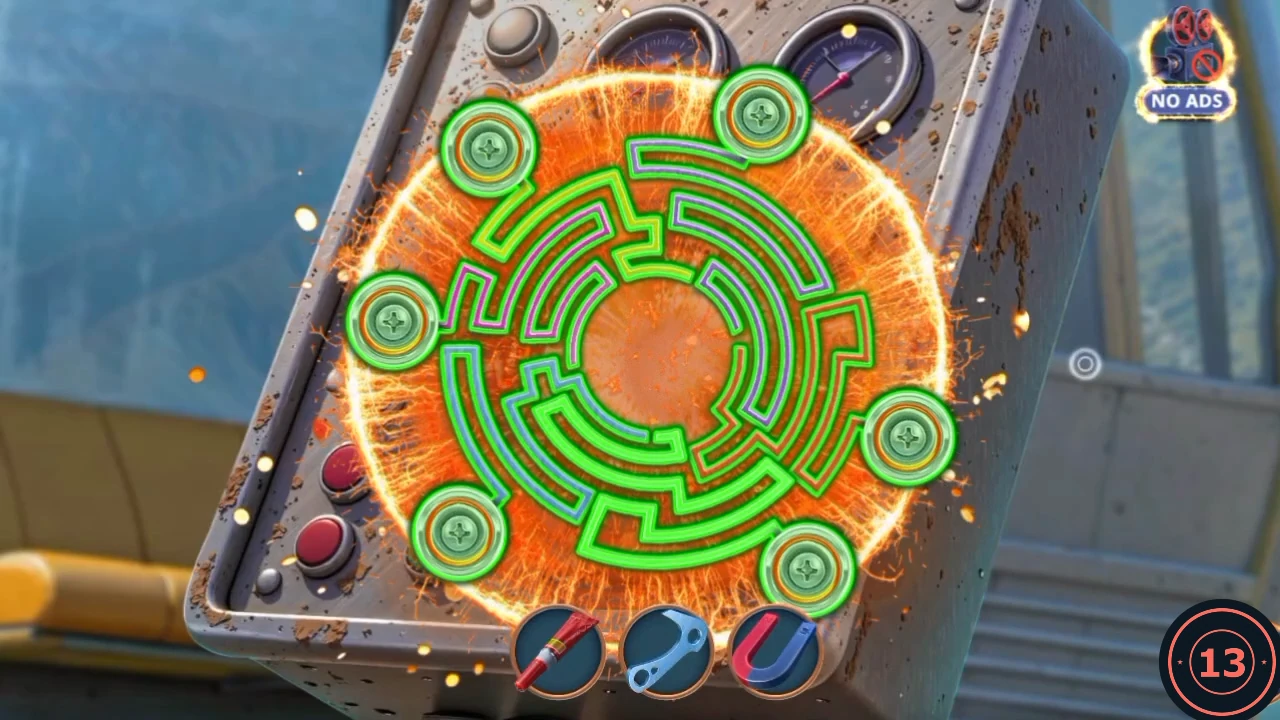
The recorded solution with every pattern green, which is how you know the panel is fixed.
Repair the viewer at Cliff Edge
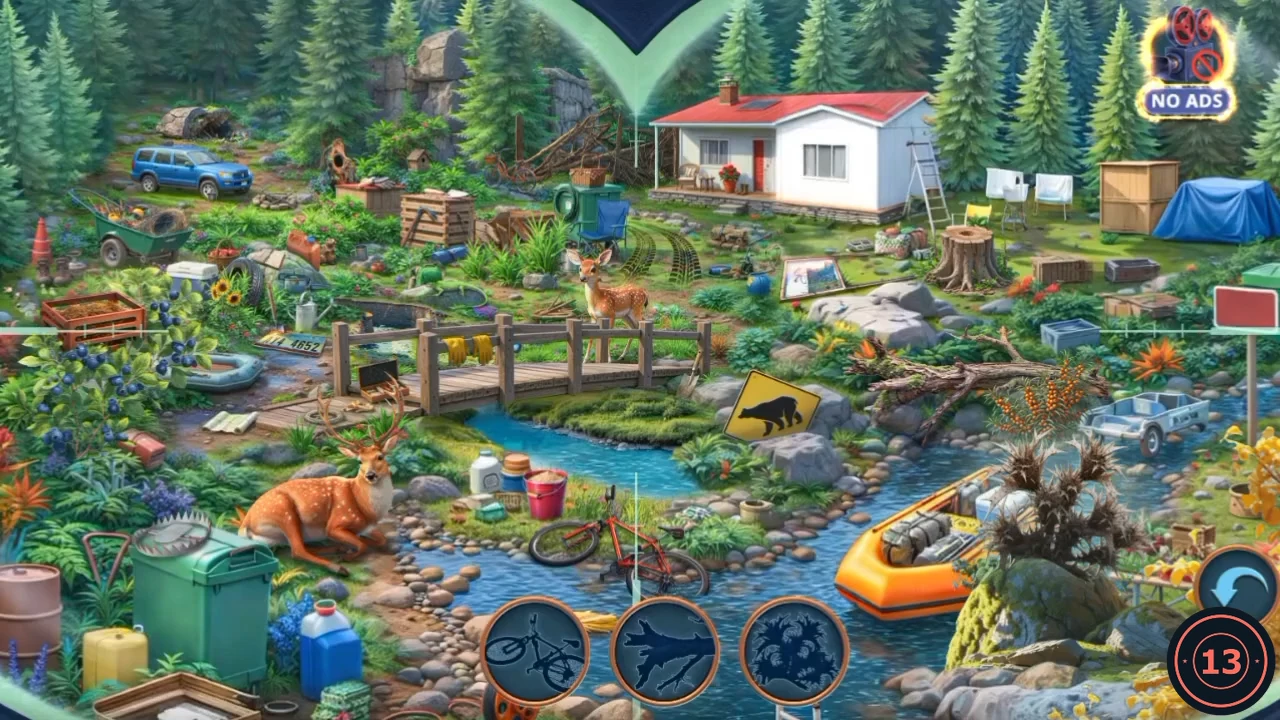
The viewer at Cliff Edge is broken, and the ice block and crate hold what you need to fix it.
- At Cliff Edge, Leah blames someone for not reporting the first signs. "Why do you think poachers are doing this?" earns 2 Decision Points. The other answer is "Maybe they just did it themselves?" The viewer is broken.
- Open the ice block at the foot of the scene. Take the Crossbow and the Winch Handle.
- Use the Magnet on the glove in the ice. Take the Ranger Emblem.
- Open the table map and read Leah's note about the fire. Take the Soft Birch Bark.
- Open the crate on the right. Fit the Winch Handle on the spool, then the Hook on the rope. The winch drags the crate up and it opens. Take the Soap, the Dry Wood and the Lens.
- Open the viewer. Use the Soft Birch Bark on the right eyepiece, the Burner to remove the old glass, then seat the Lens.
- Look through the viewer. Each circle at the bottom shows the black shape of something in the valley, and the thing disappears when you tap it. Three show at a time, and the order can differ. Positions are from the recording. Burnt bush: on the boulder by the orange raft. Fallen branch: right of the yellow road sign. Bicycle: in the stream at the bottom centre. Crate: the orange crate at the far left, above the berries. Tyre tracks: in the mud above the deer. Leaping deer shape: the orange deer lying at the lower left. Tree stump: at the upper right, below the washing line. White sign: on the grass among the rocks, right of the standing deer. Bear trap: on top of the green bin at the lower left. Bridge rail: the near railing of the wooden bridge. Yellow road sign: the diamond with the animal, centre right. Stream: the blue pool below the bridge, which is the last and easiest to miss. The Park Landmark Map is your reward when the last shape is gone.
- Open the table and lay the Park Landmark Map on it. Red rings appear and the drawer below opens. Take the Lemon, the Broken Drill and the Alcohol.
Light the fire on the trail
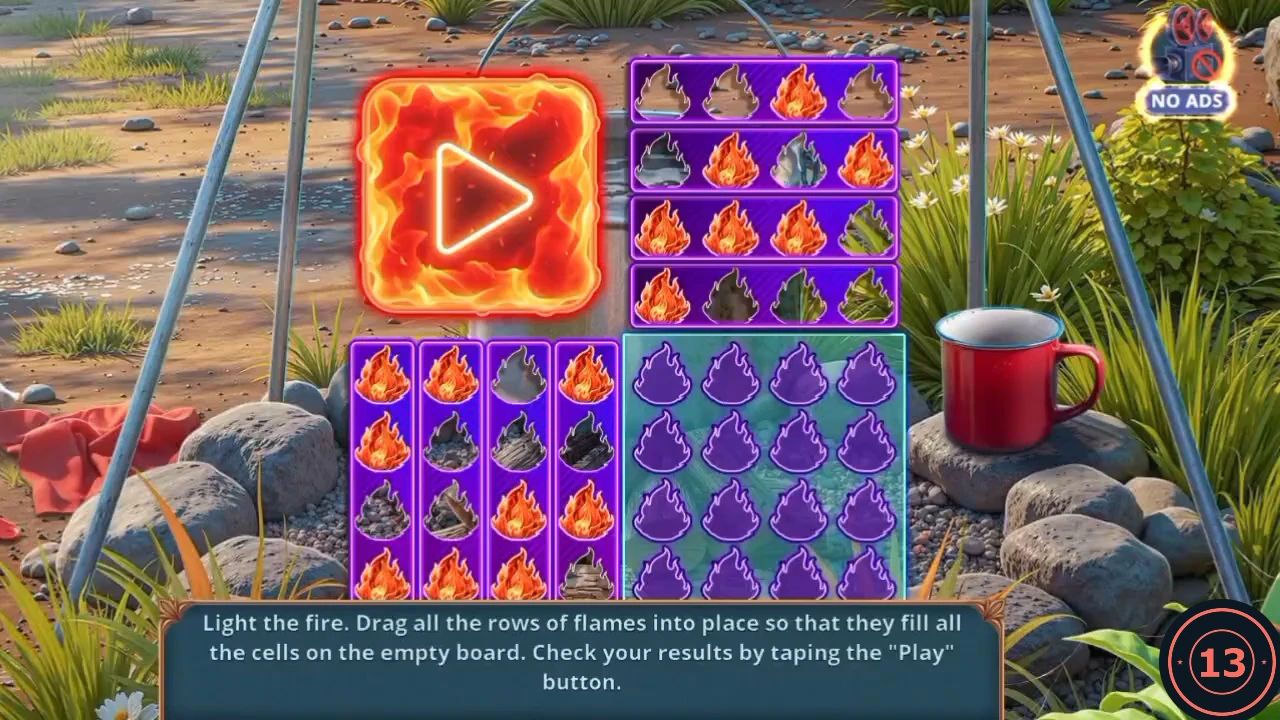
Every cell of the empty board must have a flame from its row in the top stack, or from its column in the left stack. Drag rows and columns to swap them, then tap Play.
- At Mountain Trail, open the firepit and place the Alcohol and the Dry Wood in its slots. The flame puzzle opens.
- From the recorded start, swap rows 2 and 3 of the top stack, and swap columns 1 and 4 of the left stack. Then tap Play. If your stacks start differently, check each empty cell and move a row or column that has a flame over it.CODErows 2 and 3, columns 1 and 4
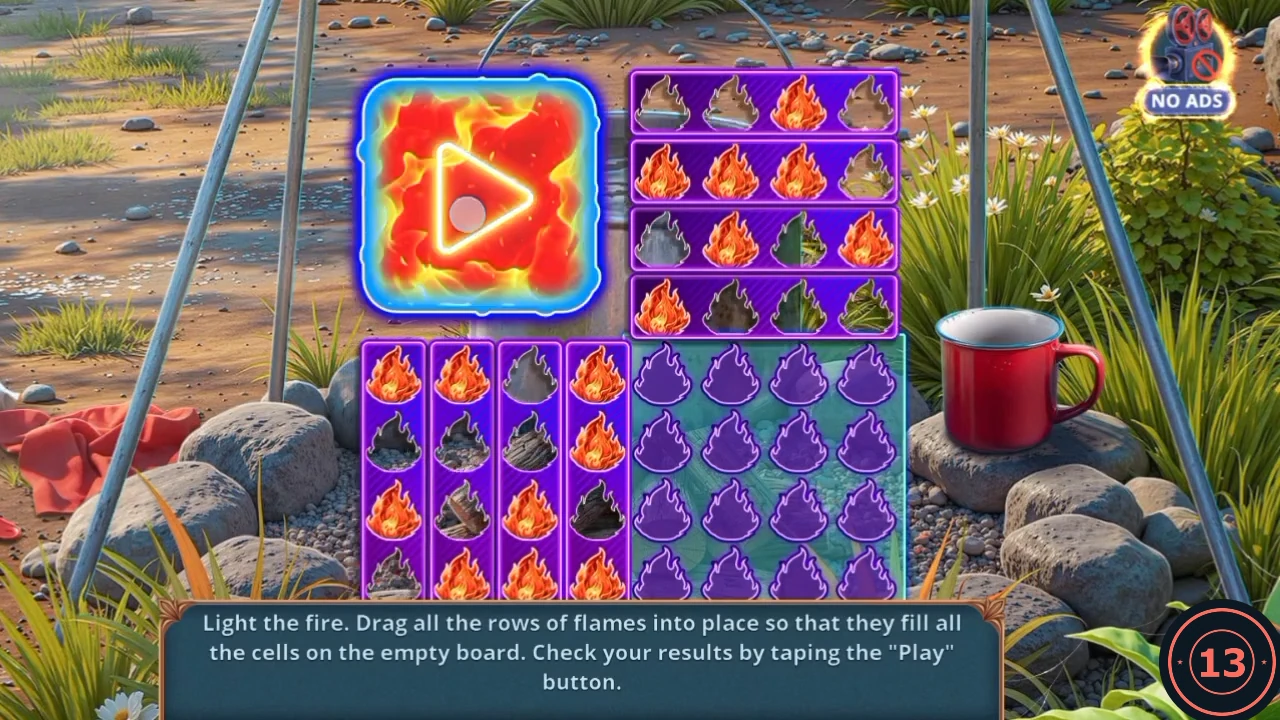
The recorded arrangement as Play is tapped, with rows 2 and 3 and columns 1 and 4 swapped. - Take the Water Mug from beside the fire.
Open the warehouse locker
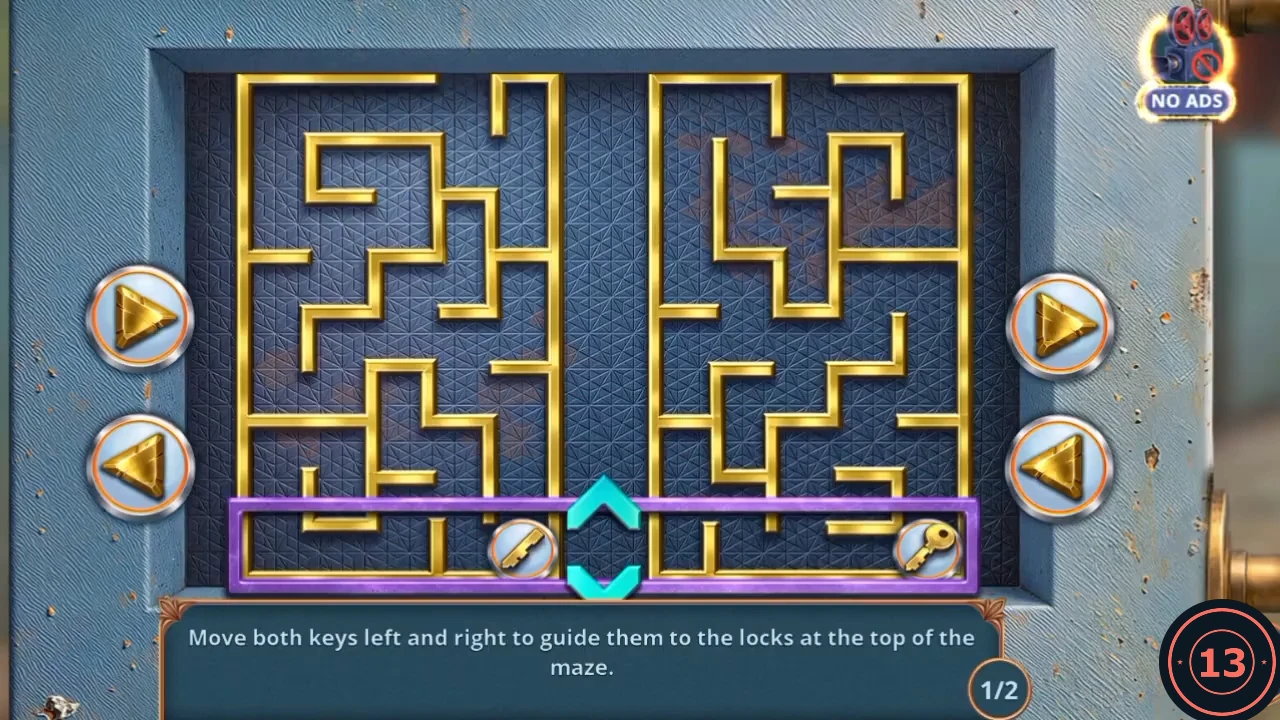
Both keys sit in the same purple row. Each pair of arrows moves one key sideways. The chevrons move the whole row up or down, but only if neither key is blocked by a wall. There are two boards, and each ends with both keys in the top row of the maze.
- At Cliff Edge, open the ice and use the Water Mug. Take the Torn Glove and the Tube with Plan.
- In the Old Warehouse, open the mannequin and place the Ranger Emblem in the lamp slot on his helmet. Take the Gun he lets go of.
- Open the gun cabinet and put the Gun in the empty rack. The side door opens. Take the Hand Fan.
- At the Crevice, open the flowers and use the Hand Fan. Take the Key from under the flowers.
- In the warehouse, open the left locker and use the Key. The maze opens.
- Recorded solution for board 1/2. Both keys start at the far right of their mazes. L and R are the left and right keys, < and > are their arrows, and Up and Down are the chevrons. Each key finishes under the gap in the top wall of its maze. If your board looks different, move each key under an opening, raise the row, and repeat.CODEUp Up, R<, Up, R>, L<, Up, L< L<, Down, L<, Up Up, R<, Down, R< R<, Up, L>, R<, Up, L<, Up Up, L> L> L>, R>, Down, R>, Up
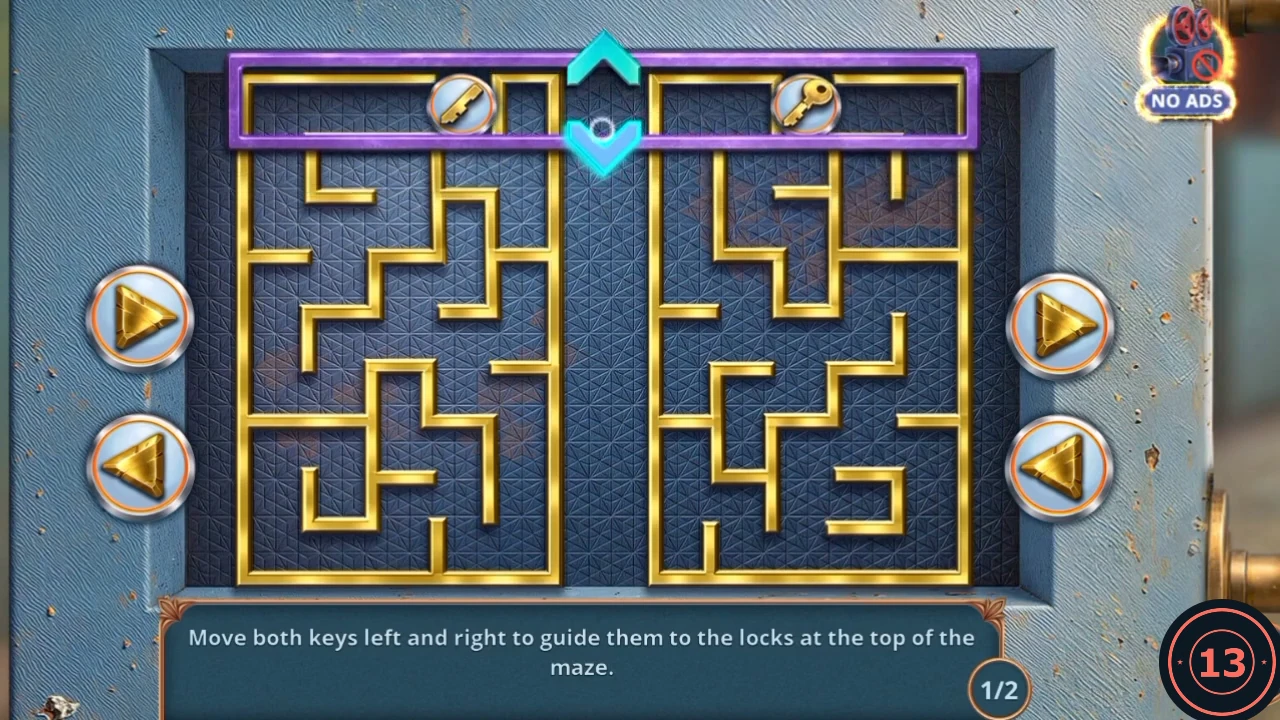
Board 1/2 finished. Each key sits under the gap in its maze's top wall. - Recorded solution for board 2/2, with the same notation. The doors open.CODER< R<, Up, L<, Down, L< L< L<, Up, R<, Down, R<, Up Up, L>, Up, L<, R>, Up, R> R>, Down, R>, Up Up, L>, Down, L> L>, Up, R<, L>, Up, R>, Up Up, L<, Down, L<, Up, R< R< R<
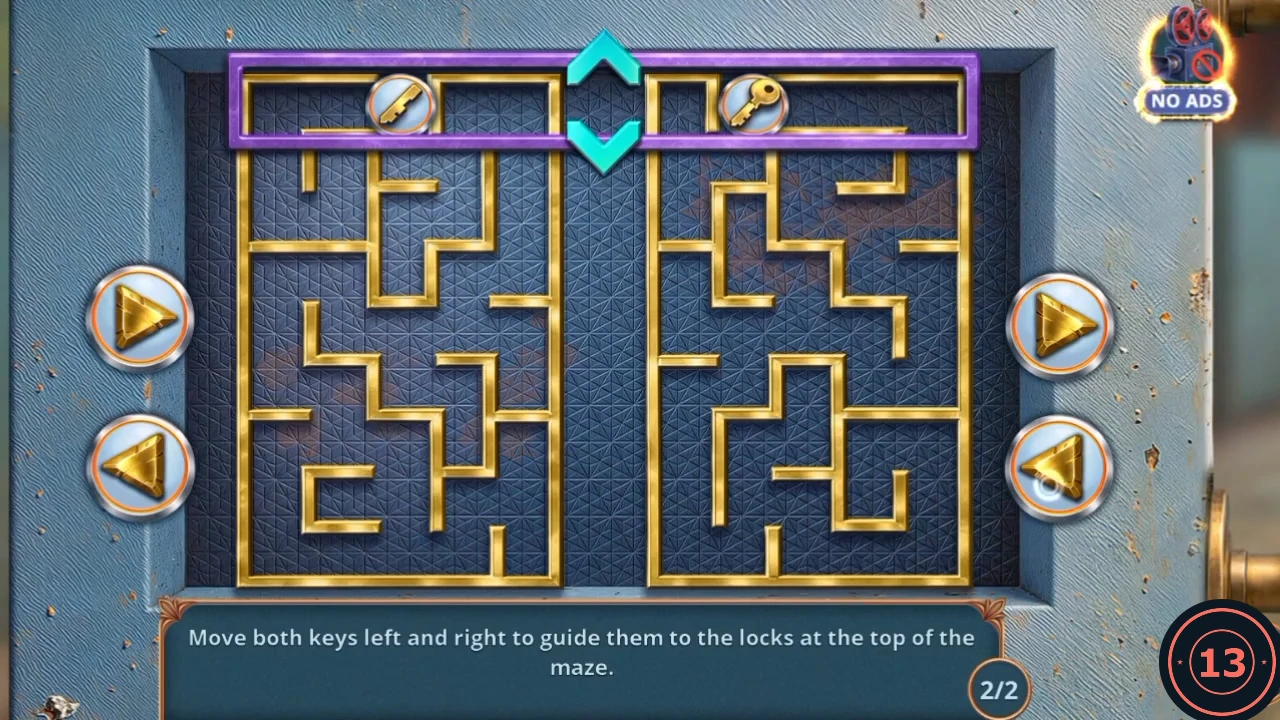
Board 2/2 finished, with both keys under their gaps again. - Read Mark's old diary inside the locker. The task to reach the warehouse gear is complete.
Search the rubble for the second time
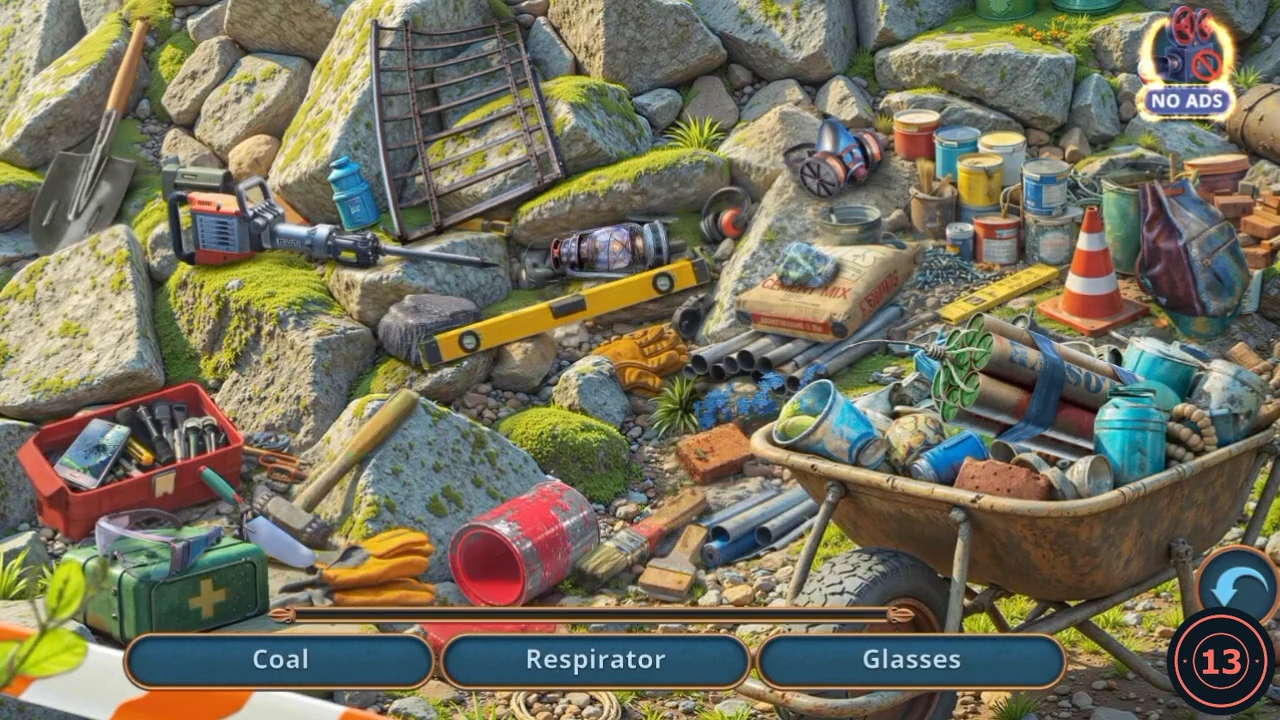
The Tube with Plan opens a second, different search of the same rubble. This time the bar lists items by name.
- At the Crevice, open the rubble and use the Tube with Plan on it. The rubble sparkles.
- Open the rubble again. The bar shows three names at a time, and each item is removed when you tap it. Positions are from the recording, and the order can differ. Coal: the dark lump on the moss at the left, just left of the yellow spirit level. Respirator: the gas mask on the rock at the upper right. Glasses: on top of the green first-aid box at the bottom left. Bag of Samples: the grey-blue bag at the upper right, behind the paint cans. Quartz Piece: the pale crystal on top of the cement bag. Trowel: the silver blade by the green first-aid box. Lantern: on the rocks left of the cement bag. Fence Fragment: the rusty metal panel leaning on the rocks at the top left. Dynamite: the bundle of red sticks across the wheelbarrow. Jackhammer: at the left, under the fence panel. Forget-me-not: the blue flowers just left of the wheelbarrow. Broken Smartphone: in the red toolbox at the left. When the list is empty, the Shell lands on the rocks beside the blue canister at the upper left. Tap it to take it.
Fit the drill bit
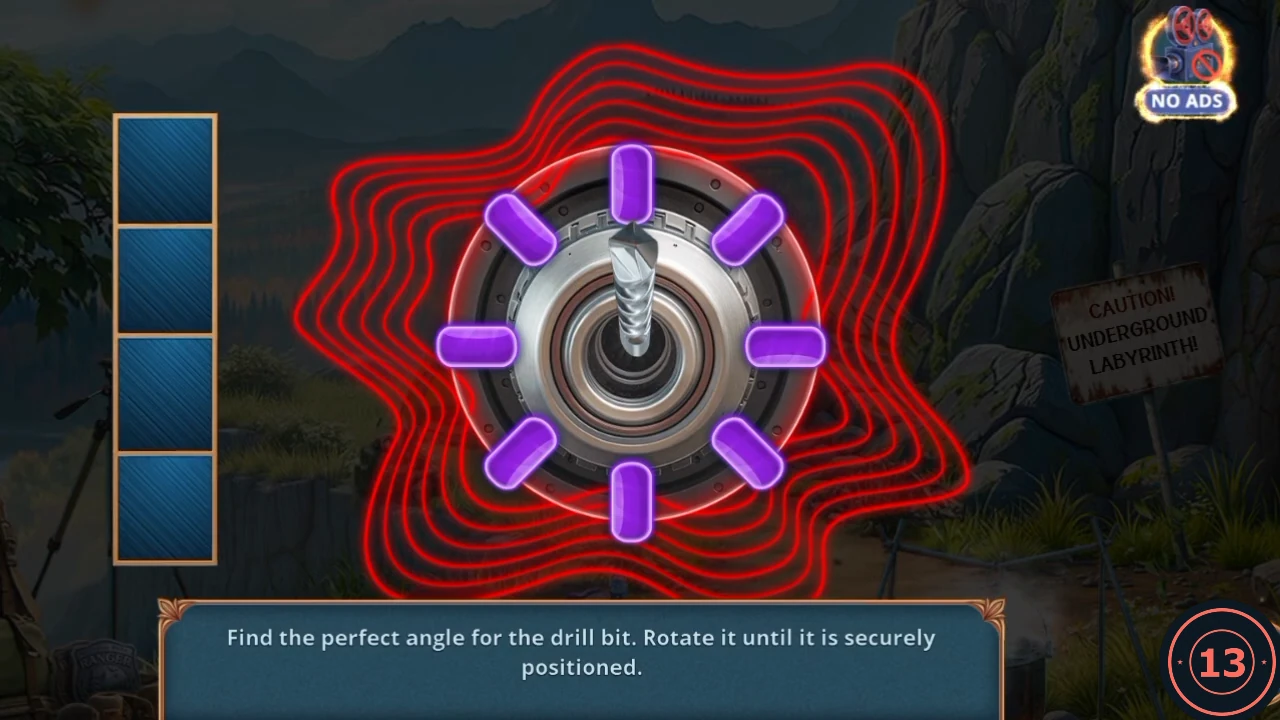
Drag the bit around the disc. The rings turn green at the right angle. Hold the bit there until a cell of the meter fills, then find the next angle. Four cells complete the puzzle.
- At Mountain Trail, open the red bag and drag the Shell along its front pocket to cut it open. Take the Drill Bit.
- Open the Broken Drill from the inventory and place the Drill Bit. The puzzle opens.
- Find each green angle in turn and hold the bit there. The angle moves after each cell fills. The recorded angles were roughly up-right, left, right and down, but the rings are the reliable guide. Take the repaired drill.
Fix the stag medallion
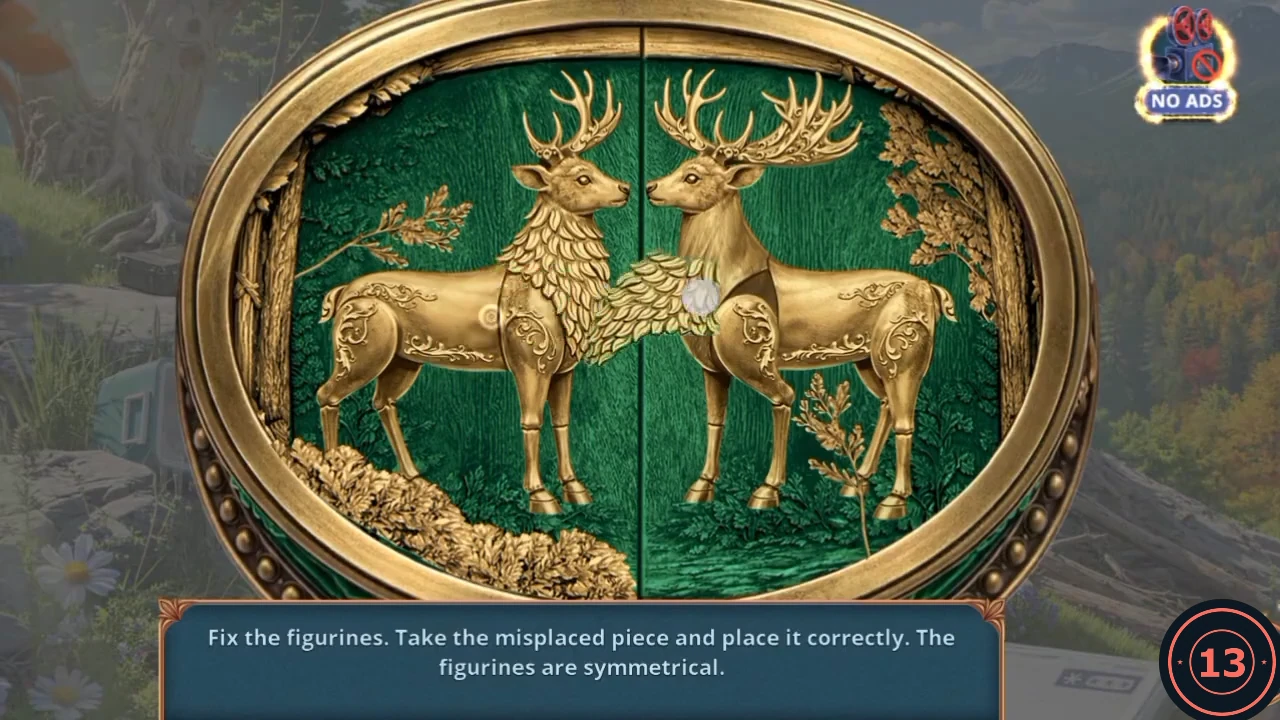
The two stags mirror each other, so compare left and right to spot each piece in the wrong place.
- At the Crevice, open the barrel and use the drill on it. It leaks and the liquid washes out the Corkscrew and the Deer Figurine. Take both.
- At Cliff Edge, open the crate and fit the Deer Figurine on the green medallion. The symmetry puzzle opens.
- Use the left stag as your guide and fix the right one. Drag each misplaced piece into its mirrored position: the chest, the front leg, the back leg and the antlers, then the leaf sprays around it. When both sides match, the medallion opens. Take the Semicircular Ring.
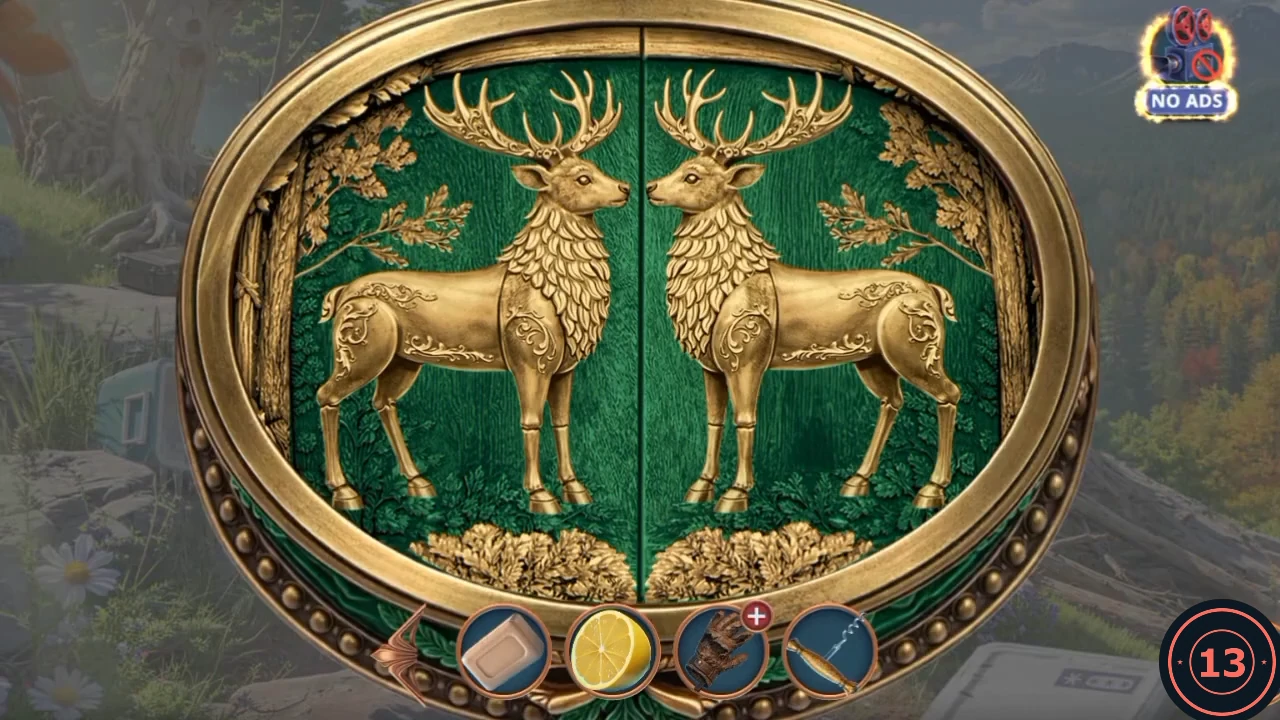
Target state: both stags mirror each other exactly.
Chapter 3 badges before the X10 viewer
Collect these before finding the truck through the X10 viewer. Finishing that search takes you down to the river, and the first scenes of this chapter were locked in the journal afterwards. No warning appeared in the recording. This group holds 8 pickups worth 18.
- Mountain Trail, main scene: on the green backpack. Worth 2.
- Mountain Trail, red bag and pump close-up: at the upper right. Worth 2.
- Mountain Trail, firepit close-up: at the upper left, on the ground to the left of the big pot. Worth 2.
- Crevice, main scene: on the red cloth beside the blue bag. This position is approximate. Worth 2.
- Crevice, barrel close-up: on the stone to the left of the barrel. Worth 2.
- Crevice, flowers and stream close-up: in the top left corner, on the rocks. This position is approximate. Worth 3.
- Cliff Edge, main scene: a pale disc right beside the figure standing behind the camp table. This position is approximate. Worth 3.
- Cliff Edge, ice block close-up: at the upper left, on the ice. Worth 2.
Find the truck through the X10 viewer
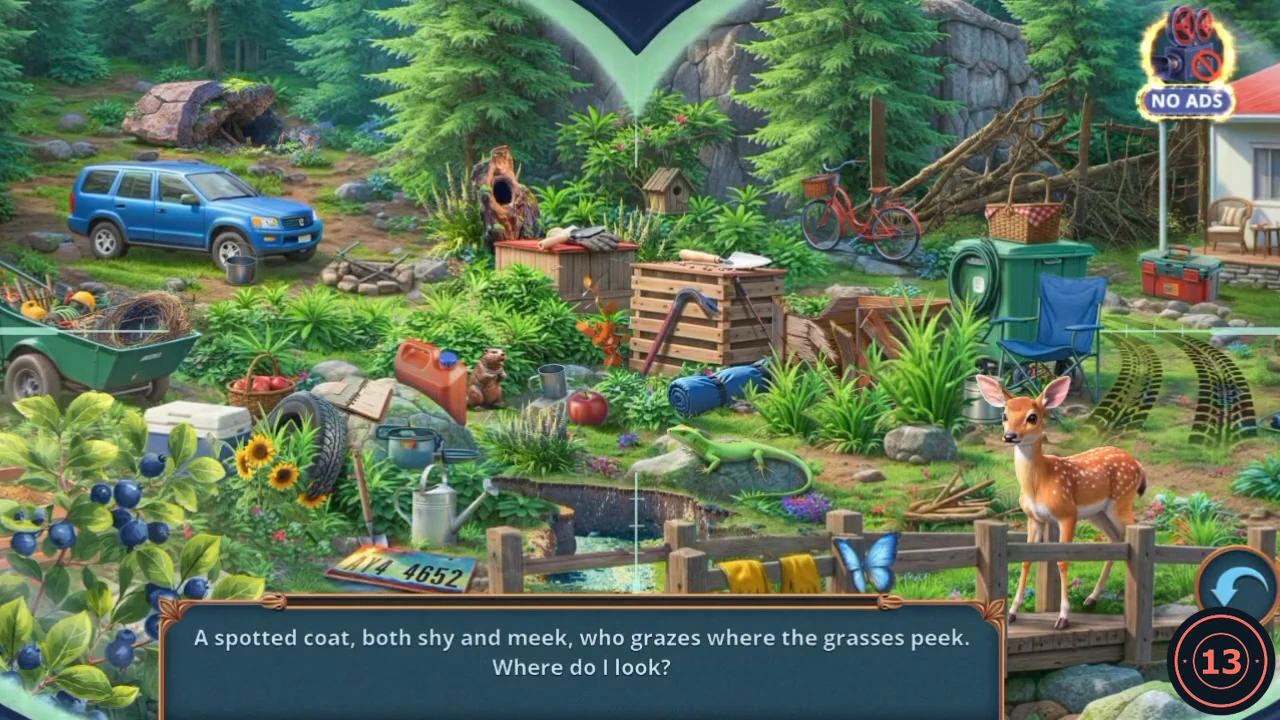
Each riddle at the bottom points to one thing in the valley scene. Tap it to get the next riddle.
- At Mountain Trail, open the red bag and use the Soap on the main zip, then the Corkscrew on its tag. The compartment opens. Read the note about the new binoculars, then take the Crossbow Bolt and the Long-Range Binoculars.
- Open the Crossbow from the inventory and load the Crossbow Bolt in its slot.
- At Cliff Edge, open the viewer and tap the old binoculars to take them off, then fit the Long-Range Binoculars.
- Open the viewer and solve the twelve riddles in order, tapping each answer in the scene. Positions are from the recording. Riddle 1, spotted coat: the fawn on the bridge at the right. Riddle 2: the branch of blueberries at the bottom left. Riddle 3, sunbathing, scaly guest: the lizard on the stones at the bottom centre. Riddle 4: the hollow in the old stump at the top centre, left of the birdhouse. Riddle 5, crumbled mouth of earth and shale: the cave mouth in the rock at the top left. Riddle 6, splintered planks and spilled freight: the broken crate right of the slatted pallet. Riddle 7, wooden trap of broken trees: the barrier of fallen trunks at the top right. Riddle 8: the nest of twigs in the green wheelbarrow at the left. Riddle 9: the discarded tyre beside the sunflowers at the lower left. Riddle 10, grey, ancient buddy that stands firm and tall: the tall grey rock behind the big pine at the top, tapped just right of the pine. Riddle 11, deep, muddy wound in the path: the dark muddy trench at the bottom centre, behind the fence, not the tyre tracks at the right. Riddle 12, plate, bent and muddy: the number plate 4652 at the bottom left of the fence. The note shows the truck's position, 38.5678°. Take the Truck Coordinates.CODE38.5678°