Clean the shoelace and make a magnet line
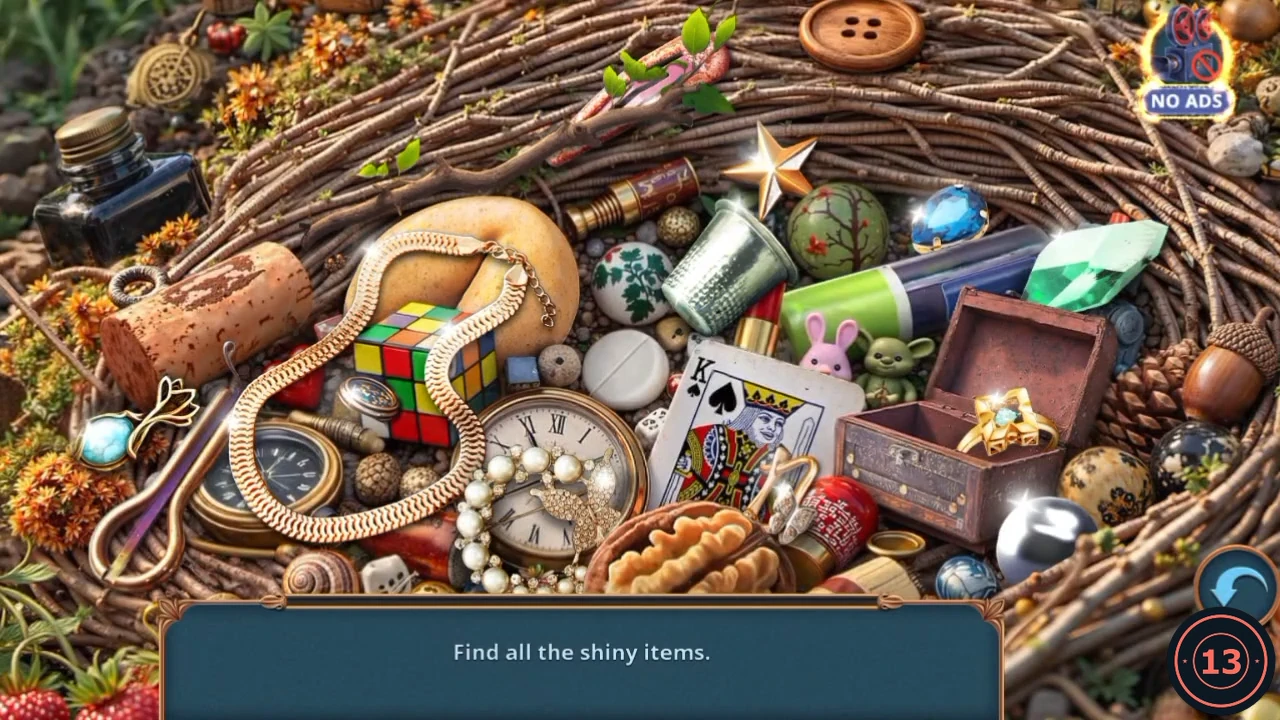
The Loaded Pistol brings down the flag, and the Cloth lets you clean the lump on the bench.
- Back on the burnt path, open the tall pole with the flag on it and use the Loaded Pistol. The flag falls into the thorn bush. Take the Cloth.
- Open the bench and place the Cloth on the dirty lump. Pour the Hand Cleaner on the Cloth and wipe. Take the Paper Clip and the Shoelace.
- Open the sparkling nest again. "Shiny items" means the metal and gem objects, and each one is removed when you tap it. There are ten in the recording, and you can take them in any order. Teal gem pendant: at the left edge, by the twig. Pearl necklace with the gold butterfly: lower centre, on the clock. Silver thimble: top centre. Blue gem: upper right, next to the thimble. Gold star: above the thimble. Green crystal: at the upper right. Gold ring: inside the open wooden chest. Chrome ball: at the lower right. Gold clip: just below the playing cards. Gold chain: the long loop around the toy cube. When all ten are gone, the Magnet lands above the toy cube. Tap it to take it.
- Open the Shoelace from the inventory and add the Magnet to make the magnet on a line.
Search the rock crack
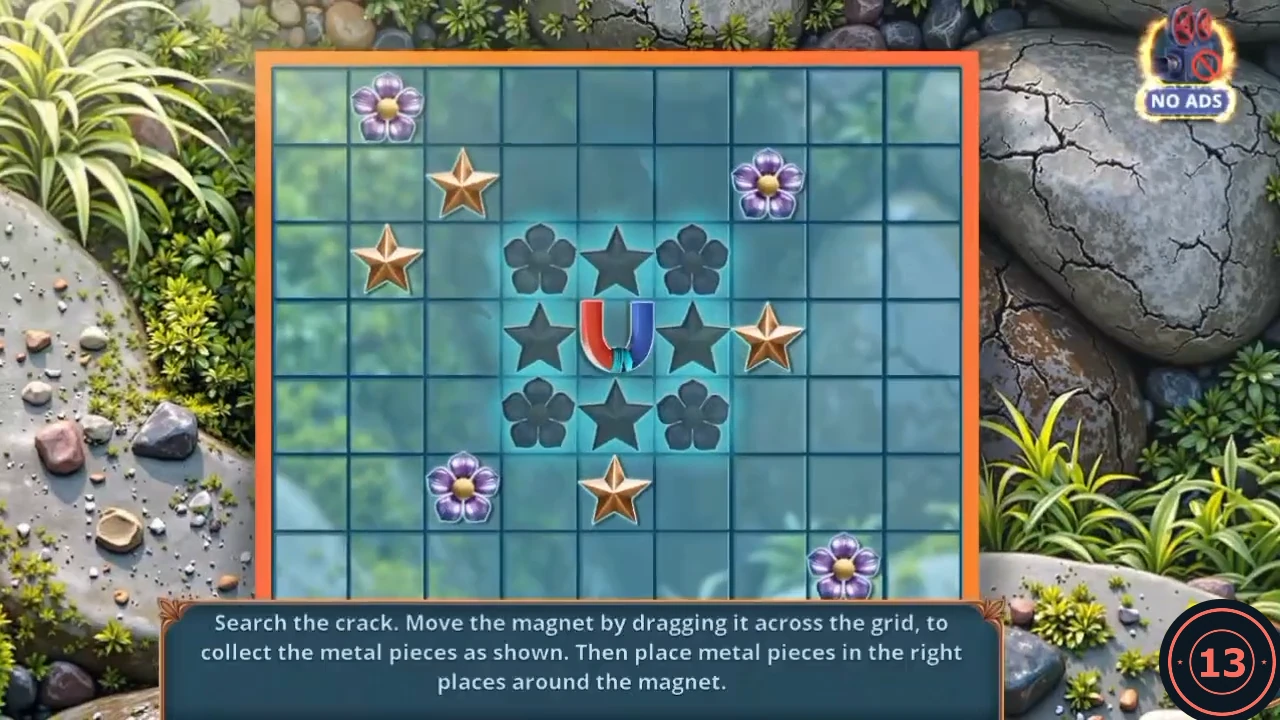
The dark outlines mark the target around the centre of the board and stay where they are. The magnet moves on its own. Drag it so that a loose piece lies in the right position next to it, and the piece sticks and moves with the magnet: stars directly beside it, flowers on its corners and moons two squares out.
- At the ranger's cabin, open the crack in the rocks and use the magnet line. Drag the magnet next to each loose star, flower and moon to pick it up, starting with the nearest. When all twelve are attached, bring the magnet back to the middle of the outlines so each piece fills an outline of its own shape.
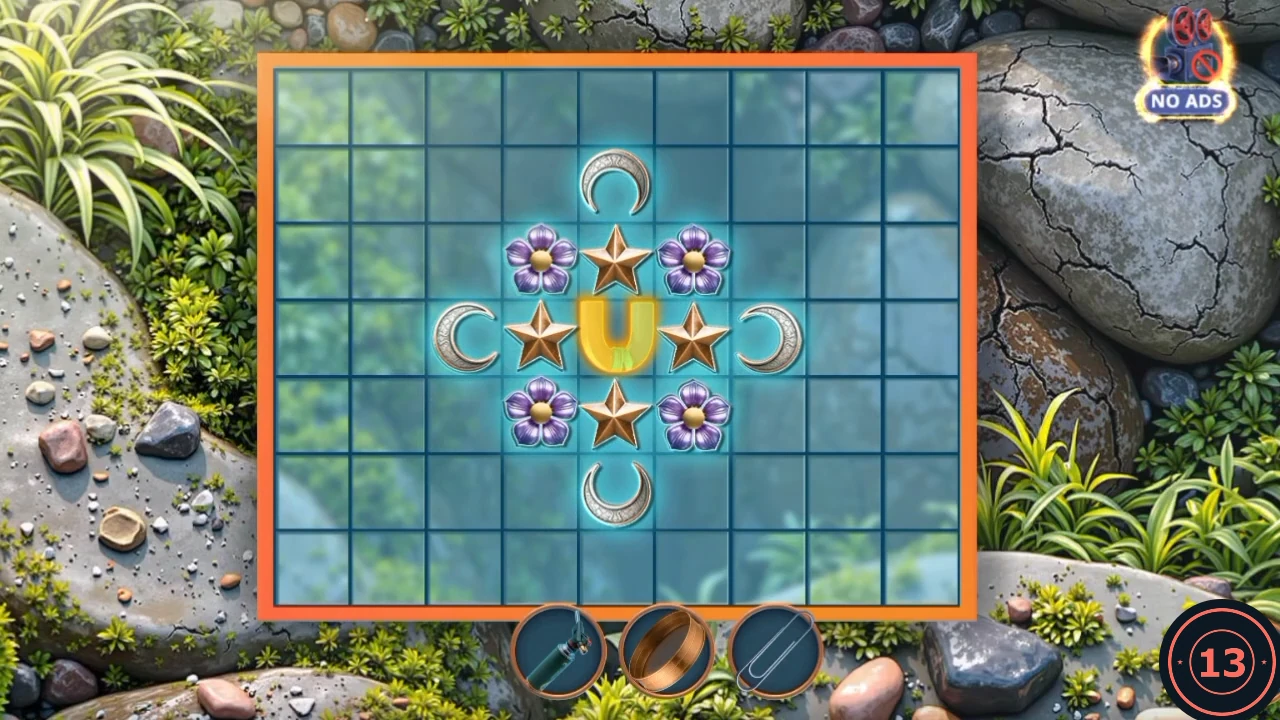
The finished pattern, with all twelve pieces in their outlines. - Take the Steel Horn.
Deer figure, Compass and the second desk search
The Steel Horn sets off a short chain of tools that ends with the rope for the broken bridge.
- Open the carved deer on the stump and fit the Steel Horn. Take the Comb.
- Open the broken bridge and use the Comb on the plank nails. Take Hal Reed's Compass. Alex wishes for rope.
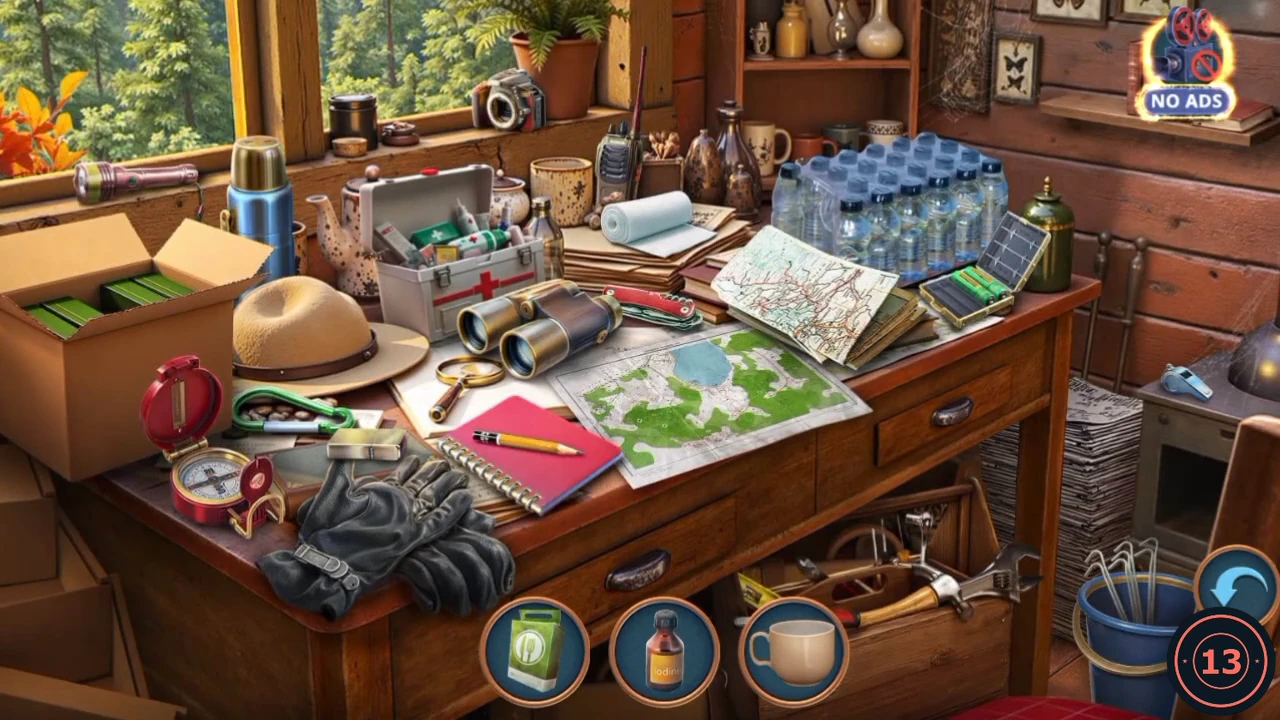
- The cabin desk now sparkles. Open it. Each circle at the bottom shows a close-up of an object, and it stays in place after you tap it. Three show at a time, and the order can differ. Positions are from the recording. Green ration pack: in the cardboard box at the left. Mug: on the shelf behind the water bottles. Iodine bottle: in the first-aid box. Red-handled awl: in the toolbox under the desk at the lower right. Black gloves: at the front of the desk. Brown book: on the wall shelf at the top right, under the NO ADS button. Camera lens: on the windowsill, in front of the camera. Stack of newspapers: on the floor to the right of the desk. Red flag: on the big green map (more flags appear on the map when you find it). Water bottle: in the wrapped pack at the back right. Battery: in the solar case right of the road map. Tent peg: in the blue bucket at the bottom right. When all are found, the drawer at the right of the desk slides open with the Shears inside. Tap them to take them.
- On the burnt path, open the thorn bush and use the Shears. Take the Twine.
- Open the broken bridge and tie the Twine to the piling, then use the beaver helper. Alex says the beaver will stretch it to the other side, and the puzzle opens.
Chapter 2 badges before the river crossing
Collect these before you run the rope across the logs. No warning appeared at this crossing in the recording, but the journal's first row was locked by the time the camp was being searched. This group holds 7 pickups worth 15.
- Burnt forest path, main scene: between the two trunks just above the back of the bench. This position is approximate. Worth 2.
- Burnt forest path, bench close-up: on the log under the bench, at the bottom left. Worth 1.
- Burnt forest path, chainsaw close-up: on the dirt at the upper right. This position is approximate. Worth 2.
- Stream path, main scene: on the big fallen trunk at the upper right. This position is approximate. Worth 3.
- Stream path, log jam close-up: on the blue-grey rock in the bottom left corner. Worth 2.
- Ranger's cabin, main scene: on the roof ridge above the porch. Worth 3.
- Ranger's cabin, deer figure close-up: at the lower left among the blue flowers, on the edge of the stump. Worth 2.
Run the rope across the logs
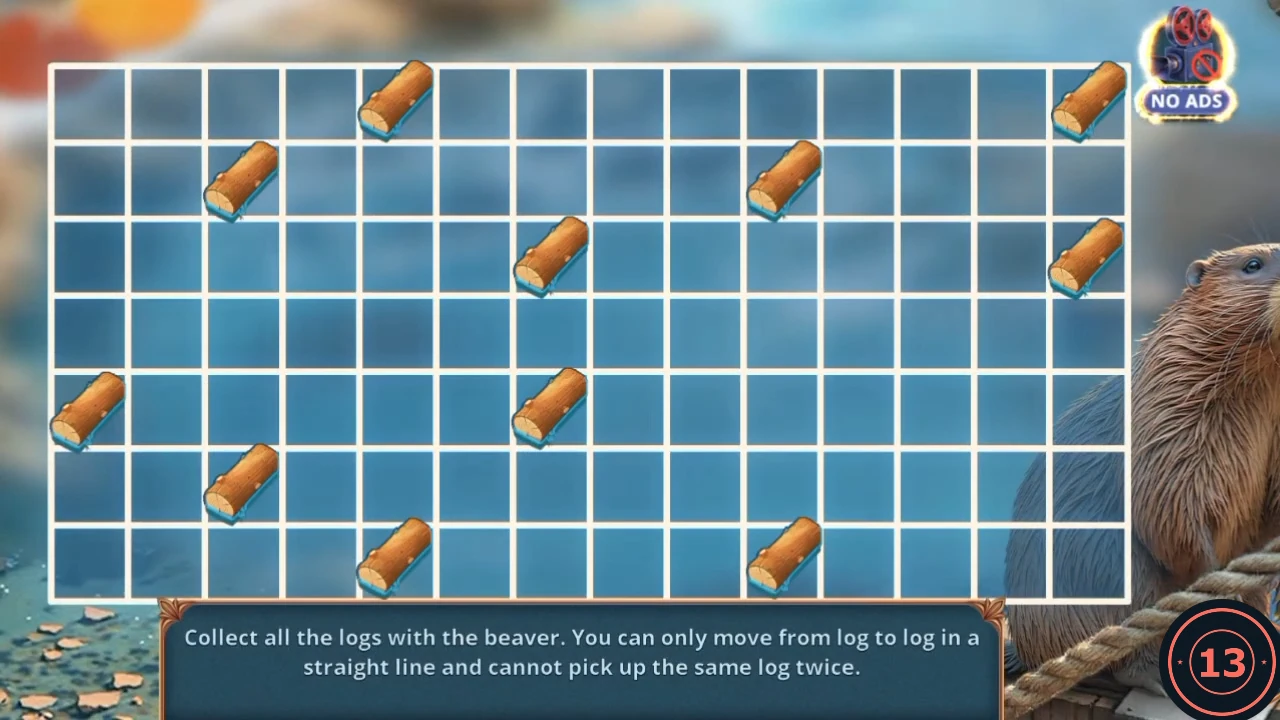
Tap logs one after another. Each move must be a straight line along the grid, and no log can be used twice. Below, column 1 is at the left and row 1 is at the top of the 14 by 7 grid.
- Recorded order: tap the logs at column 3 row 6, column 3 row 2, column 10 row 2, column 10 row 7, column 5 row 7, column 5 row 1, column 14 row 1, column 14 row 3, column 7 row 3, column 7 row 5, column 1 row 5.
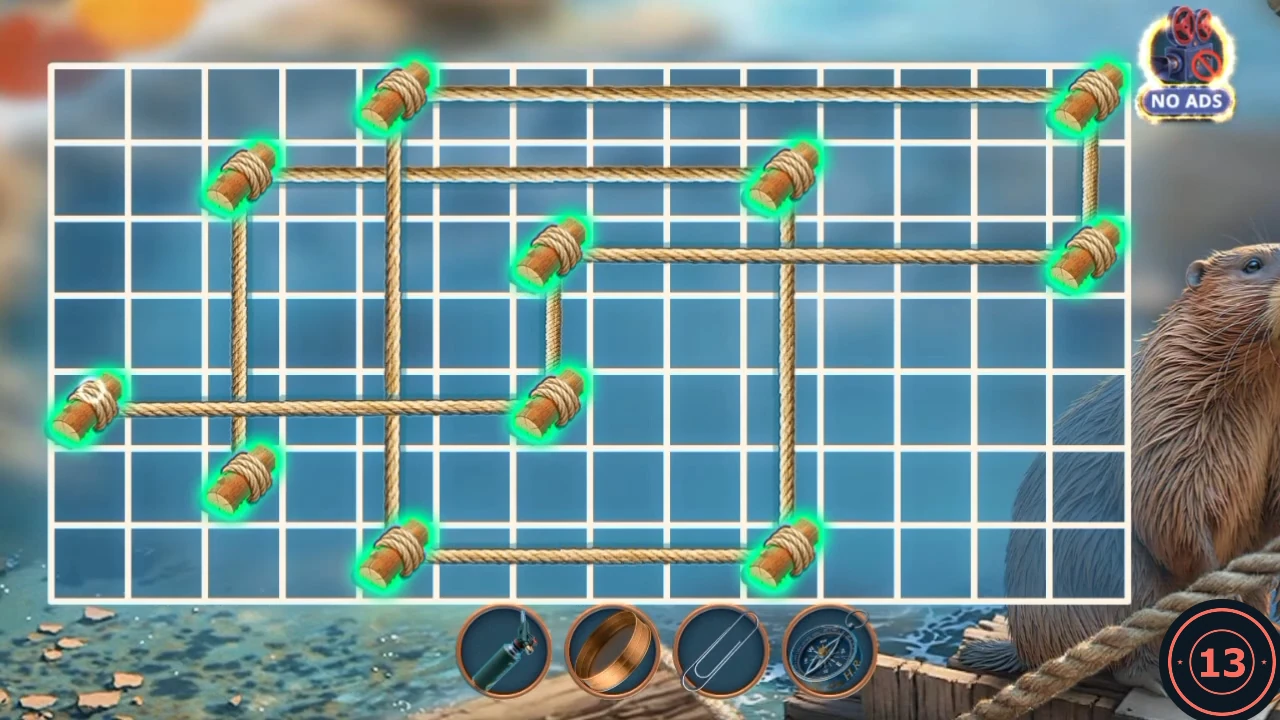
The recorded rope path, finished. The last log tapped is at the far left.
Ornithologist's Camp
Reed is not here, but Leah says he would have left a clue.
- When Leah suggests the abandoned ornithological post, "Great idea. Let's go." earns 1 Decision Point and opens the gold Bonus Location on this chapter's journal page. The other answer is "It's unnecessary. We can't waste any time." Only the first was played, so what declining does is unknown, and the steps after this assume you accept.
- Open the cork board and read Reed's note about his soaked field notes. Take the Box and the Wet Paper.
Abandoned Ornithological Post: the lake platform
The reply you gave Leah at the camp opened this gold Bonus Location, the Abandoned Ornithological Post. Your new task is to study Hal Reed's audio diary.
- At the lake platform, open the shallow water by the folding stool. Take the first red item (its icon reads 1/2) and the Soldering Iron.
- Open the holed pot on the log and use the Soldering Iron to mend it. Take the Camping Pot.
- Open the steam vent in the middle of the path and place the Camping Pot over it. Take the Bottle Opener that is uncovered.
- At the camp, open the radio table and use the Bottle Opener on the strapped jack. Take the Jack.
- At the lake platform, open the mossy log and use the Jack. Take the second red item and the Swimming Mask.
- Open the water by the stool and use the Swimming Mask. Take the Cassette from the sunken bag, then the Rubber Glove behind it.
Dry the paper and search the cork board
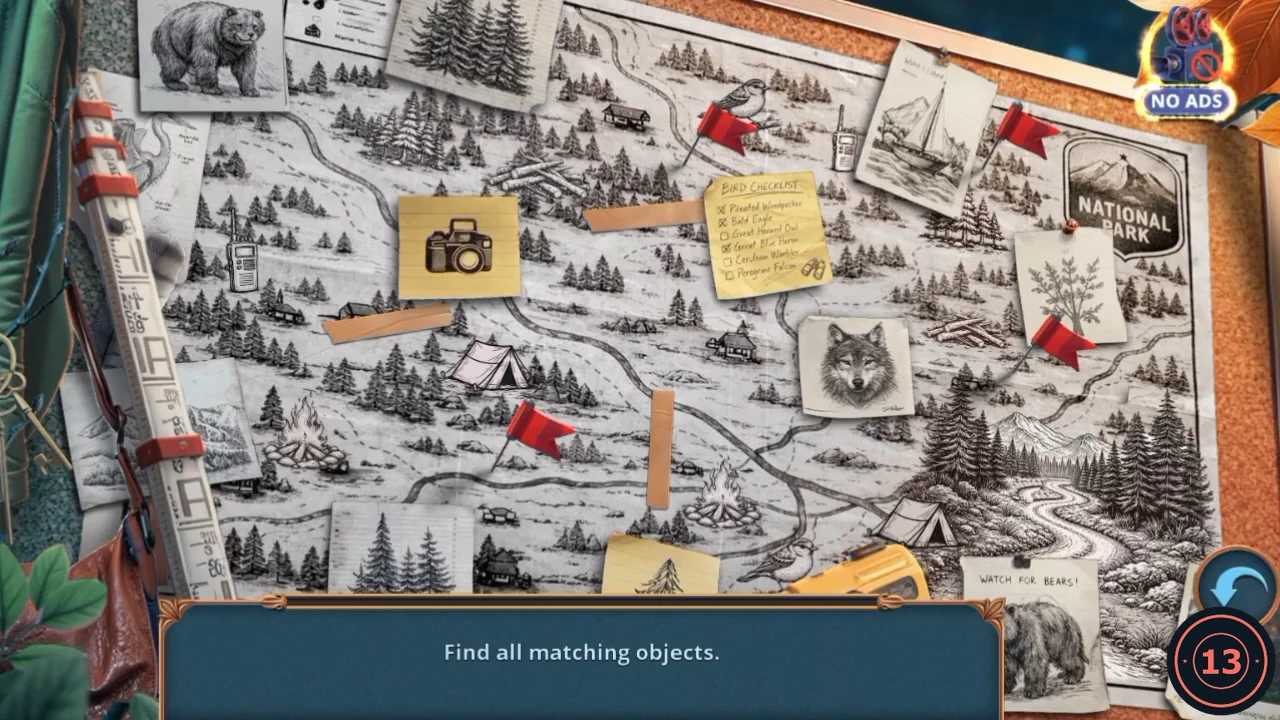
The Wet Paper from the cork board needs drying before it fills the gap in the board, and the search that follows gives you the Awl.
- At the camp, open the firepit and use the Burner to light it. Put the Wet Paper on the stones beside the fire, then take the Dry Paper.
- Open the cork board and place the Dry Paper over the gravel gap. The board now sparkles.
- Open the board. "Matching objects" means pairs of the same small drawing on the map: tap one and it gets a cyan outline, then tap its partner and both are removed. Positions are from the recording, and the order can differ. Walkie-talkies: one on the left of the map, level with the camera note and just left of it, and one at the top right between the red flag with the bird and the sailing-boat picture. Campfires: one left of centre low on the map and one at the lower centre, right of the strip of tape. Tents: one above the left-hand red flag and one at the lower right near the yellow tape. Fir tree clusters: one at the top left and one to the right of the bird checklist. Log piles: one above the camera note and one left of the small tree picture on the right. Birds: one on the upper red flag and one at the bottom by the yellow tape. When all pairs are gone, the top right corner of the map peels back to show a hole in the cork. Tap the Awl inside it to take it.
- Open the cracked green case and use the Awl to split it. Take the Lock Picks.
Match the key for Reed's Box
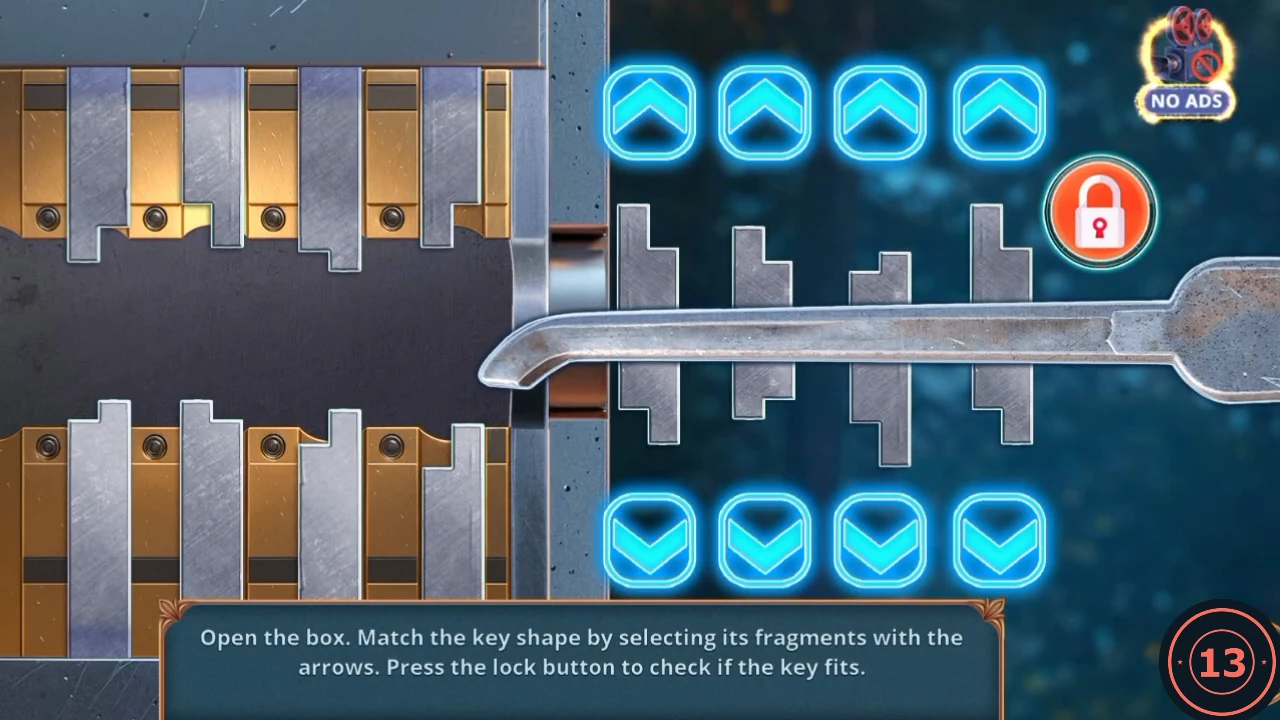
The key needs to fit the pins on the left. Tap an arrow to swap that column's top or bottom fragment for another shape.
- Open the Box from the inventory and use the Lock Picks on its keyhole. The key puzzle opens.
- Change each fragment until its shape fits the matching pin above or below it. Compare the steps carefully: a notch must line up with the pin's step. This is the method rather than a list of presses, because the starting fragments may differ. Tap the red padlock to test. All eight marks turn green when the key is right.
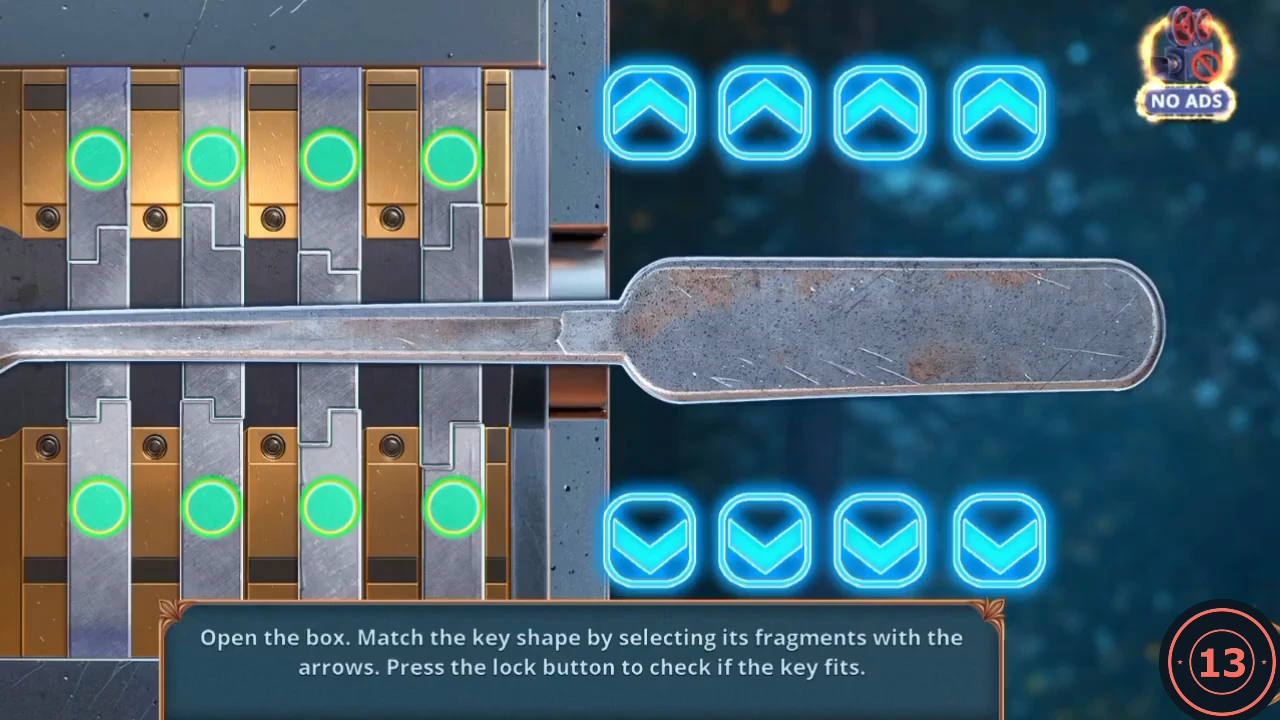
The accepted key, with all eight marks green. Your own fragments may start differently. - Read the notes in the open box: Reed built a transmitter to stabilise the magnetic waves and went to place it at the platform further out in the swamp.
- Back at the camp, when Leah calls Reed foolish, "Never mind, we'll reprimand him when we find him." earns 2 Decision Points. The other answer is "Well, listen, it's not for you to judge." The path to the swamp then opens.