Watch from the bushes and search the plane
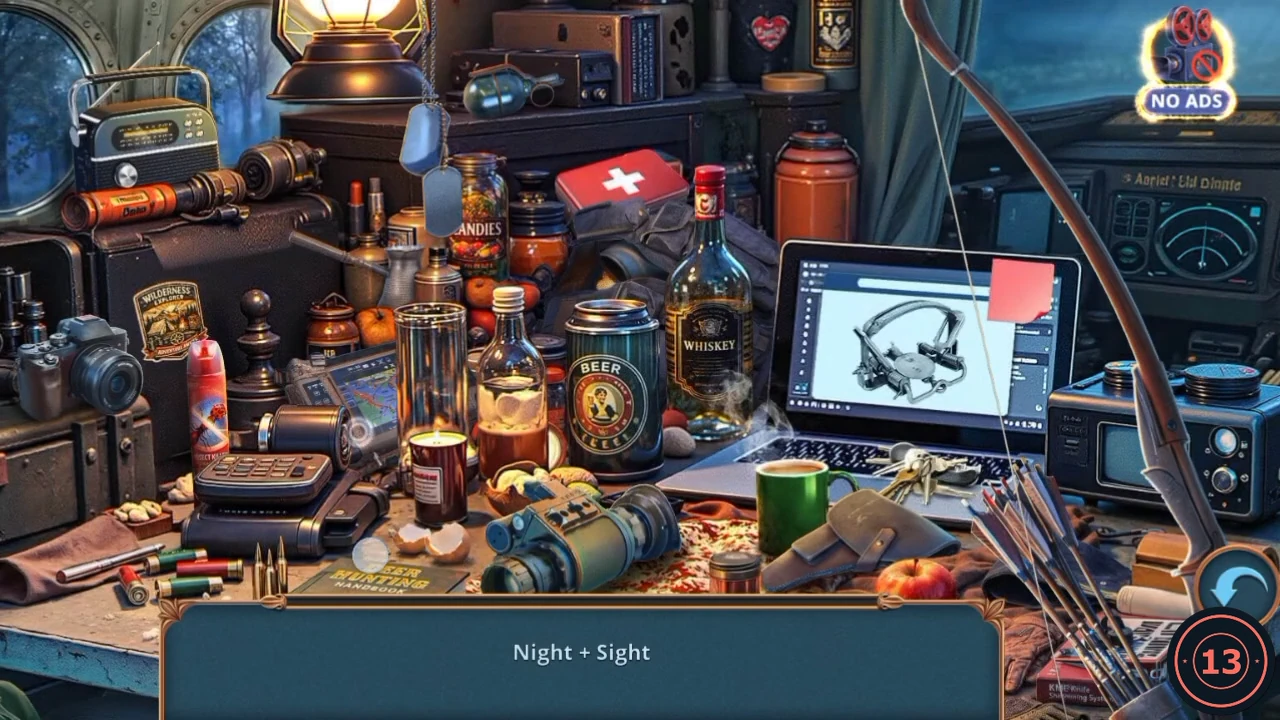
The flight ends at the Poachers' Camp. Hold back, then search the plane.
- After the flight you and Leah watch Ron Carter greet Nolan Shepard from behind the bushes. Your reply sets the Decision Points: "Lie low" earns 6, "Quietly retreat" earns 2 and "Loudly shrink back" earns none. Leah goes after the animals and you reach the Poachers' Camp.
- Open the blue WILD HUNT case on the right. Read the note lying on it and take the Machete.
- Open the vines covering the plane door and cut them with the Machete. The plane search opens.
- Each clue joins two words into one object. Tap the object and it's removed. There are twelve in the recording, and the order can differ. Night + Sight: the night-vision scope at the front centre of the desk. Old-Fashioned + Weapon: the bow and arrows at the right. Canister + Poison: the red spray can at the left. Coffee + Pot: the metal pot with the long handle, in front of the jar of candies. Communication + Antenna: the radio on the case at the top left. Jaw + Trap: the sketch of the trap on the laptop screen. Pin + Explosion: the grenade on the top shelf, beside the dog tags. Screen + Map: the tablet showing a map, in the centre on the left, behind the candle. Flash + Picture: the camera at the far left. Name + Metal: the dog tags hanging at the top. Protection + Gun: the holster in front of the laptop, next to the green mug. Defense + Body: the dark vest behind the whiskey bottle. When the bar is empty, the Tube with Sleeping Dart drops onto the patterned cloth at the front of the desk, left of the green mug. Tap it to take it.
Free the quokka from the glass tank
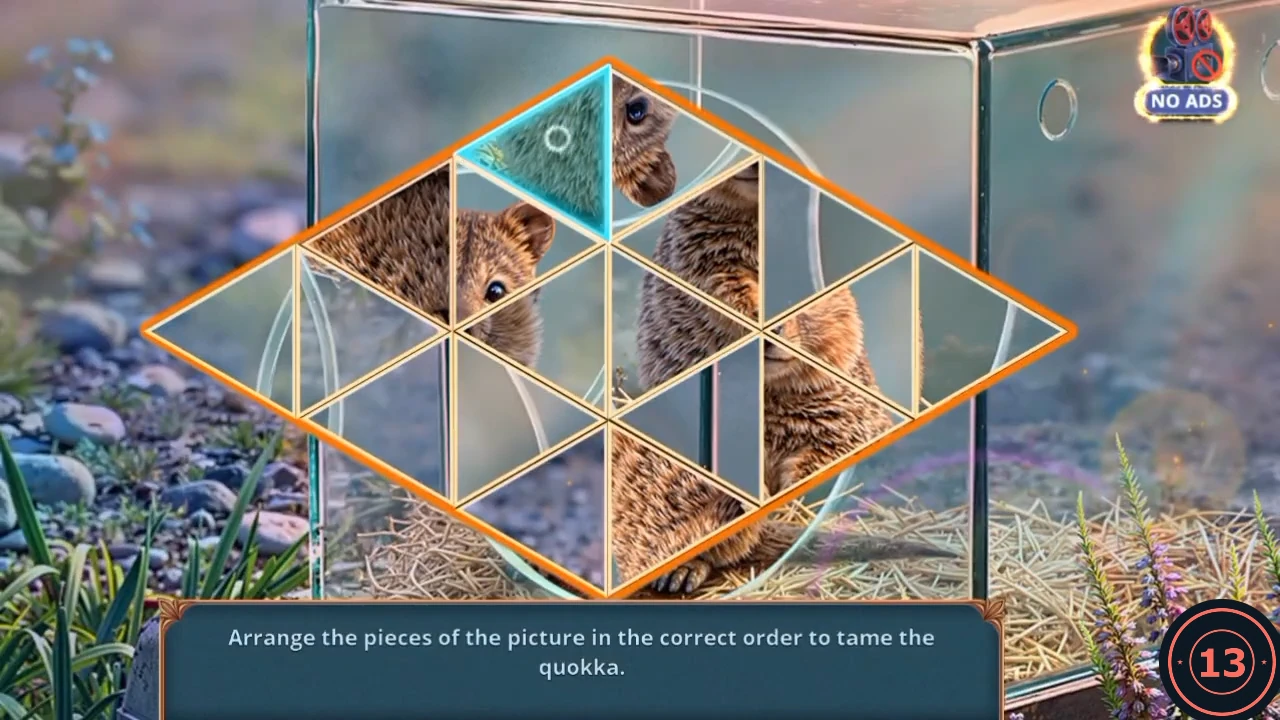
The Sleeping Dart gets Ron Carter out of the way. The quokka's picture is a triangle puzzle. The starting layout may differ, and a full move list would be long, so this is the approach rather than every swap.
- Use the Tube with Sleeping Dart on Ron Carter at the table. Once he slumps, take the Suction-Cup Keychain from the table.
- Open the glass tank and stick the Suction-Cup Keychain on the front. Use the Glass Cutter on the glass. A circle of glass lifts away with the keychain.
- Rearrange the triangles until the quokka picture is whole inside the rhombus. The quokka joins your helpers.
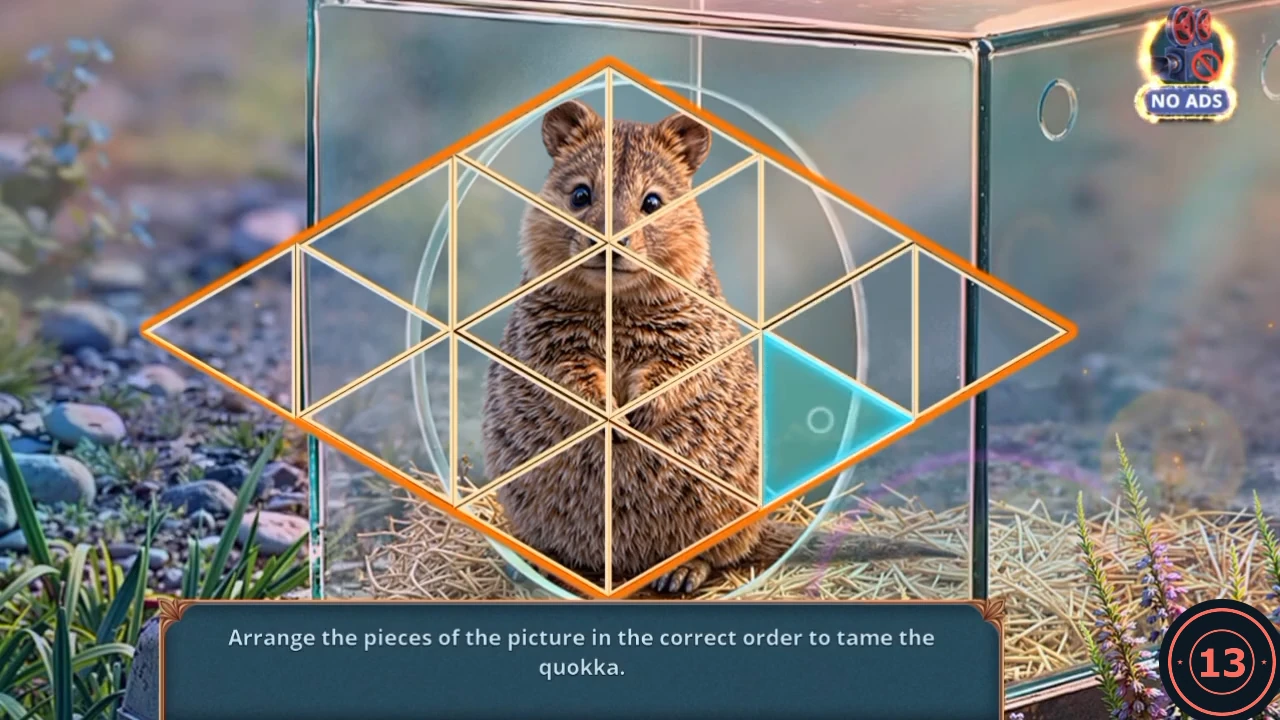
Target picture: the completed quokka. The blue triangle is only the last one moved.
Leah calls on the radio
Leah calls with news, and this is a scored reply.
- Leah reports that the poachers greeted Shepard like an old friend. "Pin down their coordinates and call for backup. We'll get them." earns 2 Decision Points. No marker shows on "Maybe you misunderstood?". Leah then asks you to find Nolan's getaway vehicle or a good ram to catch him. Your new task is Prepare the trap.
Power up the scanner
The Tree Platform holds the parts you need to bring the Dead Scanner back to life.
- Go to the Tree Platform. Open the bag on the table and use the quokka on it. It chews through and leaves the Power Bank.
- Open the rail with the two knotted ropes and take the Antenna.
- Open the Dead Scanner in your inventory and fit the Antenna and the Power Bank in its two slots. The screen comes on.
- Open the red blanket by the crate and take the Torn Documents and the Acetone.
Arrange the locks on the scanner
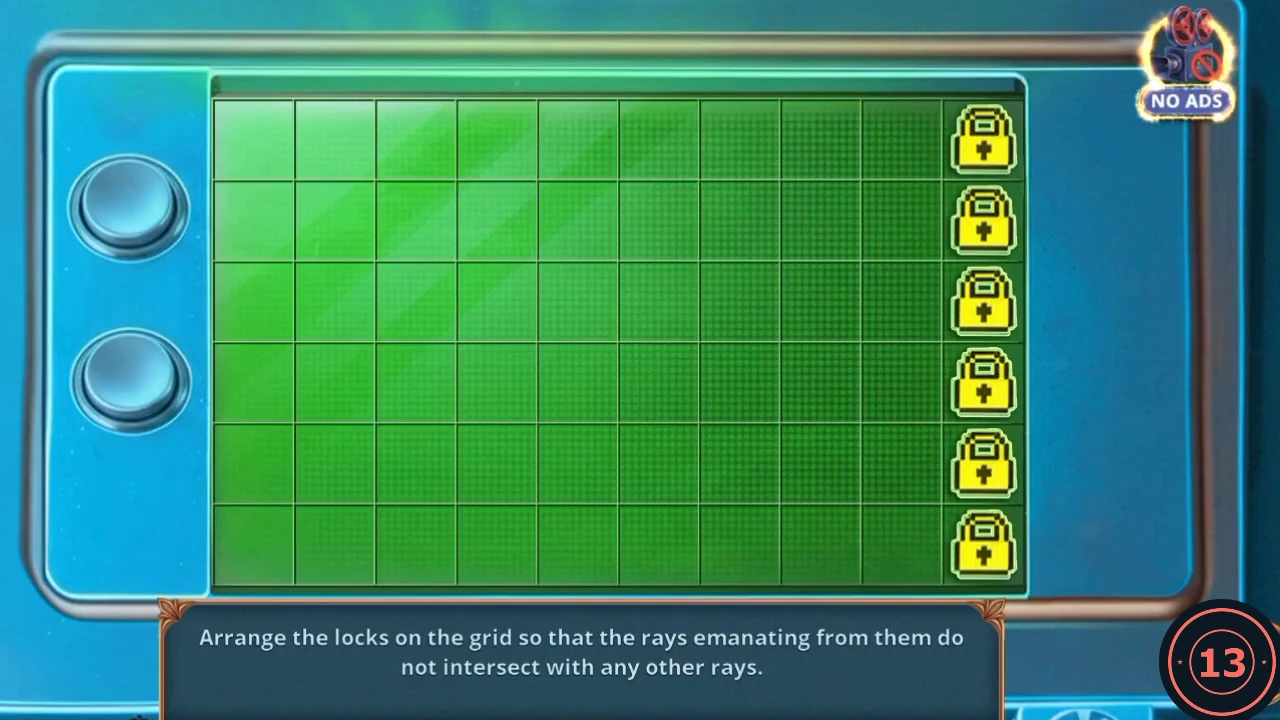
Each lock sends rays along its row, its column and both diagonals. A lock turns red when its rays touch another lock. All six must end clear. The six locks start in the right-hand column.
- Return to the Poachers' Camp and use the Scanner on the WILD HUNT case. The board opens.
- Recorded solution: place the locks on these squares. Rows count from the top and columns from the left.CODERow 1, column 2 Row 2, column 7 Row 3, column 10 Row 4, column 3 Row 5, column 1 Row 6, column 8
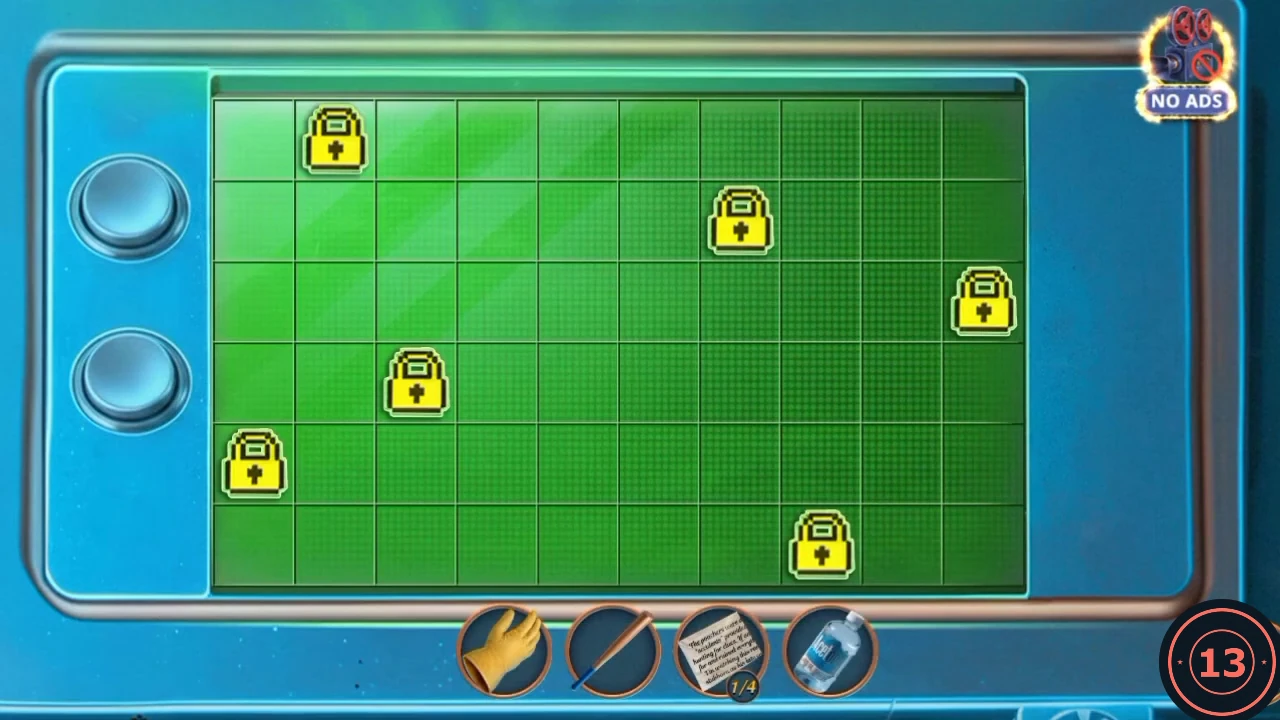
The recorded solution, with all six locks clear of each other's rays.
Search the case and the bag
The scanner opened the case. Its contents lead through the stove and the bag to the sneaking board.
- Open the WILD HUNT case and take the SUV Keys and the Bottle of Water.
- Open the stove and pour the Bottle of Water on the fire. Use the Heat-Resistant Glove on the ashes to take the Magnet.
- At the Tree Platform, open the blanket and hold the Magnet to the clasp of the brown bag. Take the Nets and the Duct Tape.
- Open the rail with the two knotted ropes and use the Nets on it. The net rolls out and the sneaking board opens.
Sneak past the poachers
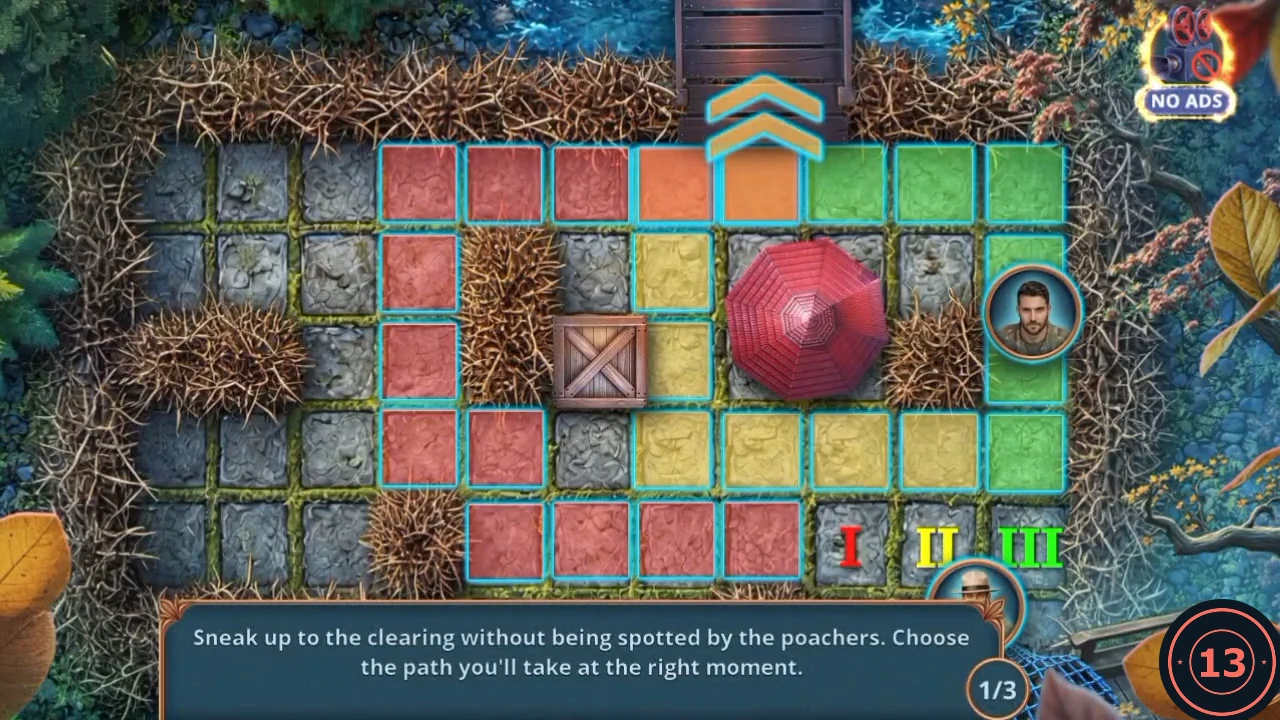
There are three rounds and the board changes each round. Buttons I, II and III pick the red, yellow and green paths to the chevrons at the top. Poachers patrol the board, so choose a path when they are clear of it.
- Press Start. The recorded run took path III in round 1, path II in round 2 and path III in round 3. Poacher timing decides which path is safe, so watch the patrols rather than copying these choices.
Search the SUV and move the boulder
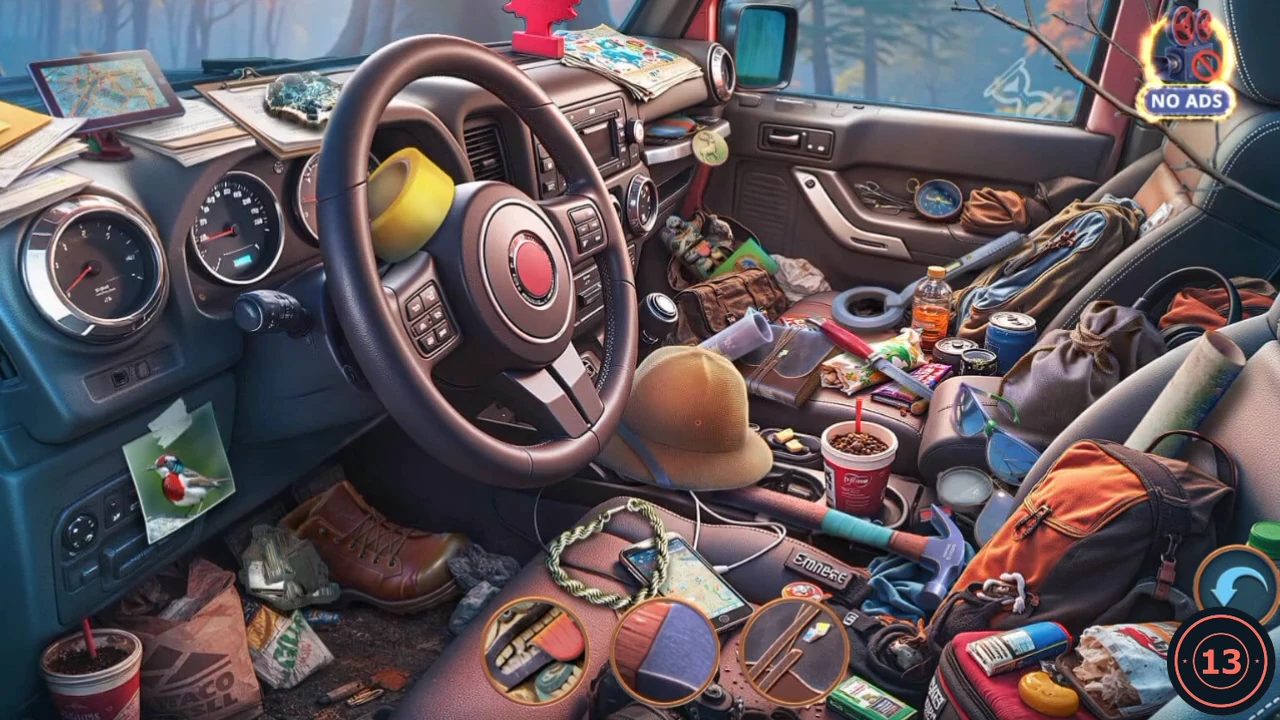
You reach the Meadow by the Old Road, where the SUV stands. The keys from the case open it.
- Open the SUV door and use the SUV Keys. The door opens.
- Search the cab. Each circle at the bottom shows a close-up of part of an object, and the object stays in place after you tap it. Three show at a time, and the order can differ. Positions are from the recording. Yellow tape: on the steering wheel, at its upper left. Brown leather notebook with straps: on the seat right of the hat. Hammer: on the console at the lower right, with the teal grip. Brown sack tied with rope: on the passenger seat. Clear plastic measuring cup: just above the hat. Patterned pouch: in the footwell behind the gear lever, beside the green packet. Rolled map: on the passenger seat at the right, and the circle shows its end. Crumpled banknotes: on the floor at the lower left, beside the boot. Teal rock: on the clipboard on the dashboard at the upper left. Compass: in the door pocket. Tablet with a map: on the dashboard at the top left. Grey rubber ring: behind the orange bottle in the centre. When the bar is empty, the last silhouette is the Wolf Figurine, which drops below the steering wheel, left of the hat. Tap it to take it.
- Open the boulder. Set the Wolf Figurine at its foot and use the orange-shafted tool on it. The boulder shifts. Take the Stone.
- Open the fallen log and place the Stone under the plank. The red Plane flips out, so take it.
- Pour the Acetone on the resin at the upper left of the log and take the Saw.