Fill the hexagon
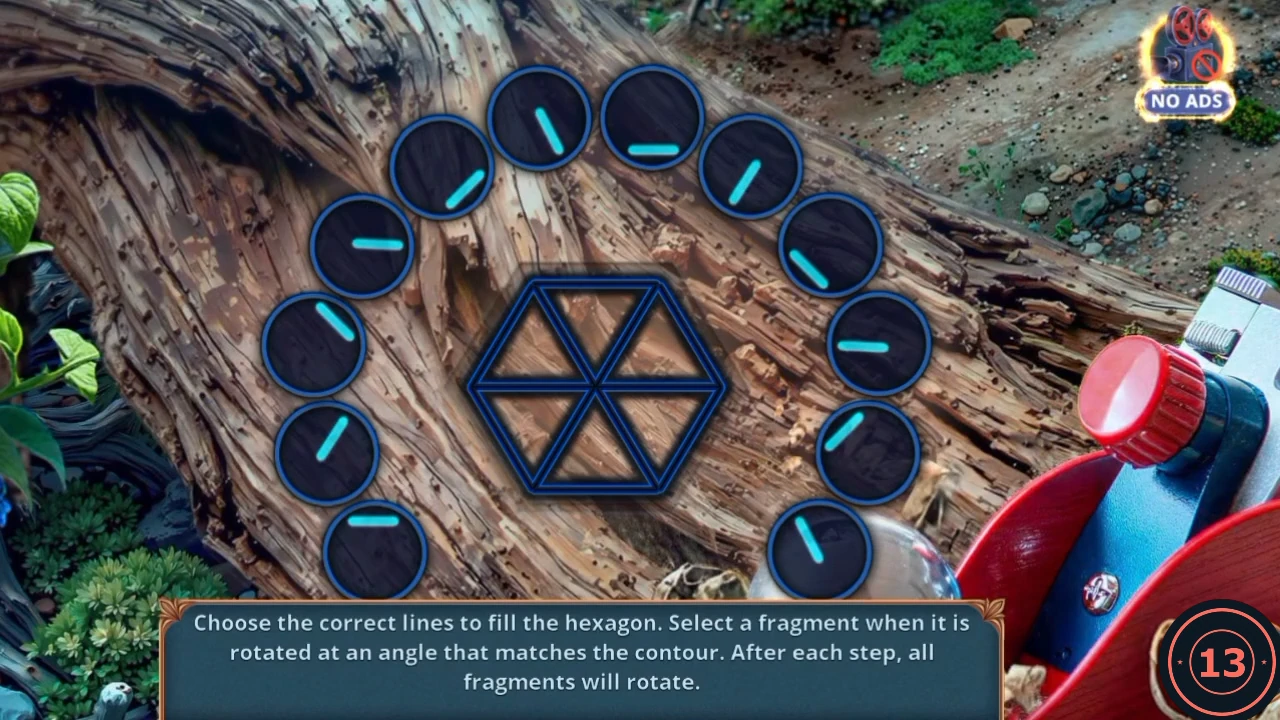
The outline has twelve lines: six outer edges and six spokes. Each round tile holds one line at an angle, and every tile turns after each choice. Tap a tile when its line is parallel to a line that is still empty. It flies into place. The recording used all twelve tiles, one for each line.
- Open the ground patch beside the boar's cage. Use the Saw on the tangled branches at the upper left, then set the red Plane on the ground by the root. The board opens.
- Fill all twelve lines using the method above. Take the Pegs from the opened spot.
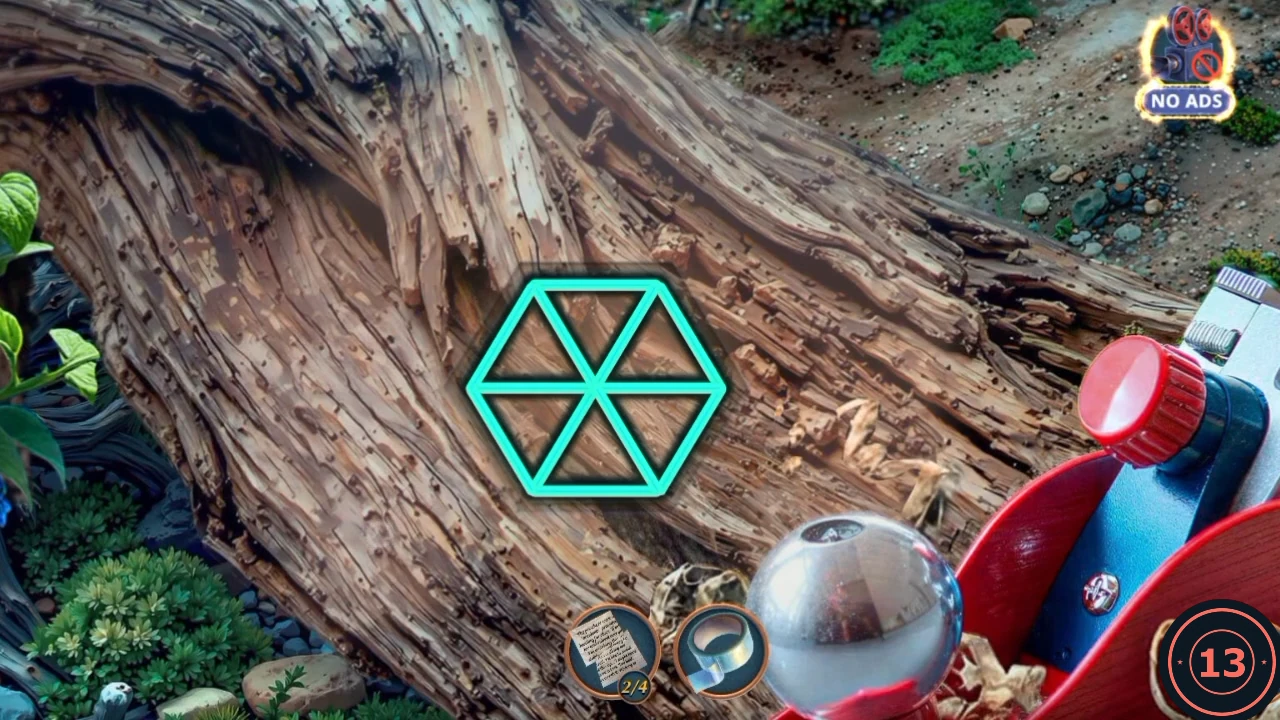
The finished hexagon, with every line lit and every tile used.
Pin back the blanket and search the plane window
The Pegs pin back the red blanket at the Tree Platform, and what lies behind it sets up the plane window search.
- Open the red blanket and use the Pegs on it. Read the note about UV lights and the tribe's symbols, then take the Broken UV Lamp and the Fallen Airplane Photo.
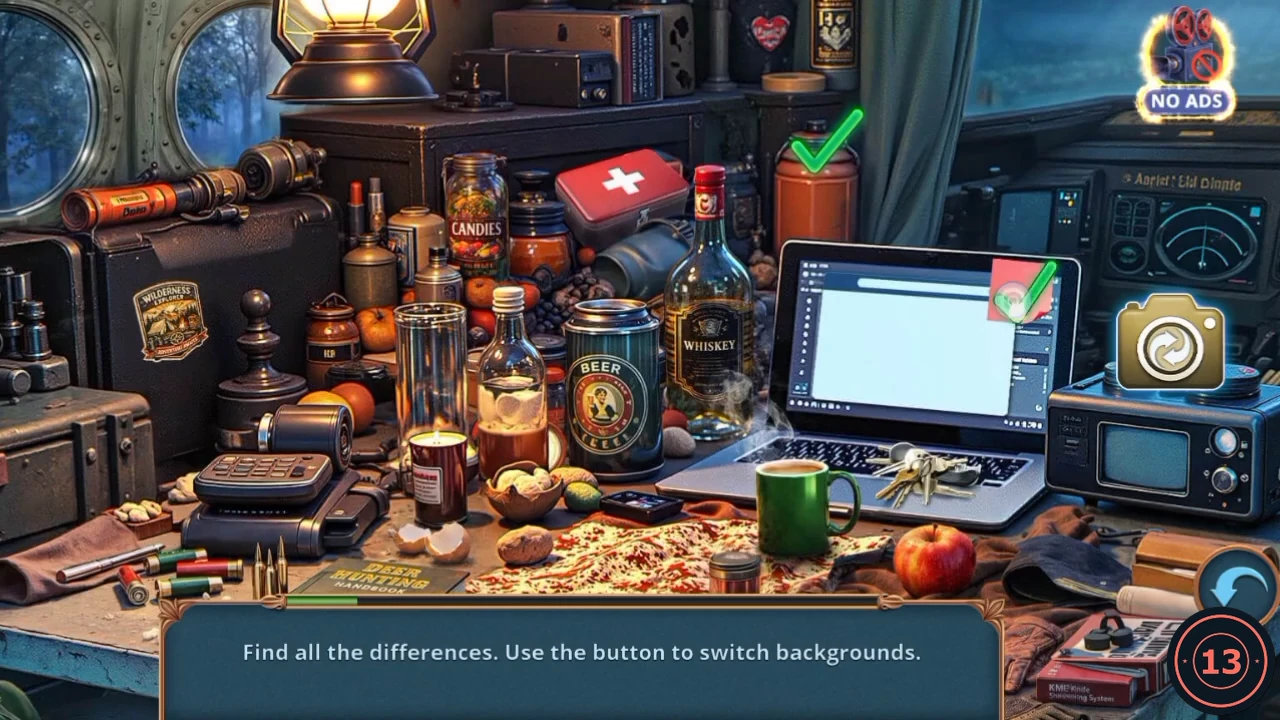
- At the Poachers' Camp, open the plane window and use the Fallen Airplane Photo. Find all the differences, using the camera button at the right to switch between the two pictures. Each one gets a green tick. There are eleven in the recording, and you can tap them in any order. Tall jar at the top right: orange in one picture, a steel flask in the other. Sticky note on the laptop: red in one, tan in the other. Keys on the laptop keyboard. First-aid box at the top centre: it's a different red box in the other picture. Wilderness Explorer sticker on the black case at the left. Red cartridge lying in the row of shells at the far left. Broken eggshell at the front of the desk, left of the patterned cloth. Beer can in the centre: dark green in one, white in the other. Deer Hunting Handbook at the front of the desk. Mug beside the keyboard: green in one, red in the other. Apple at the front right: red in one, green in the other. When all eleven are ticked, the Poacher's Hat drops over the whiskey bottle in the centre. Tap it to take it.
Tame the boar
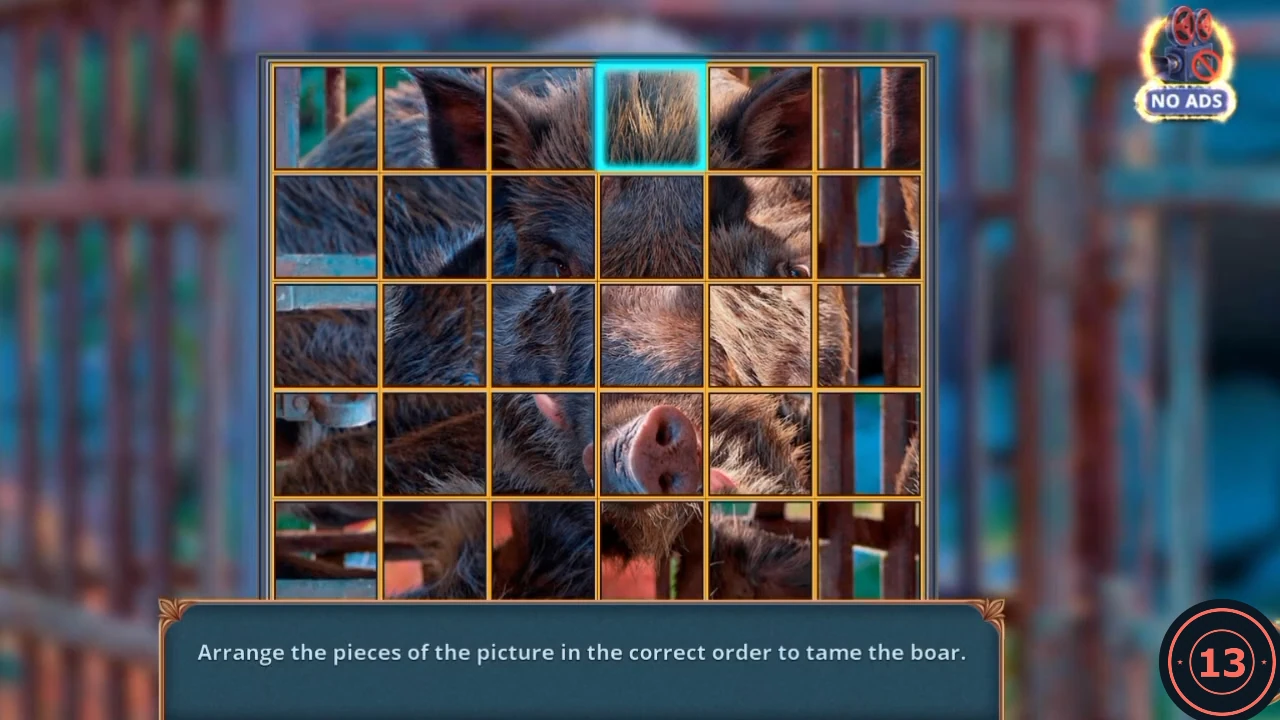
The Poacher's Hat carries the bait for the boar. Its picture is a 30-square tile puzzle. The starting layout may differ, and a full move list would be long, so this is the approach rather than every swap.
- At the Poachers' Camp, open the WILD HUNT case and use the Poacher's Hat on the truffles. Take the Hat with Truffles.
- At the Meadow by the Old Road, open the cage and place the Hat with Truffles in front of the boar. The picture puzzle opens.
- Tap two squares to swap them. Rearrange the 30 squares until the boar picture is whole. The boar joins your helpers.
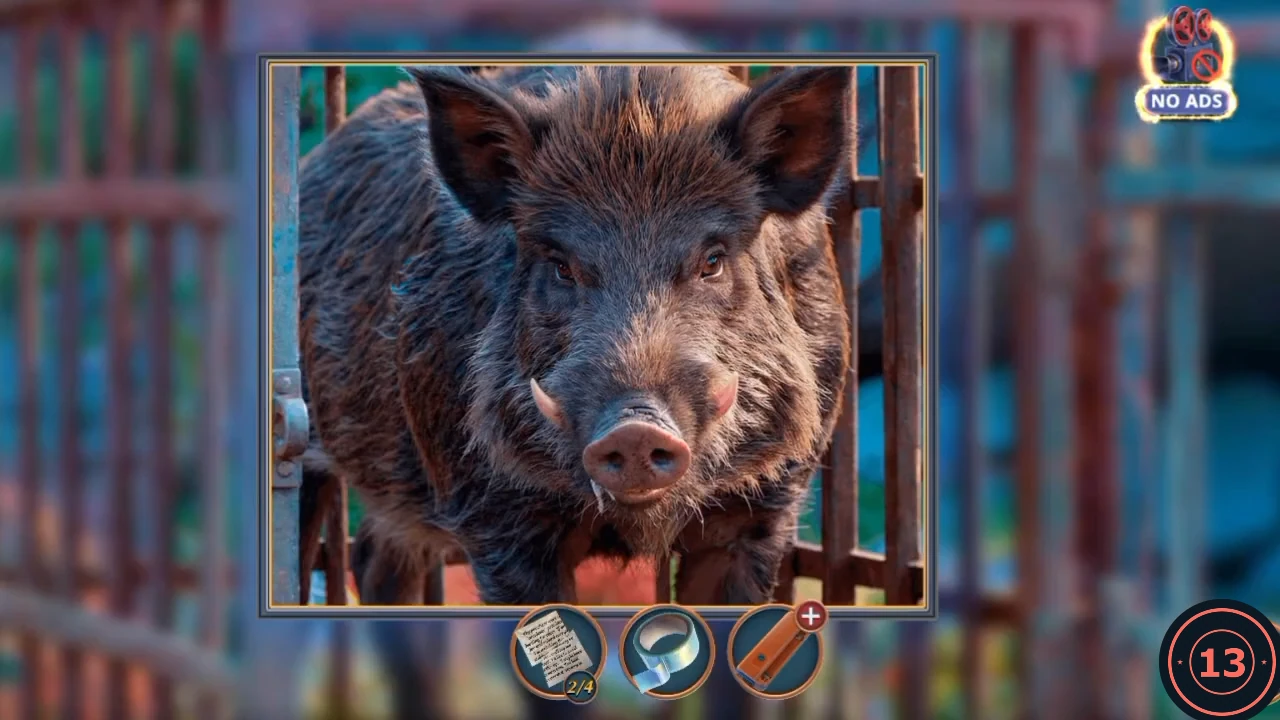
The finished picture to work towards.
Clear the log and dig for the paper
The boar opens the way to the knot diagram, and the last pieces of the torn document are nearby.
- Open the fallen log and drag the boar icon onto it. The boar shoves the log away. Tap the blue paper to read the four-step knot diagram, then take it and the Shovel.
- Open the ground patch with the boot print and dig with the Shovel. Take the buried paper. Your Torn Documents counter rises to 3/4.
- At the Tree Platform, open the scattered papers and set the Duct Tape on them. Alex says "I need this whole. Can I glue it back together somehow?" You still need the last torn piece.
- At the Poachers' Camp, open the stove and place the knot diagram beside the rope. Alex wants to turn the rope into a lasso, but it is too short for now.
- At the Meadow by the Old Road, open the orange bush where the two poachers stand. Take the last torn piece and the UV Light Bulb.
Line up the torn document
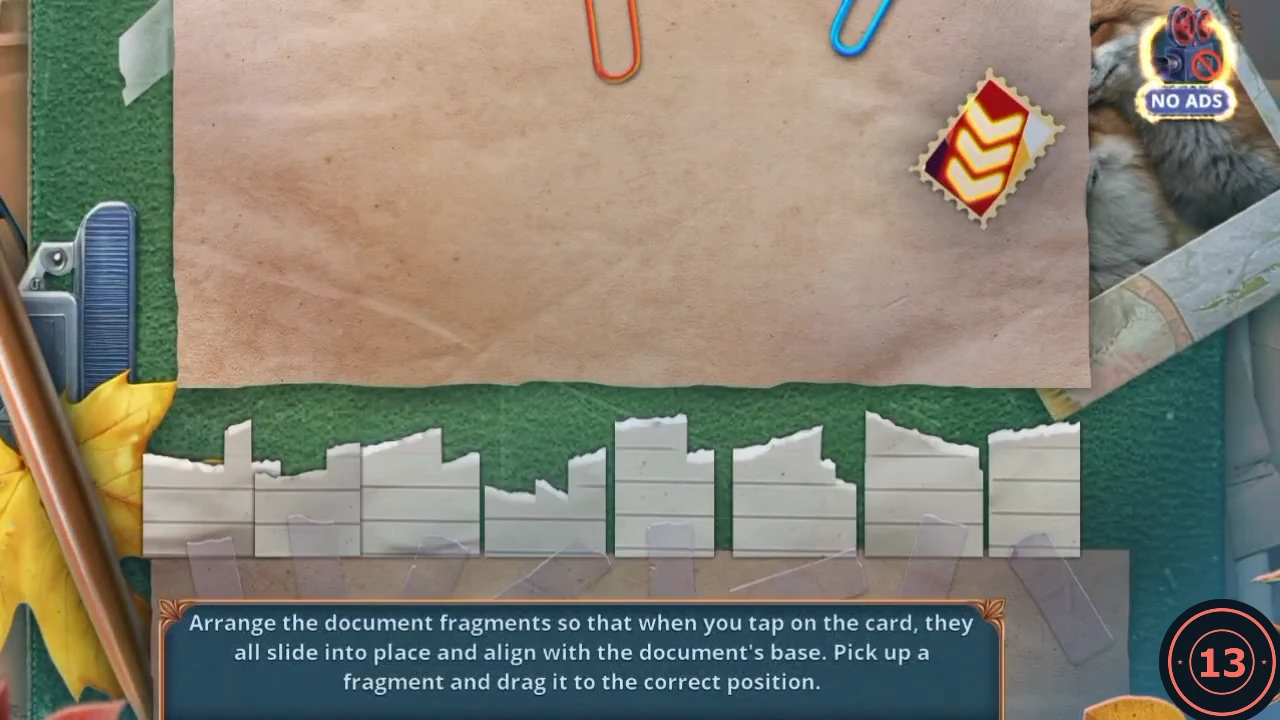
Eight torn strips sit below the paper base. Tapping the card with the chevrons slides them all up at once, and they only stick if each strip's jagged top fits the edge of the base above it. This is a rearrangement, so no move list is given here. Drag a strip to swap it with another, working from one end and matching the step heights in the base edge. Press the card to test.
- At the Tree Platform, open the papers and use the Torn Documents. The board opens.
- Rearrange the strips and tap the card until the document joins up. Read the note, in which Nolan calls the poachers a necessary evil and says he is watching Green, then take the Power On Button from the pile.
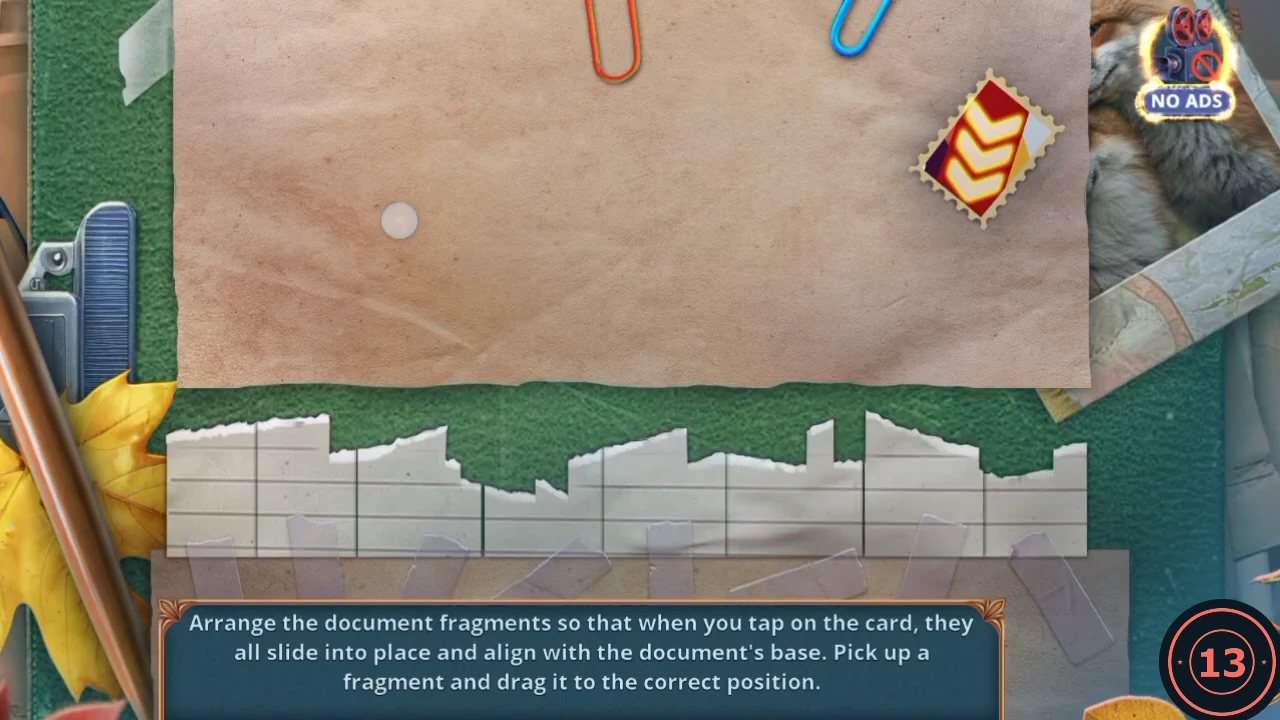
The order that joined up in the recording, seen just before tapping the card. - Open the Broken UV Lamp in your inventory and fit the UV Light Bulb and the Power On Button in its two slots. Alex says "Now I can take a look inside the SUV."
Read Nolan's secrets under UV light
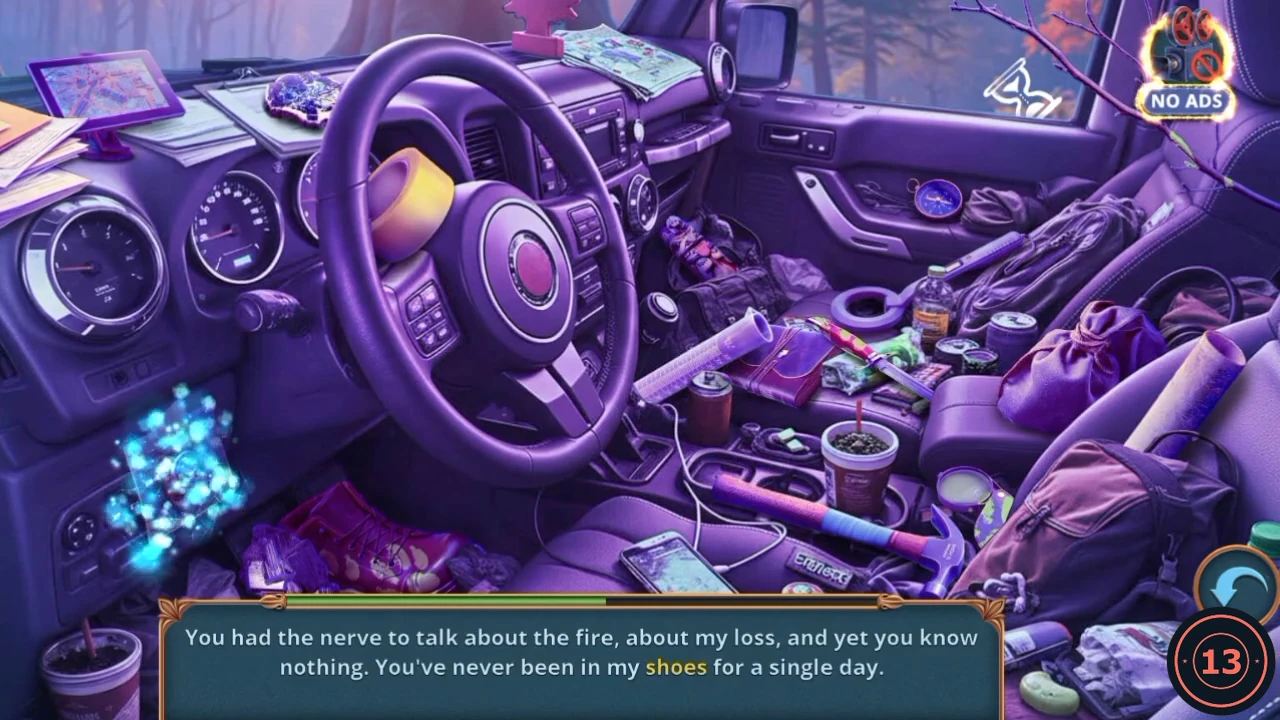
Each line of Alex's reply to Nolan has one word in yellow. Find the object that word points to. The yellow words in the recording were wolf, reward, special connection, breaking, poacher, ornithologist, shoes, more attentive, stabbing and nature.
- Open the SUV's open door and use the UV Lamp on the cab. The purple search opens.
- Lines from Nolan's notes appear on the bar, with one word in yellow. Tap the object that matches that word and it's removed. There are ten in the recording. Wolf: the wolf statue on the cushion at the top right, on the passenger seat. Reward: the small round medal by the centre vent, right of the steering wheel. A special connection: the braided gold chain on the phone at the bottom centre. Breaking: the cracked glasses on the armrest at the right. Poacher: the safari hat in the centre. Ornithologist: the bird photo taped to the dashboard at the lower left. Shoes: the boot on the floor at the lower left. More attentive: the round magnifying lens in the holder below the armrest. Stabbing: the red-handled knife right of the hat. Nature: the leafless branch across the window at the top right. When the bar is empty, the Piece of Rope drops into the footwell behind the gear lever, just above the hat. Tap it to take it.
- At the Poachers' Camp, open the stove and use the Piece of Rope on the rope. Take the green Lasso.
Chapter 4 badges before the final puzzle
Collect these before catching the poachers. They complete the set. In the recording the Inspiration Archive achievement, "Find all collectibles in the game", appeared with the last one. This group holds 7 pickups worth 15.
- Poachers' Camp, main scene: in the grass at the lower left, left of the grey case. This position is approximate. Worth 2.
- Poachers' Camp, stove close-up: inside the fire. Worth 3.
- Tree Platform, main scene: on the blanket on the left railing, near the mug. This position is approximate. Worth 3.
- Tree Platform, bag and acetone close-up: at the top right, beside the strap. This position is approximate. Worth 2.
- Meadow by the Old Road, main scene: on the track just right of the boar's cage, left of the SUV's rear wheel. This position is approximate. Worth 2.
- Meadow by the Old Road, rock close-up: on the small stone at the upper left, beside the roots. This position is approximate. Worth 1.
- Meadow by the Old Road, fallen log close-up: at the right edge, above the fern. This position is approximate. Worth 2.
Trap the poachers
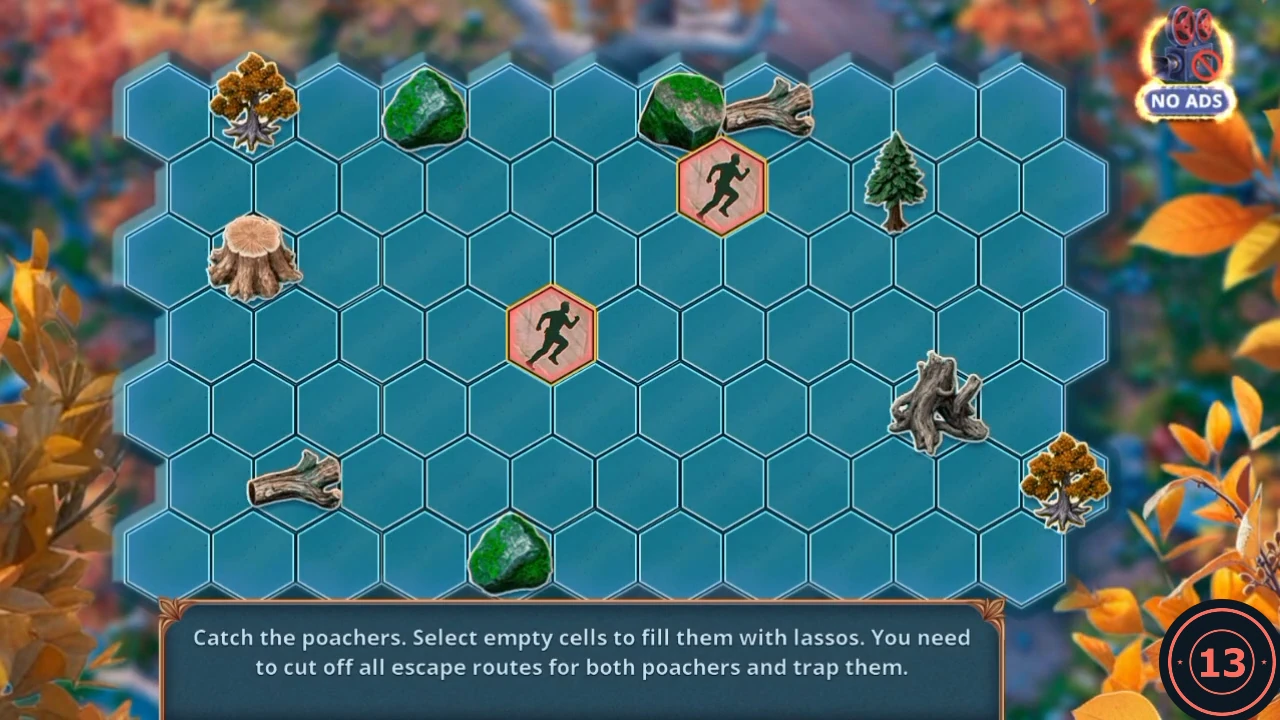
Each time you fill an empty cell with a lasso, both poachers move one cell towards the board's edge. You win when no route out remains for either of them. Stumps, rocks and bushes already block their cells, so use them as part of your wall. Fence the far edges first, before the poachers get close to them, then close the gap they are running towards.
- At the Meadow by the Old Road, open the orange bush and use the Lasso, which lands at the foot of the bush. Alex asks "Where's that boar?". Drag the boar icon from the lower left of the screen onto the close-up of the poachers. The board opens a moment later.
- Build a closed ring around the poachers. The recorded ring runs along the top row from the bush at the upper left past the two rocks to the cell right of the fallen log, down past the pine and the grey stump on the right, along the diagonal to the bottom row, past the green rock, and back up the left side past the fallen log and the wooden stump.
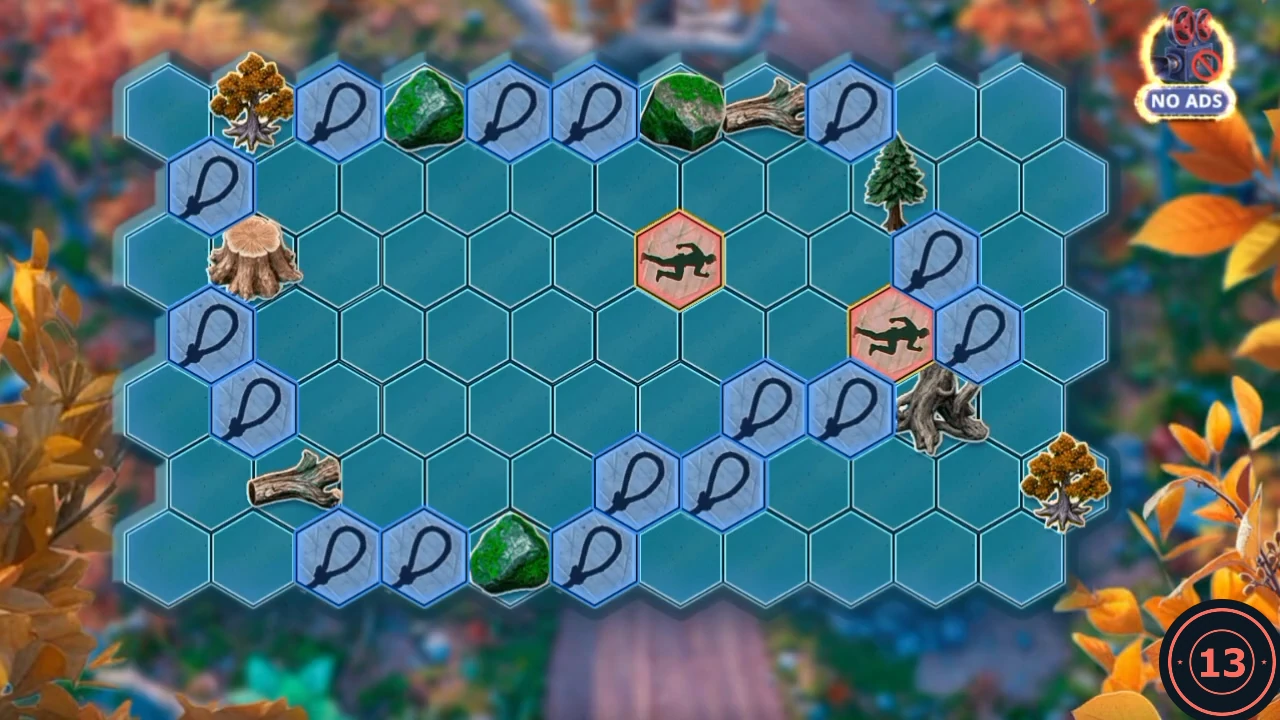
The closed ring from the recording, with both poachers caught inside it.
Results and the ending
The recording shows only this one ending, reached with 13/13 on the final board. Whether a lower total changes the ending isn't shown.
- The Chapter 4 results board shows your Decision Points. The recording reached 13/13: Talk to Leah (2), Agree to look at the cave (1), Ask about Nolan (2), Lie low (6) and Show resolve (2). The reward tiers are 0, 4 and 10.
- The boar charges the poachers and the rangers arrest them. Ron Carter says "It was his idea! We've just done what he told us!" and Nolan Shepard raises his hands. Back at the station, Leah says "Great job as always, partner!" and the game returns to the title card.
Extra mini-game for 140 badges
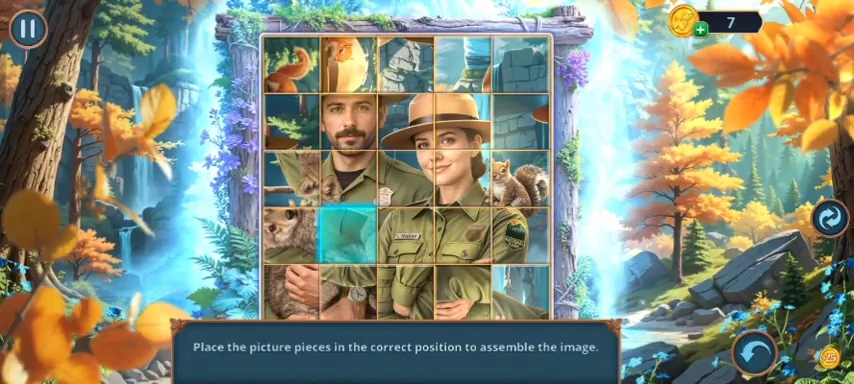
This reward was seen only in the recording of the other release, where all 140 badges had been collected. The Google Play recording stopped at the title card without all the badges, so it doesn't show whether the window appears there. The picture shows two rangers in wide-brimmed hats with a squirrel, a wolf cub and a small animal, in front of a waterfall.
- Finish the game with all 140 badges. After the title card, a MINI-GAMES window shows the picture with the text Ranger Badgers 140/140 and Extra mini-game. Tap Play.
- Pick up a square, which glows teal, and drop it on another cell. The starting layout may differ, so rearrange the 25 squares by the picture, starting with the two faces and the hats in the middle. The recording ends with the picture nearly complete, so the final reward isn't shown.
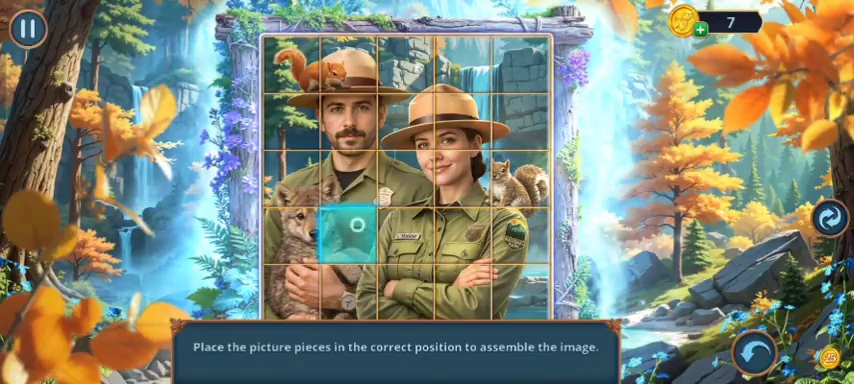
The last view in the recording, with one square still held. Use it as a guide to the finished picture.
Achievements seen along the way
Achievement banners slide in at the upper left of the screen as you play. The banner names are clipped in the recording and no full list appears, so these are described by what earns them, and there may be others. In the banners, a HOP is a hidden-object scene.
- Story progress: several come from normal play, including tuning the radio, crossing the swamp, assembling the chainsaw and reading the poacher's notes. Taming animals earns them too: the recording showed banners for the wolf cub, eagle, beaver, owl, badger, heron, chamois, flying squirrel, quokka and boar.
- Hidden-object speed and accuracy: the banners ask for finishing a hidden-object scene in one, two or three minutes, finding objects within a few seconds, finding a total number of objects, and making no wrong selections.
- Streaks: other banners ask for 3 and then 5 hidden-object scenes in a row within a time limit each, and for 3 mini-games in one go each.
- Bonus Locations: the other release's recording showed Old Tales for examining the Old Ranger's Cabin and Eldritch Secrets for revealing the secret of the ancient tribe.
- Collectibles: the other release's recording showed the Inspiration Archive achievement, "Find all collectibles in the game", with the last Ranger Badge.