Ranger Badges and Decision Points
The game's counter runs to 140 Ranger Badges, 35 per chapter, spread over 68 pickups. A badge is a small round grey or bronze disc that is easy to mistake for a pebble. Tap it and a banner shows your running total. One pickup adds 1 to 3 to that total, so the count climbs faster than the number of discs you find. Decision Points are separate: some conversation replies carry a star marker worth up to 6 points. Each chapter ends on a results board out of 13, with reward pictures at 0, 4 and 10 points, and this guide names the top reply at each choice.
- Open the journal to check your progress. In the recording, a location tile with badges still to find shows a hexagon counter such as 0/3, and that counter counts pickups in that location rather than points. Tiles where every pickup had been found showed no counter.
- Earlier scenes lock as the story moves on, and badges left behind can't be collected after that. This guide gives a badge checklist just before each point where that happens, so check it there. The game itself warns you only at some of these points.
Ranger office at the Watch Tower
Leah hands you the Fire Coordinates note, and your task is to pack for the hike. Throughout this guide, "open" means tap a spot to zoom in on it.
- Accept the Fire Coordinates note from Leah (X16345, Y635). It goes straight into your inventory.
- Open the green and red toolbox beside the jacket. Take the Compass and the Wet Wipes.
- Use the Wet Wipes on the dried yellow resin on the toolbox, then take the Radio Frequency sticker (103.5). The jacket zipper is stuck for now; you come back to it later.
- Open the radio on the cabinet and place the Radio Frequency sticker on it. The screen reads Emergency Supplies Access Granted and drawer 103.5 opens.
- From the drawer take the First Aid Kit, the Second Half of Pruning Shears, the rolled Sandpaper and the Map Part.
- Open the wall map and place the Map Part on the torn corner, then place the Fire Coordinates note on the map. A hidden-object list starts.
Wildfront Nature Reserve map
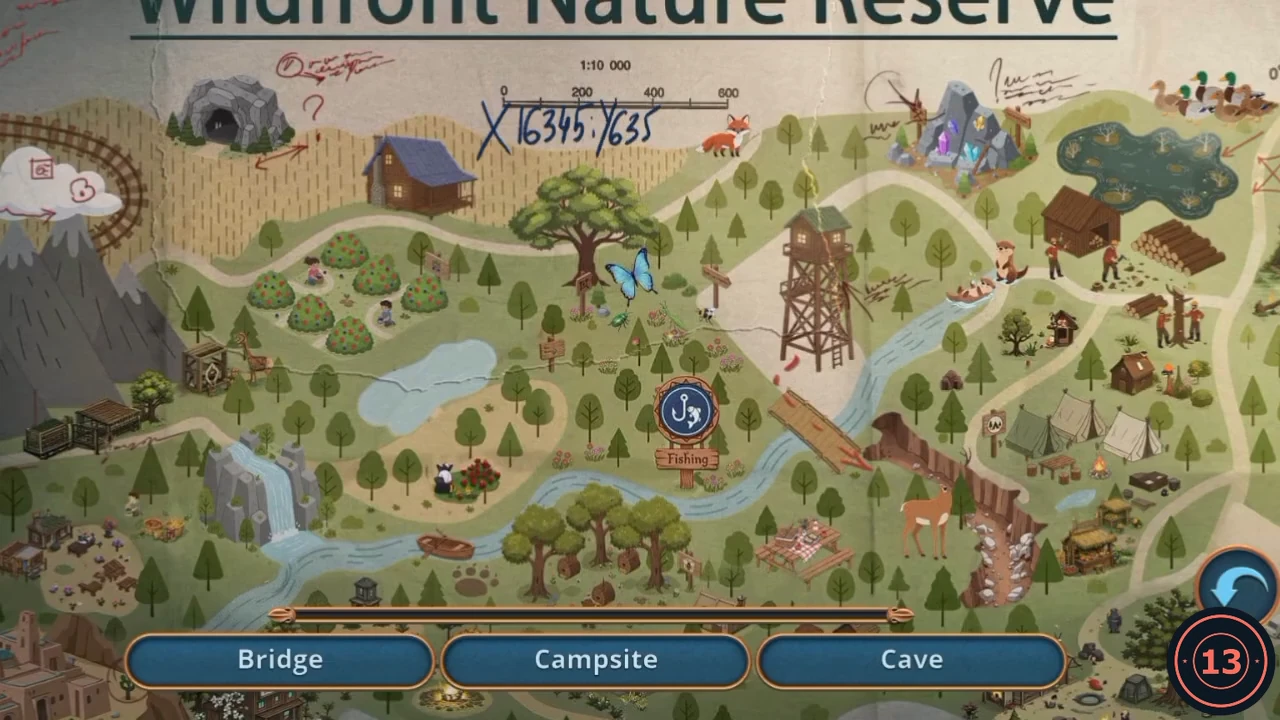
Name labels appear three at a time at the bottom. Tap the matching landmark on the map.
- Tap each place on the map as its name appears on the bottom bar. Only three names show at a time, and the order can differ. Bridge: the pale diagonal plank just below the watchtower. Campsite: the white tents right of centre. Cave: the top left corner. Big Oak: the large tree at top centre. Swamp: the dark pool at the top right. Ranger Tower: the wooden watchtower in the centre. Otter Habitat: on the river bank to the right of the tower, below the brown hut. Waterfall: the rocks at the lower left. Forest Cabin: the blue-roofed cabin at the upper left. Mountains: the grey peaks at the left edge. Lake: the pale blue lake left of centre. River: the blue stream along the bottom.
- A tracing sheet settles over the map and marks the fire. You receive the Fire Location, and the first journal page opens.
Pack the backpack and leave
The map search gave you the Fire Location, the last thing you need before leaving the office.
- Open the backpack on the desk. Place the Compass, the First Aid Kit and the Fire Location in the three slots and the bag closes. The Compass and First Aid Kit return to your inventory ready to use, and you can now leave: "I can go through now."
- Go through the door to the Forest Clearing. Leah spots a wolf cub in a trap, and your task becomes Save the wolf cub.
Free the wolf cub
Your first rescue. Everything you need is in this clearing.
- Open the orange bedroll and take the Cutters lying on it.
- Open the box under the purple tarp. Use the Cutters on the ropes, read the note that appears, then take the pink band and the Trap Release Lever.
- Open the cub close-up and use the Cutters on the trap. The cub is free but hurt.
- Use the First Aid Kit on the cub. A tile puzzle begins.
Tame the wolf cub
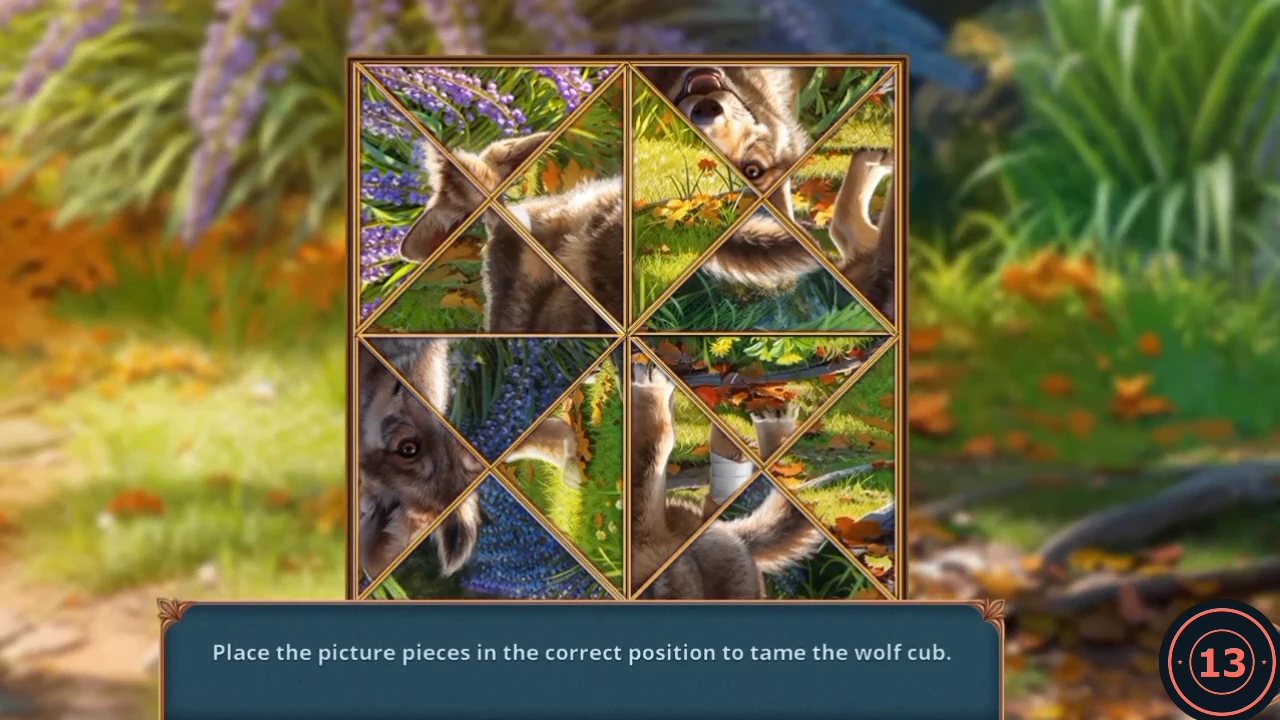
Triangular pieces make up a picture of the cub standing with a bandaged leg. The starting layout may differ, so solve by the picture rather than a fixed move list.
- Tap two triangles to swap them. Start with the cub's eyes and head at the top centre, the tail at the upper right and the bandaged leg at the lower left. The picture completes when every piece is right.
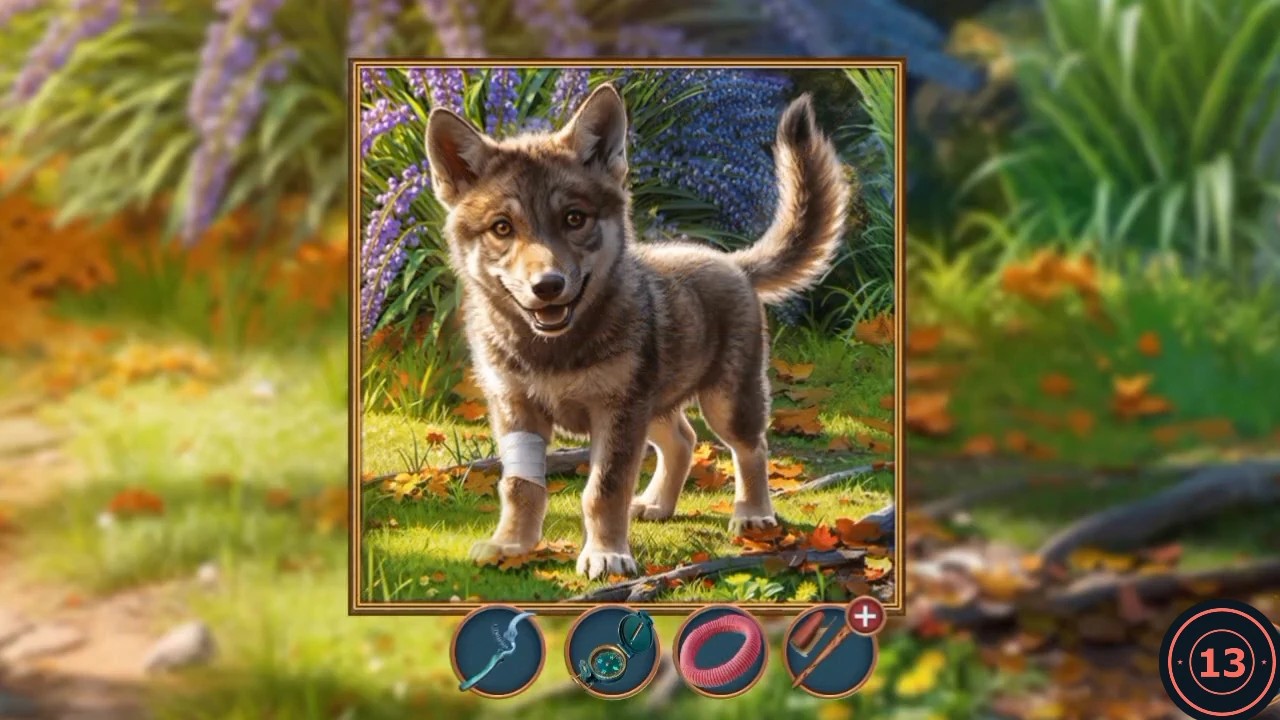
Target picture: the completed wolf cub. Use it to place the head, tail and bandaged leg. - When Leah raises poachers, the answer "You're right - it's most likely poachers." earns 2 Decision Points. The other reply is "Maybe just a lost tourist with a bad habit?"
Clear the way with the cub
The tamed cub is your first helper. Helper icons sit at the bottom left of the screen, and you send a helper by tapping or dragging its icon onto the spot.
- Tap the cub helper at the bottom left, then tap the stones by the path. It digs up a Bag. Open the Bag from the inventory and take the Jack.
- Open the rock close-up and use the Jack to lift the rock. Take the Brush and the Broken Pruning Shears from under it.
- Open the Broken Pruning Shears from the inventory and add the Second Half of Pruning Shears to make the Pruning Shears.
- Open the thorn barrier with the orange rag at the signpost and use the Pruning Shears. Then use the cub helper to follow it down the cleared path.
Follow the wolf cub maze
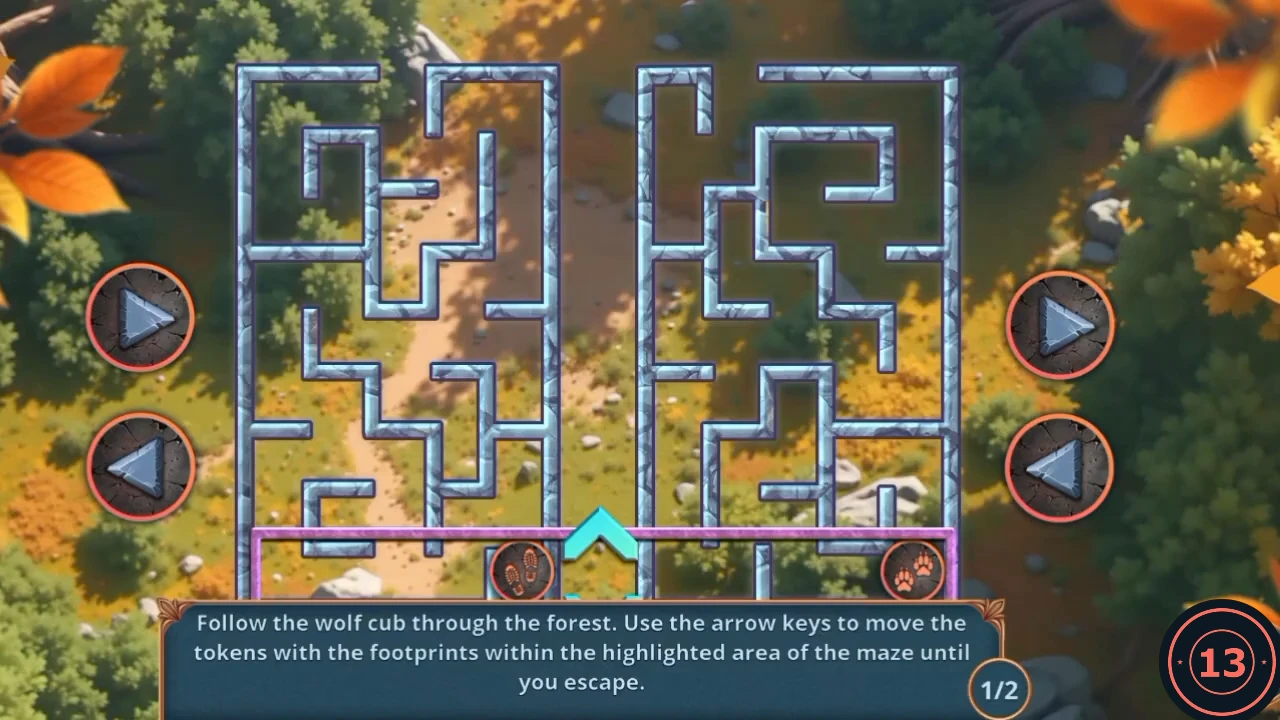
Two connected mazes, marked 1/2 and 2/2. The walkthrough gives a method rather than a move list because the route is long.
- Use the side arrows to slide the left and right paw tokens along the highlighted row. The centre chevrons move the whole highlighted row up or down, and only work when both tokens stand at an opening in the wall.
- Work out both sides together: find the next row where both sides have an opening, line both tokens up, then press up. Step back down when one side is blocked. Reach the top row to finish 1/2, then solve 2/2 the same way.
Pond clearing and the fire box
The cub drives a wolf away from Nolan.
- Choose how to answer Nolan. The friendly option, "Good thing you're alive! We'll head to the site; do you need help?", earns 2 Decision Points on the chapter board.
- Open the tree with the wooden plank. Take the folded map at its foot, then the Lock Picks that were lying under it. The resin above is too sticky for now.
- Open the padlock on the red fire box and use the Lock Picks. The box opens as a hidden-object scene.
Fire box, first pass
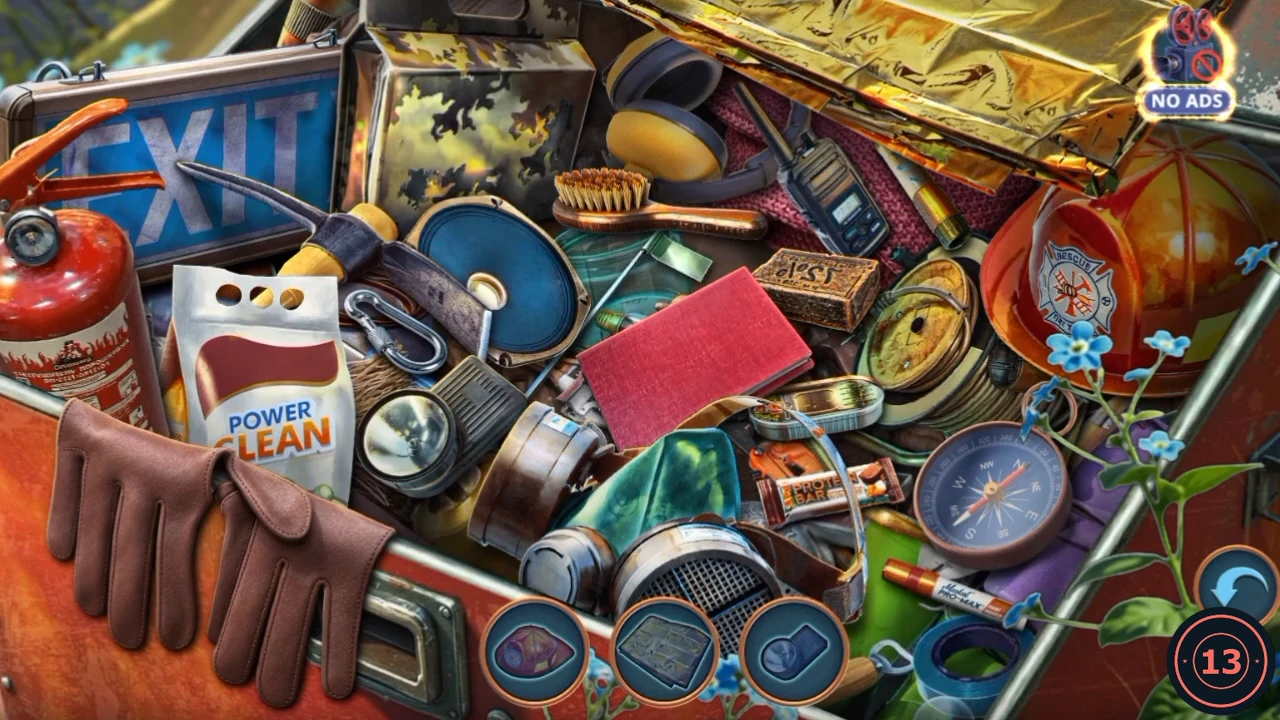
Find the objects shown as silhouettes at the bottom of the screen. Removing large items uncovers others.
- Tap each object as its silhouette appears on the bar. The positions are from the recording. Flashlight: left of the middle, just right of the Power Clean bag. Carabiner: just above that flashlight, by the top of the bag. Small brass tube: between the radio and the red helmet at the top. Compass: lower right. Gas mask with its green hood: bottom centre. Red book: centre. Fire extinguisher: left edge. Brown gloves: lower left. Pickaxe: the long handle running across the EXIT sign, at upper left. Ear defenders: top centre. Red fire helmet: right. Gold foil blanket: across the top right, and it's easy to overlook because it looks like part of the box. Removing the blanket brings up the last silhouette: tap the Swamp boots that drop into the box.
Assemble the rake and cross to the Riverbank
The Riverbank's tall grass needs a rake, and you have the parts for one.
- Open the dirt mound beside the fire box and take the Rake Top.
- Open the Trap Release Lever from the inventory (it has a plus sign). Place the Sandpaper and the Rake Top in the two slots beside the rough handle. The handle is smoothed and the head fitted, which makes the Rake.
- Place the Swamp boots at the swamp edge beyond the pond to cross to the Riverbank.
Riverbank: first visit
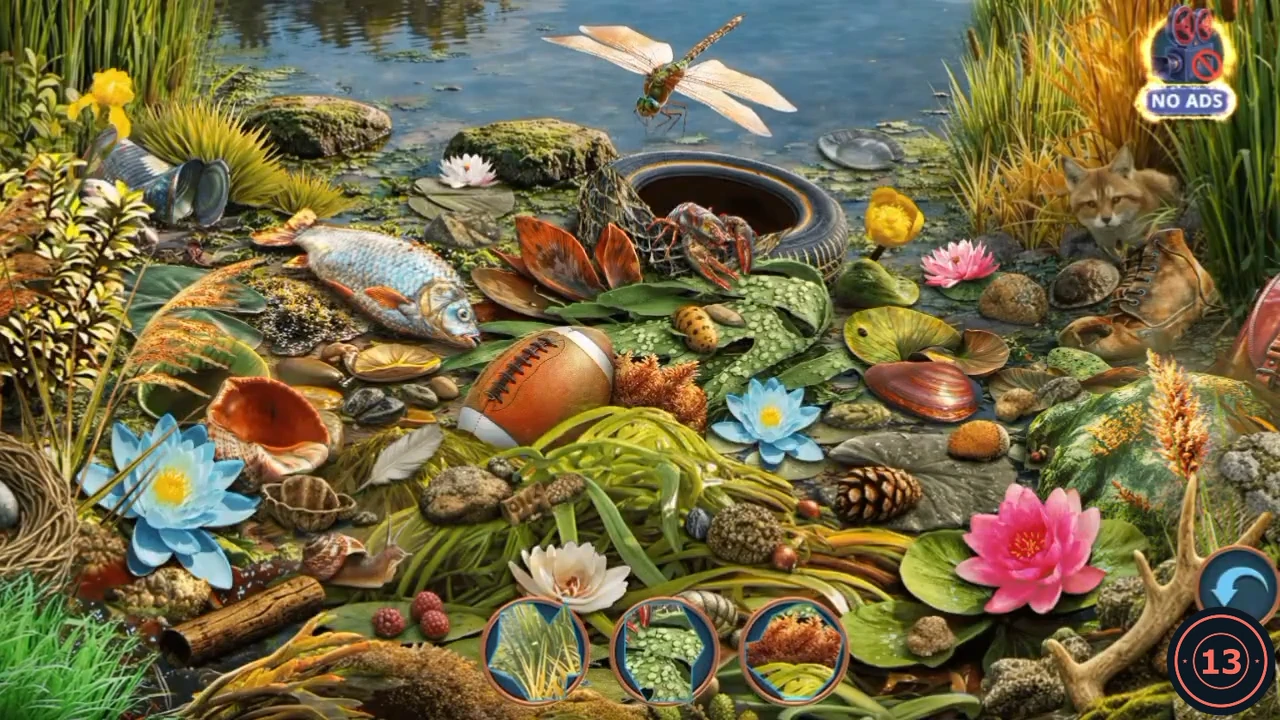
This first visit gets you the Kite, the Screwdriver and the first Metal Detector part. The bridge and the cart have to wait.
- Open the crate under the tilted cart and take the Bottled Water.
- Open the tall grass and use the Rake to clear it. A hidden-object scene starts.
- Each picture on the bar is a close-up of part of this scene, and the object stays in place after you tap it. Positions are from the recording. Big green leaf with dewdrops: just right of centre, under the crayfish. Yellow-green grass tuft: top left, next to the mossy stone. Big silver fish: left of centre. Tall reeds: top right, above the fox. Red-brown clam shell: right of the small blue water lily. Plant with yellow-edged leaves: left edge. Green mound with orange lichen: right side, behind the orange flower spike. Round brown shell: upper right, beside the boot. Orange coral with yellow-green weed: just right of the football. Mossy stone: top centre, left of the tyre. Yellow-green stems: under the white feather, left of centre. Rough brown stone: on the weed, lower centre. When the bar is empty, the Kite lands over the tyre. Tap it to take it.
- Open the large tree and place the Kite in the branches. A note and a tool drop near the stump.
- Open the stump and take the Screwdriver.
- Read L.M.'s note when it opens and tap the three red phrases: oil cans, boot prints and the lake.
- Open the rope bridge deck and take the long metal rod and the Metal Detector handle lying on it. Alex notes that an otter could carry the ropes across later.