Tame the eagle
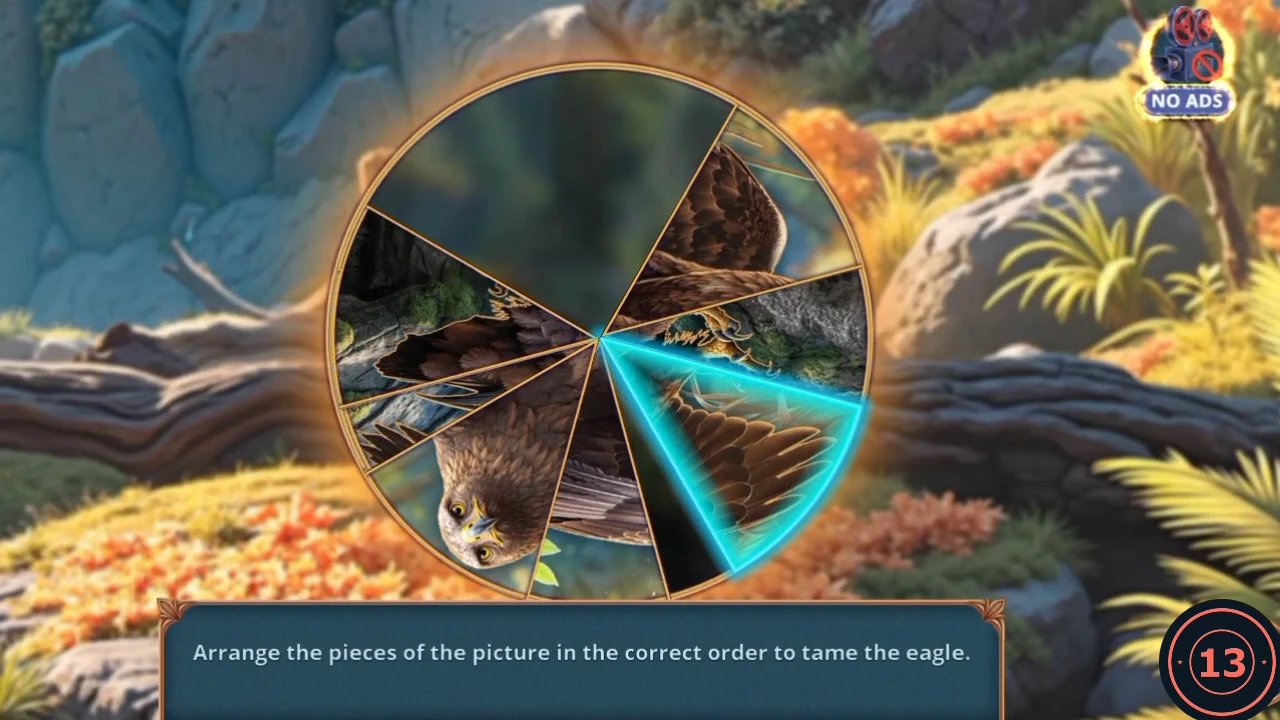
Eight wedges form a picture of the eagle spreading one wing. The starting layout may differ, so solve by the picture.
- At the Burning Cliff, open the anthill and take the Rag. Read the note about the feeders.
- Open the backpack among the vines and take the Magnet.
- Open the eagle on its rock. Place the Rag and pour the Bottled Water over it. The puzzle opens.
- Tap two wedges to swap them. Put the eagle's head at the top left, the raised wing at the top right, and the rock and greenery at the bottom.
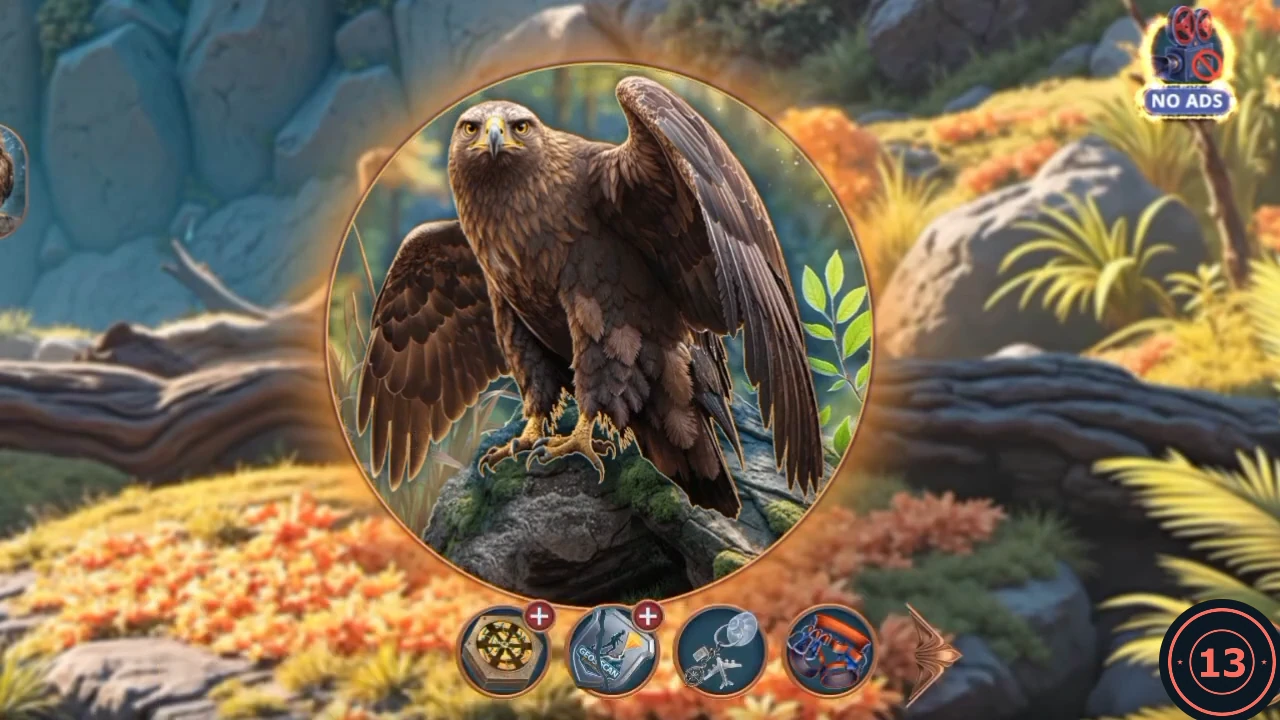
Target picture: the completed eagle.
Send the eagle up the cliff
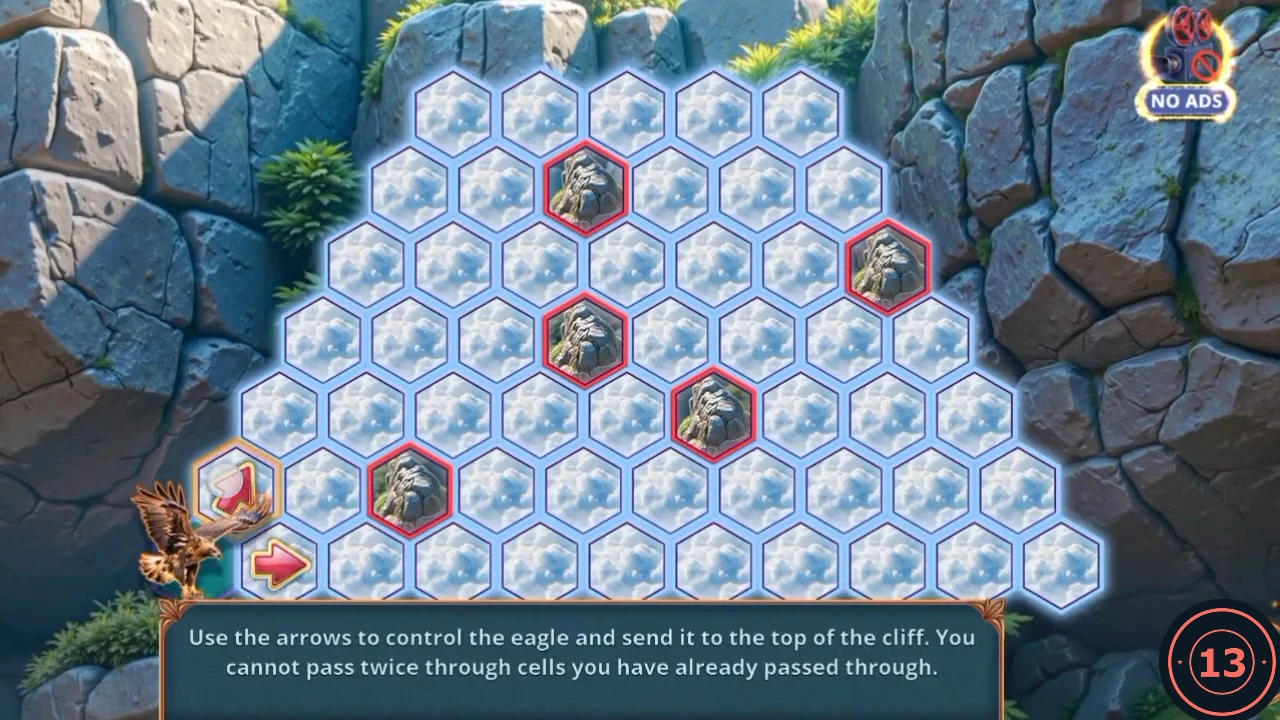
The eagle slides until something stops it, and it cannot cross a cell it has already visited. Keep going until every cell is teal. The route below is the one recorded; if your board looks different, plan so that no pocket of white cells gets cut off.
- When Leah says the eagle might help, "Great idea, Leah - he can help us. We just need to find some ropes." earns 2 Decision Points. The other reply is "Maybe... but we shouldn't trust such important tasks to animals." Leah then hands you the National Park Logo and your task Tame the eagle completes.
- Open the backpack among the vines and place the National Park Logo on its flap. The backpack opens. Take the Climbing Hooks, then the Feeding Scoop.
- Open the dirt mound and use the Feeding Scoop. Take the Rope.
- Open the cliff and place the Rope and Climbing Hooks in the two slots, then use the eagle helper.
- Press the arrows in this order, starting from the bottom-left corner: up-right, right, down-right, left, down-left, down-right, up-right, right, down-left, right, down-right, left, up-right, down-right, down-left, down-right, up-right, right, down-left, right, up-left, left.
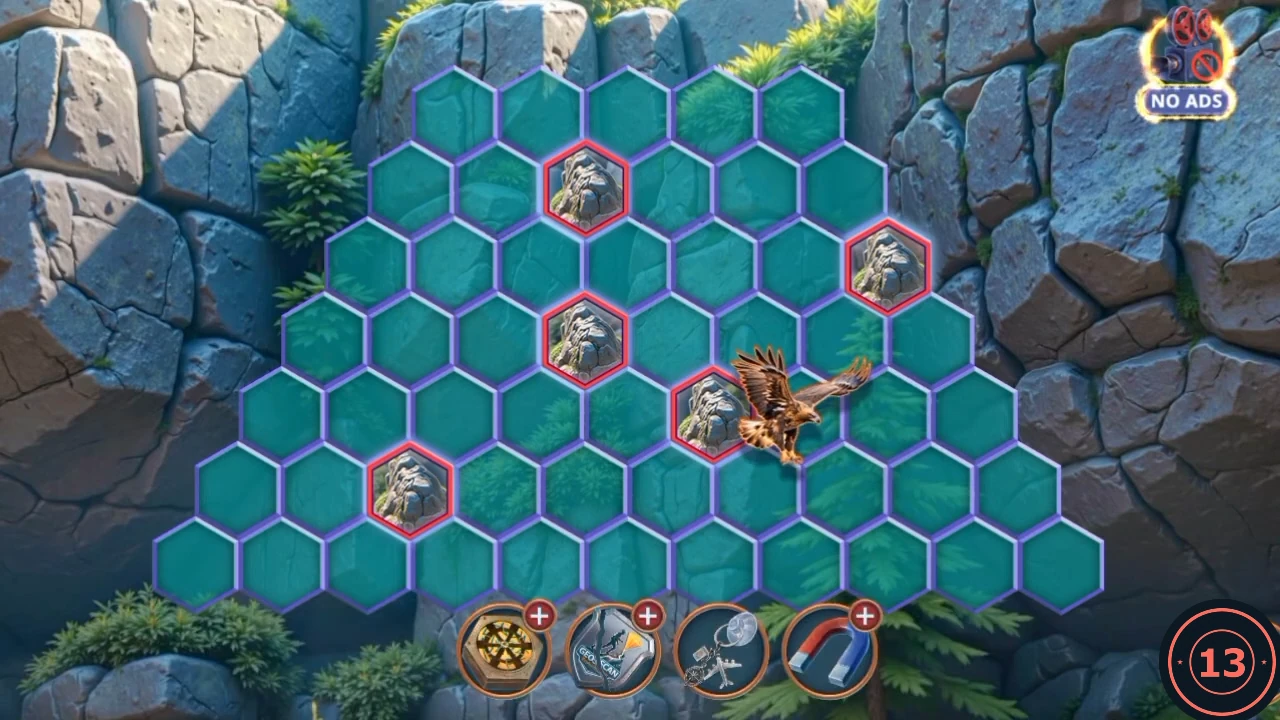
The goal state: every free cell teal. The eagle is flying off at the end of the recorded route.
Geologists' camp
Leah finds a wounded woman beside the burning tents.
- Choose how to react to the fire: Be Afraid of the Fire earns 0 Decision Points, Use the Tarp 2 and Help the Woman 6.
- Open the woman's close-up and take the Large Rock from beside her.
- Open the hedgehog's hollow and place the Large Rock on the rope. The first-aid case rises. Take the Gas Can, the Bandages and the Band-Aid.
- Open the Cracked Amulet and use the Band-Aid to get the shield-shaped amulet.
- Open the teal cooler and place the amulet on the lid. Lift out the paper bag and take the Paper Clip: there is a false bottom. Use the Suction Cup to lift it out, then take the Handle.
- Open the red tent's stuck zipper and use the Paper Clip as a pull. You can now enter the tent.
Red tent: first search
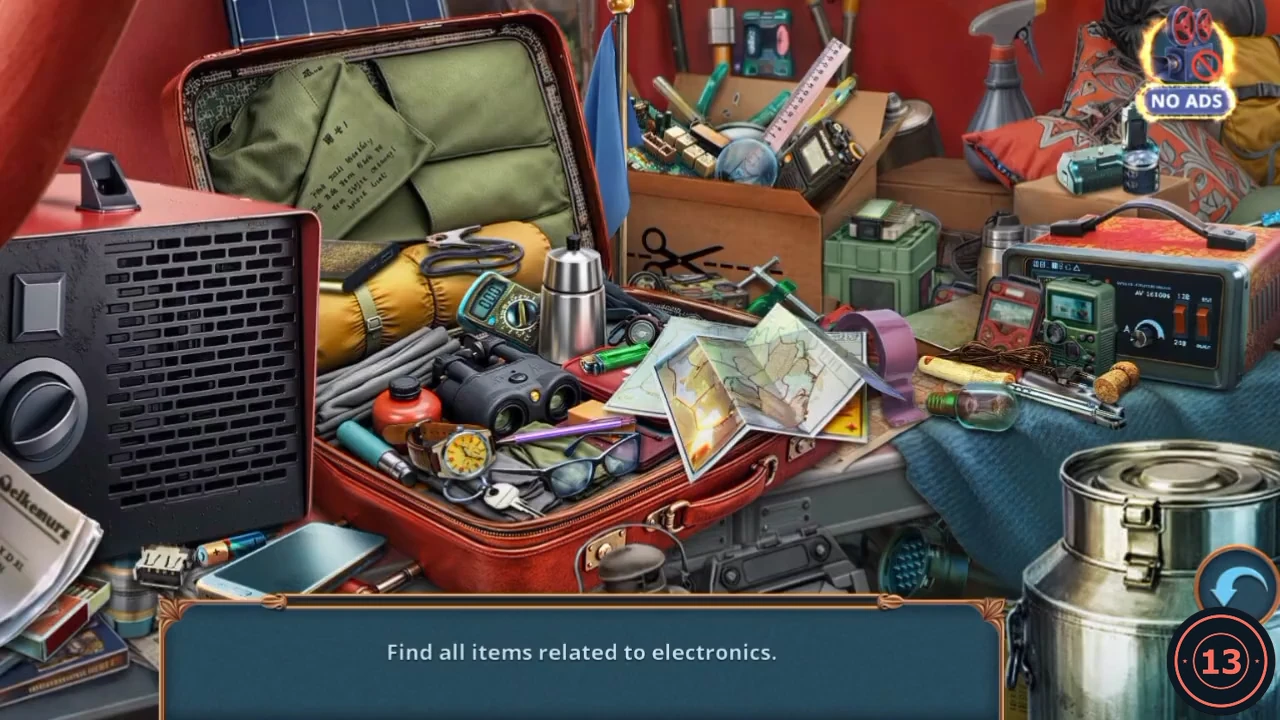
The tent holds a code lock and the first of two searches of the red suitcase.
- In the tent, open the red suitcase's gold lock. A Hex Key is stuck in its first wheel: take it. The lock itself needs a three-digit code.
- Open the green pouch and read the torn note on it.
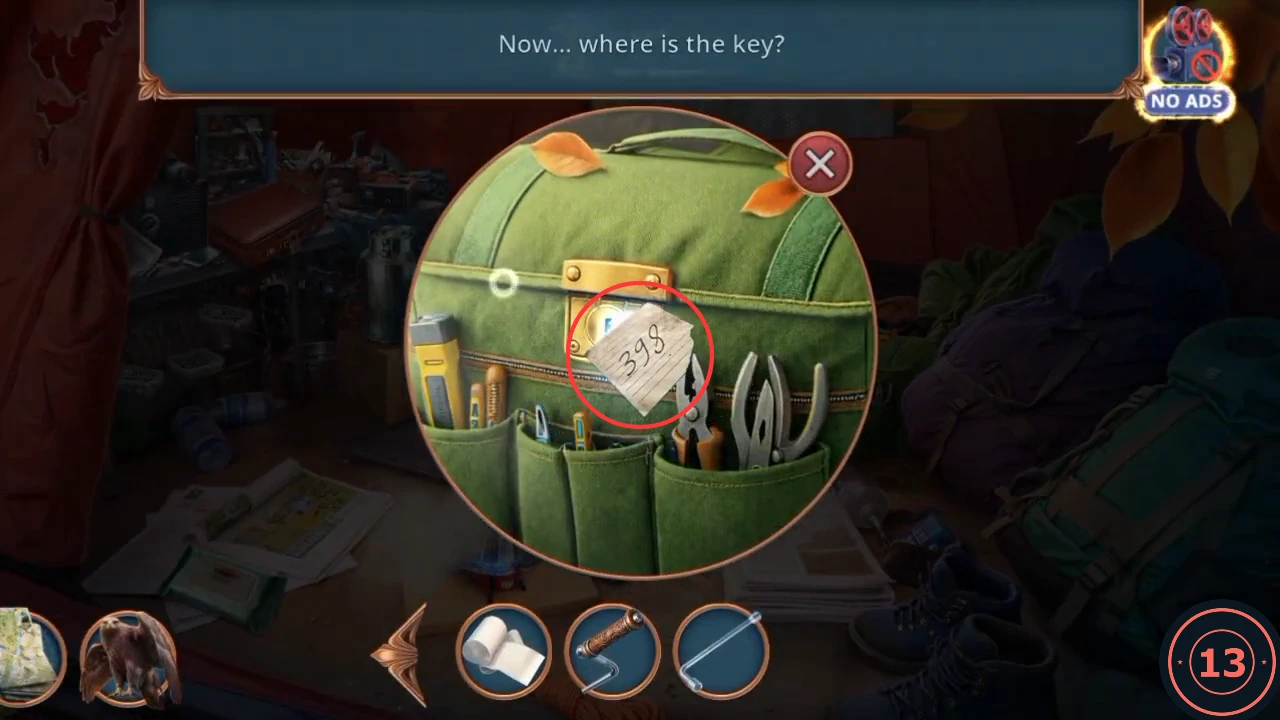
The torn note on the green pouch shows the suitcase code, 398. - Open the red suitcase's gold lock and set the three wheels to 398. The suitcase opens as a hidden-object scene.CODE398
- Find all items related to electronics. Each correct pick gets a green tick and stays in place. There are twelve in the recording. USB plug and smartphone: on the table at the bottom left. Power bank: the flat black block on top of the yellow roll in the suitcase. Clip lead: on the same roll, the coiled cable with a metal clip. Multimeter: the teal meter beside the steel flask in the suitcase. Radio: in the cardboard box at top centre. Circuit board: also in that box, on its left side. Teal battery unit: on the cushion at the top right. Green case with a circuit on top: in front of the cardboard box. Round connector plug: under the table at the bottom centre. Copper wire coil: on the table right of the map. Battery charger: the big red-topped unit at the right. When all twelve are ticked, the Apple appears on the bar and in the scene. Tap it to take it.
- Take the Apple from the tent floor.
- Open the hedgehog's hollow and offer the Apple. Take the Glove.
Put out the burning branch
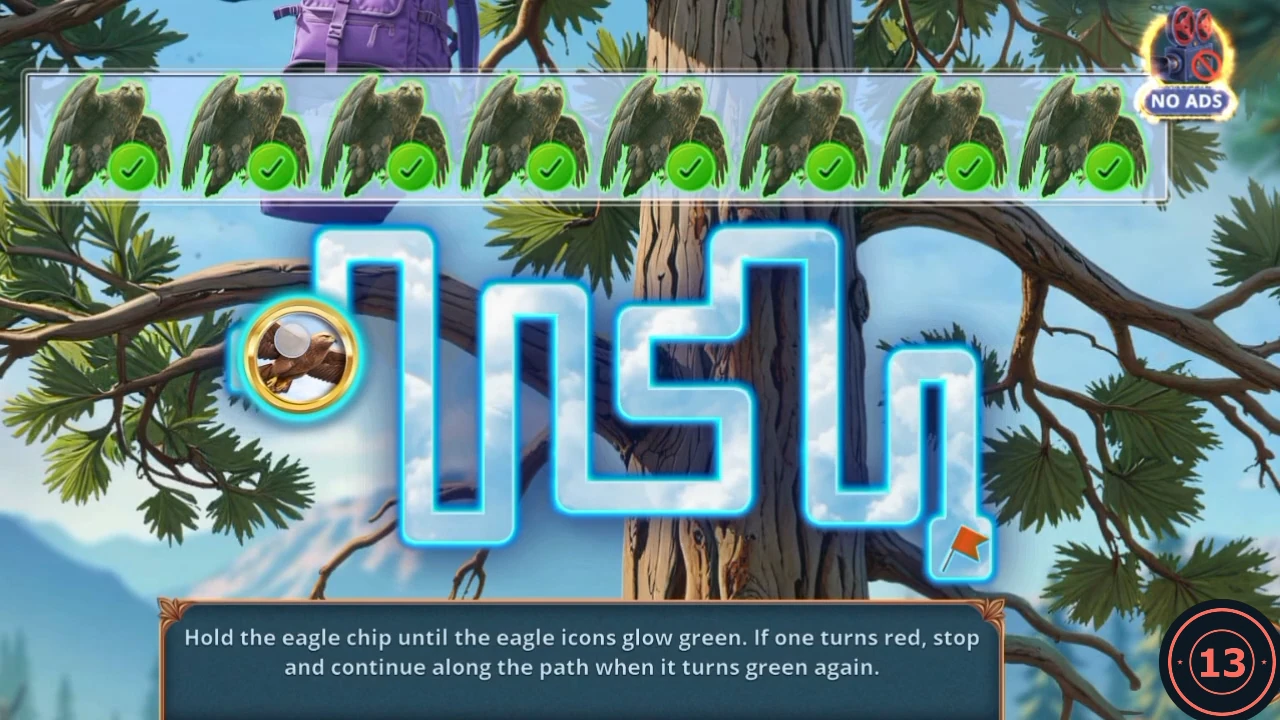
A timing mini-game. There is no fixed sequence, because the icons turn red as you go.
- At the Burning Cliff, open the backpack and use the Glove on the vines. Take the Bucket of Sand.
- At the camp, tap the burning branch and use the Bucket of Sand on it. The flames die down, but a pack is hanging too high for you.
- Use the eagle helper. Hold the eagle chip and drag it along the path to the red flag, stopping whenever an eagle icon turns red and continuing when all of them are green.
- Back at the camp, the Key and a pink tube appear in your inventory.
Search the suitcase by word clues
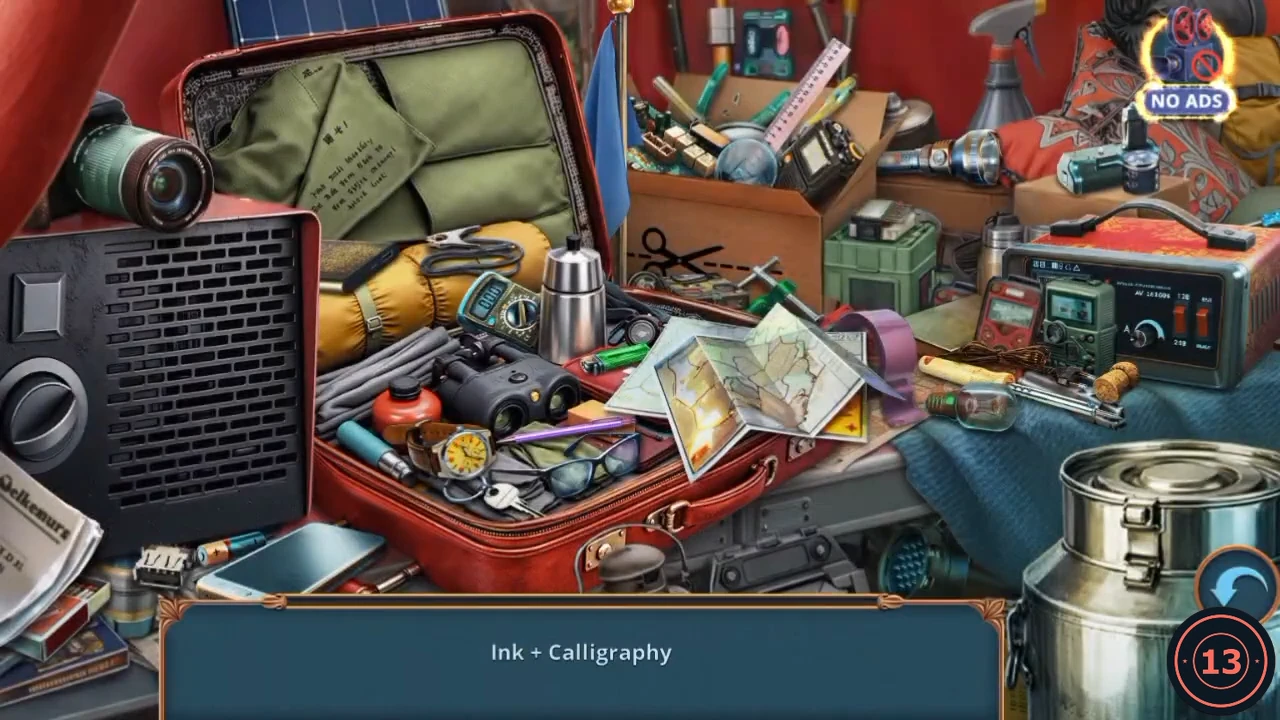
This second suitcase search uses pairs of words instead of a category. Each pair describes one object.
- In the tent, open the green pouch and use the Key. Take the red warning triangle.
- Open the suitcase scene again. The bar now shows two words at a time, and together they describe one object. Tap the object and it's removed. Positions are from the recording, and the order can differ. Ink + Calligraphy: the purple pen across the open suitcase. Length + Accuracy: the ruler standing in the cardboard box at top centre. Time + Circle: the wristwatch on the grey gloves in the suitcase. Metal + Cut: the black-handled scissors on the front of the cardboard box. Eyesight + Glass: the glasses on the green cloth in the suitcase. Lines + Direction: the big folded map on the right of the suitcase. Light + Night: the flashlight between the cardboard box and the red cushion. Words + Memory: the flat green notebook left of the red multimeter. Frame + Flash: the camera lens on top of the red heater at the left. Lock + Form: the keys on the grey gloves in the suitcase. Water + Way: the big metal can at the bottom right. Stick + Cloth: the blue flag standing behind the suitcase lid. When the bar is empty, the Coffee Pot Lid lands on the red cushion at the top right. Tap it to take it.
Open the hexagonal device
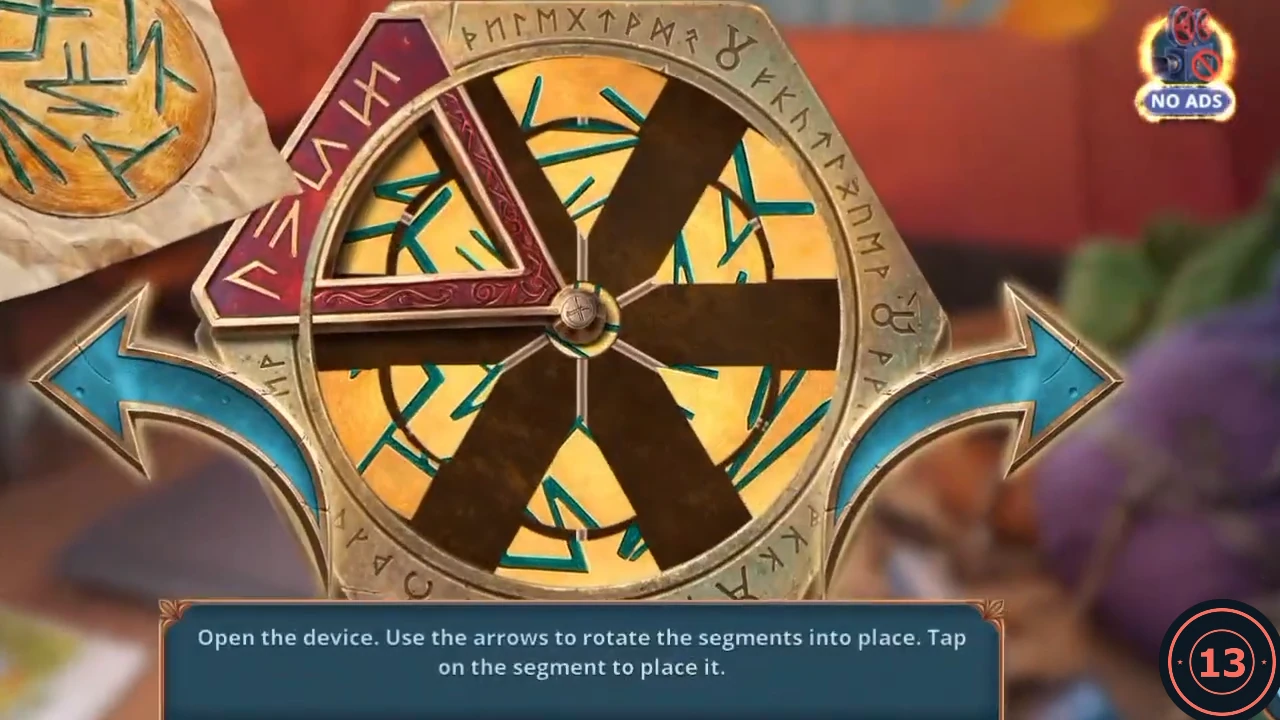
The paper at the top left shows the target pattern. The red triangle marks the wedges you can move.
- Open the steaming coffee pot and place the Coffee Pot Lid. Take the Flat Tray, the gold paper and the Belt.
- Open the Magnet and add the Belt. At the cooler, lower it into the crack in the rocks and take the Gears.
- Open the hexagonal device and place the warning triangle and the gold paper in its two slots.
- Use the arrows to rotate the outer ring of segments. Tapping an outer segment slides it straight inward from wherever it sits, so line it up with the matching gap in the rune pattern from the paper before you tap. This is the method rather than a fixed move list. The recording never shows a placed segment coming back out, so do not count on undoing a tap: check that the lines will join first.
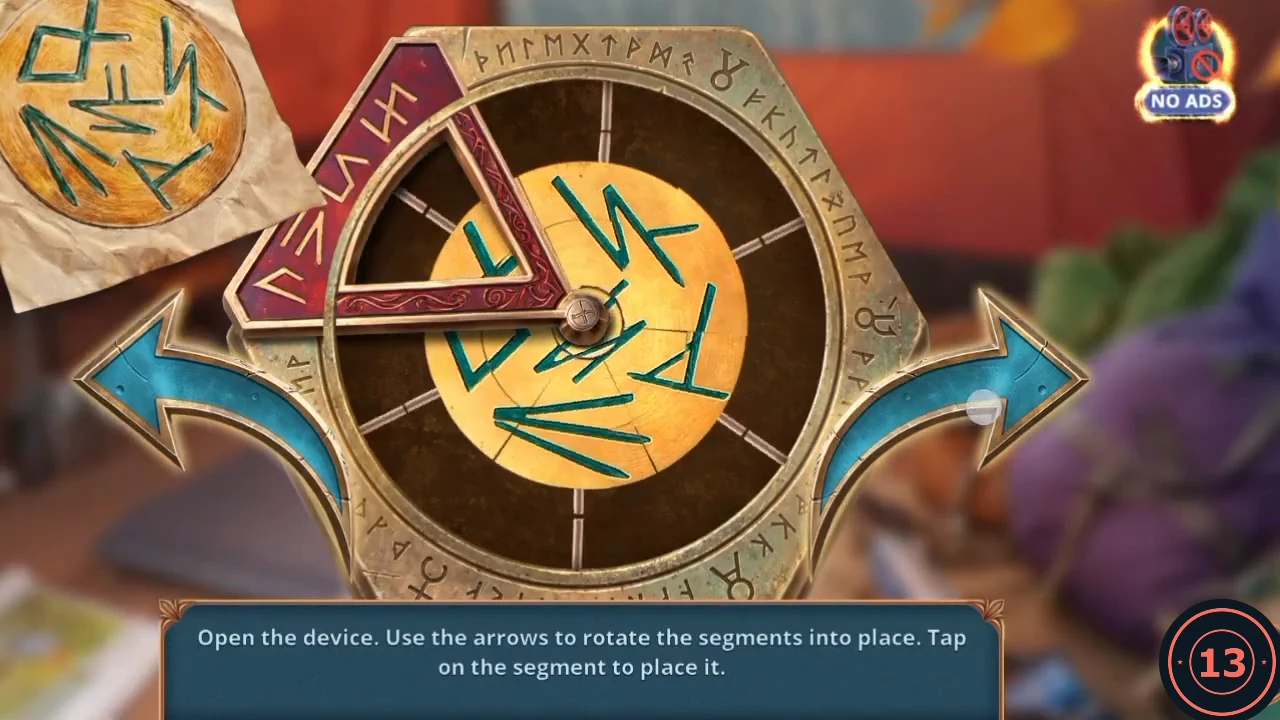
The solved device: the centre disc now matches the paper.
Gear hut chain
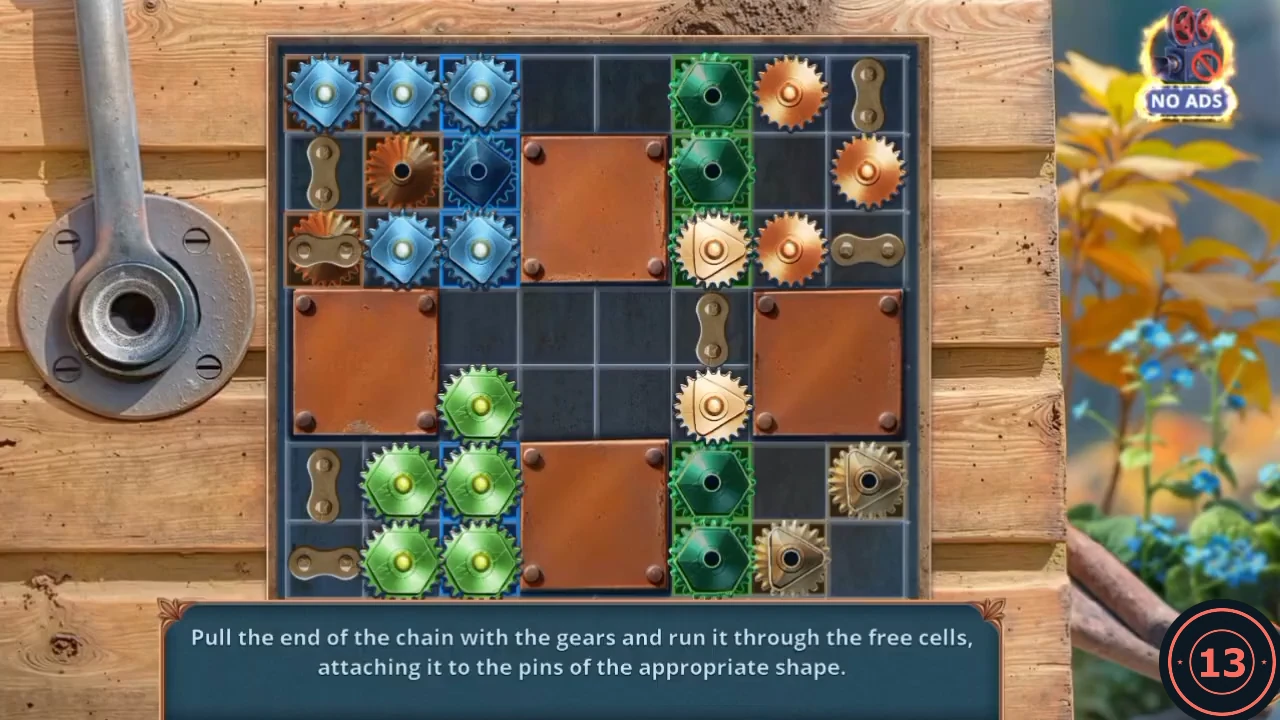
Join each chain end to all the pins of its own shape, avoiding the brown blocks and other chains. The recording shows one solve, so treat the finished board as an example.
- At the Burning Cliff, open the wooden hut and place both Gears.
- Drag each chain through free cells to its matching pins: blue, green, orange and tan. Do the pins in the corners first, since their routes are the most limited.
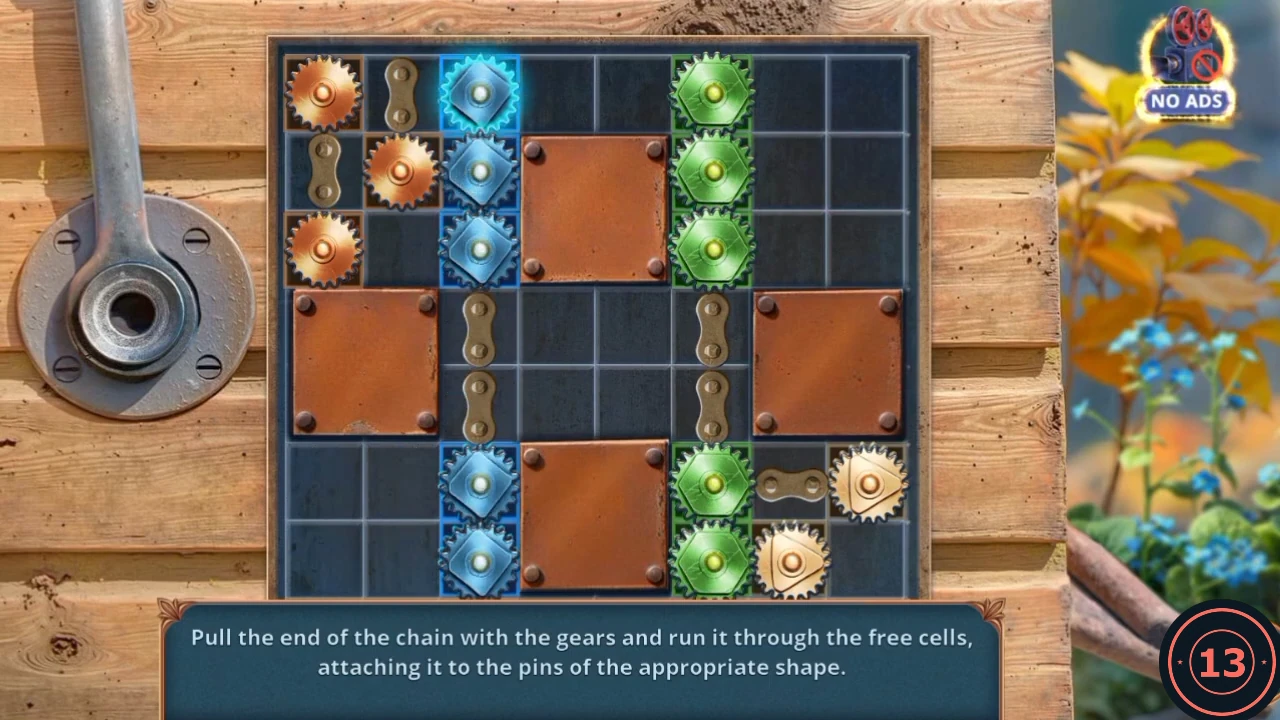
One finished board from the recording. Treat it as an example of how the chains can run. - Take the Hygieia Amulet from the hut's window.
Old Ranger's Cabin: carve the wooden block
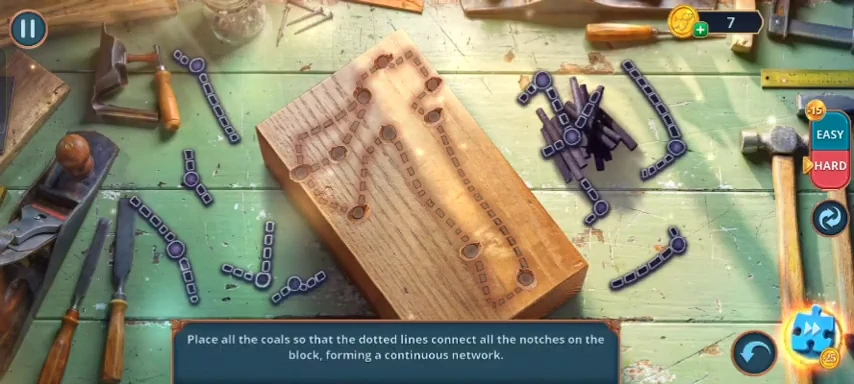
The cabin isn't finished until this is done, and it locks with the rest of Chapter 1 when you treat the wounded woman, so come back now. You need the Handle from the cooler's false bottom. The Google Play recording shows the same green box and workbench, but its player never came back, so these steps come from the other release's recording.
- Open the journal map and tap the gold Old Ranger's Cabin tile to go there. Open the red cabinet and use the Handle on the keyhole of the green box with the little trees. The lid opens. Take the Wooden Block.
- Open the workbench in the middle of the floor and place the Wooden Block on it. The puzzle starts with the chain pieces spread around the block.
- Drag each chain piece onto the block so it lies along a dotted groove, with its round joint in a notch. Match pieces by length and bend. The recording starts with the V-shaped piece on the left-hand side of the block and the long bent piece on the bottom-right groove, then fills the top and the centre. The recording used dragging only, with no separate rotate button. All the notches must end up joined into one network.
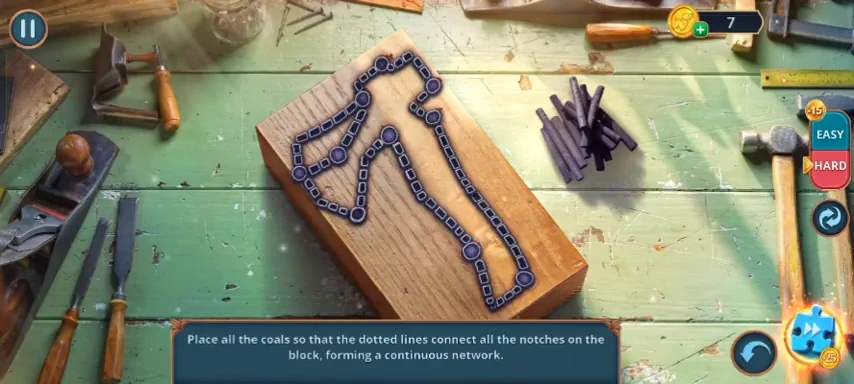
The finished network in the other release's recording, just before the block is carved into the axe. - The block is carved into an axe shape. Take this Ornament Part from the workbench.
- Open the desk and place the Ornament Part in the axe-shaped recess on the drawer. The drawer opens. Read the note about the people called those who hear the forest and someone digging by the northern stream. Your Inspect task then completes, with the achievement for examining the cabin.
Chapter 1 badge checklist
Collect any of these you missed before treating the wounded woman. Placing her last item brings up the warning that you can't return to earlier locations. This chapter holds 15 pickups worth 35.
- Forest Clearing, orange bedroll close-up: on the mossy stone left of the bedroll, among the white flowers. Worth 3.
- Deep Forest (the pond clearing), main scene: on the grass to the left of the path, above the firepit. This position is approximate. Worth 1.
- Deep Forest, firepit close-up: behind the big rock on the right. Worth 3.
- Deep Forest, resin tree close-up: at the lower left beside the lavender, next to the map papers. Worth 2.
- Riverbank, main scene: on the green patch at the river's near edge, just right of the logs in the wooden crate, above the small orange mushrooms. This position is approximate. Worth 2.
- Riverbank, crate and bottle close-up: at the left edge of the picture, among the leaves beside the crate. This position is approximate. Worth 2.
- Eagle's cliff, main scene: on the rocks just above the little wooden feeder. This position is approximate. Worth 3.
- Eagle's cliff, wooden feeder close-up: inside the arched opening. Worth 3.
- Eagle's cliff, rucksack and vines close-up: on the moss at the lower left, by the orange flowers. This position is approximate. Worth 2.
- Eagle's cliff, dirt mound close-up: in the bush at the right edge. Worth 2.
- Geologists' camp, main scene: on the ground just right of the two people by the left-hand tents. This position is approximate. Worth 2.
- Geologists' camp, cooler close-up: at the right edge, on the rocks. Worth 2.
- Geologists' camp, hedgehog hollow close-up: on the root at the upper left. Worth 3.
- Red tent, main scene: on the tan floor mat, in front of the crates. Worth 2.
- Red tent, coffee maker close-up: at the top centre, on the grey bag. Worth 3.
Treat the wounded woman
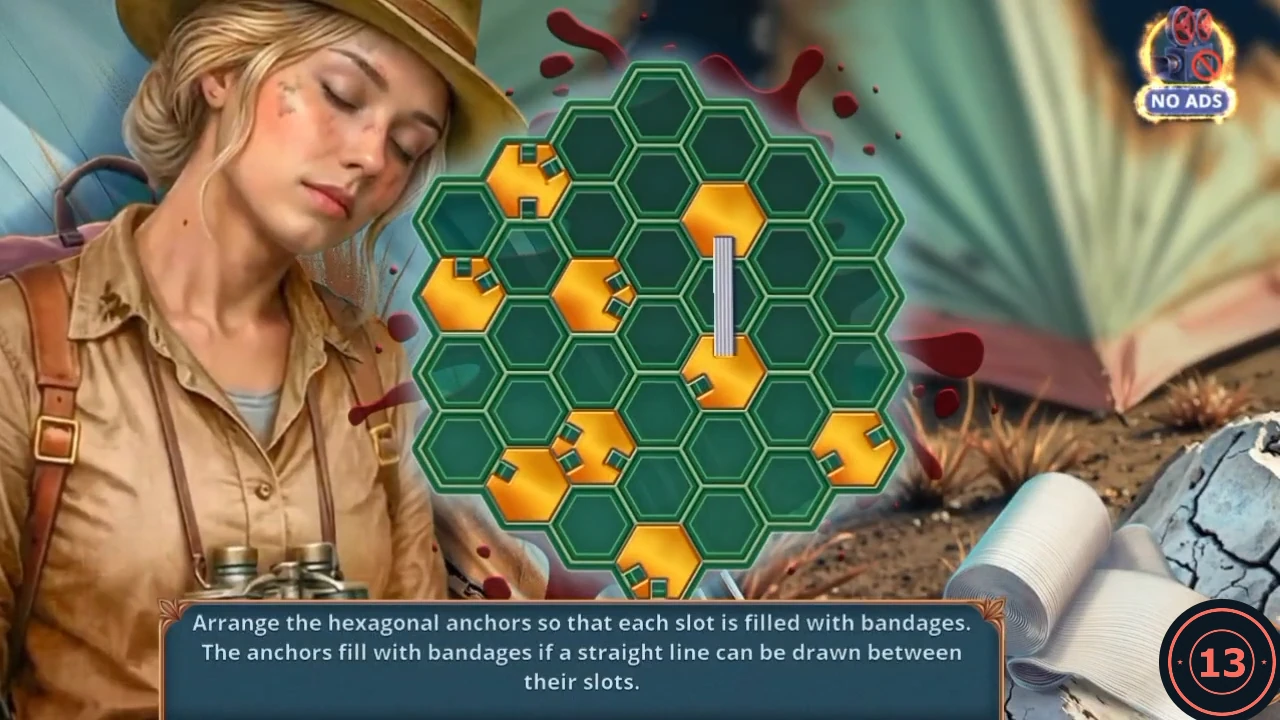
This is the chapter's point of no return: finish every search here first.
- In the tent, open the green case by the coffee pot and place the Hygieia Amulet on it. Take the Hand Cleaner and the Antiseptic.
- Open the woman's close-up and fill the three slots: the Antiseptic spray in the bottom slot, the pink tube that came with the Key in the middle slot, and the Bandages in the top slot. Placing the last item brings up a warning.
- The prompt warns that finishing this task stops you returning to earlier locations for items you missed. If you want every Ranger Badge, tap NO and go back for any you still need. Tap YES when ready.
- Drag the hexagonal anchors so every open slot faces another slot along a straight line. A filled line shows the pair is linked. Finish with all nine anchors joined.
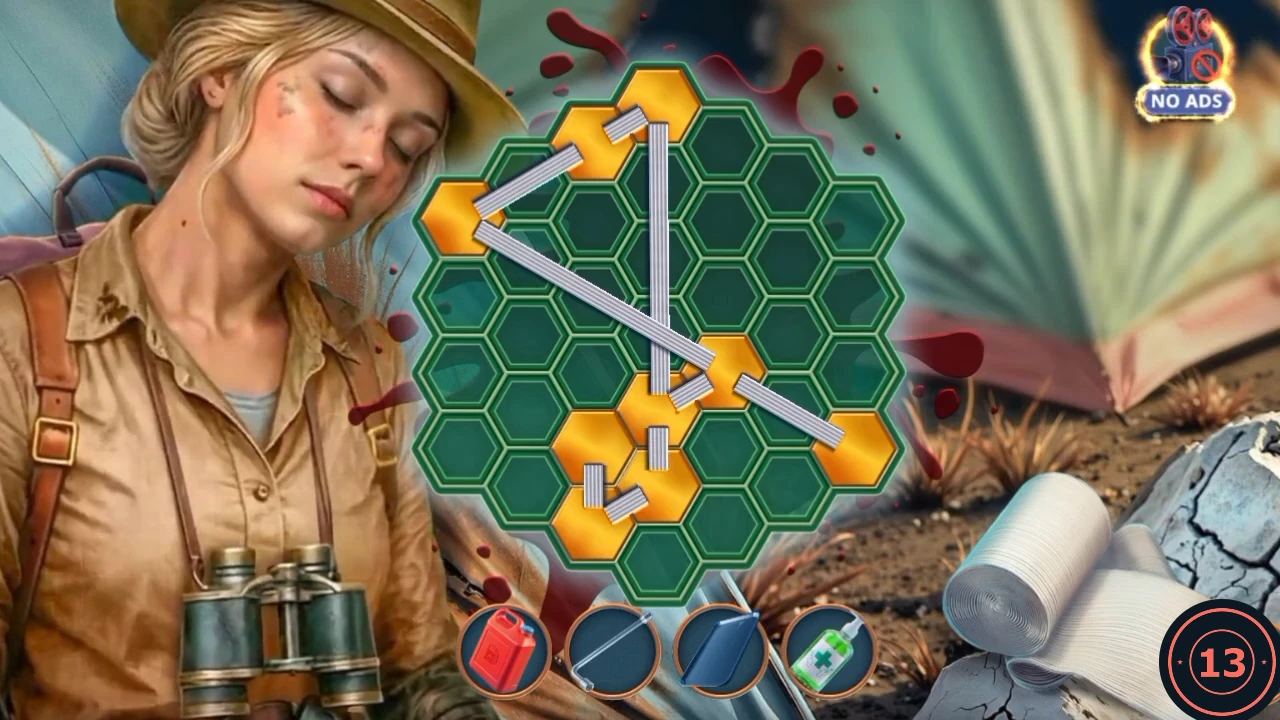
The completed board from the recording, with all nine anchors joined. - The results board totals your Decision Points out of 13 for Chapter 1 and shows the reward tiers at 0, 4 and 10. The full 13 comes from Agree with Leah, Respond Positively to Nolan, Agree to check the cabin, Support Leah and Help the Woman. Your task to help the woman completes and Chapter 2 begins on a burnt forest path.