River: Fix the Boat
Light the campfire, bail the boat and fish the net out of the river.
- At the campfire take the red brush and light the fire with the flint.
- Take the bucket by the riverbank rock and bail the boat; take the harpoon.
- Hook the net out of the water with the harpoon and cut it open with the knife to start a pairs search.
Fishing Net Pairs
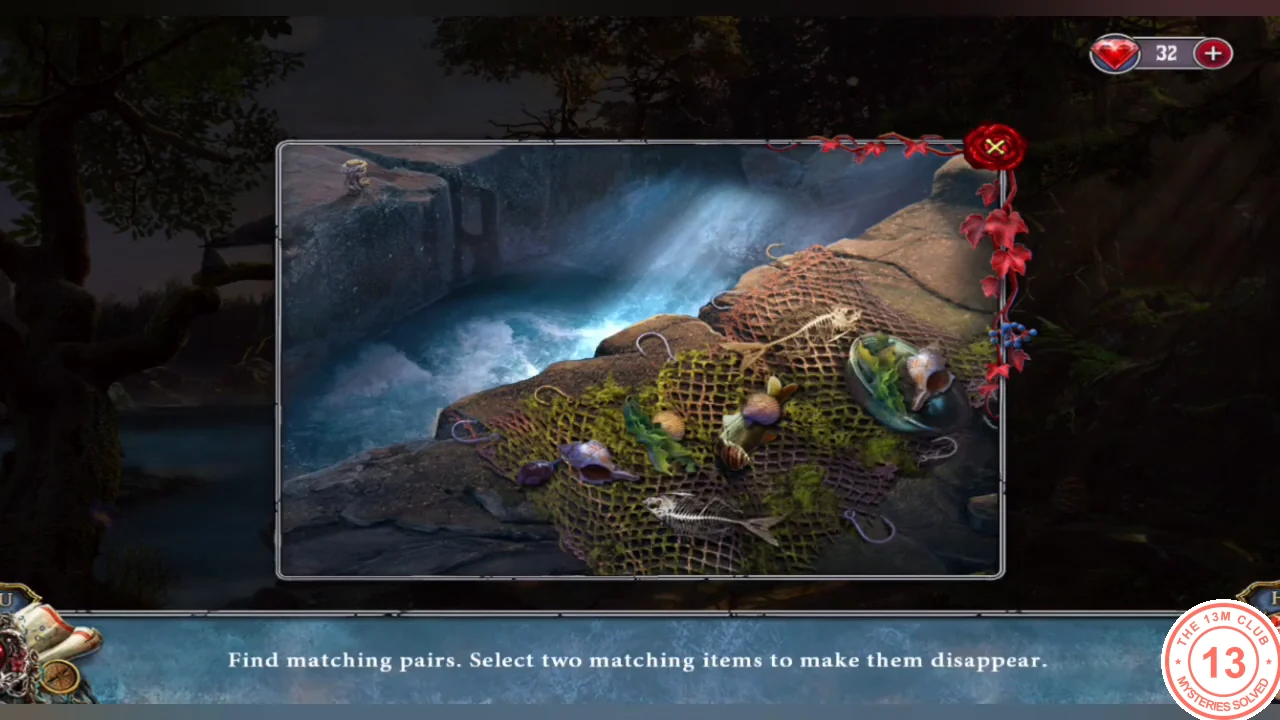
Remove matching pairs from the fishing net until it is empty.
- Select two matching items to remove them until the net is empty. You get a fish and a bowl.
- Give the fish to the seagull on the branch for the scraper.
Firefly Web Puzzle
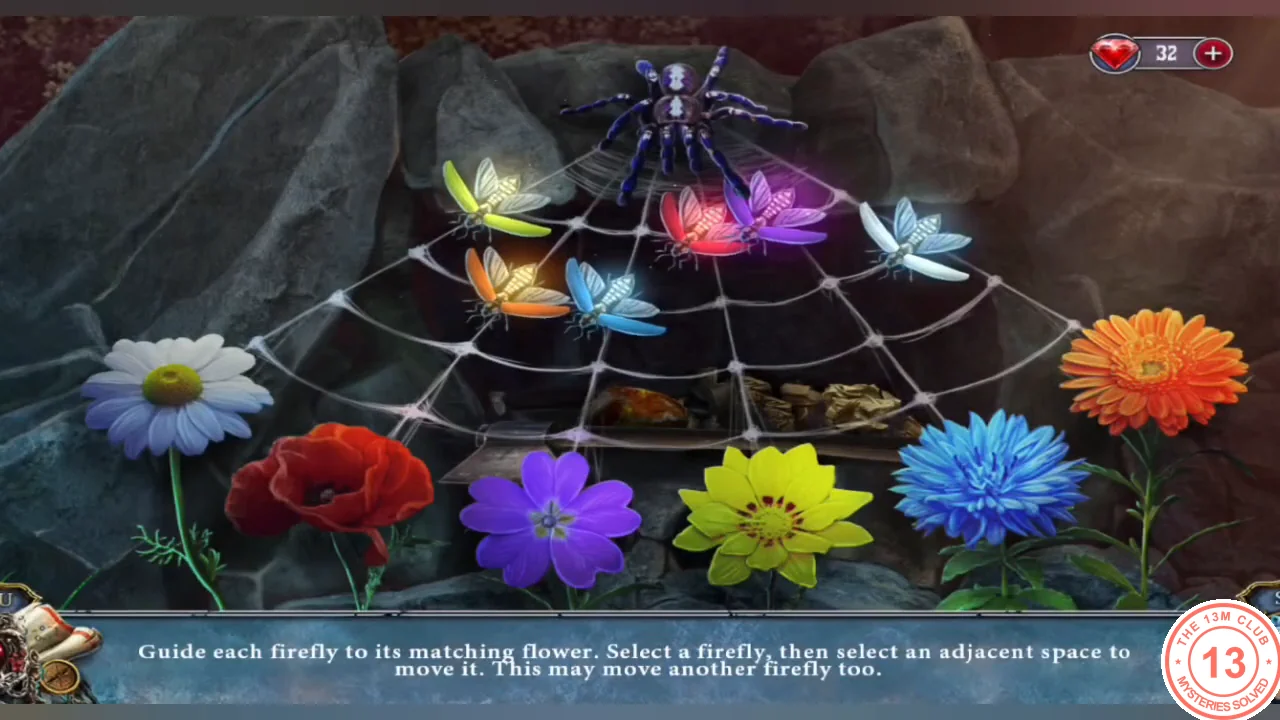
Guide each firefly to its matching flower. Select a firefly, then an adjacent web point; moving onto another firefly swaps them. A firefly that reaches the point above its flower settles there.
- Examine the rocks behind the fire pit. Match colors to flowers: white to the daisy, red to the poppy, purple to the purple flower, yellow to the yellow flower, blue to the cornflower and orange to the orange gerbera. Bring down the fireflies with the clearest route first; one order that works is red, white, purple, blue, yellow, then orange. If your fireflies start in different places, keep the same color-to-flower pairs and swap fireflies out of each other's way.
- Behind the rocks take the axe and the solid resin.
Patch the Boat
Melt the resin and patch the boat so you can row to the waterfall.
- Put the resin and the scraper in the bowl in inventory, heat the bowl on the campfire and patch the boat with the liquid resin. Row to the waterfall.
Waterfall: Retrieve Your Belongings
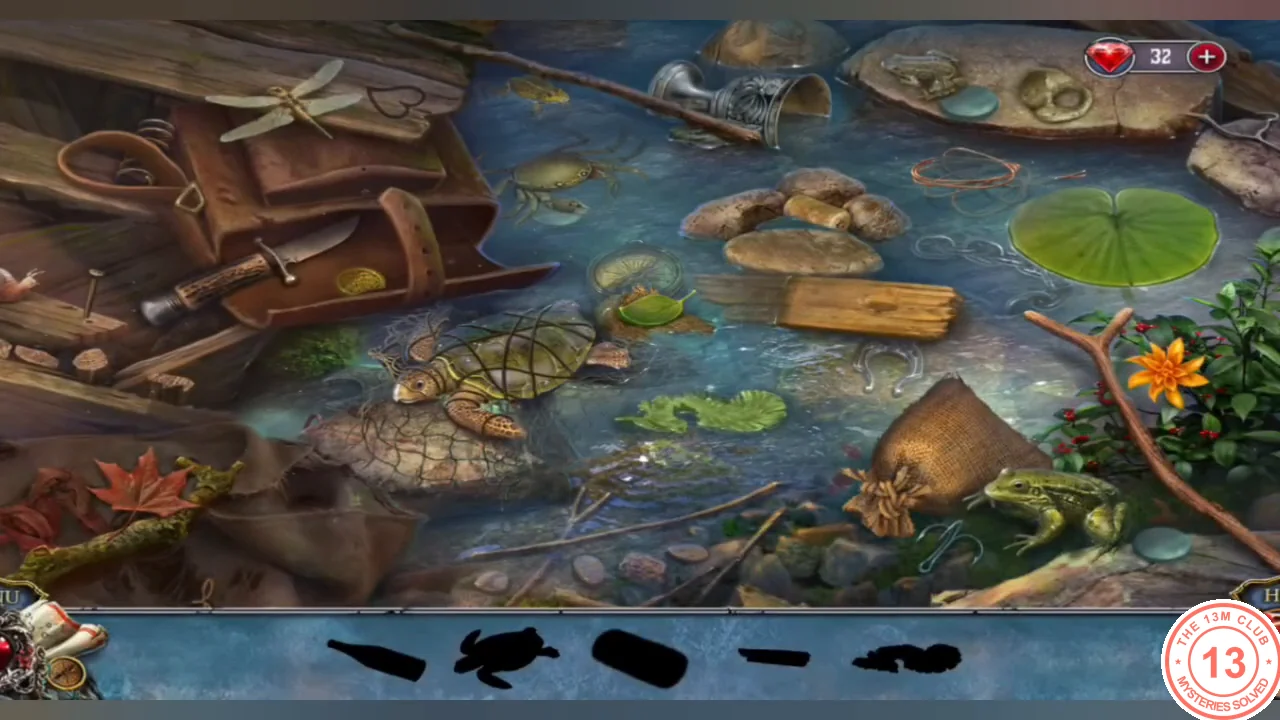
Your belongings were washed away at the falls. Find the items shown as silhouettes in the river to get them back.
- You lost your things going over the falls. Tap the river on the right to open a silhouette hidden-object scene; find every silhouette to recover your belongings (the axe and brush).
- Chop the wrecked boat's planks with the axe; take the awl and the magnet.
- Brush the moss off the rock left of the cave to reveal a stone symbol lock, then pry the right-hand stone with the awl. Take the forked key and Blaze's scroll pointing to a hiding place above the waterfall.
- In the bushes on the right take the mint (the chest there needs two pegs). Drive the ants off the anthill with the mint and take the rope and peg 1/2.
- Tie the magnet to the rope and drop it into the river.
Metallic Objects Search
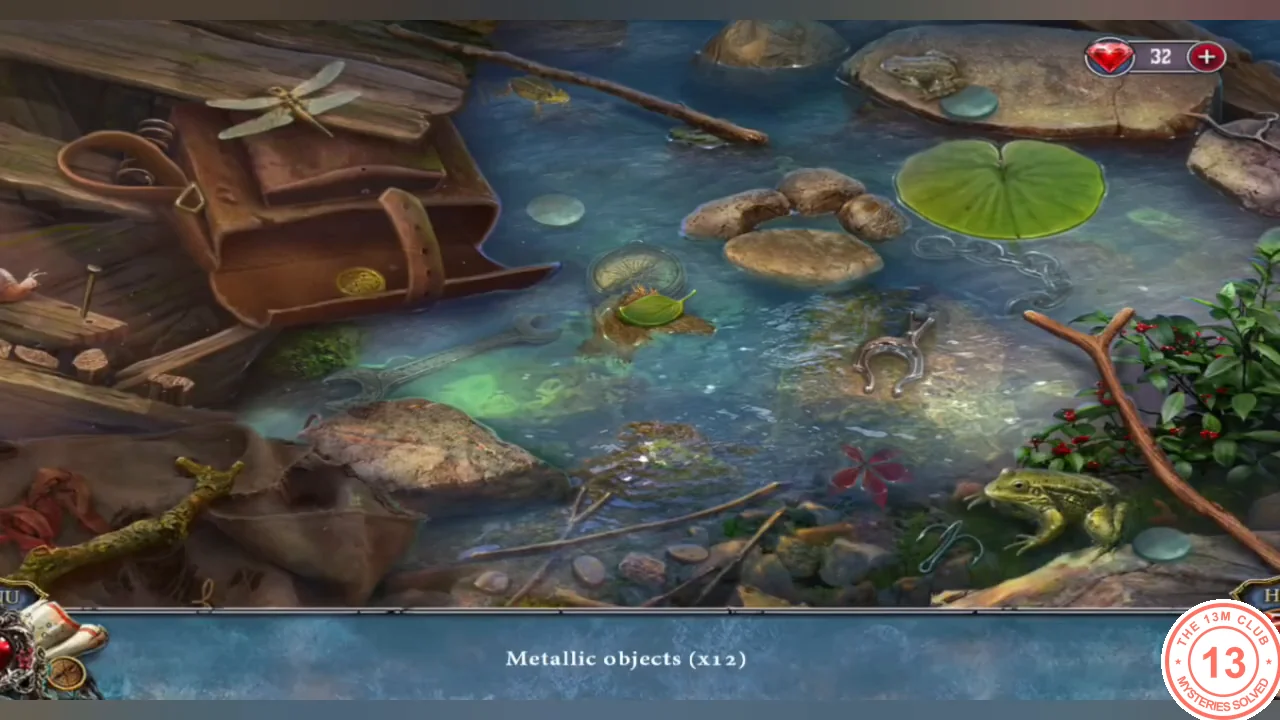
Use the magnet to find all 12 metallic objects on the riverbed.
- Find all 12 metallic objects on the riverbed (an easy one to miss lies near the frog at the bottom right). You get peg 2/2.
- Put both pegs in the chest in the bushes; read Marion's note and take tile 1/3 and the symbol code paper.
Cave Entrance Stone Sequence
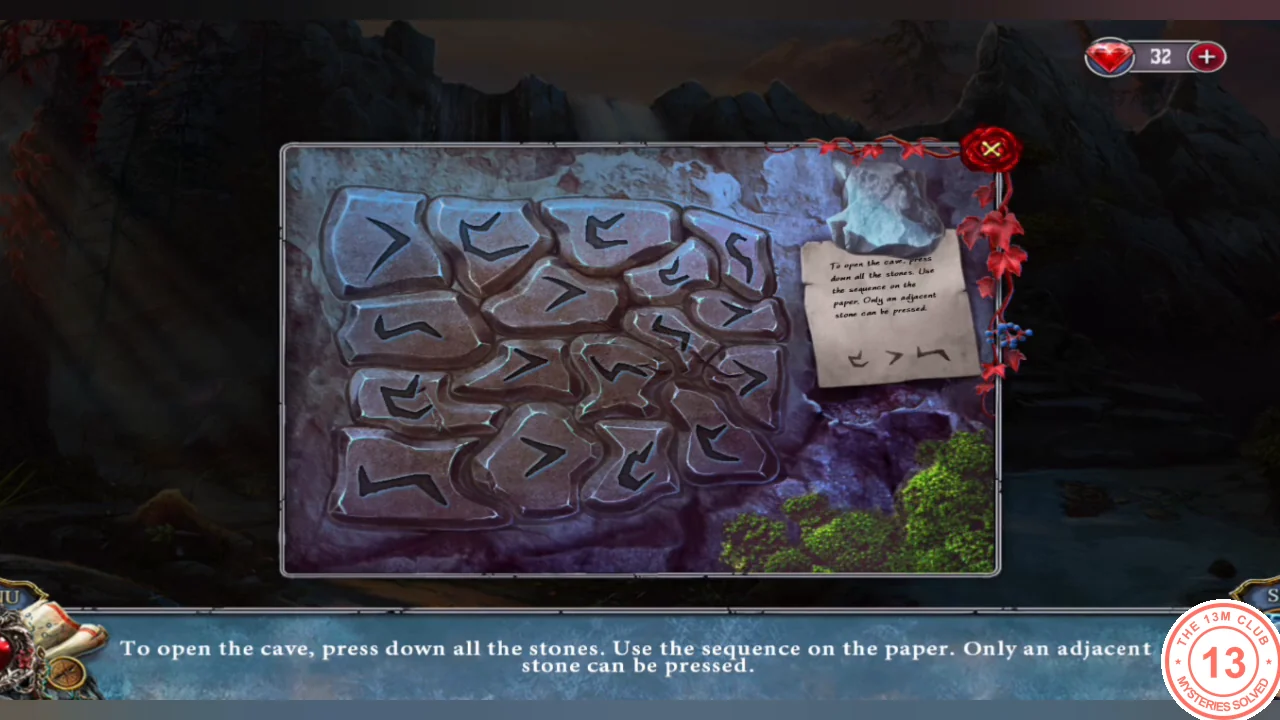
Press down all stones following the repeating sequence on the paper (hook, arrow, zigzag). Only a stone adjacent to the last pressed one can be pressed.
- Place the symbol code on the stone lock. Start on the hook stone at bottom right and keep pressing an adjacent stone with the next symbol in the cycle hook, arrow, zigzag until all 17 stones are down (follow the numbered order in the image). The cave opens.
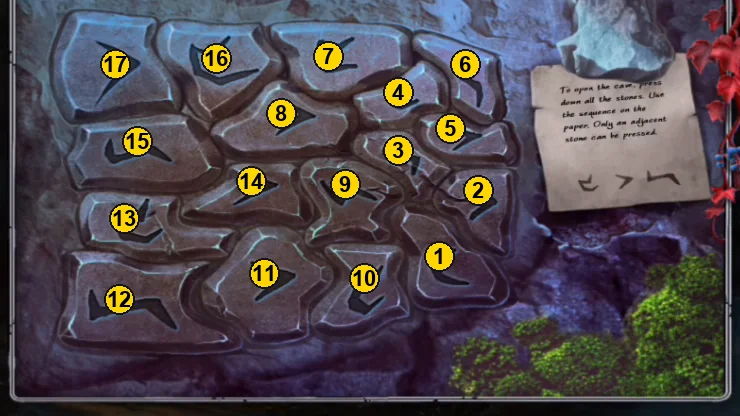
Pressing order, 1 to 17, starting on the hook stone at the bottom right.
Cave: Break Blaze's Curse
The Druid takes Ruby. Search the cave for the items you need to break Blaze's curse.
- Watch the Druid kidnap Ruby. Under the tree, take the oil next to the flowers. At the ivy chest on the left take the burlap. On the hatch with triquetra shapes take the perfume bottle (the hatch needs three tiles).
- On the stone table, oil the rusted lock of the book and twist it open with the burlap. Take Blaze's photo of Ruby and the pin; lay the burlap on the table.
- Use the amulet on the photo to make the magic photo.
Wolf Token Puzzle
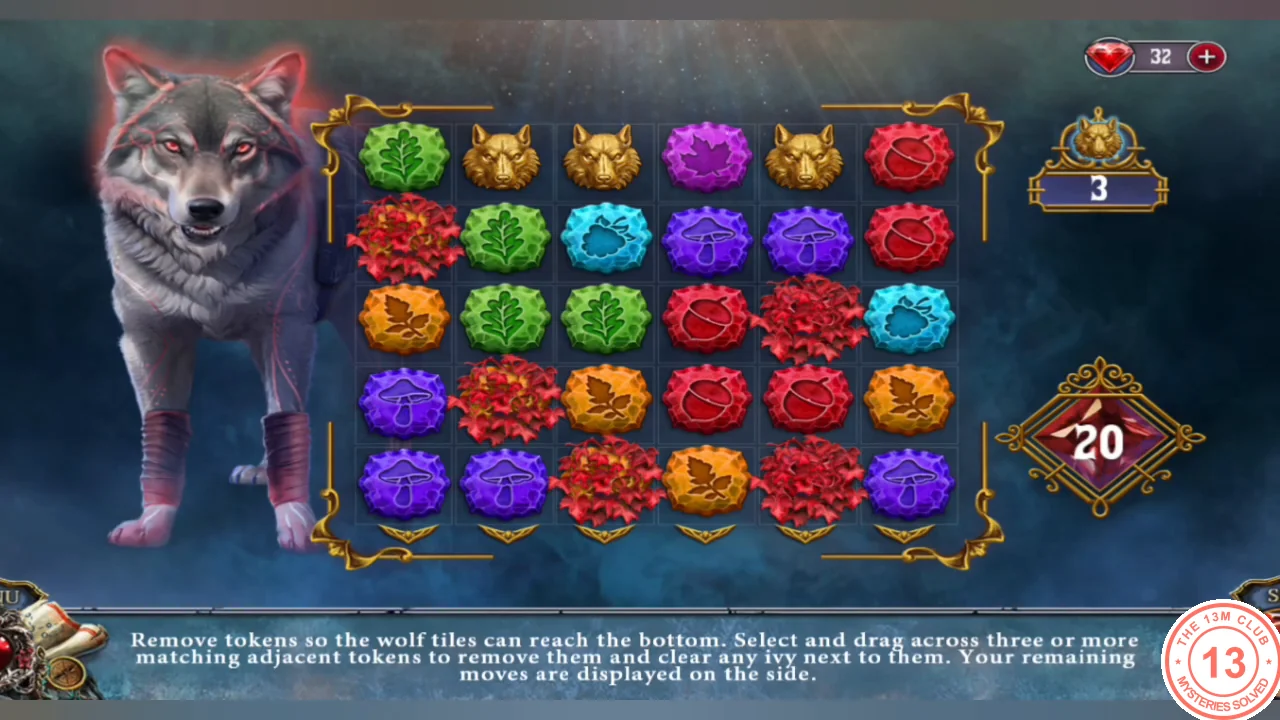
Remove tokens so all three wolf tiles reach the bottom row; drag across three or more matching adjacent tokens. You have 20 moves.
- Give the magic photo to the sleeping wolf and clear matches below each wolf tile; the board may differ in your game. The wolf becomes Blaze, Ruby's real father, who gives you instructions for opening the tunnel.
Open the Secret Passage
Collect the three triquetra tiles and the potion ingredients to open the secret passage.
- Read the scroll and open its end with the pin to take sphere piece 1/4 and the growth powder.
- Open the left chest with the forked key; take the pickaxe and tile 2/3.
- Break the stone animal head with the pickaxe; take the blue crystal and tile 3/3.
- Put the blue crystal on the burlap on the stone table and crush it with the rock to get crystal powder.
- Place the three tiles on the triquetra hatch.
- Open the growth powder recipe and add the ingredients in order: perfume bottle, oil, crystal powder, growth powder (the oil stays in your inventory). You get the growth potion.
- Spray the growth potion on the flowers under the tree.
Flower Bloom Puzzle
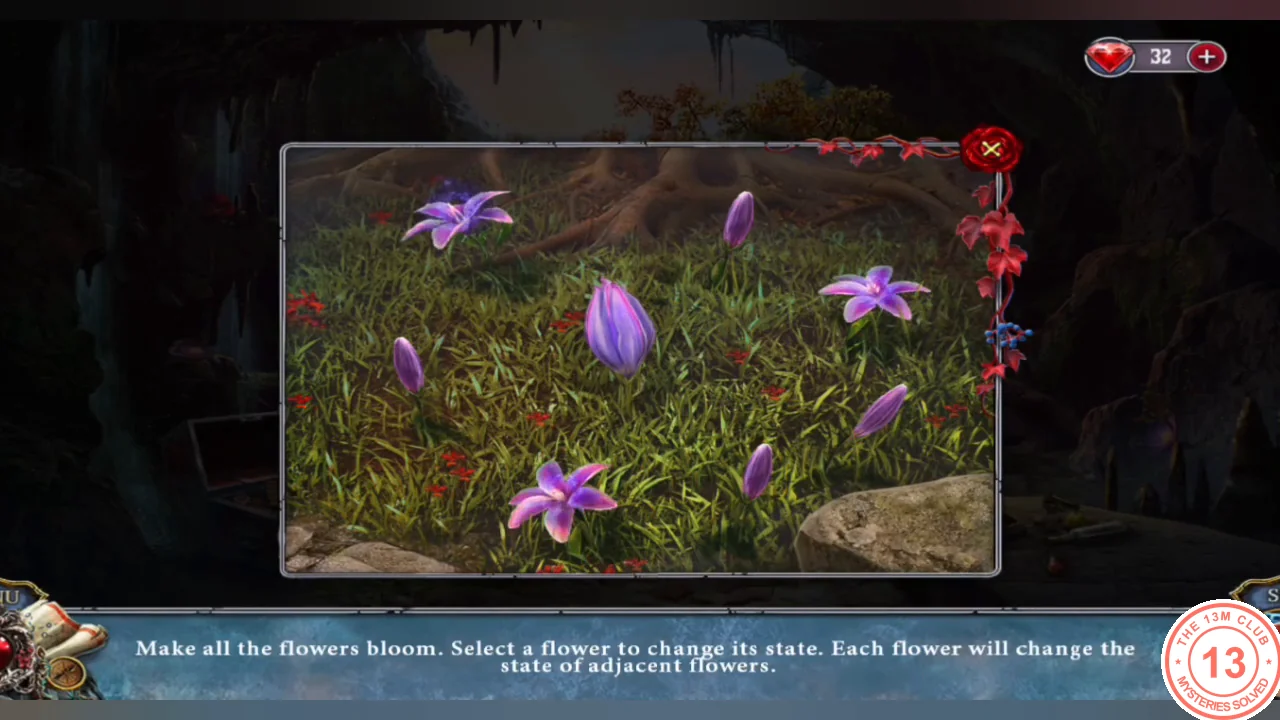
Make all seven flowers around the bud bloom. Selecting a flower flips it and its two neighbors in the ring.
- Each tap flips three flowers in a row around the ring. Tap the flower in the middle of a closed group of three to open them, and fix leftovers with taps whose flips cancel out. Your starting state may differ. Example: with the top-left, upper-right and bottom-left flowers open at the start, tap upper-right, bottom-left, middle-right, then bottom-right.
- Place the magic flower in the triquetra hatch; a passage opens in the rock face. Follow Blaze into the stone mouth.
Tunnel Gear Path
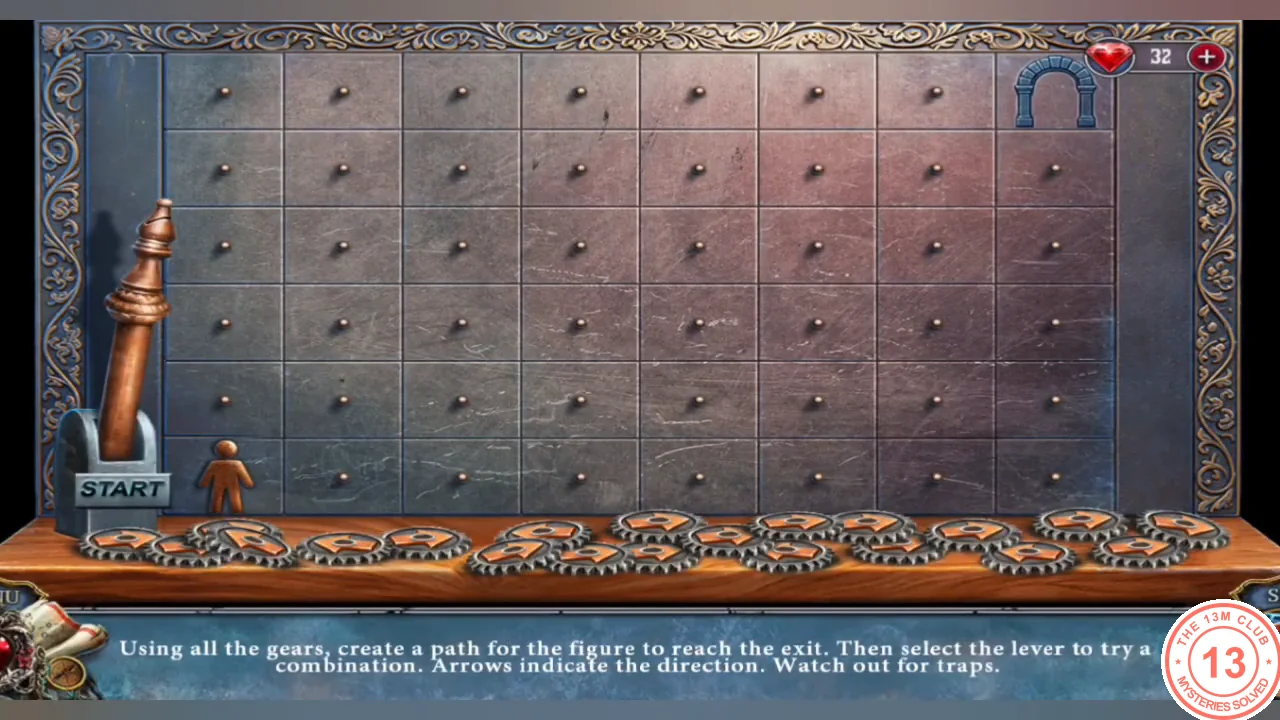
Use all the gears to build a path for the figure to the exit, then pull the lever. Arrows show direction; avoid traps.
- Build the route shown in the solved image. From the start, go up the first column to the second row, one space right, then up to the top row; right to the fourth column; down to the third row; one space left; down the third column to the second-to-bottom row; right to the seventh column; up to the third row; one space right; then up the right edge to the exit. Pull the lever.
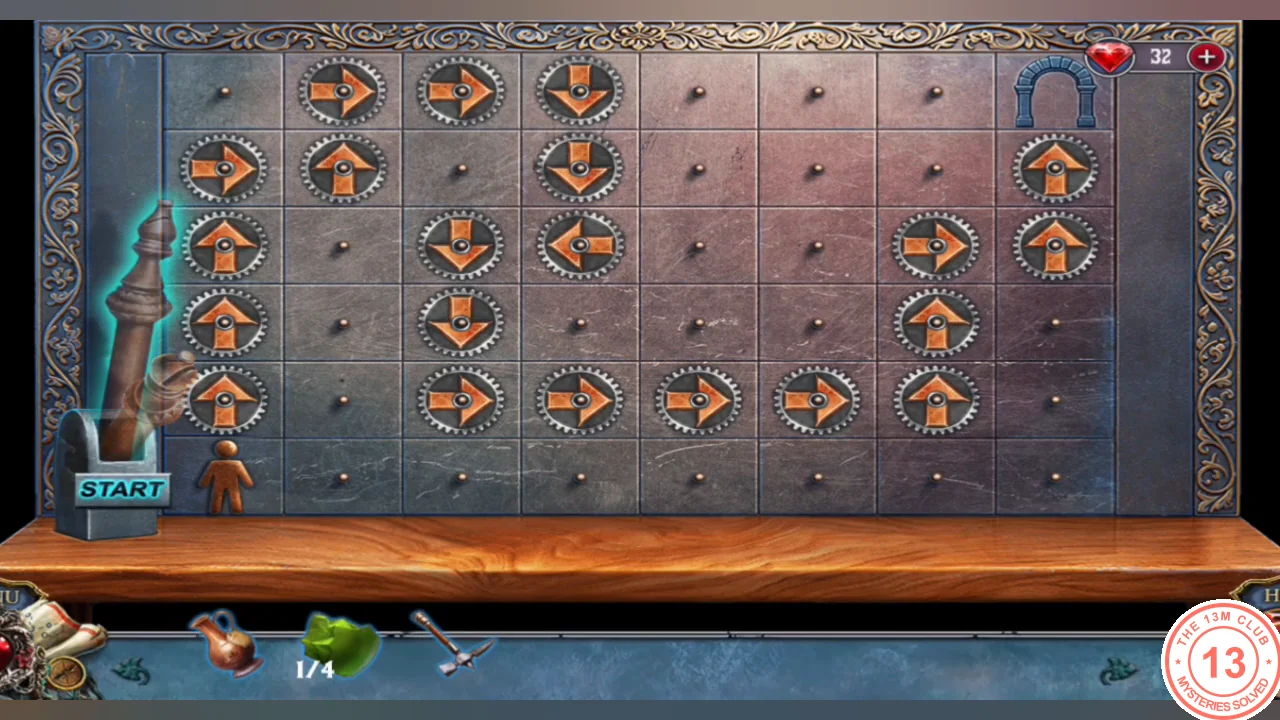
Solved: the finished gear path from the start to the exit.