Sacred Grove: Clear the Way
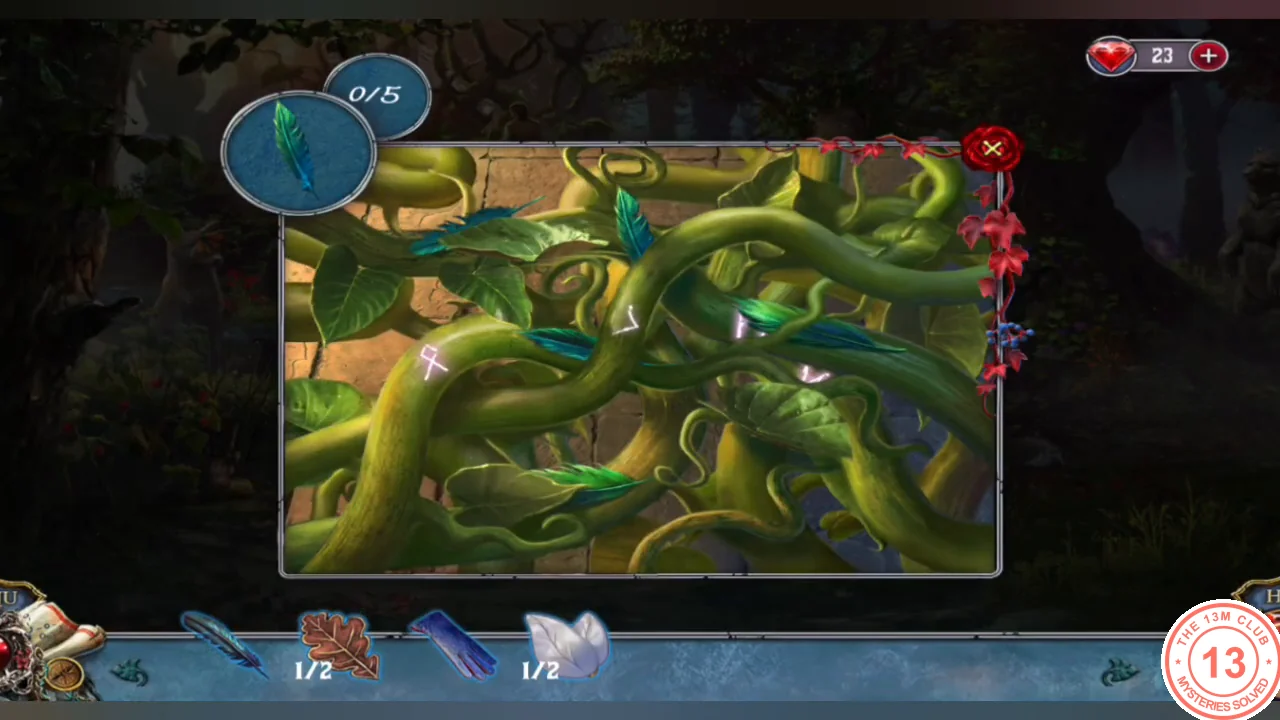
Vines cover the Sacred Grove. Find the five green feathers, then collect the tools to clear the way.
- Find the five green feathers hidden in the vines over the altar.
- At the raspberry bush with the hamster, pick a raspberry with the glove and drop it by the hamster. Take the bundle of straw it leaves, then reach through the thorns with the glove for the small trowel.
- At the stone altar on the right, read the note about the magic sickle and sweep the webs with the feathers.
Altar Hidden Objects
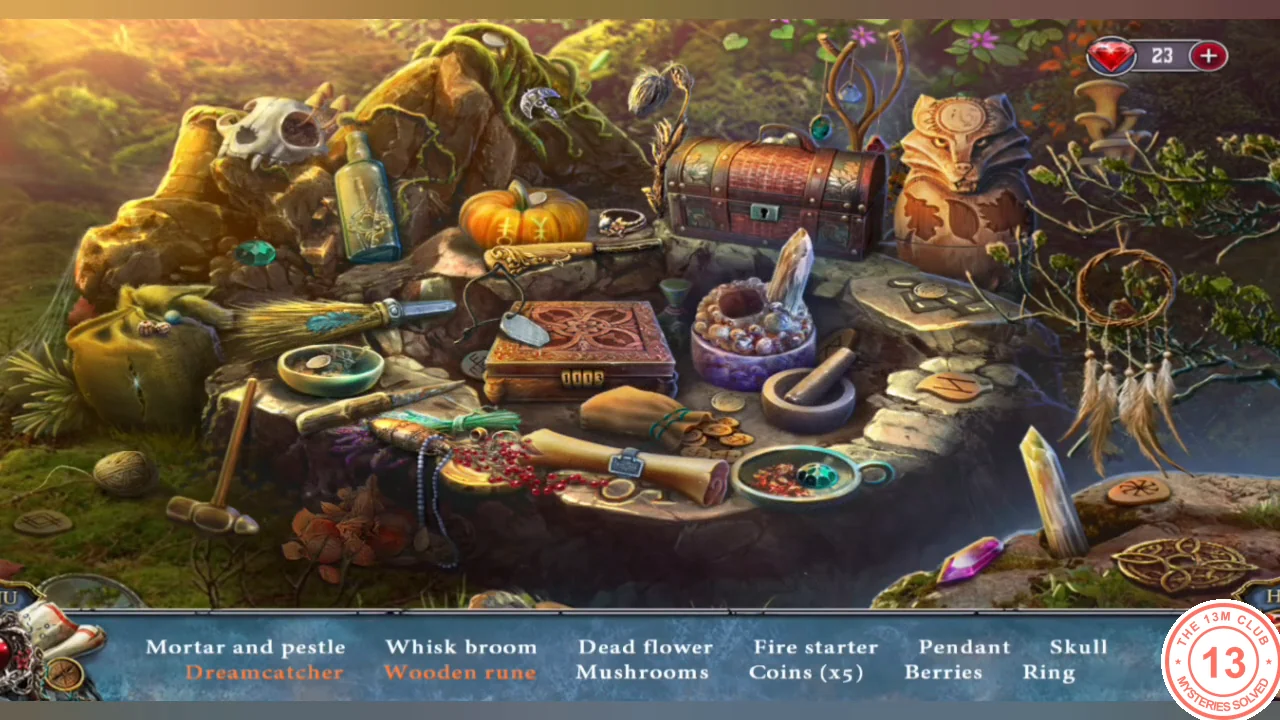
Find every listed item at the altar; some need an extra action first.
- Find the mortar and pestle, whisk broom, dead flower, mushrooms, five coins, pendant, berries, skull, ring and fire starter; complete the dreamcatcher with its missing pieces and carve the wooden rune. Reward: fire starter.
Smoke Out the Bees
Smoke the bees out of their hive for the second oak leaf.
- Light the straw with the fire starter in inventory to make smoking straw, and use it on the beehive in the tree right of the steps; take oak leaf 2/2.
- Scoop away the brittle bark of the carved tree panel with the trowel.
Oak Leaf Plate
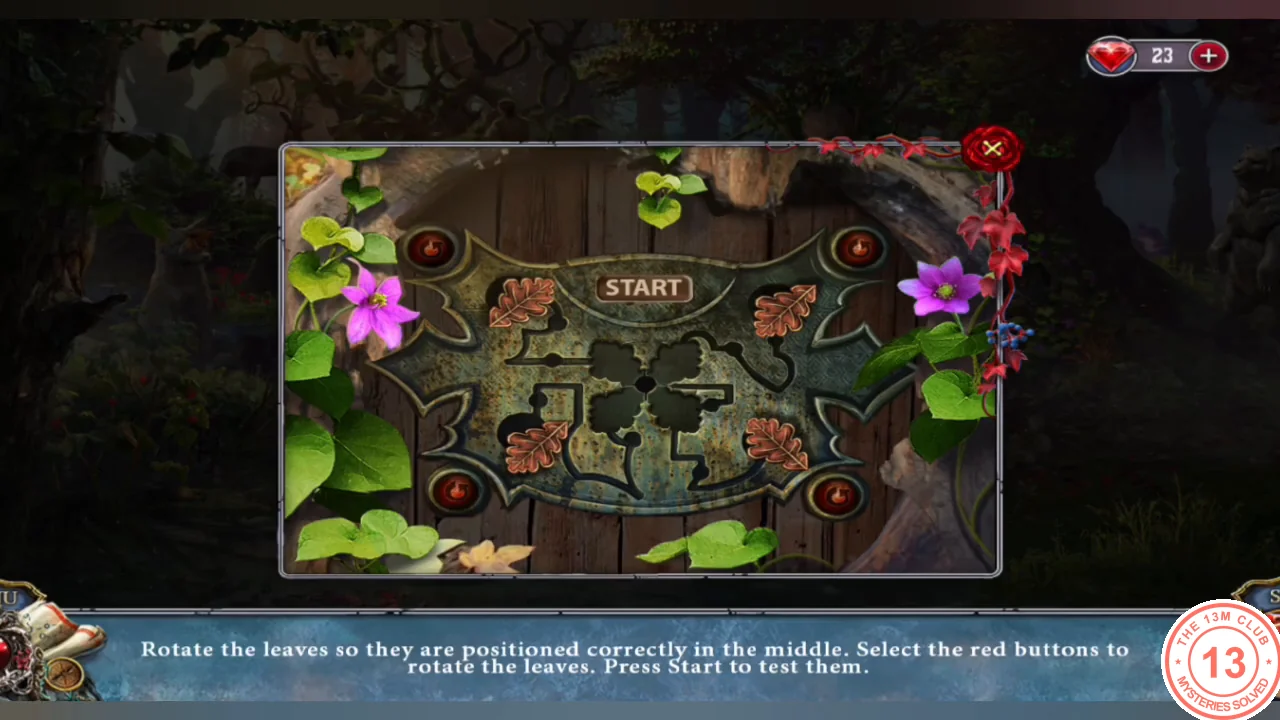
Rotate the leaves so they fit their places in the middle. Red buttons rotate the leaves; Start tests them.
- Place both oak leaves in the empty right corners. Rotate each corner leaf to match the leaf-shaped hollow its channel leads to (stems meet at the center, tips point outward), then press Start. In the opened hollow, take the broken artifact (the gold ornament at the lower left; you will repair it later), then the sickle on the right. Tap the pages at the back to read Dakmor's note and the magic recipe; the magic recipe goes into your inventory.
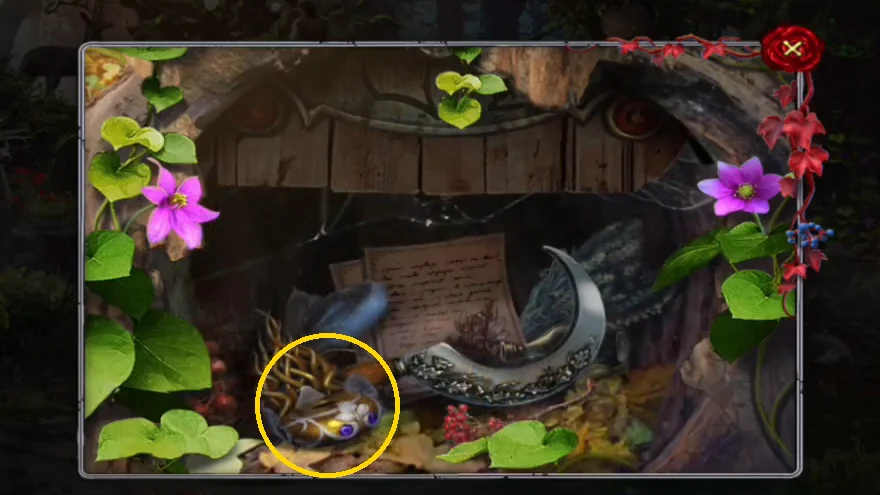
Inside the hollow: the broken artifact (circled) at the lower left, the sickle on the right and the pages at the back.
Altar Silhouette Hidden Objects
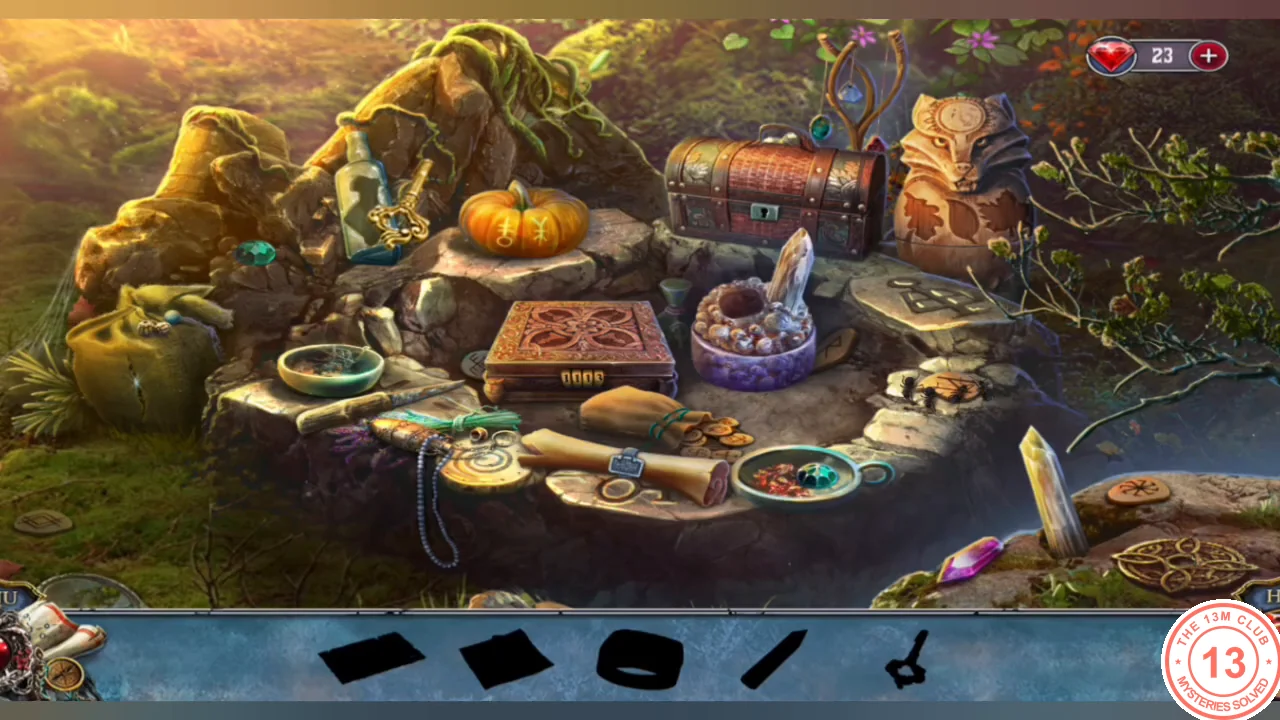
The bar shows silhouettes of the objects to find. Several need an extra action first.
- Return to the altar and find the silhouette objects. Break the bottle with the hammer for a key, open the chest, shine the lens on the crystal bowl for the code, open the box with 1350, feed the ants a sugar cube, sharpen the dull knife on the grindstone, attach the ring to the scroll, restore the glass pendant and fill the rune slots of the statue. Reward: runic ink.CODE1350
Make the Magic Sickle
Make the magic sickle and cut the vines over the stair archway.
- Open the magic recipe in your inventory and add the blue feather, the runic ink and the sickle to it. The feather writes runes on the blade with the ink, making the magic sickle.
- Use the magic sickle on the vines over the stair archway.
Rose Vine Grid
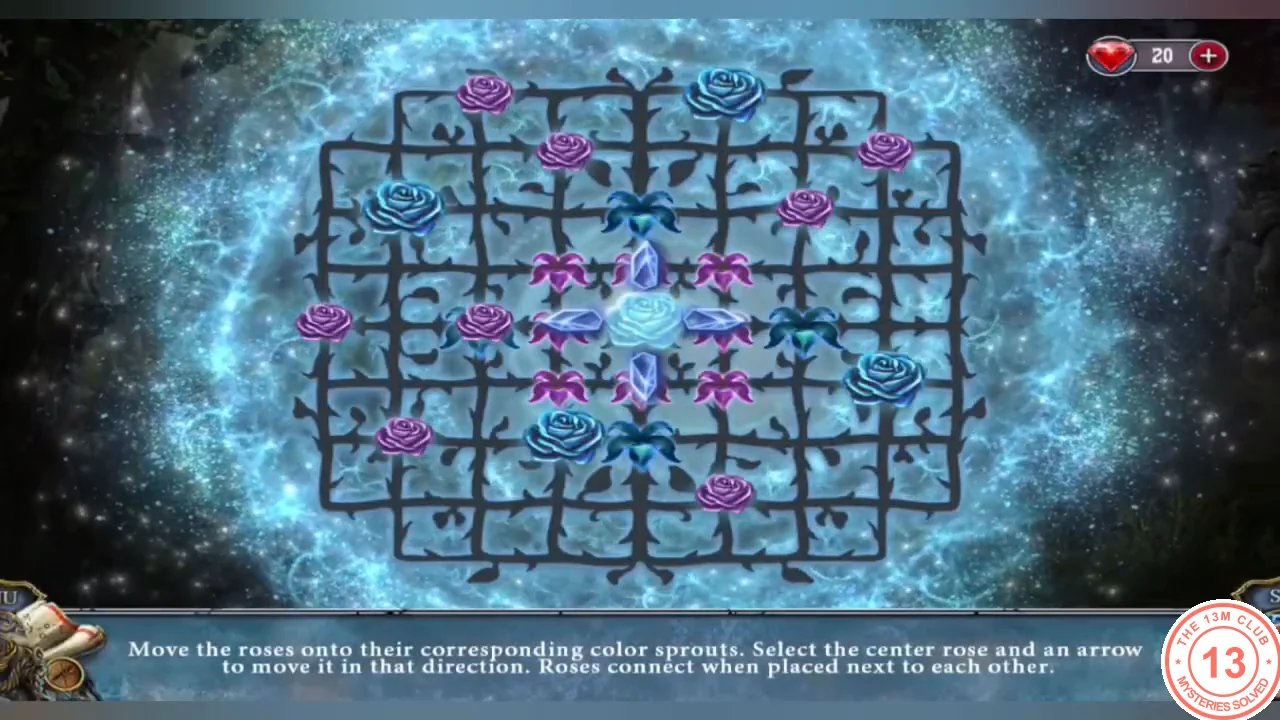
Move the roses onto their matching colored sprouts. Select the center rose and an arrow to move it; roses connect when placed next to each other and then move with it.
- Move the center cluster around the grid to pick up the loose roses, then park it with blue roses at the four blue sprouts and pink roses at the four pink sprouts, as in the solved image. Blaze attacks Dakmor; Dakmor smashes the amulet.
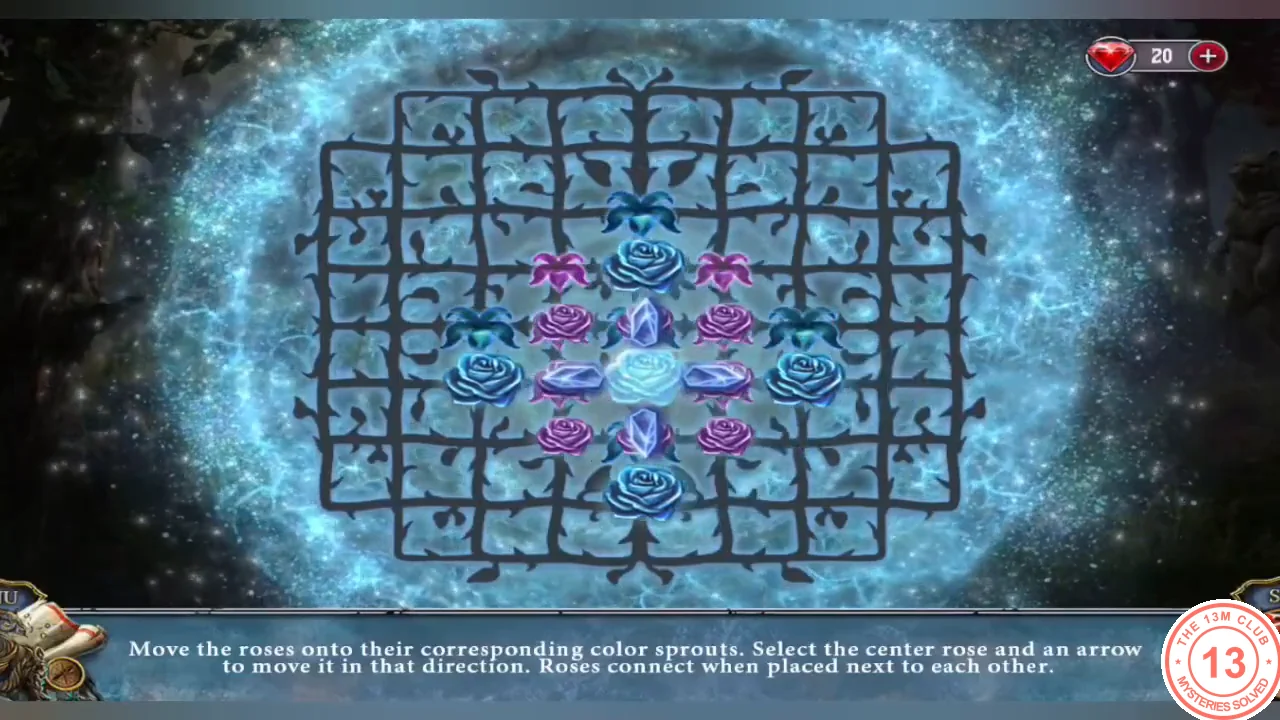
Solved: blue roses at the blue sprouts, pink roses at the pink sprouts.
Fix the Amulet
Collect the four amulet shards and Ruby's ring around the Sacred Grove and repair the amulet.
- At the fountain on the left, tap the white petal wedged in the side of the basin until it comes loose (no tool is needed; it may take a second tap). Petal 2/2.
- Take the machete from the hand of the hooded statue on the right; she used to hold a torch.
- At the altar, take amulet shard 1/4 from the rim and Ruby's ring from the deer's wreath.
- At the burrow among the roots of the big tree take the torch, cut the branches with the machete and take the diadem and shard 2/4.
- Put the torch in the statue's hand and light it with the fire starter. Take the horn the light reveals, then put the diadem on her head and take shard 3/4 from her hand.
- Fit the horn into the socket on the fountain rim to divert the water and take shard 4/4.
- Open the broken amulet and set the four shards in it. Thalia asks for an item Ruby values: use the amulet on Ruby's ring to make the magic ring.
- Add both white petals to the broken artifact in inventory (the one from the oak-leaf hollow; it still needs one more part).
Break Ruby's Curse
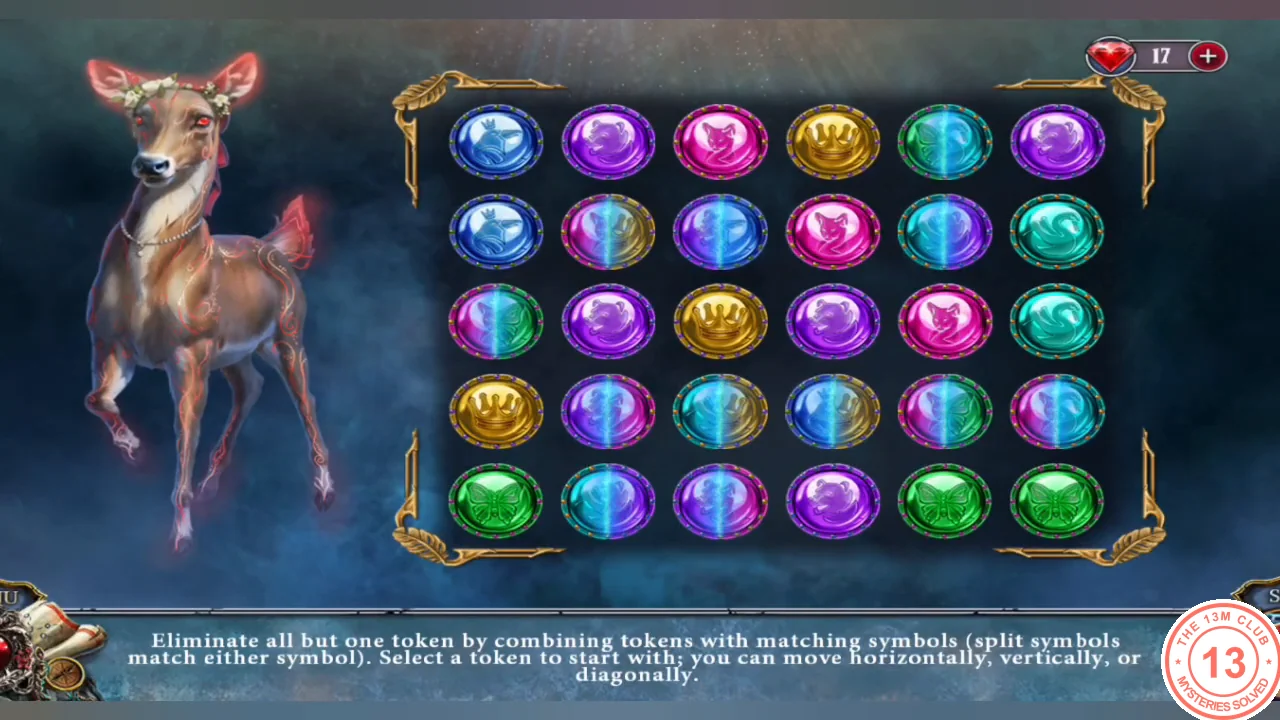
Eliminate all but one token by chaining tokens with matching symbols (split tokens match either symbol). Pick a starting token; moves go horizontally, vertically or diagonally.
- Cut the vine bonds on the deer with the magic sickle and give her the magic ring.
- Plan a chain before you start: each move lands on a token sharing a symbol and removes the token you left, so use split tokens to switch between symbol groups and avoid stranding isolated tokens. Finish with one token left. Your board may differ.
- Ruby thanks her father and gives you the purple crystal. Add it to the artifact.
Defeat Dakmor
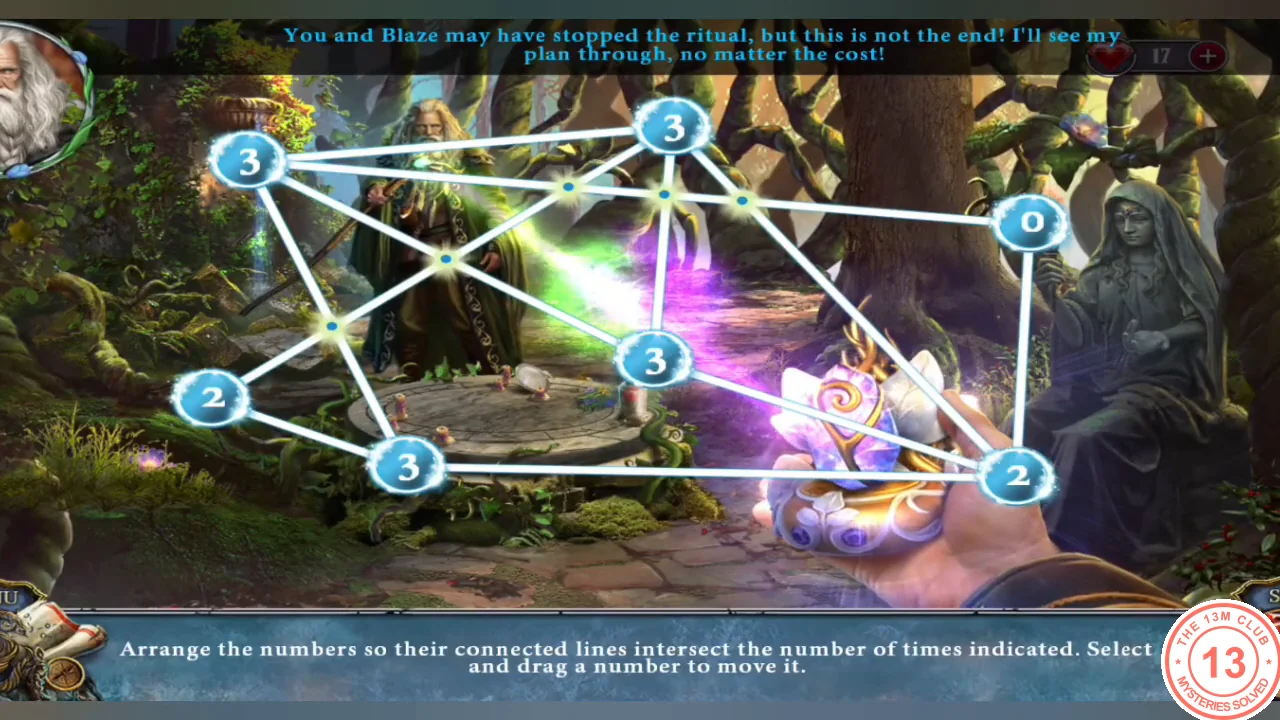
Arrange the numbers so each one's lines cross other lines exactly as many times as the number says. Drag a number to move it.
- Dakmor appears beside the stone circle. Use the finished artifact on him to start the puzzle.
- Untangle the network: start with the 0, moving it where none of its lines cross anything, then drag the 2s and 3s until every node shows the right number of crossings (solved image).
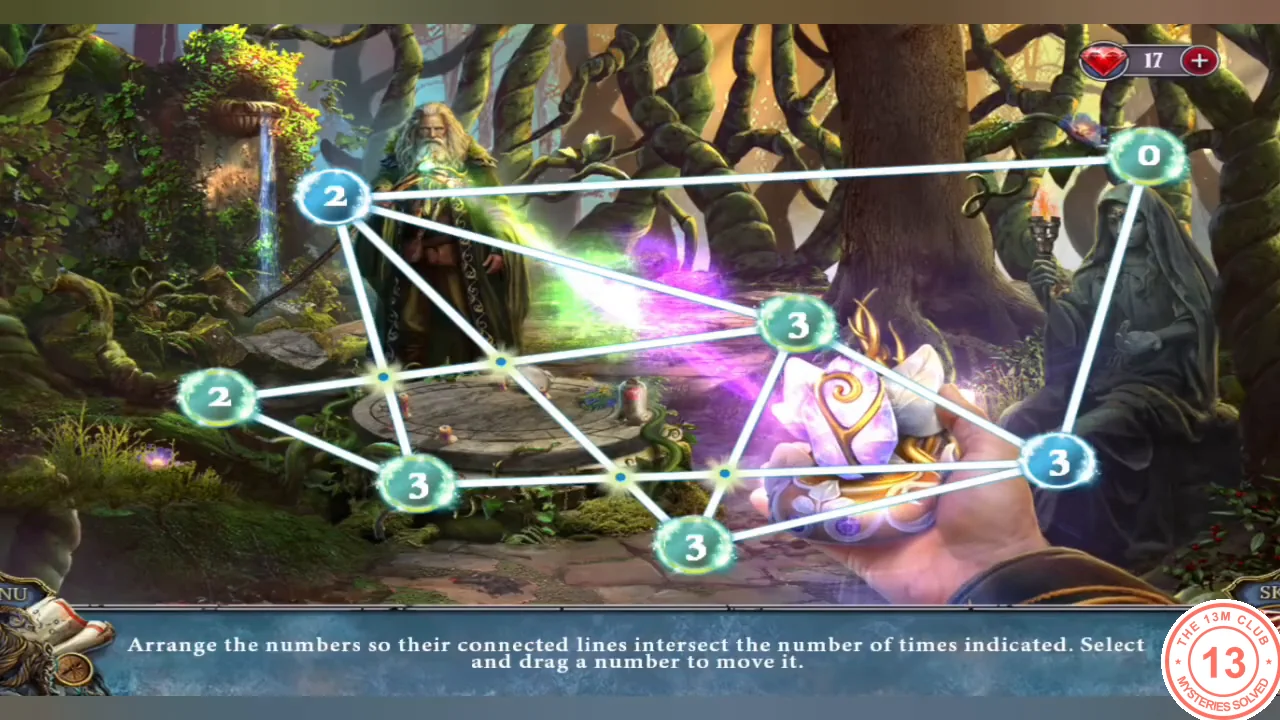
Solved: every number matches its count of crossings.
Ending
Dakmor is defeated and the curse is lifted.
- Dakmor mourns Elizabeth and turns into a flower. Roland and Ruby return to the chapel for their wedding.