
The Wedding Courtyard
Red ivy seals the chapel. Read Ruby's letter and open the jewelry box she gives you.
- In the carriage, read Ruby's letter, take the half amulet tucked inside it and look at Ruby's portrait. Then talk to Ruby in the courtyard; she gives you her jewelry box.
- Open the jewelry box in your inventory and take the blue hair ribbon. Ruby's diary underneath opens.
Ruby's Diary Pictures
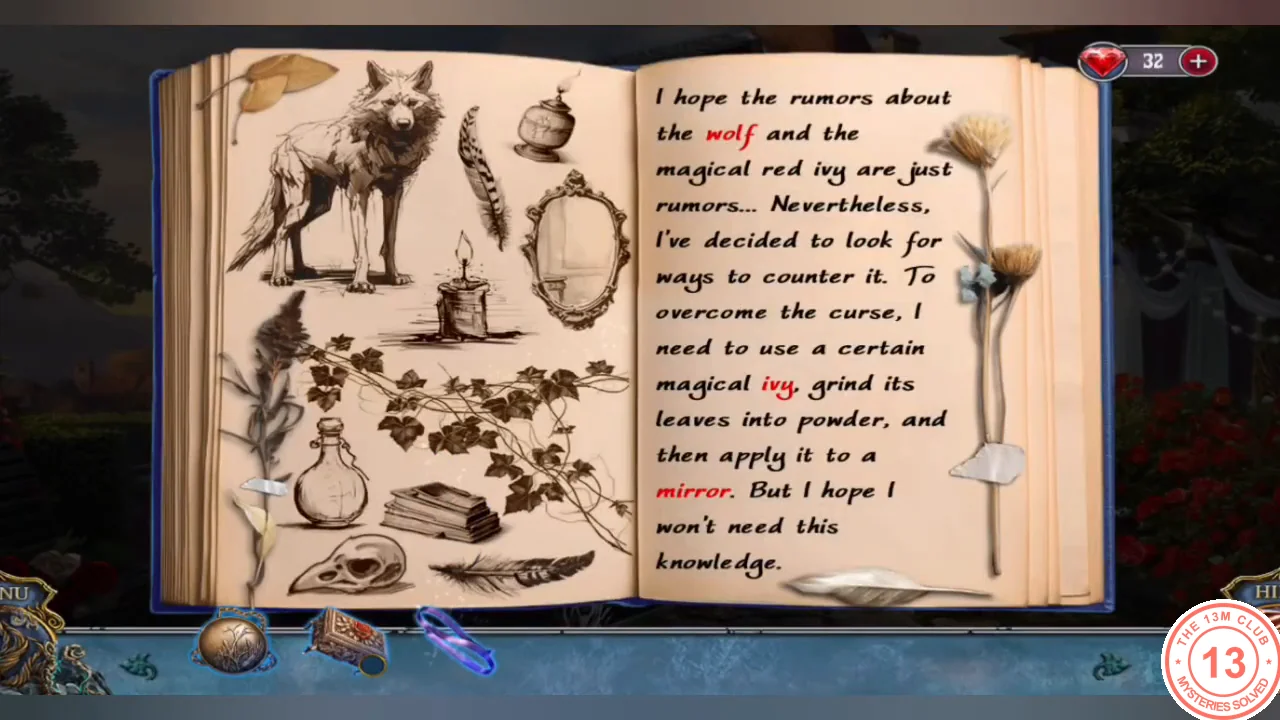
The diary page names three things in red: the wolf, the magical red ivy and a mirror. Tap the matching drawing for each red word to make it disappear.
- Tap the drawing of the wolf on the left of the page, the dark ivy branch in the middle and the oval mirror at the upper right of the drawing. Reading the text alone does not clear them; each drawing fades when you tap it.
- Turn the page and take the recipe "How to get rid of red ivy magic". Then take the compact of mirrors and the scissors from the jewelry box.
Courtyard: Crystal, Bowl and Candy Bar
Use the scissors and the fountain to collect what you need, then open the candy bar.
- Examine the easel (a cousin's letter about wolf rumors), then cut the crystal garland with the scissors to get the decorative crystal.
- At the chapel doors, cut an ivy branch with the scissors to get red ivy (a new branch grows back at once). Take the watering can.
- Examine the rose bed on the right; the magpie flies off. Take the rag and the dirty bowl.
- Examine the fountain (the magpie now sits on the cherub) and fill the watering can.
- Open the dirty bowl in inventory, pour in water from the watering can and wipe it with the rag to get a clean bowl.
- Give the decorative crystal to the magpie on the fountain; it leaves a cupcake token.
- Place the cupcake token in the cupcake-shaped lock on the candy bar to open the hidden-object scene.
Candy Bar Hidden Objects
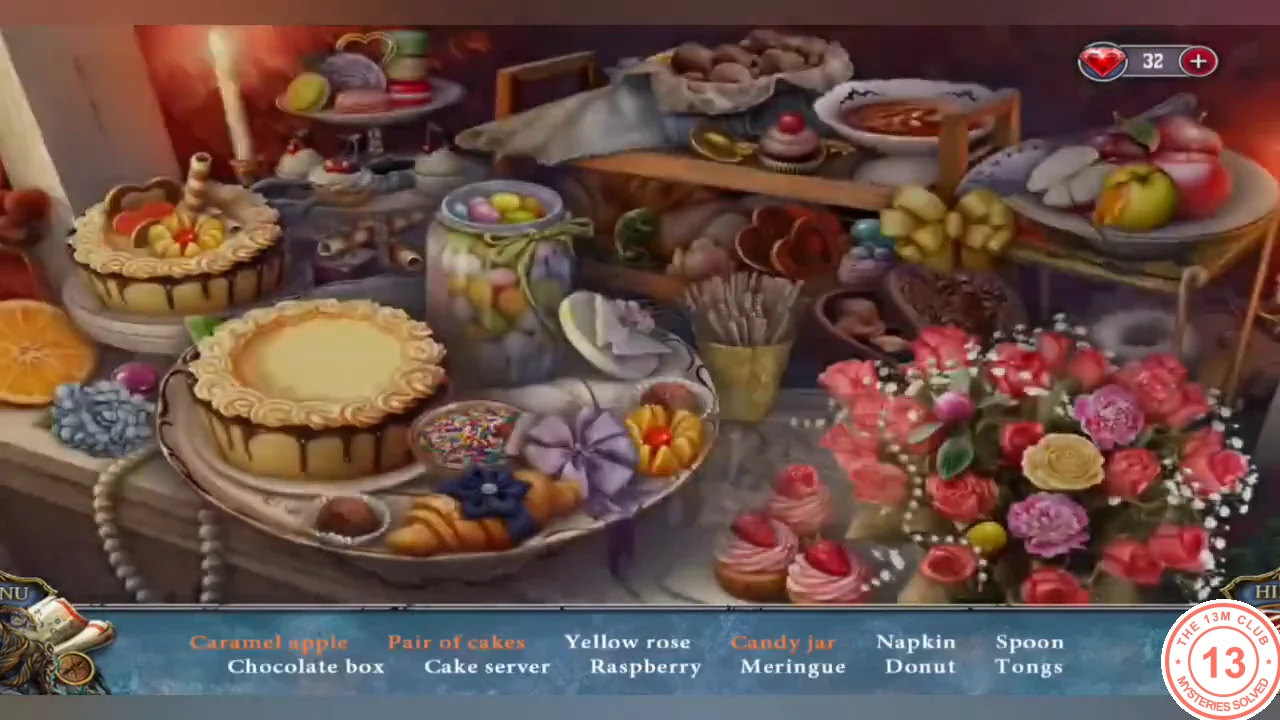
Find the listed items. Items in a different color need an extra action.
- Find the caramel apple, chocolate box, yellow rose, raspberry, napkin, spoon, meringue, donut, tongs and cake server.
- For the pair of cakes, decorate the bare cake with the wafer and fruit topping so it matches the other cake.
- For the candy jar, put the missing candies back into the jar and then close its lid.
- Finishing the scene gives you the cake server.
Prepare the Magic Mirrors
Make the ivy powder and load it into the magic mirrors so you can project the wolf image on the chapel doors.
- Dig in the rose bed with the cake server to uncover an owl statuette.
- Open the ivy recipe in inventory. Add the red ivy and the clean bowl, then use the owl statuette to grind the ivy into ivy powder.
- Open the compact of mirrors in inventory and add the ivy powder to make the magic mirrors.
- Use the magic mirrors on the chapel doors to start the projection puzzle.
Wolf Projection Puzzle
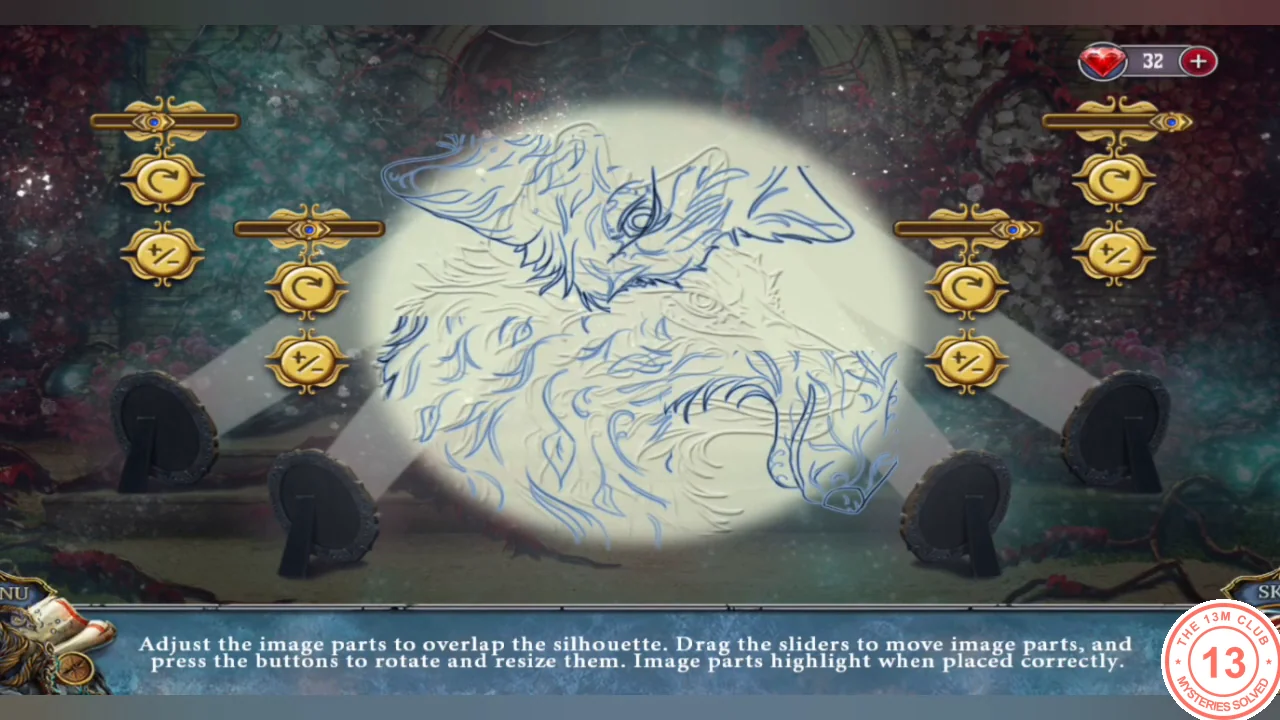
Adjust the four image parts so together they cover the wolf silhouette. Each part has a slider (move) and two buttons (rotate and resize); a part highlights when it is placed correctly.
- Work on one quarter at a time: drag its slider until the piece sits in its corner of the silhouette, then press rotate and resize until its outline matches. One order that works: lower-right, upper-right, lower-left, then upper-left.
- When all four parts are correct, the ivy burns away and the chapel doors open.
Chapel: Help Paul
The wedding turns into a nightmare inside the chapel. Gather what you need to reach the green gem in the floor.
- Watch the scene: the wolf takes Ruby and Paul is turned into a boar. Examine the overturned chairs to the right of the center aisle (a purple feather fan lies on one): the green gem in the floor there needs something to grip it. Take the feather fan and rip off a piece of upholstery.
- Fix the fan in inventory with the blue hair ribbon.
- At the books and flowers, sweep the glass fragments away with the fan, read Paul's card and open "The Tale of Little Red Riding Hood" to take compass decoration 1/2.
- At the boar under the beam, take Ruby's other amulet half and combine it with yours. Thalia, the spirit of the amulet, introduces herself.
- Examine the boar again (you must remove the curse before freeing him) and take the wedding decoration and the keys.
- Throw the wedding decoration at the bag hanging under the balcony; it falls onto a chair.
Bag Lock Leaf Tiles
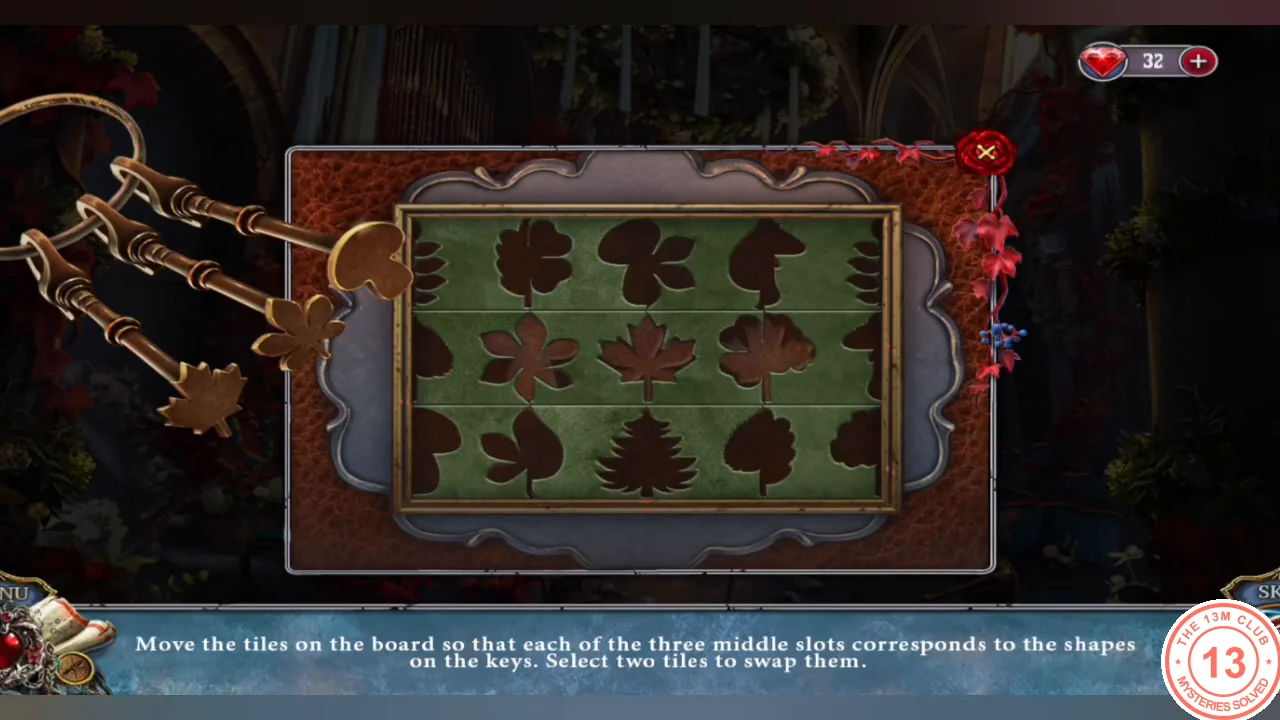
Swap tiles so the three middle slots show the shapes on the keys. Select two tiles to swap them.
- Place the keys in the lock first.
- Swap tiles until the middle row reads, left to right: the mushroom-shaped leaf, the five-lobed horse-chestnut leaf and the maple leaf, matching the key heads from top to bottom. The keys then turn.
Repair Paul's Compass
Look through Paul's bag and fix his broken compass to learn how to break his curse.
- From the bag take the broken compass (a gift from Marion) and the tweezers, and read Granny's letter to Ruby. Objective: break Paul's curse.
- Open the gift box on the chair: protect your hand with the upholstery to take a mirror shard from the cracked hand mirror.
- Return to the fallen chair and use the tweezers on the green gem to get compass decoration 2/2.
- Add both compass decorations to the broken compass in inventory.
- Use the amulet on the compass to make the magic compass.
- Cut the ropes around the boar with the mirror shard, then give him the magic compass.
Boar Token Puzzle
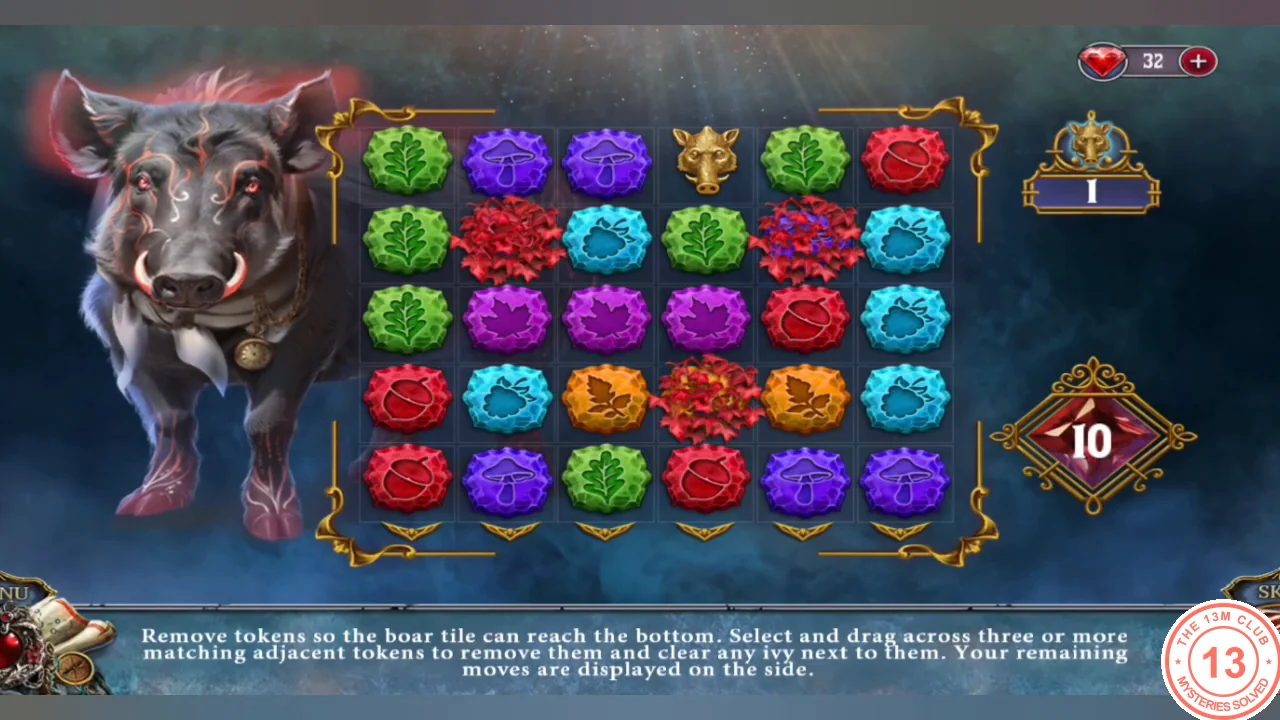
Remove tokens so the boar tile reaches the bottom row. Drag across three or more matching adjacent tokens to remove them; this also clears adjacent ivy. You have 10 moves.
- Clear matches directly below the boar tile first so it drops, and use matches next to ivy to clear it. The board layout may differ in your game.
Raise the Pillar
Help Paul and Roland move the fallen pillar, then set off toward Ruby's grandmother.
- Paul suggests using cloth to move the fallen pillar. At the chair by the left wall (the ivy is now gone), take the blue drapery and the gold cord.
- Use the drapery on the fallen pillar; Paul and Roland move it. Paul goes for help.
- Return to the courtyard and take the carriage toward Ruby's grandmother.