CENTAUR VILLAGE
Following the Hoof Prints
The Search lantern reveals the centaur's tracks. Follow them to a closed village gate.
- In the Darkwoods camp, use the Search lantern on the broken cage. Glowing hoof prints appear.
- Follow the prints into the swamp and take the new path on the right to the gate of the centaur village.
- Zoom into the round shield on the ground right of the gate. The middle does not fit snugly, so try the Knife on it. The Knife breaks.
- Zoom into the note pinned to the post left of the gate ("Get off our land!") and take the Dagger.
- Use the Dagger on the middle of the shield to lift the cover and take the paper clue from underneath.
- Zoom into the small gap under the fence on the right and chop the roots away with the Battle ax. Kiana crawls under the fence to open the gate from the inside.
PUZZLE
Centaur Gate Puzzle
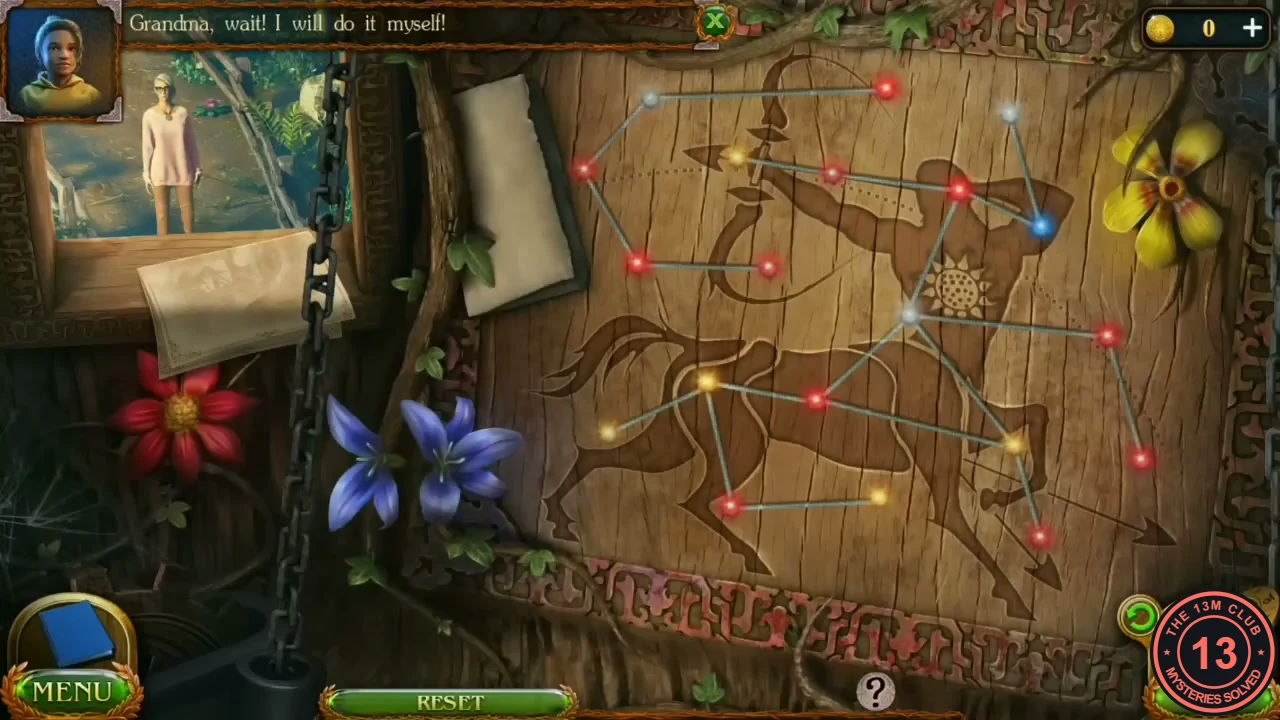
The gate shows a centaur archer drawn with points of light. Clicking a point changes its colour.
- Optional: during the puzzle, take the Manuscript at the window on the left (Manuscript 8 of 10, "Ziruk and the centaurs").
- Place the paper clue on the gate. It asks for 7 red, 4 blue and 5 yellow points; the rest stay white. Click points to change their colour. Some points have only two colours, others have more.
- Solution: Red (7): bow-arm shoulder, left end of the bowstring line, end of the right shoulder line, lower right, bottom-right hoof, left hip, belly. Blue (4): arrow tip, top right, right elbow, bottom-left front hoof. Yellow (5): the two top-left points, the left end of the tail, rear right knee, bottom middle. White (4): top end of the bow line, middle of the arrow, middle of the bow, sun centre.
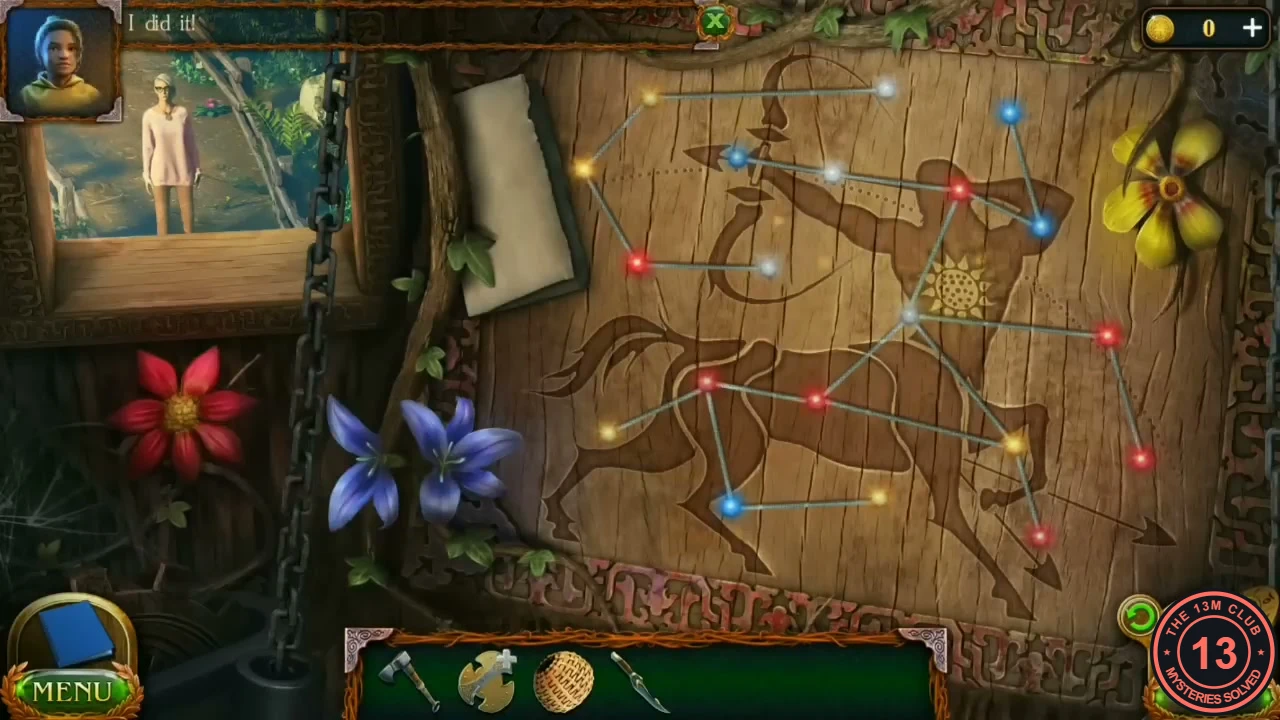
Solved: 7 red, 4 blue, 5 yellow and 4 white points. - Go through the gate. A young centaur girl confronts you ("You shouldn't be here!"). The task Talk to the chief is added.
CENTAUR VILLAGE
The Village and the Chief's House
Look around the courtyard and the blacksmith's hut, then go to the chief's house.
- In the courtyard, the bear carving on the stump at the right is missing a claw, and the statue in the centre has a brazier stand.
- Enter the blacksmith's hut on the left. Take the Fang from the table on the left. The lizard panel on the square pillar has no head, and the coal box on the right is locked.
- In the courtyard, zoom into the platform in the big tree on the right and then the pine branch. Click the hook in the branch: it drops, a cone bursts with a flash, and you can take the Hook.
- Go under the large fallen tree to the chief's house, which is on fire. The task Extinguish the fire is added. Take the Stick from beside the window, then use it to prop up the sagging straw roof on the right.
- Zoom into the stone wall at the far left and take the Rune. Then zoom into the tool bench under the straw roof and take the Pincers.
PUZZLE
Wolf Carving Ring Puzzle
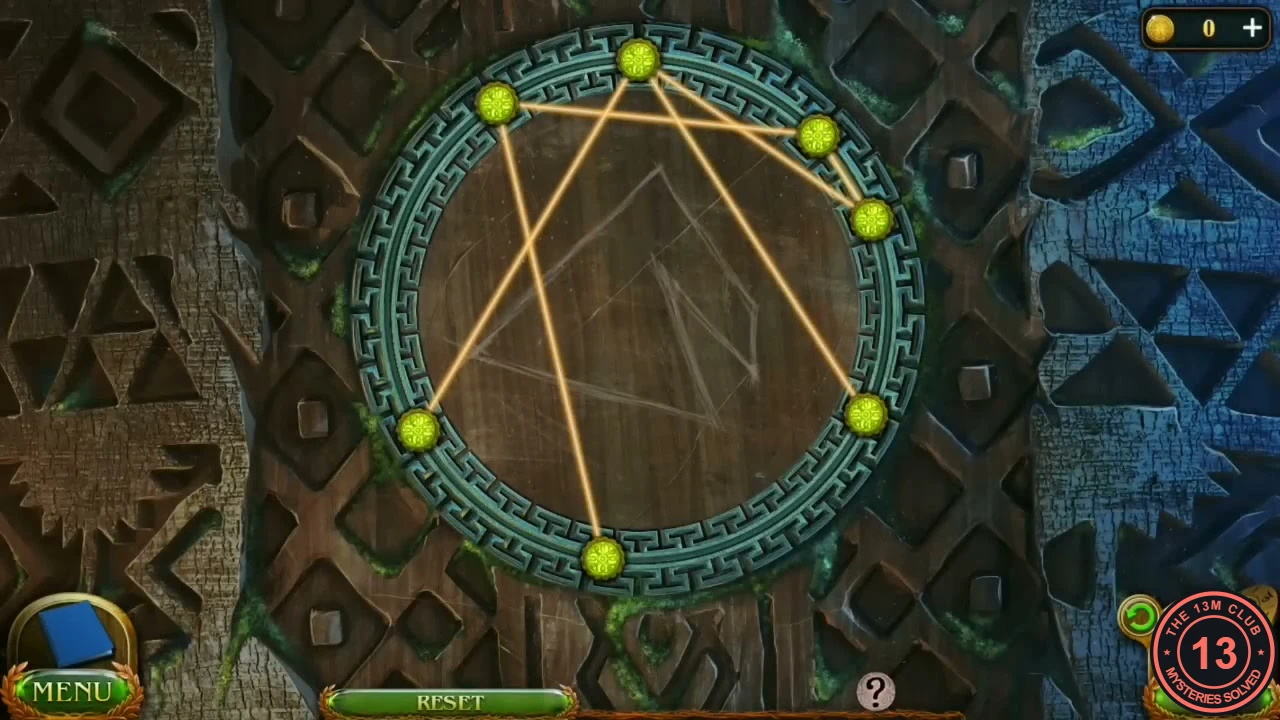
A wolf carving on the tree right of the chief's door hides a ring puzzle.
- Zoom into the wolf head on the tree right of the house door and fit the Fang. The carving lifts and shows a ring of green nodes linked by glowing lines over a faint drawing.
- Drag the nodes around the ring until the glowing lines lie over all of the faint lines drawn on the wood below.
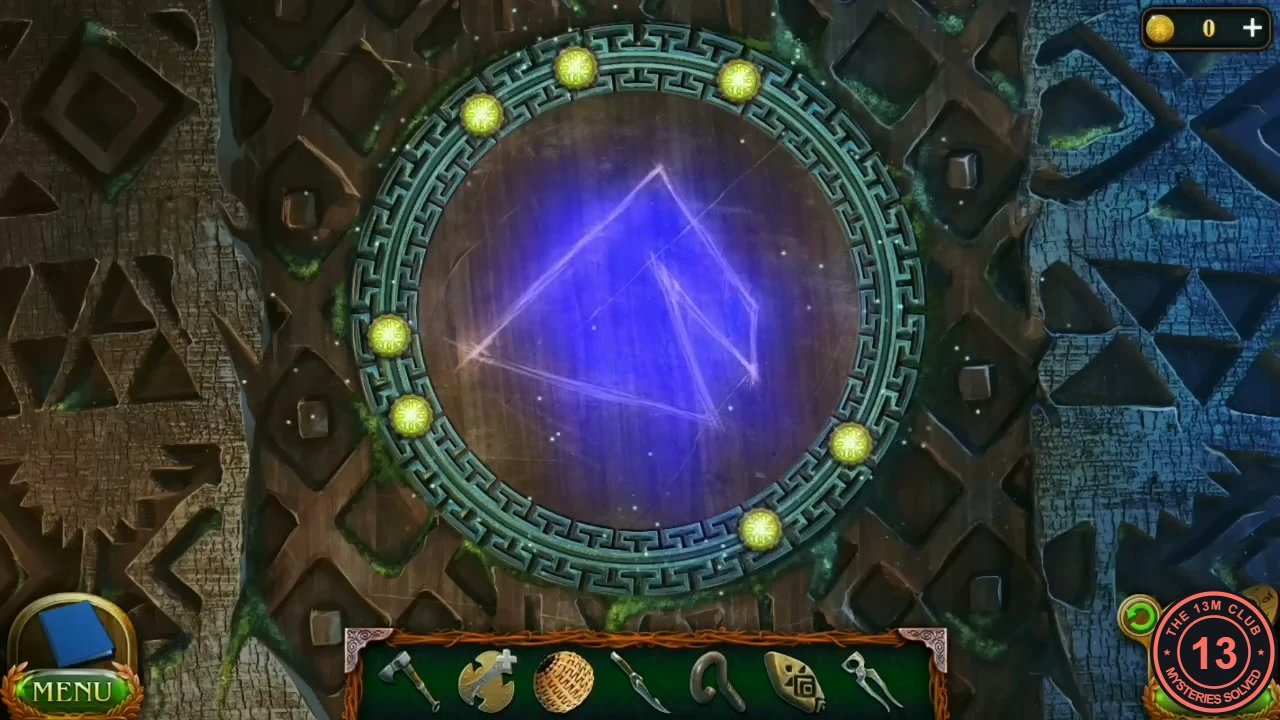
Solved: the lines match the drawing and glow blue. - Take the Amulet part. Note the RED HEADDRESS drawing behind it; you will need it later.
CENTAUR VILLAGE
Putting Out the Fire
Build a water pipe from the courtyard tap to the burning house.
- In the village courtyard, zoom into the alcove with a tap on the left. The old tube under the tap is broken; click it to pull the broken pieces off. Only the tap at the top and the empty fitting at the bottom remain.
- Back at the village gate, zoom into the tall bamboo next to the banner on the left and cut a section with the Battle ax. Take the Bamboo trunk.
- Travel to the Academy of Magicians greenhouse. Zoom into the water pump on the right, cut the hose free with the Pincers and take the Hose.
- Travel back to the village courtyard and zoom into the tap alcove again. Fit the Bamboo trunk between the tap and the fitting below it, then attach the Hose to the bottom of the bamboo. Back out of the close-up: the hose now lies coiled on the ground at the lower left of the courtyard. Click it so it stretches across toward the burning house. Then zoom into the tap again and turn its handle at the top.
CENTAUR VILLAGE
Reviving Chief Ziruk
The chief is unconscious from the smoke.
- Enter the chief's house. Ziruk lies unconscious on the straw on the left. A centaur says an ammonia flower from the swamp could help.
- Travel to the Darkwoods swamp and take the Ammonia flower (the blue flower in the centre).
- Return to Ziruk and hold the Ammonia flower to him. He wakes and explains that a ritual arrow can summon his lost tribe. The recipe book is in the chest, and the key is in the attic. The task Make a Ritual Arrow is added.
- Zoom into the wooden planks on the floor in the centre. Fit the Hook and tie the rope to it, then turn the winch on the left to raise the planks into a ramp to the attic.
PUZZLE
Attic: Find 15 Horseshoes
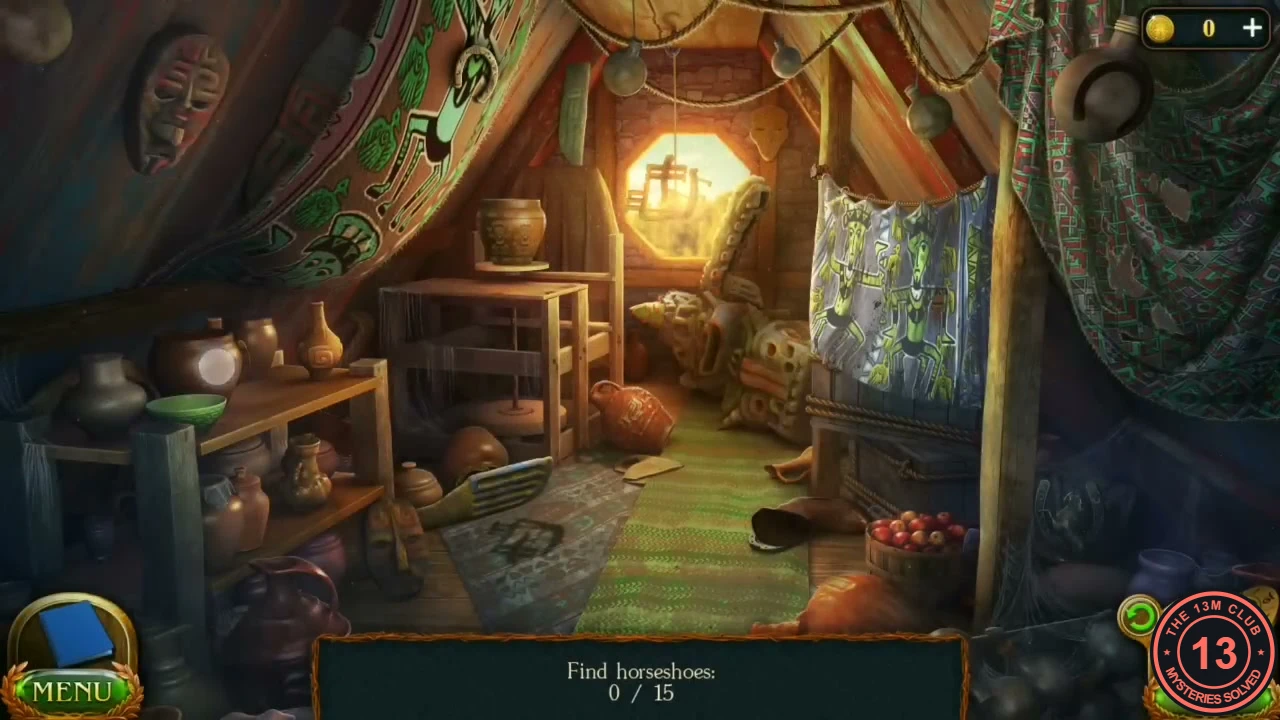
A hidden-object search for 15 horseshoes. Six are in the main attic view; the other nine are in four close-ups: the hanging cloth and basket on the right (two at the basket, one on the wooden pole), the pot shelf on the left, the vase on the potter's wheel and the carved head under the window.
- Main attic view, six horseshoes: (1) the horseshoe hanging on the round gourd in the top-right corner; (2) a grey horseshoe in the dark shadow just right of the wooden post behind the apple basket (lower right); (3) click the boot lying on its side on the rug left of the apple basket: it stands up and uncovers a horseshoe on the rug; (4) click the wooden piece dangling on a string in front of the bright eight-sided window to take the horseshoe hanging with it; (5) the dark horseshoe lying flat on the grey rug left of centre, beside the striped wooden beater near the low shelf; (6) click the striped wooden beater leaning on the round brown jug on the floor to move it, then take the horseshoe hanging on the jug behind it.
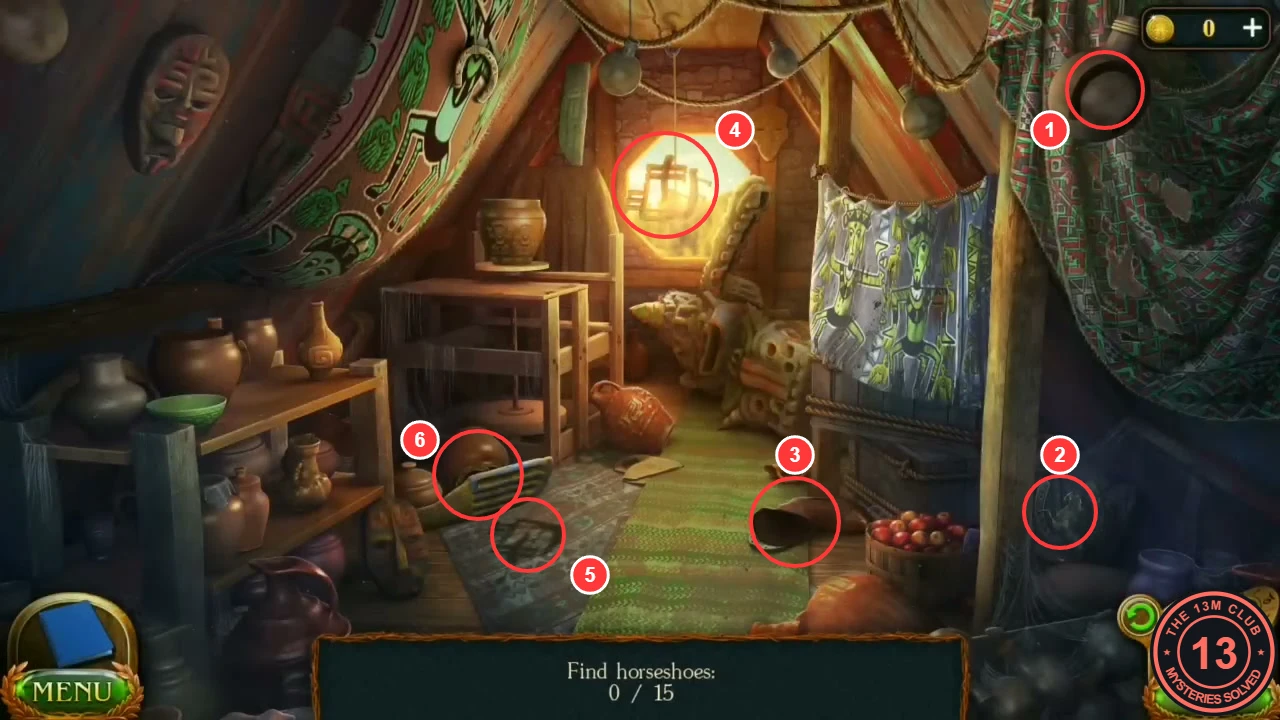
Main view: 1 gourd, 2 shadow right of the post behind the apples, 3 toppled boot, 4 piece hanging in the window, 5 grey rug, 6 move the beater to reach the jug. - Click the patterned cloth hanging on a rope at the right to open the cloth-and-basket close-up. If the cloth is spread across the whole view, click it to bunch it to the left. Click the right half of the basket lid: it lifts and shows a horseshoe lying on the right inside the basket. Click that horseshoe: the counter goes up by one, but a horseshoe still lies in the same place. Click it again until it disappears. If the counter has not gone up a second time, also click the U-shaped dent in the brown cushion at the lower left, left of the wooden pole. The counter should now be two higher than when you opened this close-up.
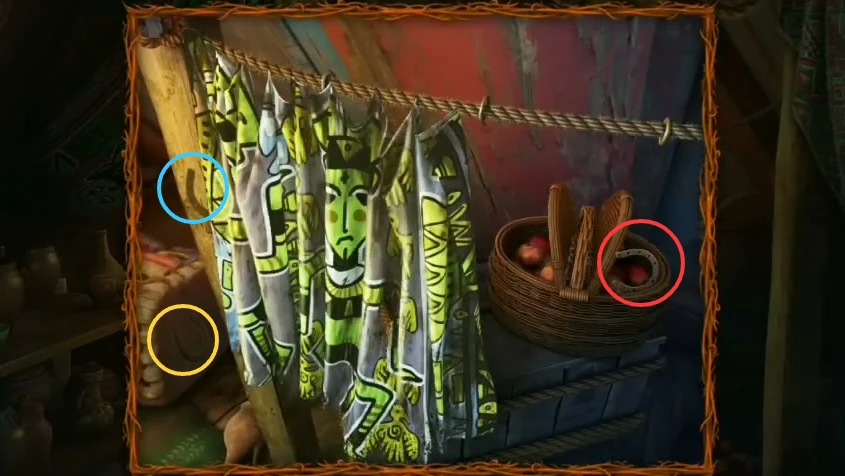
Red: the horseshoe inside the basket on the right (click it until it is gone). Yellow: the U-shaped dent in the cushion, to click if the counter has not risen twice. Blue: the dark horseshoe on the wooden pole, the last one in step 6. - Open the close-up of the pot shelf on the left. On the top shelf, a horseshoe is wrapped around the neck of the small carved bottle-vase right of the big brown jar. On the lower shelf, click the small mug between the brown jug and the patterned jug: it moves and reveals a golden horseshoe on a stand behind it.
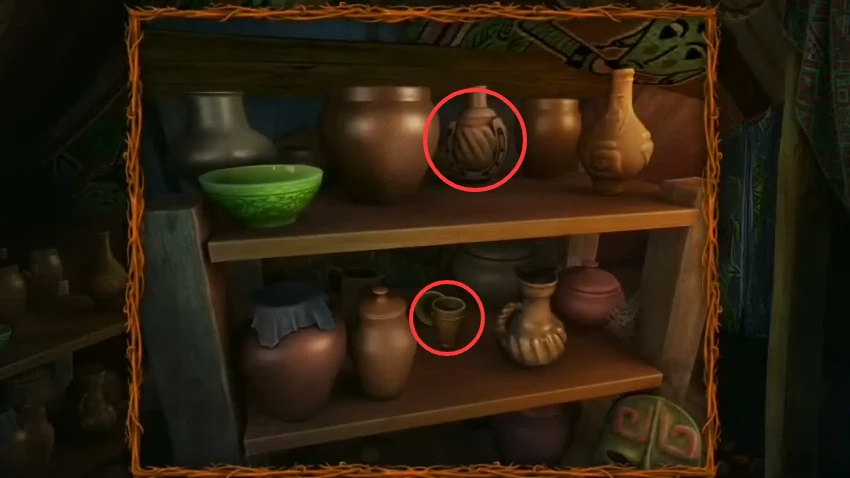
Top shelf: the horseshoe wrapped round the small carved bottle-vase. Lower shelf: move the small mug to reveal the golden horseshoe. - Open the close-up of the large painted vase on the potter's wheel. Turn the wheel to rotate the vase and look among the painted figures for three horseshoe shapes: one is drawn above and between the heads of the two figures; one forms the necklace (collar) of the right-hand figure; and after turning further, one is the small pale curved mark just right of the face and headdress of the left-hand figure.
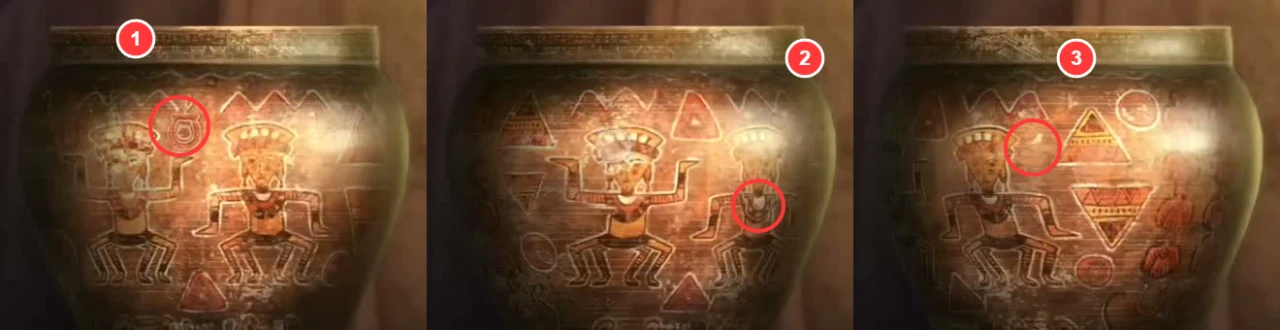
The vase as you turn it: 1 between the two heads, 2 the right figure's collar, 3 the small pale curve beside the left figure's face. - Open the close-up of the carved wooden head lying on the floor under the window, left of the stack of carved panels. Click its curled green-and-red snout: it lifts and shows a horseshoe in the opening. Take it.
- For the last horseshoe, reopen the cloth-and-basket close-up on the right (pull the cloth aside again if it covers the view). A dark horseshoe-shaped shadow sits on the upright wooden pole itself, in its upper middle part, just left of the bunched cloth. Click it: it fades away and the counter reaches 15 of 15.
- Back downstairs, zoom into the big chest on the right and use the Horseshoe on it. Take the Book of rituals and the Mold.
- Ziruk tells you about the forge and the rock lizards (catch them by surrounding them with bright light) and gives you the Key to the coal box.