The Gate of Pumpkinton
Wind from the weather vanes powers the gate. A note on the gate says the energy must be guided to the lock through the rotating grooves on the gate posts.
- Read the sign (Pumpkinton) and the note about wind energy on the gate.
- Zoom into the ladder lying on the ground on the left. Take the first Stained glass piece. Cut the roots off the ladder with the Knife and lean it against the pillar.
- Climb the ladder. Take the second Guide disc from the top of the pillar and mount the Vane there (a rooster weather vane).
- Spin the Storm whirligig on the ground in front of the gate. Its whirlwind turns the vanes and powers the pillars.
The Guide Discs on the Gate Pillars
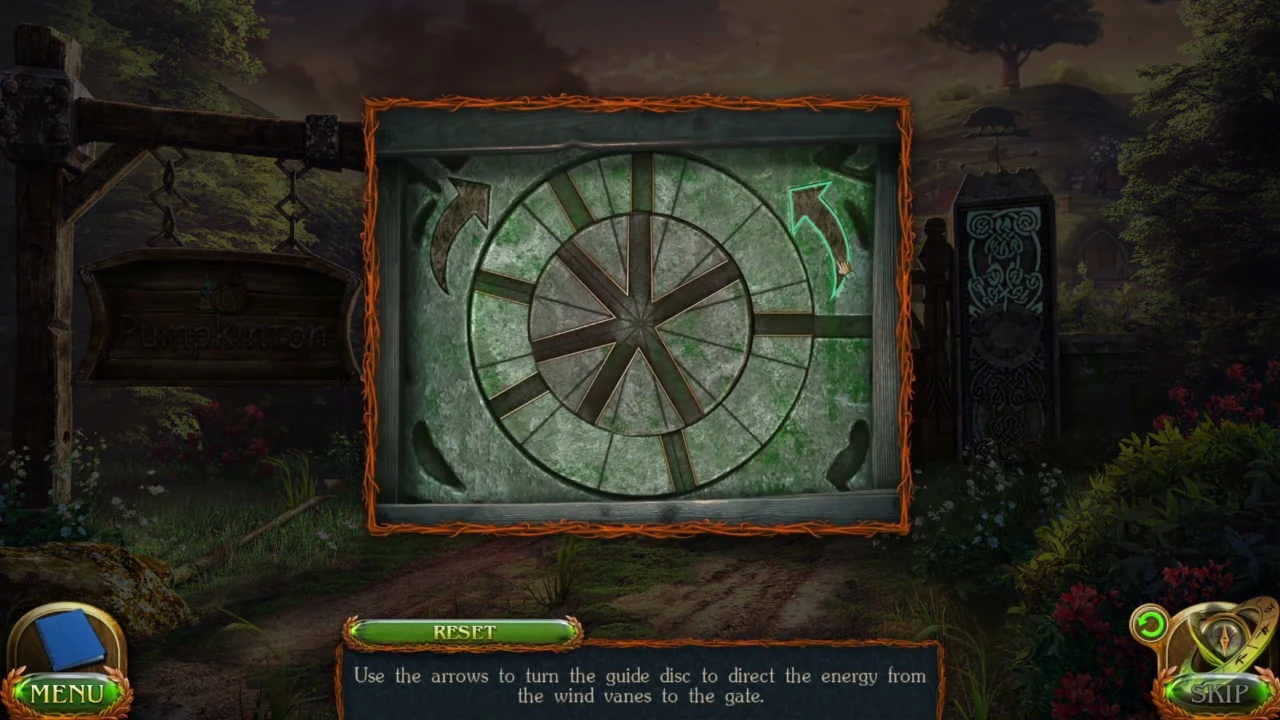
Each pillar takes a Guide disc. Two curved arrows at the top turn the disc's rings; the left arrow and the right arrow turn in opposite directions. Line up the grooves into one unbroken channel from the top to the gate side.
- Zoom into the left pillar and insert a Guide disc. Click the arrows in this order: Right, Left, Right, Right.
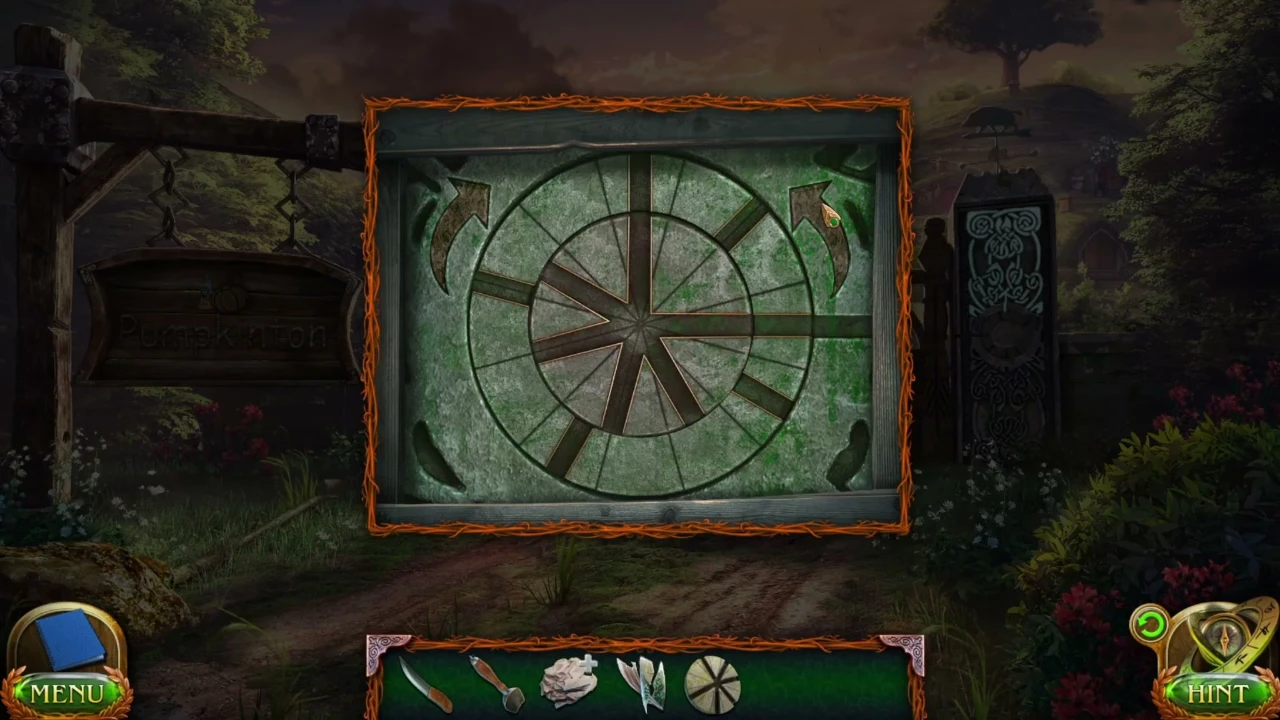
Left disc solved. - Zoom into the right pillar and insert the other Guide disc. Click: Right, Right, Right, Left.
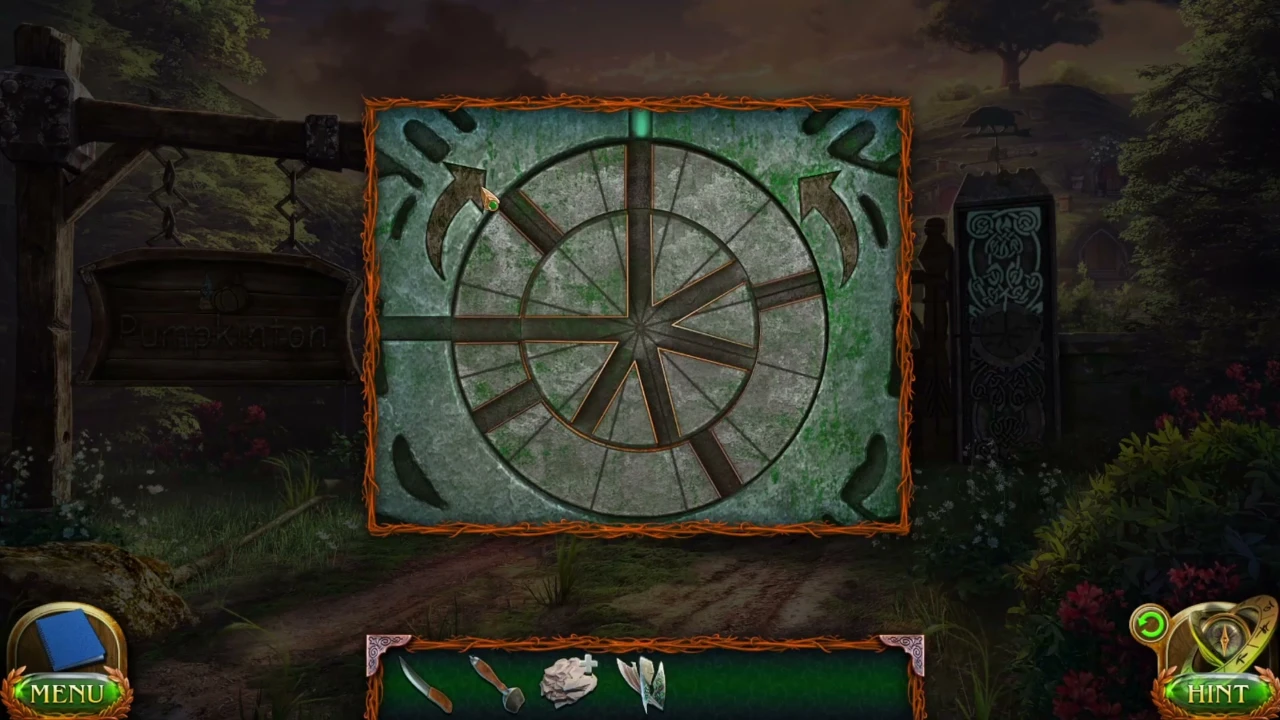
Right disc solved.
The Gate Lock: Close the Chain of Rays
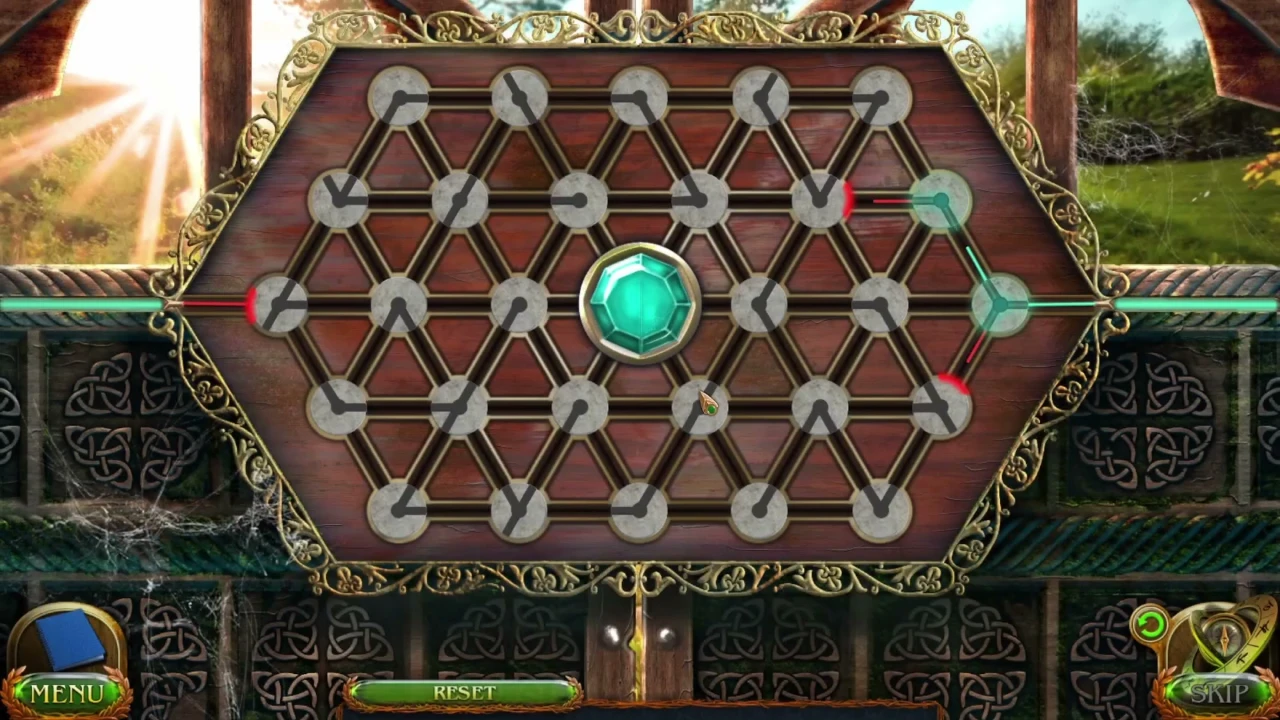
Click the stones on the gate to rotate them.
- Rotate the stones until the light rays form one closed, unbroken chain. Every stone must be part of it and the rays must lead to the centre. Work in from the corners and edges, where stones have fewer possible directions.
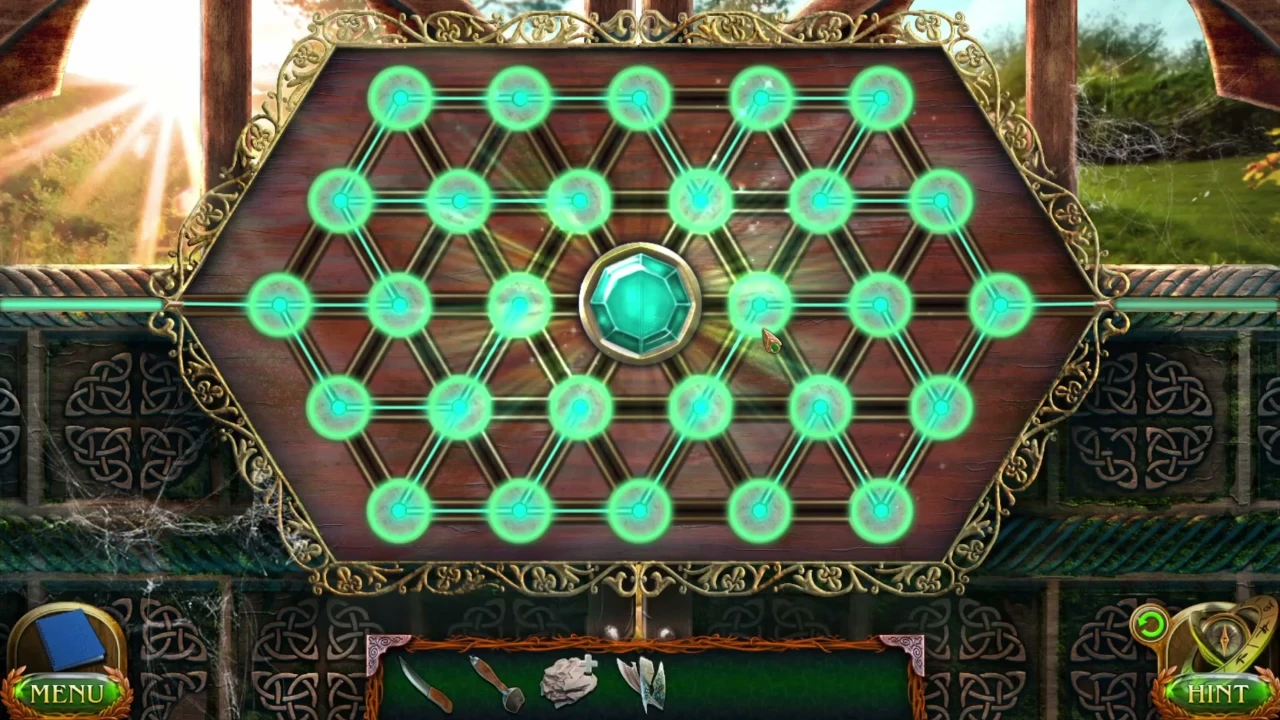
Solved: one closed chain of rays. - In the cutscene Kiana enters the village and has a vision of a floating island, a river and a water hand calling her. She meets Joko the halfling, who says he has paper and drawing charcoal at home. New task: Drawing on paper.
Ten Stained Glass Pieces
Joko's key is behind a round stained glass window that is missing ten pieces. You found the first one at the gate ladder; the other nine are in the village, and Joko gives you one.
- In the well square, zoom into the cart with the horses and take a Stained glass piece.
- Open the gate bolt to the right of the cart and go to Joko's house. Read the note on the door: the key is in the usual place, behind the stained glass window. The door is locked. Take the piece lying on the seat of the small wooden chair at the lower right, then the piece at the foot of the log pile left of the path.
- Zoom into the flower wheelbarrow on the left and part the flowers to find one piece. Then zoom into the round window right of the door; Joko gives you a piece he found.
- Zoom into the pumpkin pile and move the pumpkins. Take a Part of the pattern and another piece. Go back to the Pumpkinton gate and take the piece from the sign.
- In the well square, zoom into the well rim and take a piece. Take the last one from the ground by the small cart wheel at the lower left of the square.
The Round Stained Glass Window
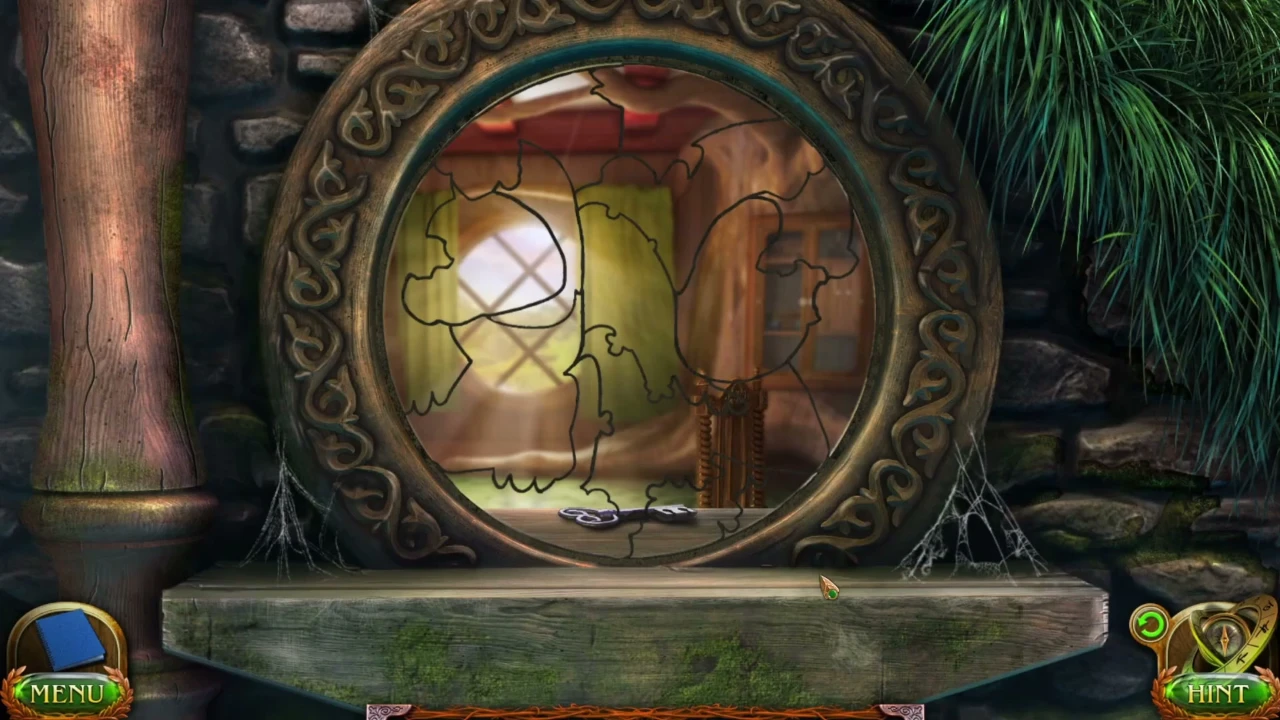
Put the ten pieces in the window and arrange them to restore the picture.
- Place the pieces in the window and move them into position. The finished picture shows two halflings holding grapes. Start with the pieces that have the frame's curved outer edge, then fill the middle.
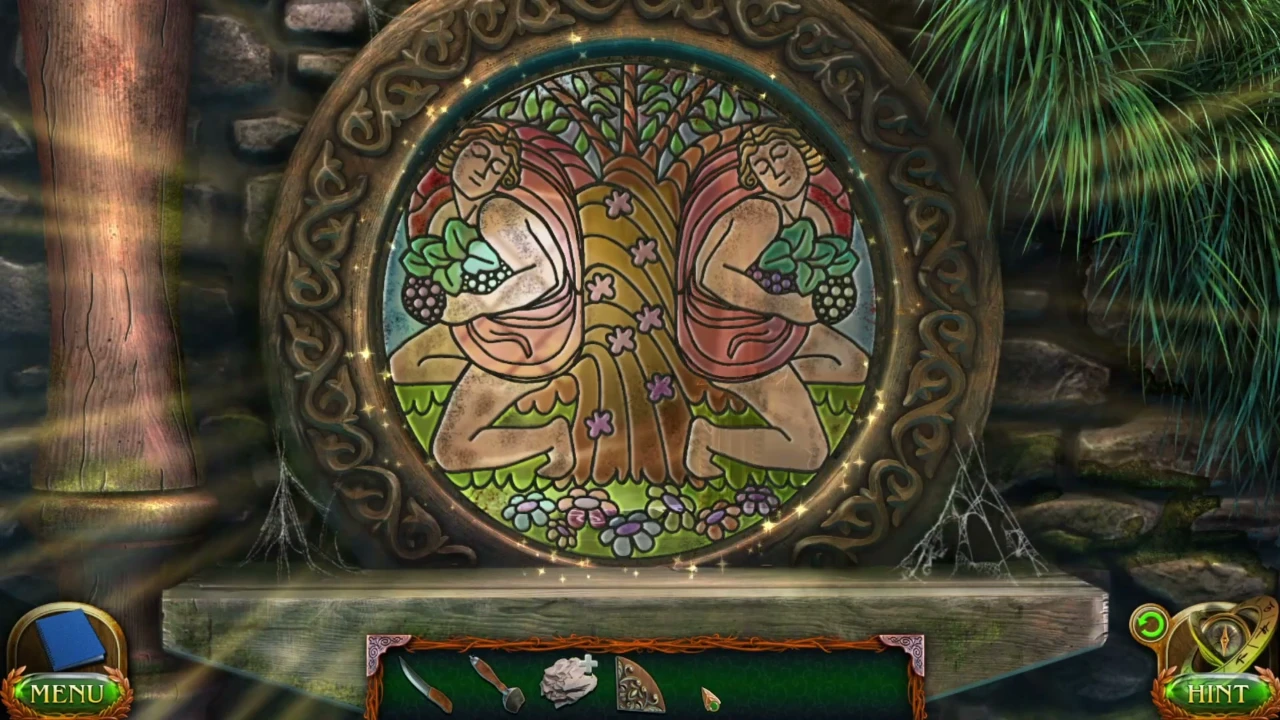
Finished: two halflings holding grapes. - Take the Key from behind the window and unlock the front door. Move the rug and look at the trapdoor: the cellar is locked, and something lies in a burrow that only the hamster can reach.
- Open the wall cabinet right of the window and its small doors, move the items and take the Sunflower. Back at the well square, open the sack on the cart and take the Grain.
The Well Lid: Symbol Rings
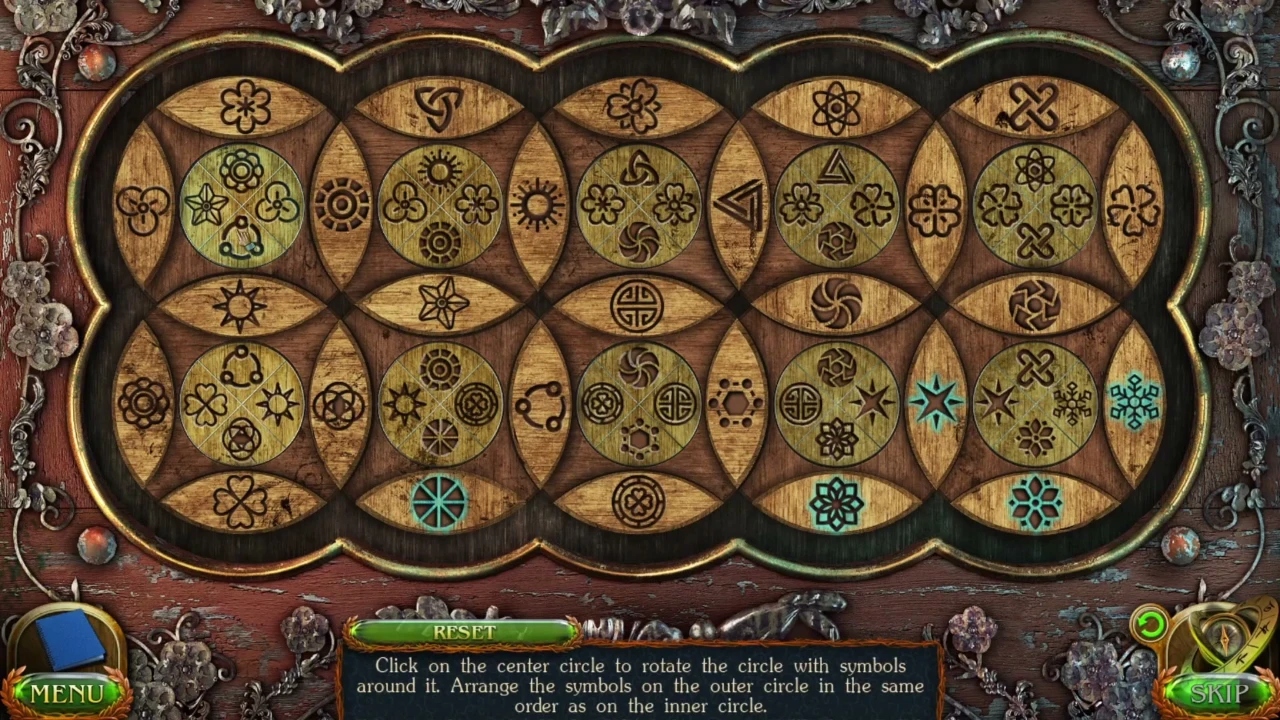
There are ten circles in two rows. Clicking the centre of a circle rotates the ring of symbols around it. Neighbouring circles share some outer symbols, so turning one circle changes its neighbours too.
- Place the Sunflower in the slot on the well lid. The panel opens and shows the puzzle.
- Arrange the outer symbols of each circle in the same order as the inner symbols of that circle. Correct symbols light up turquoise. Solve the circles one at a time and only turn a solved circle again if a neighbour needs one of its shared symbols. Your scrambled start may differ, so follow the matching rule rather than a fixed list of turns.
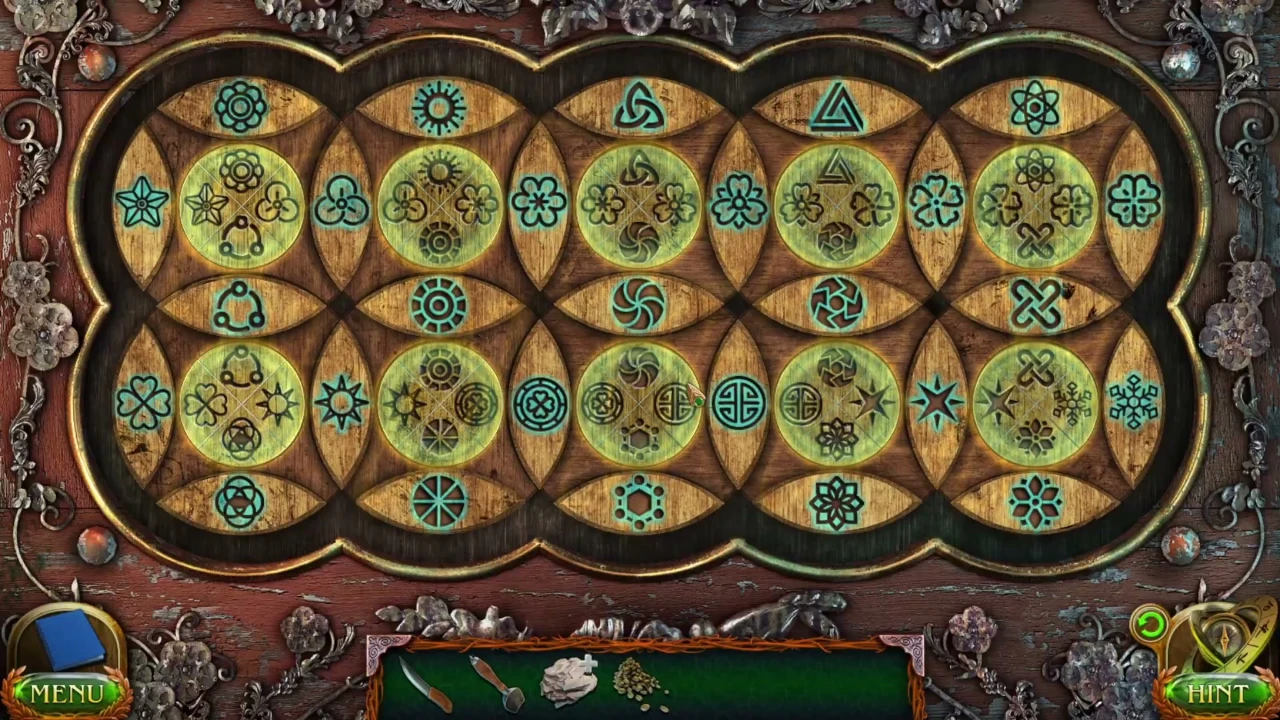
Solved: every symbol lit turquoise. - Take the Part of the pattern from inside the well rim. Note the chain: you can draw water here later.
The Hamster and Joko's Bureau
Lure the hamster out with grain.
- In the house, put the Grain by the mouse hole in the fireplace. The hamster comes out. Look at the trapdoor again and take the Part of the pattern from the other burrow.
- Put the three pattern parts in the round lock of the bureau on the right and open it. Take the Workpiece (a blank for drawing charcoal), the Drawing paper, the Paper ball and the Key that was behind the paper ball.
- Unlock the trapdoor with the Key and go down into the cellar.
The Cellar: Find 15 Items
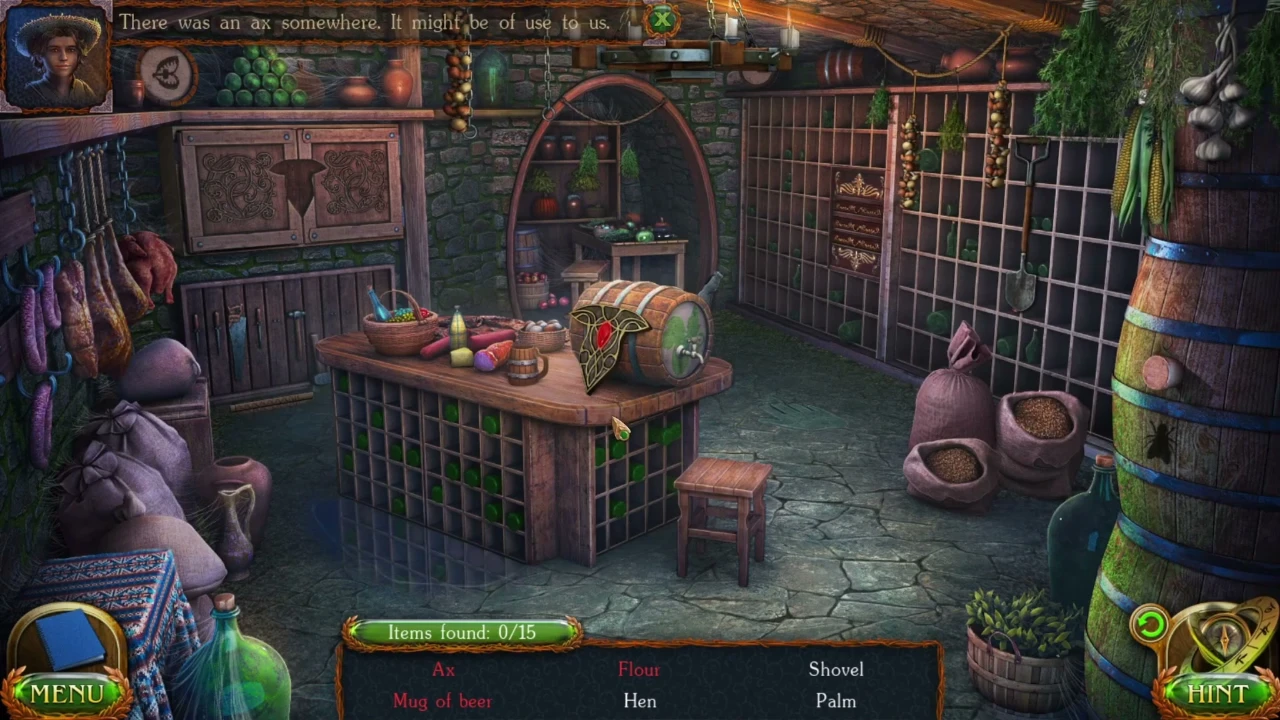
Items: Ax, Flour, Shovel, Mug of beer, Hen, Palm, Magnifying glass, Clover, Helmet, Boot, Corn, Shield, Fly, Tweezers and Trap. The Ax is the reward you need. Five items lie in the open; the rest are in close-ups or need an extra action. The round emblem on the end of the beer barrel is missing three red gems; each gem flies into it as soon as you pick it up.
- Take the items lying in the open. Shovel: the spade hanging on the wine-rack grid just left of the tall barrel pillar on the right. Corn: the bunch of yellow corn cobs hanging at the top of that barrel pillar. Fly: the black fly drawn on the same barrel pillar, lower down. Hen: the plucked chicken hanging among the sausages on the left wall. Trap: the round trap on the high shelf at top left, beside the pile of green fruit.
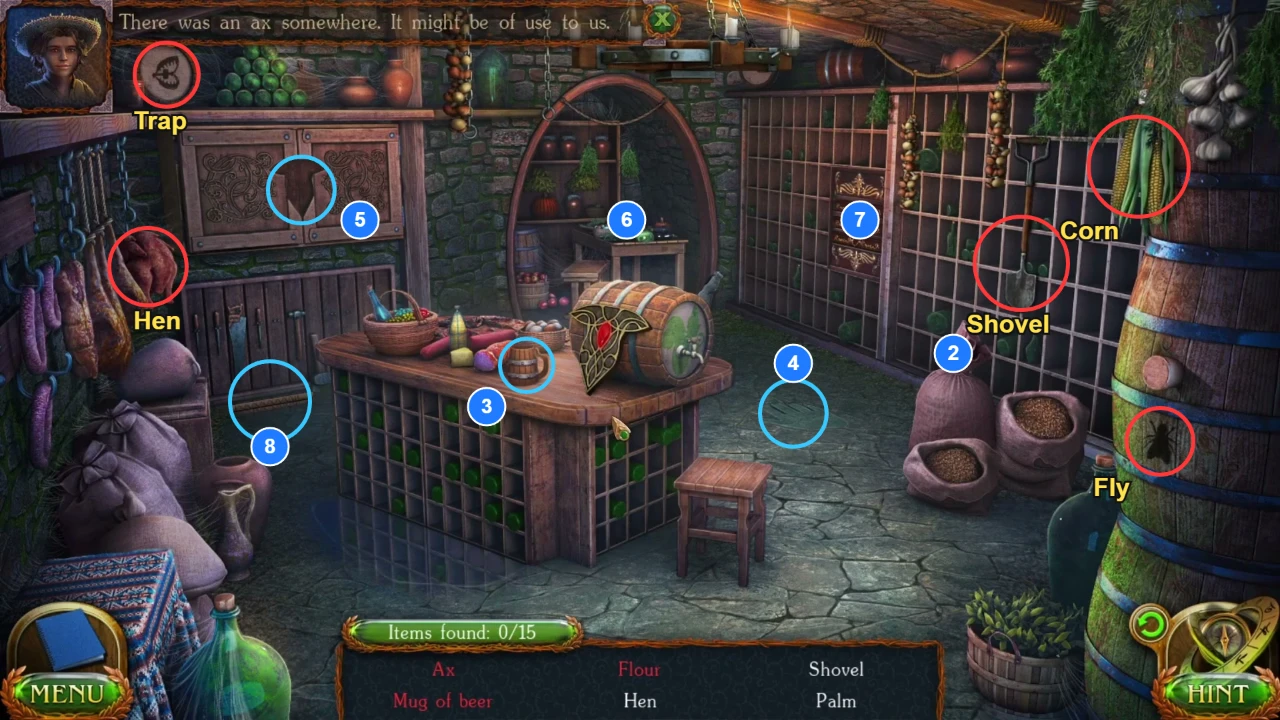
Red: the five open items from step 1. Blue numbers match the later steps: 2 tall tied sack, 3 empty mug, 4 hand print, 5 cupboard recess, 6 vegetable alcove, 7 small chest of drawers, 8 wooden handle. - Click the tall tied sack behind the grain sacks, right of the counter, to open it. Take the Flour. A red gem lies on the flour; take it too.
- Take the empty wooden mug from the front edge of the counter, left of the barrel, and put it on the wooden stool in front of the counter. Click the barrel's tap to fill it, then take the Mug of beer. Take the red gem that was hidden under the mug on the counter.
- Take the Palm: the faint hand print on the floor between the stool and the sacks. A red gem now lies on that spot; take it.
- Take the completed emblem from the barrel and place it in the recess of the carved cupboard at top left. The cupboard opens: take the Magnifying glass on the left and the Shield on the lower shelf.
- Zoom into the vegetable table in the arched alcove behind the counter. Clover: the four-leaf clover just above the egg basket, between the red pepper and the carrots. Tweezers: the thin tweezers among the green onion stalks, just left of the big cabbage.
- Zoom into the small carved red-and-gold chest of drawers set into the wine rack on the back-right wall. Take the small golden Helmet from the middle drawer and the Boot from the bottom drawer.
- Last item: take the carved wooden handle lying on the floor at the foot of the tool cabinet, left of the counter. It fits onto the ax head stuck in the top of the barrel at its tap end. Take the Ax.
Drawing the Vision
You need firewood, a light and charcoal to draw for Joko.
- Outside the house, split a log on the chopping block with the Ax to get Firewood.
- Look at the traveller's map with the red X. Go back to the first forest clearing and dig with the Trowel on the path just left of the grey rock in front of the tree stump. Take the Magic lighter.
- In Joko's house, put the Firewood and the Paper ball in the fireplace and light them with the Magic lighter. Put the Workpiece in the fire to make Drawing coal.
- Zoom into the bureau and draw on the Drawing paper with the Drawing coal.
- In the cutscene Joko recognises the river shore. The quickest way is through the mountain troll's cave, where a hole leads to a funicular down to the river. Toto just wants someone to play with, and Joko has a board game in his forest dugout. A special potion, whose recipe is in the dugout, summons the river spirit. You get the dugout Key and the task Spirit of the river.