Into the Darkwoods
Look for the centaurs. Five sapphires are hidden around the Darkwoods; keep each one you find.
- At the lake, go through the active dolmen to the Darkwoods. The task is to find the centaurs.
- Zoom into the tree stump with purple fireflies at the lower left and take the Sapphire from inside.
- Click the bush in the middle of the rock pile to clear it and enter the cave. Kiana waits outside.
- Zoom into the treasure pile left of the big stone chest, move the treasure aside and take the Tobacco of spirits. The chest at the top has a puzzle on its lid that needs more pieces.
- Back outside, zoom into the small skeleton against the distant tree at the top right. Read the scroll by its left hand to take the Search lantern drawing.
- In the same view, zoom into the hole in the ground at the top left and take the Sapphire. Susan can see the cave below but it is too high to jump.
The Swamp
The path on the left of the Darkwoods entrance leads into a swamp with a sunken hut.
- Take the left path into the swamp. Take the Plank from the broken bridge rail on the left and the Rake from the ground.
- Zoom into the sunken hut and lay the Plank across to it.
- Zoom into the roof. The blue mushrooms are smoke mushrooms that burst when touched. Take the Sapphire lying among them. Open the roof hatch: the stock of rum bottles below is all broken.
The Abandoned Camp
The path at the top left of the Darkwoods entrance leads to a camp where a young centaur hangs in a cage.
- Go to the camp and look at the cage in the tree: a centaur girl is trapped inside.
- Zoom into the hammock between the two trees on the right, cut it down with the Knife and take the Hammock.
- Look around: the rock holding the cage rope (do not cut it yet – something must cushion the fall), the locked box at the lower left, and the large tent on the left. In the tent, read the Sleep bomb recipe on the table (16 pine cones, resin of any tree, a full bag of smoke-mushroom gas and magnetic fireflies) and take the Sapphire beside it.
Raking the Leaves
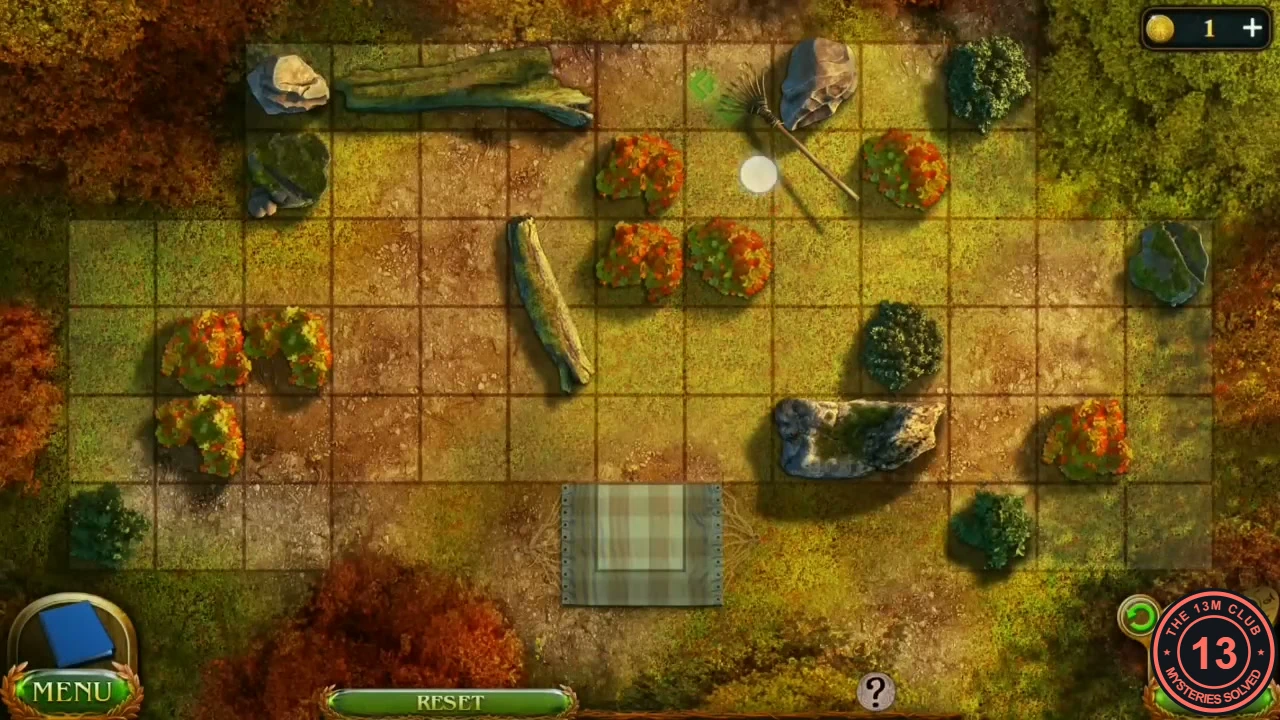
Rake every pile of leaves onto the hammock at the bottom centre of the clearing.
- Zoom into the clearing behind the camp, spread the Hammock on the ground and use the Rake on it to start.
- Click a free square next to a pile to place the rake there: every pile beside the rake is pushed one square away from it, if the square behind is free. Trees and rocks block the way, and a pile pushed into a corner or against an obstacle can get stuck, so press Reset if that happens. Work the piles one at a time towards the hammock square.
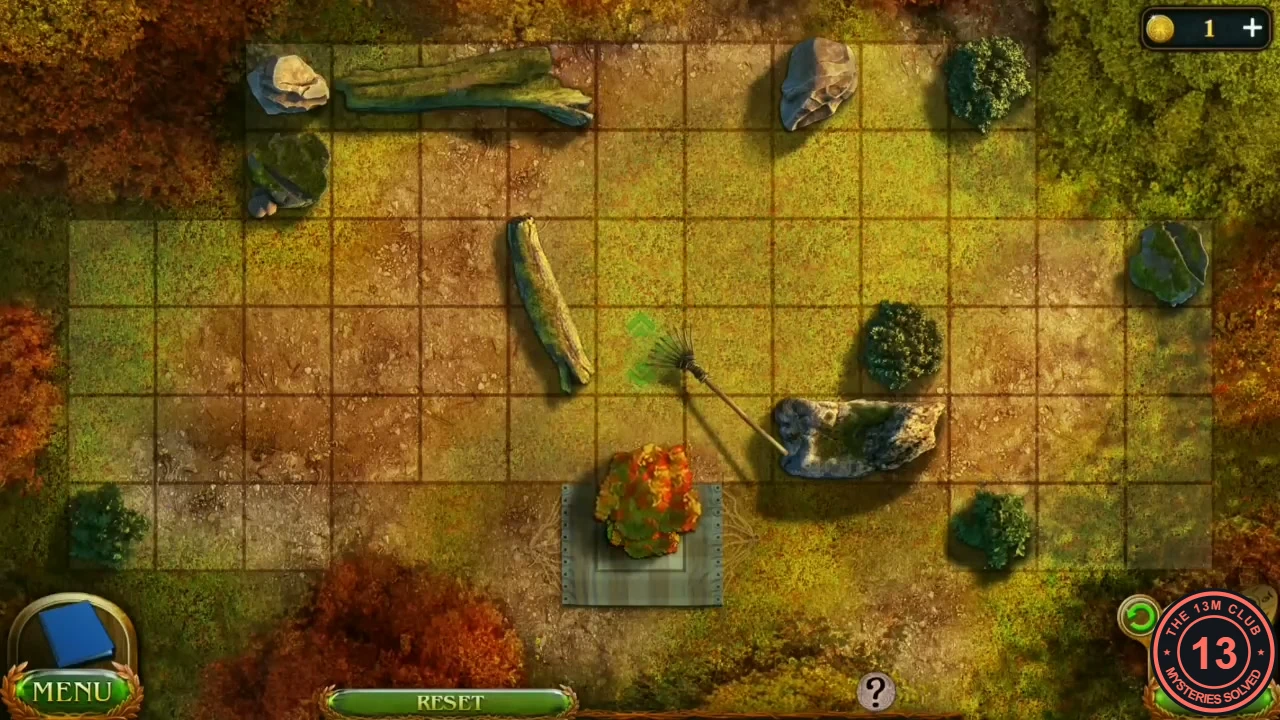
Finished: the leaves gathered on the hammock square. - Take the Pile of leaves and put it on the ground under the cage. Then zoom into the rock with the rope and cut the rope with the Knife. The cage falls; the centaur girl runs away. The task Find the Search Lantern is added.
- Zoom into the broken cage and take the Sapphire.
The Sapphire Lid
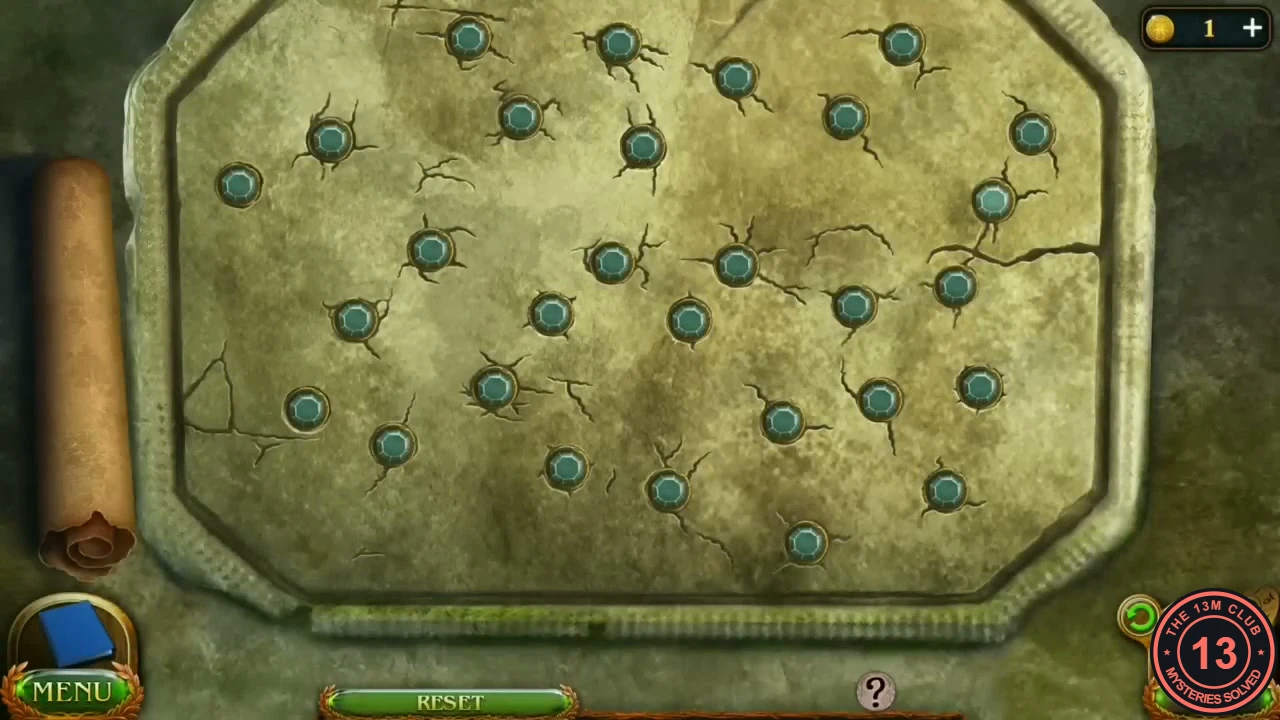
The stone lid of the sarcophagus in the cave is set with gems that light up when clicked. Copy the pattern of blue dots on the Search lantern drawing.
- Return to the cave. Zoom into the creature skeleton at the lower right and take the Hair of centaur.
- Zoom into the sarcophagus and place the five Sapphires and the Search lantern drawing.
- Open the drawing to see its blue dots, then click gems on the lid to light the same positions (13 gems are lit when it is right). Clicking a lit gem turns it off again.
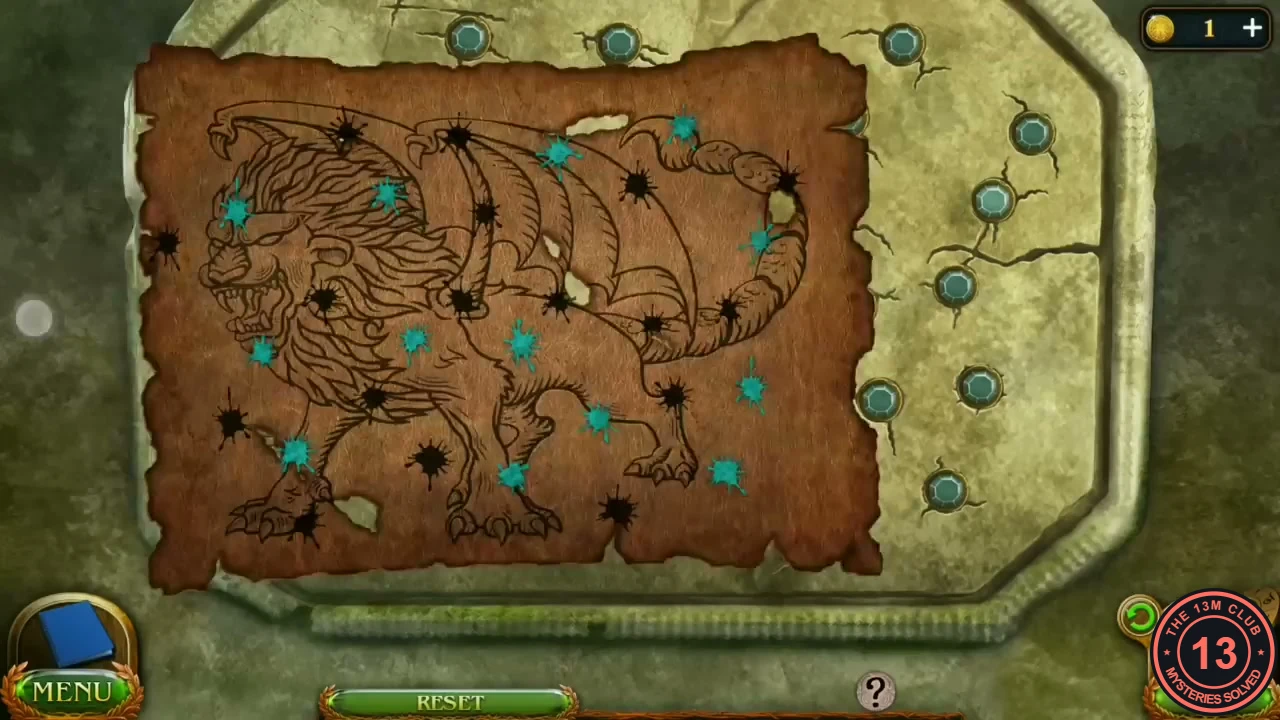
The drawing: the blue dots mark the gems to light. 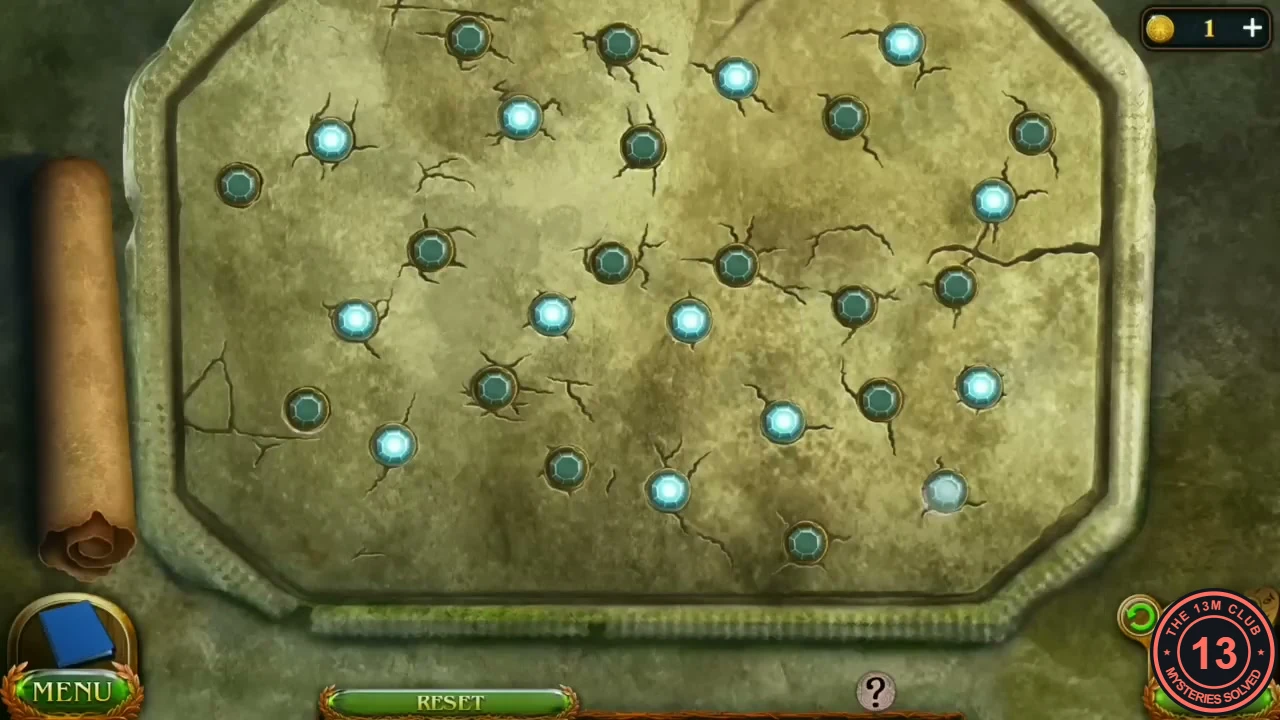
The 13 gems to light (the last one is lighting up). - Open the sarcophagus. Susan sees the lantern, but a manticore appears and chases her out of the cave. The task Put the manticore to sleep is added.
Sleep Bomb Ingredients
Collect 16 pine cones, resin, smoke-mushroom gas and fireflies. The cones are spread over the Darkwoods, camp and swamp.
- In the camp, zoom into the chopping block, put a log from the pile on it and split it with the Battle ax. Take the Firewood. Take the cone here too.
- In the white tent in the middle of the camp, take the upturned Cauldron and the cone, read the Manuscript on the floor (Manuscript 7 of 10) and take the Coil of rope that was under it.
- In the first Darkwoods scene, zoom into the skeleton hanging in the tree above the rocks. Take the Key from the shirt pocket and cut some Resin from the branch with the Knife.
- Collect all 16 Cones (the inventory counts them). You can find them at the locked box at the lower left of the camp (zoom in: the cone lies on the ground at the box's front left corner, and you can take it while the box is still locked), the chopping block, the rope rock, the hammock trees, the broken cage, the white tent and the clearing in the camp; the firefly stump, the distant skeleton and the hole at the Darkwoods entrance; and the blue flower, the swamp lake view and the sunken hut in the swamp. Several of these spots hold two cones.
- Back in the camp, open the locked box at the lower left with the Key. Take the Waterskin and the Hand net.
- Catch fireflies at the stump at the Darkwoods entrance with the Hand net.
- On the sunken hut roof, hold the Waterskin over the smoke mushrooms to fill it. Take the Bag with mushroom gas.
The Floating Bottle
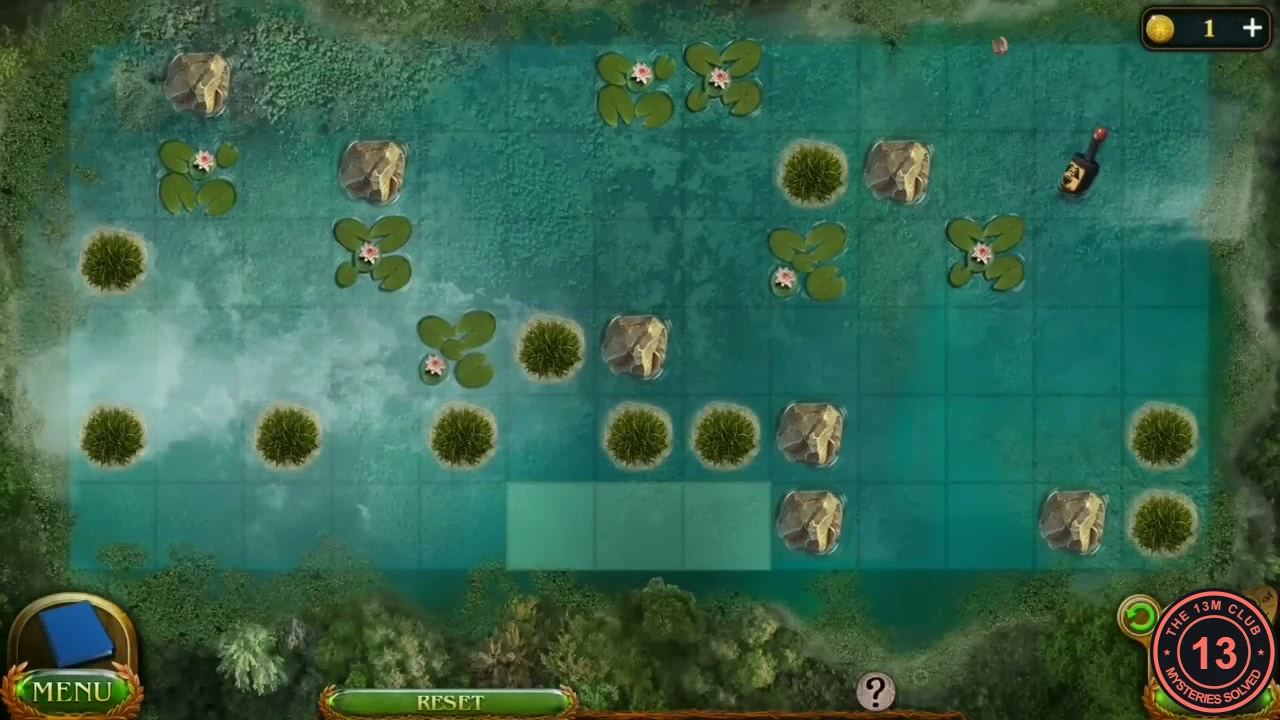
A bottle of rum floats in the swamp lake among lily pads and stones. Throw stones into the water to push it ashore.
- In the swamp, zoom into the lake and click the floating bottle to start.
- Click an empty water square to drop a stone there. The ripple pushes the bottle and lily pads next to it up to two squares away; stones, rocks and reeds do not move. Guide the bottle step by step into the highlighted squares at the bottom centre. Press Reset if it gets stuck in a corner.
Brewing the Sleeping Potion
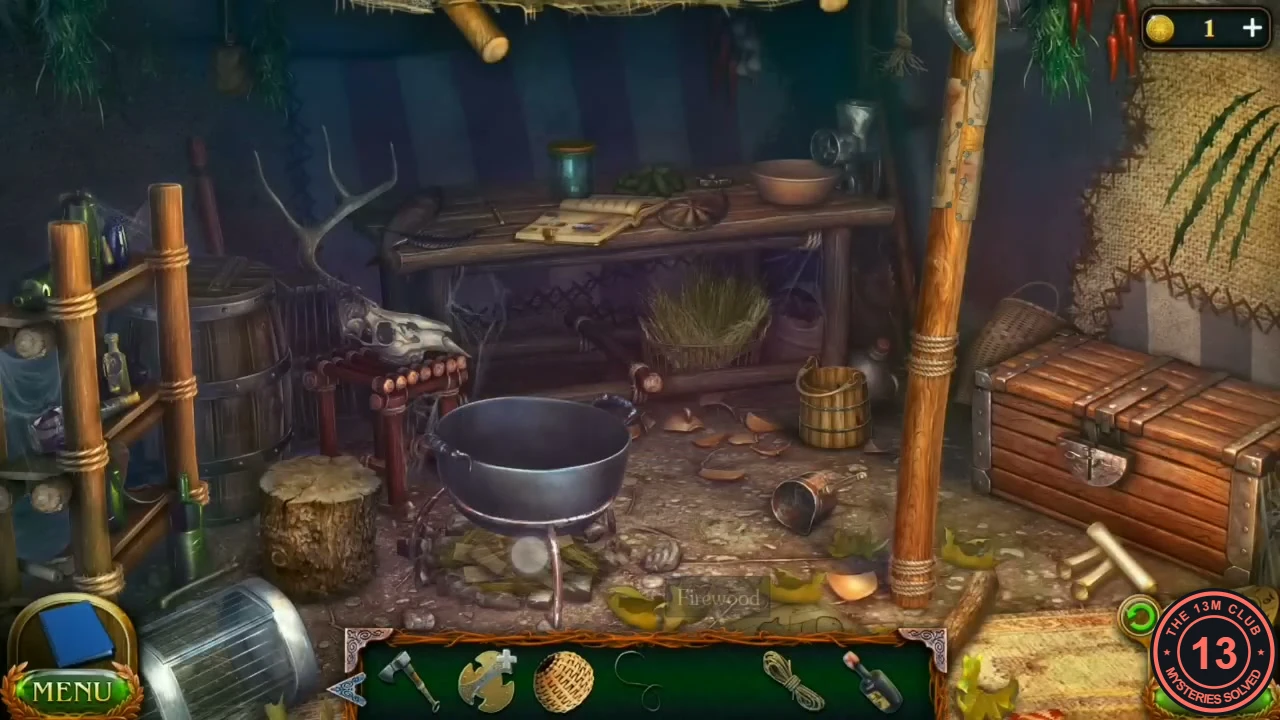
The large camp tent becomes a scene with silhouettes along the bottom. Lay out the ingredients on the table, then assemble the grinder and the fire.
- In the large tent, zoom into the table and place the Cones, Resin, Fireflies and Bag with mushroom gas. Place the Firewood under the pot stand and the Cauldron on top.
- Take the Fork from the table and use it on the pole on the right to pull out the Pins holding the pictures.
- Zoom into the shelves by the barrel on the left and take the Part of the lock.
- Zoom into the big chest on the right and fit the Part of the lock to open it. Take the wheel blade from the lid and the Matches, then fix the Bellows with the Pins and take them.
- At the table, assemble the grinder (wheel blade, disk with holes, large nut) and feed it the cones, the resin, the fireflies and the gas. Take the bowl of ingredients and the empty jar.
- Take the Bucket from under the table, fill it at the barrel on the left and pour it into the cauldron. Light the fire with the Matches and fan it with the Bellows, then add the bowl of ingredients. Place the empty Jar on the tree stump just left of the cauldron. Then use the metal scoop by the fire to ladle the potion into the jar (Susan will not dip the jar itself), and take the Sleeping potion.
The Search Lantern
Turn the potion into a bomb and drop it on the manticore.
- At the Darkwoods entrance, zoom into the skeleton against the distant tree and take its Belt.
- Open the Sleeping potion in the inventory, add the Rum and then the Belt to make the Sleep bomb.
- Zoom into the hole at the top left and throw the Sleep bomb down. When the manticore is asleep, tie the Coil of rope to the hole and climb down.
- Zoom into the open sarcophagus and give the Hair of centaur to the lantern. It glows; take the Search lantern.