The Pyramid Plaza
Ziruk's ritual brings you to Karemos. The temple at the top of the pyramid can't be reached yet.
- Zoom into the fresco at the base of the pyramid. Several sections are missing. Take the Key from its lower right.
- Zoom into the large door of the building right of the pyramid, unlock it with the Key and go inside.
Workshop: Find 16 Items
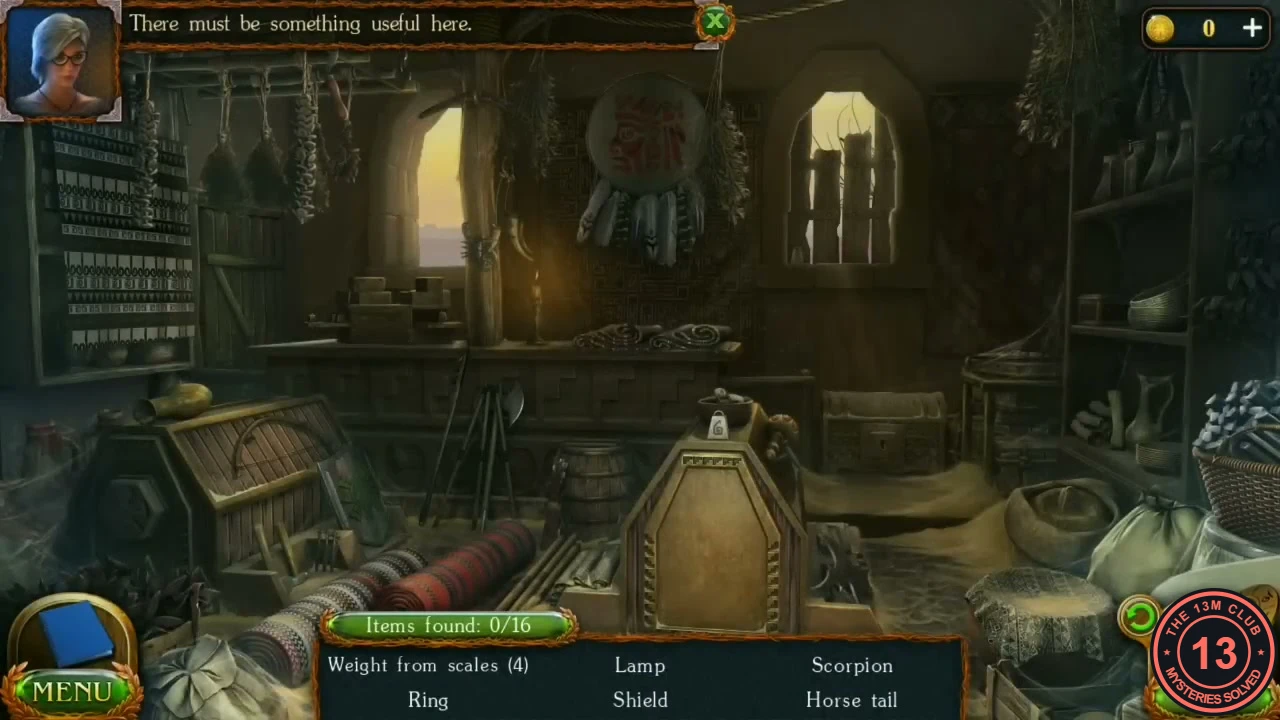
Items: Weight from scales (4), Harpoon, Bow, Shield, Tambourine, Sickle, Scorpion, Boomerang, Lamp, Flask, Ring, Comb and Horse tail. Nine lie in the open (two of them weights). The Lamp and Flask are behind a curtain, one weight is inside the barrel, the last weight is behind the right window's shutter, the Horse tail is in the chest below that window, and the Ring and Comb need the two small puzzles in the next sections.
- Take the items lying in the open. Weight from scales: on top of the tall box in the centre foreground. Shield: leaning against the front of the large chest at lower left. Bow: lying on the slanted lid of that chest. Harpoon: the long single pole leaning to the left of the tripod and axe, between the chest and the barrel. Scorpion: clinging to the wooden post beside the left window. Boomerang: on top of that same post. Sickle: hanging from the rack at top left. Tambourine: the round painted drum with feathers on the wall at top centre. Weight from scales: half-buried in the grain of the open sack at lower right, left of the green tied bag.
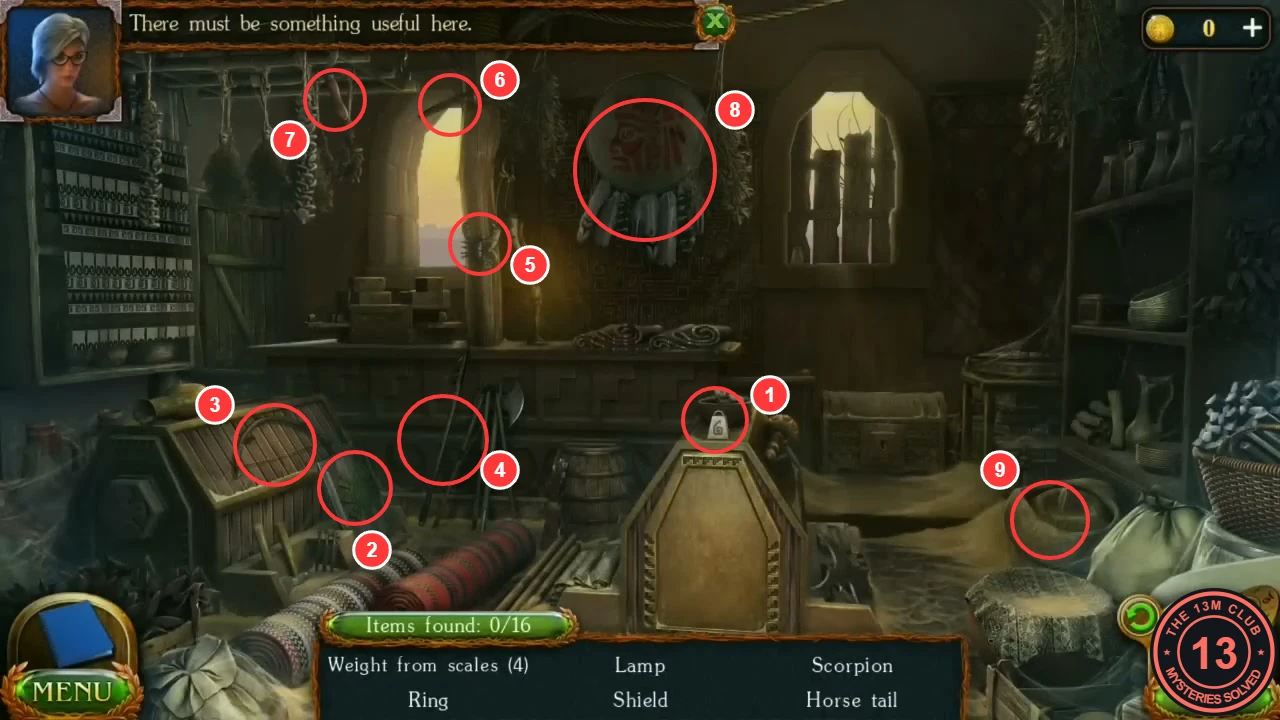
1 Weight (central box), 2 Shield, 3 Bow, 4 Harpoon, 5 Scorpion, 6 Boomerang, 7 Sickle, 8 Tambourine, 9 Weight (grain sack). - Click the patterned cloth hanging over the shelves on the left wall twice to pull it aside. Take the Lamp from the upper shelf and the small dark stoppered Flask from the lower shelf, right of the brown pot.
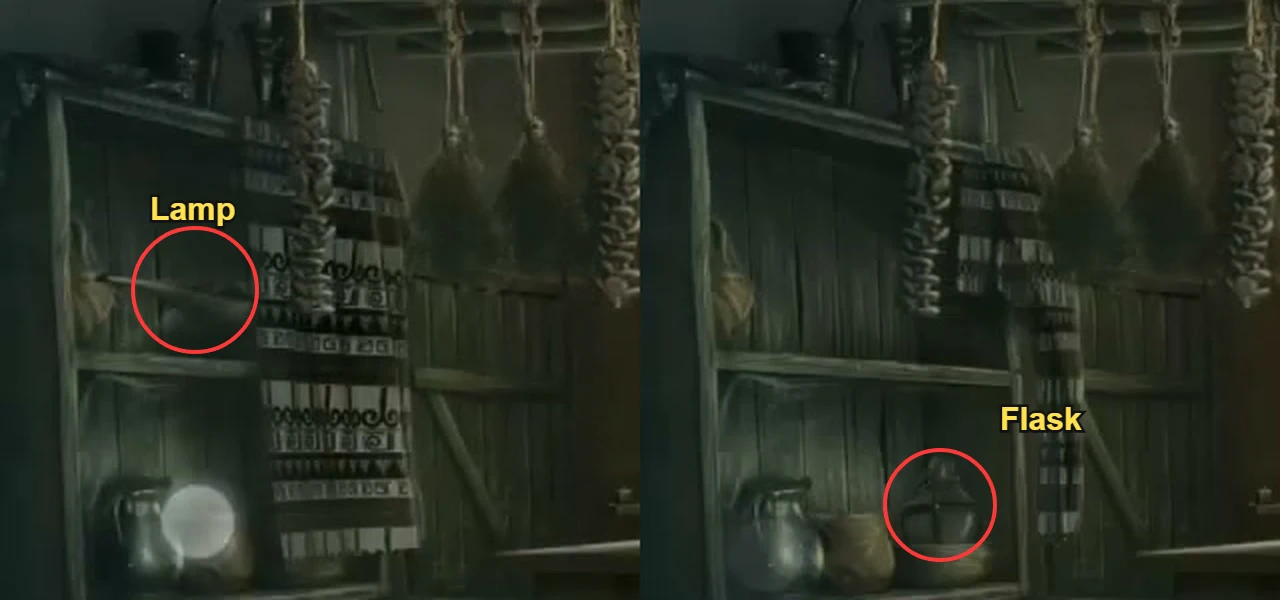
Left wall shelves: the Lamp on the upper shelf (left view) and, once the cloth is pulled further aside, the Flask on the lower shelf (right view). - Zoom into the barrel at the bottom centre; its lid comes off. Take the Weight from scales lying in the grain beside the jar.
- Open the shutter of the right window and take the key hanging there. Use it on the chest below the window. Read the Manuscript (Manuscript 9 of 10, "Karemos") and take the Horse tail.
- The last Weight from scales was hidden by the shutter you opened: it stands on the left corner of the right window's sill. With all four weights, zoom into the stacked boxes below the left window to open the scales puzzle (next section).
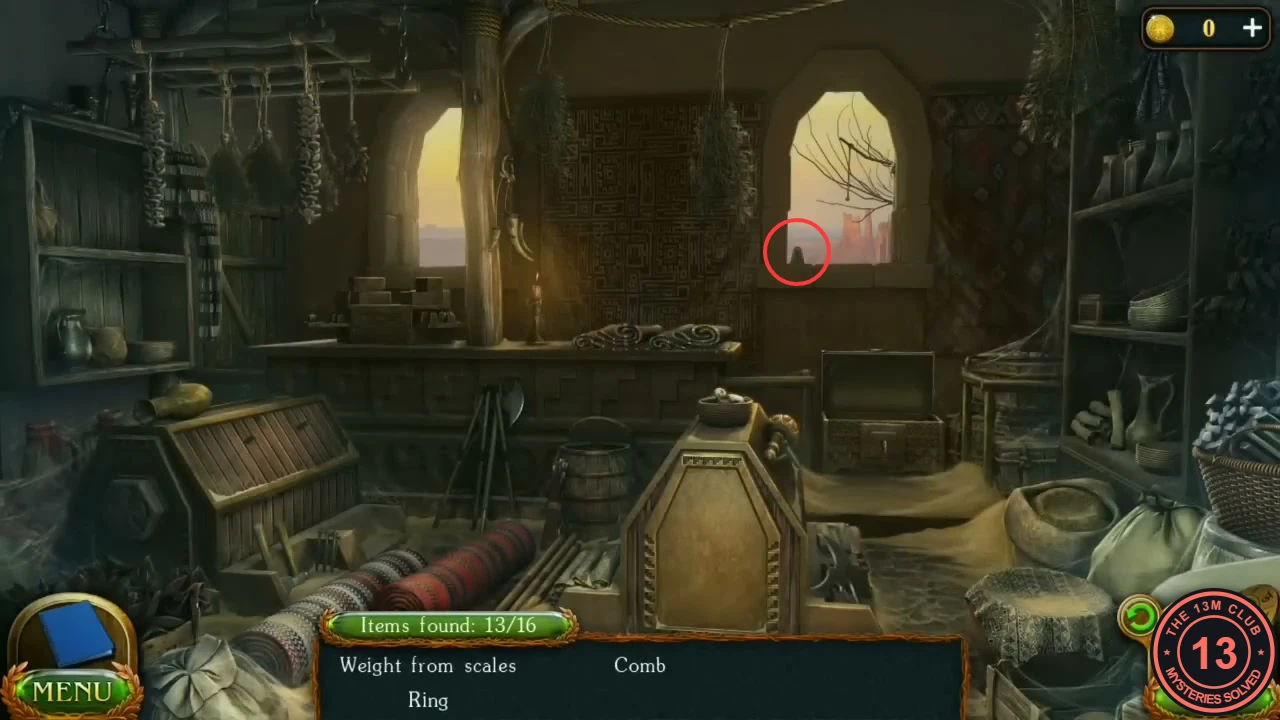
The last weight: on the left corner of the right window's sill, visible once the shutter is open.
Workshop: Eight-Weight Scales
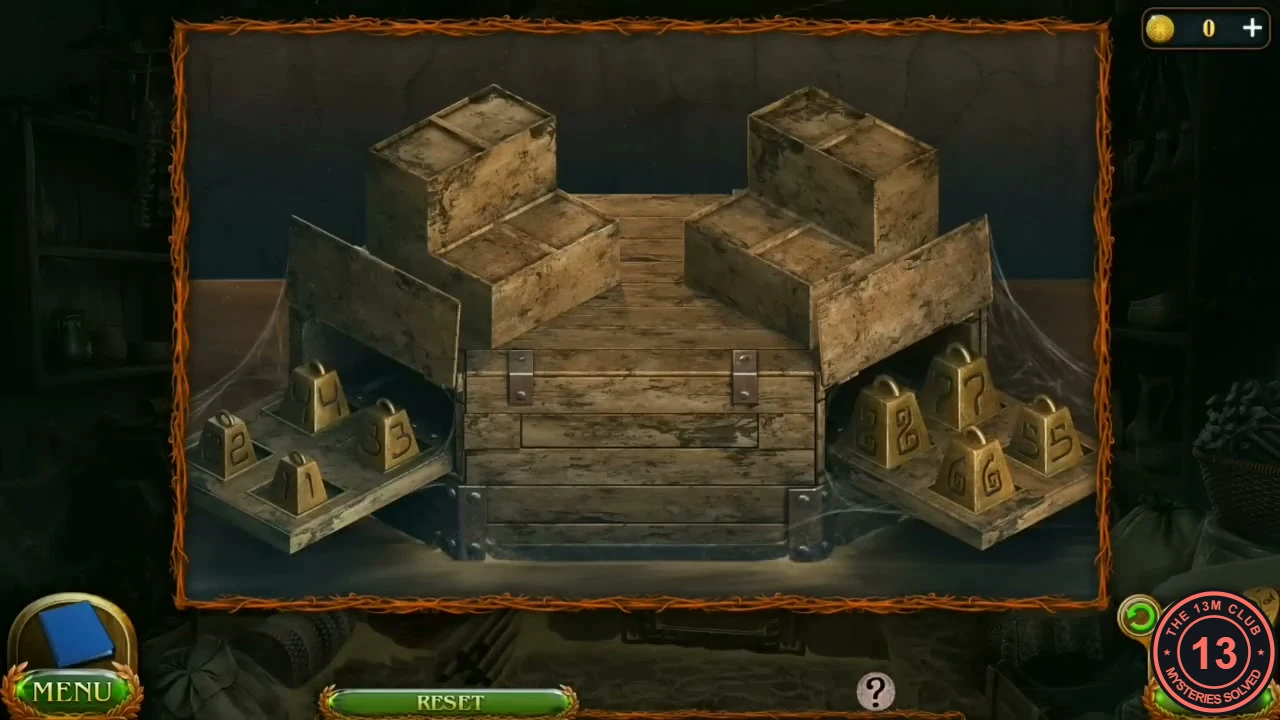
The stacked boxes under the left window hold a balance puzzle. Place the eight numbered weights so that the left four and the right four weigh the same. Reset restores the start.
- The scales show two trays of weights, numbered 1 to 8 (the 8 looks like a 2); the four slots on the left and the four on the right must weigh the same. Put 3, 4, 5 and 6 on the left and 1, 2, 7 and 8 on the right (18 each).
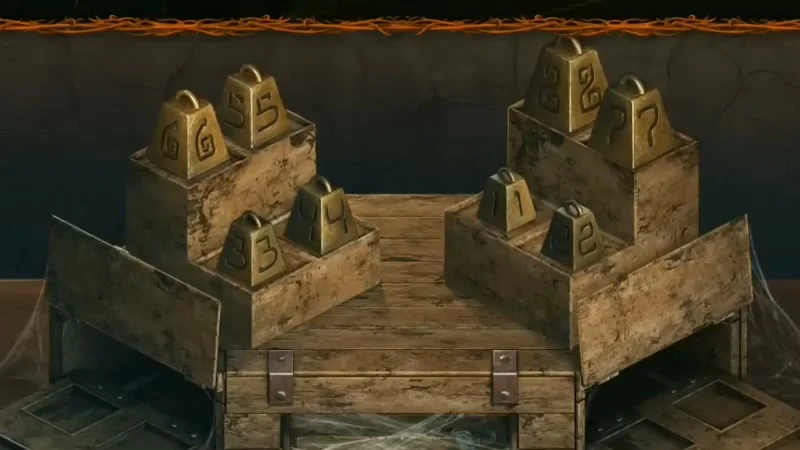
Balanced: 3, 4, 5, 6 left and 1, 2, 7, 8 right. - Click the drawer to clear the cobwebs. Click the paper in it to read it: it shows six large symbols (the order for the tile box in the next section). Take the Ring lying at the right end of the drawer.
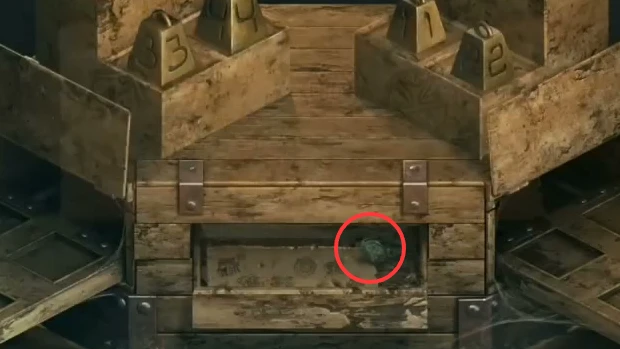
The opened drawer: read the paper, then take the Ring at the right end.
Workshop: Six-Symbol Tile Box
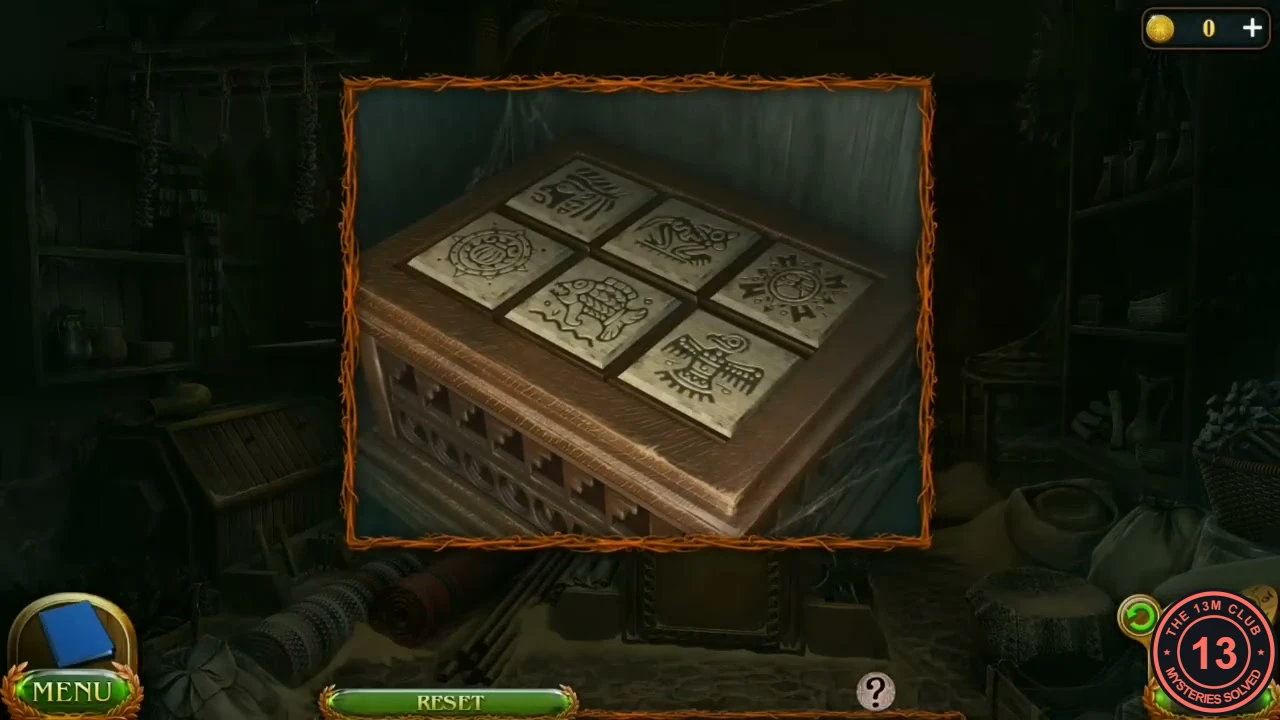
The small box on the right-hand shelf has six symbol tiles. The paper from the scales drawer gives the order. Reset clears the presses.
- Zoom into the box with six symbol tiles on the right-hand shelf. Back row, left to right: face, frog, sun. Front row: round wheel, fish, bird. Press the tiles in the order shown on the paper, left to right: face, fish, sun, round wheel, frog, bird. The box opens; take the Comb.
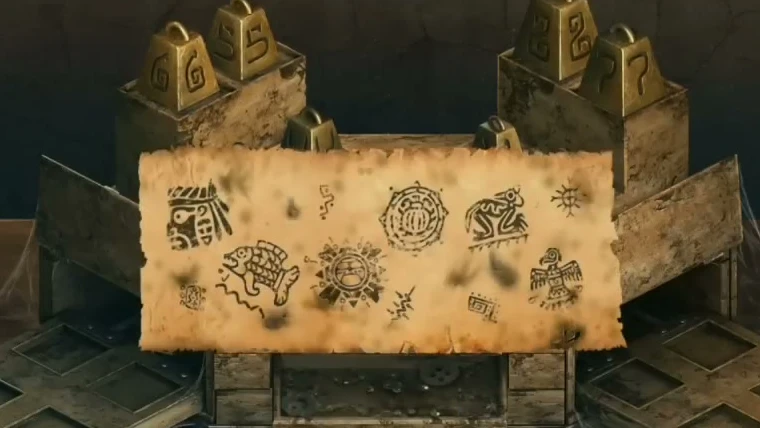
The paper gives the tile order, left to right.
The Desert and the Tent
The path right of the workshop leads to the desert, where a whirlwind blocks a cave.
- Take the path on the right to the desert. A whirlwind blocks the cave entrance. Zoom into the giant skeleton half-buried in the sand at the lower left and take the Ritual knife (1/3).
- Zoom into the dead bushes under the rock on the left, chop them with the Battle ax and take the Bundle.
- Zoom into the sand at the bottom centre and clear it away. Take the stone Bow. More sand hides a board of round tiles that you can't use yet.
- Enter the tent on the right. Read the Manuscript on the table (Manuscript 10 of 10, "Takawa"). Open the bundle on the rug and take the Stronghold of the Five Worlds and the stone Headdress. A map of Susan's adventures is also there.
- Open the Bundle in the inventory and cut it with the Dagger. Take the stone Breastplate and the Ritual knife (2/3).
- Back at the pyramid, zoom into the fresco and fit the Headdress, the Breastplate, the Horse tail and the Bow. The fresco is complete and the left pillar in front of the pyramid rises.
Left Pillar: First Totem Puzzle
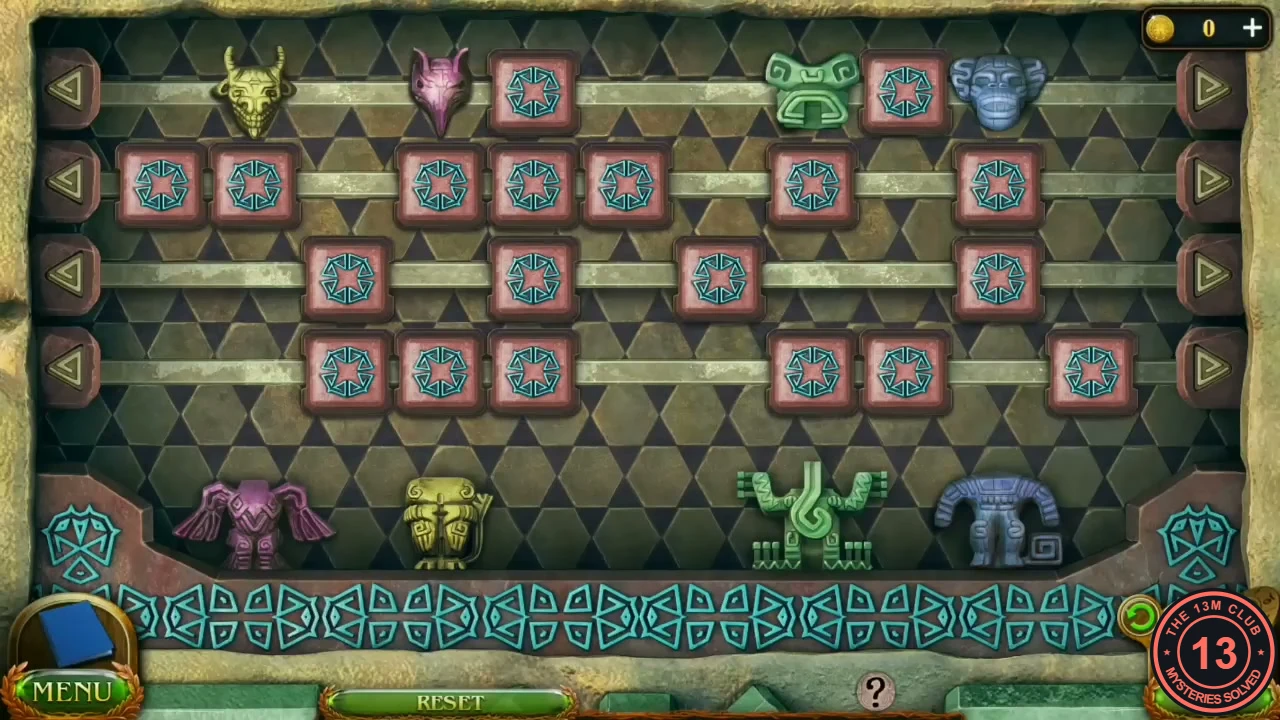
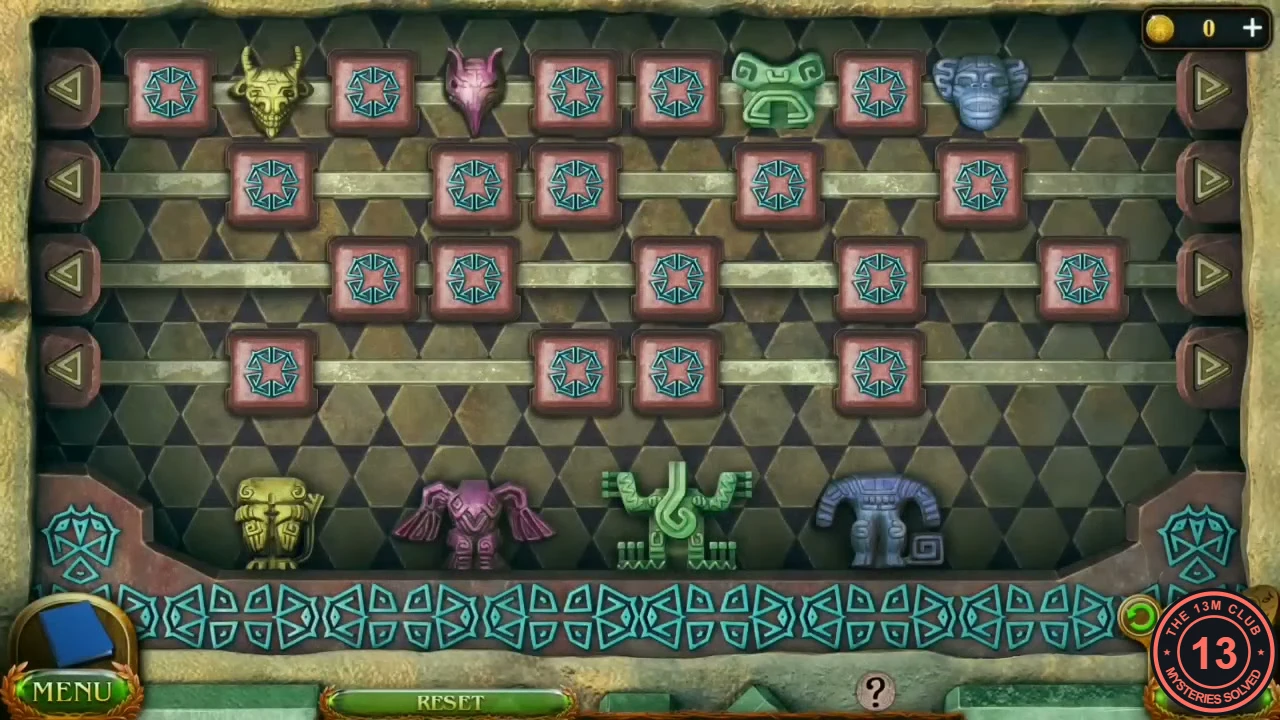
The two pillars take turns: each solved puzzle raises the other pillar, three rounds on each. In this first totem the yellow and pink heads start above each other's bodies, so they must change places; green and blue are already above their own bodies.
- Zoom into the left pillar. Each arrow slides its whole row of tiles one space left or right; rows are numbered 1 (top) to 4 (bottom), and "right" means the arrow at the right end of that row. A head resting in a row moves with that row. Whenever the space under a head is empty, the head drops until it rests on a tile or another head; with nothing under it at all, it lands on the body below. Every head must land on the body of its own colour. Starting from the layout shown above, press: row 1 right, row 1 left, row 2 right, row 3 left. The blue head drops onto the blue body.
- Row 4 left twice (the green head lands), row 4 right, row 2 left, row 3 right, row 4 left. The yellow head drops onto the yellow body.
- Row 4 right, row 3 right, row 3 left, row 4 right. The pink head lands on the pink body.
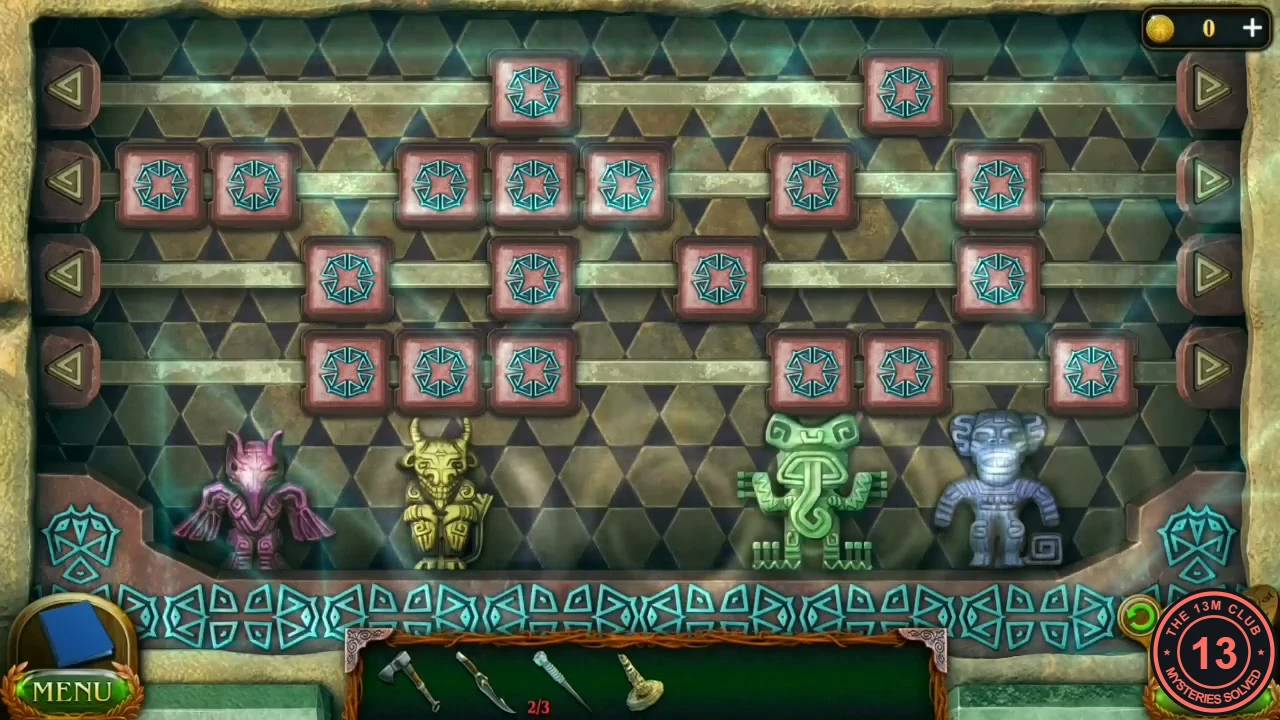
First totem solved.
Right Pillar: First Channel Puzzle
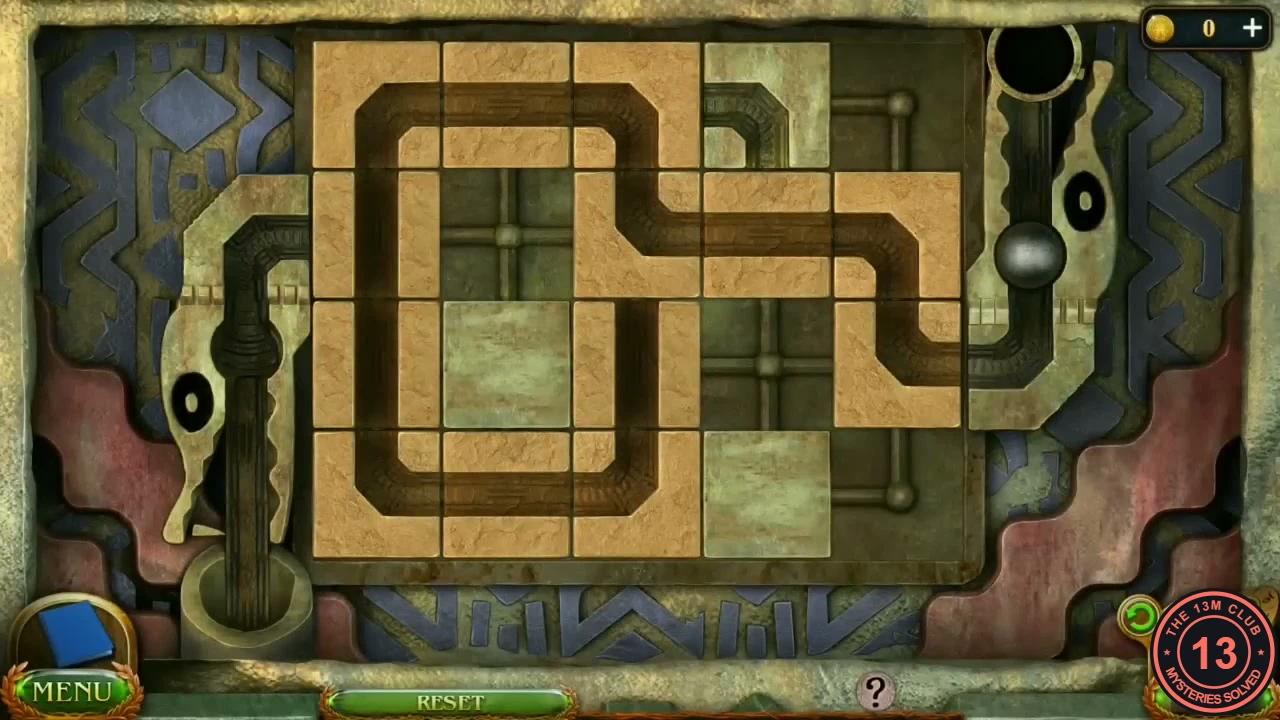
The right pillar holds a ball at the top and a sliding-block board. Build a groove that carries the ball to the exit.
- Channel puzzle (right pillar): slide the grooved blocks to make an unbroken channel for the ball from the start hole to the exit. Some blocks are fixed, and you don't need every block.
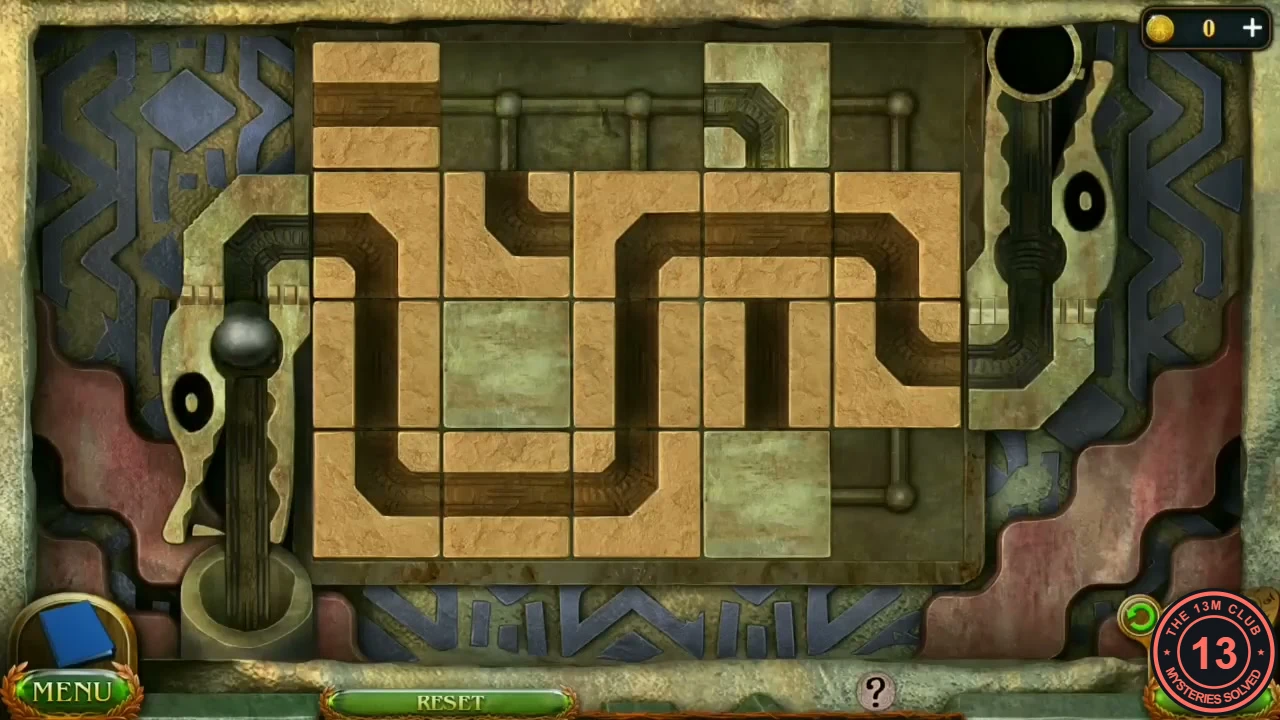
First channel solved.
Left Pillar: Second Totem Puzzle
Same rules as the first totem, on a board with one column fewer. Here the yellow and pink heads start above their own bodies; green and blue start one column to the right of theirs.
- Zoom into the left pillar. Starting from the layout shown above, press: row 1 right, row 4 right, row 1 left, row 2 left. The yellow head drops onto the yellow body.
- Row 3 left (the blue head lands), row 4 right (the green head lands), row 2 right twice, row 4 left. The pink head lands on the pink body.
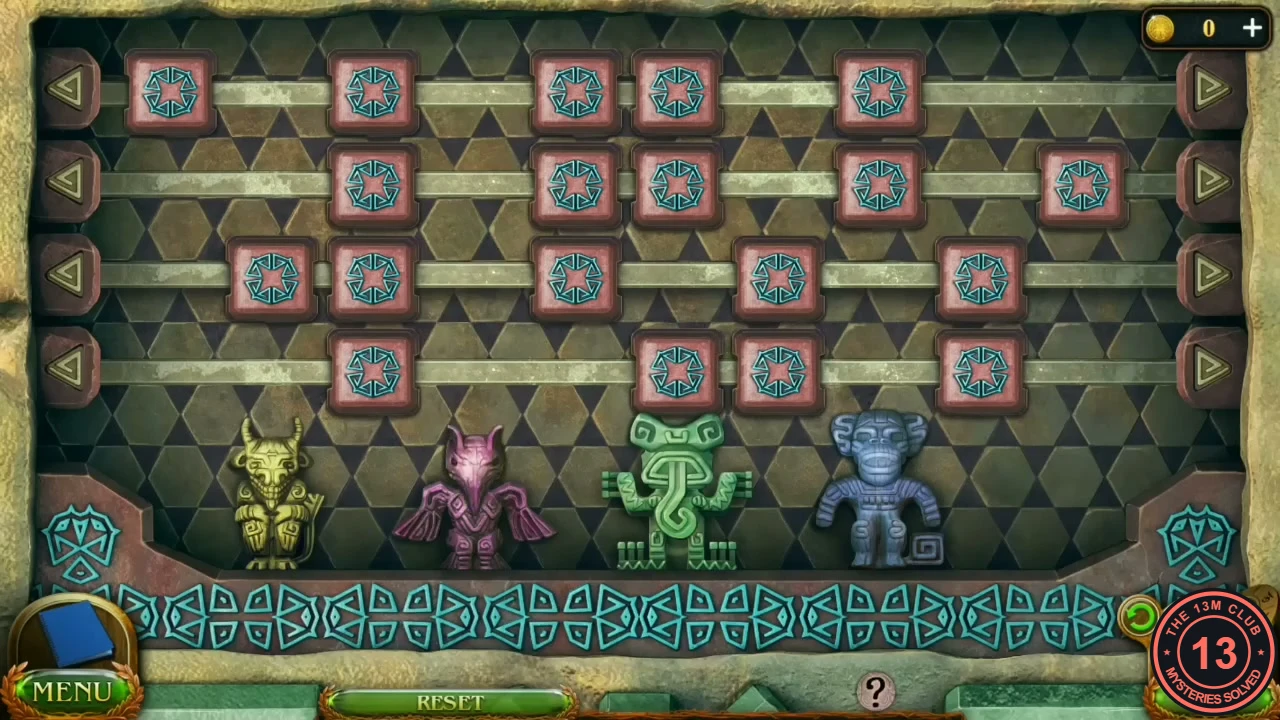
Second totem solved.
Right Pillar: Second Channel Puzzle
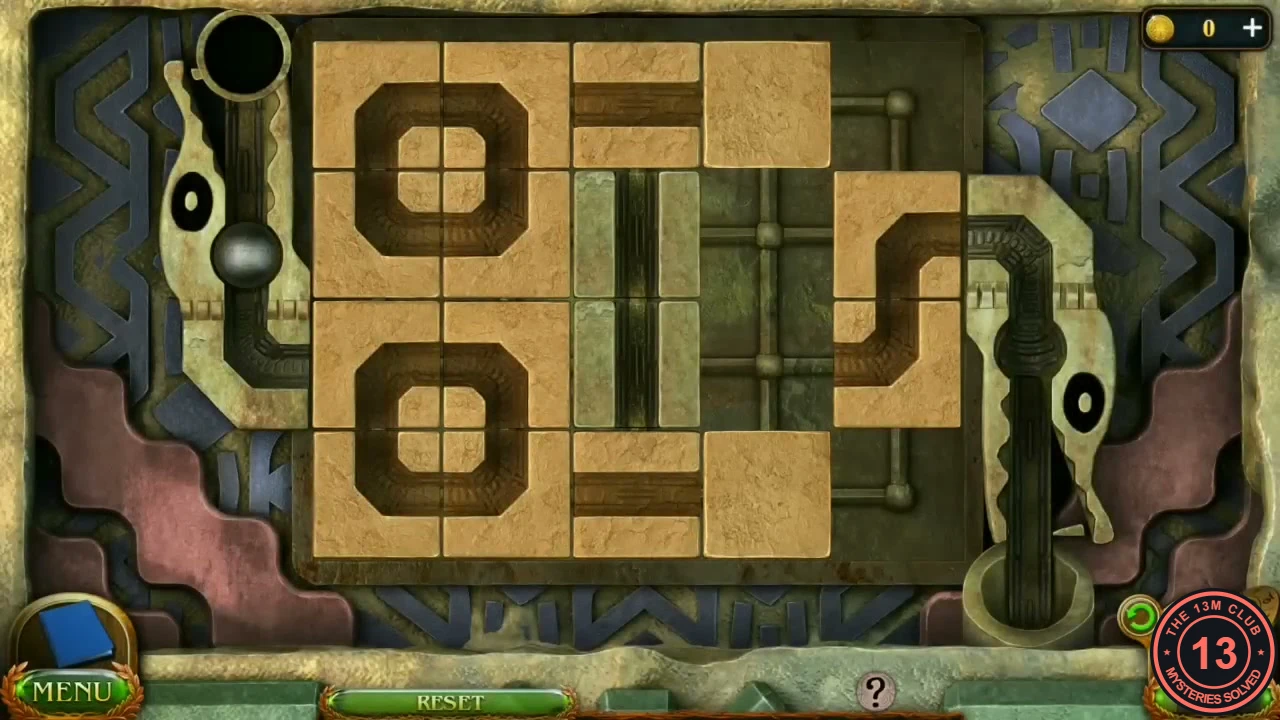
Same rules as the first channel puzzle, with a new set of blocks.
- Zoom into the right pillar again. Slide the grooved blocks until one unbroken groove runs from the ball to the exit; the finished layout is shown below.
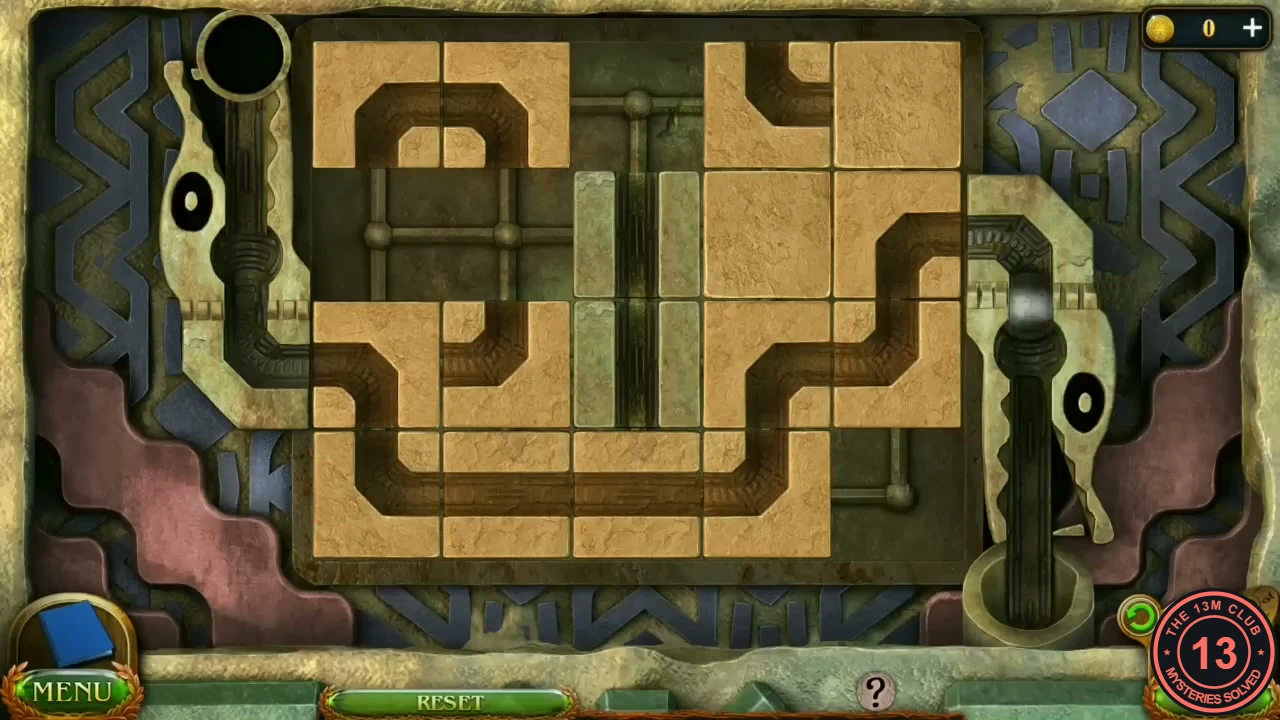
Second channel solved.
Left Pillar: Third Totem Puzzle
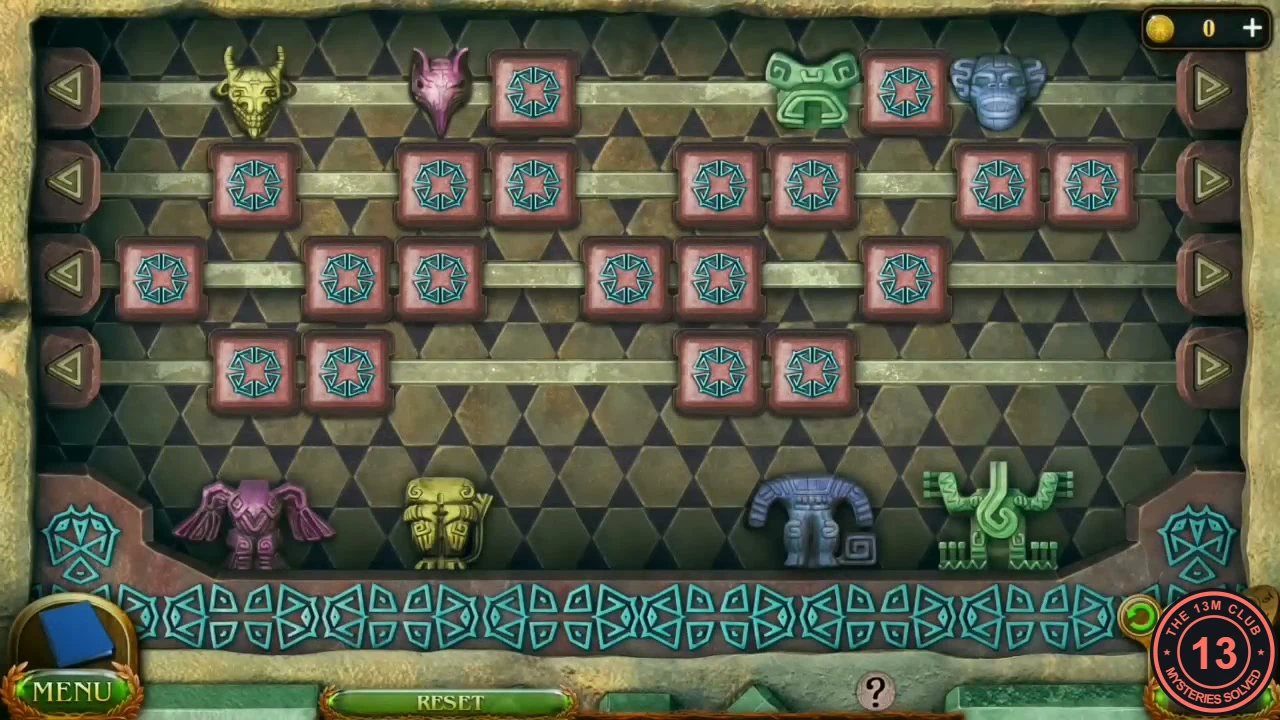
Same rules again. The yellow and pink heads must change places, and so must the green and blue heads (the blue body is now third from the left, the green body on the far right).
- Zoom into the left pillar. Starting from the layout shown above, press: row 1 right, row 1 left, row 4 right, row 3 right twice (the green head lands), row 4 left (the yellow head lands).
- Row 2 left, row 1 left, row 2 right, row 2 left, row 4 right. The pink head lands on the pink body.
- Row 3 left twice, then row 4 right. The blue head lands on the blue body.
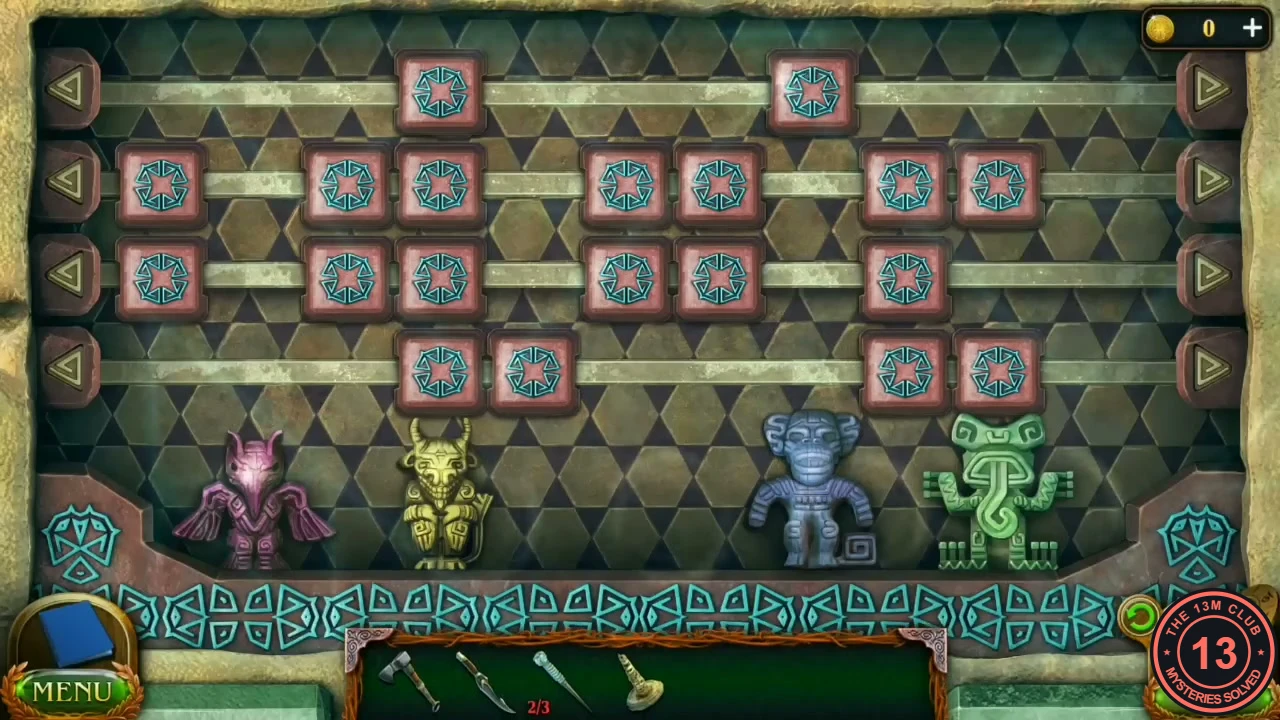
Third totem solved.
Right Pillar: Third Channel Puzzle
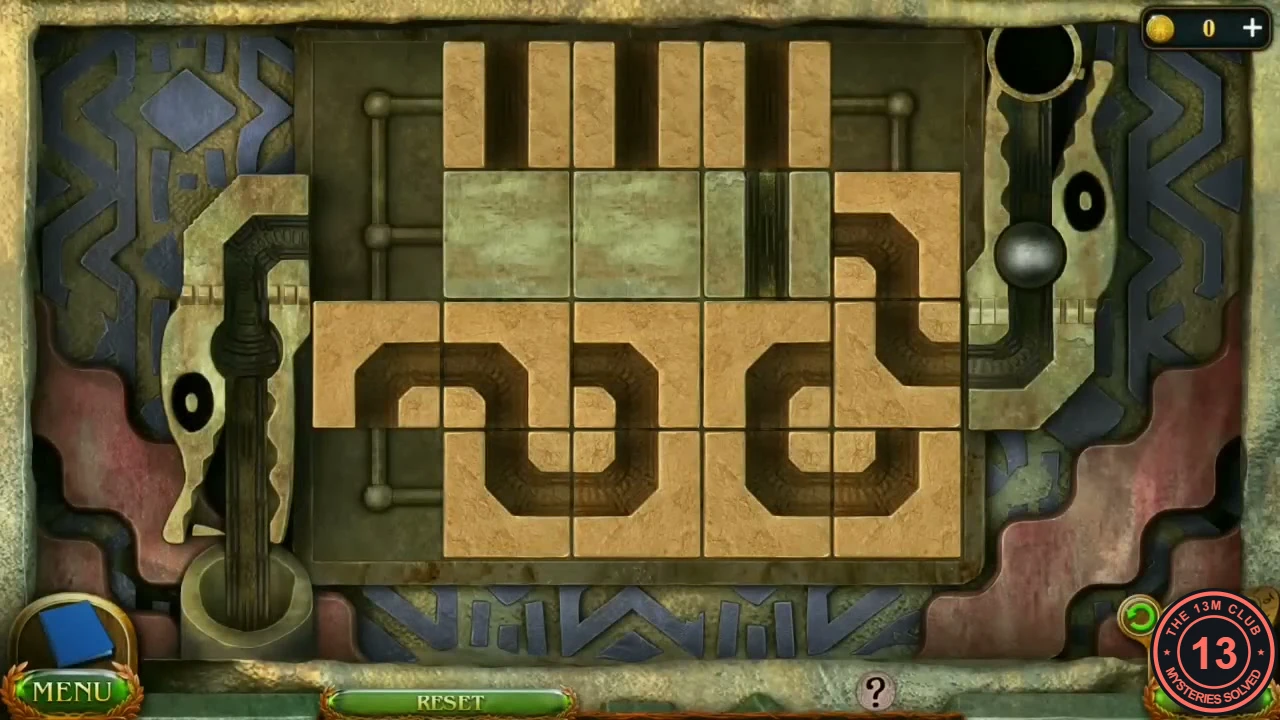
Same rules as the first channel puzzle, with a new set of blocks.
- Zoom into the right pillar for the last time and build the unbroken groove again (finished layout below). When it is done, the lower steps of the pyramid appear and you can climb to the temple.
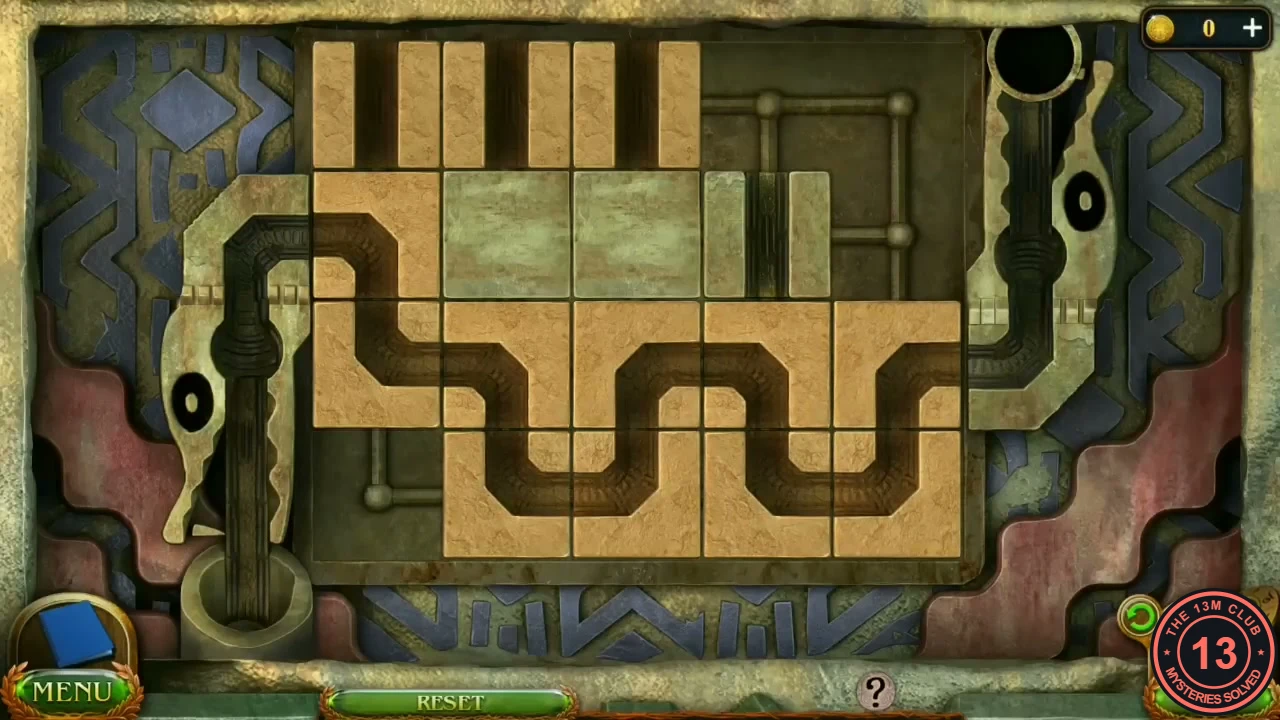
Third channel solved.