CENTAUR VILLAGE
The Forge and the Grappling Cannon
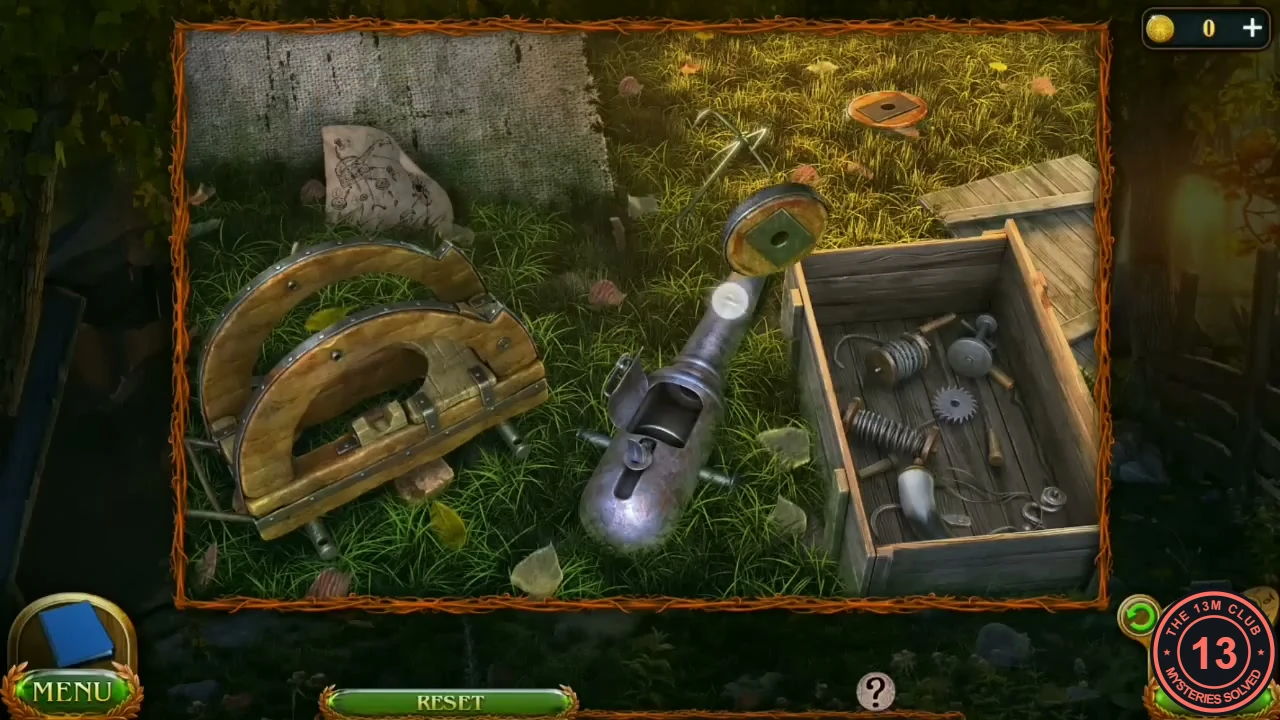
Light the forge and build a cannon to reach the lizards.
- In the blacksmith's hut, open the coal box on the right with the Key. Take the Shovel with coal and the Scheme paper.
- Zoom into the table on the left and take the Crucible. Then zoom into the fire pit of the forge: put the Shovel with coal on it to fill the pit with coals, and place the Crucible on the coals. The coals only glow faintly. Back out and click the big bellows to the right of the forge: they pump air and the fire flares up.
- In the courtyard, zoom into the platform in the big tree on the right again and click the cones on the branch. Take the Flash cones.
- Travel to the Darkwoods camp and zoom into the box of parts by the tents on the right. Put down the Scheme.
- Build the cannon in the numbered order shown on the Scheme (1–12): wheels and fittings on the wooden carriage, the parts from the crate, then the barrel and the grappling hook. Open the Scheme again whenever you need it.
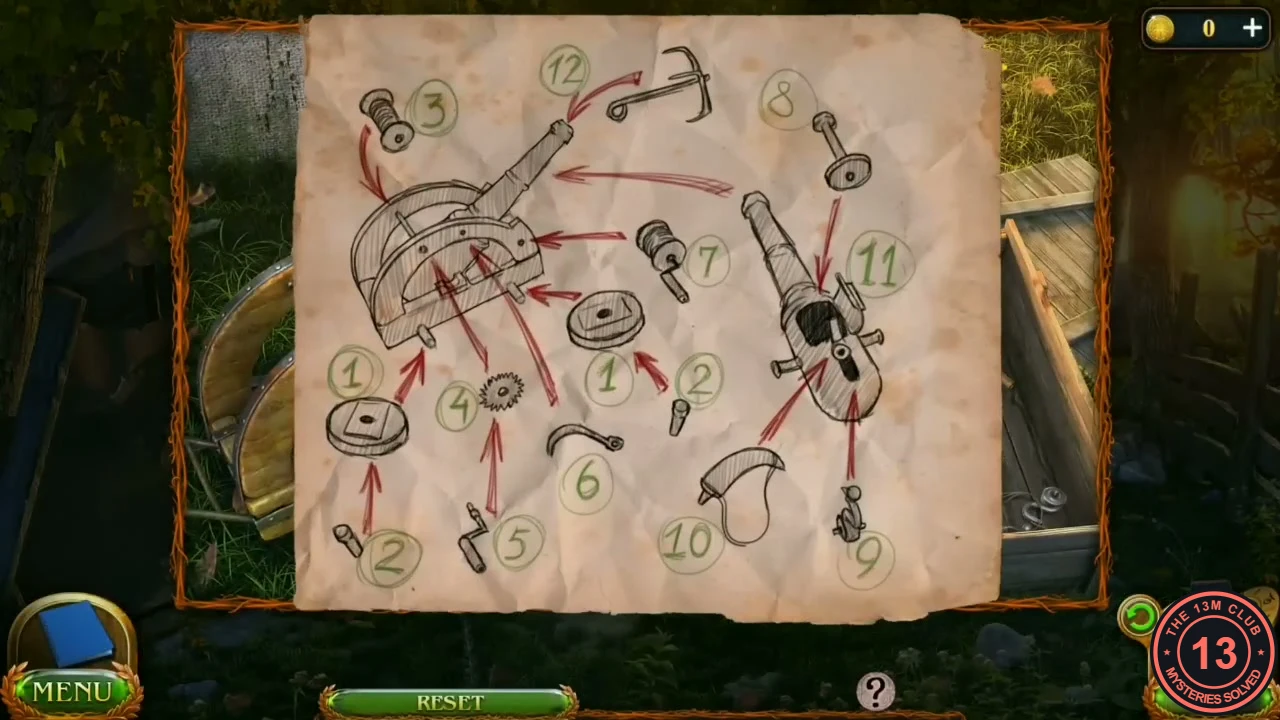
The Scheme: fit parts in the order 1 to 12.
PUZZLE
Catching the Rock Lizards
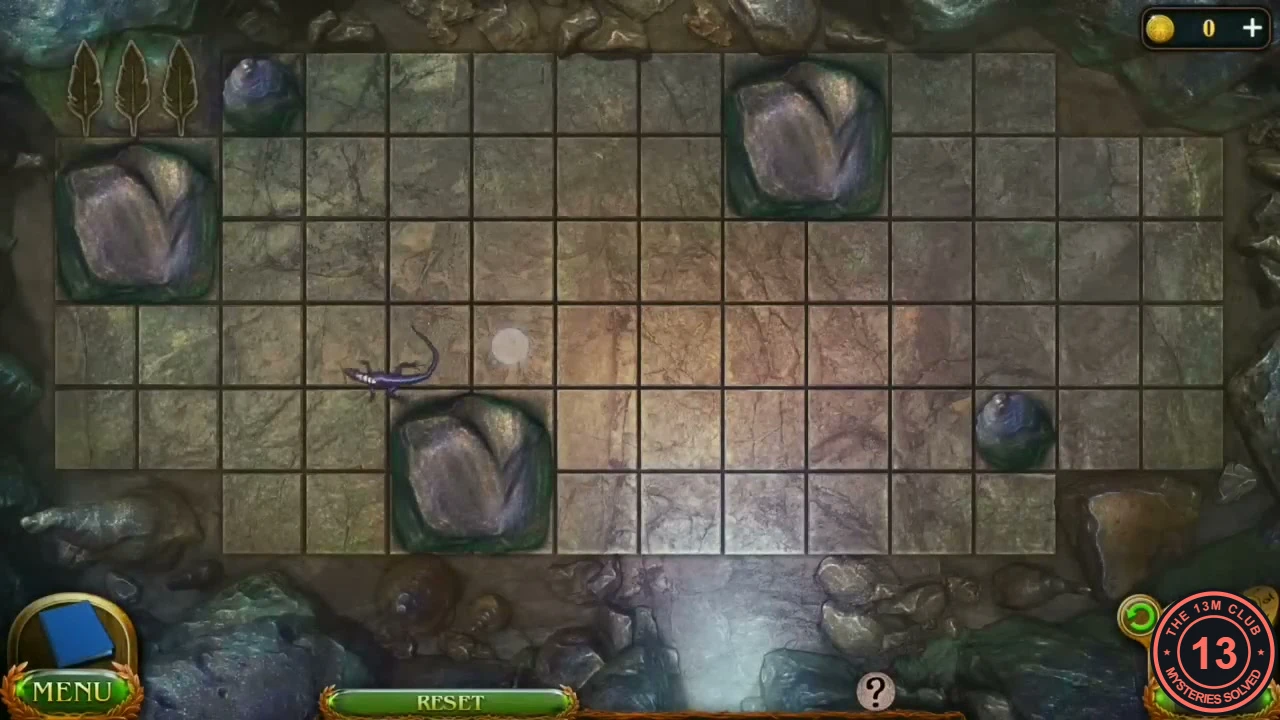
The lizards live on a cliff near the chief's house.
- At the chief's house, take the high path on the right to the cliff face and place the Grappling cannon. It fires a rope to the top; climb up.
- Zoom into the tree branch at the top left and cut it with the Battle ax. Take the Sequoia branch.
- Use the Flash cones on the cave entrance. On the grid, place flash cones on squares next to the lizard so it is boxed in by cones, rocks and the edge and cannot move. Catch it three times.
CENTAUR VILLAGE
The Arrow Shaft
Cut the sequoia branch on the saw by the chief's house.
- Zoom into the tool bench at the chief's house, put the Sequoia branch on the saw table and turn the handle on the right. The belt breaks.
- Travel to the manticore cave in the Darkwoods and take the Belt from the ground to the right of the sleeping manticore.
- Back at the saw, fit the Belt and turn the handle again. Take the Arrow shaft.
- Open the Arrow shaft in the inventory and add the Lizard feathers. A special tip still has to be smelted from Indigo metal.
- In the blacksmith's hut, zoom into the table on the left and put down the Mold.
PUZZLE
Lizard Panel: Chip Puzzle
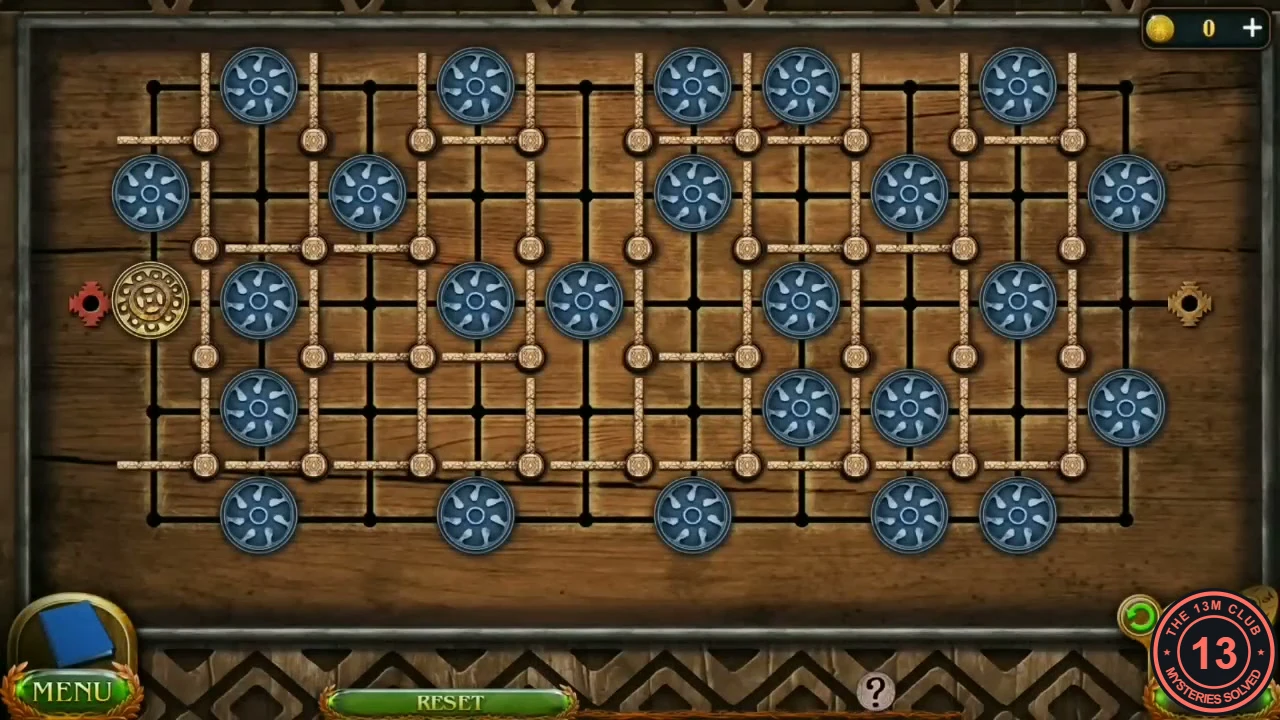
The lizard panel on the pillar in the blacksmith's hut hides the amulet centre and a colour clue.
- In the blacksmith's hut, zoom into the lizard panel on the square pillar and fit the Rune. A chip board opens.
- Move the gold chip from the left entrance to the exit on the right. Push the blue chips out of the way; the bars that block the path rotate when a chip pushes them and there is room.
- Take the Amulet center (purple gem). Note the GREEN SWORD drawing behind it.
PUZZLE
Bear Head: Beetle Puzzle
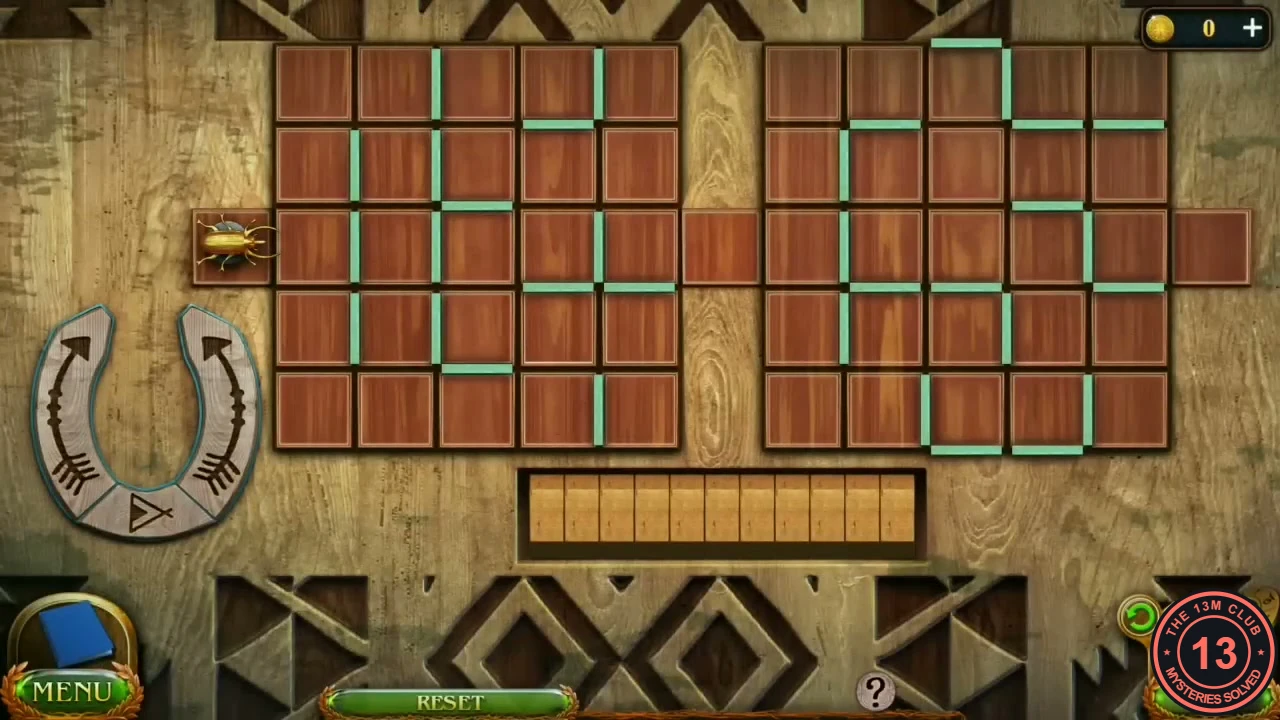
The bear head in the courtyard holds the second silver amulet part. Program the beetle's turns so it walks across both boards, then finish the amulet.
- Climb the cliff again and take the Claw from the ground at the lower left.
- In the courtyard, zoom into the bear head on the stump at the right and fit the Claw. The beetle puzzle opens: the arrow on the left arm of the horseshoe adds a left turn to the sequence bar below the boards, the arrow on the right arm adds a right turn, and the play button at the bottom of the horseshoe runs the sequence. Reset clears it.
- Stage 1 (left board): Left, Right, Right, Right, Left, Left, Right, Left, Left, Right. Run it.
- Stage 2 (right board): Right, Left, Left, Left, Left, Left, Left, Right. Run it. Take the Amulet part and note the BLUE BIRD HEAD drawing.
- Open the amulet Kiana got from the water creature in the inventory. Add both silver Amulet parts first, then the Amulet center. If you try the center too early, Susan says the parts must go in a different order.
PUZZLE
The Mural and the Shield of Valor
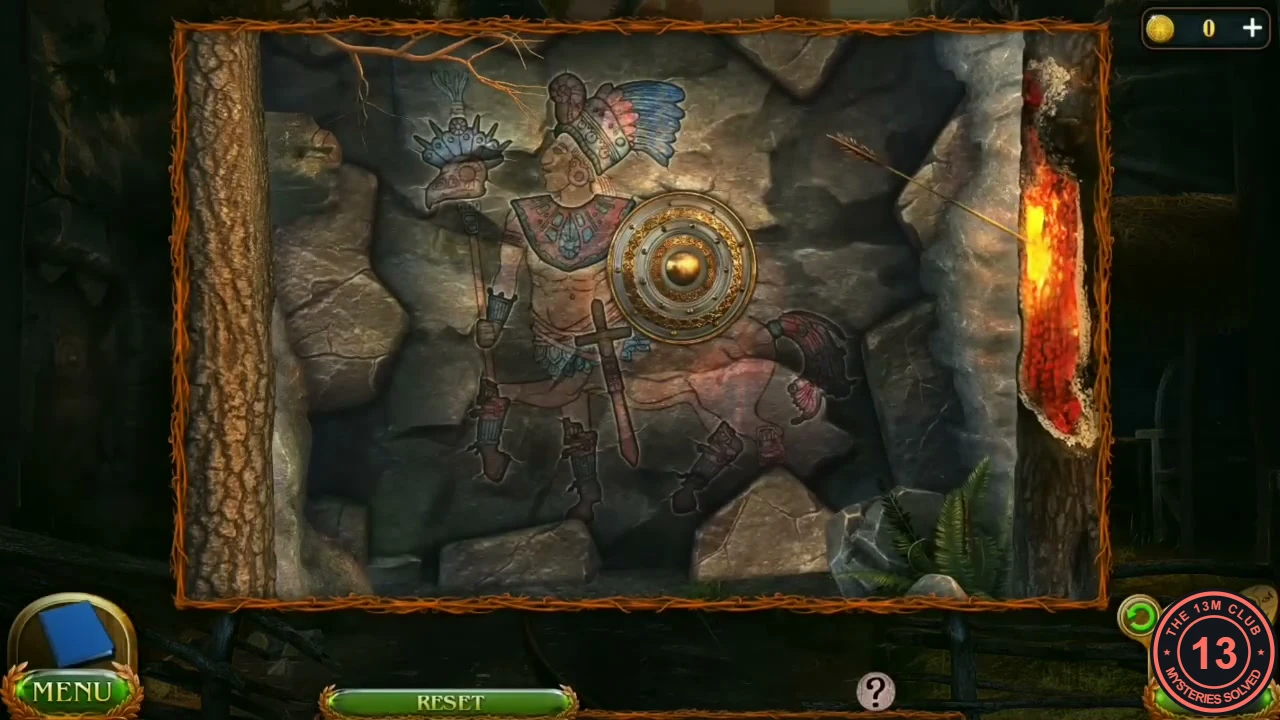
The stone wall at the chief's house hides a centaur mural.
- Zoom into the stone wall at the far left of the chief's house and place the Amulet in the centre. The wall opens to a mural: click the right parts of the fresco the correct number of times.
- The banner left of the village gate has 4 blue, 3 green and 2 red dots. The drawings give the colours: blue = bird head, green = sword, red = headdress.
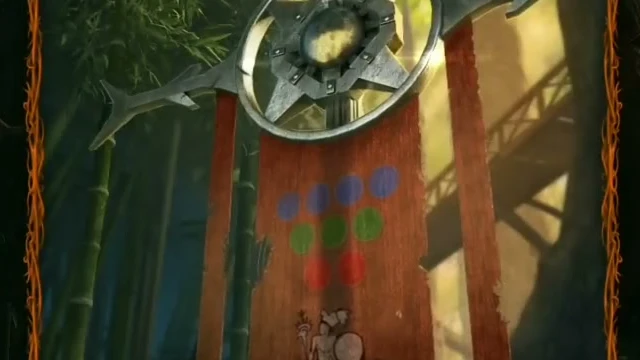
Gate banner: 4 blue, 3 green, 2 red dots. - On the mural, click the bird head on the staff 4 times, the sword 3 times and the headdress 2 times. Take the Shield of Valor.
- In the courtyard, zoom into the brazier stand at the statue and place the Shield of Valor on it.
CENTAUR VILLAGE
Forging the Ritual Arrow
Get Indigo metal, cast the tip and charge the arrow.
- Travel to the Plains lake and take the Pickaxe from the hand of the petrified troll under the bridge.
- Travel to the ritual hall of the Academy. Zoom into the shining blue deposit on the right and use the Pickaxe to take the Indigo metal.
- In the blacksmith's hut, zoom into the fire pit and drop the Indigo metal into the Crucible standing in the coals. The crucible is too hot to touch, so click the tongs hanging at the right side of the fire pit: they lift the crucible out of the coals. Take the Molten metal.
- On the table, pour the Molten metal into the Mold, then cool it with the water from the bowl. Take the Tip.
- Add the Tip to the Arrow shaft in the inventory to finish the Ritual arrow.
- At the courtyard brazier, add the Tobacco of spirits to the shield, then put the Ritual arrow into the smouldering tobacco to charge it.
- Give the arrow to Ziruk in his house. He performs the ritual and leads Susan and Kiana through a portal to the desert city where Susan grew up. The task Explore the temple is added.