Starting the Bonus Chapter: The Forest Clearing
The bonus chapter opens after you finish the main story. You play as Kiana, who comes into the Lost Lands through the portal Susan left open.
- After the main story ends, start the Bonus Chapter from the main menu. An opening cutscene shows Kiana's dream and the portal. Your first task is Local resident.
- Zoom into the fruit tree on the left. You can't pick its berries yet. Click the branches on the mound to clear them. This uncovers a door, which is locked, and a chimney on top. Pick up the two Details lying on the ground in this clearing.
The Forest Path and the Sign Tree
One scene further along the path is a box hanging in a tree, with a small chapel stone at the lower right. The scene after that has a tree with road signs.
- Walk forward along the path. Click the box hanging in the tree; it is out of reach for now. Then zoom into the small chapel stone with offerings at the lower right of this same scene. You can't do anything there yet.
- Go forward to the tree in front of the stone wall. The task Sign is added. Look at the grindstone in the wall.
- Zoom into the sign tree. One sign is missing. Take the Colored detail from the top of the remaining sign. Then zoom into the wooden fence/handrail on the left and take the Stick.
The Box in the Tree: Color and Symbol Tiles
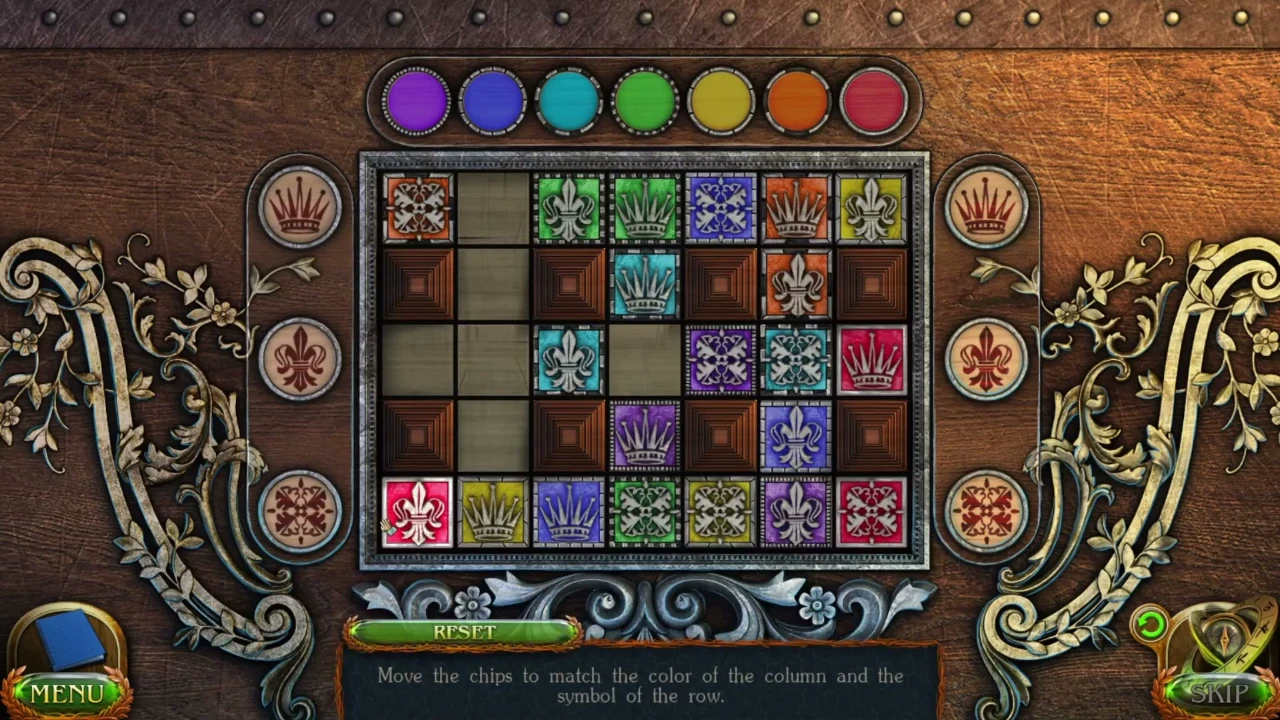
Knock the box down with the Stick and put the three Details on it to start this puzzle.
- Go back to the hanging box and knock it down with the Stick. Zoom into its front and add the three Details.
- Slide the tiles until each column has the colour shown by the circle above it (left to right: purple, blue, cyan, green, yellow, orange, red). Each of rows 1, 3 and 5 must also have the symbol shown on its side medallions (crown, fleur-de-lis and cross). Rows 2 and 4 are only open in the 2nd, 4th and 6th columns, so use those gaps to move tiles between rows.
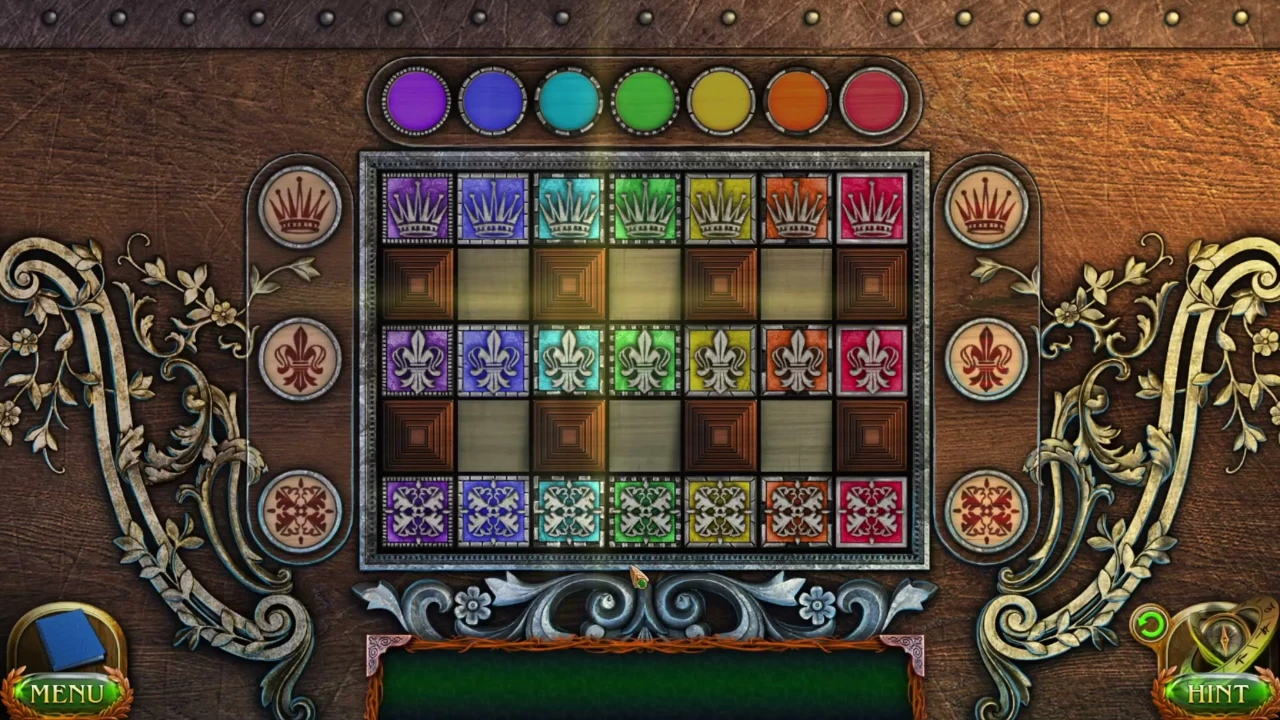
Solved tile layout. - Read the previous traveller's journal (signboards, a cache in the forest, a buried device and a sketch map). Take the Knife, the Bread and the Unfinished totem.
Carving the Totem
The knife is too dull to carve the totem at first.
- Use the Knife on the Unfinished totem in your inventory. It is too dull.
- Zoom into the grindstone in the wall next to the sign tree and sharpen the Knife on it.
- Carve the Unfinished totem with the sharpened Knife to get the wolf Totem.
The Chapel Stone Offerings
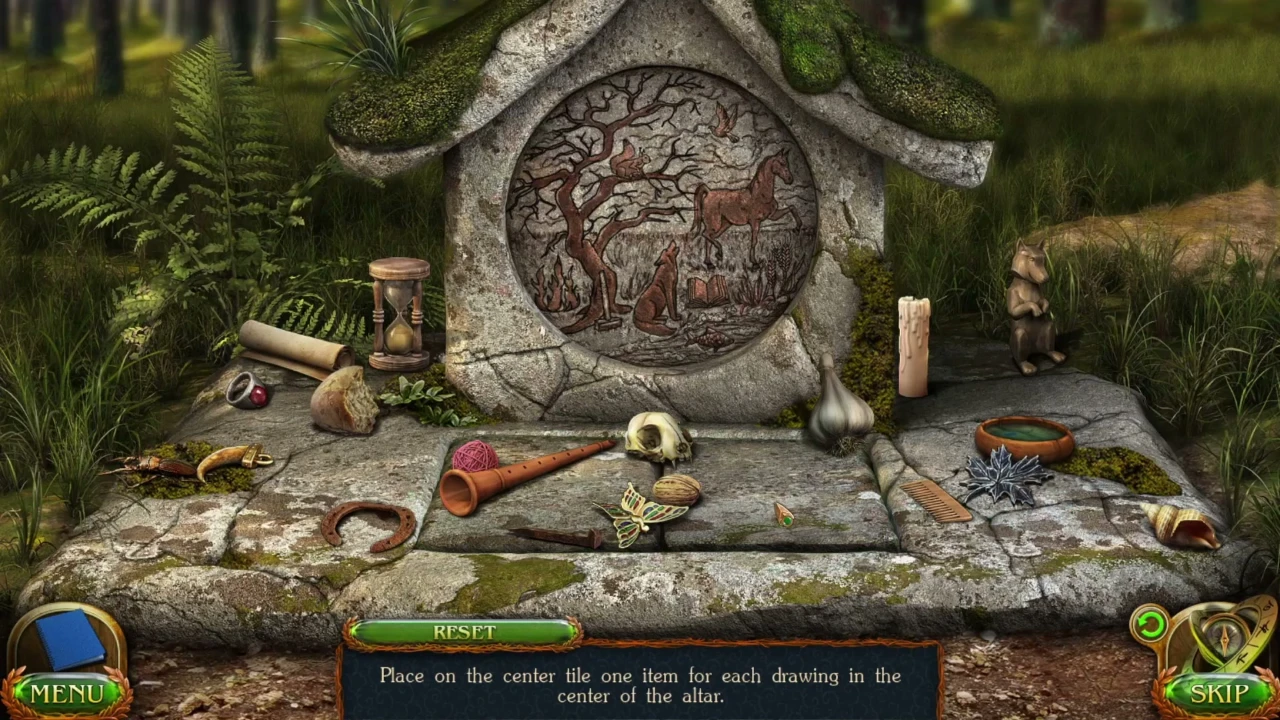
The carving in the centre of the altar shows ten pictures: a tree, a squirrel, a bird, a horse, a wolf, fire, a book, a fish, wheat and a hammer.
- Go back one scene to the forest path with the hanging box. Zoom into the chapel stone at the lower right and place the Bread and the Totem on it to start the puzzle.
- Put one matching item on the centre for each picture: maple leaf (tree), nut (squirrel), feather (bird), horseshoe (horse), wolf figurine (wolf), candle (fire), scroll (book), bowl of water (fish), bread (wheat) and nail (hammer). Leave the other items, such as the hourglass, skull, garlic, comb, shell, flute, ring, yarn, claw, butterfly and beetle, off the centre.
- Take the road Sign plate and the Storm whirligig, a device that makes a whirlwind when you spin it on the ground. Go forward to the sign tree and put the Sign plate on it. The task Sign is complete.
The Troll's Cave
Follow the left path from the sign tree.
- Take the left path to the cave entrance. Click the hanging cage with the skeleton, then the winch on the right; the winch is jammed with sand. Pick up the Detail from the ground.
- Enter the cave. Pull the cloth off the box on the left and put the Detail on its lid.
The Cave Box: Rotate the Field
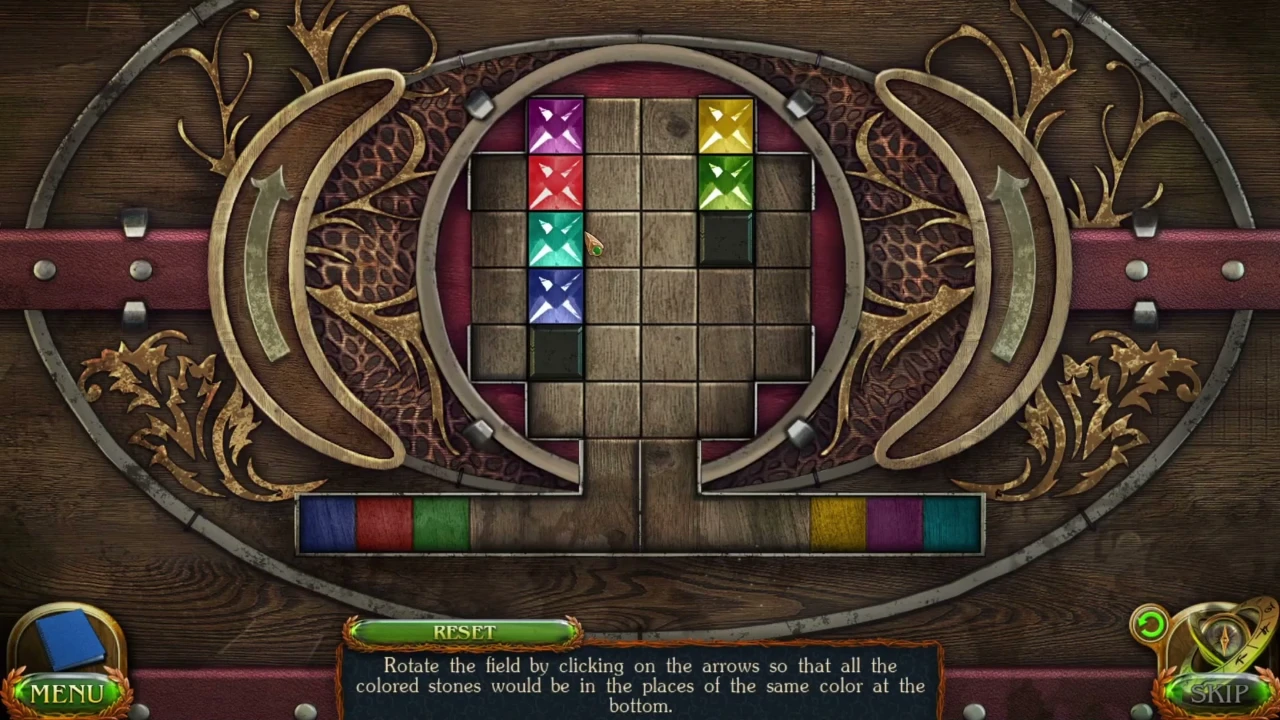
Each arrow rotates the field, and the coloured stones drop into the slots at the bottom. Each stone must land in the slot of its own colour (blue, red and green on the left; yellow, purple and cyan on the right).
- From the starting position, click the arrows in this order: Left, Right, Left, Right, Left, Right, Right, Left. If a stone drops into the wrong slot, press Reset and start again.
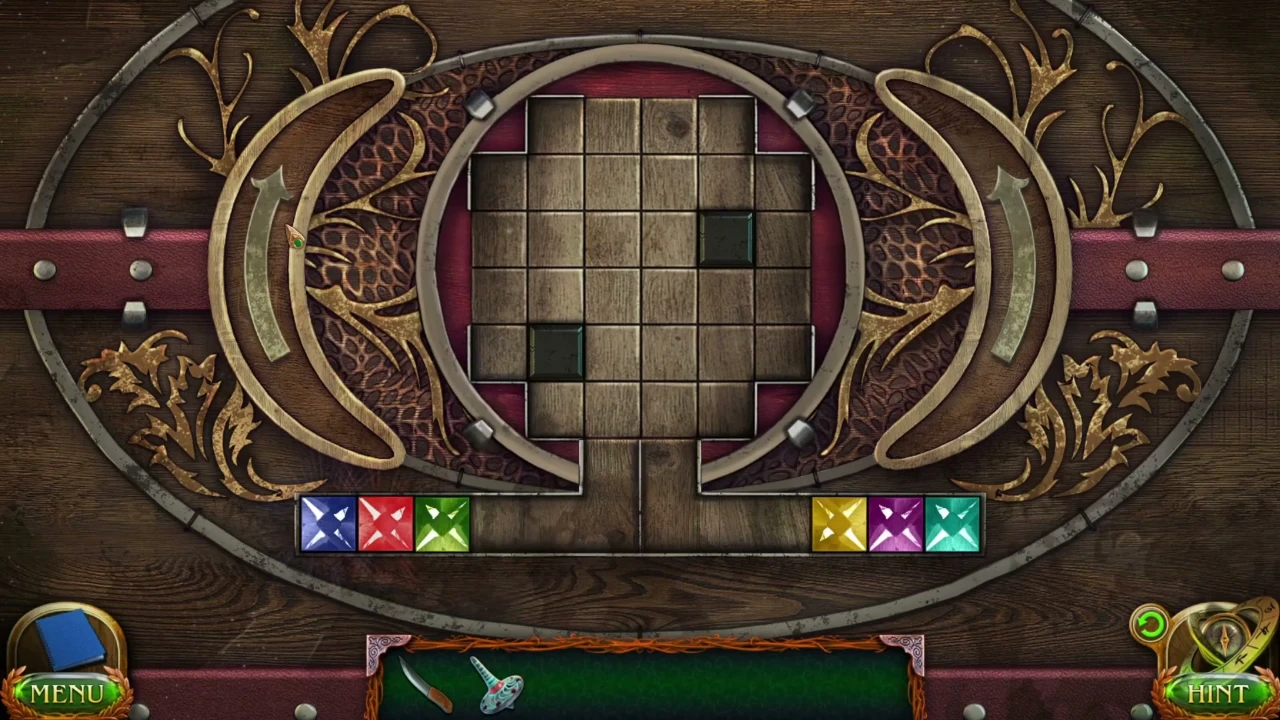
Solved: every stone in its own slot. - Take the Mirror shard and the Trowel from the open box.
The Bucket in the Hole
A bucket lies at the bottom of a hole in the cave floor.
- Zoom into the large pot in the centre and take the Scoop. Click the crack in the back wall; the task River in the distance is added and something lies out of reach. Clear the straw pile on the right by clicking the rope several times to uncover a round hatch, then open it. It is too dark to see inside.
- Shine the Mirror shard into the hatch. There is a bucket at the bottom.
- Use the Scoop in the wall crack to pull out the Prosthesis with hook. Hang the hook on the rope in the hatch and pull up the bucket. Take the Key and the Guide disc from it, then the Bucket.
- Fill the Bucket at the large pot. Toto the troll appears and locks Kiana in his cage. He has a friend he keeps in a cage, and he swaps the signs on the sign tree.
Escaping Toto's Cage
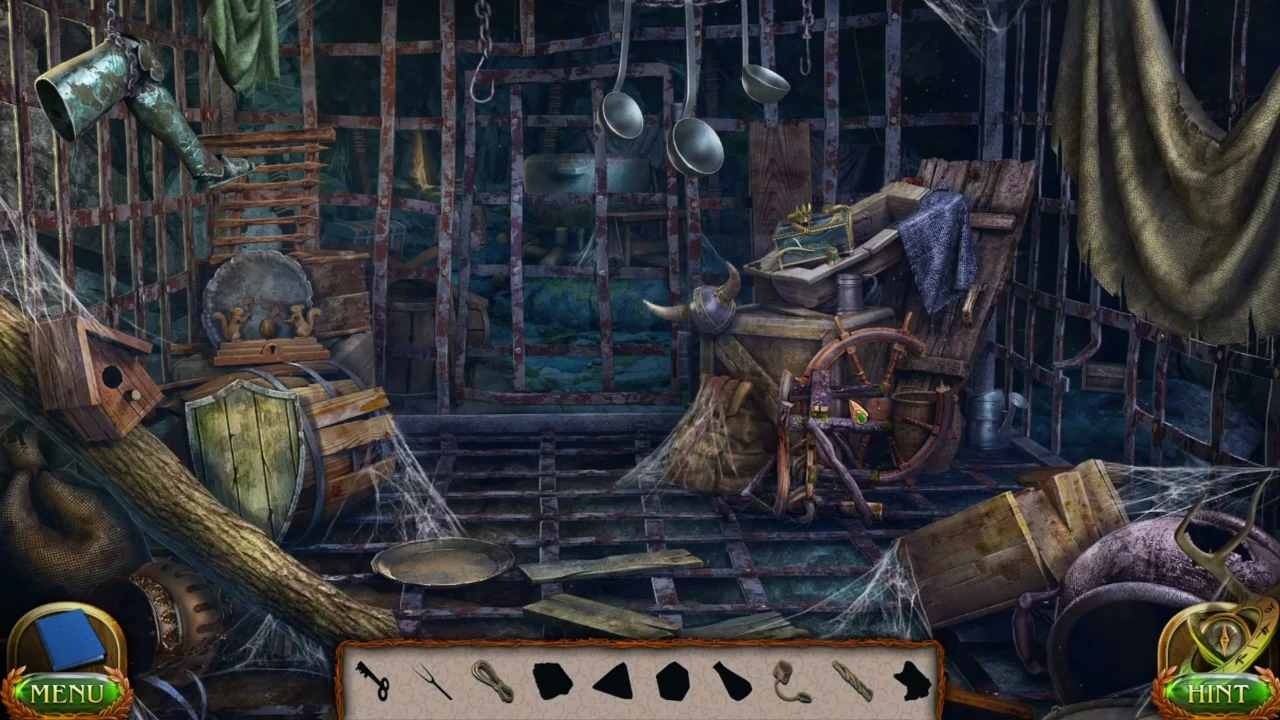
The cage is a silhouette search. The bar at the bottom shows the outlines of the items you need, and each one fills in when you find it. The loose items are spread over the cage and its close-ups: the padlocked door, the birdhouse on the left, the squirrel mechanism, the glass tank with the golden snake head on the pile at the right, and the gap at the lower right.
- Zoom into the padlocked cage door and take the Rope tied to the bar on its left. Back in the cage, tap the Flint, the small pouch hanging on a cord under the birdhouse at the left. Zoom into the squirrel mechanism above the shield: take the skull Sign plate, then the Wick, the frayed rag lying on the board to the right of the squirrels.
- Zoom into the glass tank with the golden snake head on the pile at the right. Take the Key lying on the board at the tank's lower left, and the Gem in wax, the lump of wax with a green stone stuck in it, at the tank's lower right corner.
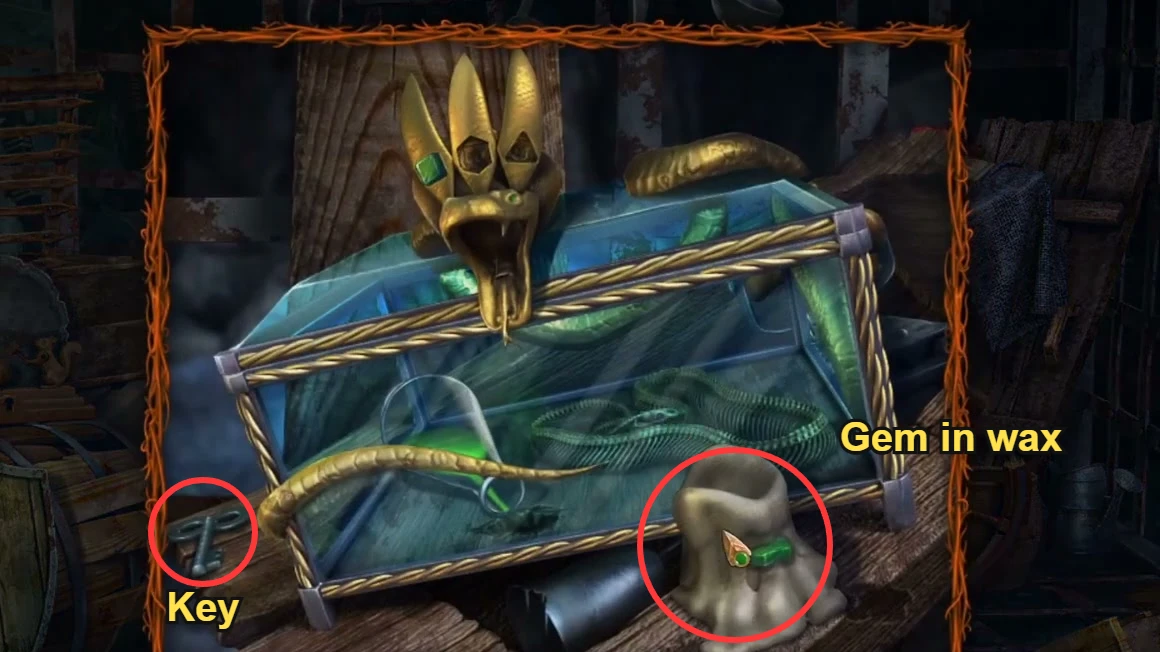
Tank close-up: the Key (left) and the Gem in wax (right). - Zoom into the gap at the lower right of the cage. Take the pumpkin Sign plate lying on the floor; the Fork is underneath, so take it too. A box lies out of reach outside. Go back to the squirrel mechanism and use the Fork to pull the nail from the crate behind the squirrels. The board comes loose and you get the Magnet.
- Put the Key into the lock on the squirrel mechanism. The squirrels crack the nut and you get a green Gem.
- At the gap, stick the Magnet to the bars, tie the Rope to it and pull the box over to you. Open it to find a wax-melting set. Assemble the base, side parts and plate, add the Wick and light it with the Flint, then put the Gem in wax on top. The wax melts and leaves the second green Gem.
- Zoom into the glass tank again and set both green Gems into the golden snake head. The lid opens; take the flask of Acid from inside. Pour the Acid on the cage padlock.
The Winch, the Cage and the Right Signs
You need a bucket of water to wash the sand out of the winch.
- Pick up the Bucket again and fill it at the large pot. Leave the cave.
- Pour the water on the winch at the cave entrance to wash out the sand, then turn the winch to lower the hanging cage. Unlock the cage with the Key. Take the Pick and the traveller's Paper, a map with a red X, from the skeleton.
- Go to the sign tree. Replace the two wrong plates with the ones from the cage. The upper plate, which points right, gets the pumpkin plate in place of the red angry face. The lower plate, which points left, gets the skull plate in place of the green smiley. A hole opens in the trunk; take the Vane.
- Break the stone wall next to the grindstone with the Pick and follow the new path to the gate of Pumpkinton.