The Temple Hall
The temple at the top of the pyramid is dark at first.
- Zoom into the large stone weight on the right and chop the wooden planks under it with the Battle ax. The roof opens and light fills the hall.
- Zoom into the rubble right of the hanging net, move the stones and take the Brush.
- Zoom into the hanging net on the left, cut it with the Dagger and take the Horse's head.
- Zoom into the book on the central plinth; something with the symbol in its centre will open it. Take the Ritual knife (3/3) from the plinth.
- Outside, zoom into the round stone at the top of the first flight of steps. Insert the three Ritual knives and take the Flute.
Flute Puzzle
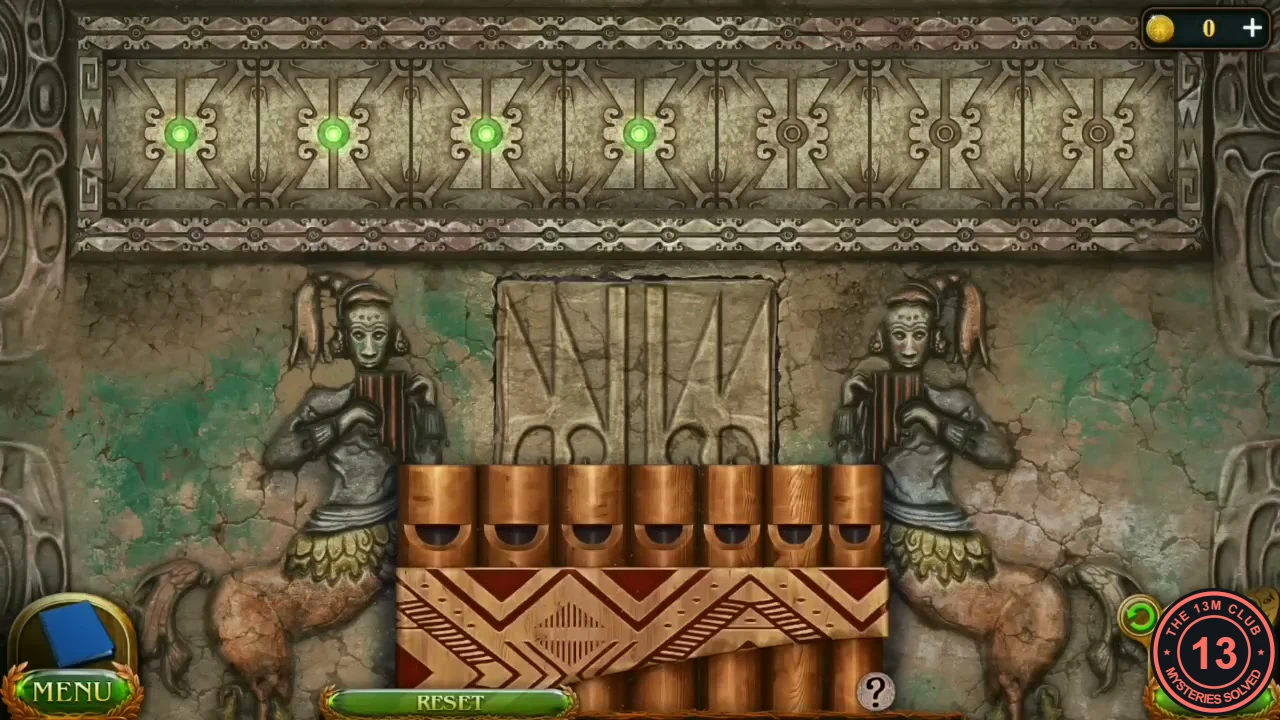
The mural on the back wall of the temple hides a musical cache.
- Place the Flute on the back-wall mural. Each pipe lights one of the seven green lamps above; you must light them from left to right, and a wrong pipe resets them.
- Number the pipes 1–7 from left to right and play: 5, 7, 2, 3, 6, 4, 1.
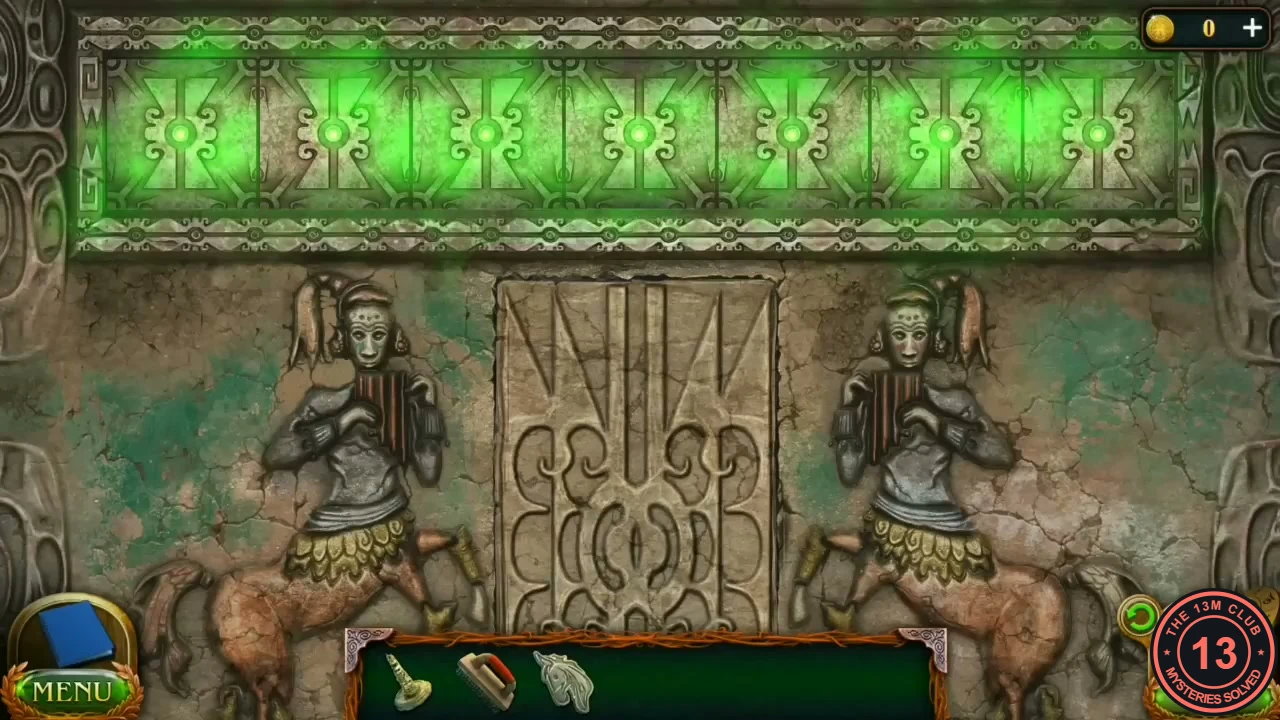
Solved: all seven lamps lit. - Take the Seal and the Tarsas figure from the opened compartment.
- Put the Seal on the book on the plinth and read it. A sand ghost (a centaur made of sand) appears and speaks with Susan. The task Learn the history of the curse is added.
The Sand Tiles and the Cave Inscription
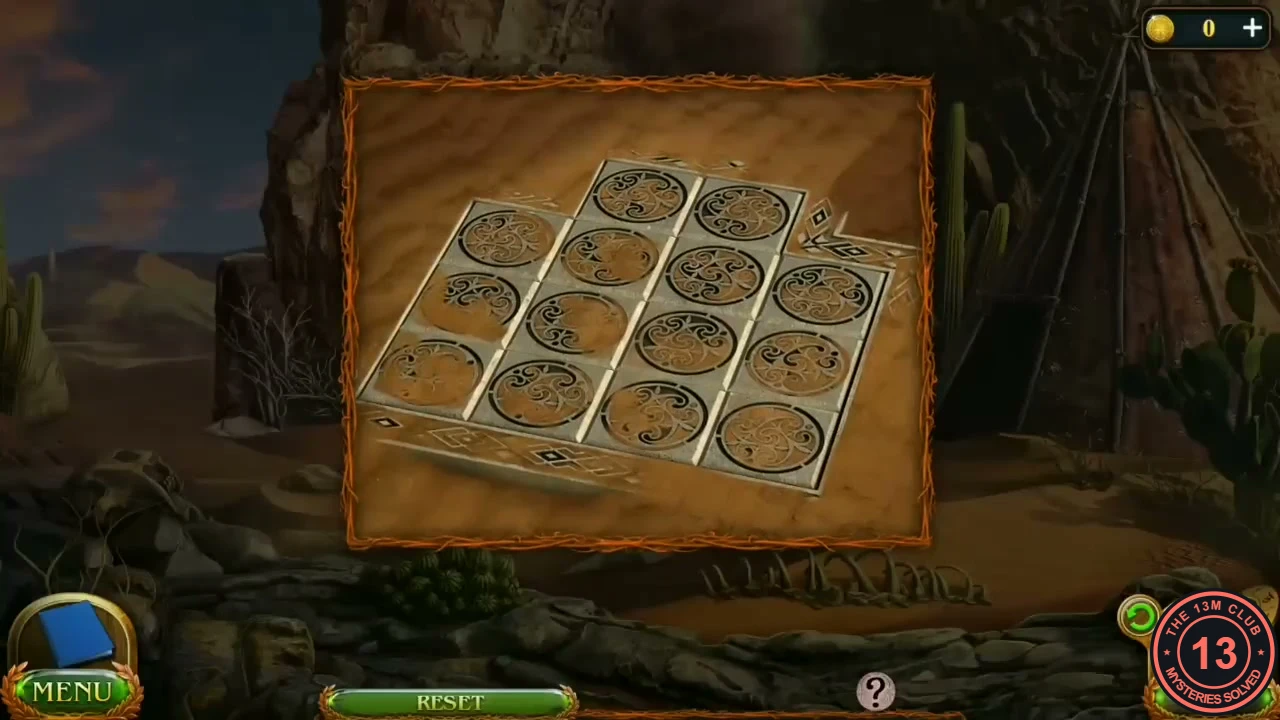
The sand the ghost left behind is a clue for the tile board in the desert.
- Zoom into the sand left on the floor where the ghost stood and note the pattern of dark marks on the grid.
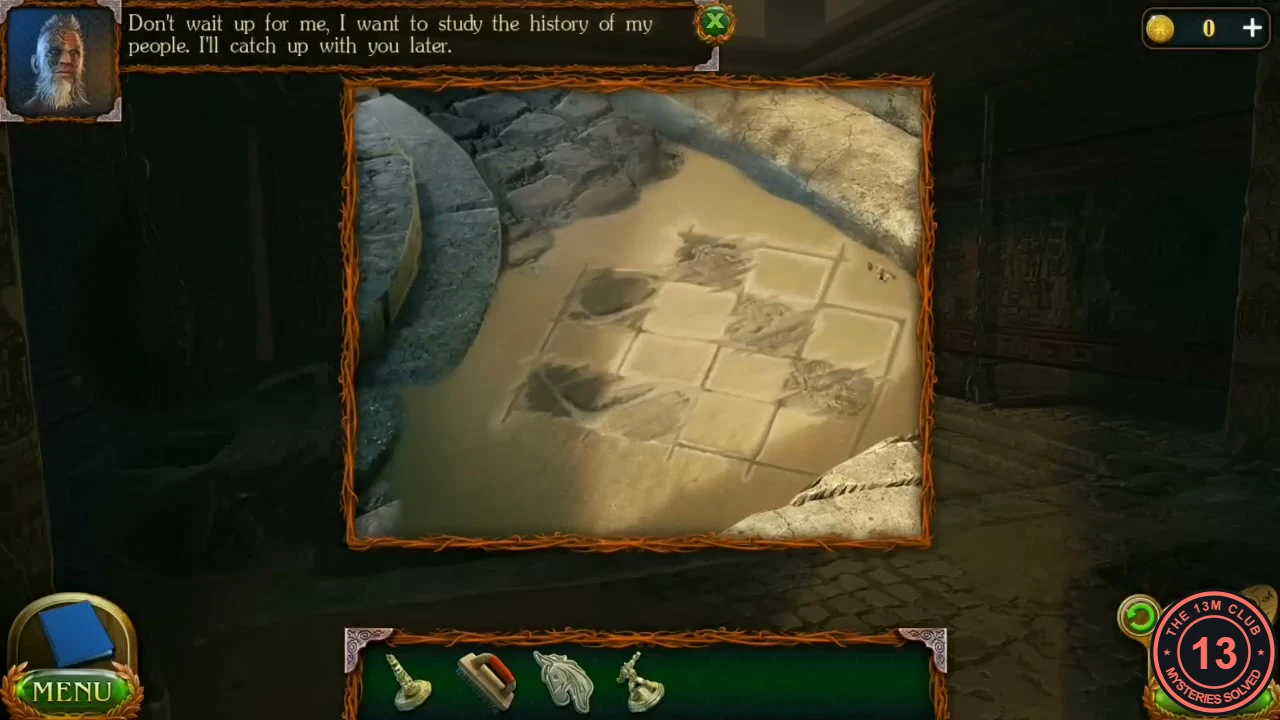
The pattern of marks in the sand. - In the desert, zoom into the round-tile board at the bottom centre. Press the tiles that match the marks: the left tile of the two-tile top section, the 1st and 3rd tiles of the next row, the rightmost tile of the third row and the leftmost tile of the bottom row.
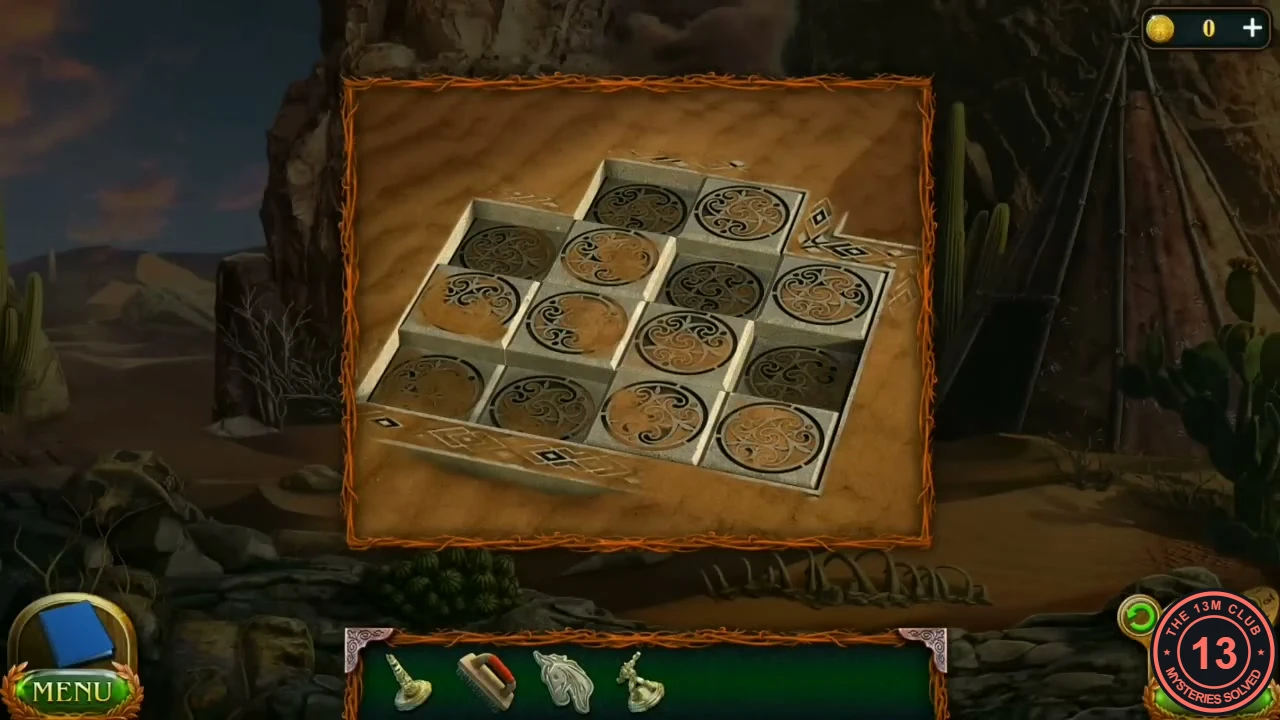
The tiles pressed to match the sand marks. - Enter the cave. Zoom into the dirty stone block on the left and clean it with the Brush. The inscription reads: horses in the West, dolphins in the East, owls in the South, wolves in the North.
Cave of Obelisks: Turning the Obelisks
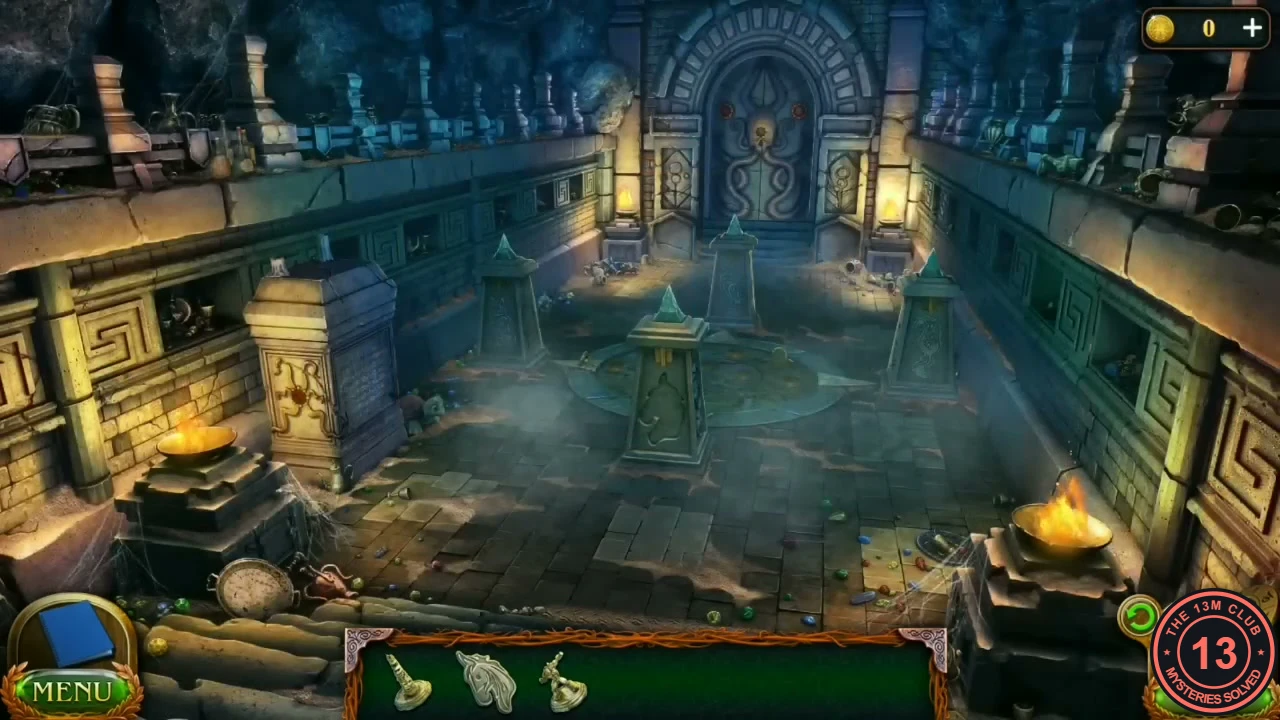
Four obelisks stand around the round floor mosaic. Each one can be turned to show a different animal; the inscription on the cleaned stone block says which animal belongs on each side.
- Zoom into the nearest obelisk (South) and fit the Horse's head into its notch. Then zoom into each of the four obelisks in turn and rotate it so the matching animal faces the centre: South owl, West horse, North wolf, East dolphin.
- Take the red Orb of memories from the broken skull on the new block. There is the same skull in the Academy library.
- Travel to the Academy library. Put the Orb into the skull on the table and turn it. A vision shows the Myopsis race; Maaron joins you. The task Summon the spirit of the desert is added.
Summoning the Desert Spirit
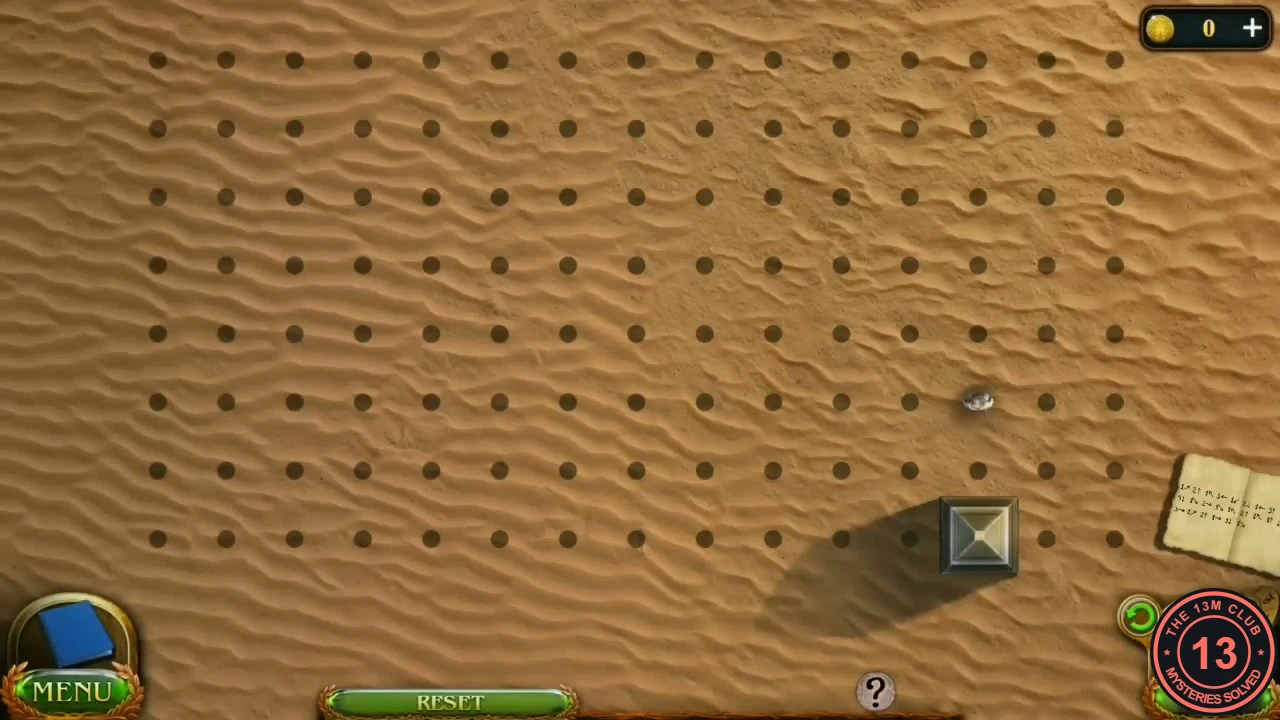
Find the ritual in the library and walk it out in the sand.
- In the library hall, read the list on the stand: shelf 10 is Spirits of the Lost Lands. Open the book on that shelf and take the clue paper.
- In the Karemos desert, zoom into the giant skeleton at the left; a ritual obelisk can be seen in the distance. Use the clue paper there to open the dotted sand grid.
- Click dots to move the stone; each number is how many dots to move in the arrow's direction. Follow the clue paper shown next to your own sand grid. In the recorded game it read as follows (pictured below); if your paper shows different arrows or numbers, use those instead. Row 1: 1↗ 2↑ 1↖ 3← 1↙ 2↓ 1← 3↑ 1↖ 4← 1↙. Row 2: 4↓ 1↘ 2→ 1↘ 1↖ 2↑ 1↖ 1↑ 2→ 3↓ 1↘. Row 3: 3→ 1↗ 2↑ 1→ 1↓ 1↘.
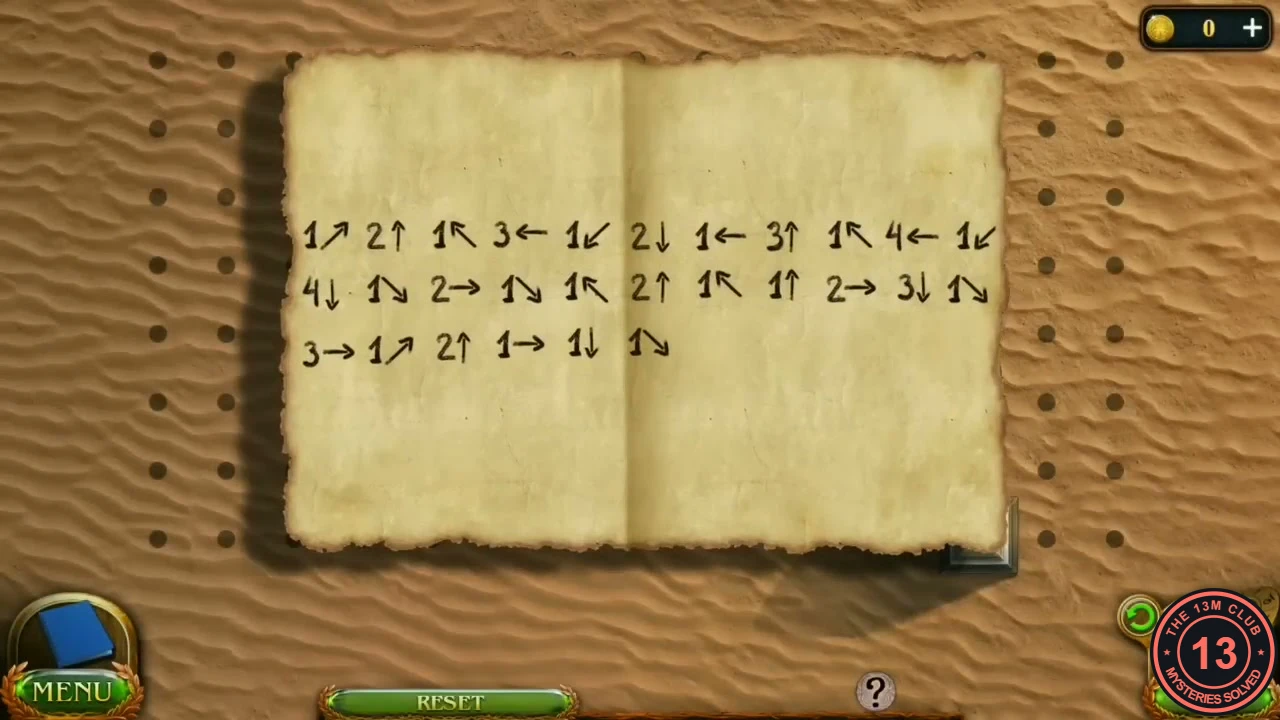
Example clue paper beside the sand grid. If yours differs, follow your own paper. 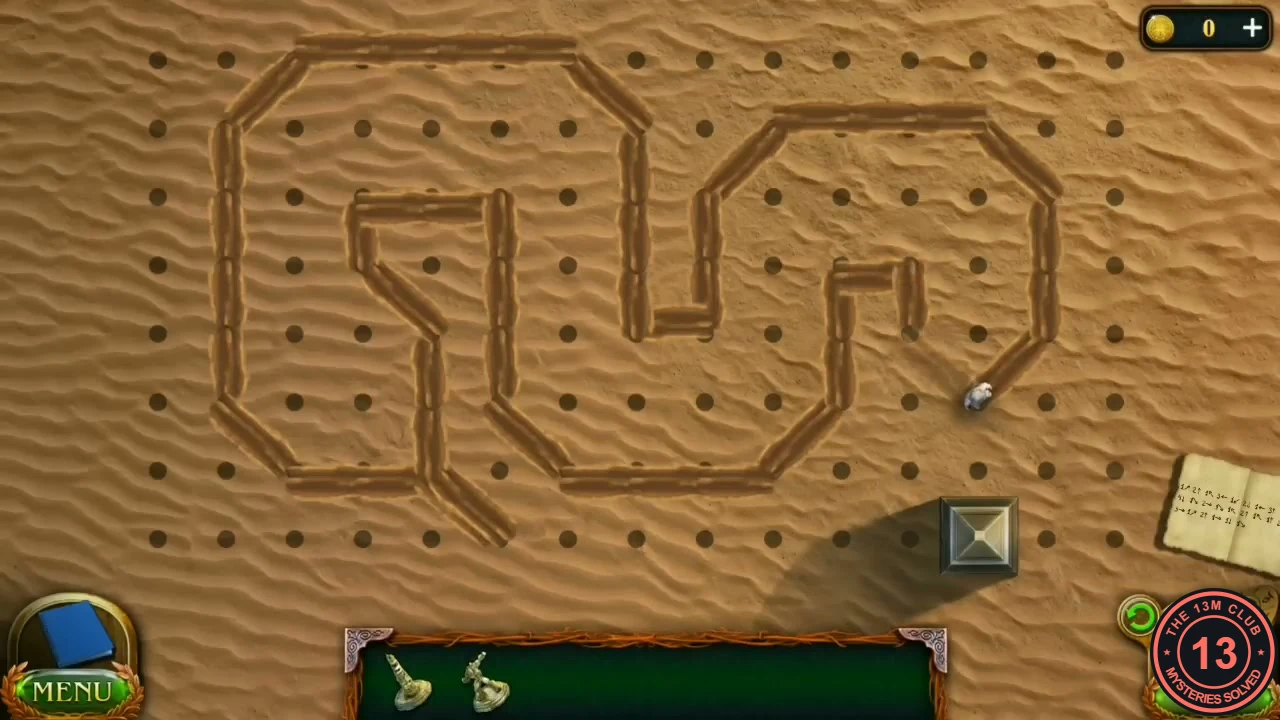
The finished path for the pictured clue paper. - Maaron summons the desert spirit. It explains how to lift the curse: take the shackles from the tomb. You receive a Key and the task Remove the shackles.
The Map of Figures
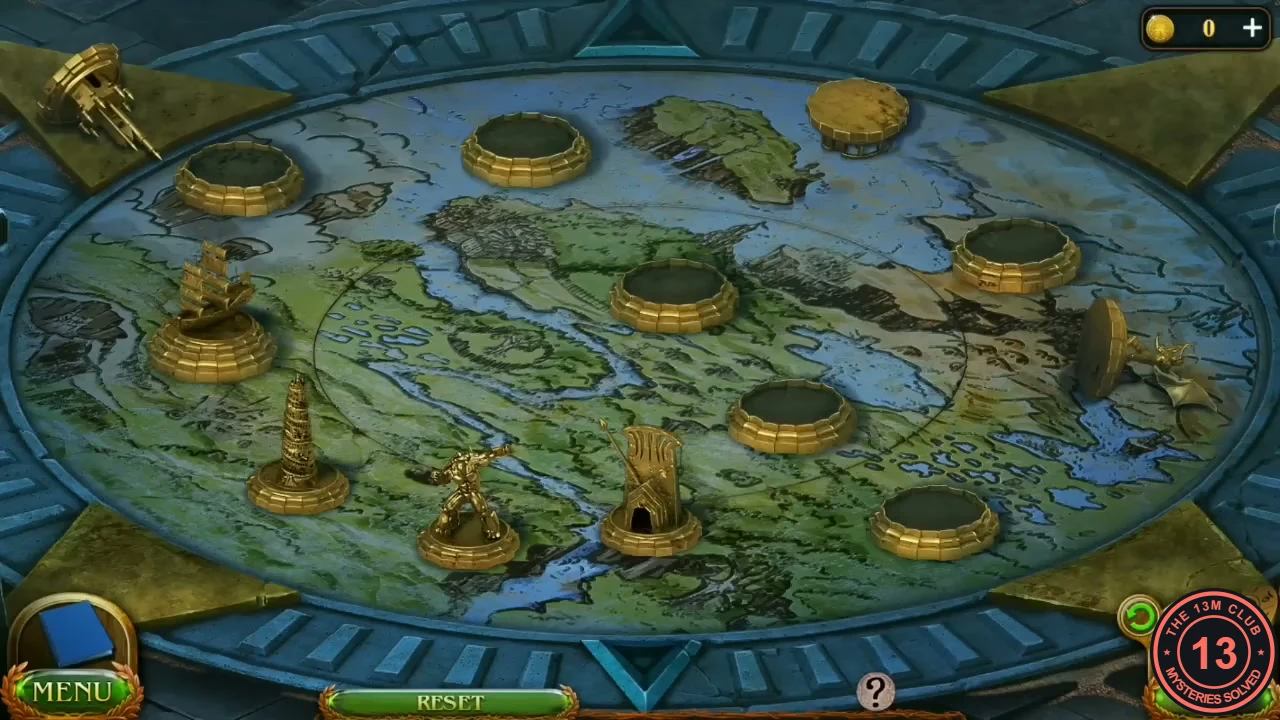
The tomb is behind the large doors at the end of the obelisk cave.
- In the obelisk cave, zoom into the large doors at the end and put the Key in the centre. Go through to the tomb. A body hangs inside a sphere held by four coloured beams.
- Zoom into the foot of the yellow control block and take the Great Metronome figure.
- Back in the cave, zoom into the compass circle in the centre to find a map board. Place the Stronghold of the Five Worlds, the Tarsas and the Great Metronome, and set the other figures upright.
- Move the seven figures so they match the map in the tent outside the cave (open it again if you need it). Take the Skull from the platform that rises.
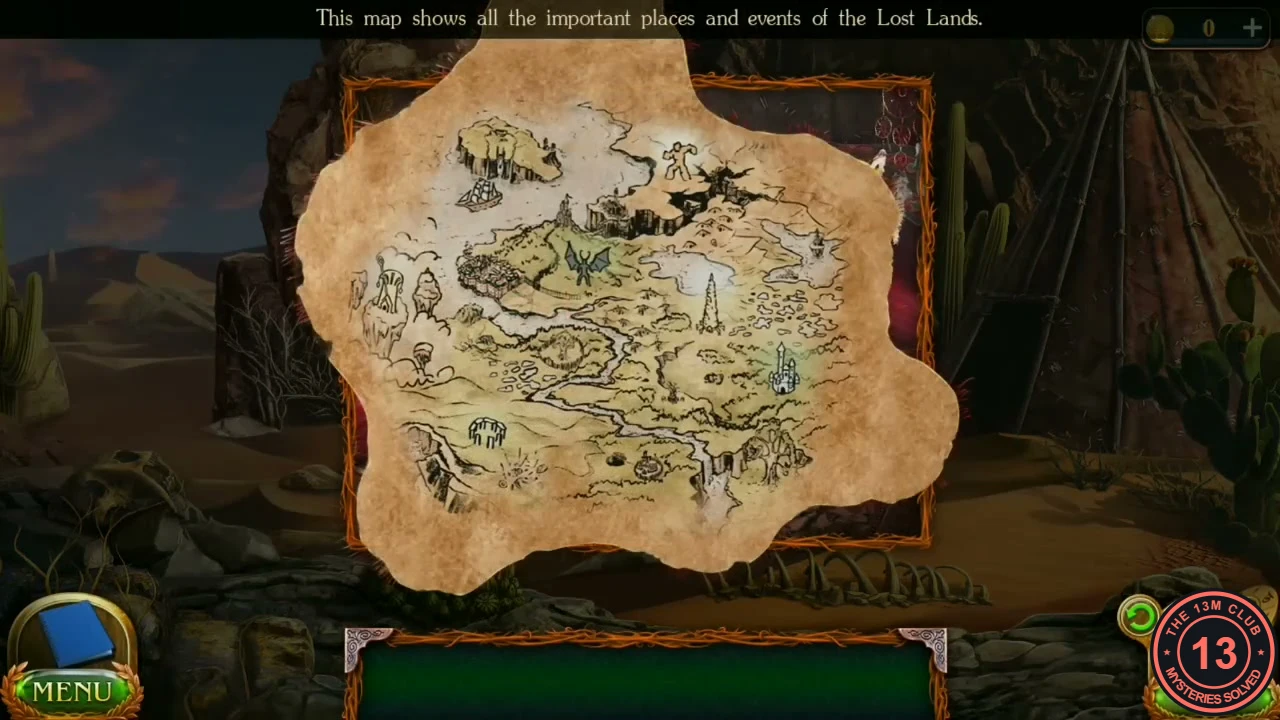
The tent map: where each figure belongs. 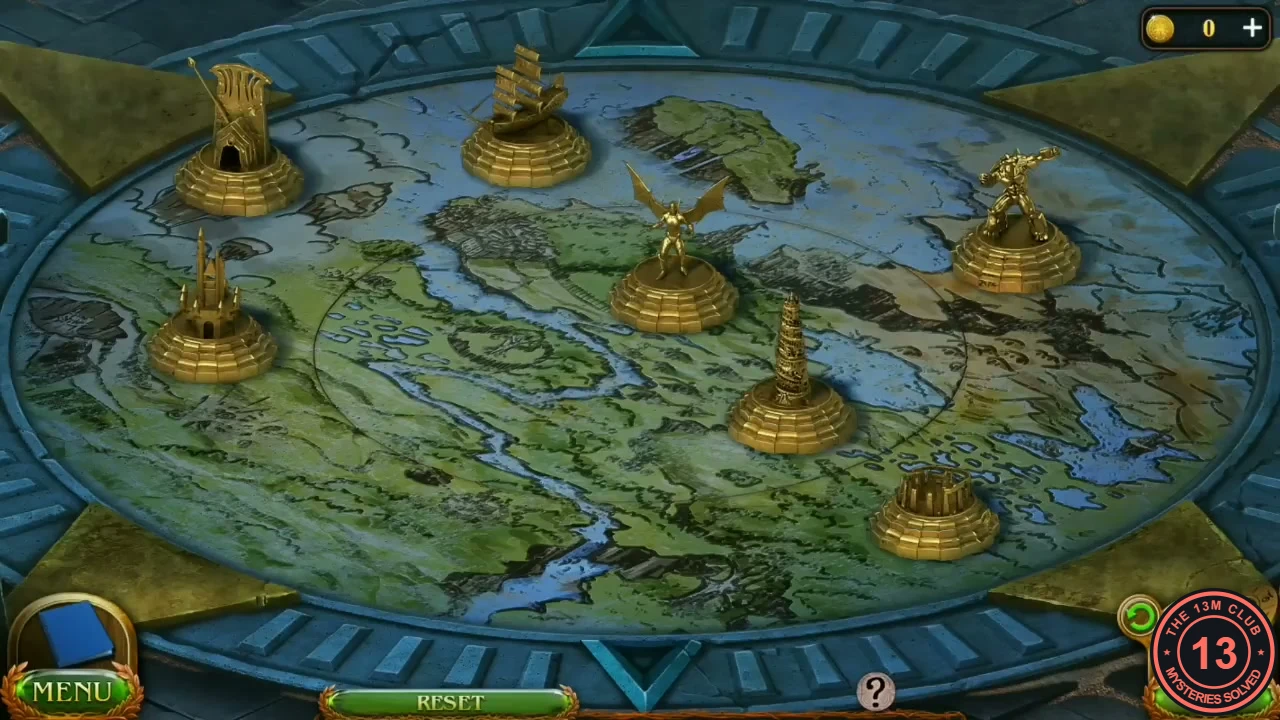
Solved: the figures on their places.
Yellow Control Block: Light Beams
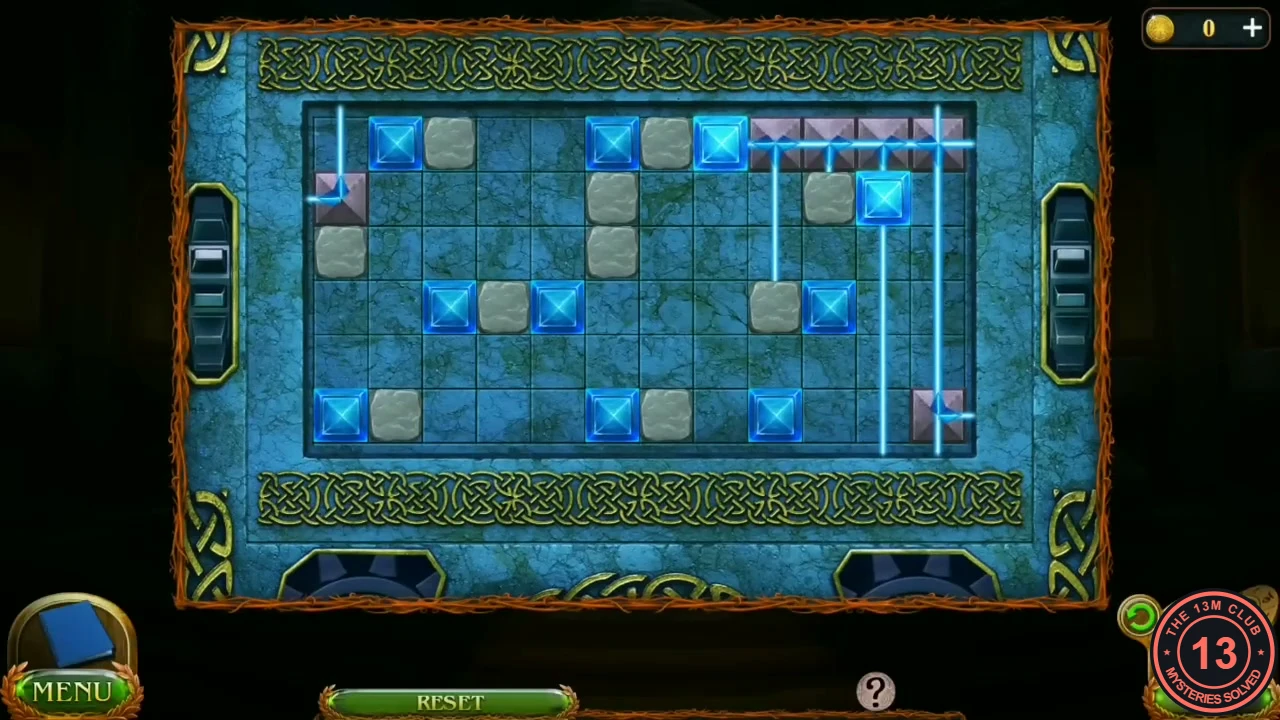
Four control blocks in the tomb (yellow, green, blue and red) keep the protection around the body. Each solved block opens the next one and starts an hourglass at the side of the screen. The hourglasses add time pressure, so work through the blocks without long pauses. The yellow block comes first: the pink pyramid emitters send beams along the rows and columns, and every blue crystal block must be lit.
- Zoom into the yellow control block and fit the Skull into the round socket in the centre. The lid opens and shows the beam board.
- Slide the pink pyramid emitters until their beams light every blue crystal block. Grey stones block the beams. Copy the emitter positions from the solved board shown below.
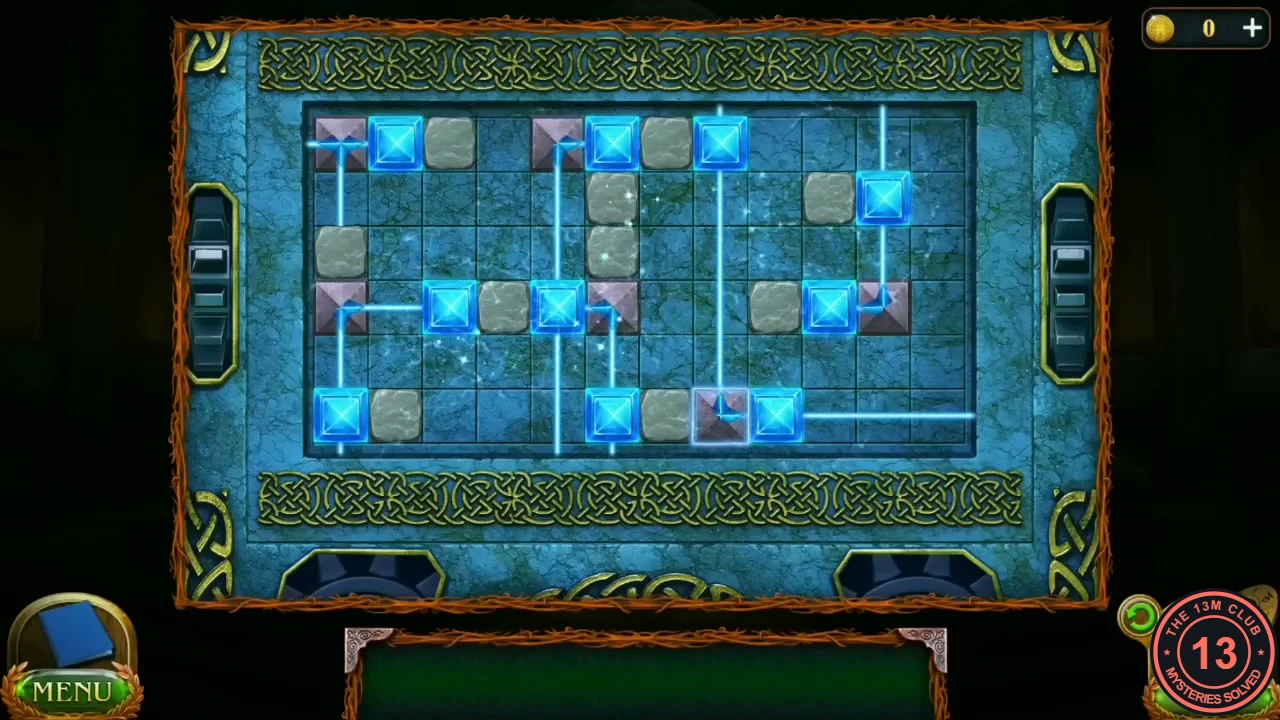
Yellow block solved.
Green Control Block: Skull Tiles
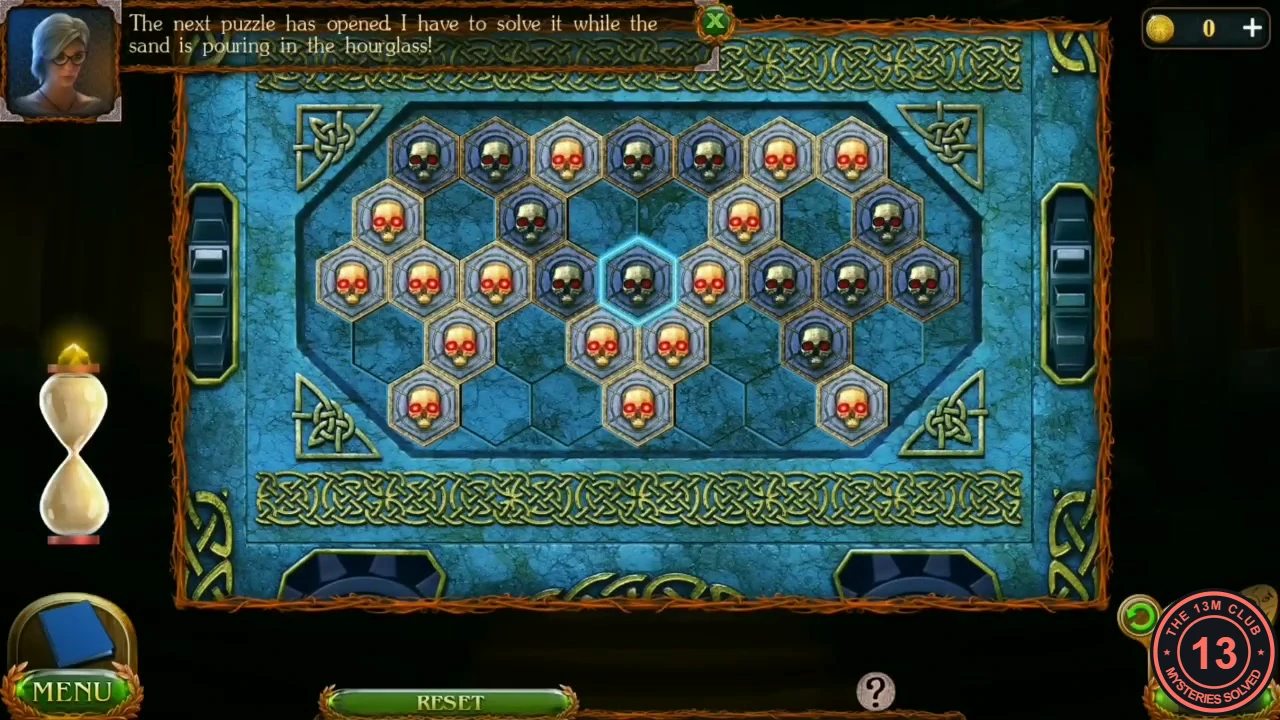
Tapping a skull tile flips it and every tile touching it between dark (off) and gold (on). Turn every tile gold. The tiles are in five rows: 7 on top, then 4, 9 in the middle, 4, and 3 at the bottom.
- Starting from the layout shown above, tap each of these five tiles once, in any order: the 2nd and the 4th tile from the left in the top row; the 2nd tile from the right in the middle row; the 2nd tile from the left in the fourth row; the middle tile of the bottom row. Every tile turns gold. If you tap a wrong tile, tap it again to undo it.
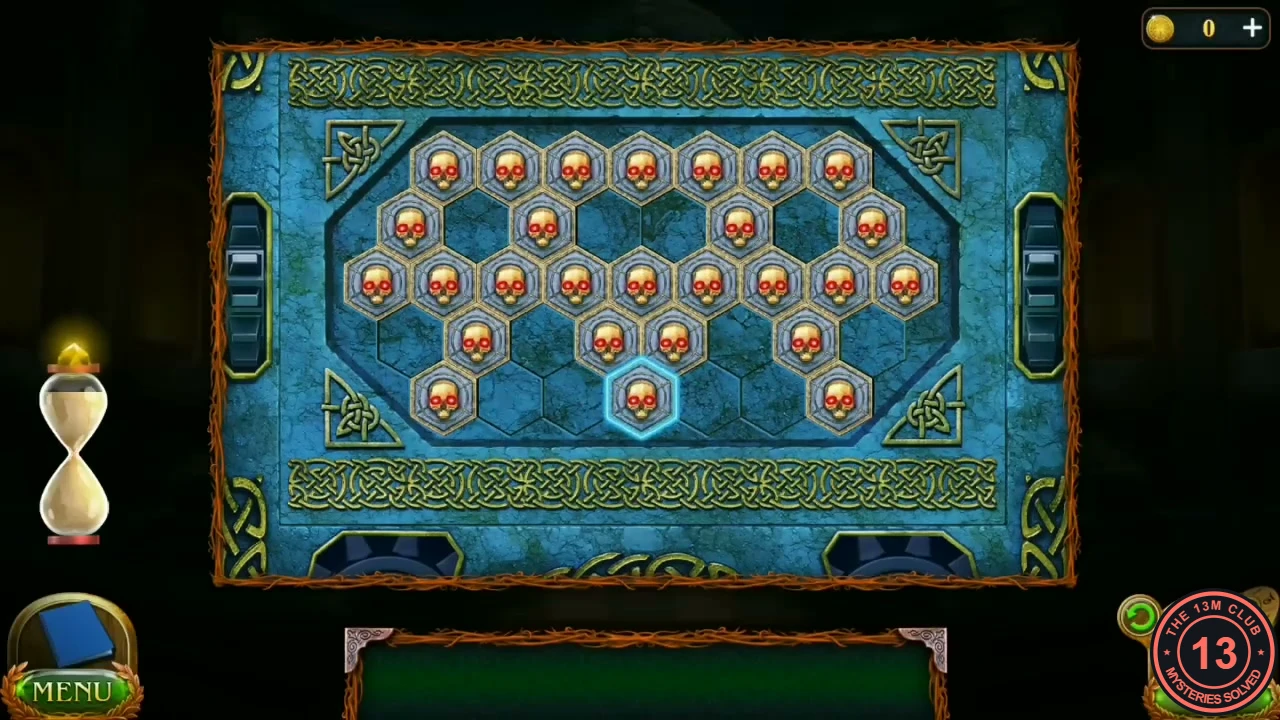
Green block solved.
Blue Control Block: Sliding Chips
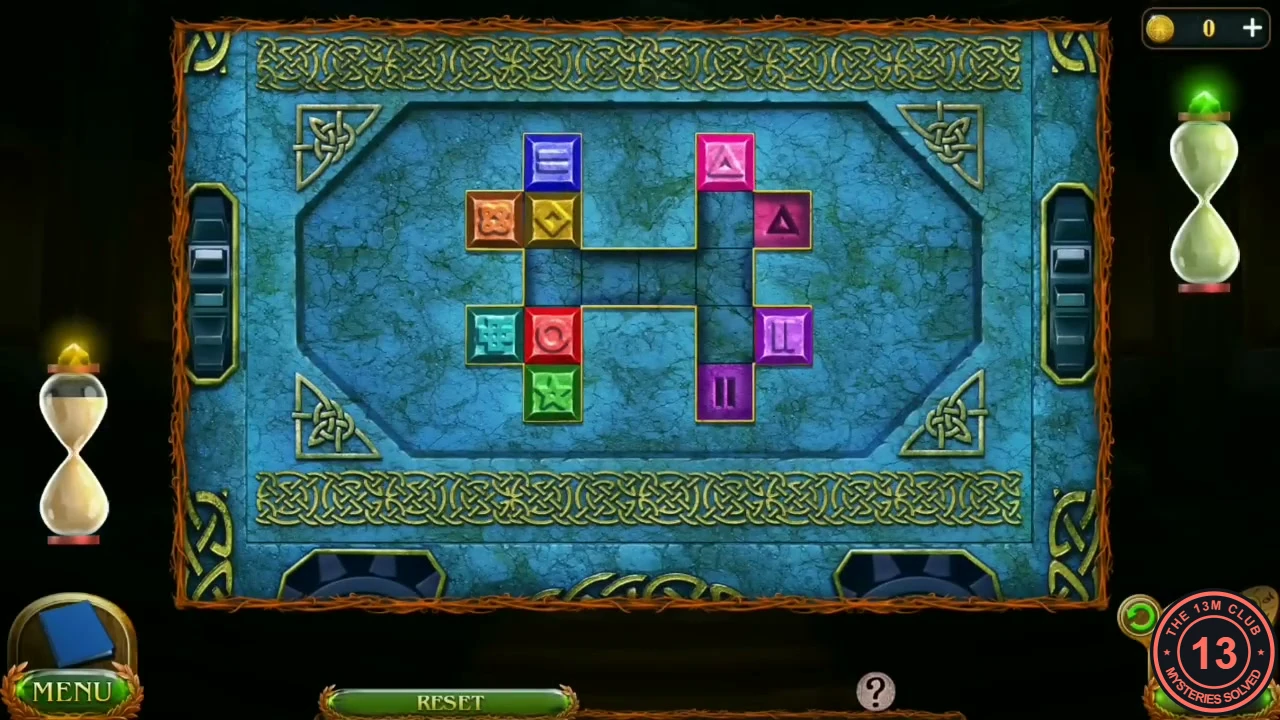
Eight coloured chips sit in two upright channels of five spaces, joined across their middle spaces by a two-space bridge. Each channel has two side pockets on its outer side, beside its 2nd and 4th spaces. Every move is a straight slide: a chip keeps going until it meets another chip or the end of a channel. Goal: left channel top teal and bottom orange, blue in the upper-left pocket, green in the lower-left pocket; right channel top yellow and bottom purple, pink in the upper-right pocket, red in the lower-right pocket.
- Start from the layout shown above (left channel from the top: blue, yellow, empty, red, green; orange in the upper-left pocket, teal in the lower-left pocket; pink at the top of the right channel, purple in the lower-right pocket). Slide: purple left; red up, then red right across the bridge (it stops in the middle of the right channel); teal right; yellow down; orange right; pink down, then pink right into the upper-right pocket.
- Slide: purple down to the bottom of the right channel; red down; yellow right across the bridge (it stops in the middle of the right channel); orange down; blue down.
- Slide: orange right (it stops on the bridge beside yellow); yellow up to the top of the right channel; blue left into the upper-left pocket; teal up to the top of the left channel; orange left back into the middle of the left channel.
- Slide: green up (it stops under orange), then green left into the lower-left pocket; orange down to the bottom of the left channel; red right into the lower-right pocket. All eight chips are on their places.
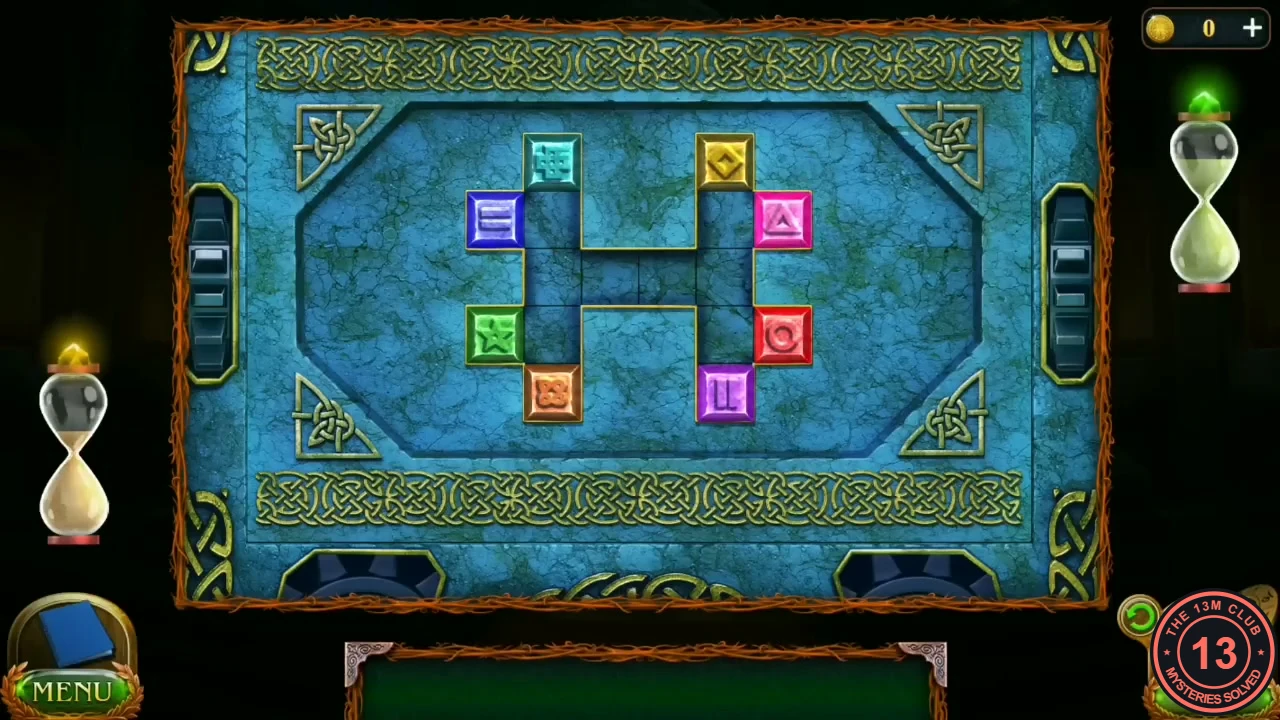
Blue block solved.
Red Control Block: Snake Chains
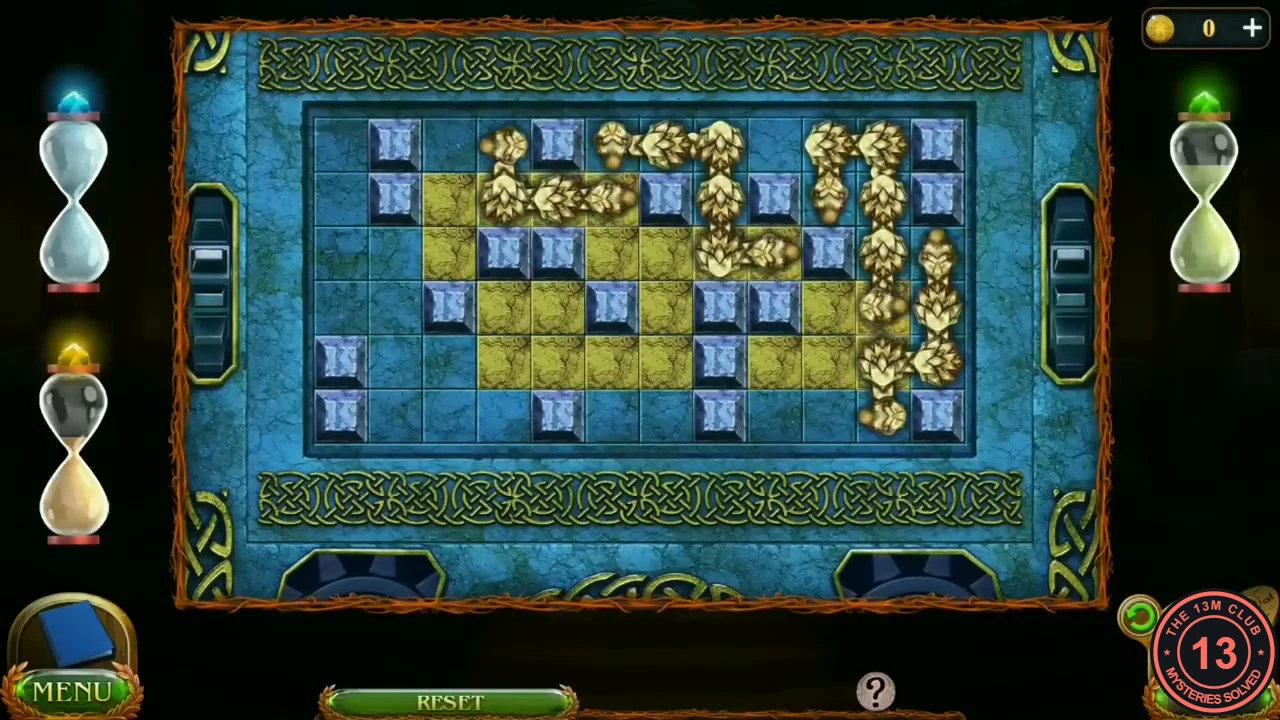
Golden snake chains lie across a grid of yellow squares and blue tiles. Drag the chains so that together they cover every yellow square and none of the blue tiles.
- Drag the snake chains one at a time, bending them around the blue tiles, until every yellow square is covered. Copy the chain positions from the solved board shown below. When the last block is solved the protection breaks.
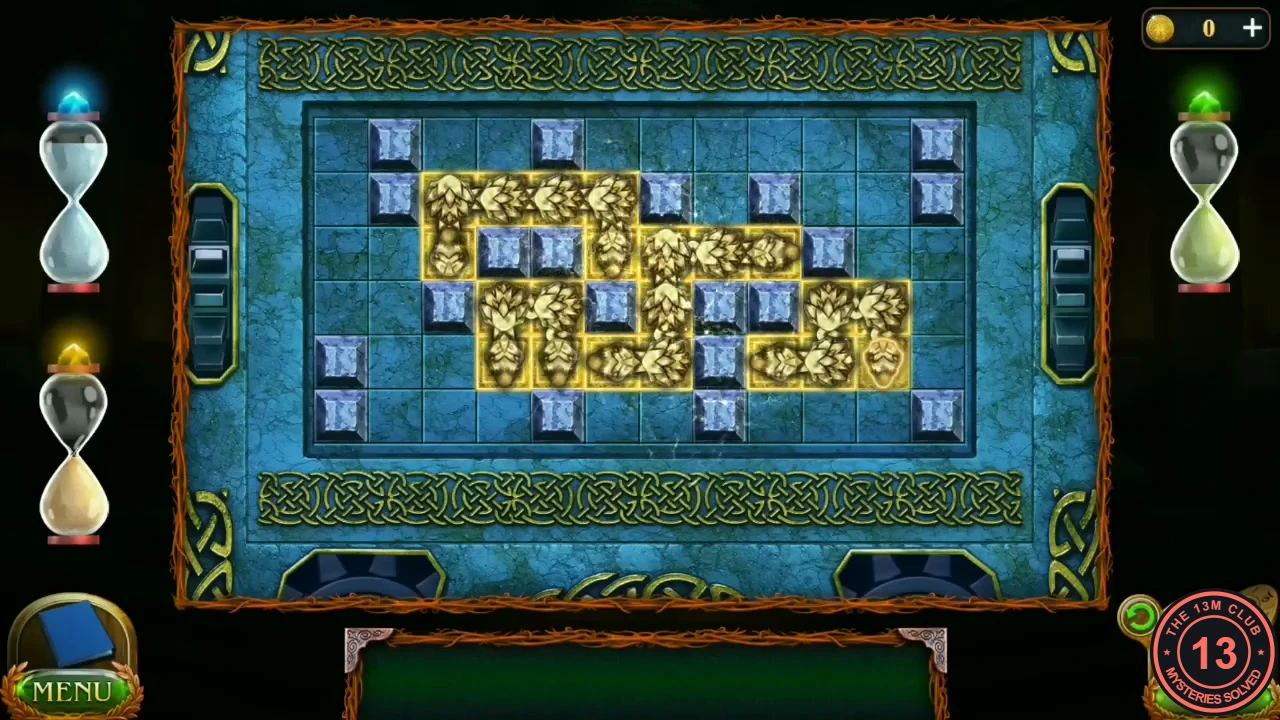
Red block solved.
The Shackles and the Ending
Kiana's amulet opens the shackles.
- Zoom into the fallen body. Kiana recognises the notch in the shackles as her amulet and gives it to you; put the Amulet into the shackles to open them.
- In the final cutscenes Susan takes the shackles and the curse spreads to her. Back in the ritual hall the curse is lifted, and the story ends with a closing scene at home.