The Sealed Well
The temple behind the island courtyard is closed by a well with three empty tile slots. Start collecting the tiles.
- In the island courtyard, go through the golden doorway in the centre and zoom into the top of the well: three tiles are missing.
- Back in the courtyard, zoom into the cracked rock wall at the upper left. Break it open with the Battle ax and take the Tile.
- Cross to the second island and zoom into the earth mound on the right. A tile is stuck in the ground; Susan needs a shovel to dig it out.
- Travel to the Stronghold excavation site and take the Shovel leaning against the rock on the far left.
- Return to the mound on the second island and dig with the Shovel. Take the Amulet and the Tile with a pattern. The mound starts to move: it is a giant turtle.
The Turtle and the Ruined City
The turtle Gabriella can carry Susan down to the ruins below the islands if she is fed.
- Go back to the courtyard and talk to the small water creature. It explains that the turtle can take Susan down if she is fed.
- Zoom into the large white lily in the courtyard pond and cut out the Stamens with the Knife.
- Give the Stamens to the turtle on the second island and ride her down to the ruined city.
- Zoom into the rubble under the arch on the left and take the Tiara.
- Ride the turtle back up. On the second island, zoom into the bowman statue in the tree, place the Tiara on its head and take the Staff.
- Ride down again and zoom into the small door at the upper left of the ruined city. Put the Staff in the round slot to open it. Inside, take the Beater from the floor on the right and the Wolf skull from the floating pedestal. The Manuscript under the pedestal is Manuscript 6 of 10.
The Gong and the Bells
Sound the courtyard gong to raise the four statues from the pond.
- Ride up to the island courtyard, zoom into the round gong at the lower left and strike it with the Beater. Four statues rise from the water.
- Zoom into the front statue on the right and take the Book from it.
- Zoom into the front statue on the left and take the Bells from its hands. Susan remembers a fresco showing these statues: their positions matter.
- Go to the second island, zoom into the hanging ropes with bells and add the Bells. The giant clam opens; take the Eagle skull.
The Buried Fresco
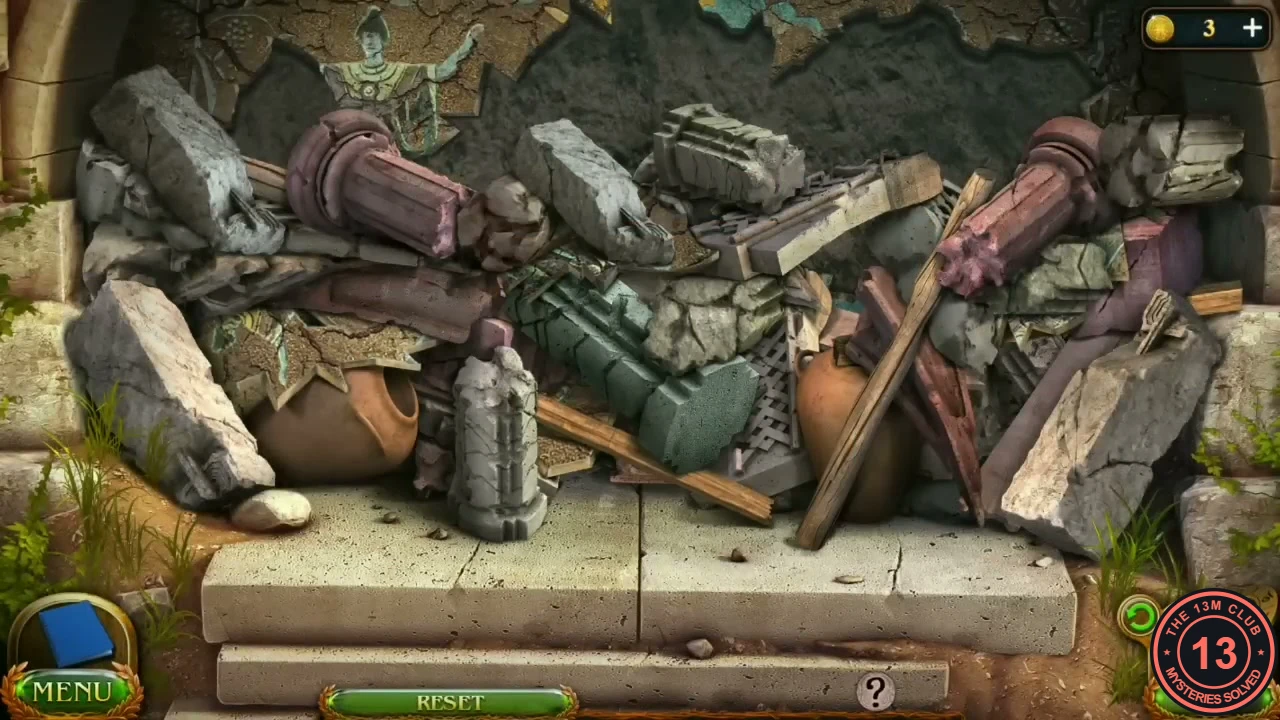
The rubble heap under the arch in the ruined city hides a fresco. Clear it by removing pairs of matching pieces.
- Ride down to the ruined city and zoom into the rubble under the arch on the left to start the puzzle.
- Click two identical pieces to remove them. A piece can only be picked when nothing lies on top of it; a blocked piece flashes red. Clear the top layers first so that the lower pieces become free. Keep removing pairs until the whole fresco is uncovered.
- Study the fresco: four statues in a row with fixed arm positions. Left and right here mean as you look at the screen. From left to right: 1 – arm on the left angled down and out, arm on the right raised high; 2 – both arms raised in a V; 3 – both arms angled down and out, hands below shoulder level; 4 – arm on the left raised high, arm on the right angled down and out.
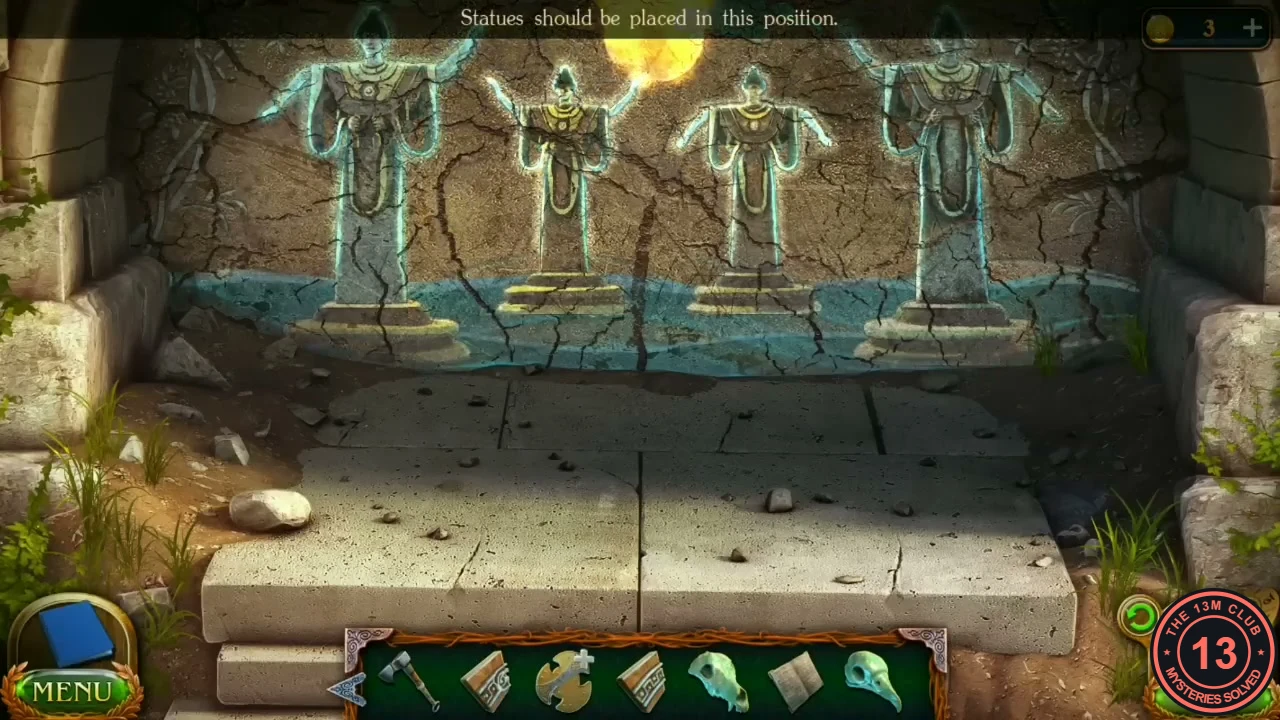
The fresco: copy these four arm positions with the courtyard statues.
Arms of the Four Statues
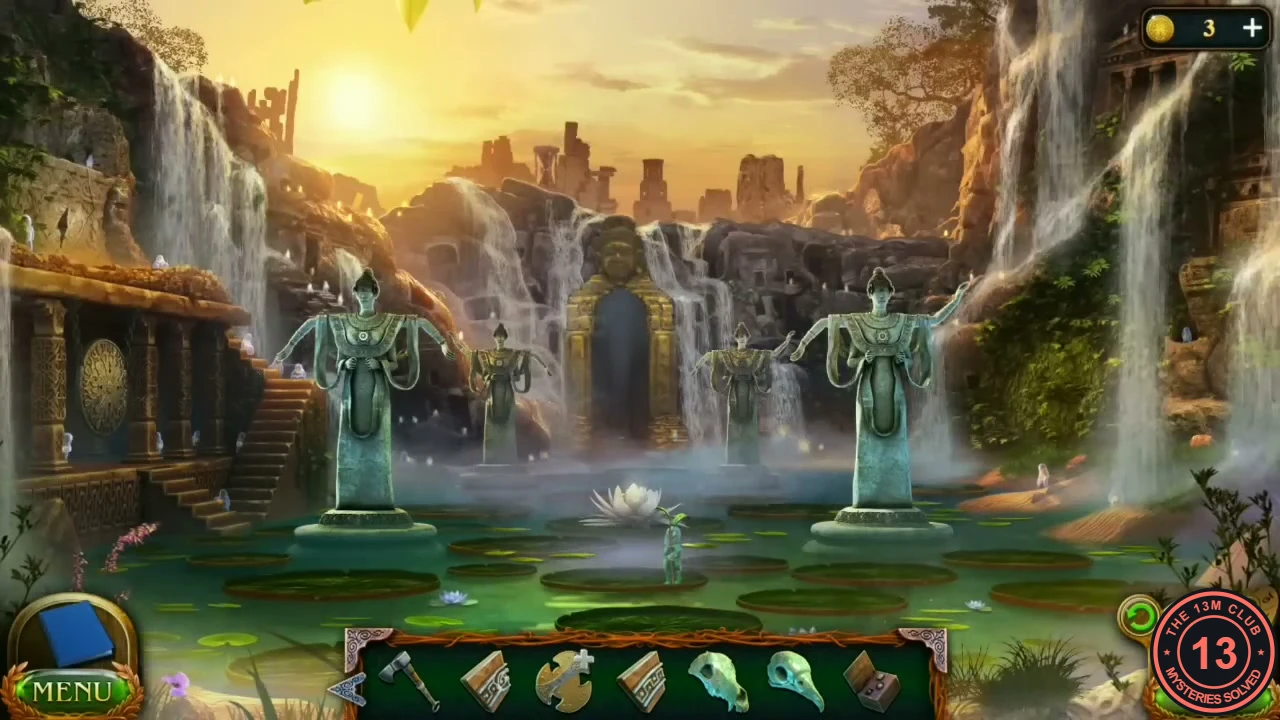
Copy the fresco with the four statues in the island courtyard pond. Fresco statue 1 is the front-left statue, 2 the back-left one, 3 the back-right one and 4 the front-right one.
- While still in the ruined city, return to the small room behind the upper-left door. Put the Book on top of the floating pedestal; it opens. Take the Set of figures.
- Ride up to the courtyard. Zoom into each statue and click its arms until they match the fresco. Left and right mean as you look at the screen, not the statue's own left and right. Front-left statue: the arm on the left points down and out, the arm on the right is raised. Back-left: both arms up in a V. Back-right: both arms angled down and out, below shoulder level. Front-right: the arm on the left is raised, the arm on the right points down and out.
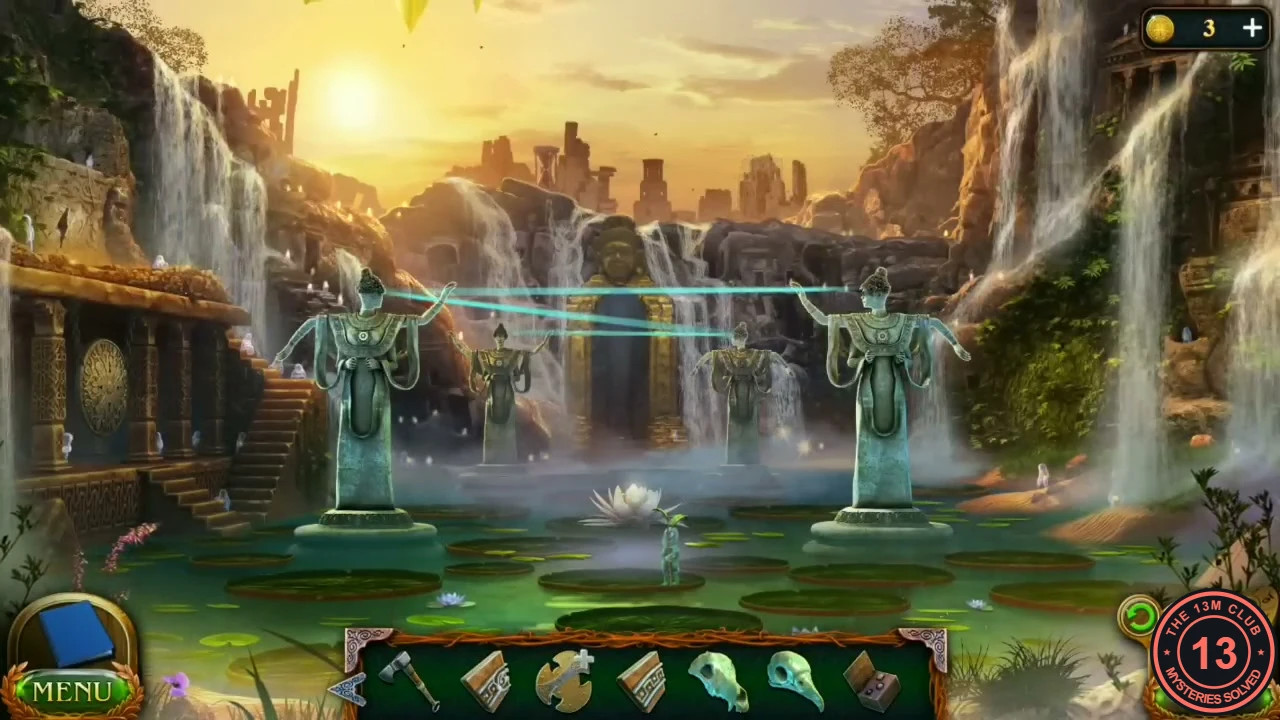
Solved: light beams link the statues. - Zoom into the overgrown spot on the right wall where the beams end and cut away the bushes with the Knife. A passage opens into a secret room.
The Aquarium Room
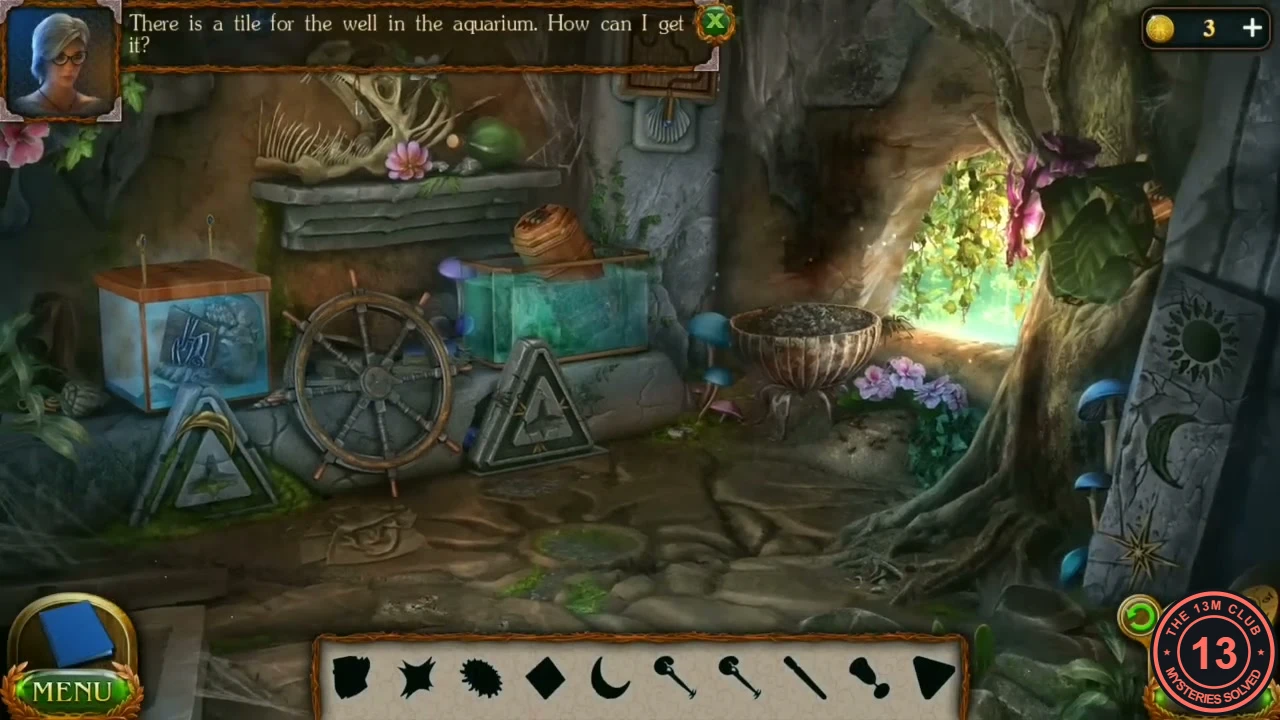
This hidden-object room shows silhouettes along the bottom. Most items are hidden behind small mechanisms. Susan notes that the last well tile is in the aquarium.
- Enter the passage. Take the Crescent near the stone triangle at the lower left. The ants by the flowers on the right block something; you will need water for them.
- Zoom into the fish skeleton on the shelf and take the Sun from its mouth.
- Zoom into the stone pillar at the right edge and place the Sun and Crescent in their slots. The compartment opens; take the Triangle button.
- Zoom into the hollow in the tree to the right of the doorway and take the Board with a ball from the bottom.
- Zoom into the wooden board on the wall at the top centre. Put the Board with a ball in the empty top-left square; the ball rolls along the path and the board opens. Take the Figural key.
- Zoom into the green tank in the centre and take the Goblet (it fills with water).
- Zoom into the blue tank at the left and place the Figural key in one corner of its lid.
- Zoom into the ants and pour the water on them. Take the Rod they were hiding.
- Zoom into the stone triangle in front of the green tank and insert the Rod. It opens; take the second Figural key.
- Take the Rag from the floor below the ship's wheel and wipe the dark smudge high on the wall to the left of the bright doorway, above the green tank. Three symbols appear: a crossed-lines sign (#), an O and an E.
Aquarium: Octagonal Symbol Lock
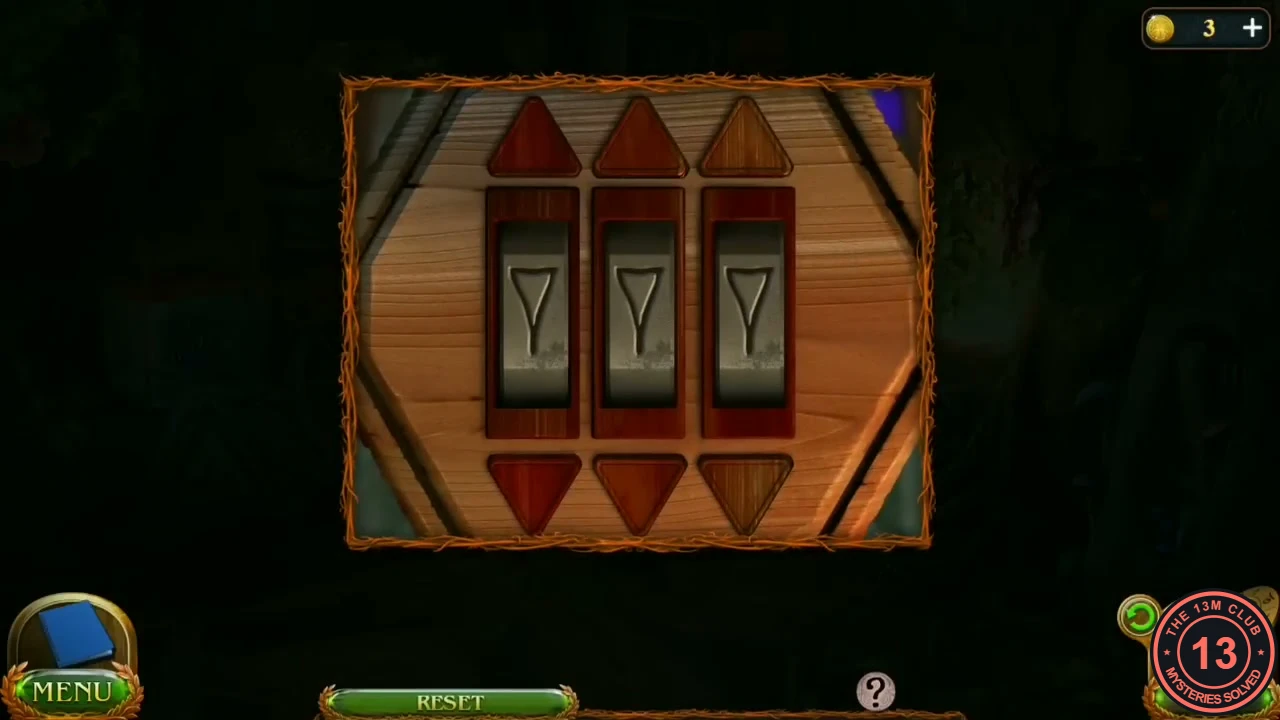
The octagonal box on the green tank needs the Triangle button and the three symbols you revealed by wiping the smudge on the wall. Reset turns the reels back to their starting symbols.
- Zoom into the octagonal box on the green tank and attach the Triangle button. Three reels appear, each with an arrow above and below it. Use the arrows to set the reels, left to right, to #, O and E (the symbols from the wall). The box opens; take the Amulet.
- Back in the aquarium room, zoom into the blue tank again, place the second Figural key and the Amulet on the lid, and take the Tile with a tail from inside.
The Crystal Vault
With all three tiles the well opens a stair to the vault of the island's magic crystal.
- Go back to the well and place the Tile, the Tile with a pattern and the Tile with a tail in the three gaps. Steps appear; descend. The task Find out why magic left the island is added.
- Look around the dome. Each standing archway holds an animal statue with an open head that needs a skull, and Susan cannot reach the crystal while the magic field is up. The statue on the fallen archway at the lower left is out of reach; Susan wants to make a ladder from an old rope bridge.
- Return to the second island and cut down the broken rope bridge with the Knife. Take the Rope bridge.
- Open the Rope bridge in the inventory and use the Knife on it to cut it into a Ladder.
- Back in the vault, put the Wolf skull in the head of the wolf statue (its eyes light up), and the Eagle skull in the eagle statue in the top-left archway.
- Place the Ladder at the fallen archway and climb to the horse statue. It also needs a skull.
The Academy Figures
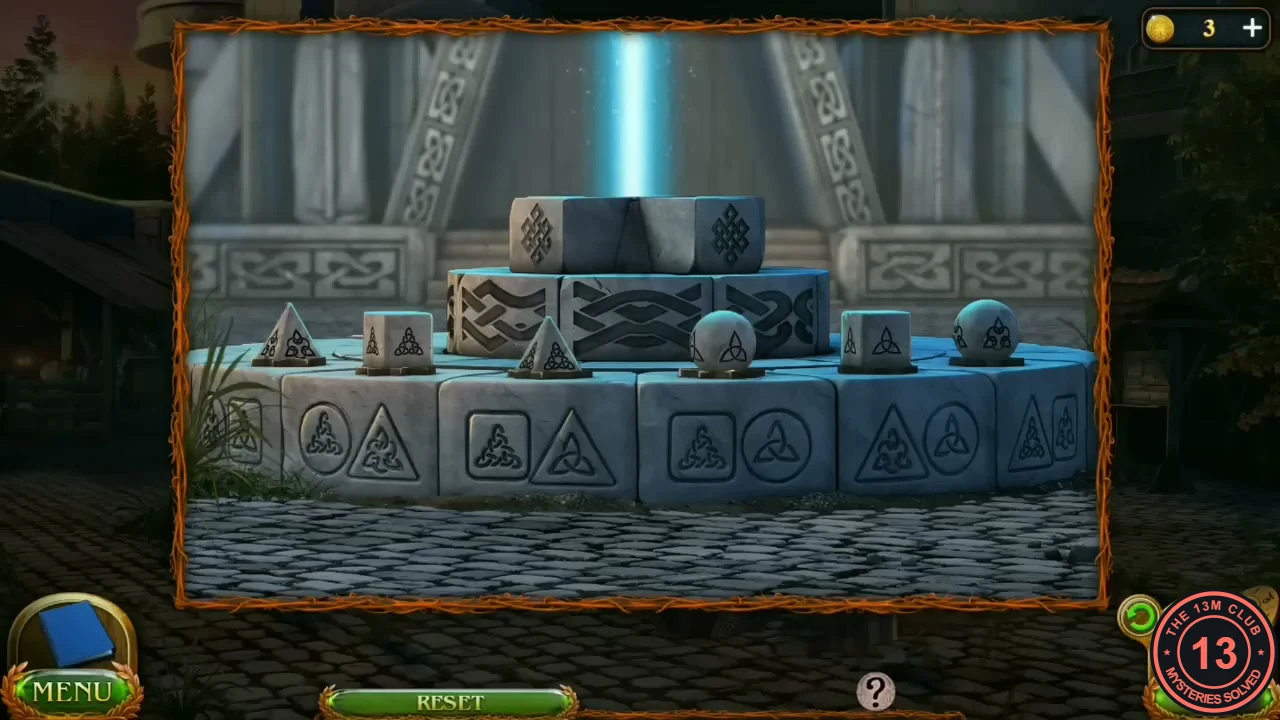
The Set of figures belongs on the platform under the floating sphere in the Academy courtyard. Each plate around the platform is engraved with two of three shapes (a circle, a triangle and a square), and each engraved shape holds one of three knot symbols. The figures also carry knot symbols: two pyramids, two cubes and two spheres.
- Travel to the Academy of Magicians courtyard. The goblin caretaker introduces himself; Maaron asked him to help Susan.
- Zoom into the stone platform under the sphere and place the Set of figures to start the puzzle.
- Swap figures until every plate and its figure use all three shapes and all three knot symbols once. The figure must be the shape missing from the plate: a circle and a triangle need a cube, a square and a triangle need a sphere, and a square and a circle need a pyramid. Its knot symbol must also be the one not engraved on that plate. Since there are two of each shape, check the symbol before you settle a figure. When solved, the front row reads, from left to right, pyramid, cube, sphere, pyramid, cube, sphere, and the symbols glow orange.
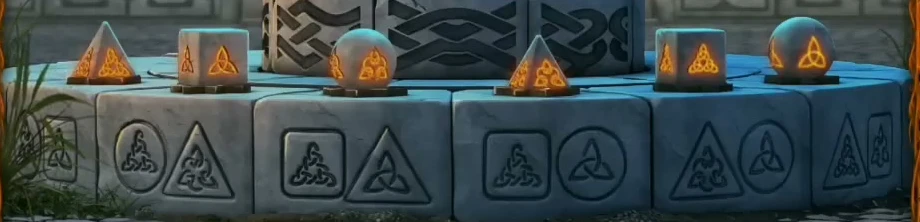
Solved, close up. Each figure is the shape its plate lacks, and its glowing knot symbol is the one not engraved on that plate. Compare the knots on the figures with the knots on the plates below them.
The Engraved Sphere
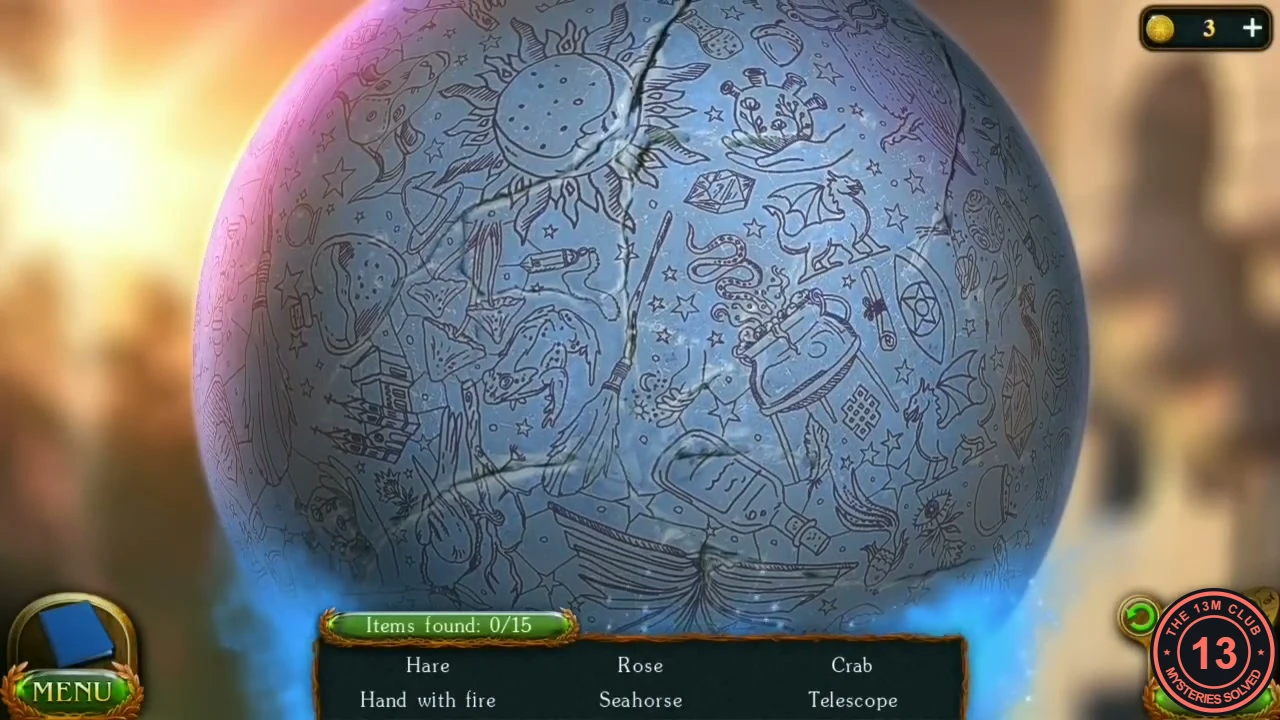
The floating sphere is now covered in engravings. Drag to turn it and find 15 drawings. The list shows a few names at a time and refills as you find them, and a correct drawing flashes green. Several drawings appear more than once (there are a few suns), so use the neighbours below rather than one fixed landmark.
- Zoom into the sphere to start the search.
- Turn the sphere and click each drawing. Seahorse: a large seahorse next to a quill pen and a crystal, left of a curled ram's horn. Hand with fire: an open hand holding a flame, under the wing of a big eagle and left of the large ring with a star inside. Rose: just below that ring with the star, between a rolled scroll and a frog. Clover tincture: a corked bottle with a four-leaf clover on its label, beside a scroll tied with string, to the lower right of a sun. Leo: a lion's head with a curly mane, left of a church with two spires. Hare: a leaping hare just above the lion's head, beside a mortar bowl. Grape: the small bunch just below the right pan of the large scales, not the big bunch beside it. Unicorn: a rearing unicorn to the right of a cathedral, above a round flask. Fork: a long thin fork at the left of a sun, near a bull's head. Mushrooms: two pointed mushrooms left of a horned bull's head. Snake: a small wavy snake beside a steaming kettle, under the big open book. Telescope: lying just above a long horizontal crack. Crab: next to a feather, above a small ring. Maple leaf: on the left page of the big open book. Mask: a carnival mask where two cracks meet, between a castle and a sun.
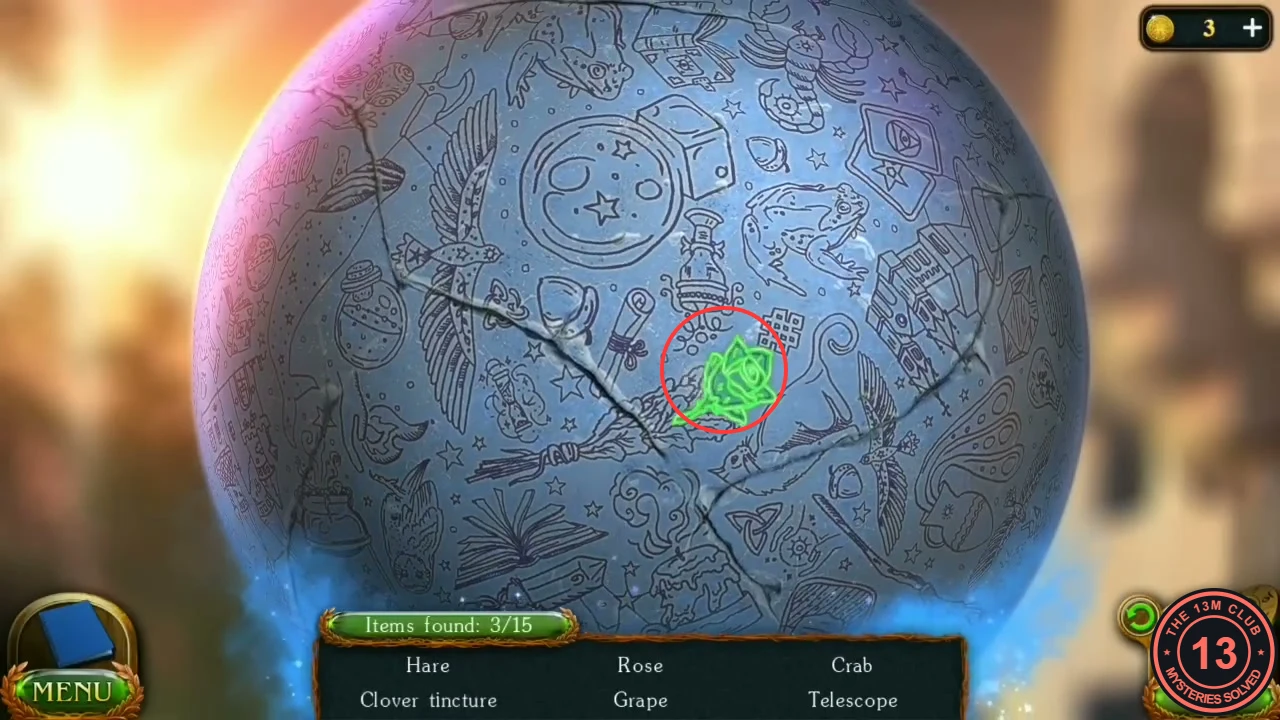
Rose: just below the large ring with the star, between the rolled scroll and the frog. 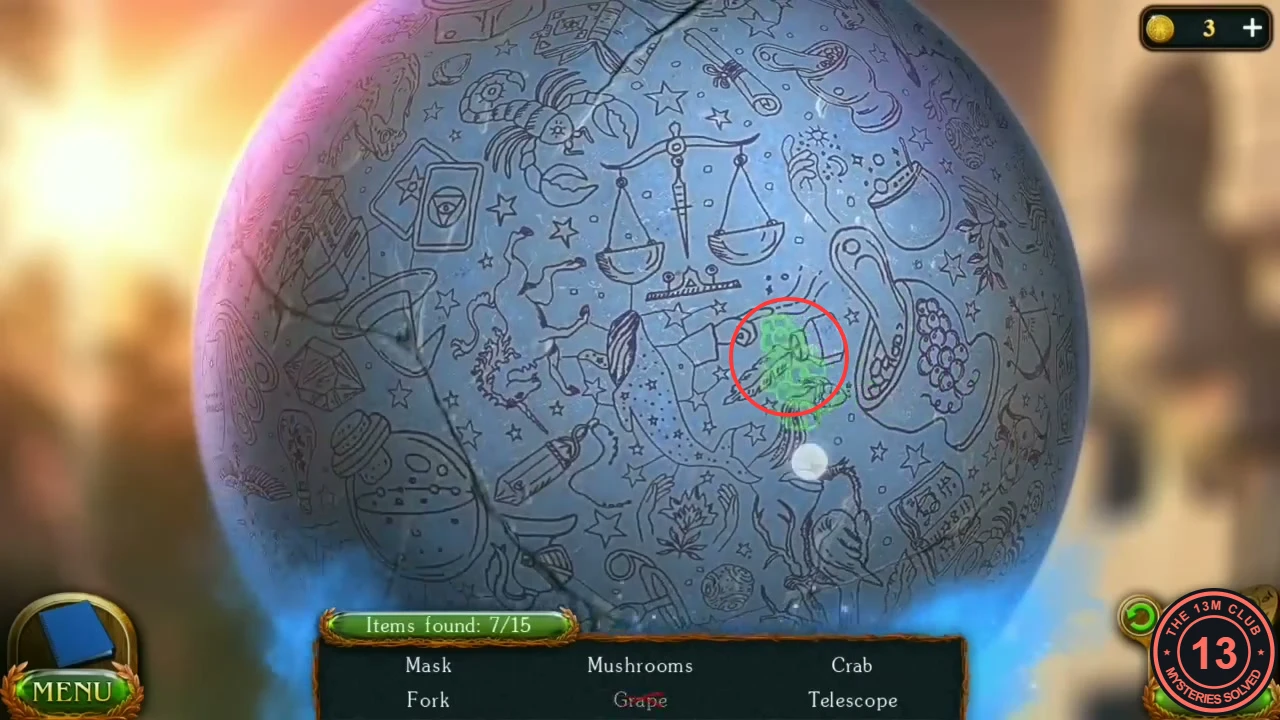
Grape: the small bunch below the right pan of the scales, not the big bunch to its right. 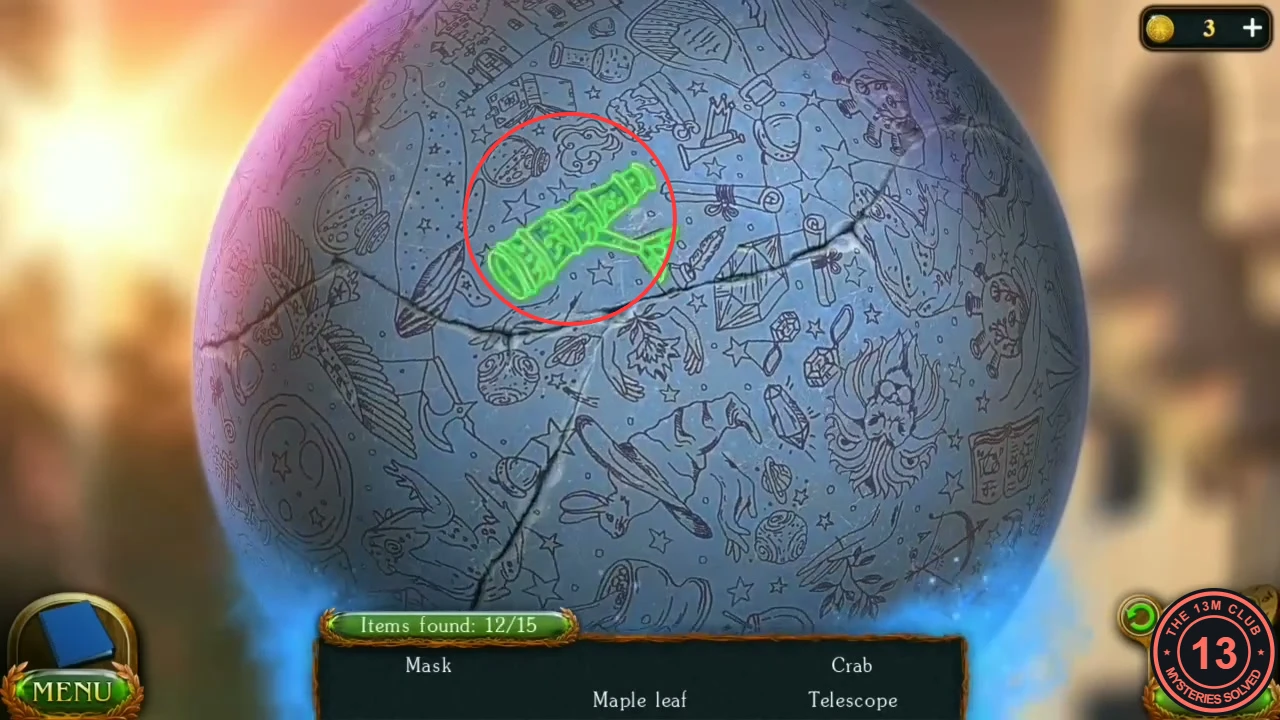
Telescope: lying just above the long horizontal crack. 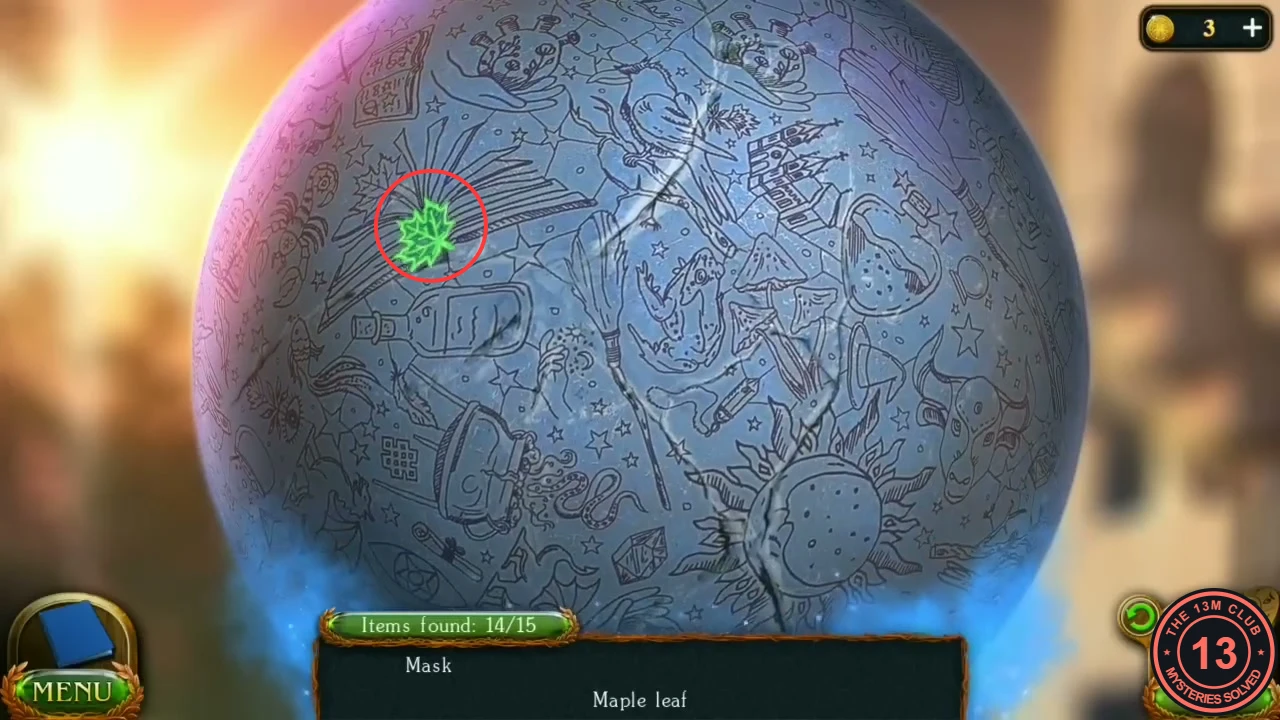
Maple leaf: on the left page of the big open book. 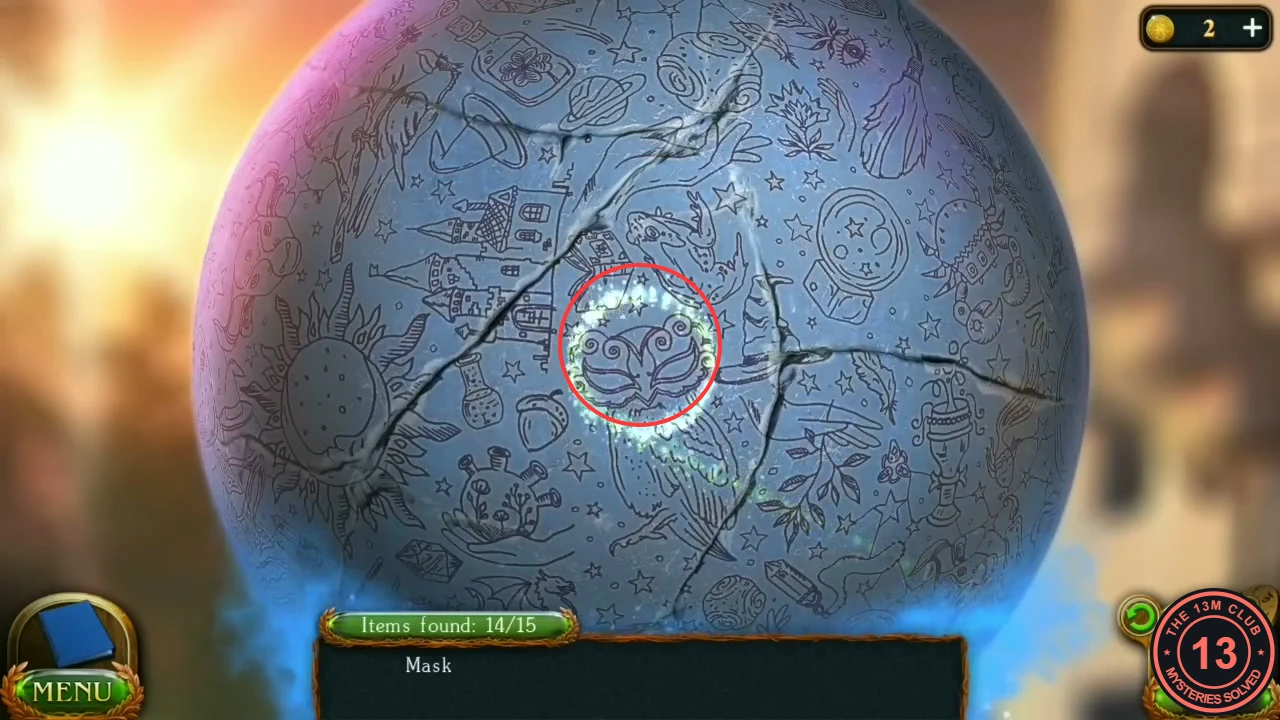
Mask: the carnival mask where two cracks meet, between the castle and the sun (shown here with the hint sparkle). - Take the Horse skull from the opened sphere.
Lowering the Magic Dome
Two more skulls are needed in the vault.
- Travel to the vault, climb to the horse statue on the fallen archway and put the Horse skull in its head. Its eye lights up.
- Travel to the ruined city, zoom into the small pool in the centre and take the Snake skull lying in it.
- Return to the vault and put the Snake skull in the head of the snake statue. The magic dome disappears.
- Zoom into the crystal, take the Part of the crystal and look through the hole beside it: a lake now lies below where the island used to be. The task Inspect the lake is added.