The summit and the priest's hut
Reach the summit, examine the sacrificial table and get into the priest's hut.
- Walk out through the tunnel onto the upper snow slope ("Okay, let's go - the way is open."). Click the glint at the top edge of the slope, just right of the carved wooden post at the upper left (Ghosts of the Past: God Mountgor 5/8).
- Walk up to the summit ("Finally, we got there..." / "It looks like Maaron wants to perform a ritual here." / "Let's wait for him in the hut. My face is about to fall off."). Click the ghostly figure that appears beside the side window on the right wall of the hut (Ghosts of the Past: Sorceress Cassandra 6/8).
- Zoom on the stone sacrificial table ("This looks like a sacrificial table. I've seen these many times before."). Strike the round stone plug on the right wing of the table with FOLNUR'S HAMMER: it breaks and a KEY drops out; take it. The crystal tree beside it is only described ("What kind of strange tree is this? Are there crystals growing on it?").
- Zoom on the hut door and use the KEY on the lock ("Damn it! It won't turn. Looks like the lock is frozen." / "Well then, use flint and steel..." / "I can't. The flint tip shattered into pieces the last time I lit the dynamite..." / "I'm so sick of all this!!! Give me a hammer!"). Hit the lock with FOLNUR'S HAMMER: the door opens.
- Enter the hut: Maaron is already there ("Maaron? You're already here? But how did you get ahead of us?" / "But the door was locked!" / "I am a magician..."). Zoom on the table at the window and read the book RITUAL OF COMMUNICATION WITH THE GODS: the blood of a horse, a wolf, a boar and an eagle in skull cups around the sacrifice; the diagram shows the cross-shaped table with a star, a cross, a four-pointed star and a circle at its ends, four skull cups and the animal heads (horse top left, eagle-owl top right, wolf bottom left, boar bottom right) and the sacrificial blade. "Even after his death, the priest has a burial place on the peak of the sacred mountain, not far from the sacrificial table."
- Maaron explains the ritual (a victim was killed on the sacrificial table, went to Limbo and was then revived). Kiana: "Unless... Unless this hut was later built on the burial site!" - "That's an idea!" (New task: Suicide ritual.) Click the tiny tower on the upper shelf left of Maaron's bench (Collection Academy tower 7/8).
- The small chest at the lower left of the hut holds nothing useful ("Empty...").
- "I should check if there's anything under the floor." Break the floorboards in the middle of the hut with FOLNUR'S HAMMER. Zoom on the table again: eight runes are carved along its front edge ("Some kind of code..."); note them.
- Zoom into the hole in the floor: a carved stone slab with symbols lies there ("Is this the tombstone? How do I open it?"). Take the WOODEN BLOCK WITH A FACE: the small orange-brown block lying against the right edge of the slab, level with its middle (beside the large carved face).
- Travel to the ice wall (Sacred Mountain page) and zoom on the wooden idol. Put the WOODEN BLOCK WITH A FACE into the gap in its face: the eyes glow blue and the mouth opens; take the RITUAL CUP (a golden skull goblet) from the mouth.
- Travel to the sunken temple and zoom on the glass dome pedestal ("The cup is protected by a force field."). Put the RITUAL CUP into the left keyhole at its base. The other two keyholes (a five-pointed star and a four-pointed star) remain empty ("These look like unique keyholes.").
- Travel to Korko's walkway at the dam and zoom on the open box on the blueprint table: take the SET OF EMPTY SYRINGES.
- Travel to Folnur's yard and zoom on the dog lying beside the kennel ("Hey, buddy! Your owner needs your help."). Use the SET OF EMPTY SYRINGES on the dog: you get the BLOOD OF THE "WOLF".
- Travel to Maaron's yard and click the hen on the path ("Do you think a chicken could pass for an eagle?"): a top-down chase board opens.
Maaron's yard: catch the hen
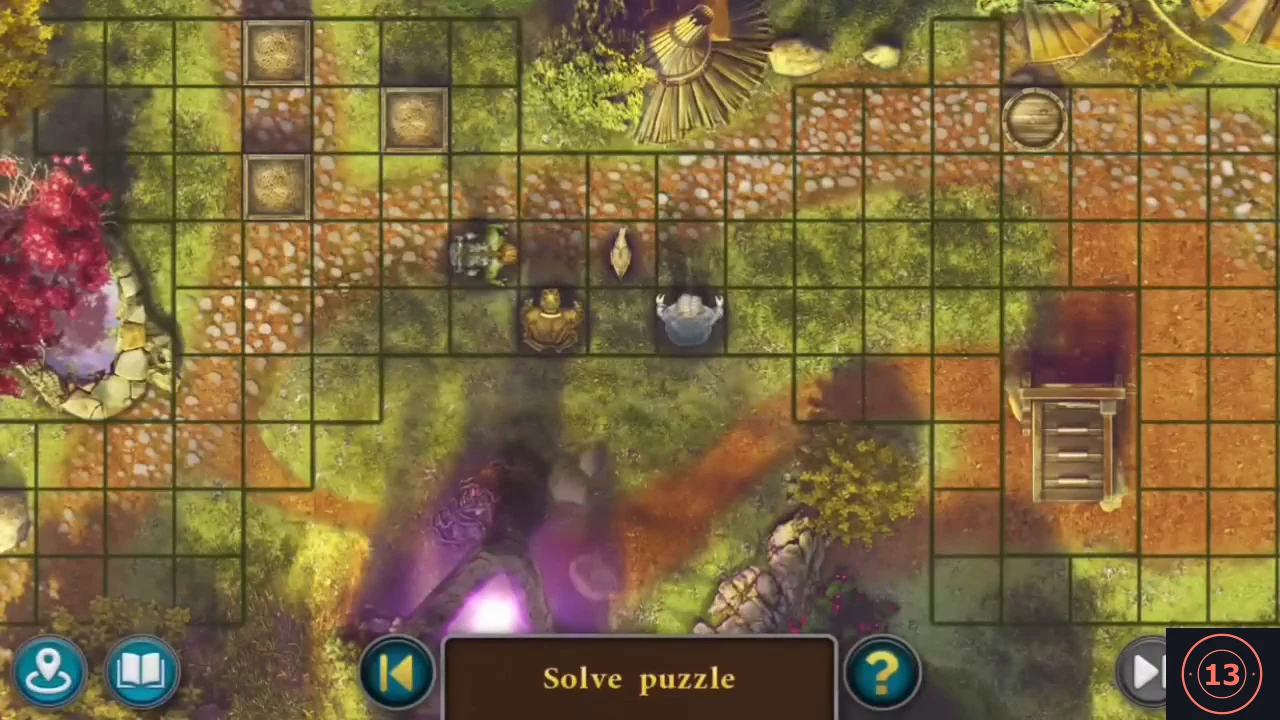
Corner Maaron's hen on the grid, then use her to gather the ingredients for the ritual. The step gives the goal and method rather than a move list.
- Corner the hen on the grid. Selecting a piece shows in blue the cells it can reach; move the pieces (the gnome figure, the grey figure, the golden frog statue and the others) to cut off the hen's escape until she is trapped in the small nook at the top left beside the straw-filled squares. In our playthrough she ended in the top row with the grey figure on her left and the golden frog statue below her (see the solved picture).
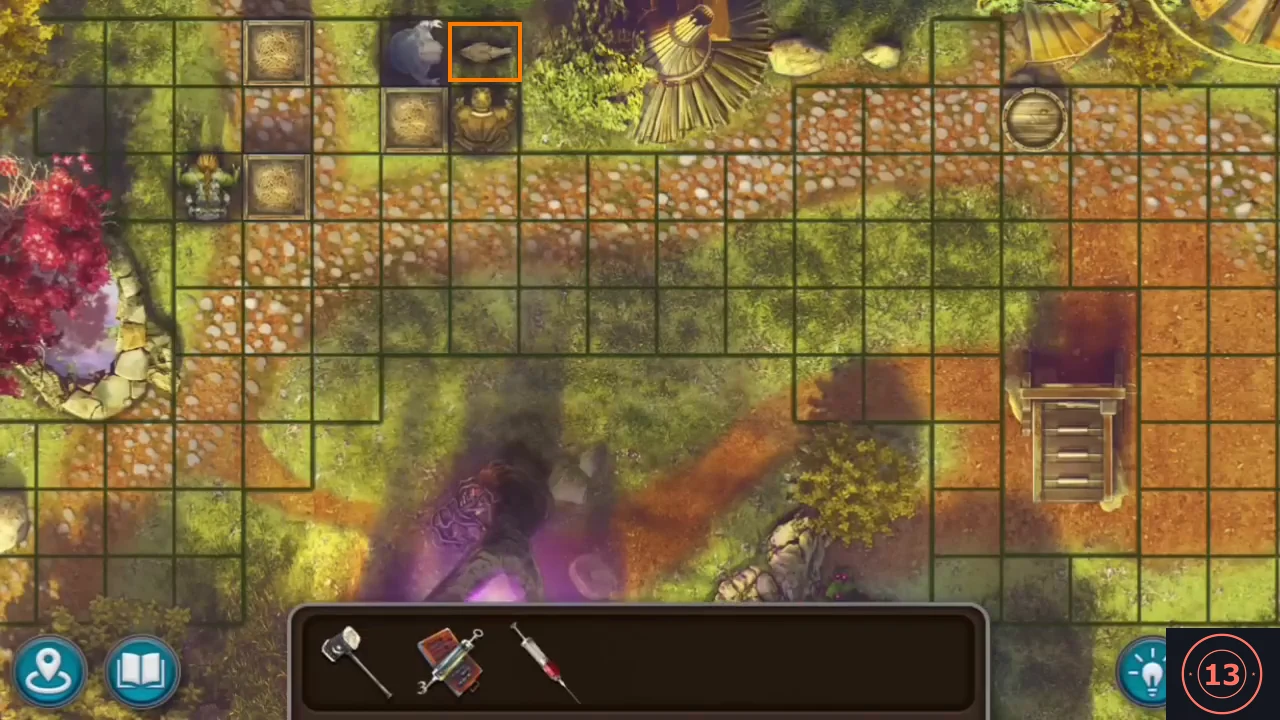
End of the hen chase in our playthrough: the hen (orange box) is trapped in the top row between the grey figure and the golden frog statue. - Zoom on the caught hen ("I heard that if you drew a straight line on the ground, you could hypnotize a chicken. Let's try it."). Click the stick lying in front of her to draw a straight line from her beak: she freezes. Use the SET OF EMPTY SYRINGES on her: you get the BLOOD OF THE "EAGLE".
- Travel to the winding riverside road in Halfling Valley and zoom on the donkey ("Hello, donkey! It's great that you're still here! You'll be our donor."). Use the SET OF EMPTY SYRINGES on it: you get the BLOOD OF THE "HORSE".
- Travel to the Lake of Love and zoom on the pig by the vineyard sign ("Sorry, pig, we need boar blood."). Use the SET OF EMPTY SYRINGES on it: you get the BLOOD OF THE "BOAR" (the syringe set is used up).
- Travel to the greenhouse. A second ritual cup hangs high under the roof on the top of the central pole ("There's the cup we need. How can we get it?"). Susan offers: "Take my bow and try to shoot it down." Take the BOW AND ARROWS, then use them on the cup: it falls and you get the RITUAL CUP.
- Travel to Folnur's house (map: Two houses). Zoom on the small window in the back wall (above the blue lion-head chest): a skull cup is propped on a stick outside the glass. Click it: the stick drops onto the sill and you get the third RITUAL CUP. No item is needed.
- Travel to the sunken temple and zoom on the glass dome pedestal. Put the two RITUAL CUPS into the remaining keyholes (the five-pointed and the four-pointed star). The force field disappears; take the fourth cup from the top of the pedestal: you now hold RITUAL CUPS (4).
- Travel to the summit of the Sacred Mountain (Sacred Mountain page, snowy summit with the bare tree and the hut) and zoom on the stone sacrificial table in front of the hut. Place the RITUAL CUPS: one cup stands in each of the four corner sockets.
- "Here we need to perform the ritual strictly according to the instructions from the book." Pour each blood into the cup whose socket matches the book's diagram: BLOOD OF THE "WOLF" into the cup at the four-pointed star (left), BLOOD OF THE "EAGLE" into the cup at the cross (right), BLOOD OF THE "HORSE" into the cup at the five-pointed star (back) and BLOOD OF THE "BOAR" into the cup at the round hole (front right). The top slab of the table rises and you get the BULL SKULL.
- Go into the summit hut and zoom on the hole in the floor. Put the BULL SKULL into the centre of the carved tombstone: four rune circles around it become active.
Summit hut: the tombstone runes
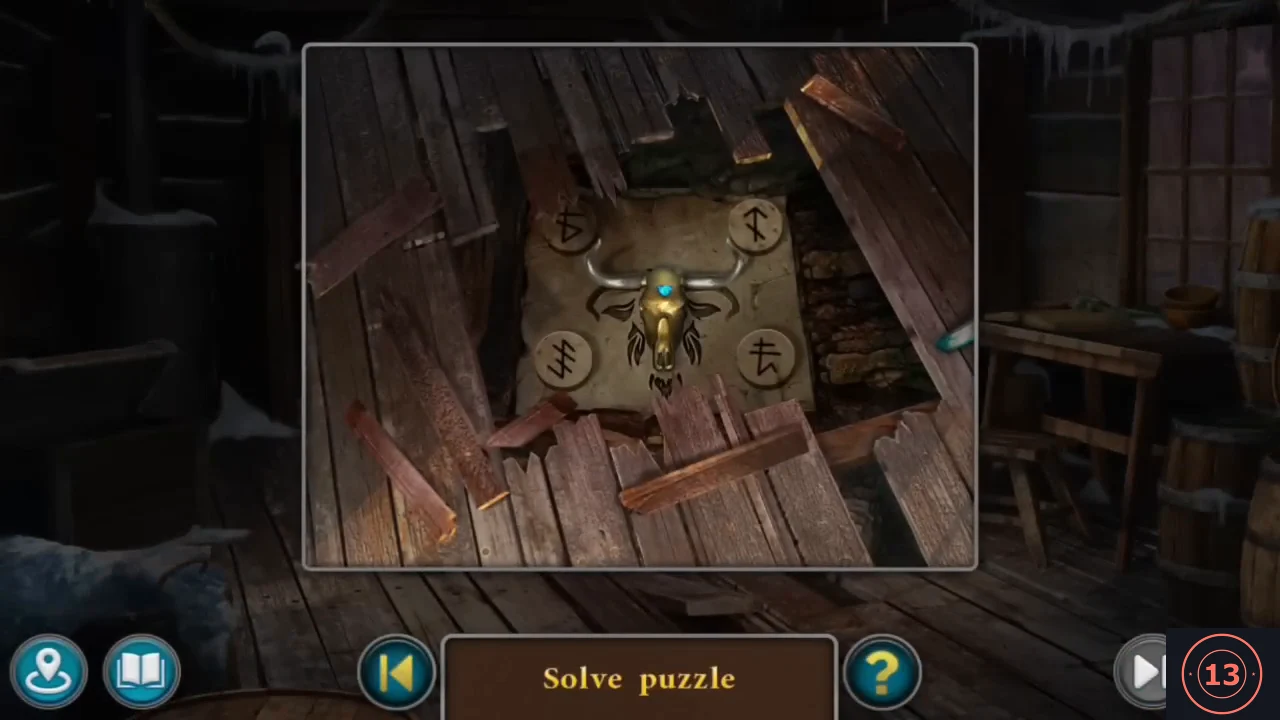
Press the four runes on the tombstone in the order carved on the edge of the hut table.
- Click the four runes in the order of the eight runes carved on the edge of the hut table, reading left to right. Each click makes the rune glow cyan. Order: bottom right, bottom left, top left, top right, top right, top left, bottom left, bottom right. The tombstone slides aside to reveal a stone staircase going down.
Summit: the ancient burial
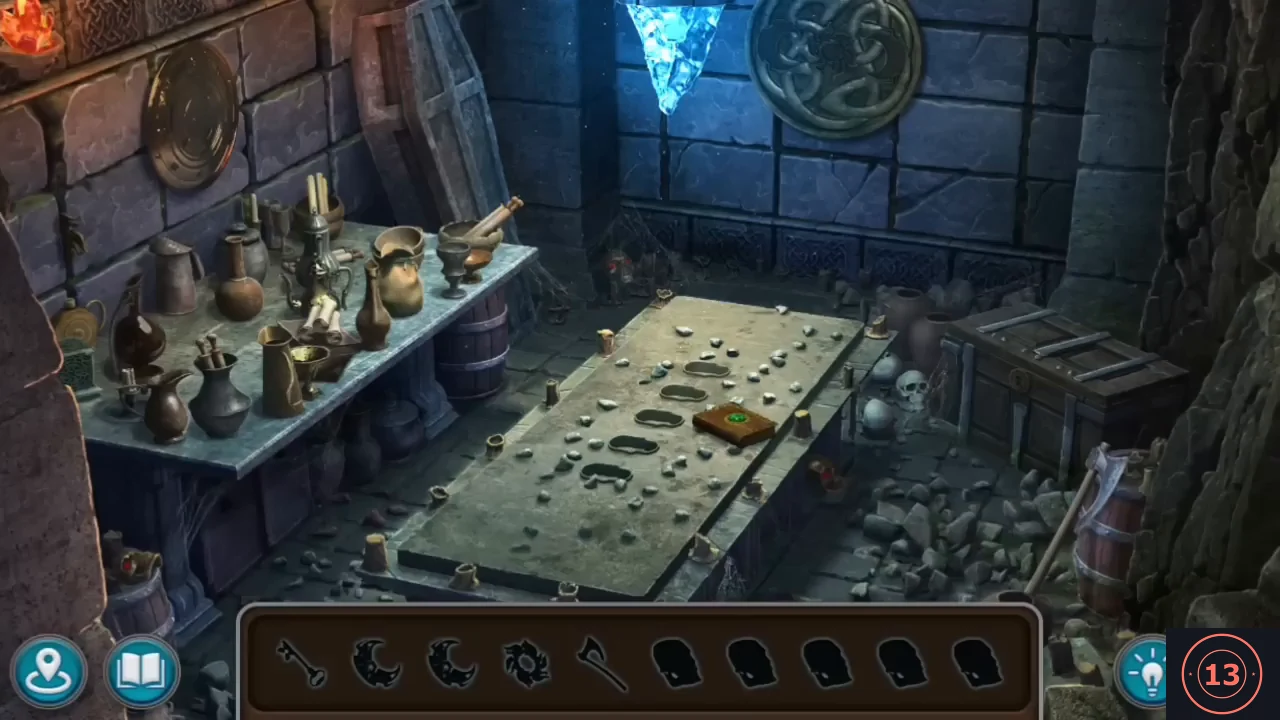
Search the ancient burial under the hut for the items shown in the bar, including five skulls and the half-moon patterns. Read the book on the sarcophagus: it gives the skull order.
- Go down the stairs into the ancient burial ("Here it is, the ancient burial! I think that we can find a ritual knife somewhere here."). An interactive search starts; its bar shows silhouettes: a key, two half-moon patterns, a sun pattern, an axe-like tool and five skulls. Zoom on the table of vessels on the left ("This thing is stuck between the slabs.") and take the KEY.
- In the main burial view pick up three golden skulls and a HALF-MOON PATTERN. The skulls are small, dark and have red eyes until you click them. First skull: on top of the small wooden barrel in the far lower left corner, under the vessel table beside the rock wall. Second skull: on the floor just right of the sarcophagus, in the gap between its side and the rubble, below the book. HALF-MOON PATTERN: click the grey coffin lid leaning against the wall at the back left, behind the vessel table; it falls away and reveals a mummy standing in an open coffin. Take the half-moon from the mummy's chest. Third skull: in the dark corner at the foot of the back wall, between the right end of the vessel table and the far end of the sarcophagus.
- Zoom on the sarcophagus lid and read the book lying on it. Left page: an H-shaped cross with the central block hatched (the shape for the table puzzle). Right page: a skull with the numerals IV II I III V. "The lid of the sarcophagus is missing certain elements."
Burial: gold tile figure
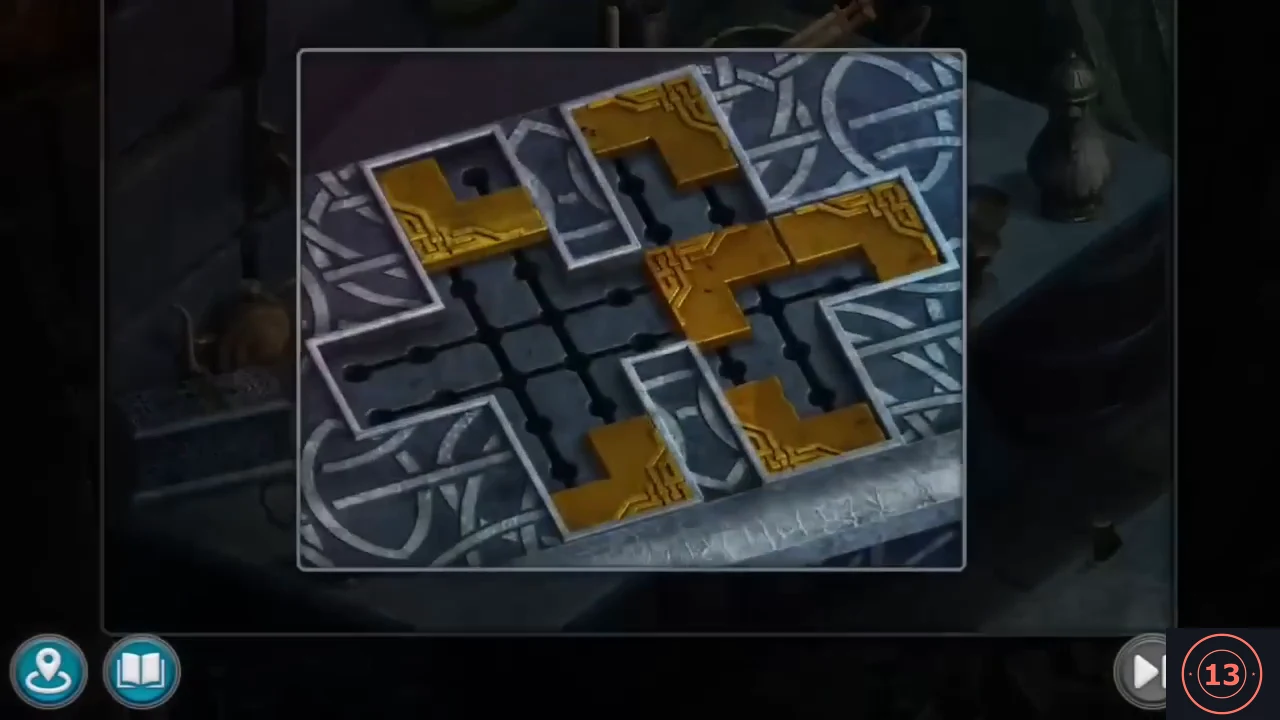
Slide the four gold L-shaped pieces to fill the shape hatched in the book, then open the chest and the shield.
- Zoom on the vessel table and open the tile puzzle stuck between the slabs ("There's some kind of puzzle here. Apparently, I need to put together a certain figure."). Slide the four gold L-shaped pieces along the grooves until together they fill the central block hatched in the book. The small box on the table then opens: take the second HALF-MOON PATTERN.
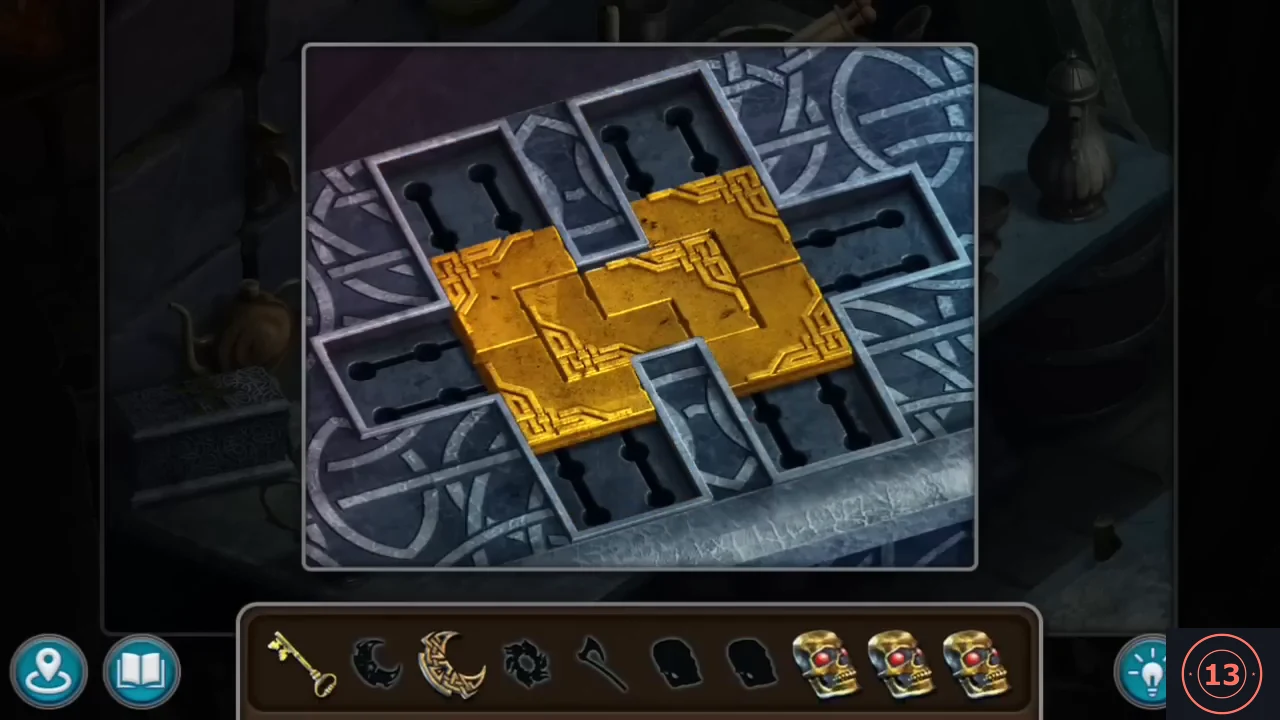
Solved: the four gold L-shaped pieces together fill the central block. - Zoom on the chest to the right of the sarcophagus and open it with the KEY; take the golden skull among the coins inside.
- In the main burial view, pick up the HATCHET (the axe-like tool in the bar): it leans against the wooden barrel on the far right, just in front of the open chest. Zoom on the vessel table again and use the HATCHET at its left end, on the gold SUN PATTERN caught on a bracket on the wall above the open jewel box: the pattern is knocked loose onto the table. Take the SUN PATTERN.
- Zoom on the round bronze shield on the back wall ("The shield is missing certain elements."). Insert both HALF-MOON PATTERNS and the SUN PATTERN: the shield slides up and reveals a niche; take the fifth golden skull.
Burial: the five skulls
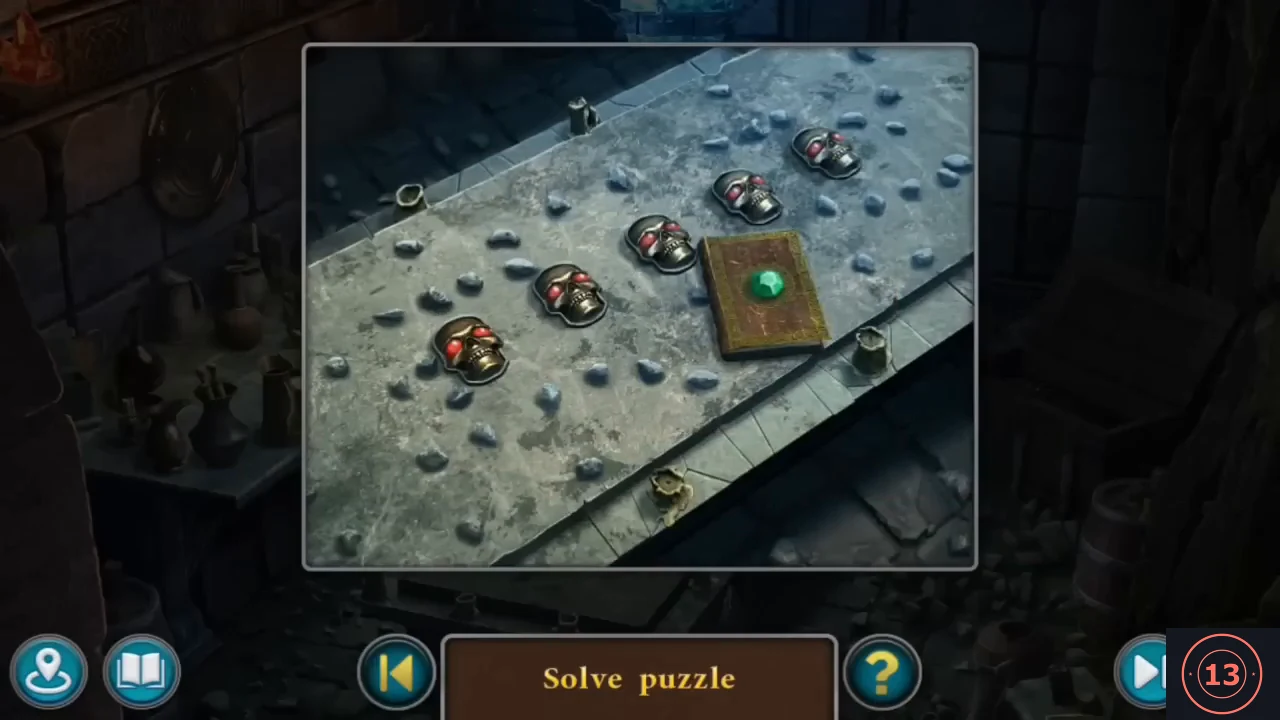
Light the five skulls on the sarcophagus lid in the order given by the book to get the ritual dagger.
- Zoom on the sarcophagus lid and put the five skulls into the five oval sockets, which run in a diagonal row from the lower left up to the book at the upper right. A puzzle starts: "Activate the skulls in the correct order. You've already seen the clue." (the book clue IV II I III V). Clicking a skull lights its eyes red.
- Number the skulls 1 to 5 along the row from the lower-left skull (1) to the skull at the upper right next to the book (5). Click them in this order: 5 (upper right, by the book), 4, 2, 1 (lower left), then 3 (the middle skull). All five skulls glow red and the lid opens. (If you get the order wrong, the puzzle can also be skipped for 25 coins.)
- The lid opens: take the RITUAL DAGGER from the sarcophagus. "I have the knife. We can begin the ritual."
The ritual and Limbo
Return to the summit and use the ritual dagger on the sacrificial table.
- Return to the summit and zoom on the sacrificial table. Use the RITUAL DAGGER: Susan lies down under the furs ("I'm ready, Maaron. Stab!"). Maaron: "First, I will perform a magic spell to create contact with the other world." A pentagram board opens over the table.
Summit: the pentagram spell
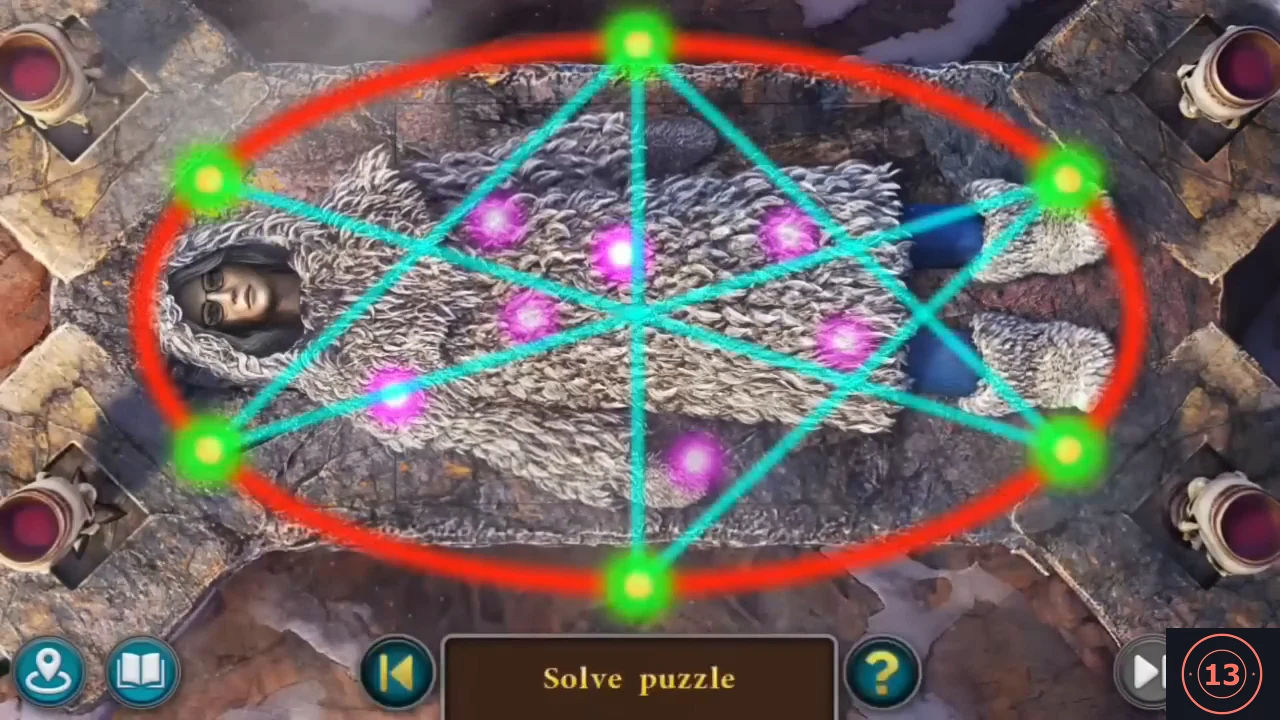
Move the nodes of the pentagram spell until every pink light lies on a line, then follow the ritual into Limbo.
- Six green nodes sit on a red ring and are joined by cyan lines into a star; pink lights float inside. Drag the nodes along the ring until every pink light lies on a cyan line. In our playthrough only two nodes needed moving: the lower-left node was slid down toward the bottom (about 7 o'clock) and the upper-right node was slid up toward the top (about 1 o'clock); the others stayed at 12, 4, 6 and 10 o'clock.
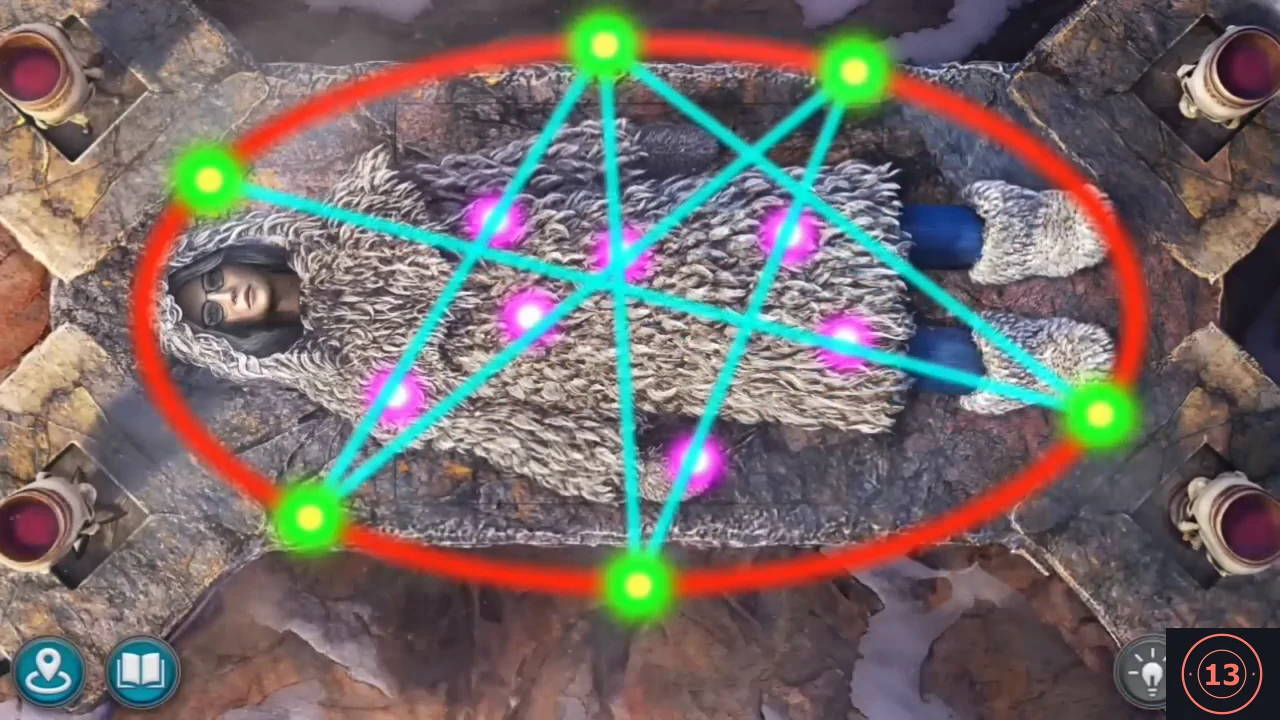
Solved in our playthrough: every pink light lies on a cyan line, with nodes at about 12, 1, 4, 6, 7 and 10 o'clock. - Cutscene ("Come on, come on!" / "Susan, are you sure about this?"). Susan wakes in Limbo, a white world with a pink tree and a stone pedestal ("Where am I? What's happening to me?"). Click the purple glint among the tree branches at the upper left (Ghosts of the Past: Capitone Chieftain 7/8).
- Zoom on the stone pedestal and take the RITUAL BAT. Walk right to the gong on a wooden frame and strike it with the RITUAL BAT: the goddess Drak Om appears ("Greetings, Susan the Warmaiden! I am goddess Drak Om...").
Limbo: nine bowls of memories
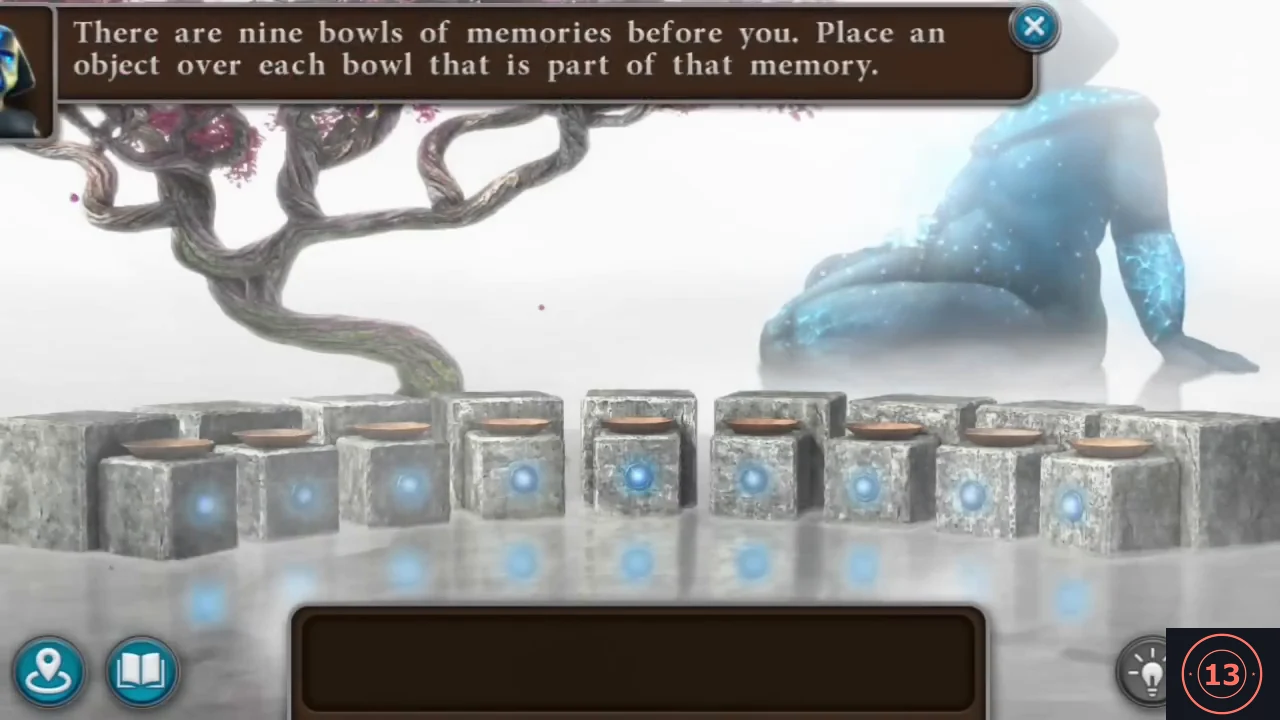
In Limbo, place the matching object over each of the nine bowls of memories.
- "There are nine bowls of memories before you. Place an object over each bowl that is part of that memory." Nine stone blocks with bowls rise. Zoom on the round stone platform in front of them and take all nine objects.
- Zoom on each bowl, read the memory shown and place the matching object: "My first trip to the Lost Lands" - TEDDY BEAR; "My first encounter with Maaron" - HEART OF THE BLACK RIDER; "The cursed gold of Gorasar Conn" - ANTI-MAGIC GLOVES; "Romantic captain Finuer Stulburn..." - COMPASS OF THE WORLDS; "The abnormal awakening of the icy Tarsas..." - HORN OF THE ELEMENTS; "Time travel and time paradoxes..." - HEXAGON OF TIME; "This is... my most morally complicated story... Uri died" - SPACE IMPALER; "It was the first time when Kiana accidentally came to the Lost Lands" - PLUSH TURTLE; "I spent so much time in the Lost Lands that my child did..." - BOOK OF STORIES.
- Drak Om speaks ("...You are the counterweight that was sent to these Lands so that evil would never triumph in the world."). After some time on the road Susan wakes in Maaron's house ("Oh... I'm at Maaron's house... It's gotten cleaner." / "...Amulet! I have an amulet for Folnur in my pocket!" / "It wasn't a dream! I really was in Limbo and the goddess brought me back! She also gave me a recipe for a potion!..."). You hold the DRAK OM AMULET (New task: Amulet with potion).
- Zoom on the carved wooden cabinet with two tree panels high on the wall to the right of the fireplace (a lantern stands on top). The panels slide away to reveal a maze board.
Maaron's cabinet: the red gem maze
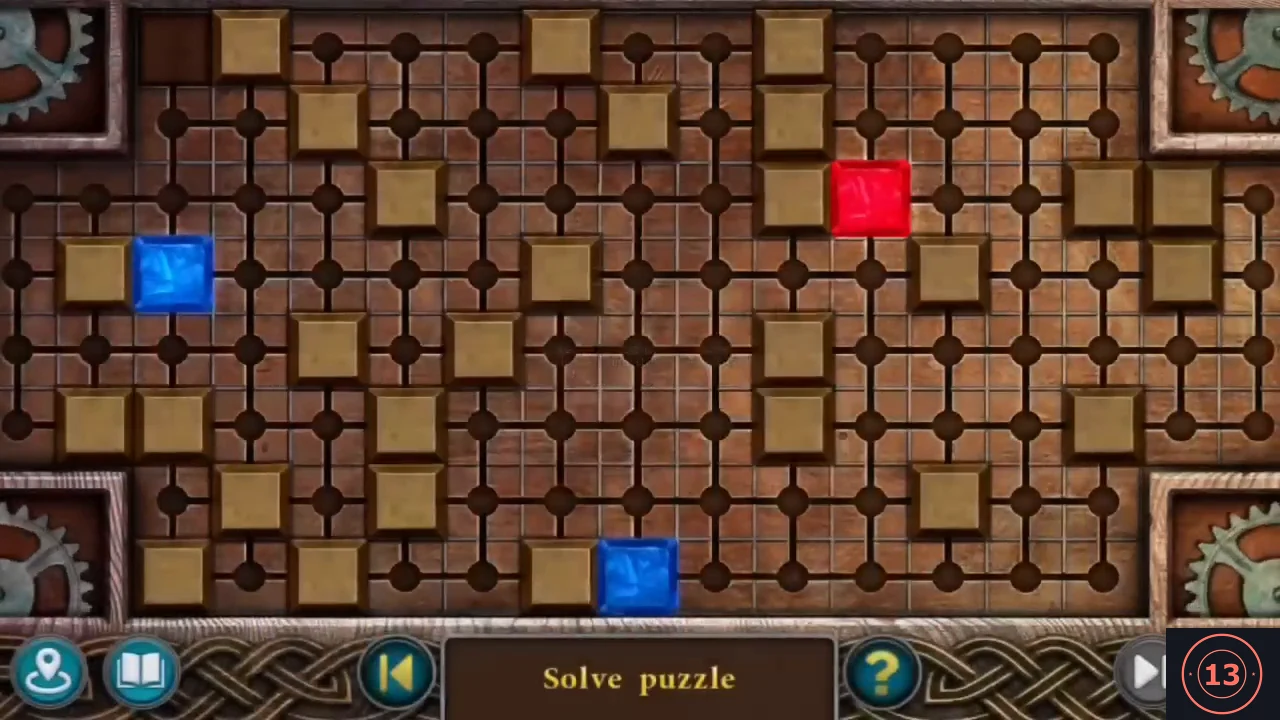
Move the red gem in Maaron's cabinet to its recess without letting it touch the blue stones, then gather the ingredients for the transformation potion. Every move slides all the stones at once. The block layout can differ between versions of this puzzle (another playthrough showed a different board), so the route given is an example for the board shown in our playthrough, together with the method for any layout.
- "Place the red gem in the recess - it must not touch the blue stones. The level will reset if the stones come into contact." The recess is the dark empty square in the top left corner, beside the gear. How it moves: touch the dot right next to the red gem on the side you want it to go. All three stones then slide in that same direction at the same time, and each keeps sliding until it reaches a wooden block, the board edge, a gear corner or another stone. A stone that is already against something does not move. So you never steer the blue stones separately; you choose moves that send them into walls away from the red gem. Do not let the red gem run into a blue stone, or the board resets. Example route for the board in our playthrough (red gem in the third row, right of centre; blue stones at the left and at the bottom): up, left, down, left, up, left, down, left, up. The last left move brings the red gem directly below the recess while both blue stones end against the left edge, and the final up move slides it into the recess. Our player used a longer route that finished with the same last two moves. If your stones start elsewhere, use the same idea: park the blue stones against the left edge or behind blocks, then line the red gem up below or beside the recess.
- The cabinet opens onto a mirror ("Well, what a sight I have!.."). Read the book about Drak Om on the left shelf (lore only), take the scroll in the middle (Collection Manuscripts 8/9) and the INKWELL from the right shelf (the glasses and the scent bottle there are only described).
- Zoom on the potion table under the round window and use the INKWELL on the letter ("Dear Susan!"): "I can write the recipe on the back of the letter." The letter turns over to its blank back and the inkwell is set down on the table to the right of the lamp (click the blank letter if the inkwell does not appear). Then click the white quill lying at the front right of the table: it dips into the inkwell and writes on the letter. You get the TRANSFORMATION POTION recipe: cores of snaky-eye berries (grind); blood or ashes of the first body or its parents; pulp and peel of the tropical spruce fruit (squeeze the pulp, grind the peel); Dead Tree Crystal (should illuminate the procedure); Sunburn mushroom cap (fry, boil and squeeze); Drak Om Amulet. "The procedure should be done under the light of the Dead Tree Crystal..." Susan: "Now I need to collect all the necessary ingredients and prepare the decoction."
- Zoom on Korko asleep in the chair ("Korko is sleeping. I won't wake him up.") and take the KEY from his lap. Use it on the door at the left of the room: it opens onto the red front door; go out to the yard.
- Go out to Maaron's hut (stone wall with the arched door) and zoom on the fallen log ("Maaron cleared away the trash and mushrooms sprouted in its place."): take the SUNBURN MUSHROOM.
- Travel to the greenhouse and zoom on the leafy bush at the lower left: take the SNAKY-EYE BERRIES.
- Travel to the summit of the Sacred Mountain and zoom on the crystal tree ("This is the tree I need!" / "All the crystals are so high up! Oh, I wish I had a bow right now... Maaron mentioned that some things were left in the hut!"). Go into the summit hut and take the BOW from the chest at the lower left (arrows come with it). Use the bow on the crystal tree: you get the DEAD TREE CRYSTAL.
- Travel to the sunken temple, zoom on the round red altar and take the URN with the ashes.
- Travel to the foot of the Sacred Mountain and zoom on the fern-like tree at the left: take the TROPICAL SPRUCE FRUIT.
- Open the recipe and drop every ingredient onto it: the mushroom, the berries, the crystal, the urn, the fruit and finally the amulet (a missing one gives "I need to collect all the missing ingredients from the list."). They combine into the TRANSFORMATION POTION kit.
Brewing the transformation potion
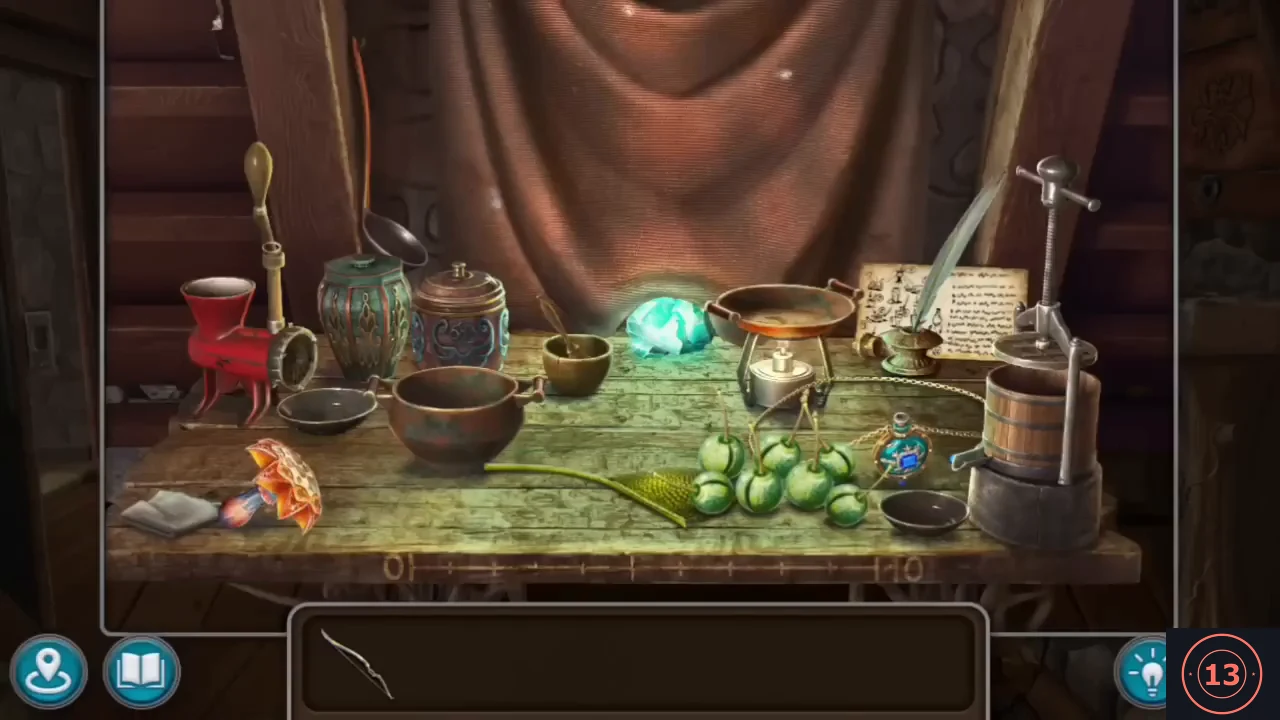
Brew the transformation potion at Maaron's house under the crystal light.
- Travel to Maaron's house ("Korko went somewhere... Could he be looking for me?") and put the kit on the potion table. "Before I start cooking, I need to have the crystal working as a light source for the work area." Close the curtain over the window so the crystal lights the table, then follow the recipe drawing: grind the berry cores, squeeze the fruit pulp in the press and grind the peel, fry, boil and squeeze the mushroom cap, combine everything in the pot and fill the amulet. You get the AMULET WITH POTION.
- "I need to test this potion on myself before giving it to Folnur." "I must focus my thoughts on Folnur and clearly visualize his appearance before drinking the potion." A scattered picture puzzle opens.
Visualizing Folnur: the scattered portrait
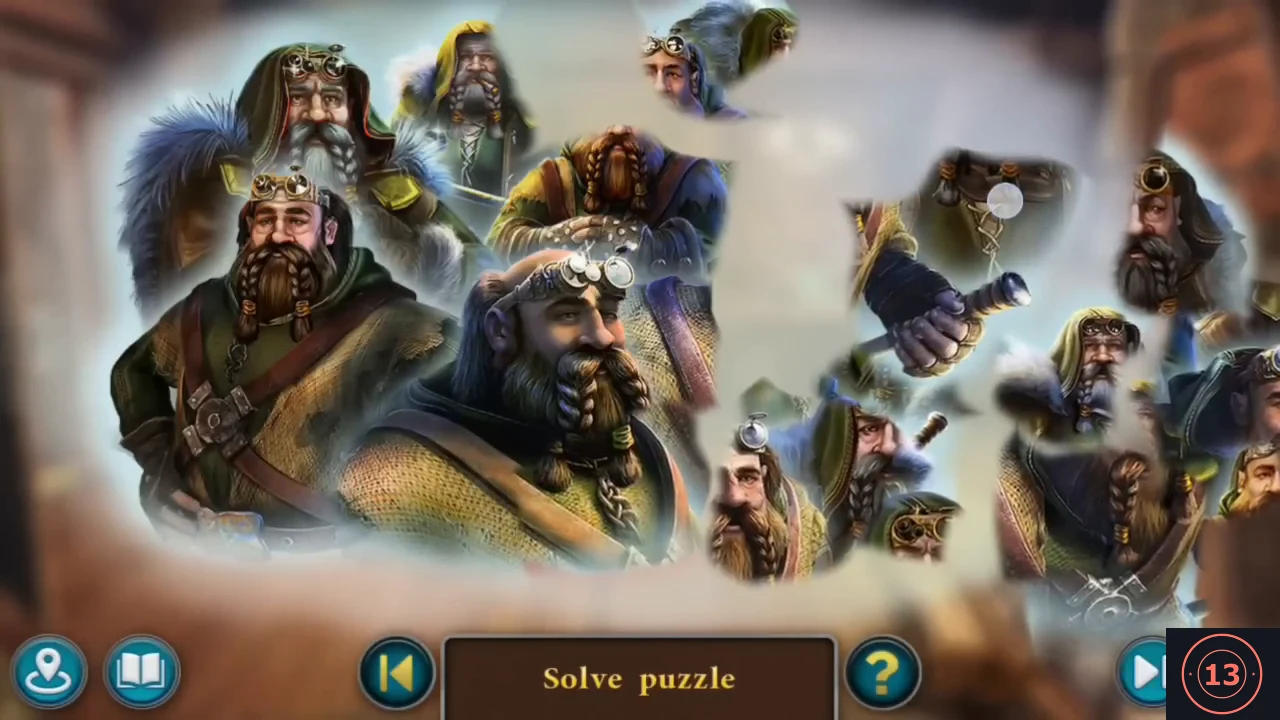
Rebuild Folnur's scattered portrait to complete the visualization.
- Drag the scattered fragments onto the picture until Folnur's portrait (the group of dwarves around him) is complete.
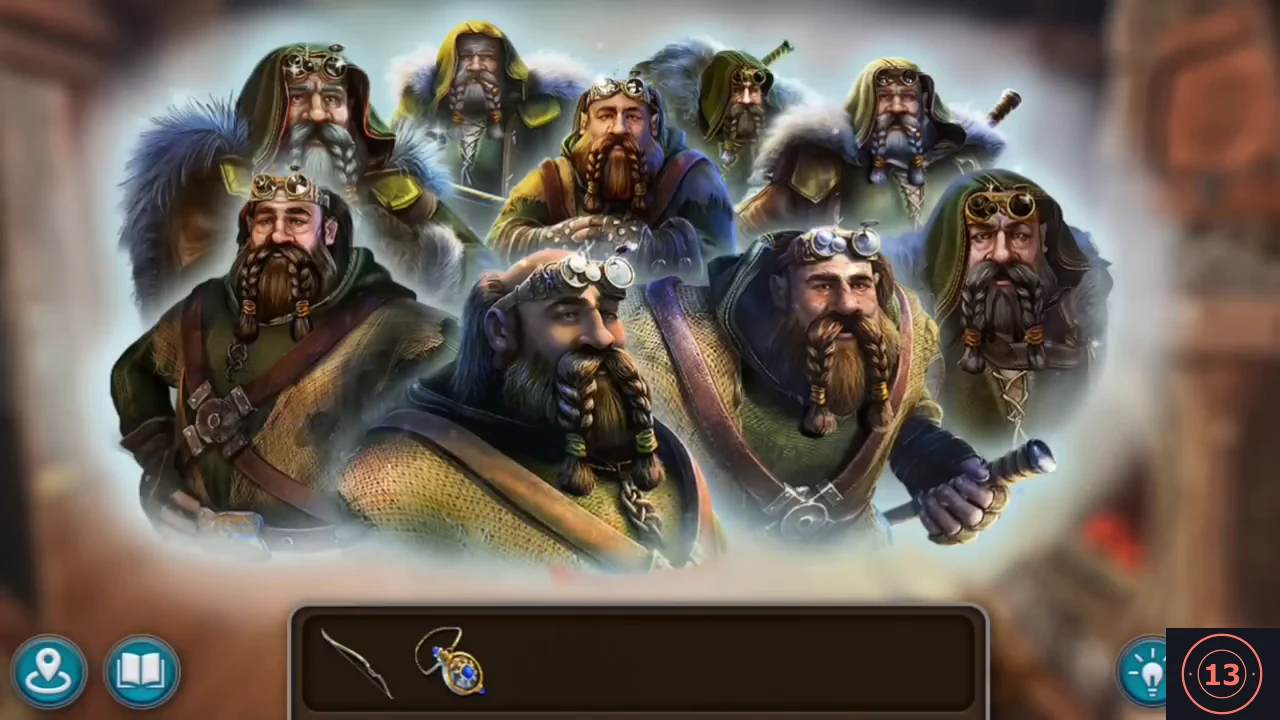
The completed picture: Folnur among the group of dwarves.