The ballista and the hidden door
The vision points to a hidden door in the barn. Retrieve what you need from the well and prepare the ballista.
- After the vision Kiana and Maaron talk in the yard ("If Folnur let the dog off the chain, then he had no plans..." / "Where did he go? What temple is there in that direction?" / "I don't know. However, we can just go in the same..."). New task: Dog's sniff.
- Zoom on the well and lower the horseshoe MAGNET into it on its rope: it pulls up three POWERFUL ARROWS.
Shooting the chain locks with the ballista
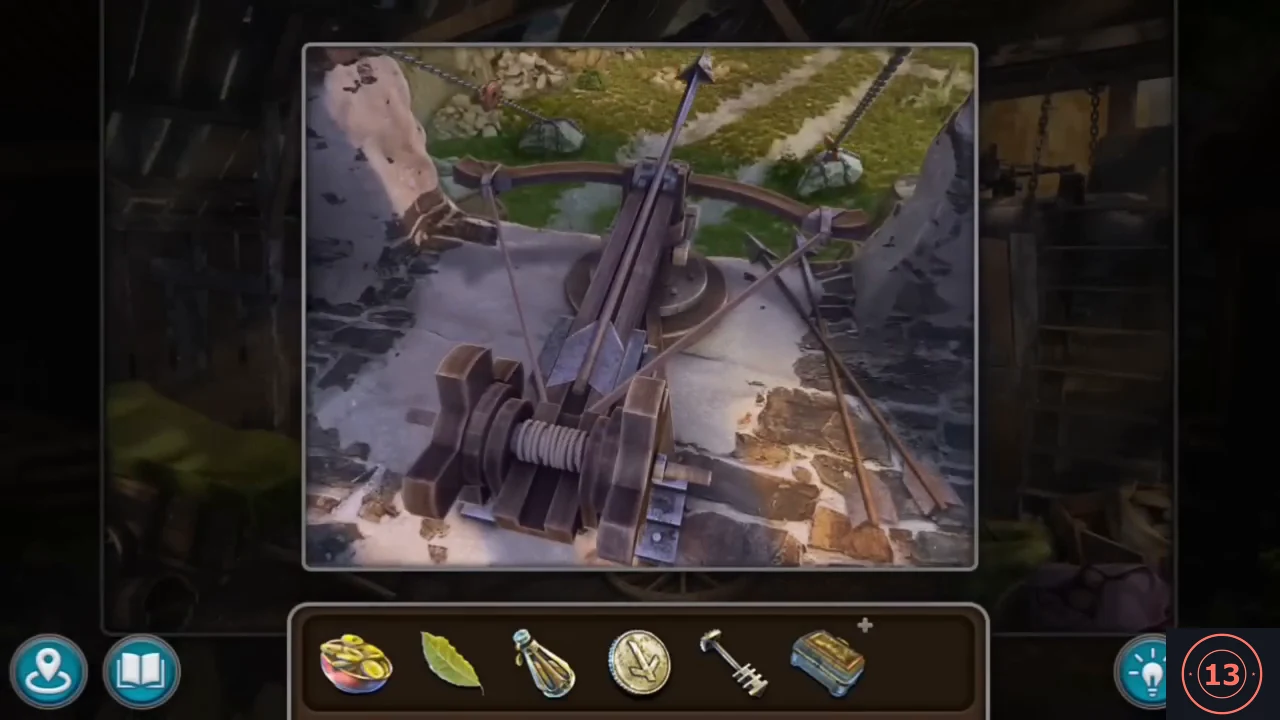
Aim the ballista at the locks on the two chains holding the barn's wooden wall and shoot both off.
- In the barn, zoom on the ballista and load the POWERFUL ARROWS. The wooden wall is held by two chains with locks ("I see some kind of locks on the chains."). Turn the ballista to aim at the lock on one chain and fire; then aim at the lock on the other chain and fire again. In our playthrough the first straight shot missed ("Missed!"), the shot aimed at the right-hand lock hit ("Yes!"), and the shot aimed at the left-hand lock broke the second chain, so three arrows are enough for one miss. The wall swings down and reveals a door with two wheels.
Twin-wheel door in the barn
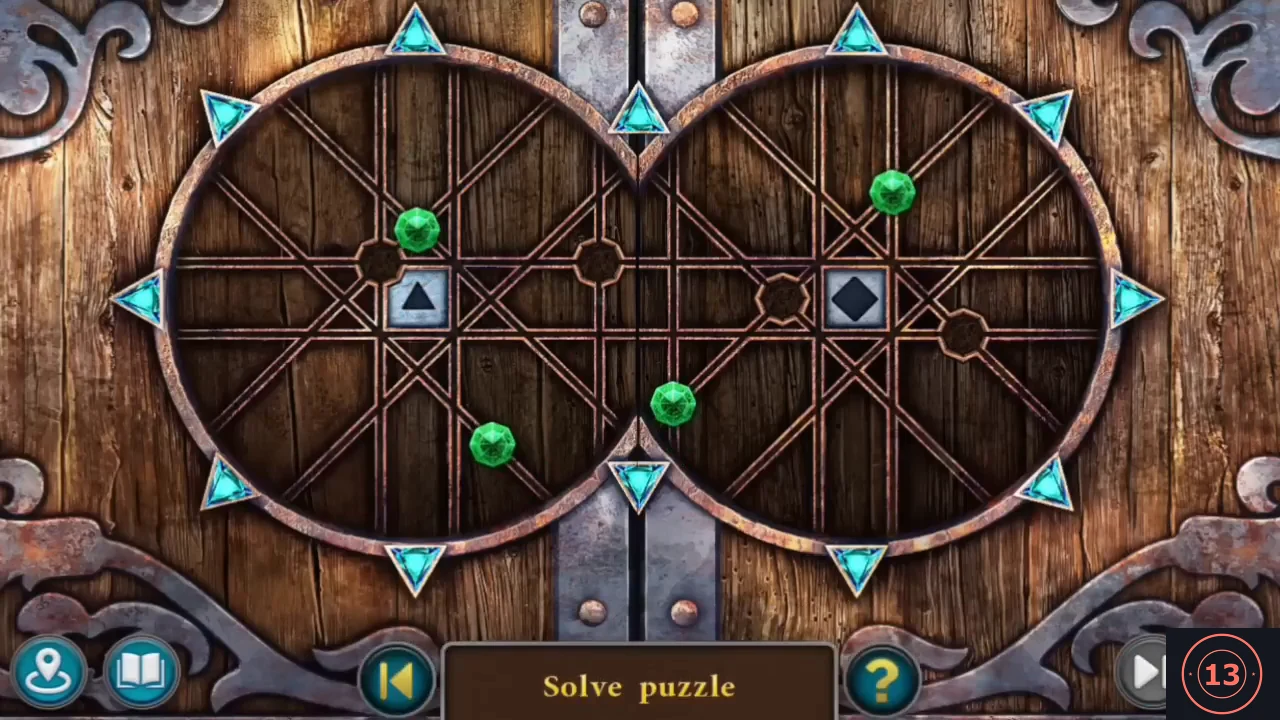
Rotate the two interlocking wheels to bring the four green gems onto the empty sockets. The gem positions change between playthroughs, so match the gems to the sockets on your own wheels; our solution is given only as an example.
- Zoom on the door and insert the KEY from Folnur's box: it turns in both locks (triangle and diamond squares) and four green gems appear on the two interlocking wheels. Rotate the wheels so the gems move along with them; the goal is to bring every gem onto one of the four empty octagonal sockets on the wheels' bars. The starting and finishing gem positions differ between playthroughs (the Extras replay of this lock has several versions), so match the gems to the empty sockets on your own wheels. Solved in our playthrough: two gems in the left wheel's sockets (one just above-left of the triangle square, one at the right edge where the wheels meet), and two in the right wheel (one just left of the diamond square, one at the right below it). The wheels glow and the door opens.
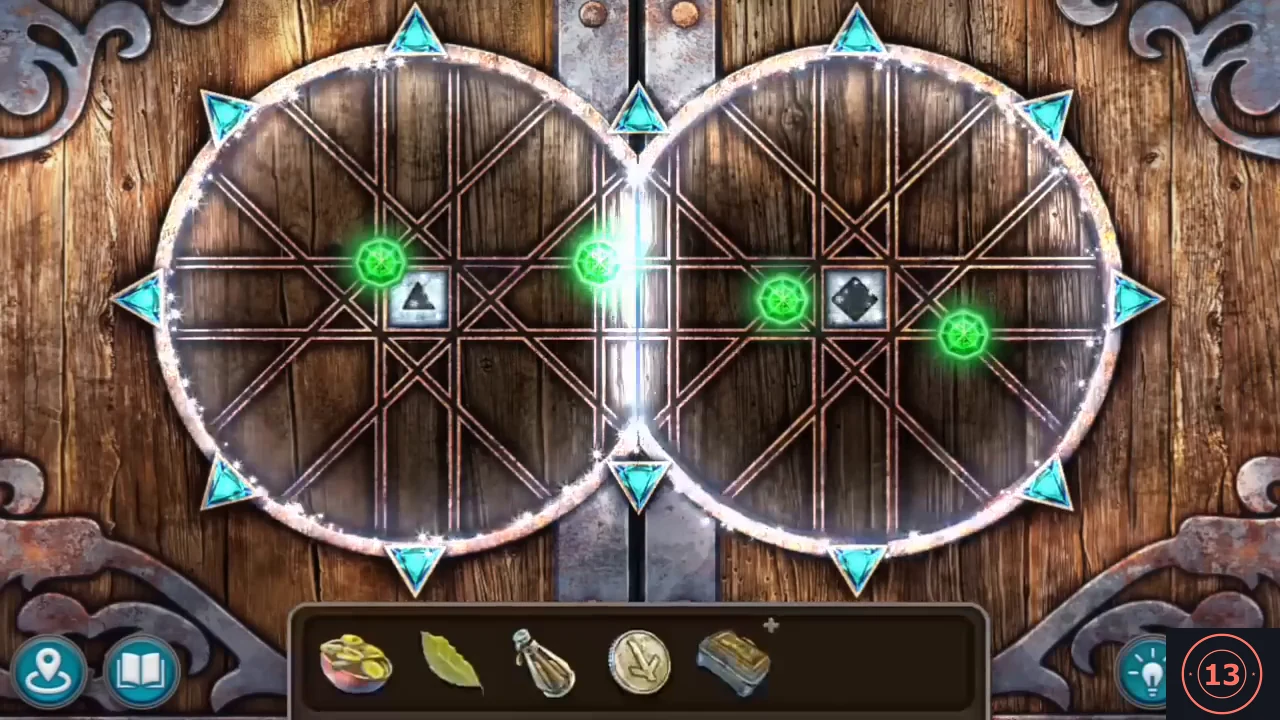
Example solution from our playthrough: the four green gems rest in the octagonal sockets and the wheels glow. Your gem positions may differ.
On Folnur's trail
Follow Folnur's trail along the forest road and note the gnawed tree trunk.
- "After some time on the road..." Kiana and Maaron reach a forest path ("Maaron, we've been walking for so long, but there's no... have chosen the wrong direction?" / "Look, there's some kind of building ahead. Let's try to...").
- Click the morphing object on the dirt path behind the cart, just left of the wooden post (Morphing objects 10/42).
- Zoom on the pile of stones and sacking right of the cart: read another note from the mysterious "B" (a sketch of a building with a red path) and take FOLNUR'S GLASSES ("Look! Those are Folnur's glasses! It looks like he stopped here for a rest.").
- Note the tree trunk by the path ("The tree trunk looks like gnawed by beavers. The log will fall after a couple more blows."), then follow the path to the dam.
Beaverling problems
At the waterfall dam the beaverlings have problems. Collect the reel, open the toolbox and send the pallet of sandbags down the ramp.
- At the waterfall dam ("Wow! What an incredible sight!" / "Look, there's someone on the balcony!") zoom on the balcony and talk to the beaverling worker: there has been an accident, the foreman is on the crest of the dam, and the freight elevator can only be used once the materials, tools and the sandbags stuck in the forest are loaded. He gives you the KEY TO THE TOOLBOX. New task: Beaverling problems.
- Click the tiny white tower on the far hilltop above the left end of the waterfall (Collection Academy tower 5/8). Then click the morphing object low at the far right edge of the scene, beside the stump (Morphing objects 11/42).
- Zoom on the wheeled reel at the lower left of the dam and take the REEL WITH RAMP.
- Zoom on the wooden toolbox at the lower right and open it with the KEY TO THE TOOLBOX. Take the HATCHET. The drawknife ("Drawknife is needed to make a log smooth.") and the trowel ("I can use a trowel to spread something viscous.") stay in the box for now. "We need to deliver here a pallet of bags from the forest."
- Go back to the forest road and zoom on the cart with the sandbag pallet. Place the REEL WITH RAMP beside it: the ramp unrolls along the path. Use the HATCHET on the cart: after a few blows the pallet of bags slides off the cart onto the ramp. "The pallet is still difficult to move along the ramp. What can we use to make the pallet move faster?"
- Open the map and travel to Maaron's house (Two houses). Zoom on the door at the back and take the CUP GREASE hanging there. Travel back to the forest road with the map.
- Back on the forest road, zoom on the cart and put the CUP GREASE down: a small tub of grease stands beside the cart. Go to the dam, open the toolbox again and take the TROWEL. Return to the cart zoom and use the TROWEL: it scoops grease from the tub and spreads it over the ramp planks in front of the pallet (several passes; the planks turn dark and glossy).
Steer the pallet to the dam
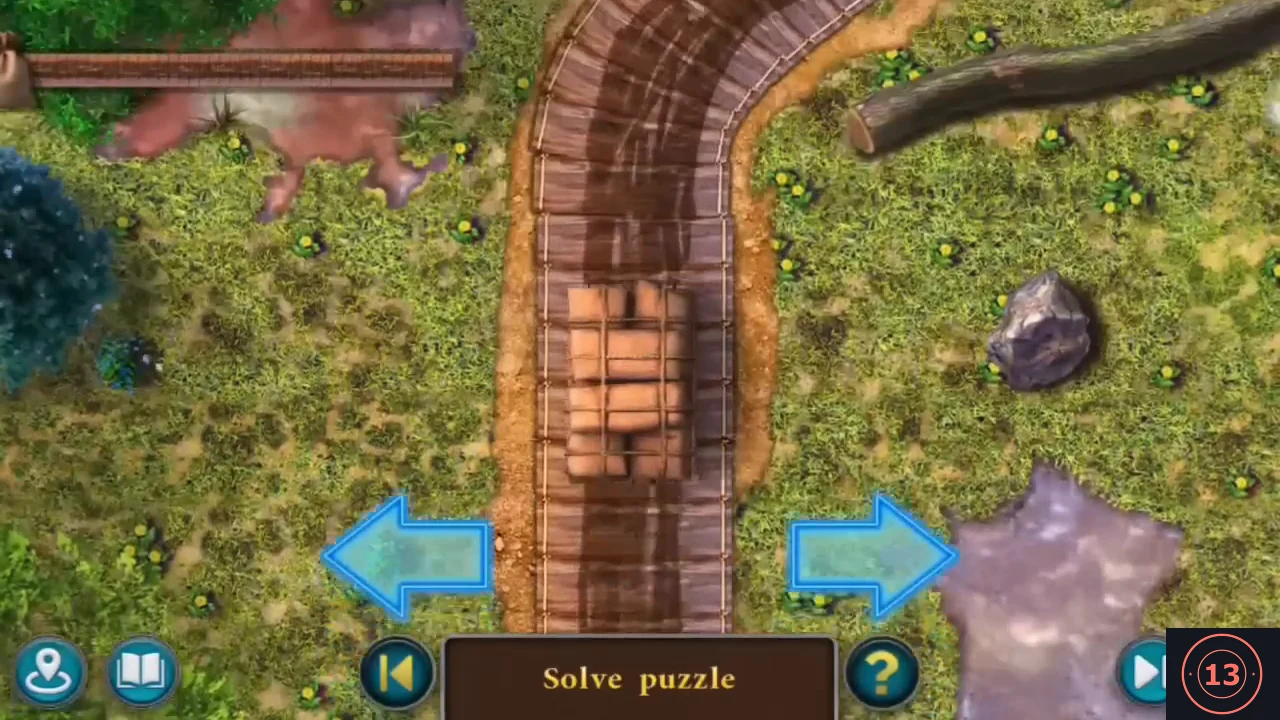
Steer the sliding pallet along the winding plank track down to the dam. This is a timing mini-game; there is no code to enter.
- The pallet slides down the greased ramp in a top-down view. Use the blue LEFT and RIGHT arrow buttons at the bottom to keep the pallet on the winding plank track while the view scrolls; the bar at the top left shows the sack's progress. Avoid steering off the planks into the grass, puddles, logs and rocks beside the track. When the pallet reaches the end of the track it arrives at the dam.
Lifting the pallet
Lift the pallet of sandbags at the dam with tools from the toolbox and the forest road.
- Zoom on the pallet of bags at the dam: "We need to lift the pallet somehow to put a log under it. We need to use something as a lever." (The hatchet does not work: "This item is unlikely to be of any use in this situation.")
- Go to the forest road and zoom on the gnawed tree trunk by the path. Chop it with the HATCHET: the trunk falls. Take the LOG (with its branches).
- At the dam open the toolbox again and take the CARPENTER'S DRAWKNIFE and the PICKAXE left in it.
- Use the LOG at the dam to examine it: "It's too early to scrape off the bark. The branches are in the way." Chop off the branches with the HATCHET, then strip the bark with the CARPENTER'S DRAWKNIFE ("...process this log to become smooth."). The smooth log gives ROUND TIMBER - the popup shows 1/2 and a second piece follows, so the inventory counter reads 2.
- Zoom on the pallet. Wedge the PICKAXE under it as a lever (it stays in inventory), then place the ROUND TIMBERS under the raised pallet so it rests on rollers.
- The beaverling calls from the balcony: "You did it! Excellent! There's just a little bit left! Catch another key for the box near the elevator! You'll find a list of everything you need to collect for the elevator in this box!" Go to the freight elevator platform (the cart with the pallet in it) and open the box ("Beaverling has already given us the key to this box."). Read the list of 16 items: plane, crowbar, construction brackets, rope, boards tied with rope, mallet, vise, anvil, sandbag, scissors, steel angles, chisel, spanner, blacksmith tongs, glass cutter, pallet with bricks.
Load the freight elevator
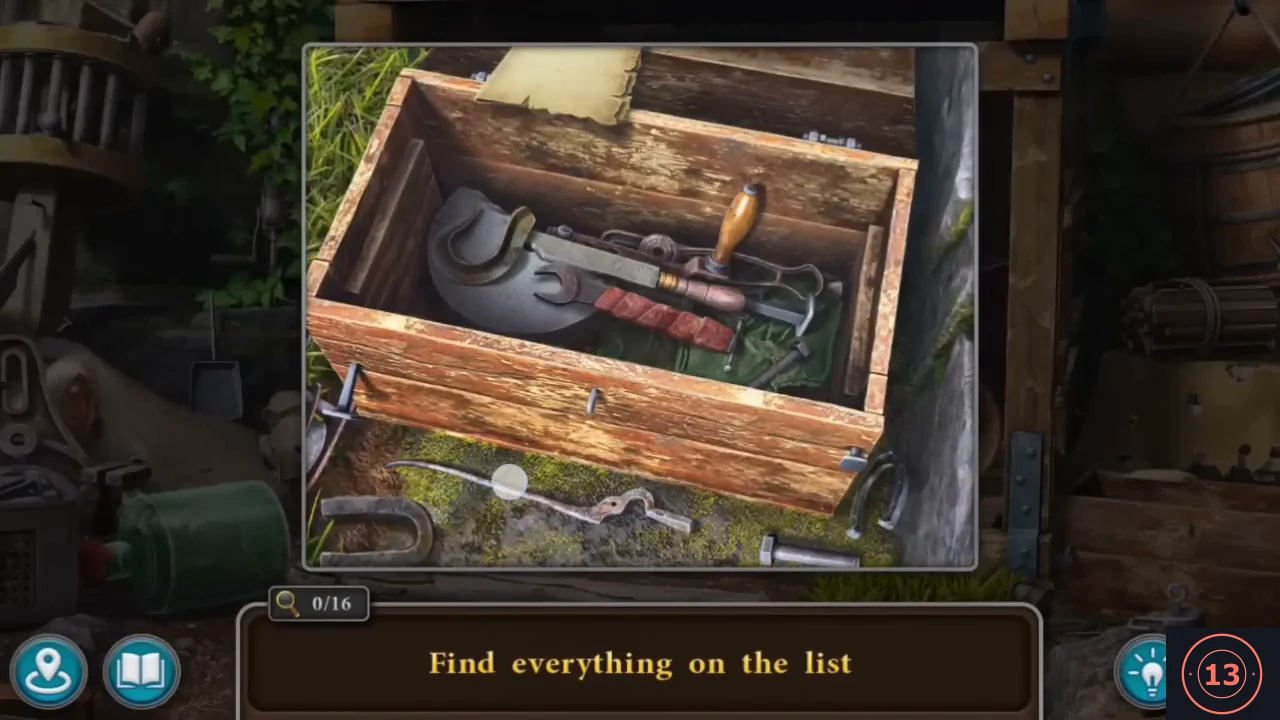
Find the 16 items on the list to load the freight elevator. Some items must be assembled or uncovered first.
- Interactive hidden-object scene "Find everything on the list" (counter 0/16). Every item you find is loaded onto the elevator platform. Toolbox (the open box at the bottom right): click the tool tray to lift it out and take the SPANNER; a chisel falls out onto the ground. Take the CROWBAR lying on the ground below the box and the CHISEL (orange handle) on the ground in front of it. One half of the blacksmith tongs lies on the floor of the box ("Nothing useful can be done with just one half of the tongs"); click the other half lying on the green cloth on the platform, the halves join, and you can take the BLACKSMITH TONGS. Wooden drum (the cylinder of wooden bars at the upper left): pull the ball-ended metal MALLET out from between the bars. Lower left: move the green glass jug to uncover the VISE. Sand pile (left, with a shovel stuck in it): zoom in, move the sack, take the shovel and put two scoops of sand into the sack; take the SCISSORS from the hollow you dug, click the pile of rocks for the STEEL ANGLES and tie the sack to get the SANDBAG. Take the ANVIL beside the sand pile, left of the platform's left post. On the platform: take the PLANE (the yellow block on the beam under the bell) and the CONSTRUCTION BRACKETS on the floor at the foot of the pallet; move the round wooden lid behind the sacks for the BOARDS TIED WITH ROPE; move the wicker basket and lift the green cloth for the ROPE. Barrel (upper right): "The top of the barrel can be easily broken with something heavy" - click the metal wheel on its lid twice; it tips over and drops, breaking the lid. Move the piece of board and take the GLASS CUTTER. Finally click the bundle of logs on the yellow block to the right of the platform to get the PALLET WITH BRICKS (16/16).